
Okta Workforce
Setting Up an Okta Workforce Integration
This document outlines the procedure for integrating Okta Workforce Single Sign-On (SSO) with Wristband.
1. Locate Your External IdP Callback URL
- In the Wristband dashboard, enter Tenant View for the tenant.
- Navigate to Identity Providers > Enterprise.
- Select the Okta provider icon and click Add IdP.
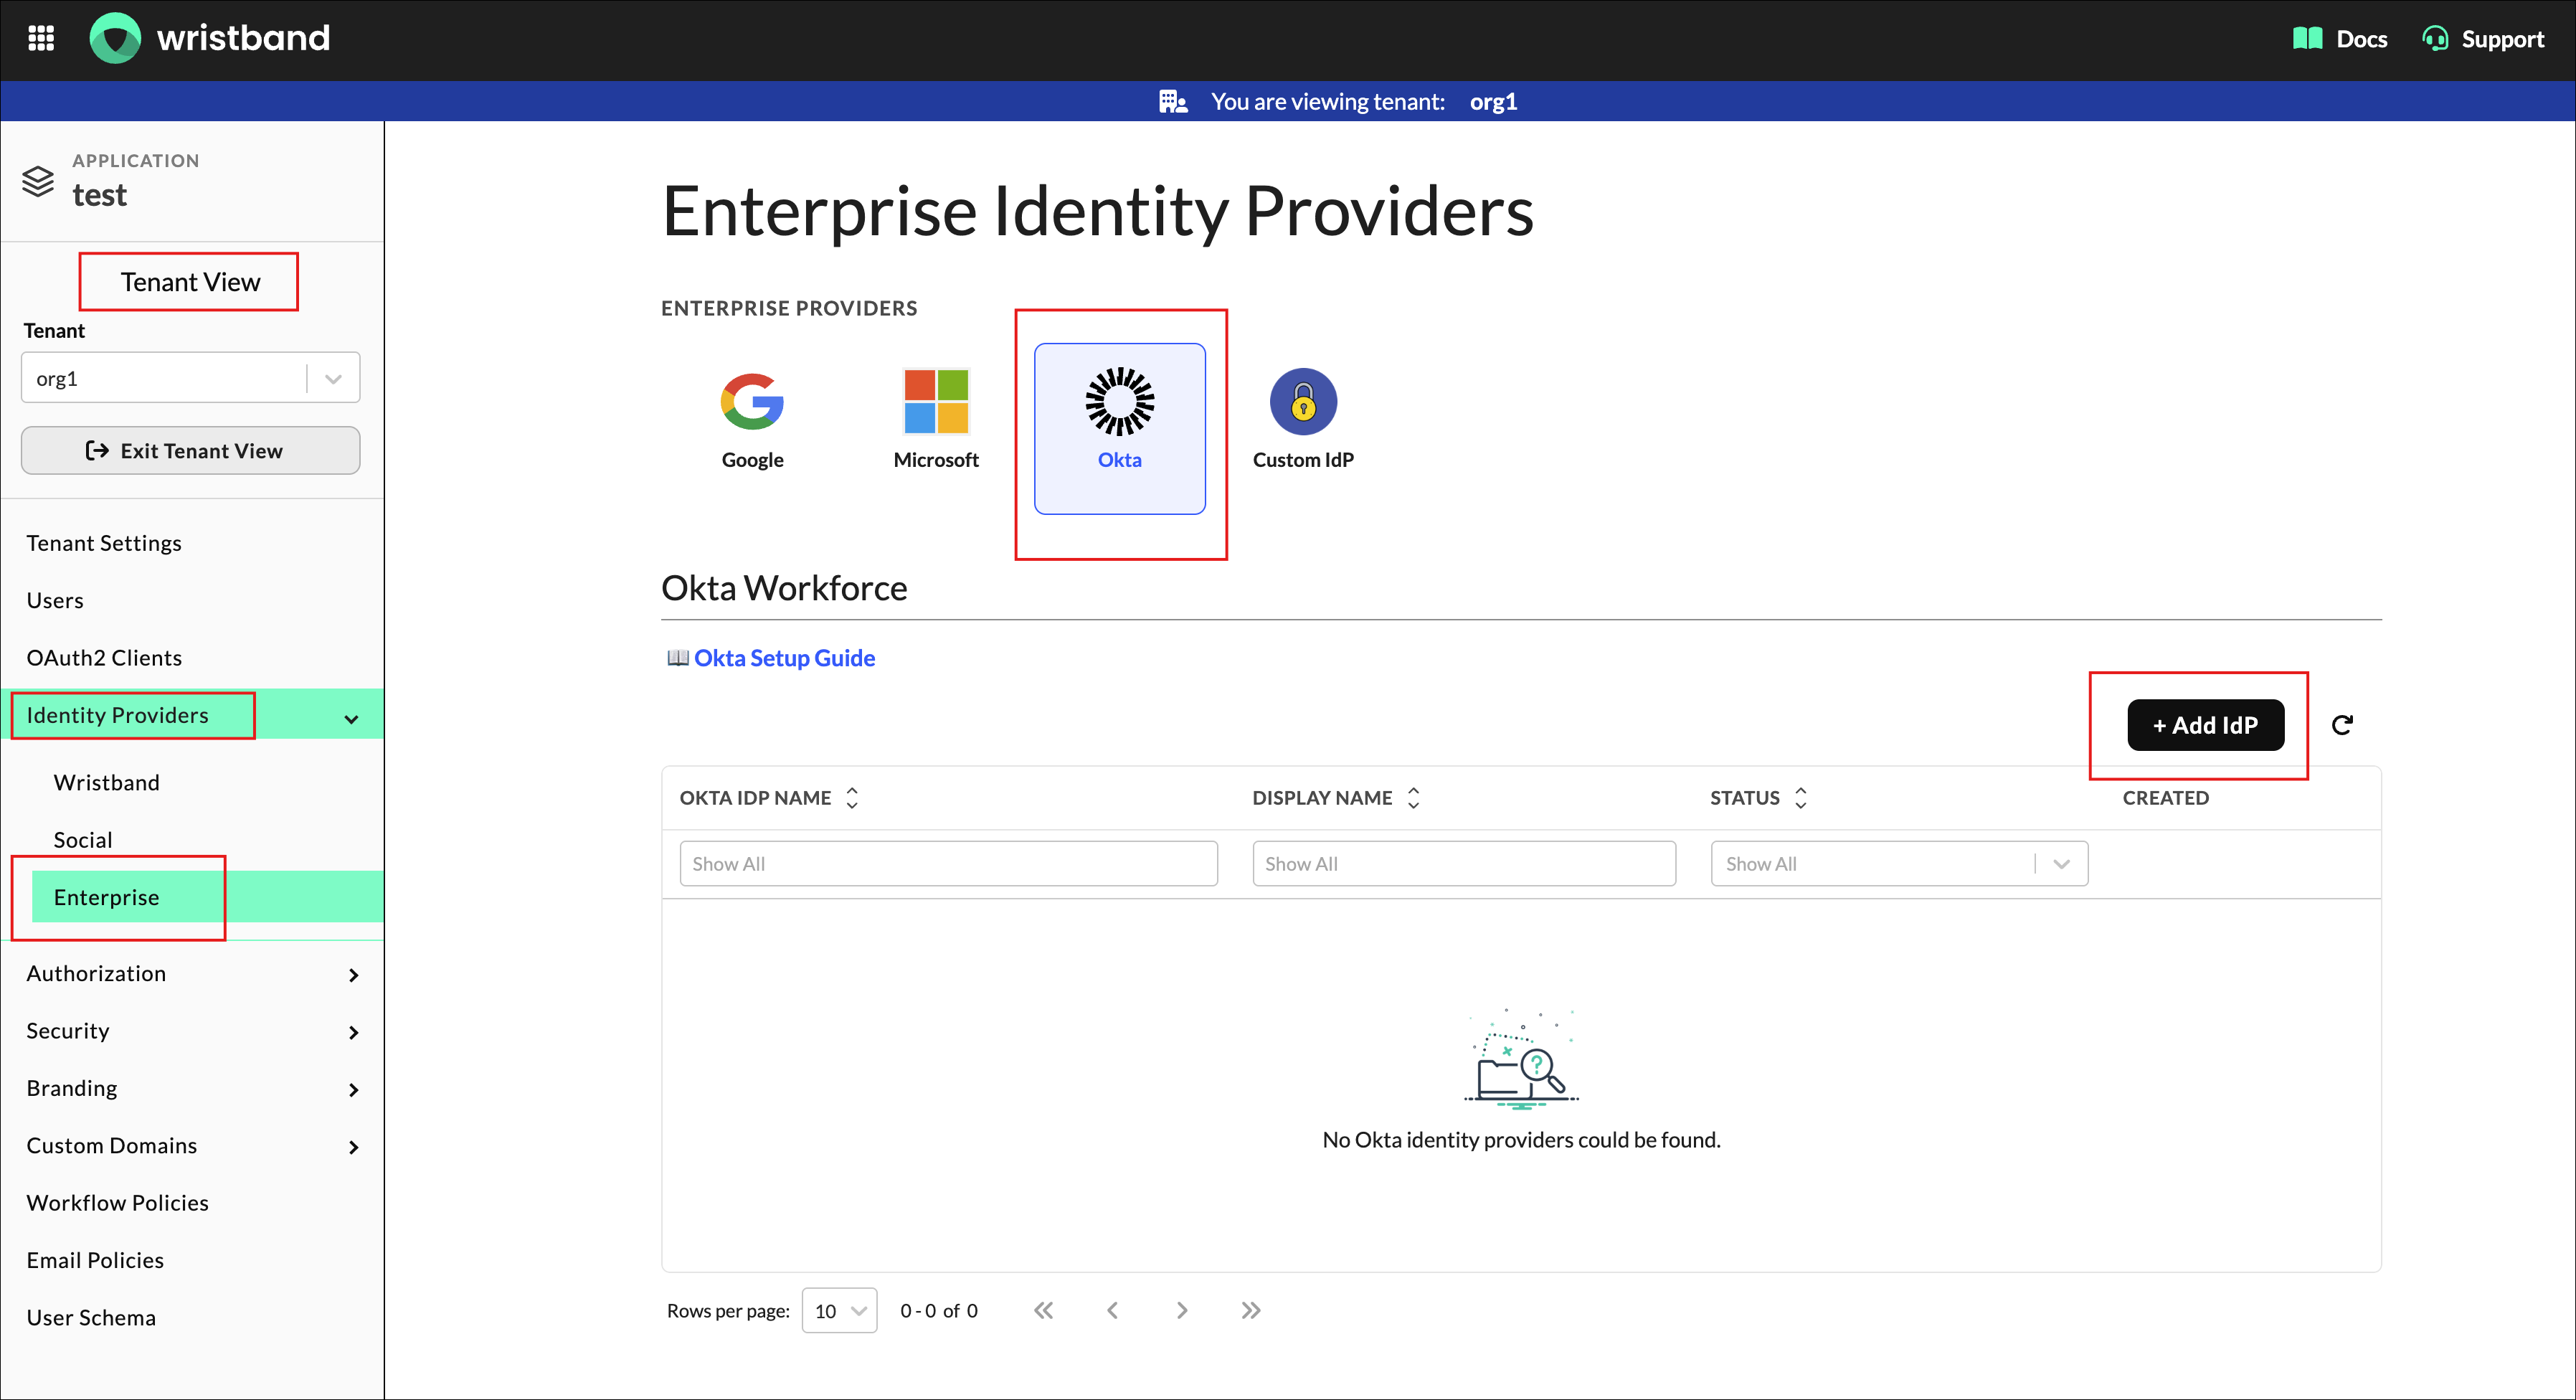
Figure 1: Select Okta under Enterprise Identity Providers and click Add IdP.
- Copy the Redirect URL from the form.
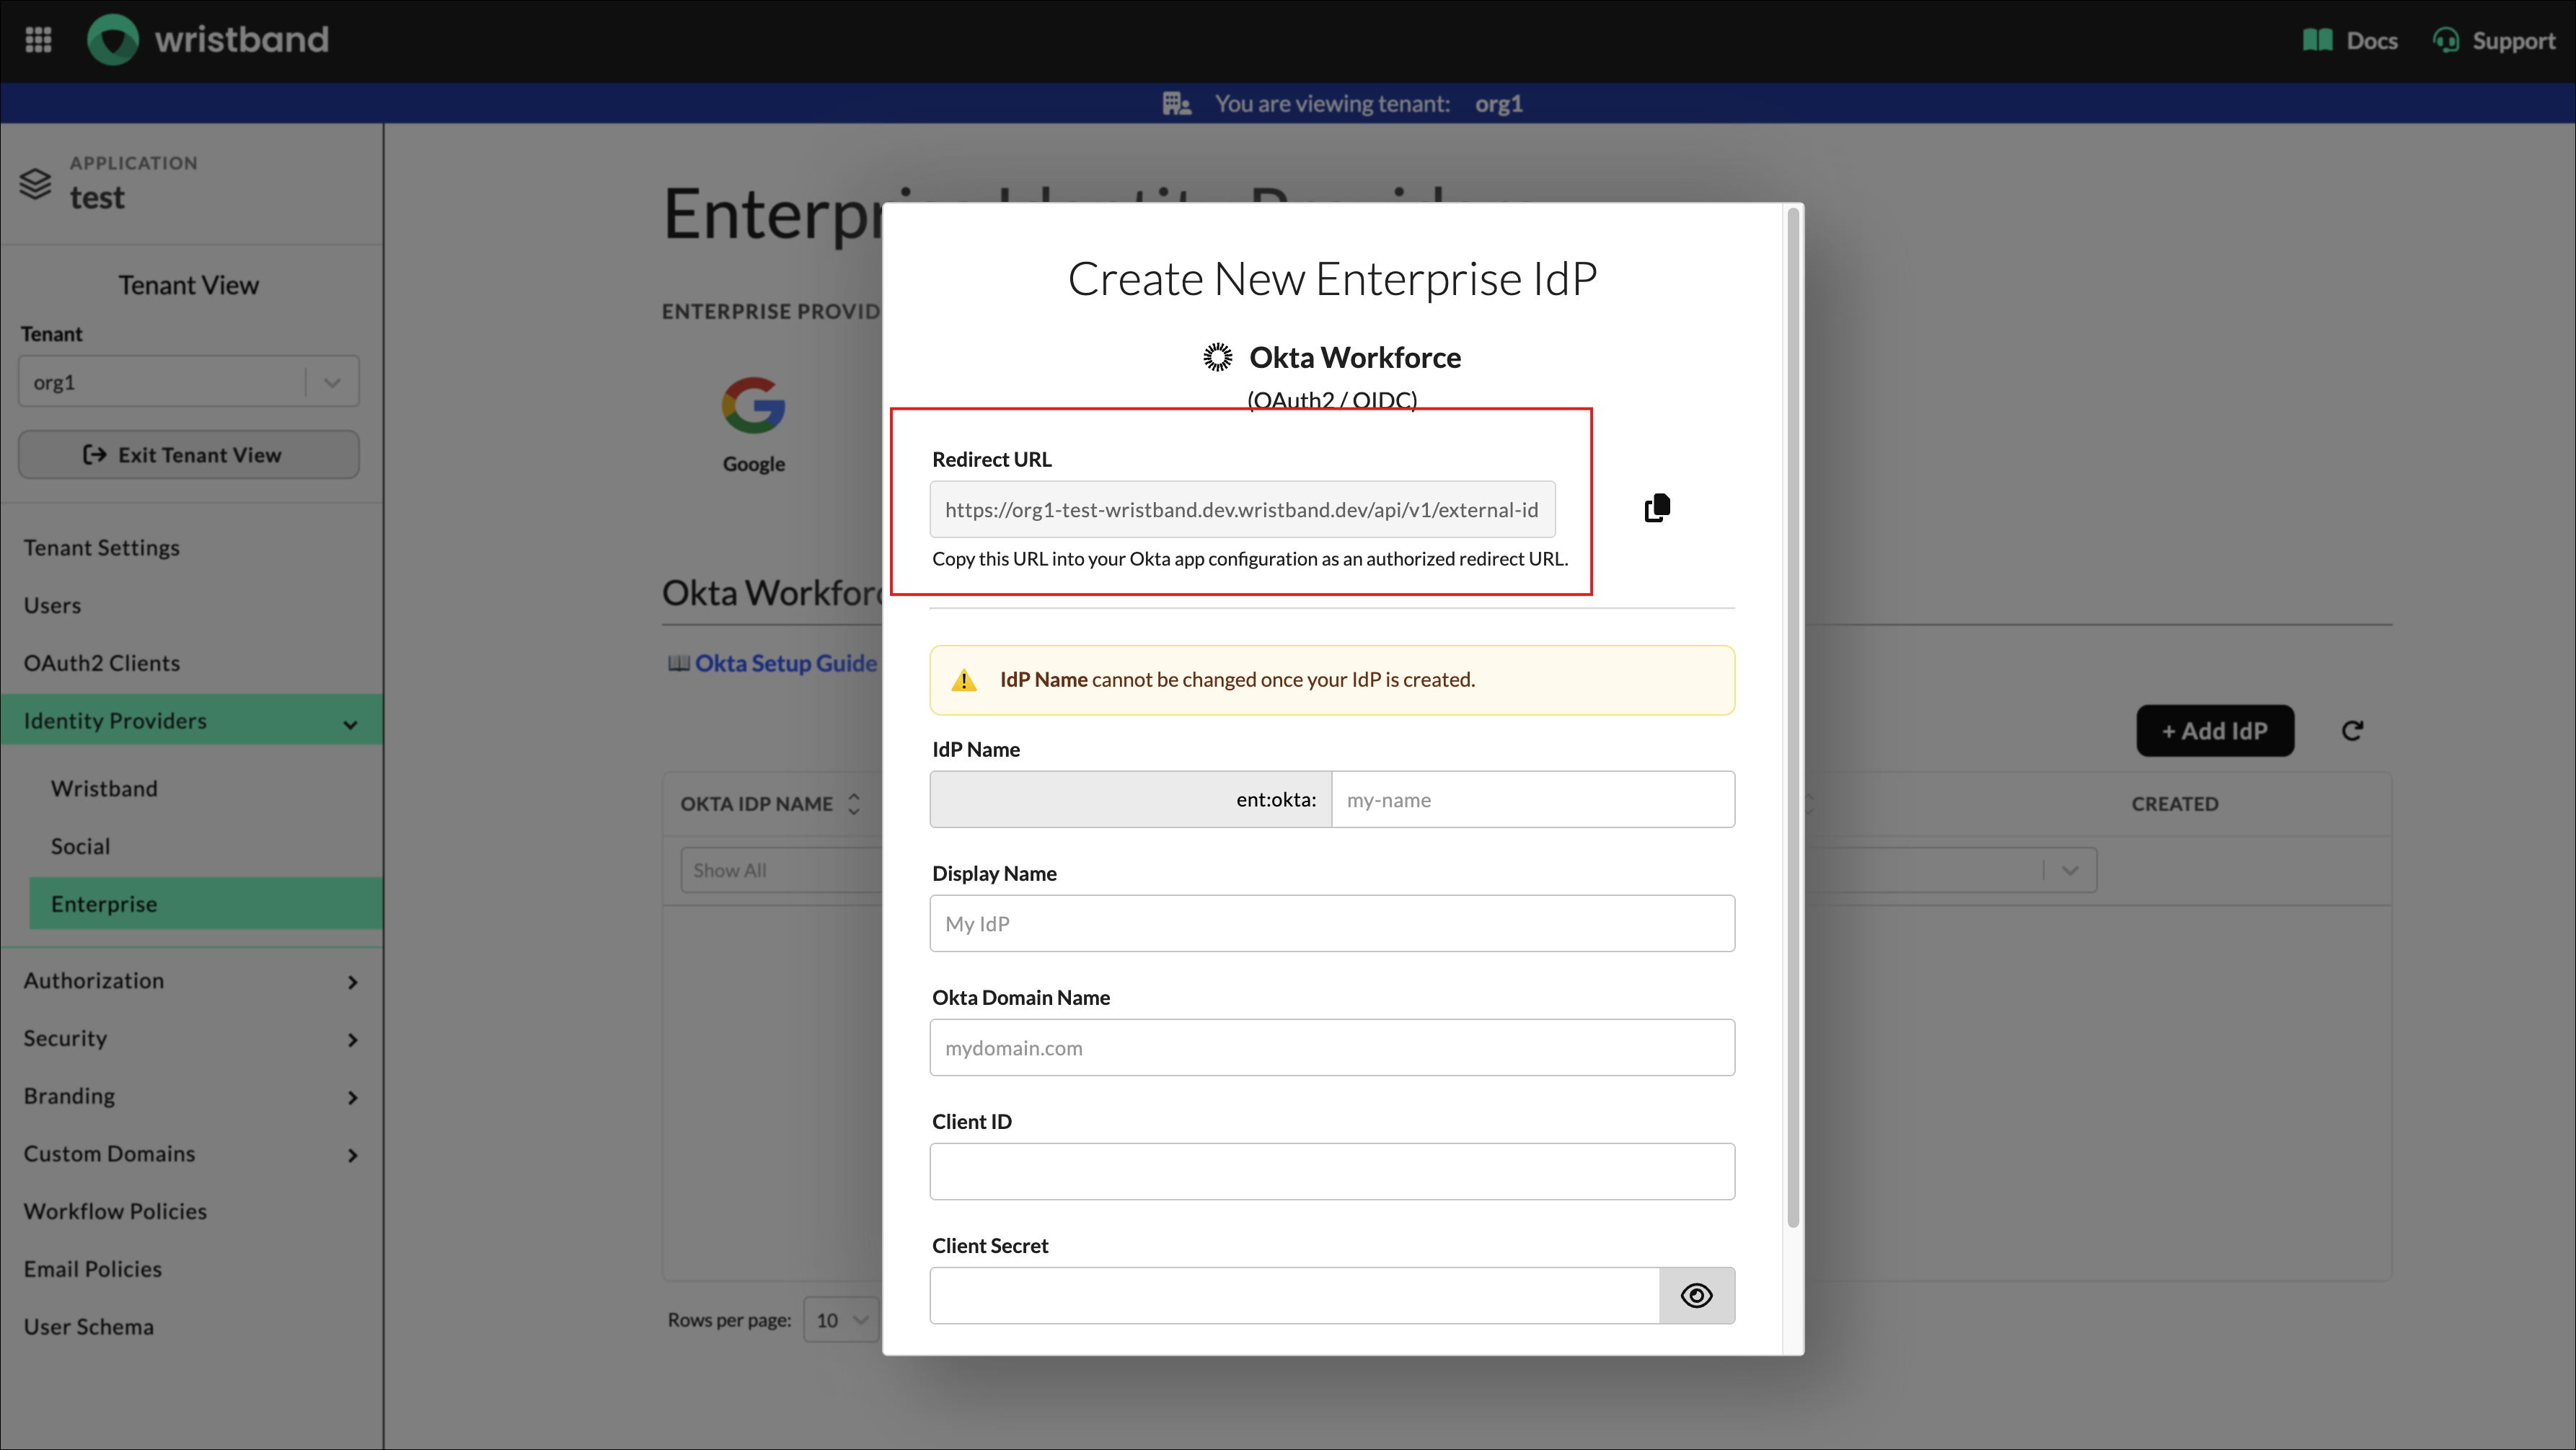
Figure 2: Copy the Okta provider’s Redirect URL from Wristband.
2. Sign Up For An Account
Sign up for an Okta integrator account here. Select Sign up for Integrator Free Plan, complete the form fields, and then log into your new Okta dashboard.
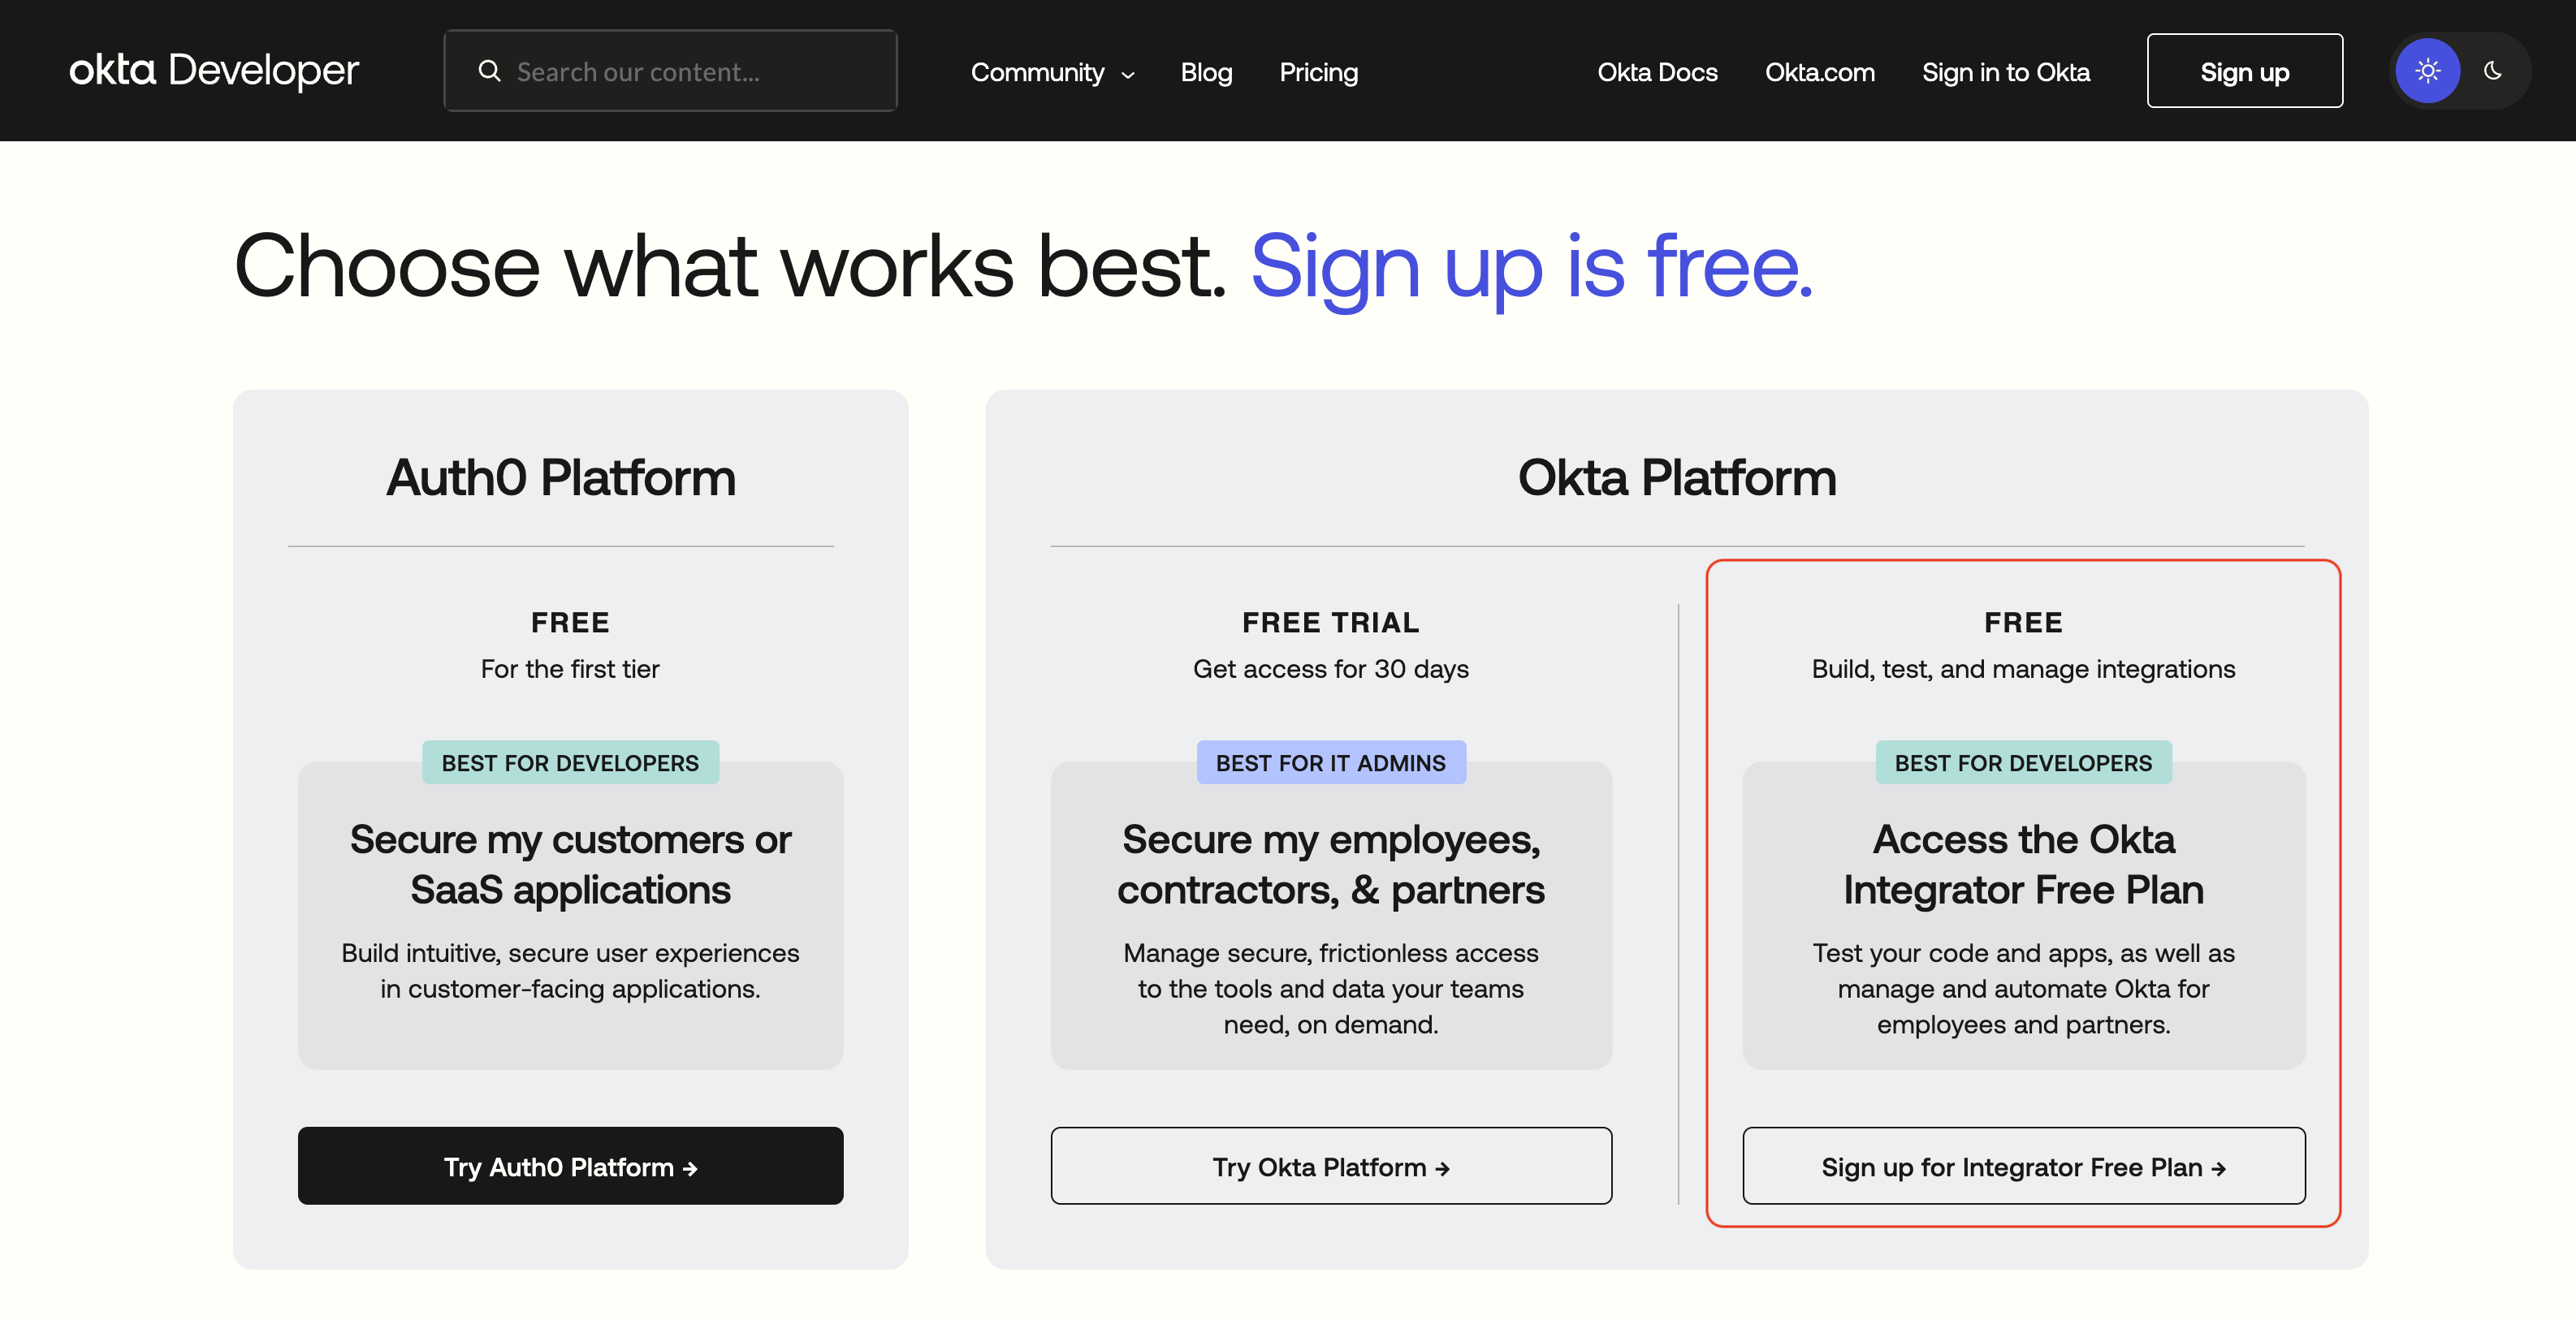
Figure 3: Sign up for the Integrator Free Plan.
3. Create a New App Integration
• Navigate to the Applications section in your Okta dashboard.
• Click the Create App Integration button to begin configuration.
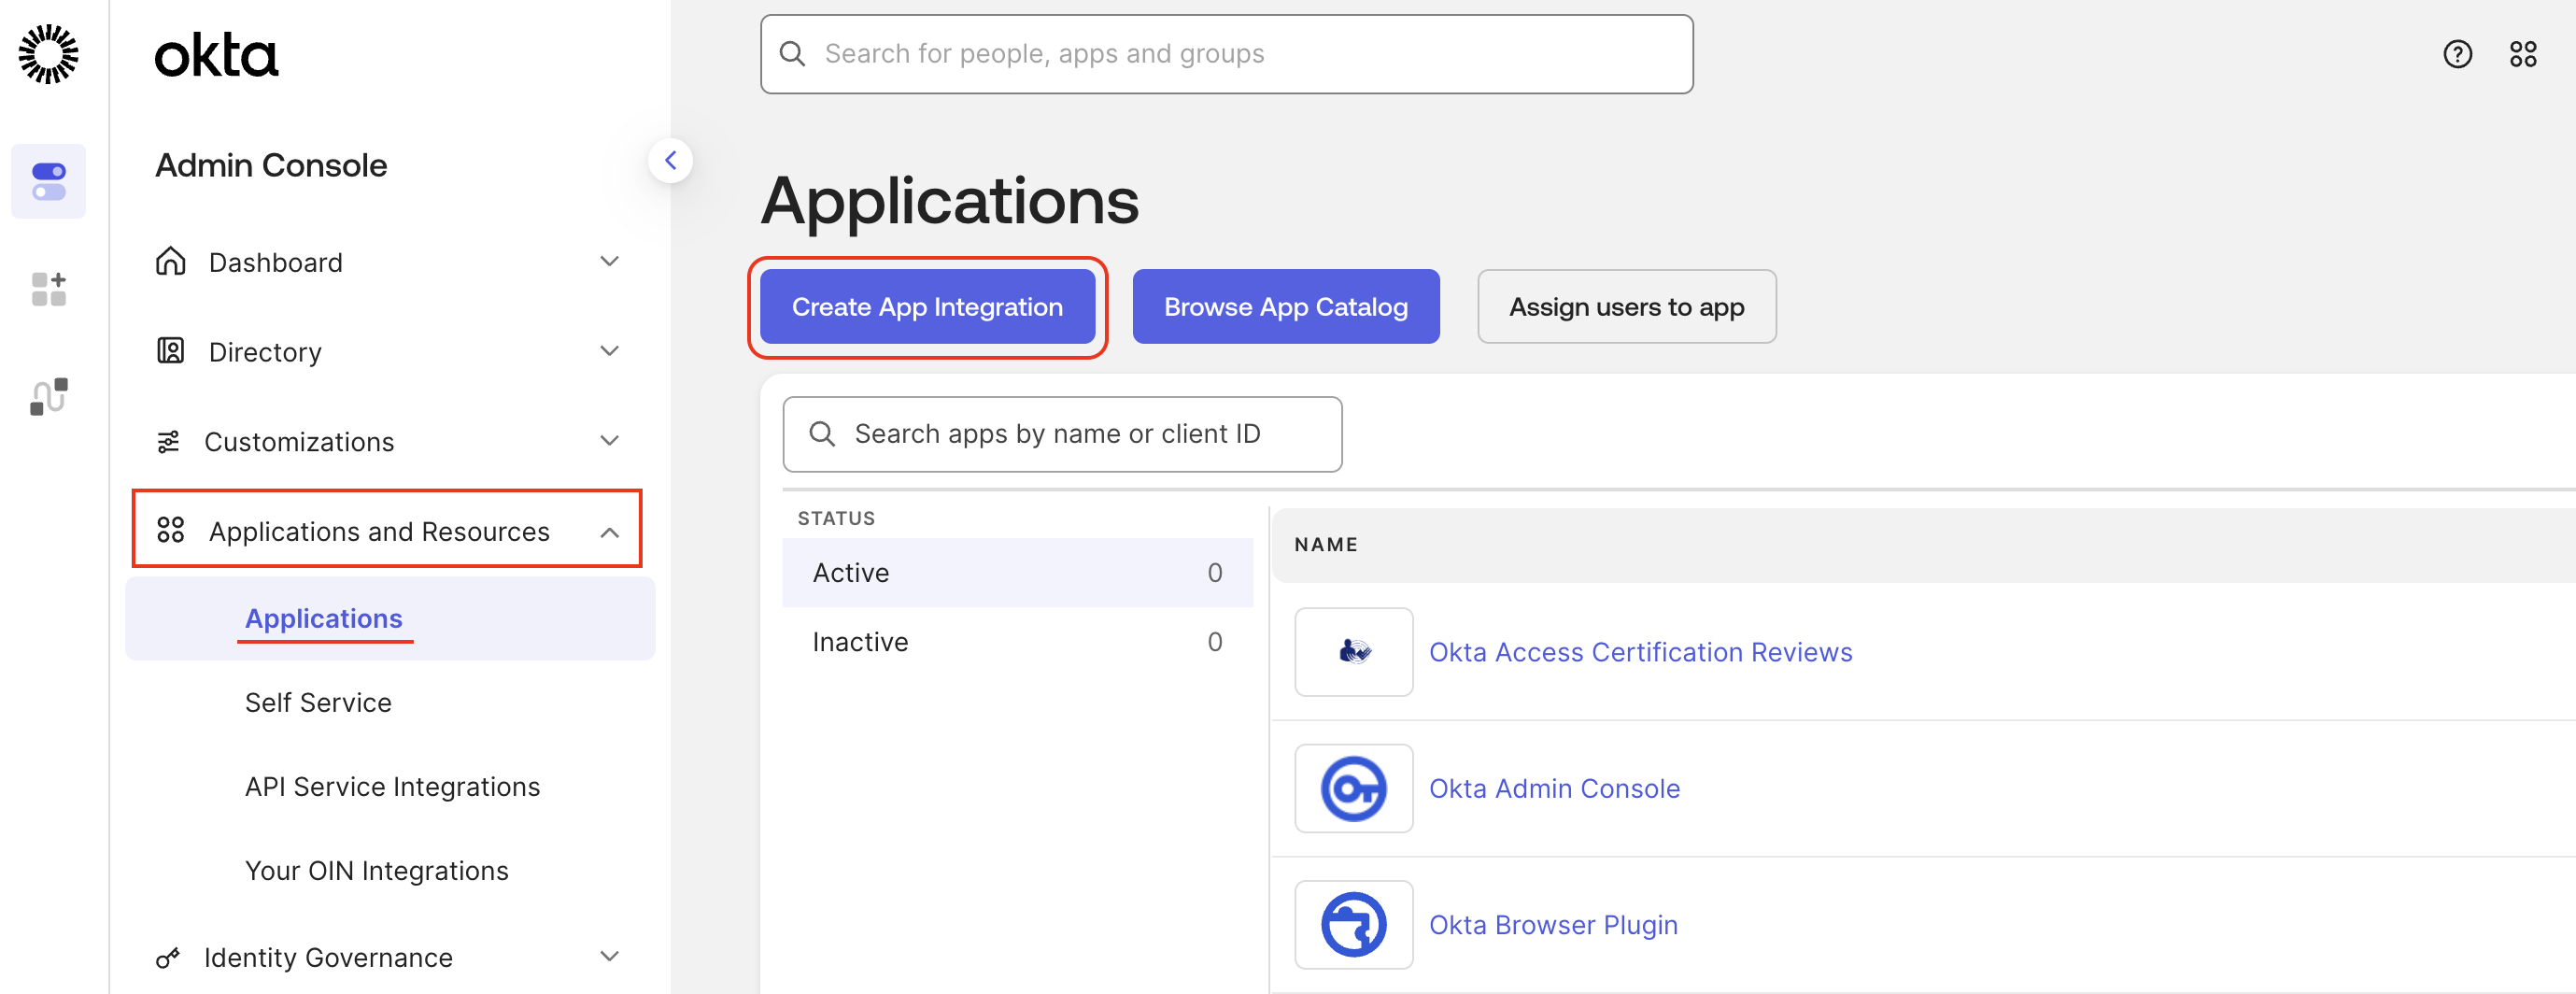
Figure 4: Open Applications and click Create App Integration in Okta.
- Select OIDC - OpenID Connect as the Sign-in method, and Web Application as the Application type.
- Click Next.
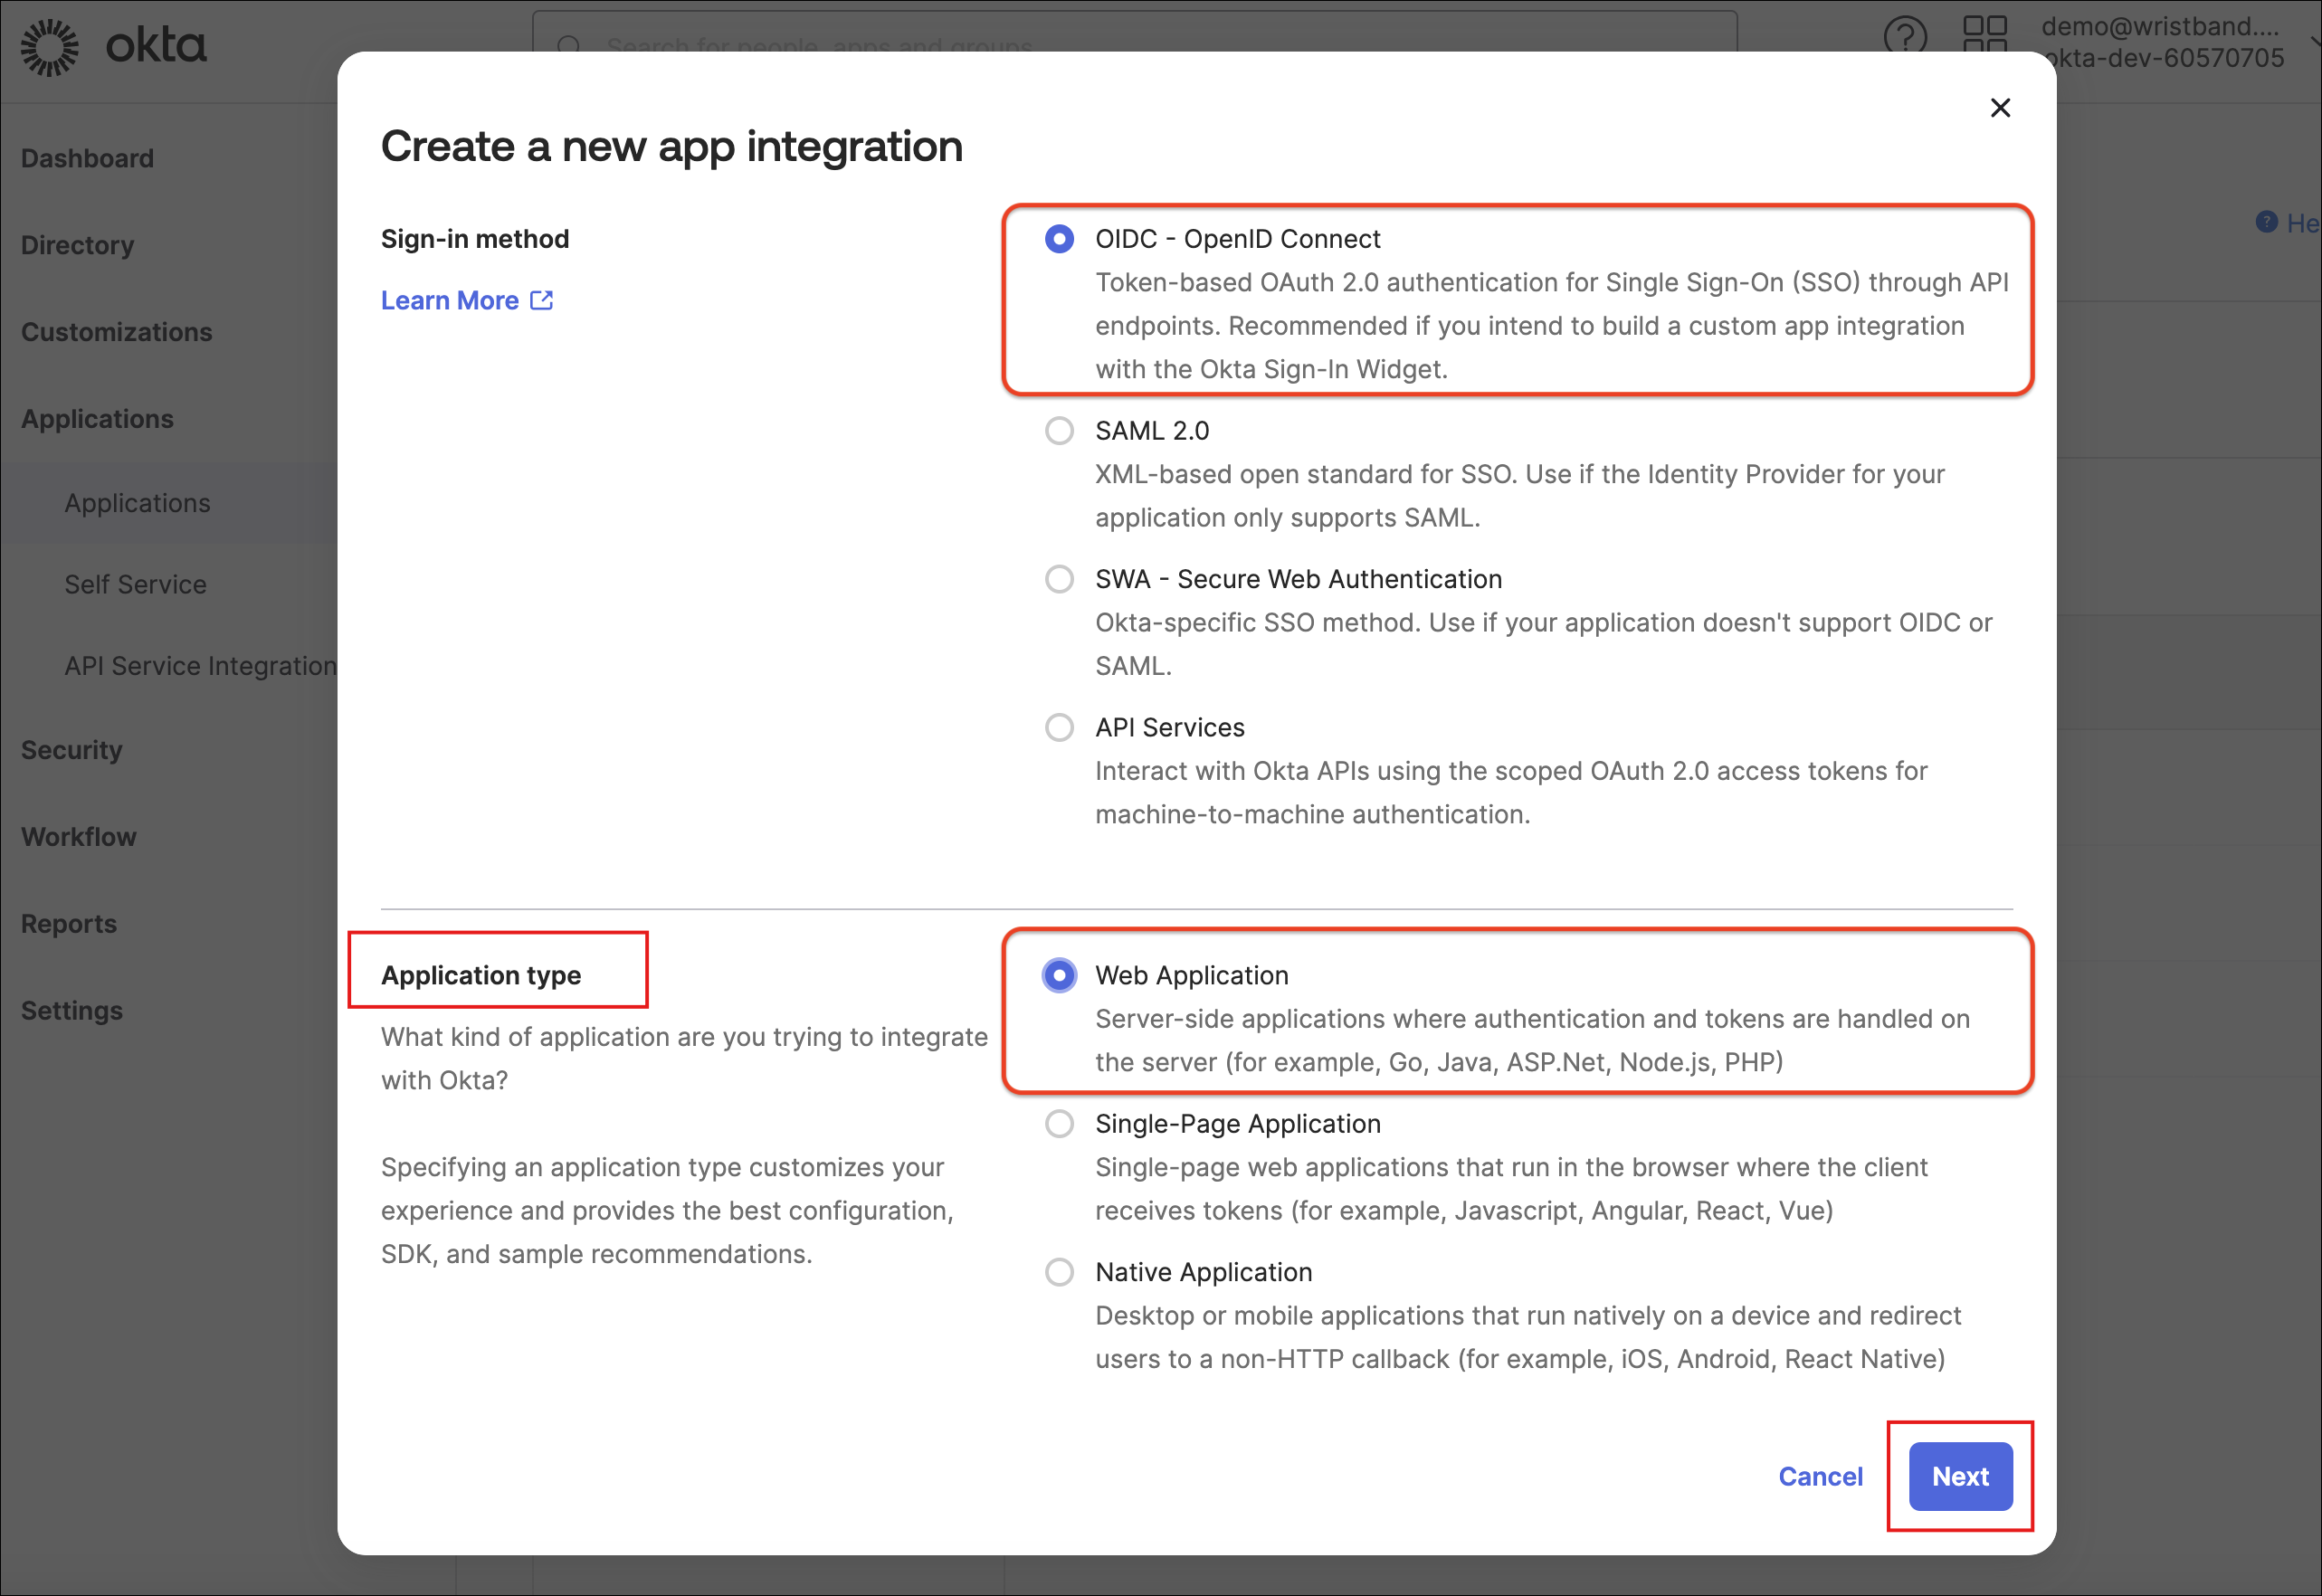
Figure 5: Select OIDC – OpenID Connect and Web Application.
Complete the fields in the General Settings section:
- App integration name: Any appropriate value.
- Client Definition: Select Use Okta-generated client ID.
- Grant Type: Select Authorization Code.
- Sign-in redirect URIs: Paste the External IdP Callback URL from step 1.
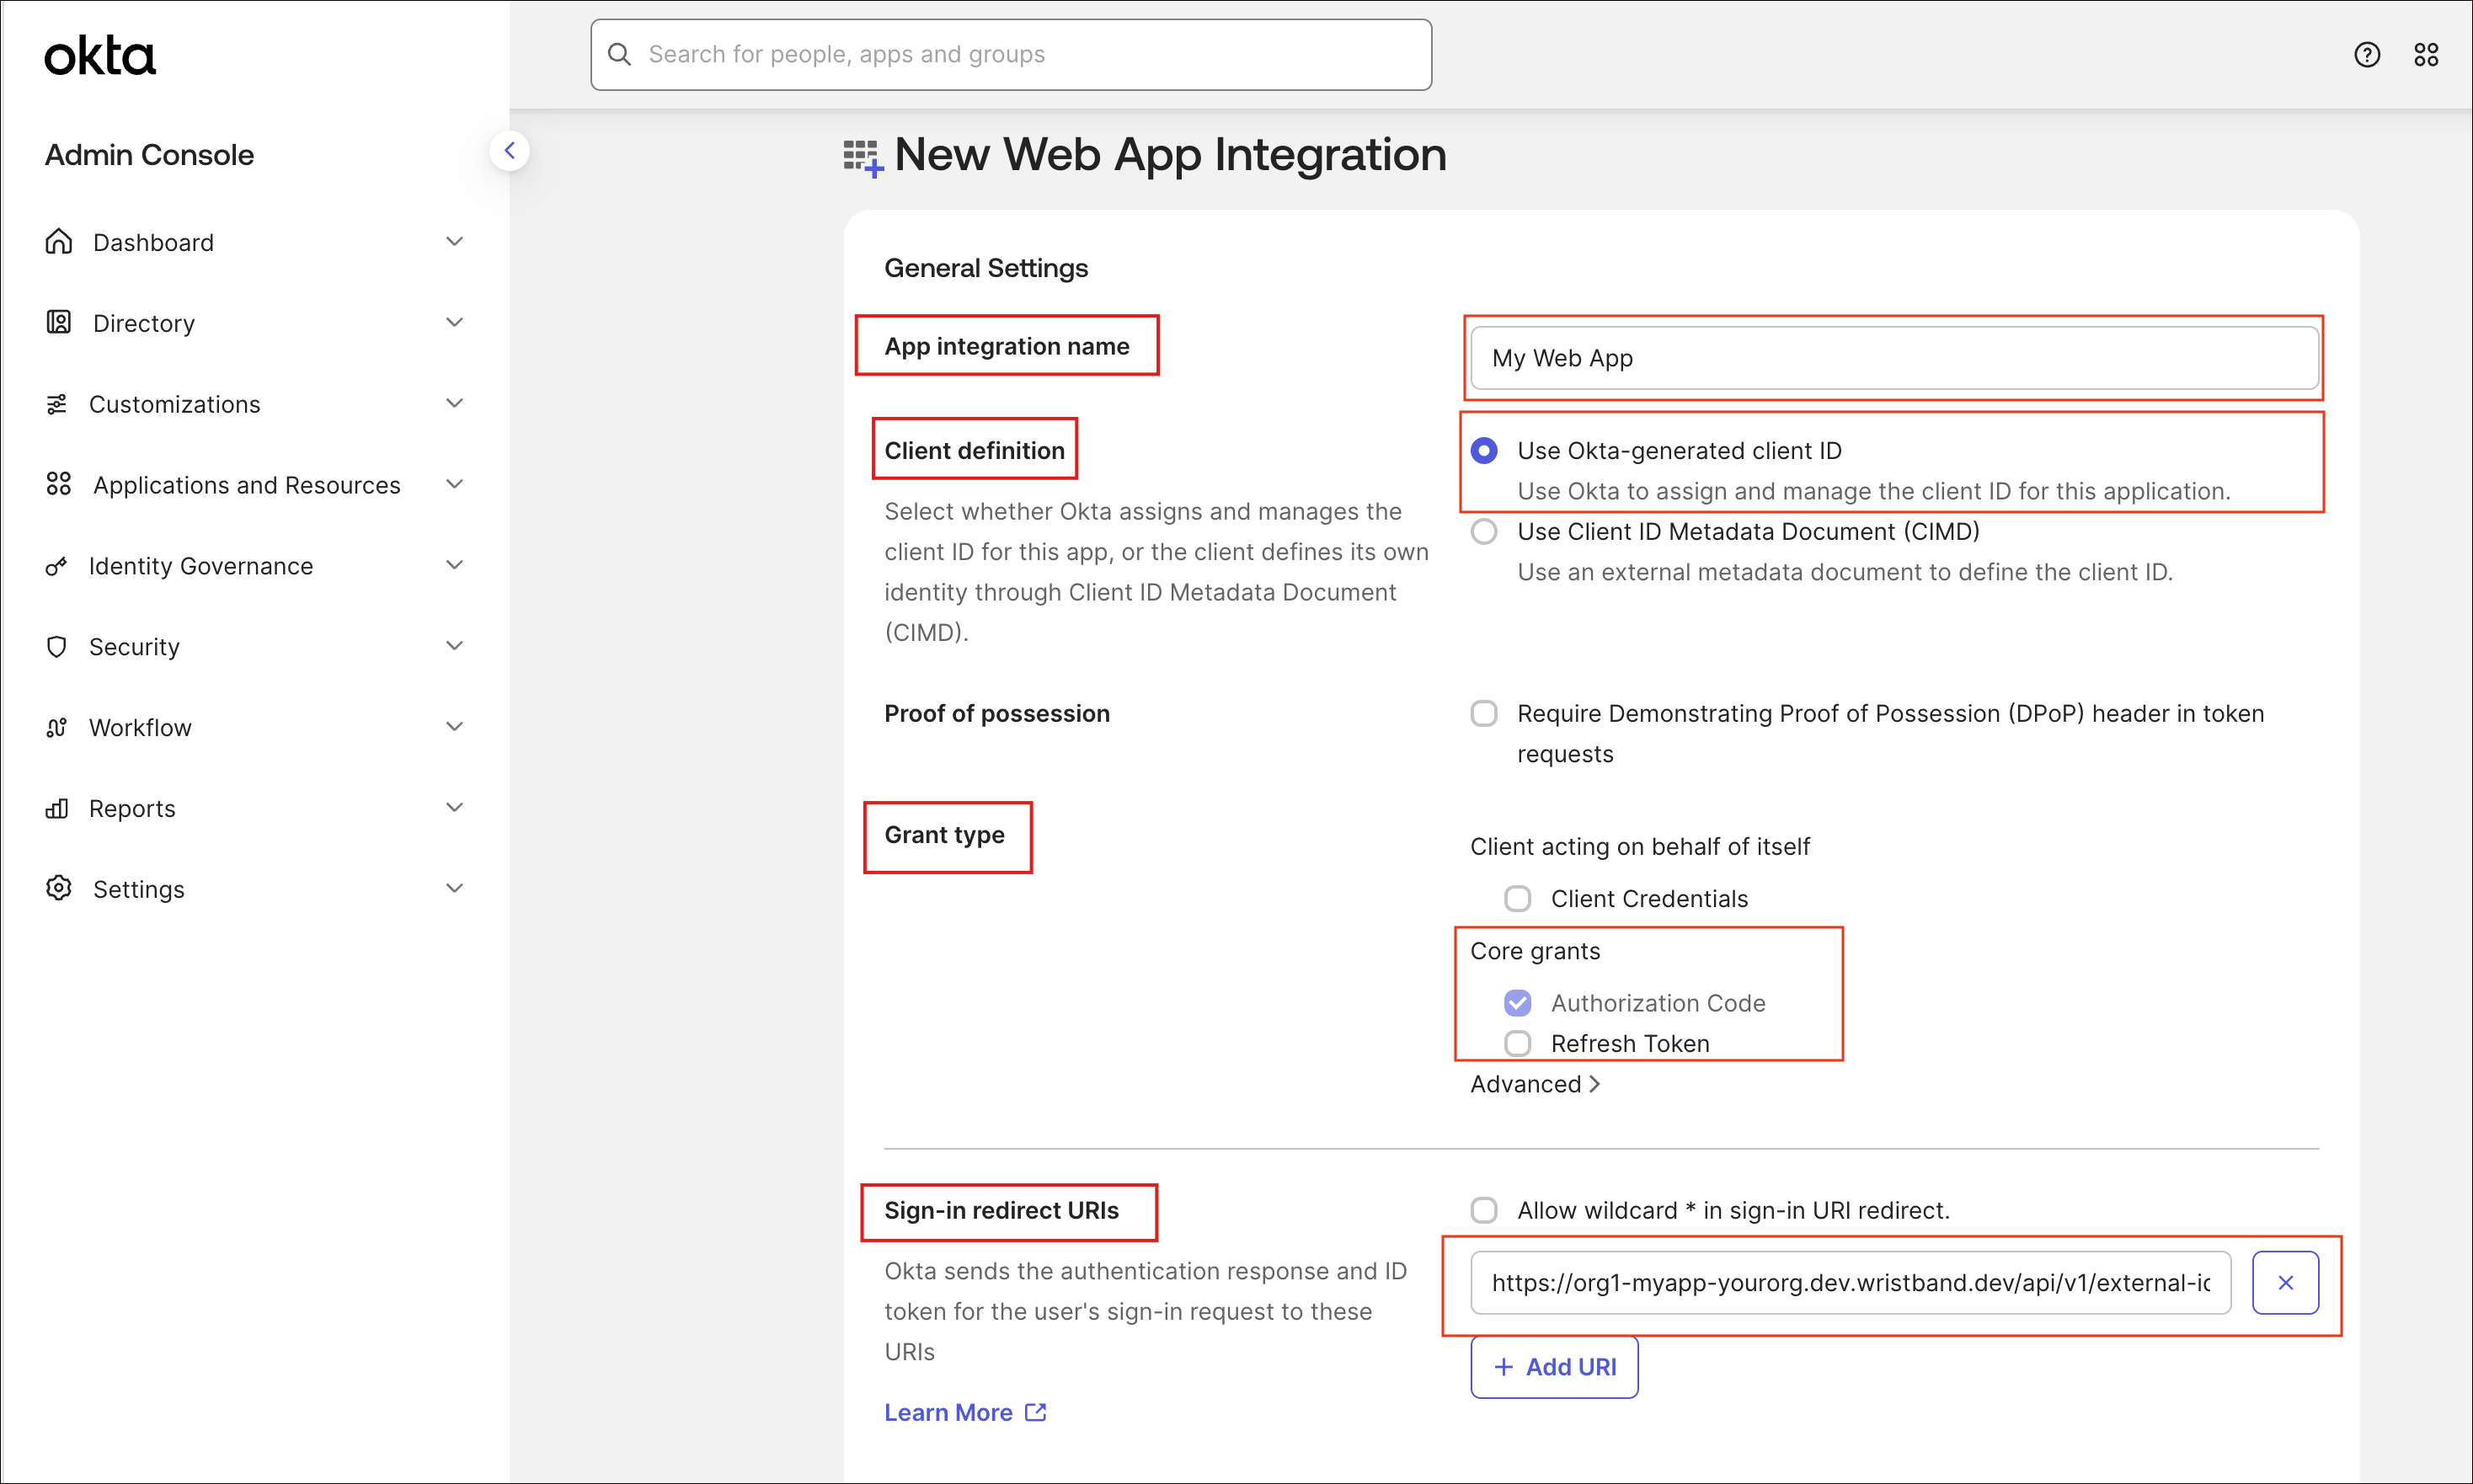
Figure 6: Enter the app integration settings and paste Wristband's Redirect URL into Sign-in redirect URIs.
In the Assignments section, select:
- Controlled access: Allow everyone in your organization to access.
- Enable immediate access: Ensure this is enabled.
- Click Save. Okta will take you to the Edit Application page.
Limiting AccessThe configurations shown below allow all users to access the application. If you need to restrict access to a subset of users you can choose the option to limit access to selected groups.
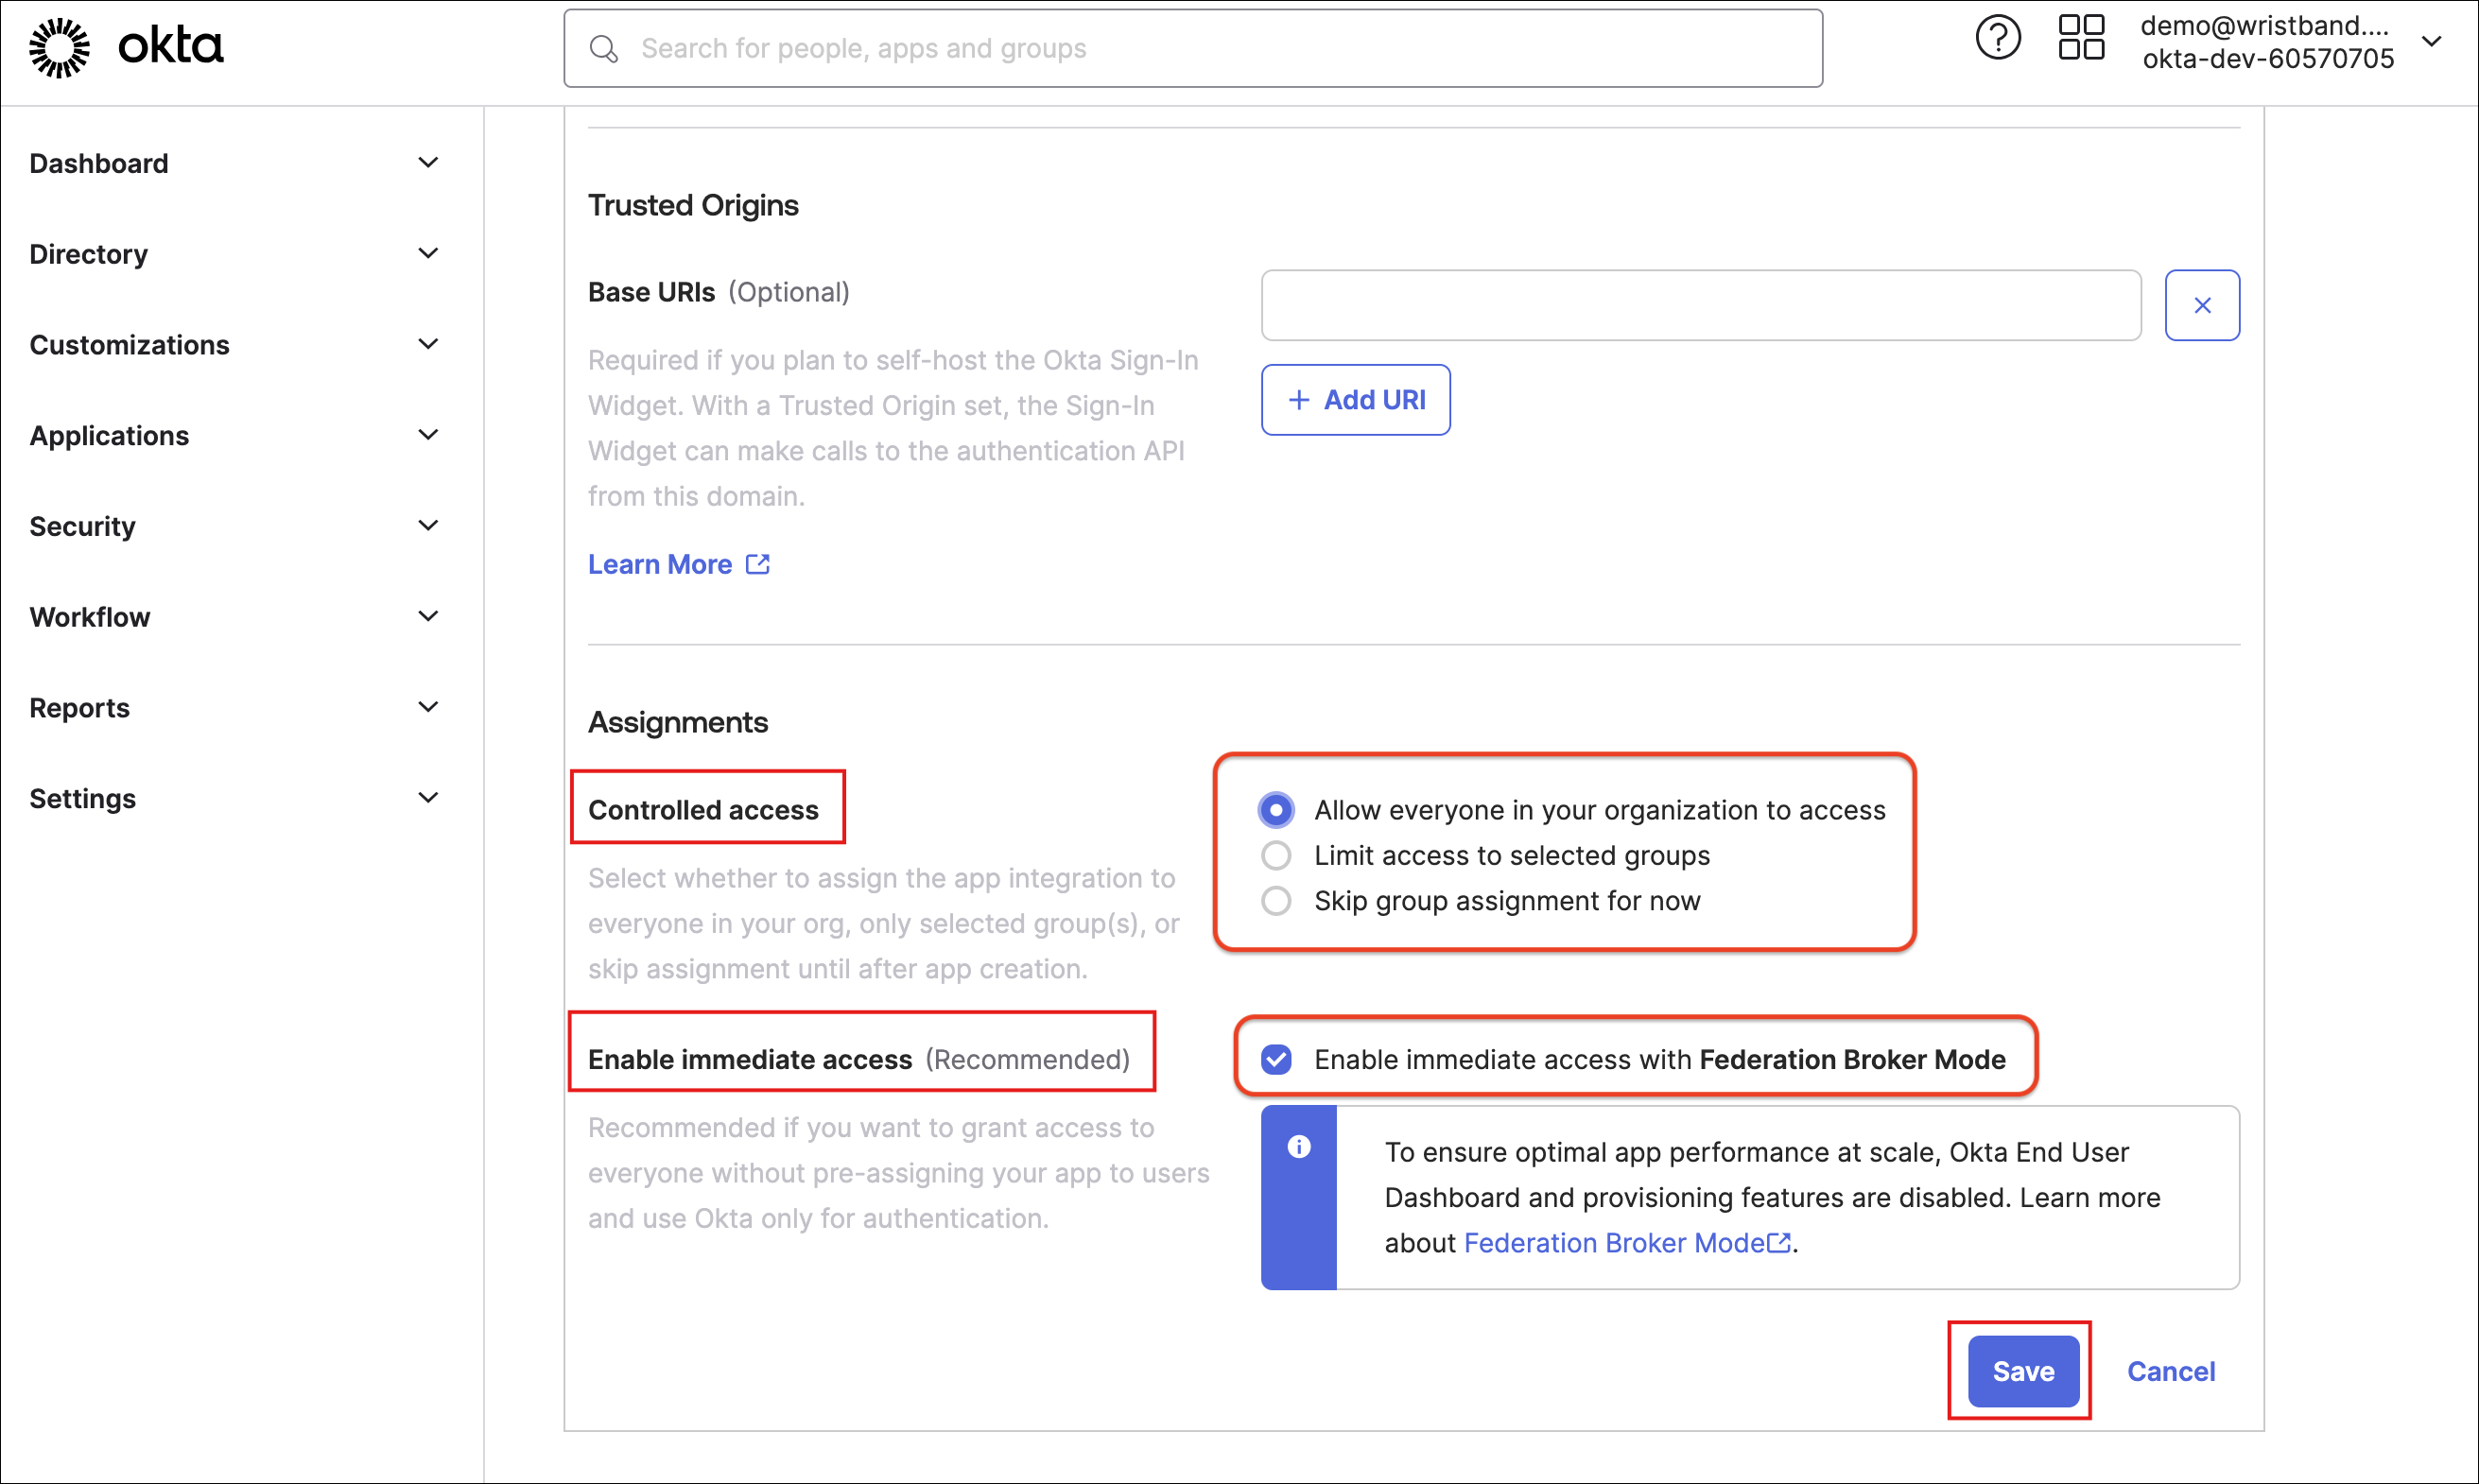
Figure 7: Set who can access the app integration, then click Save.
4. Get the Client and Domain Information
On the Edit Application page, copy these configuration values:
- Client ID
- Client Secret
- Okta Domain
The Client ID and Client Secret are in the Client Credentials section. The Okta domain can be found in the dropdown menu located in the top right corner.
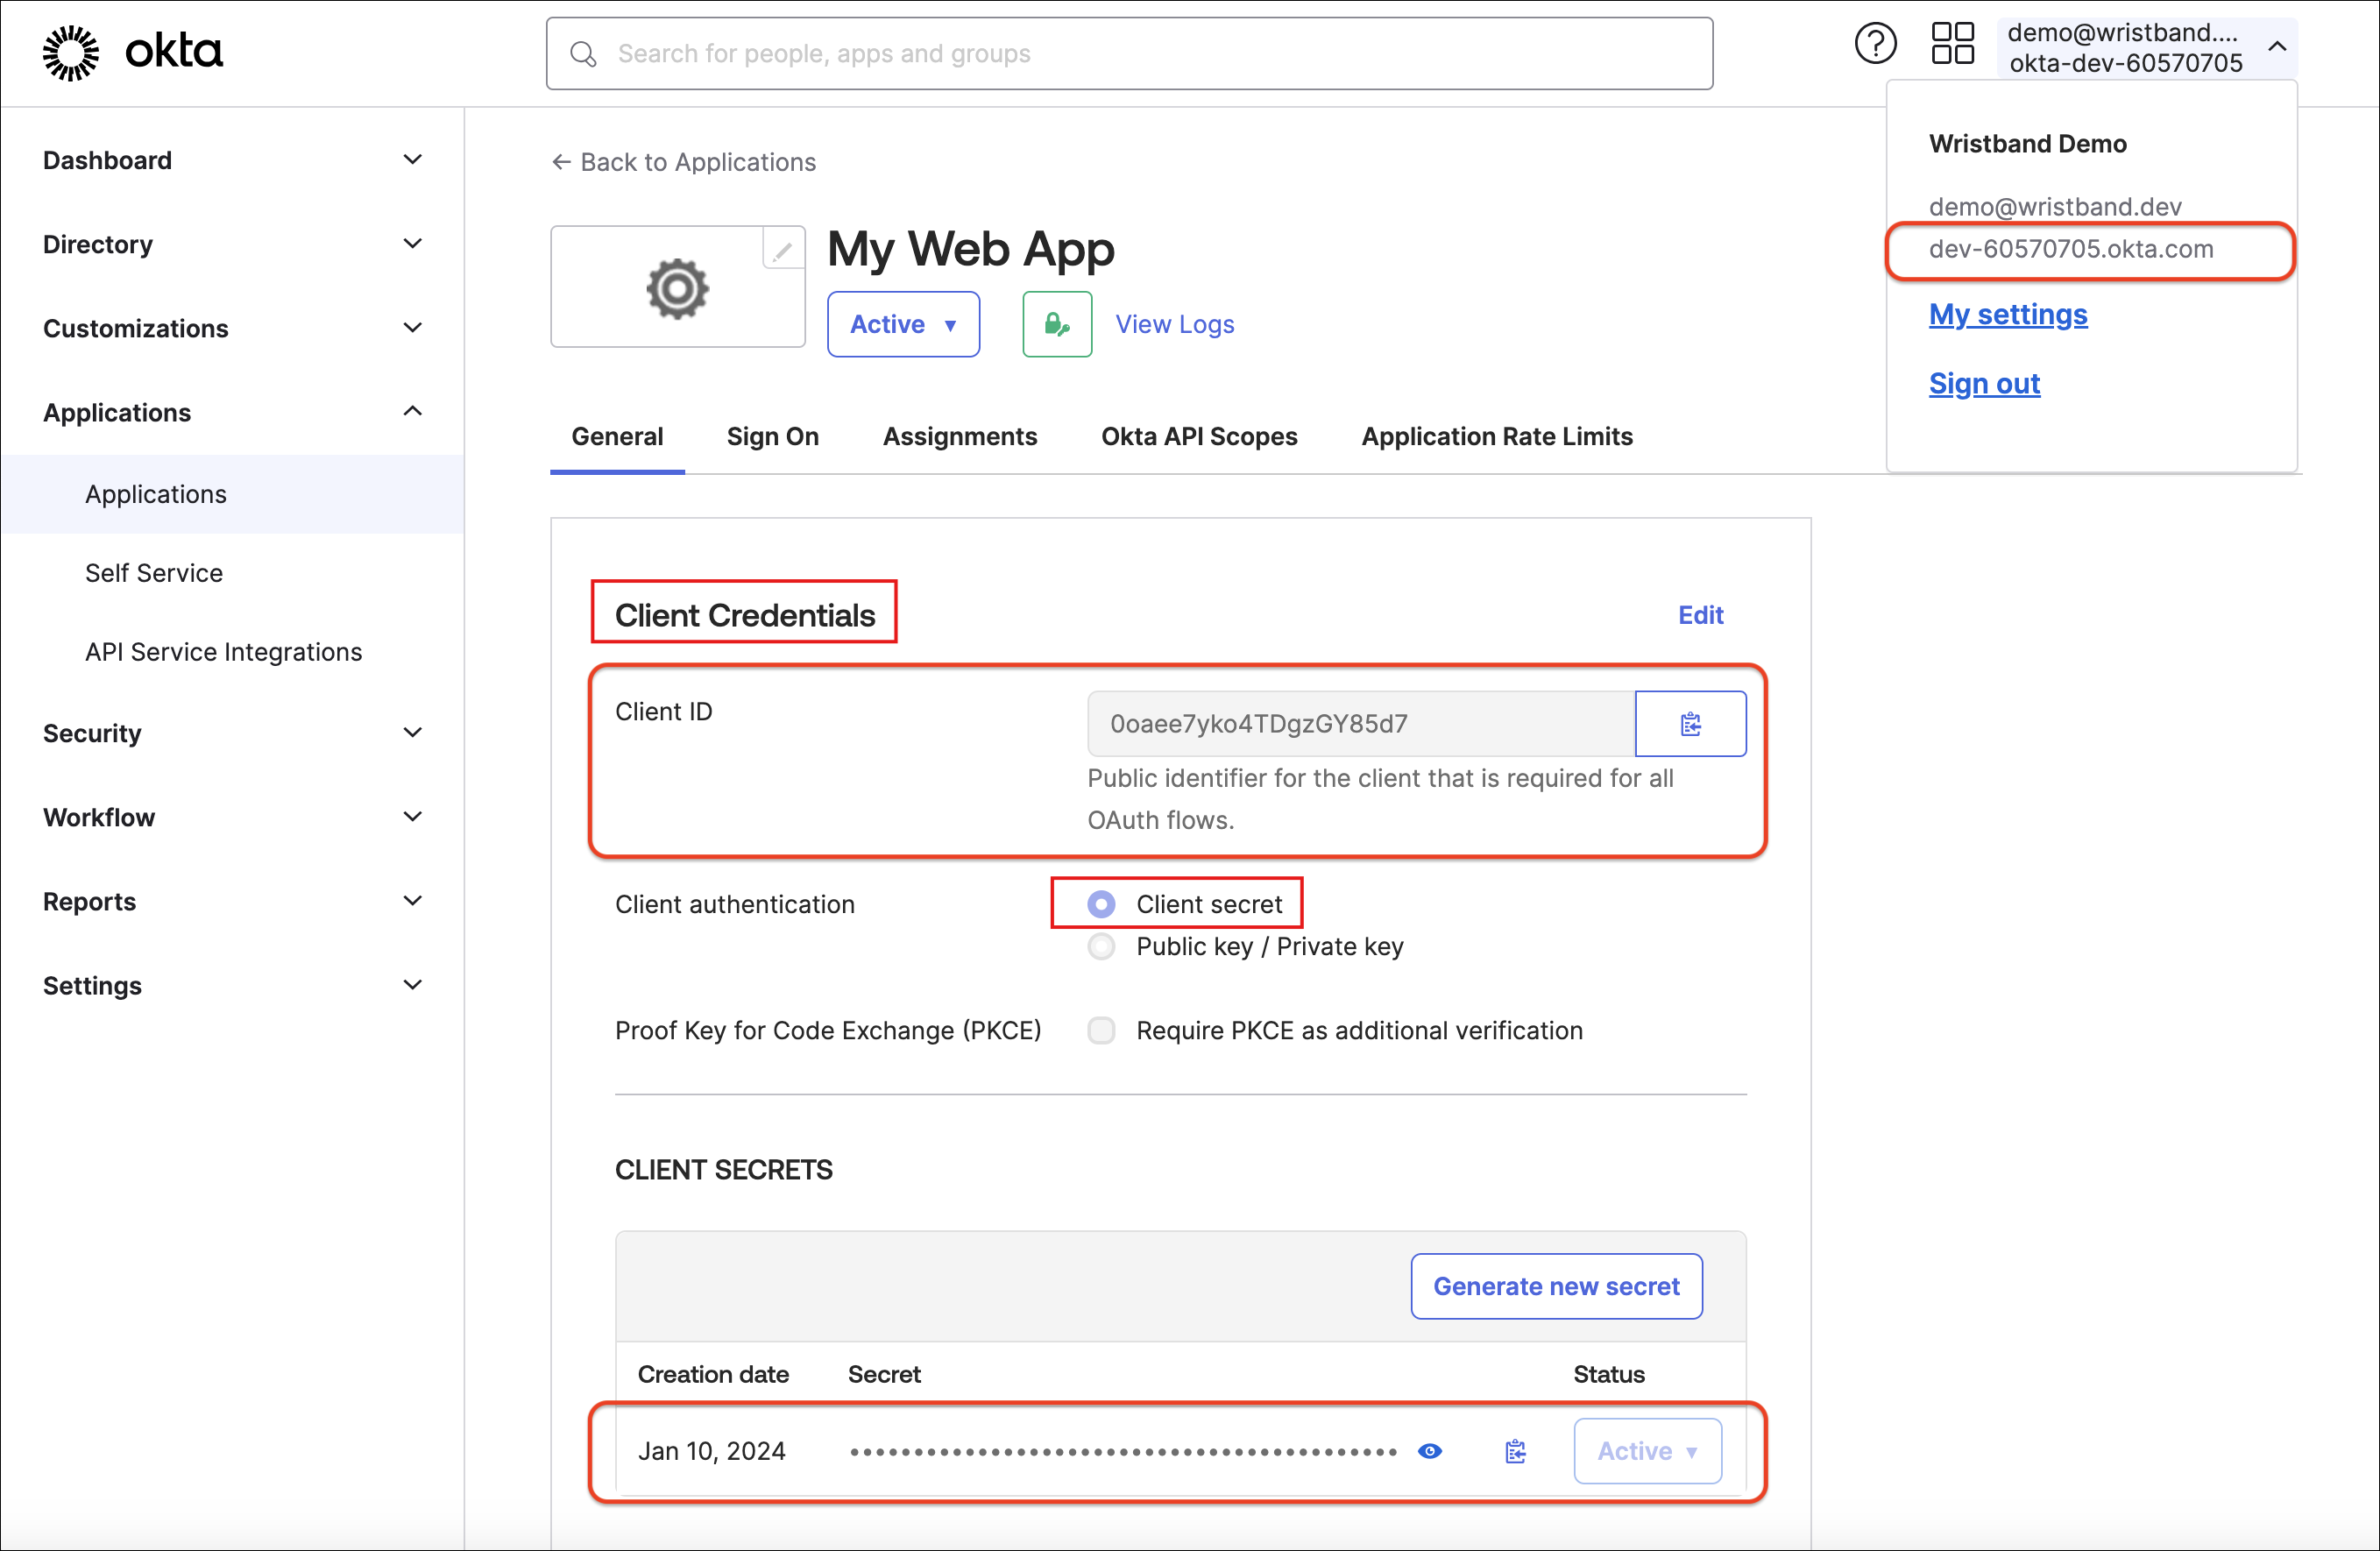
Figure 8: Copy the Client ID, Client Secret, and Okta domain.
5. Configure the Groups Claim (Optional)
To use Okta's Groups with Wristband's Role Mapping, configure your Okta application to include a "Groups" claim in the ID token.
Click on the Sign-On tab. In the OpenID Connect ID Token section, click Edit. Ensure:
- The claim name is groups.
- The group claims filter includes all groups (
Matches regexand.*). - Click Save to complete the configurations.
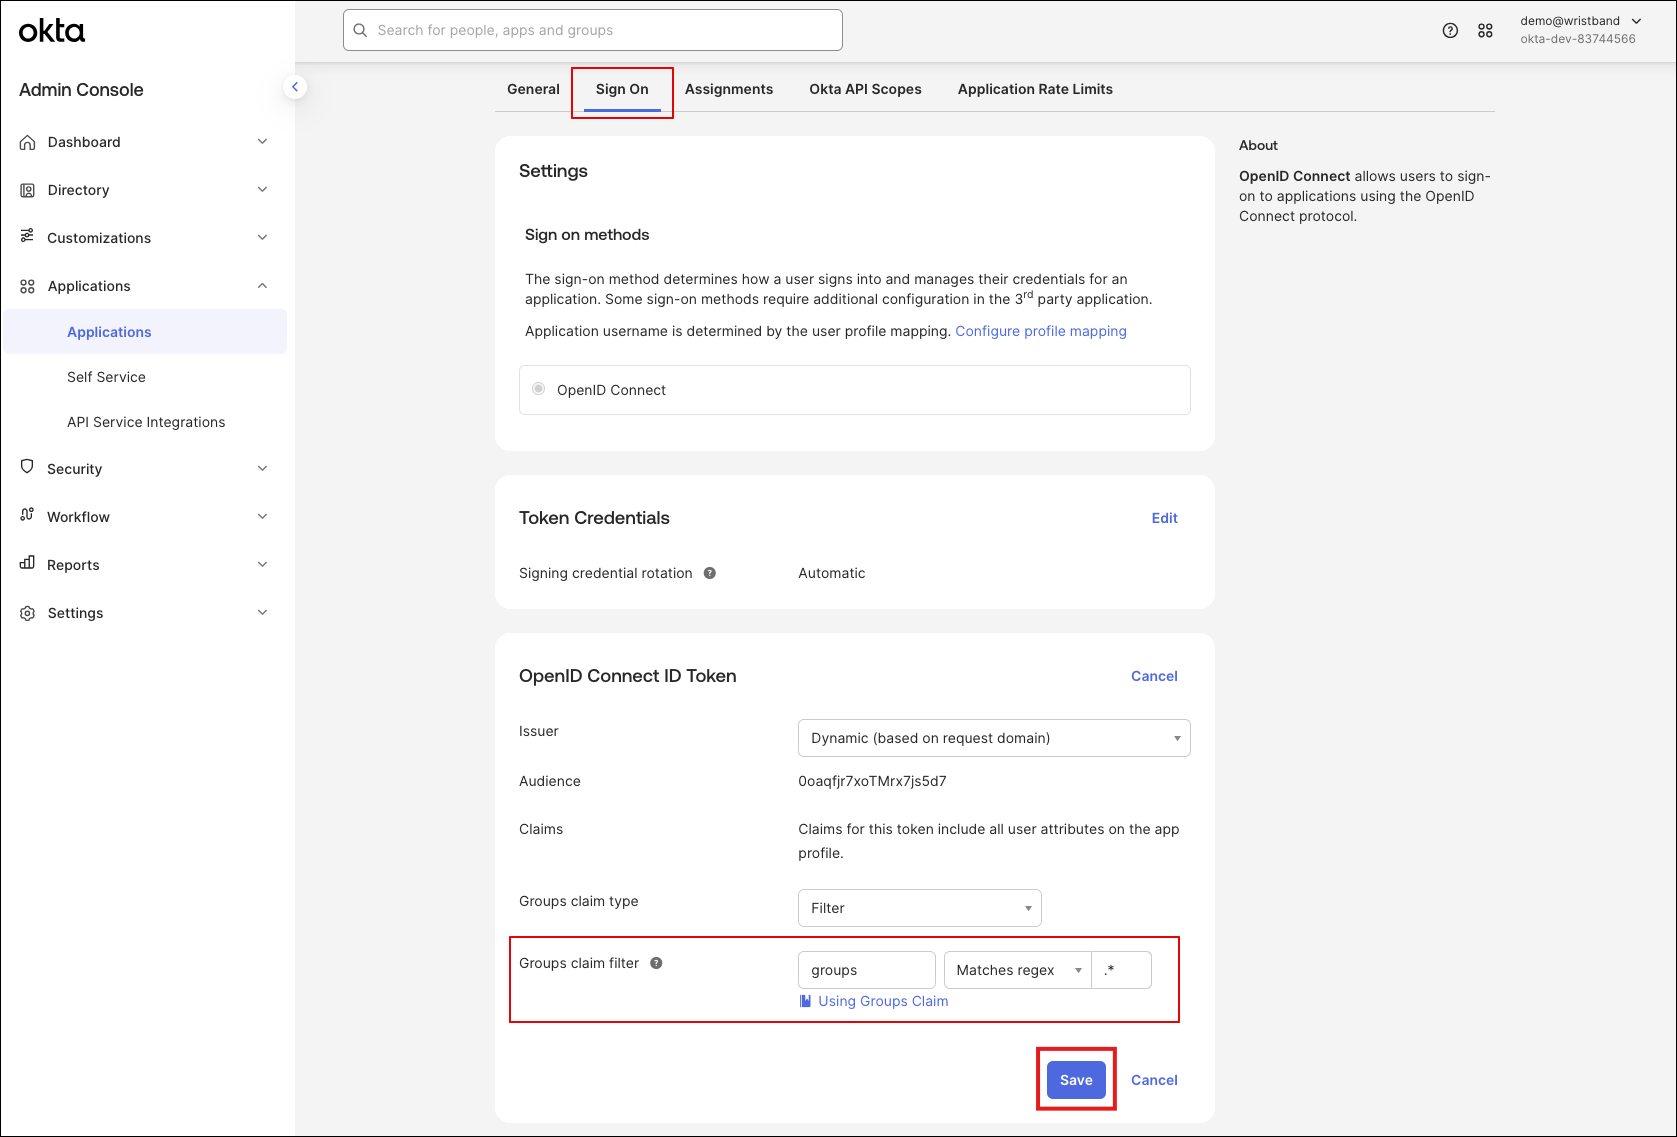
Figure 9: Optionally, add a groups claim to the ID token to map Wristband roles.
6. Create an Okta IdP in Wristband
Go back to the Wristband dashboard, open the Create External IdP modal, and enter the following values into the form:
- IdP Name: Any value desired (must be unique within the tenant).
- Display Name: Any value desired, Okta is a safe default.
- Domain Name: The Okta domain from step 4 (e.g.,
dev-60570705.okta.com). - Client ID: The Client ID from step 4.
- Client Secret: The Client Secret from step 4.
- Click Create to finish. The Okta External IdP will be in an ENABLED status.
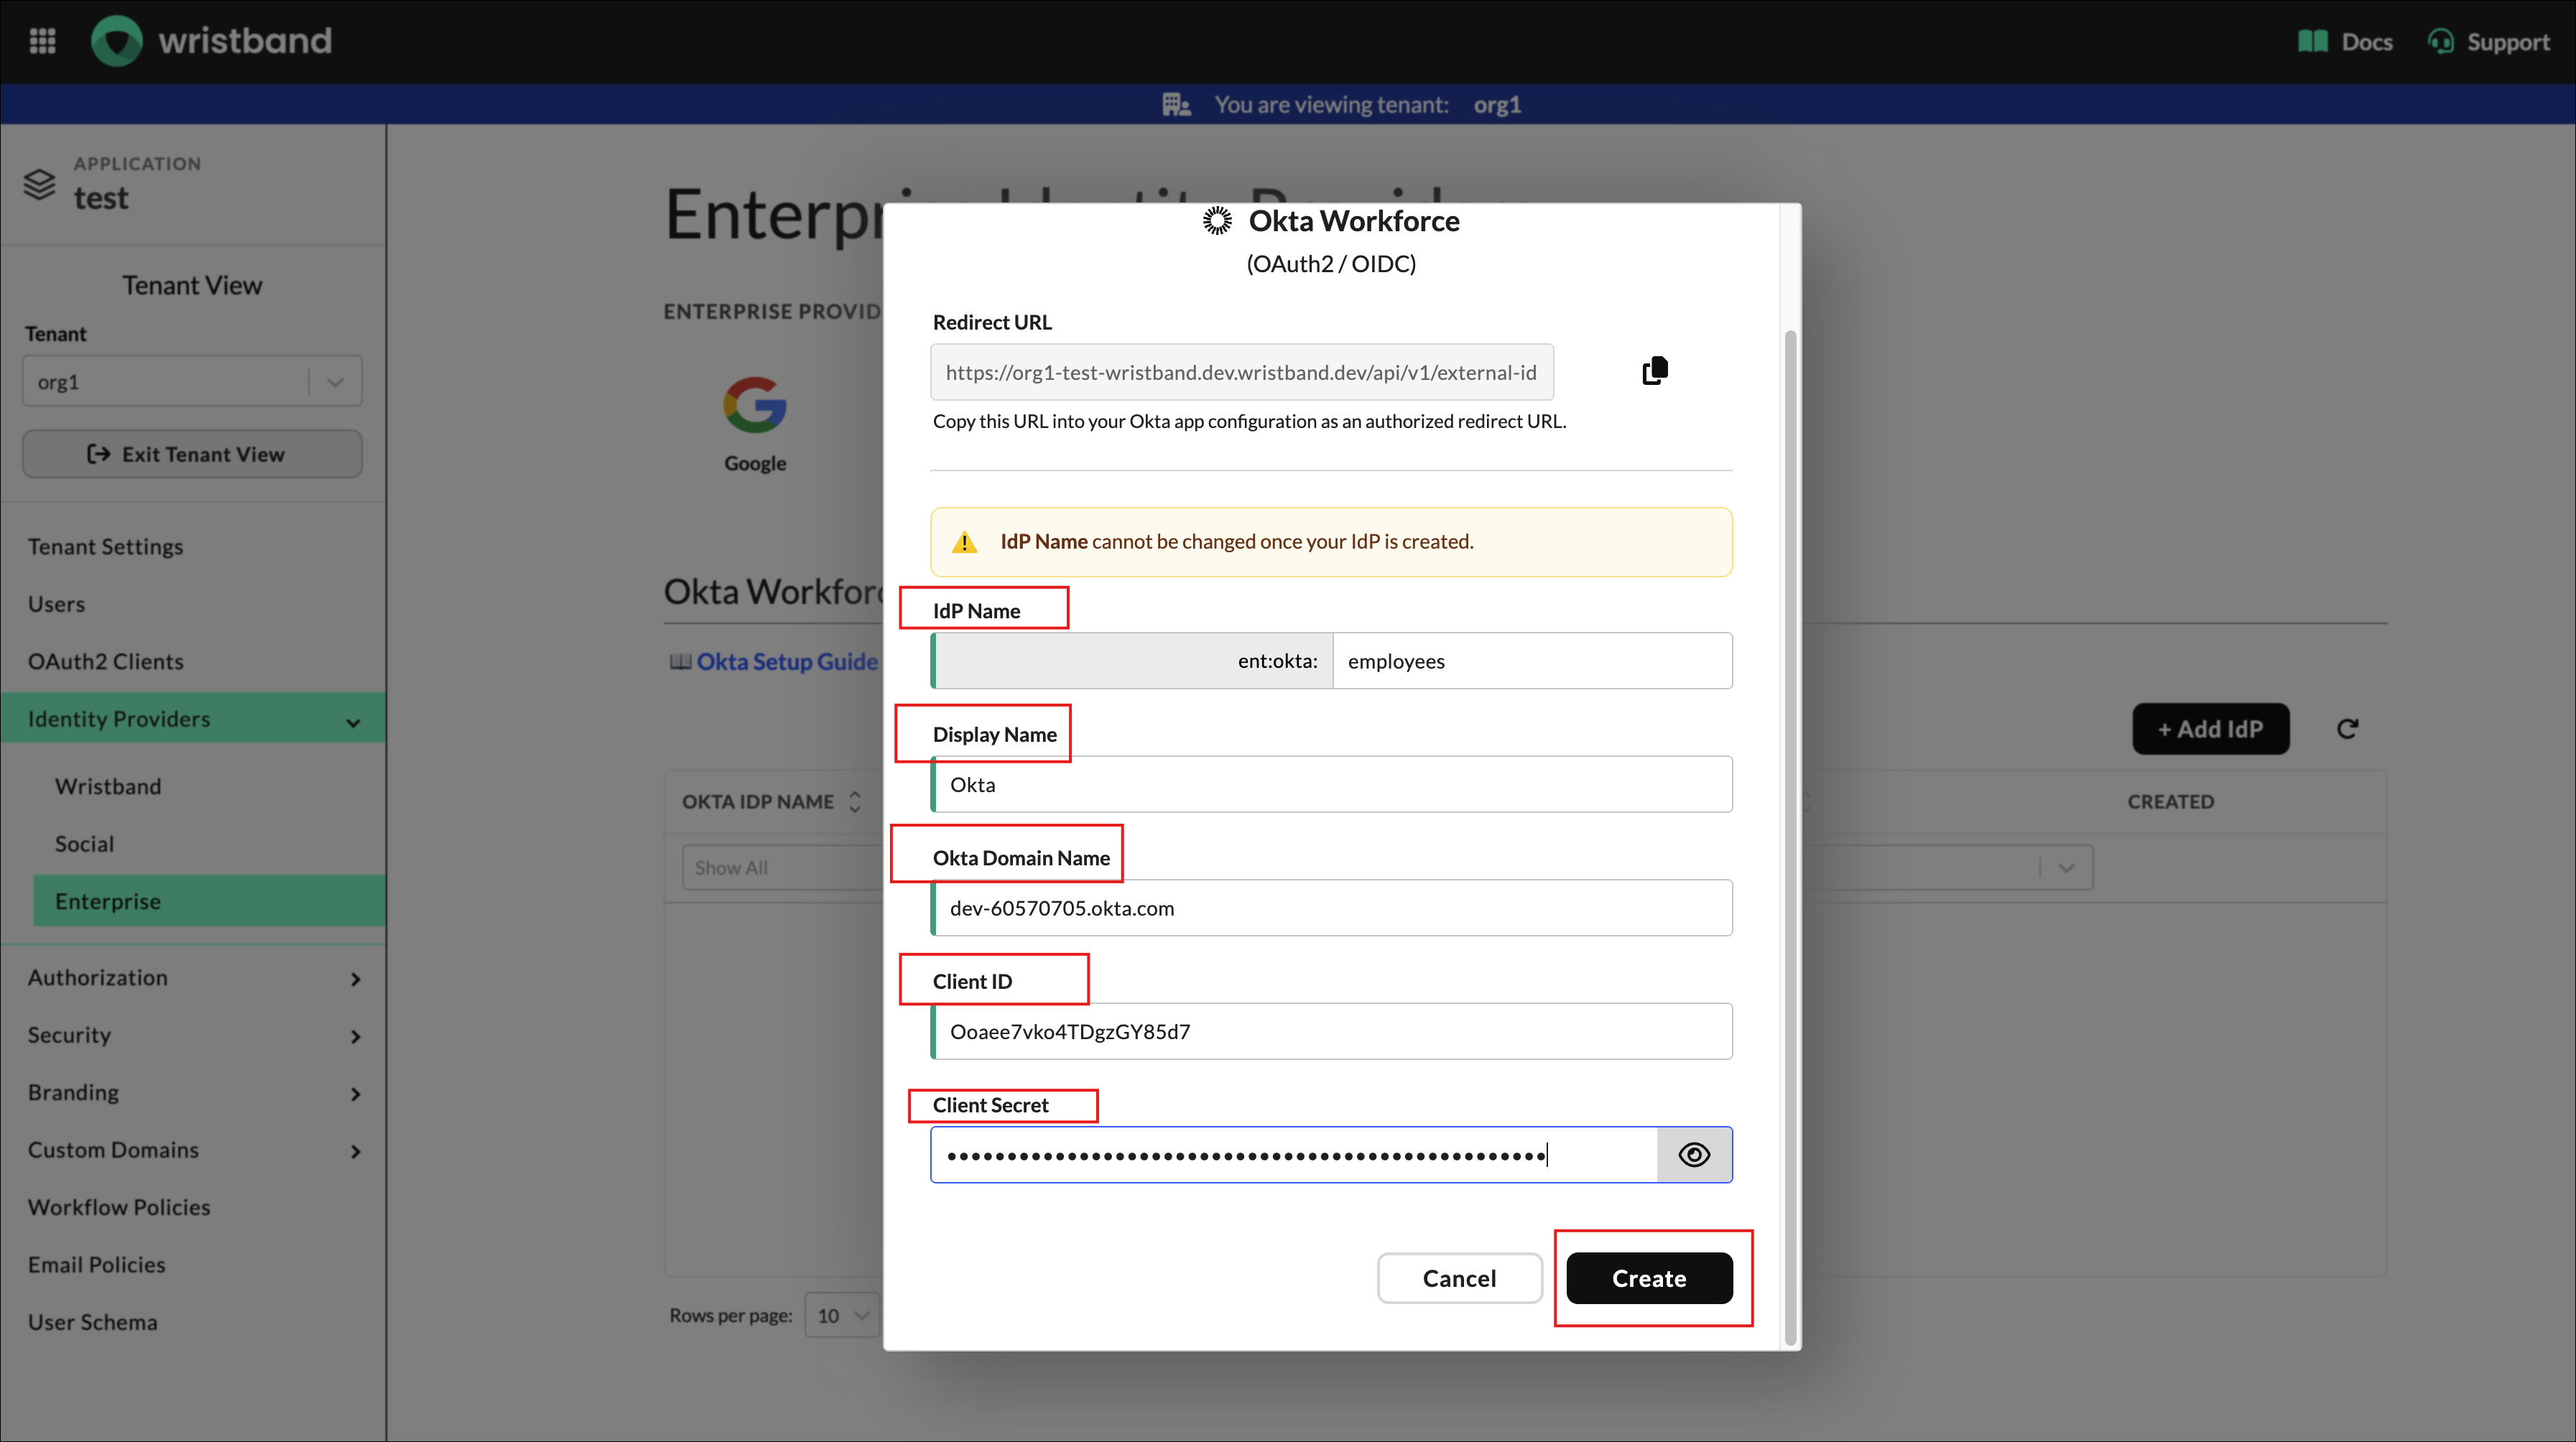
Figure 10: Enter the Okta domain and client credentials in Wristband, then click Create.
7. Enable Tenant Overrides for IdP
In the Wristband dashboard, enable the identity provider overrides for your tenant.
- Select Identity Providers from the left navigation menu.
- Enable the toggle next to Enable this tenant override.
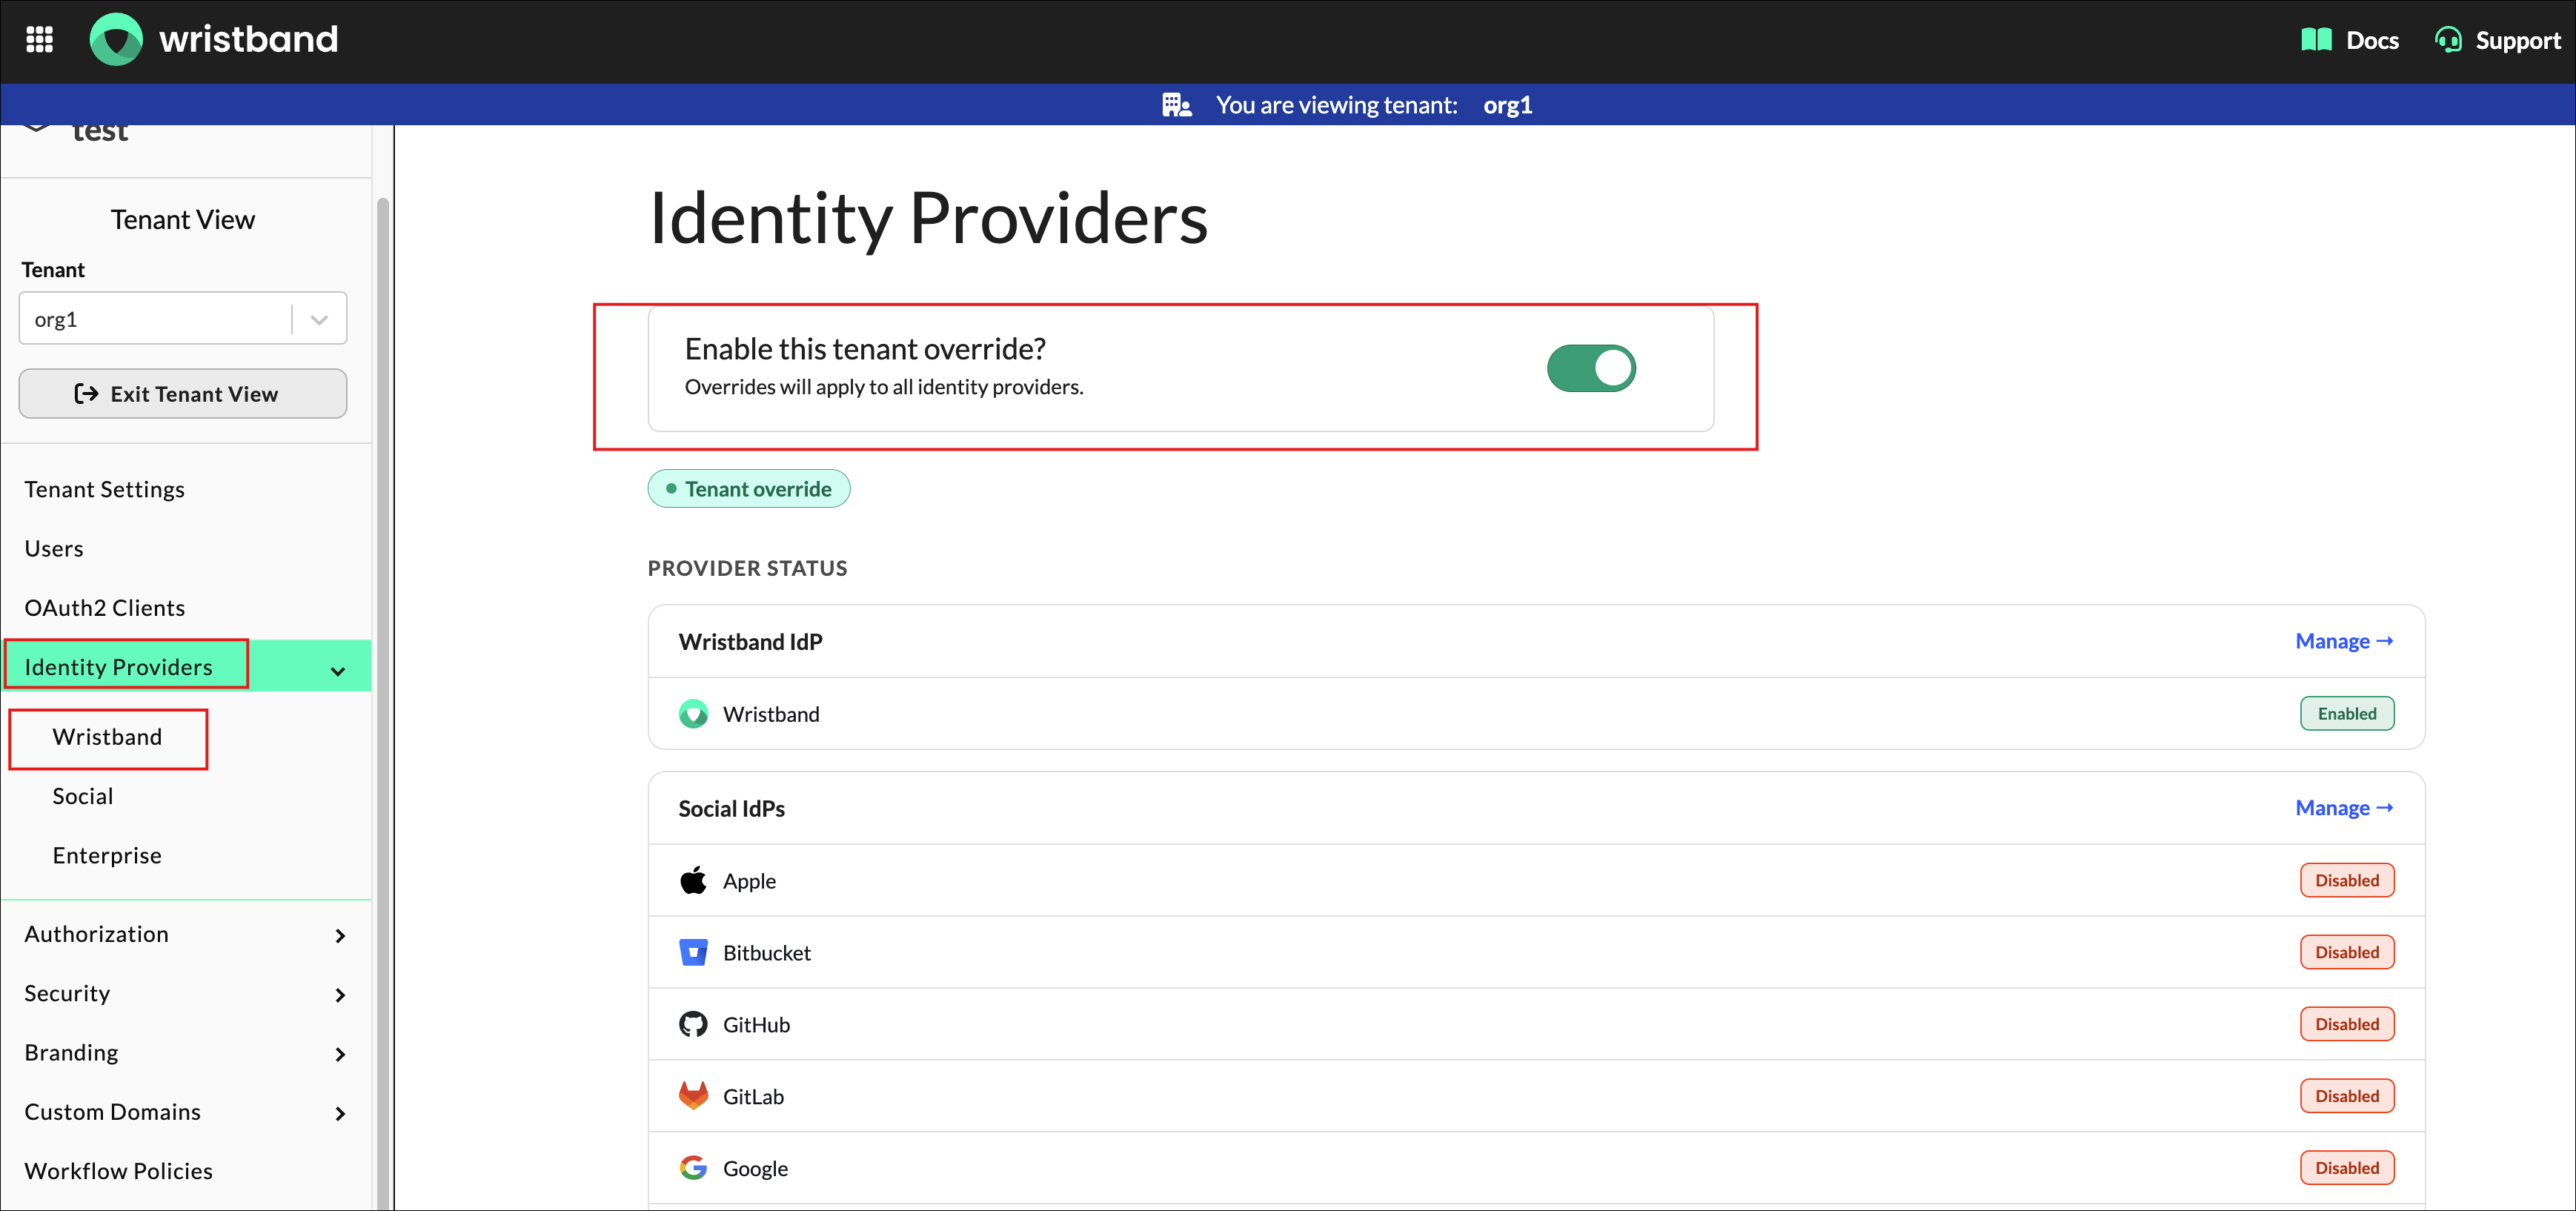
Figure 11: Turn on Enable this tenant override under Identity Providers.
The Okta Enterprise SSO integration is now complete, and users will immediately see the Okta login button on the Tenant-level Login Page.
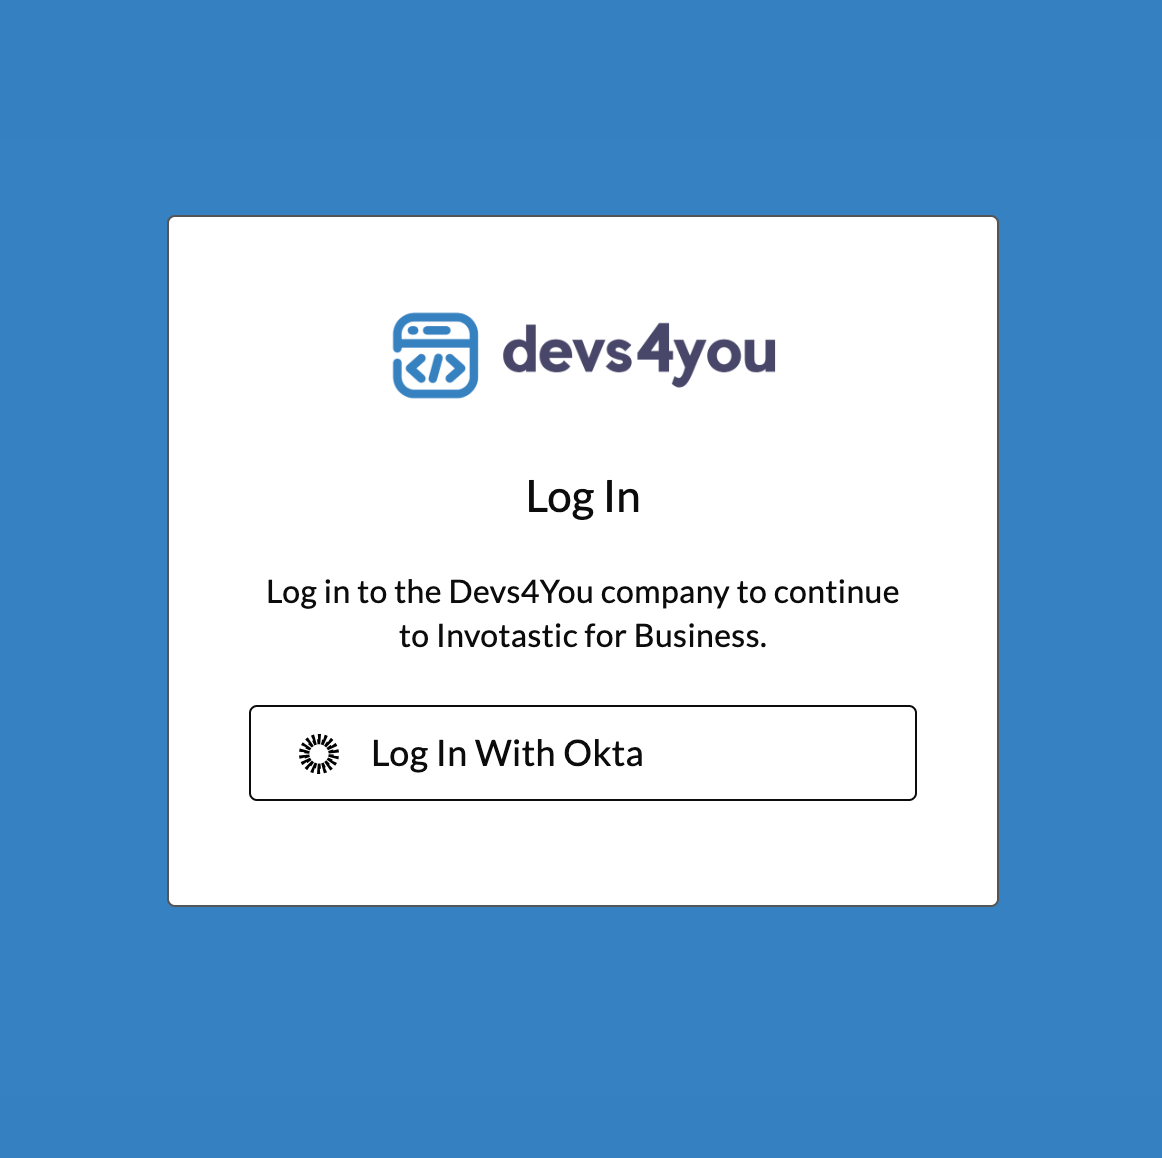
Figure 12: Sign in with Okta button on the tenant-level login page.
Updated 11 minutes ago