
GitLab
Setting Up a GitLab Integration
Learn how to set up GitLab social login in Wristband with this step-by-step guide.
Step 1: Locate Your External IdP Callback URL
- In the Wristband dashboard, enter Application View for the application you want to integrate with GitLab.
- Navigate to the
Identity Providers > Socialmenu in the side navigation. - After landing on the Social Identity Providers page, select the GitLab provider icon at the top.
- Copy the Redirect URL from the form.
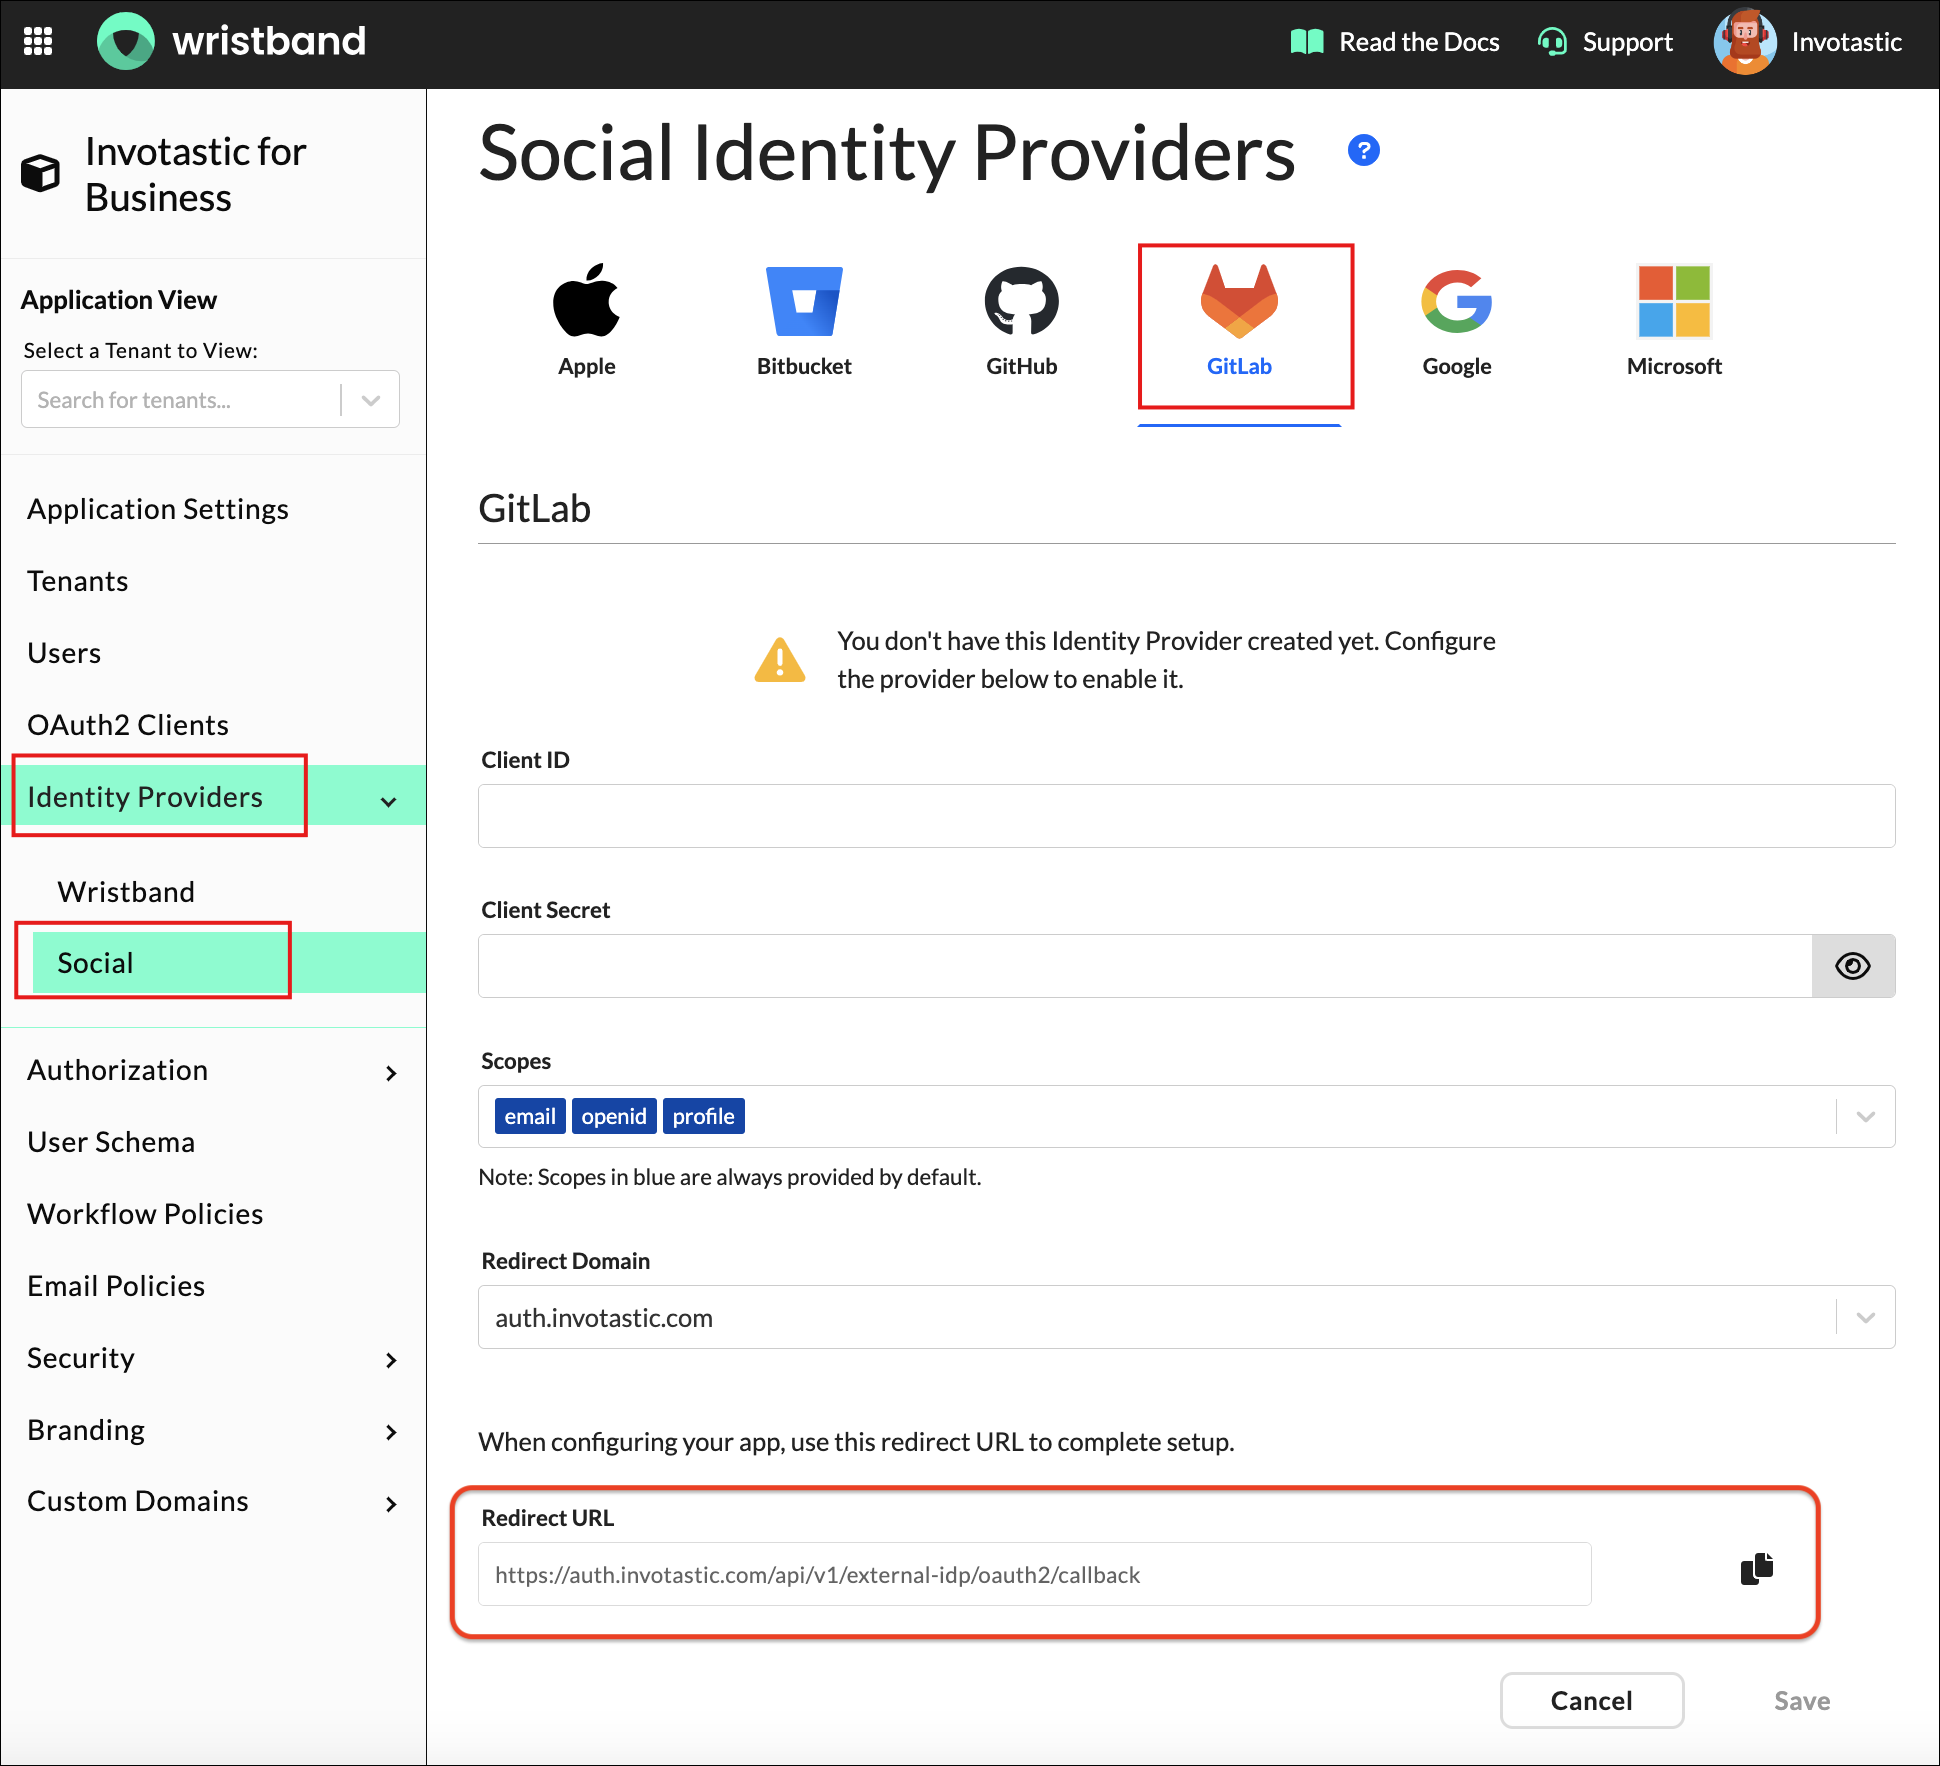
Figure 1: Select GitLab on the Wristband Social Identity Providers page.
Step 2: Sign Up/Login to Your GitLab Account
Before configuring the GitHub Social Login Identity Provider in the Wristband dashboard, ensure you are logged into your GitHub account.
Step 3: Register an Application
- In the side menu, click your profile dropdown and choose Edit Profile.
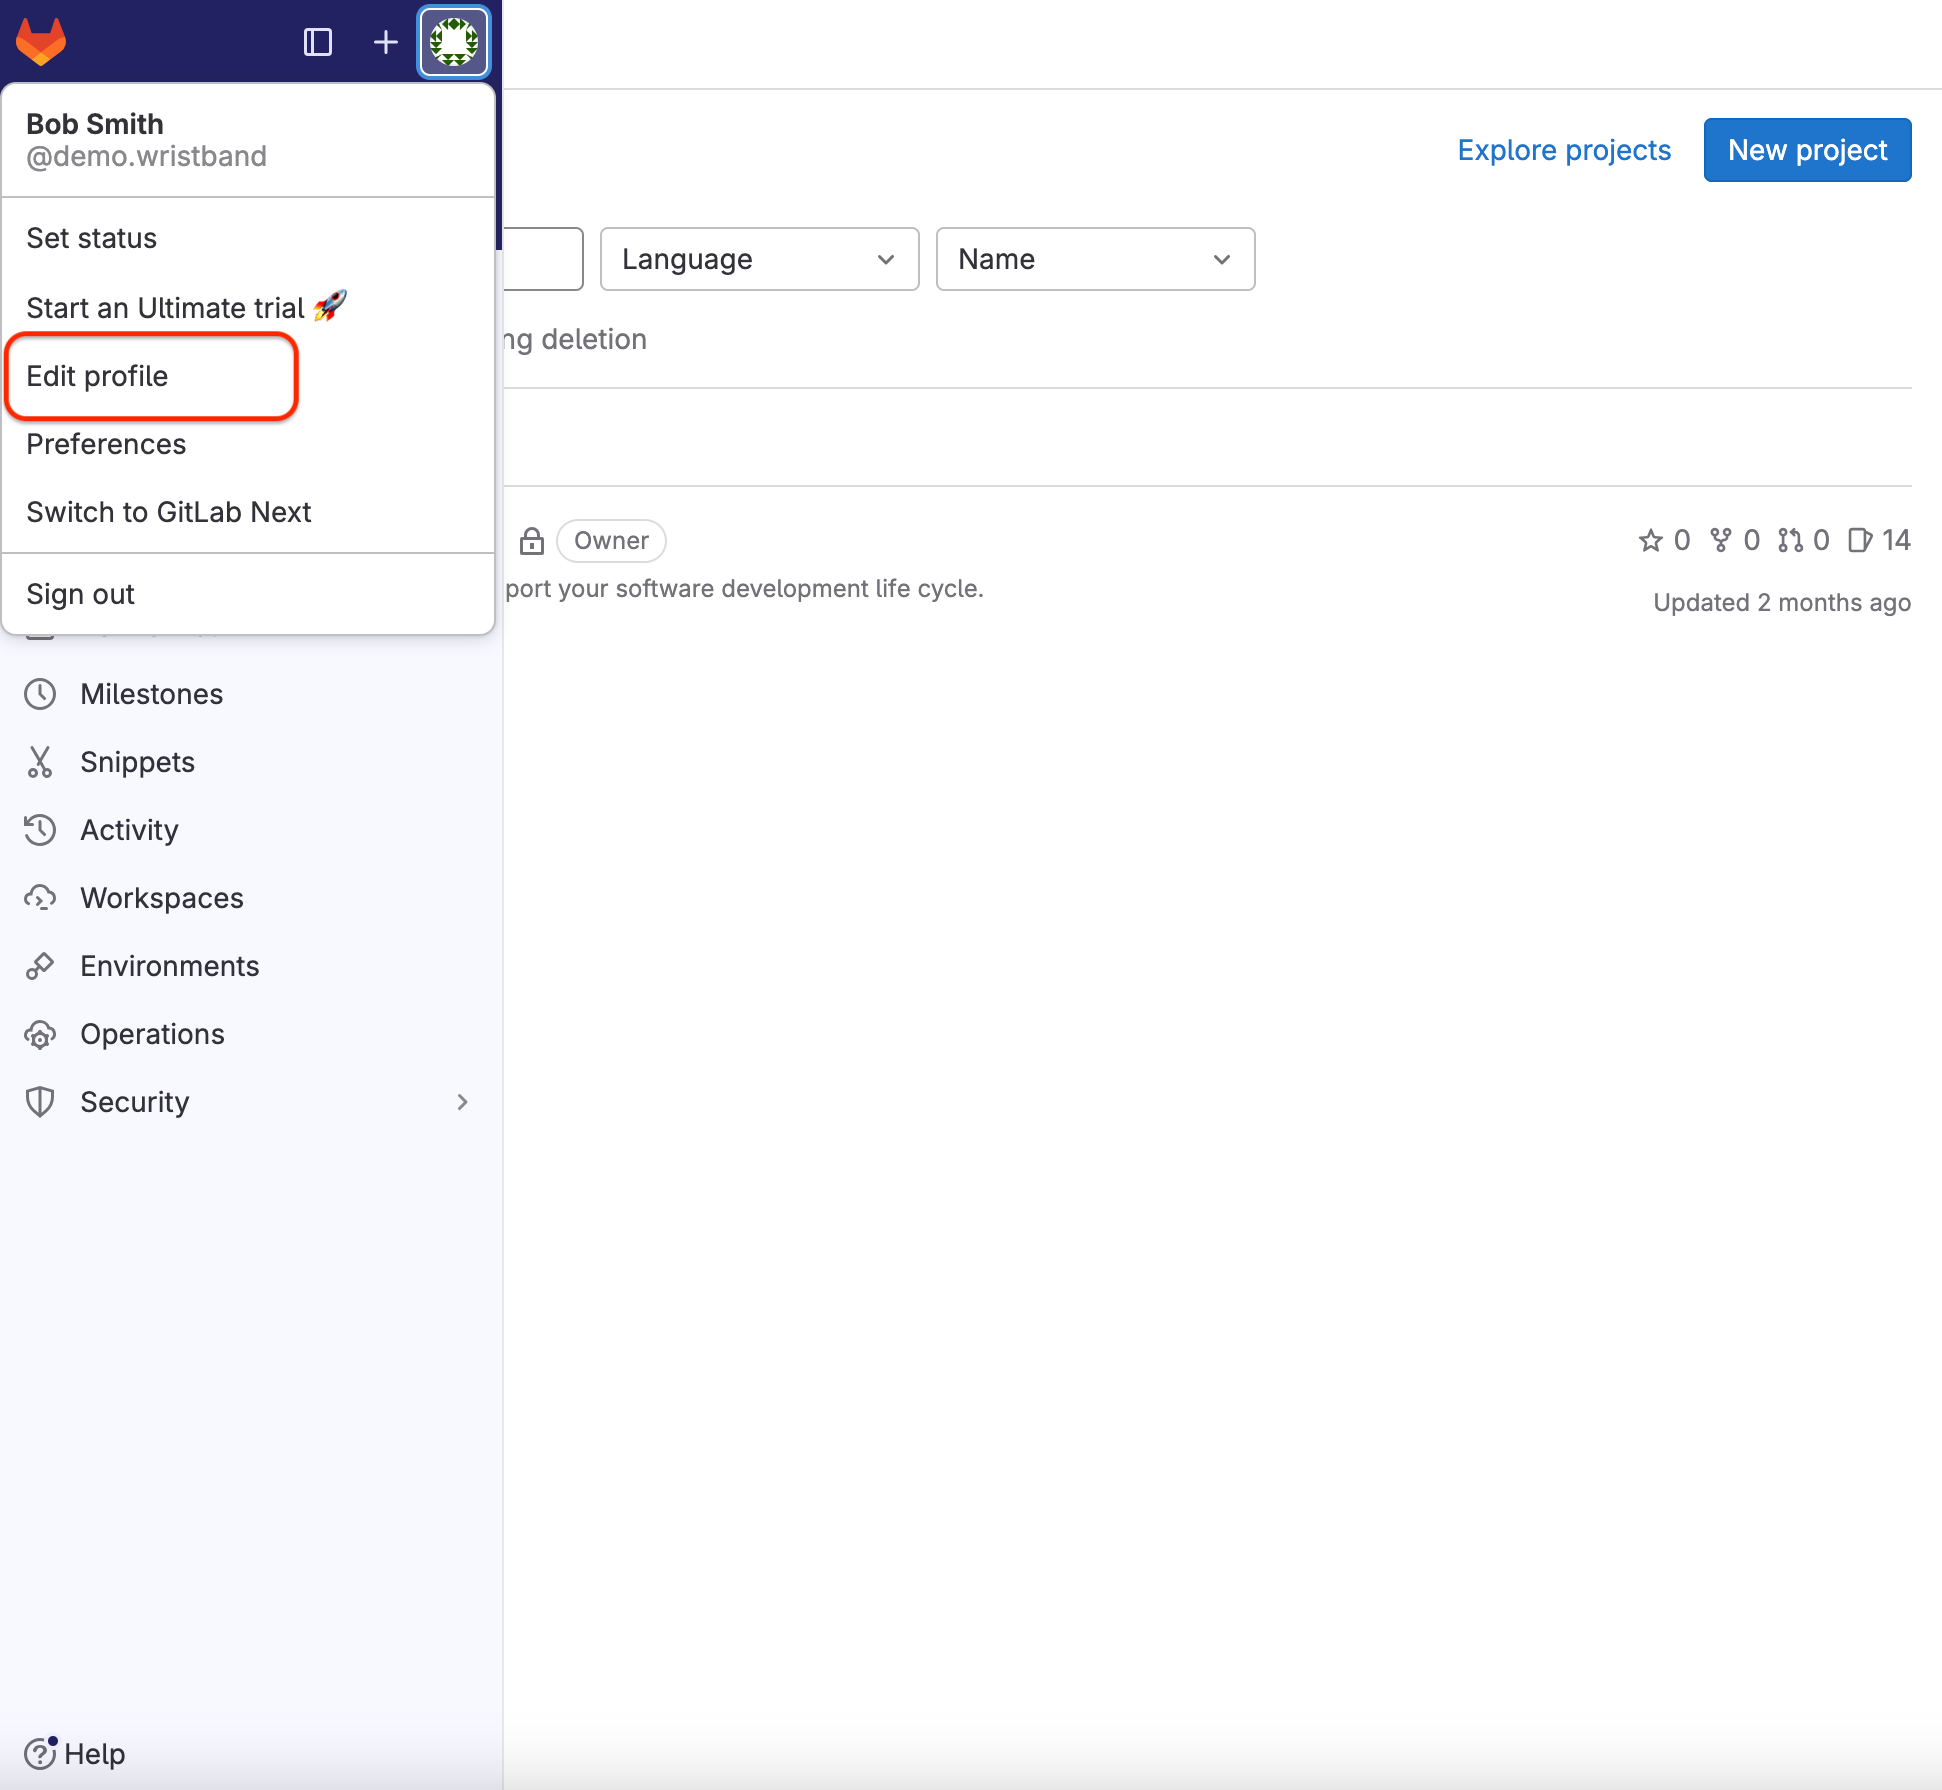
Figure 2: Open Edit profile from the GitLab profile menu.
-
Click Applications in the left side menu.
-
Click Add new application.

Figure 3: Open the Applications page in GitLab settings.
Complete the form by filling out the following required fields:
- Name: Any appropriate value.
- Redirect URI: Paste the External IdP Callback URL from step 1.
- Confidential: Ensure the box is checked.
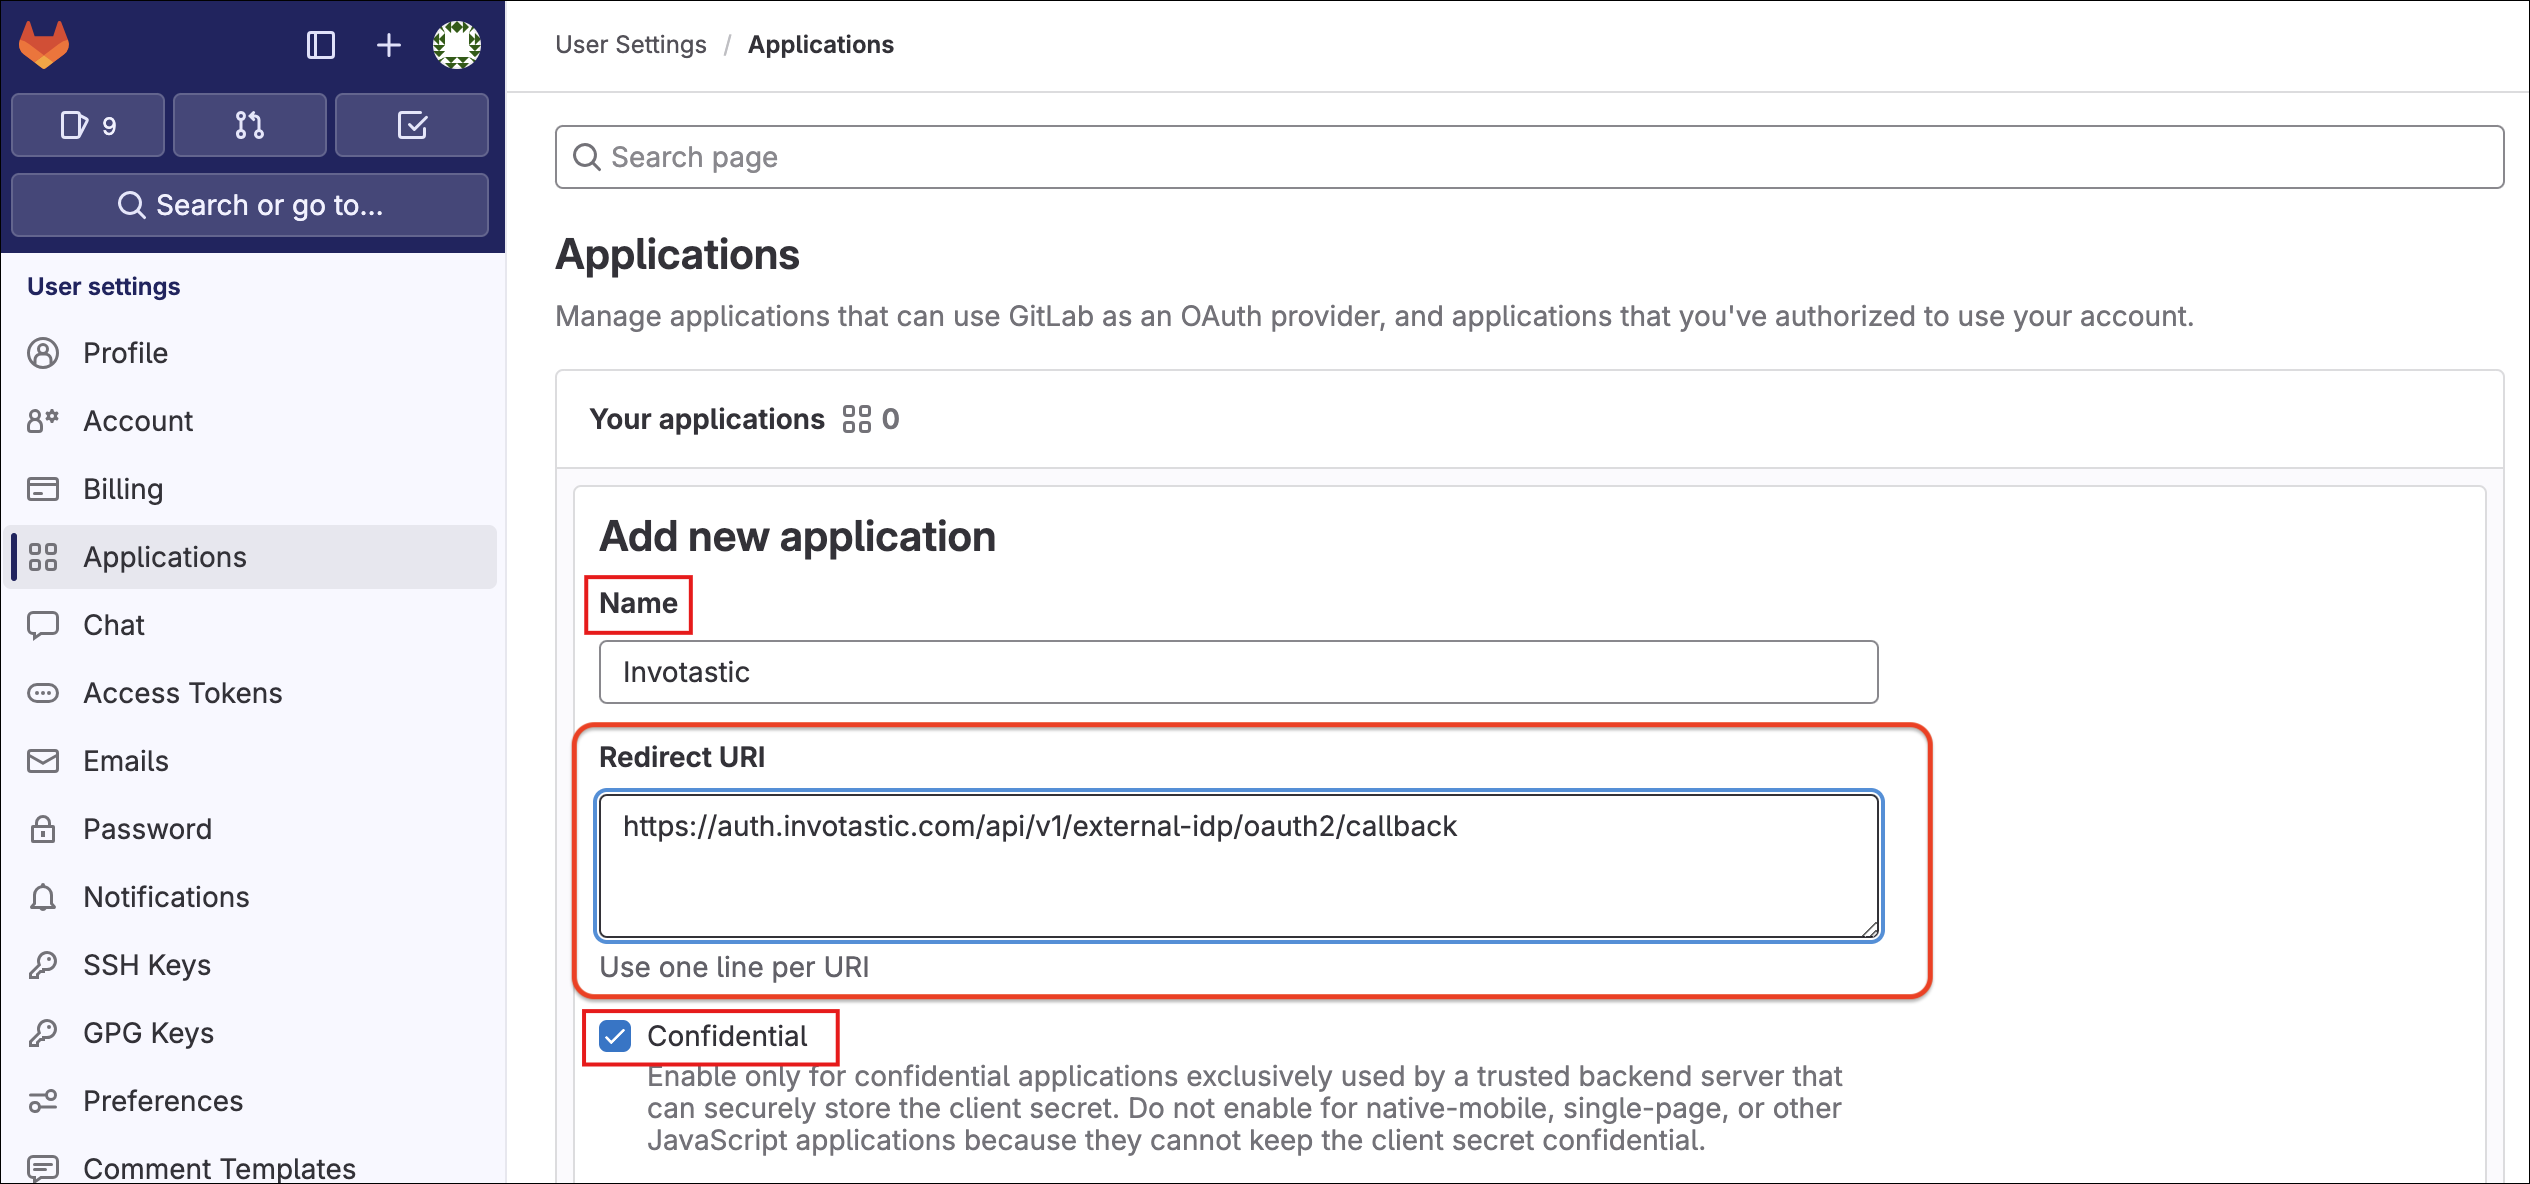
Figure 4: Enter the GitLab application name, redirect URI, and confidentiality setting.
- Scopes: Enable
openid,profile, andemailscopes. All other scopes are optional.
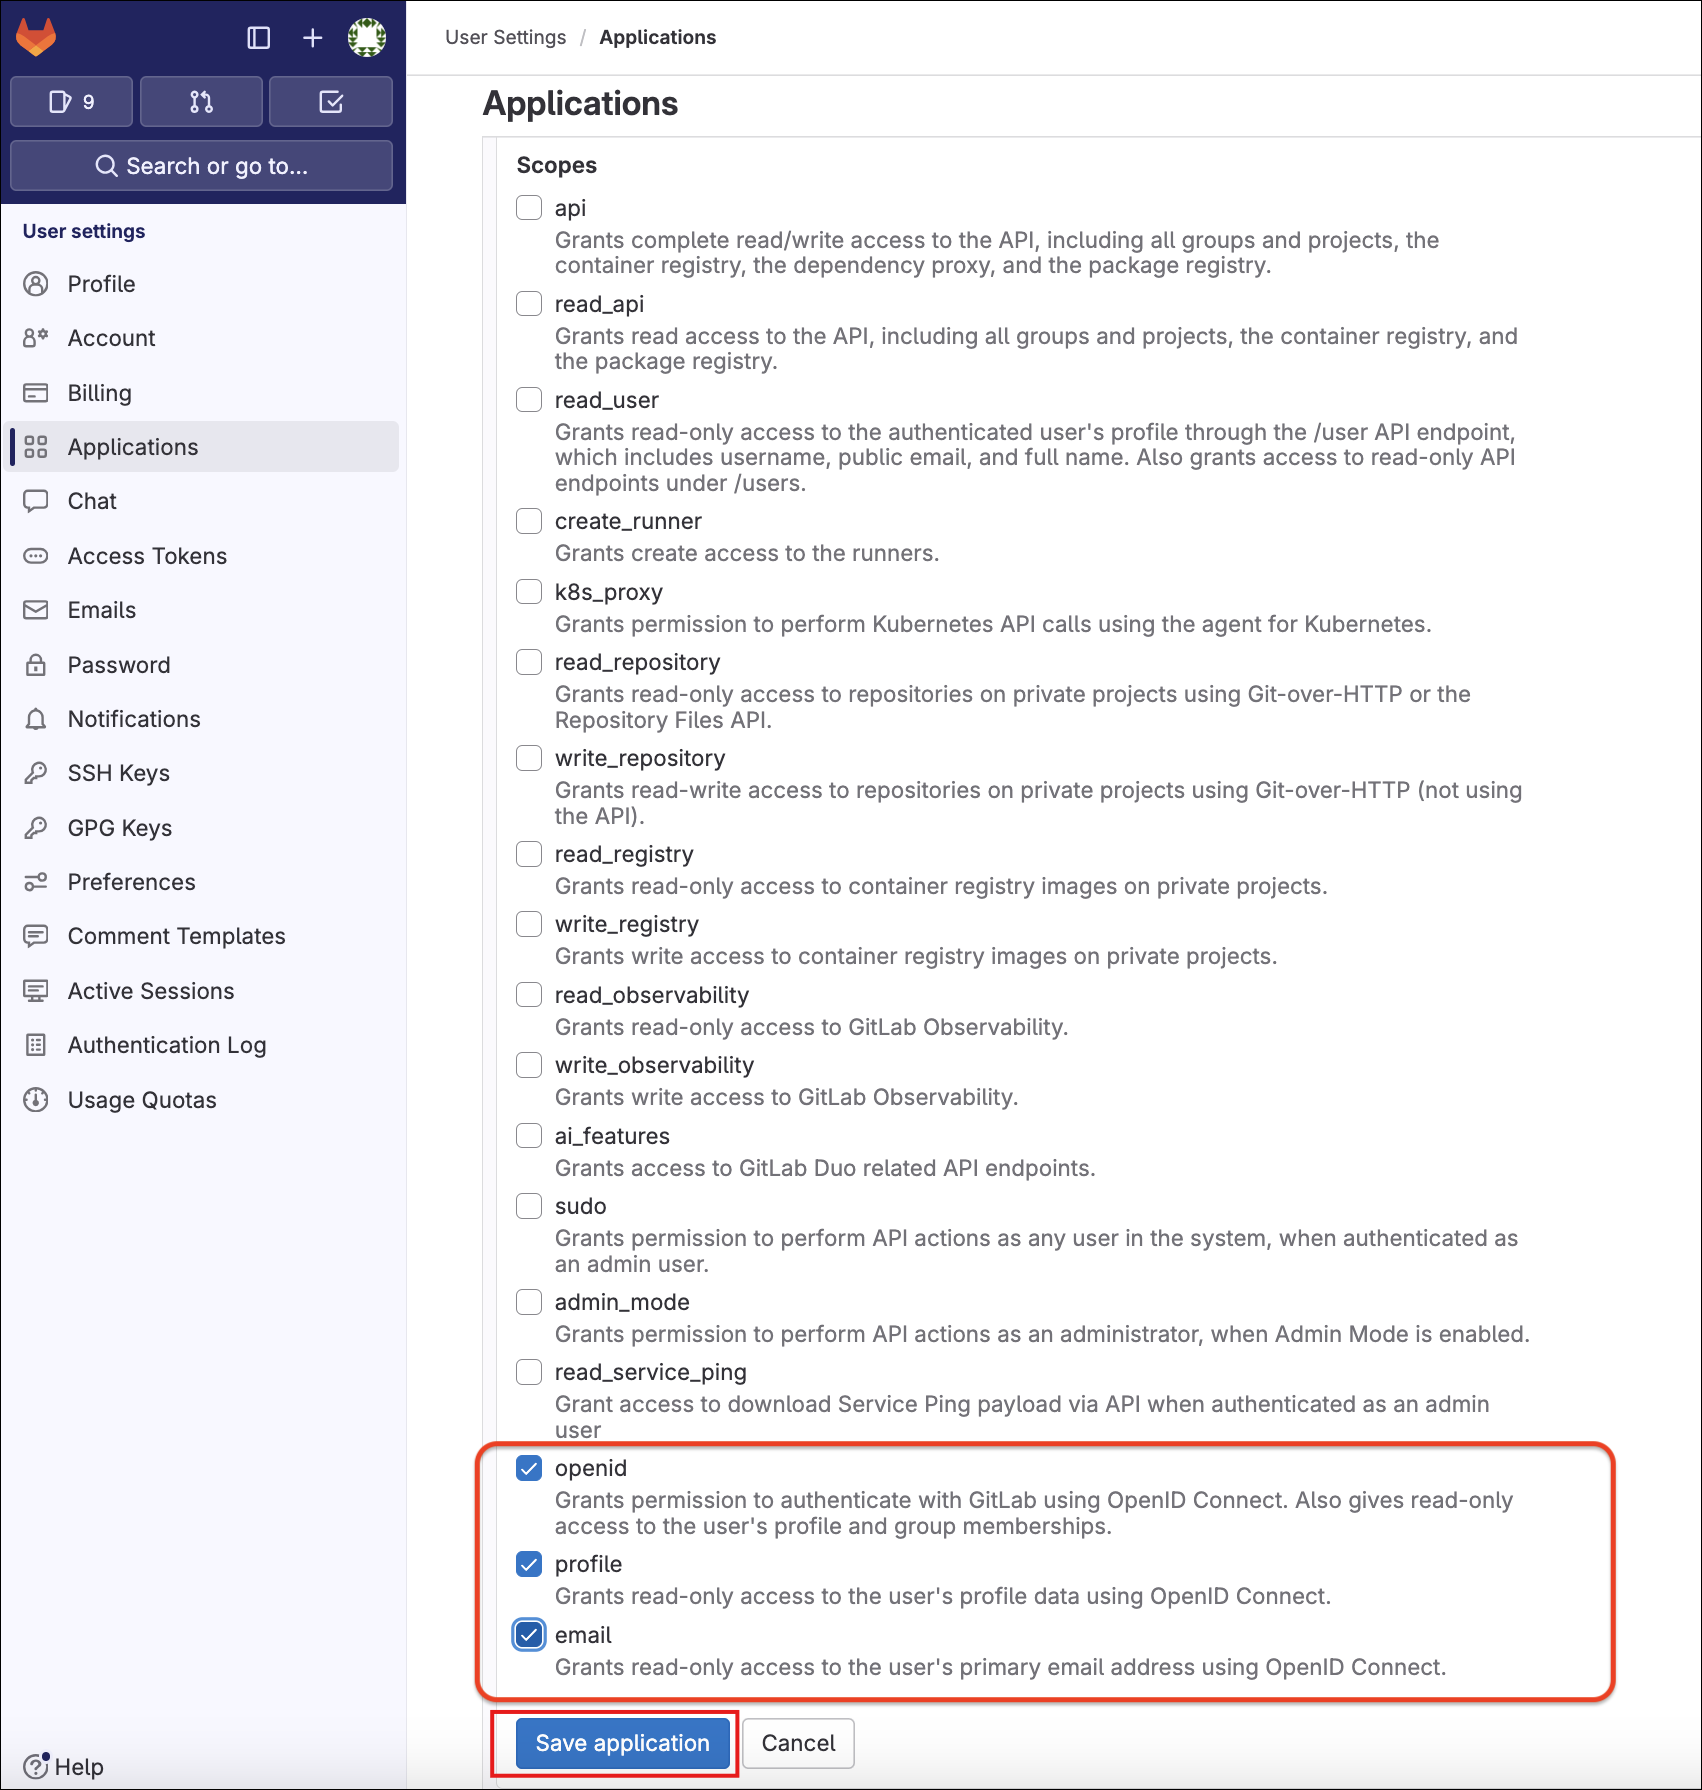
Figure 5: Enable the openid, profile, and email scopes for the GitLab application.
- Click Save application to finish.
Step 4: Copy OAuth Credentials
- Once created, you will return to the application configuration page. Copy and save the Application ID and Secret Value for the next steps.

Figure 6: Copy the GitLab application ID and Secret.
You have now completed the required configuration on GitLab for your social login integration.
Step 5: Configure the GitLab IdP in Wristband
Return to the Social Identity Provider page in the Wristband dashboard (from step 1) and enter the following values into the form:
- Client ID: The Application ID from step 4.
- Client Secret: The Secret from step 4.
Wristband requests the following scopes by default during GitLab authorization (any additional scopes are optional):
- openid
- profile
Click Save to finish. The GitLab External IDP will be in an ENABLED status.
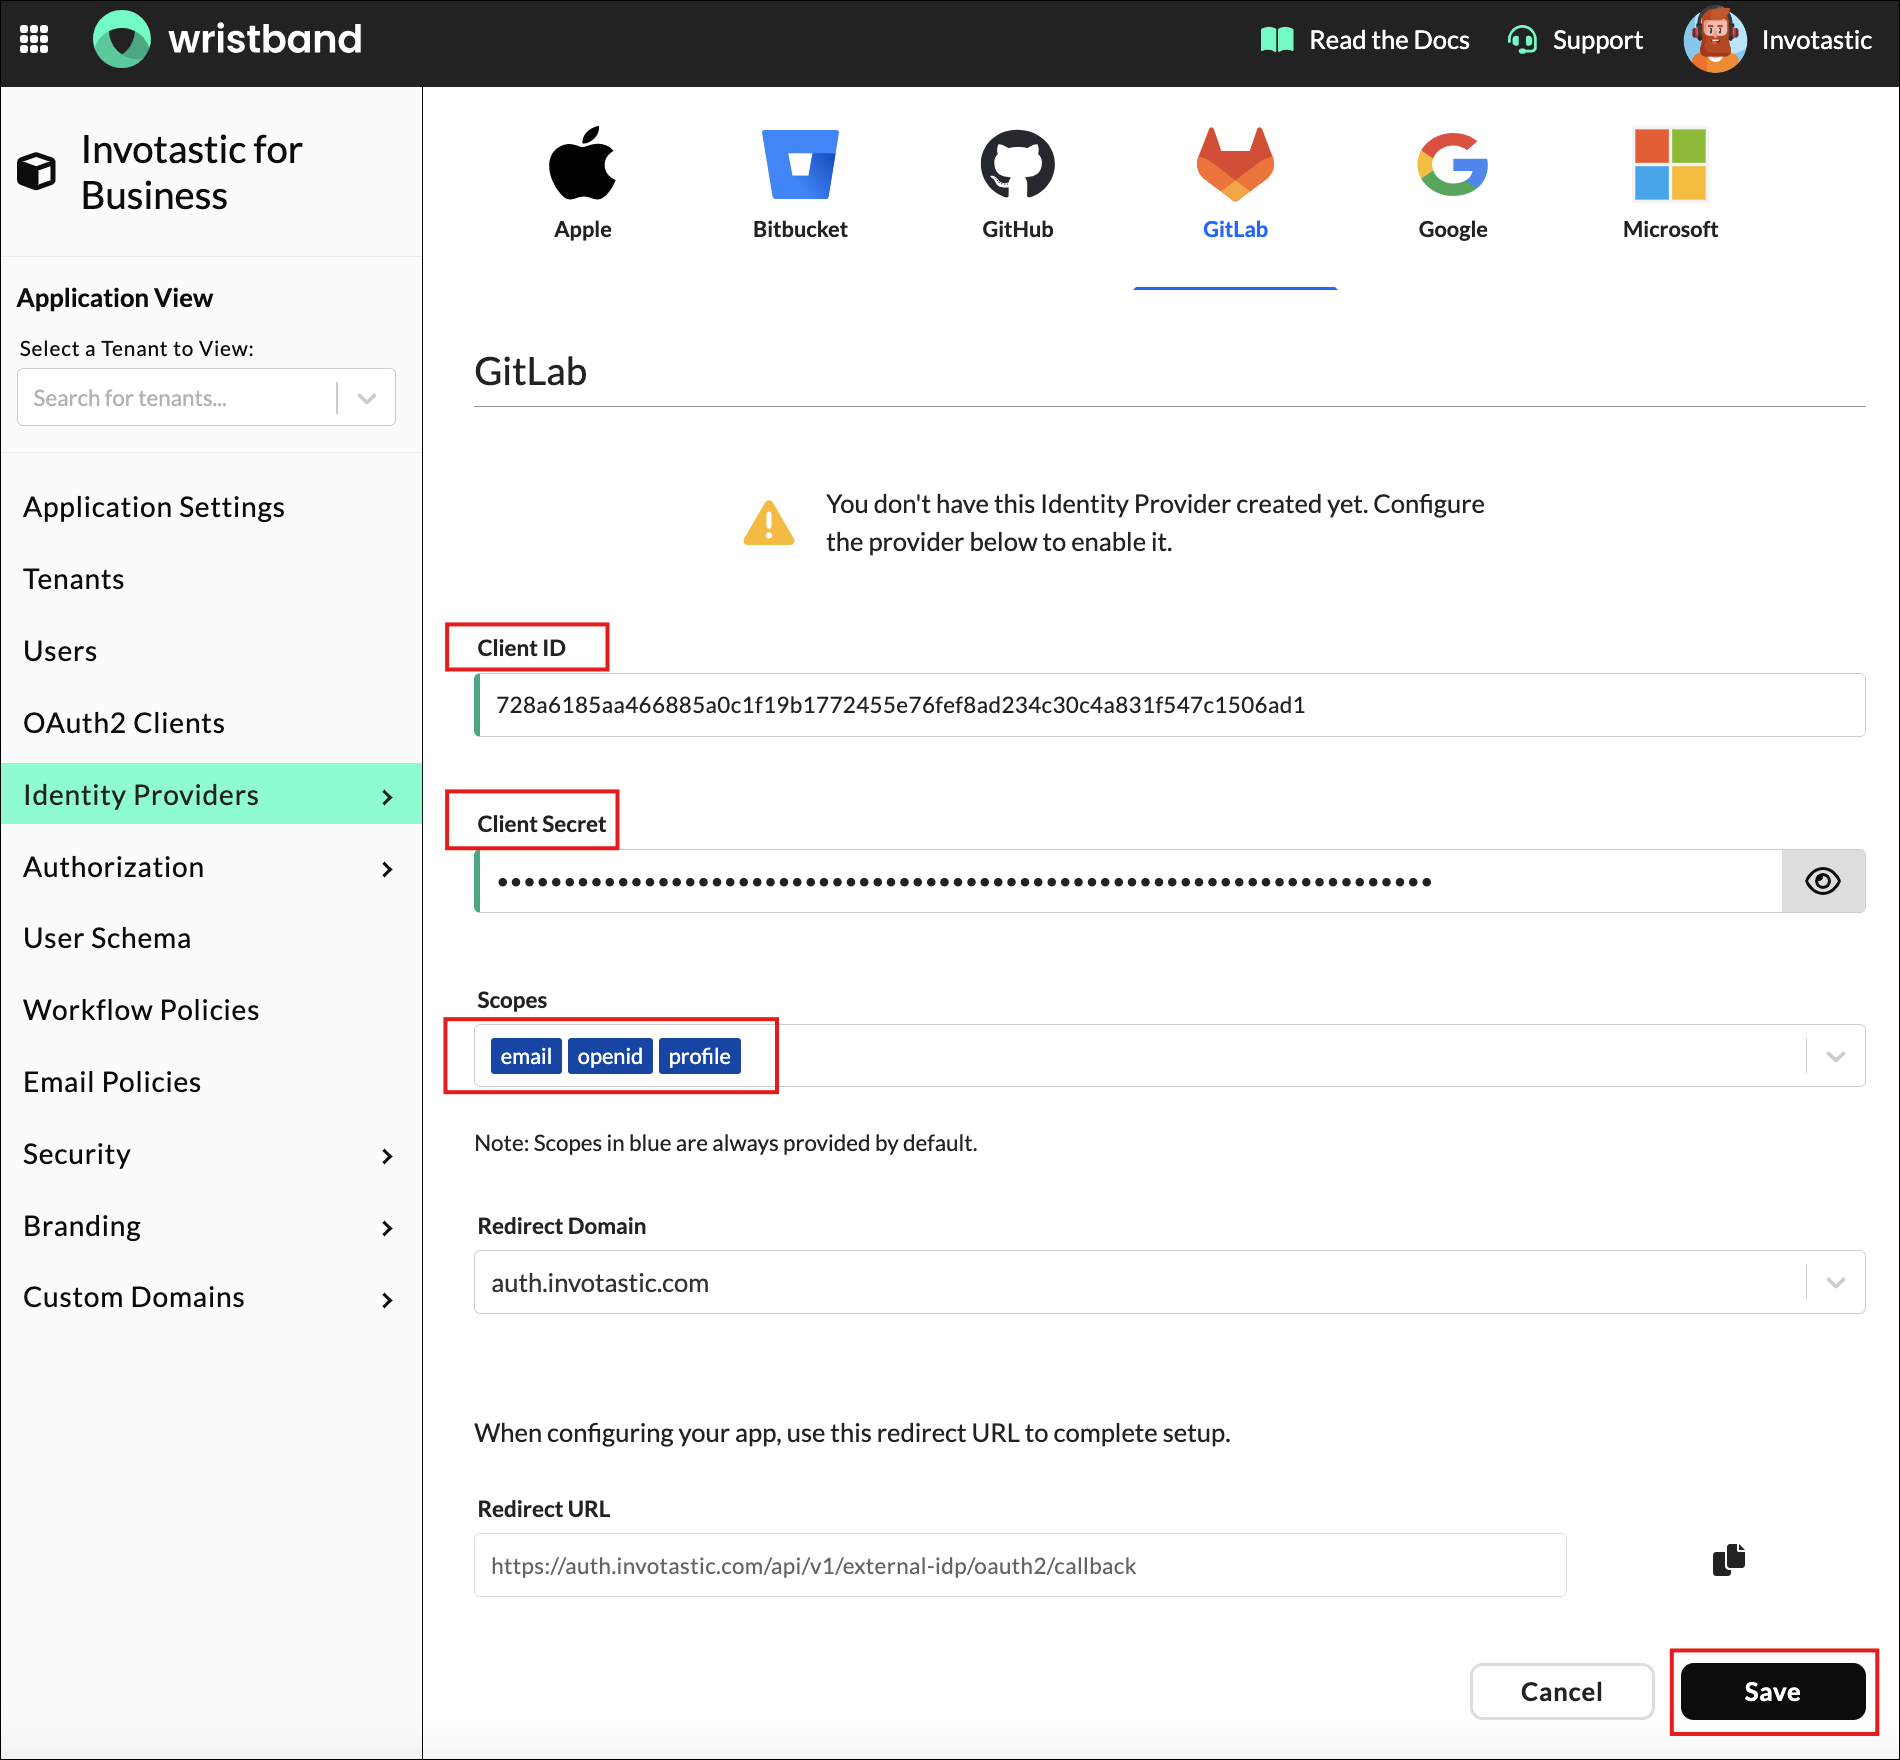
Figure 7: Enter the GitLab application credentials in Wristband and save the identity provider.
The GitLab social login integration is now complete. Users will see a GitLab login button on the Tenant-level Login Page.

Figure 8: GitLab sign-in button on the tenant-level login page.
Updated 5 days ago