Setting Up a Demo App
This guide helps you set up a Wristband demo app to get started and understand how to use Wristband.
If you are just getting started with Wristband, this guide will walk you through how to set up one of the Wristband demo apps to help you understand how to work with Wristband.
Available Demo AppsTo see the full list of currently supported demo app frameworks, check out our Example Apps Page.
We're actively expanding our demo app options to include more languages and frameworks. Let us know if you have a specific request.
The Create App Modal
Start your Wristband journey by setting up a demo app on your local machine. These apps serve as templates for integrating Wristband into your project — feel free to copy the code directly!
After logging into the Wristband dashboard, click the "Add Application" button on the home page to start the guided setup.
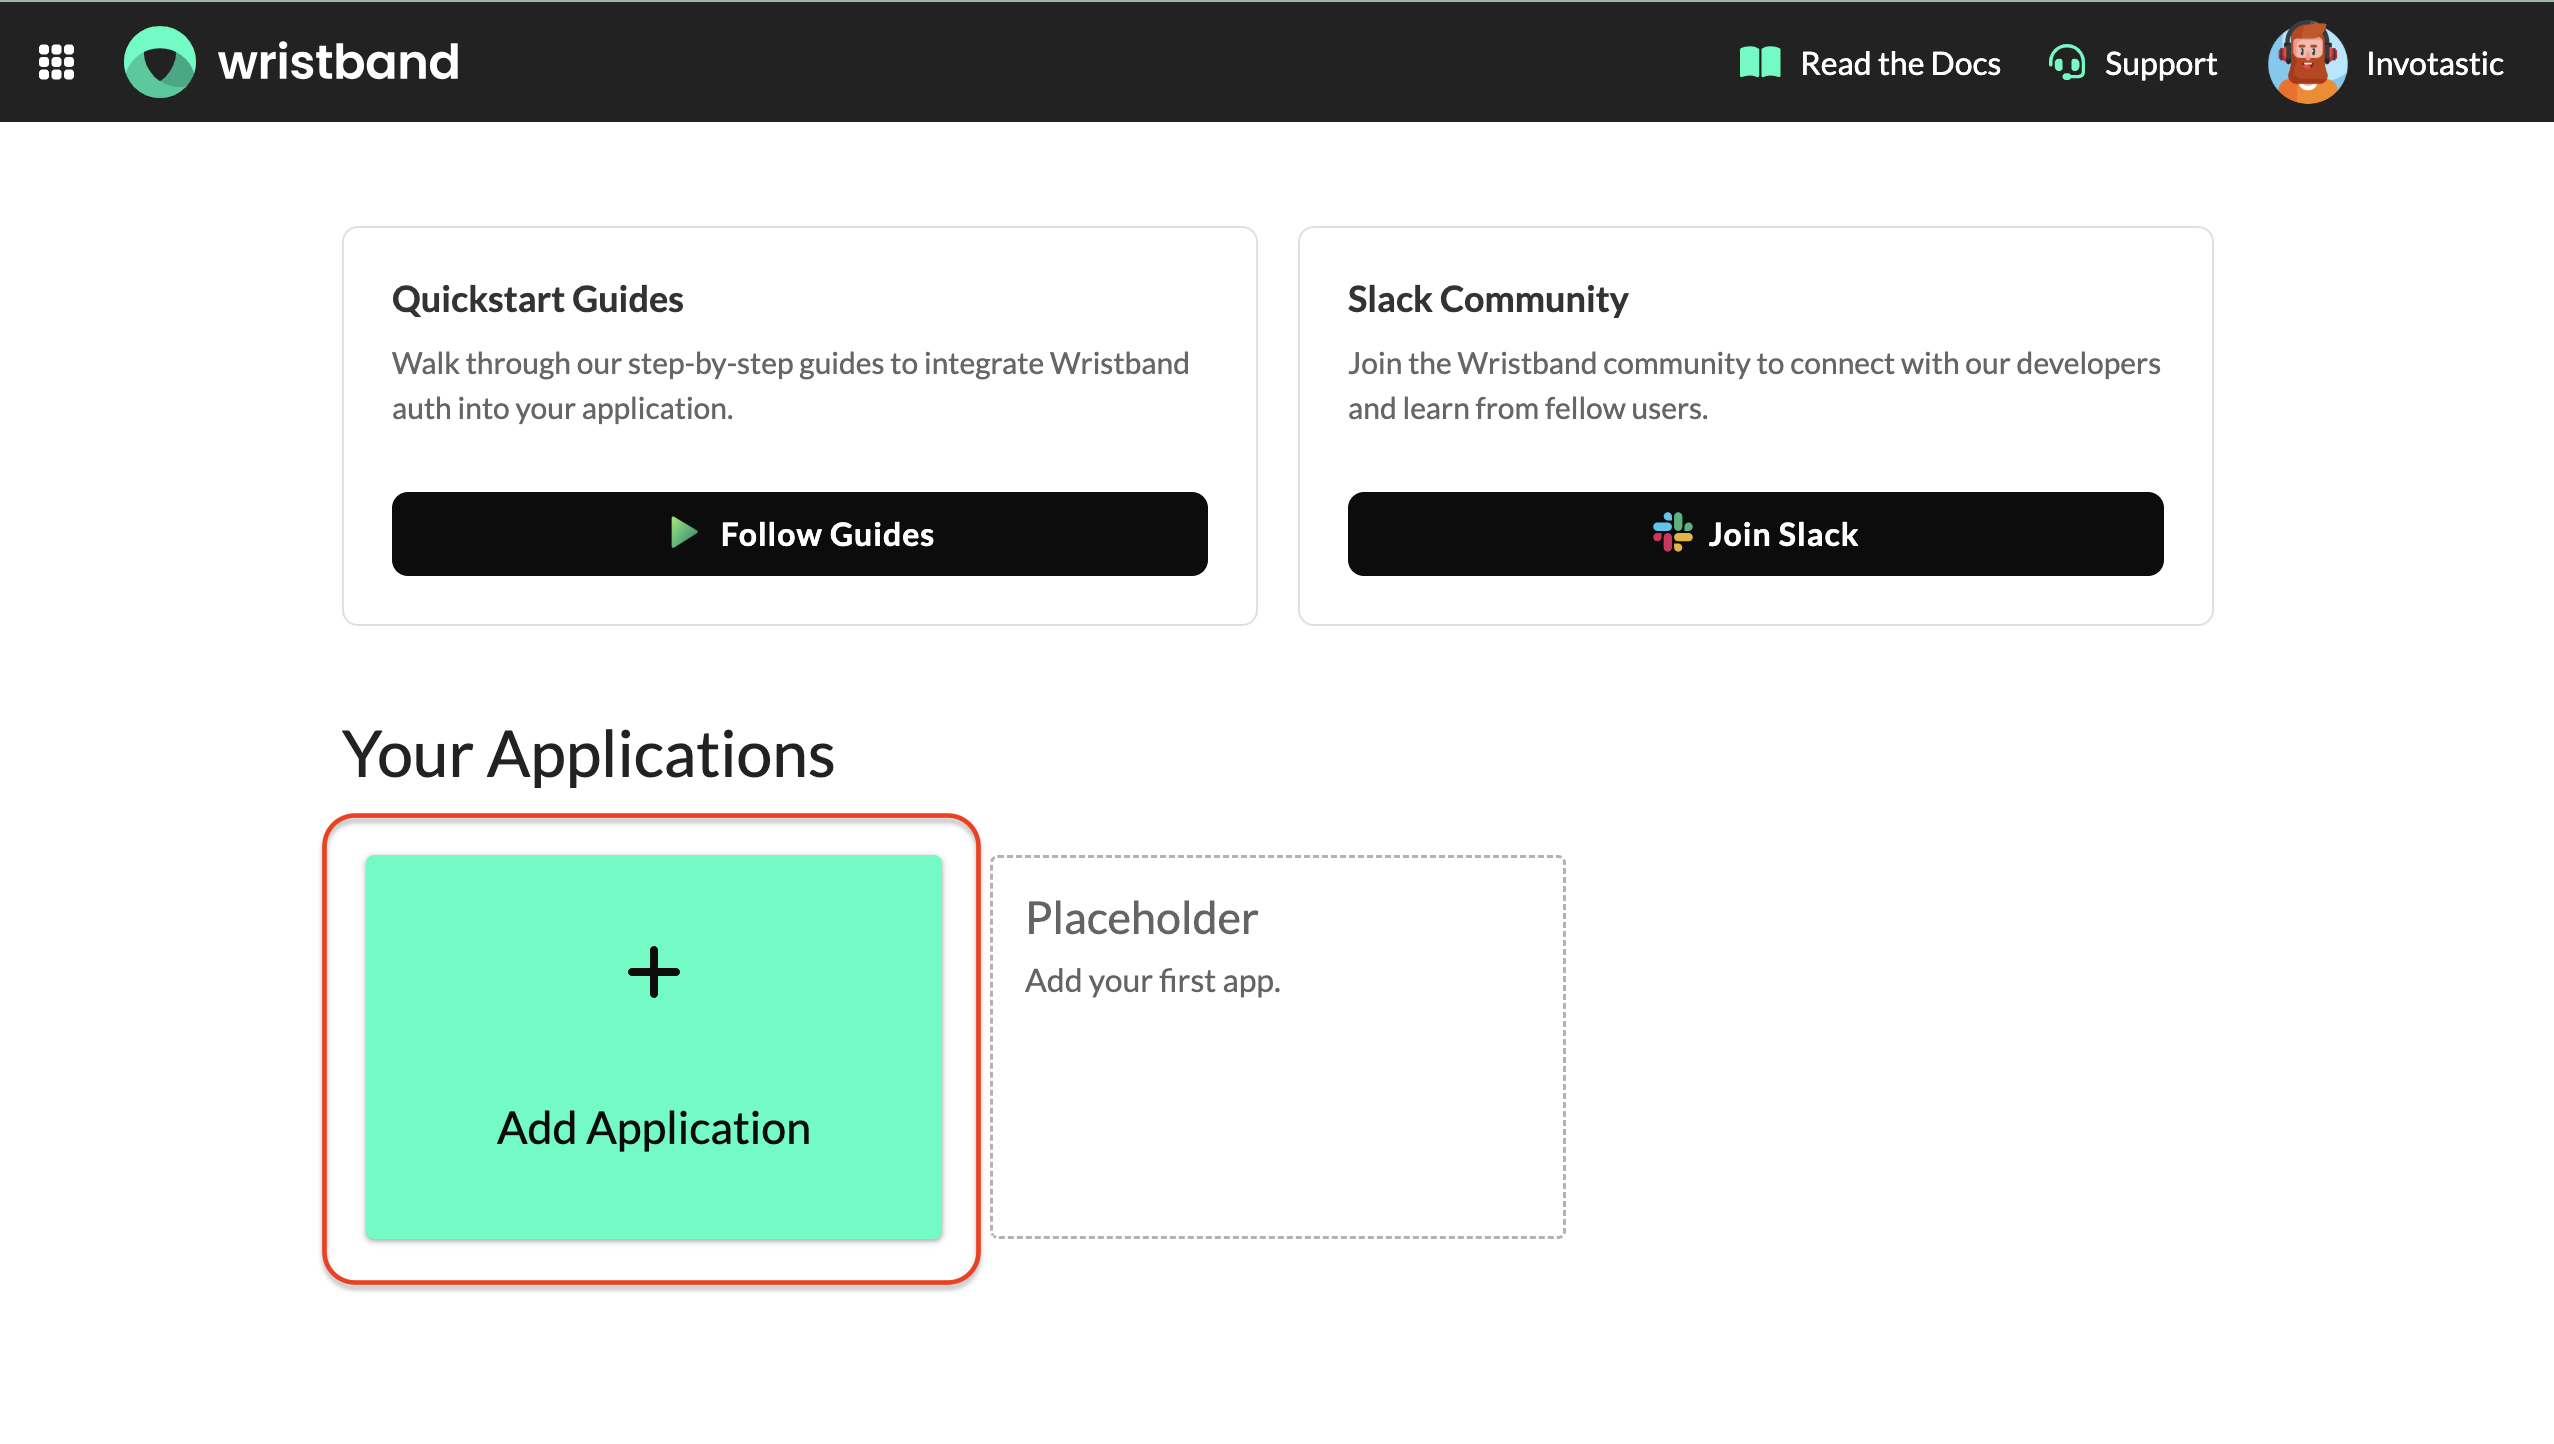
Home Page: Add Application Button
Choosing the Demo App Type
First, you'll be asked to select which type of application you'd like to create. Select the "Try Demo App" option and click the "Continue" button.
Demo App EnvironmentRegardless of the type of demo app you create, they will always be configured for a development environment, meaning that production validations are not enabled.
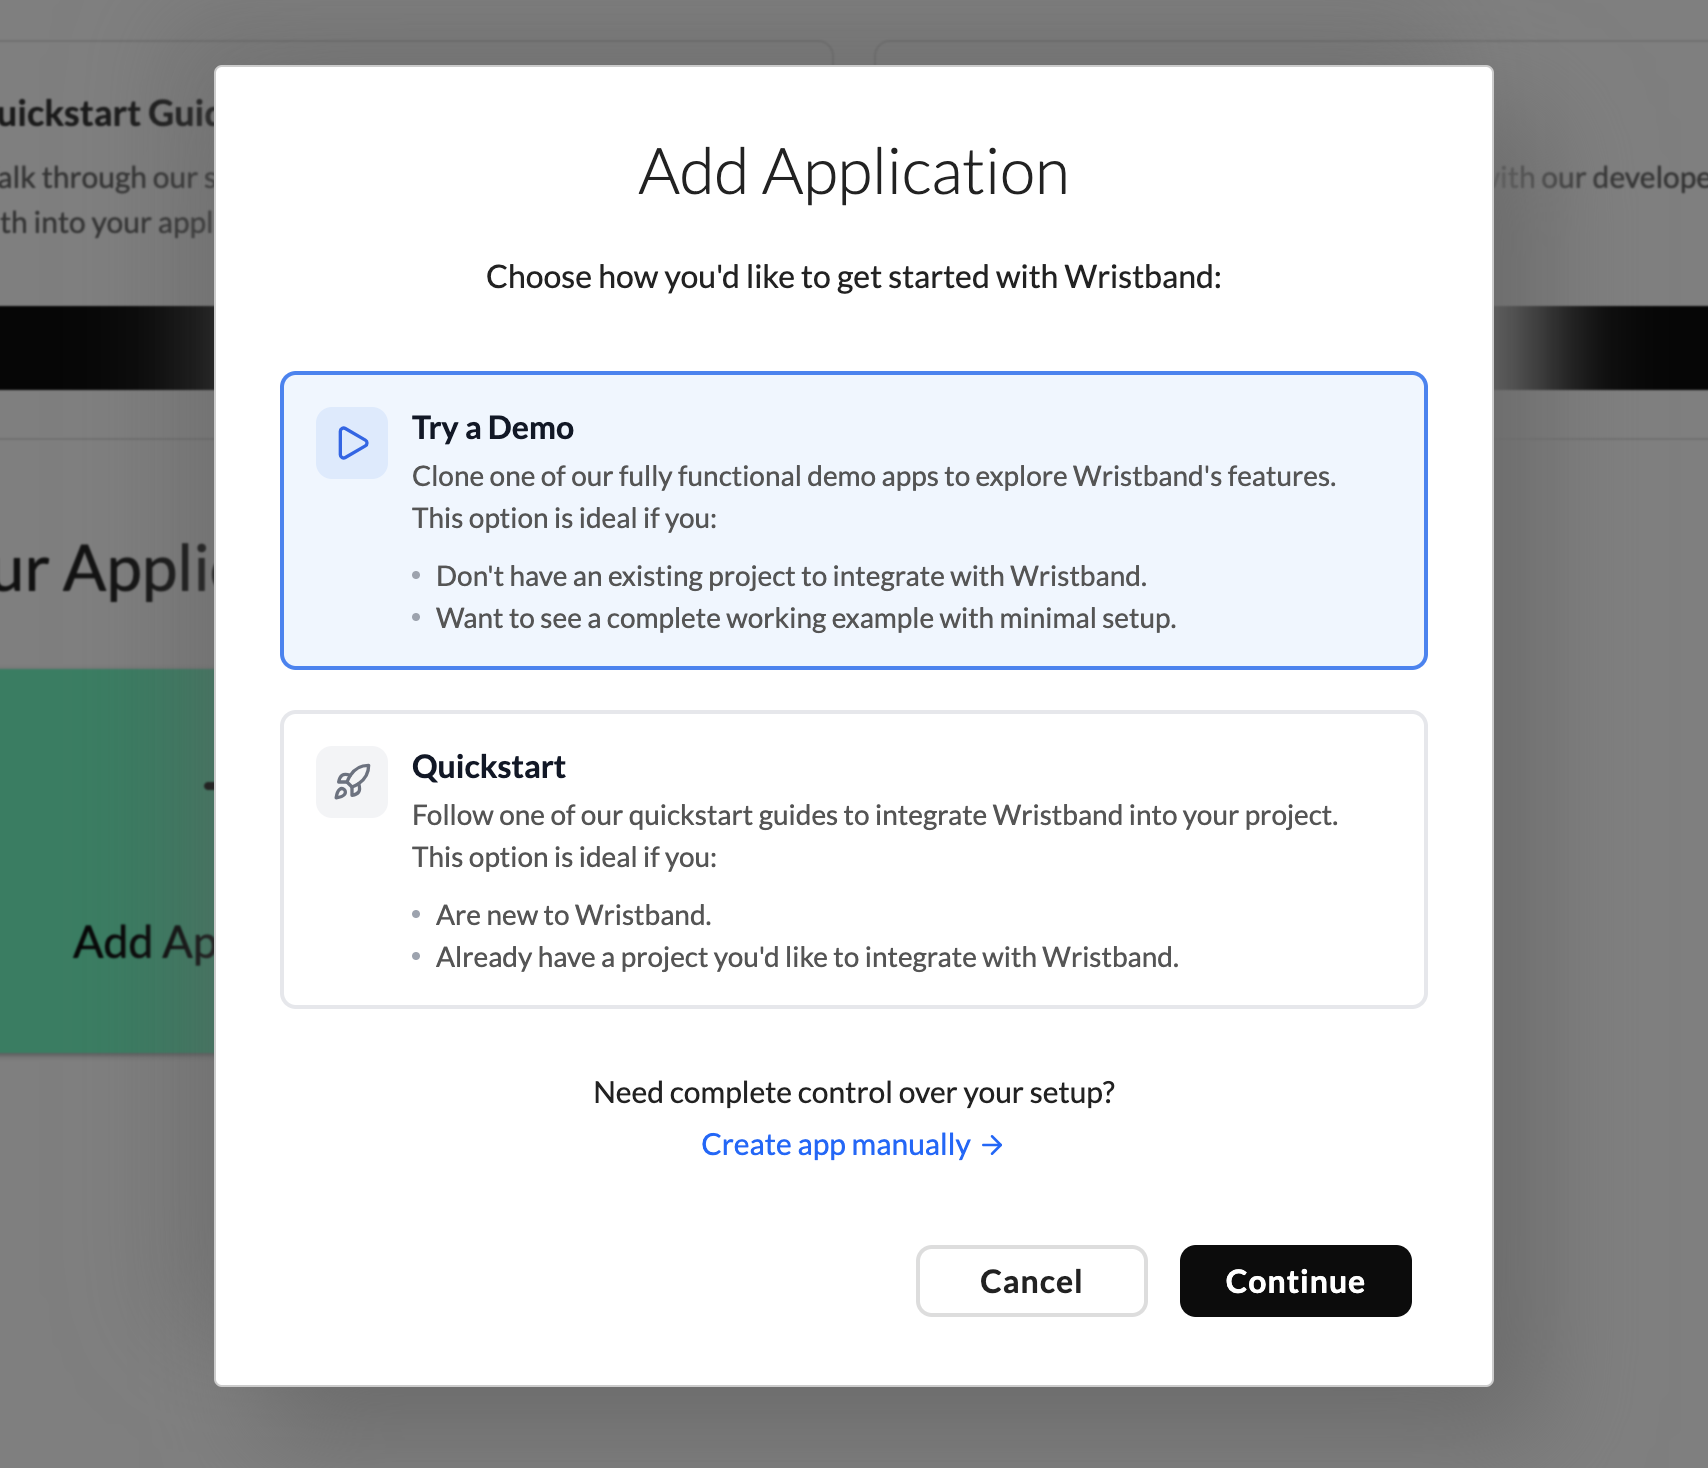
Add App Modal: Choose demo application type
Choosing Your Subject Kind
Next, you'll be asked to define the type of subject requiring authentication for the application. This decision depends on whether access tokens will be issued to human users or automated backend services.
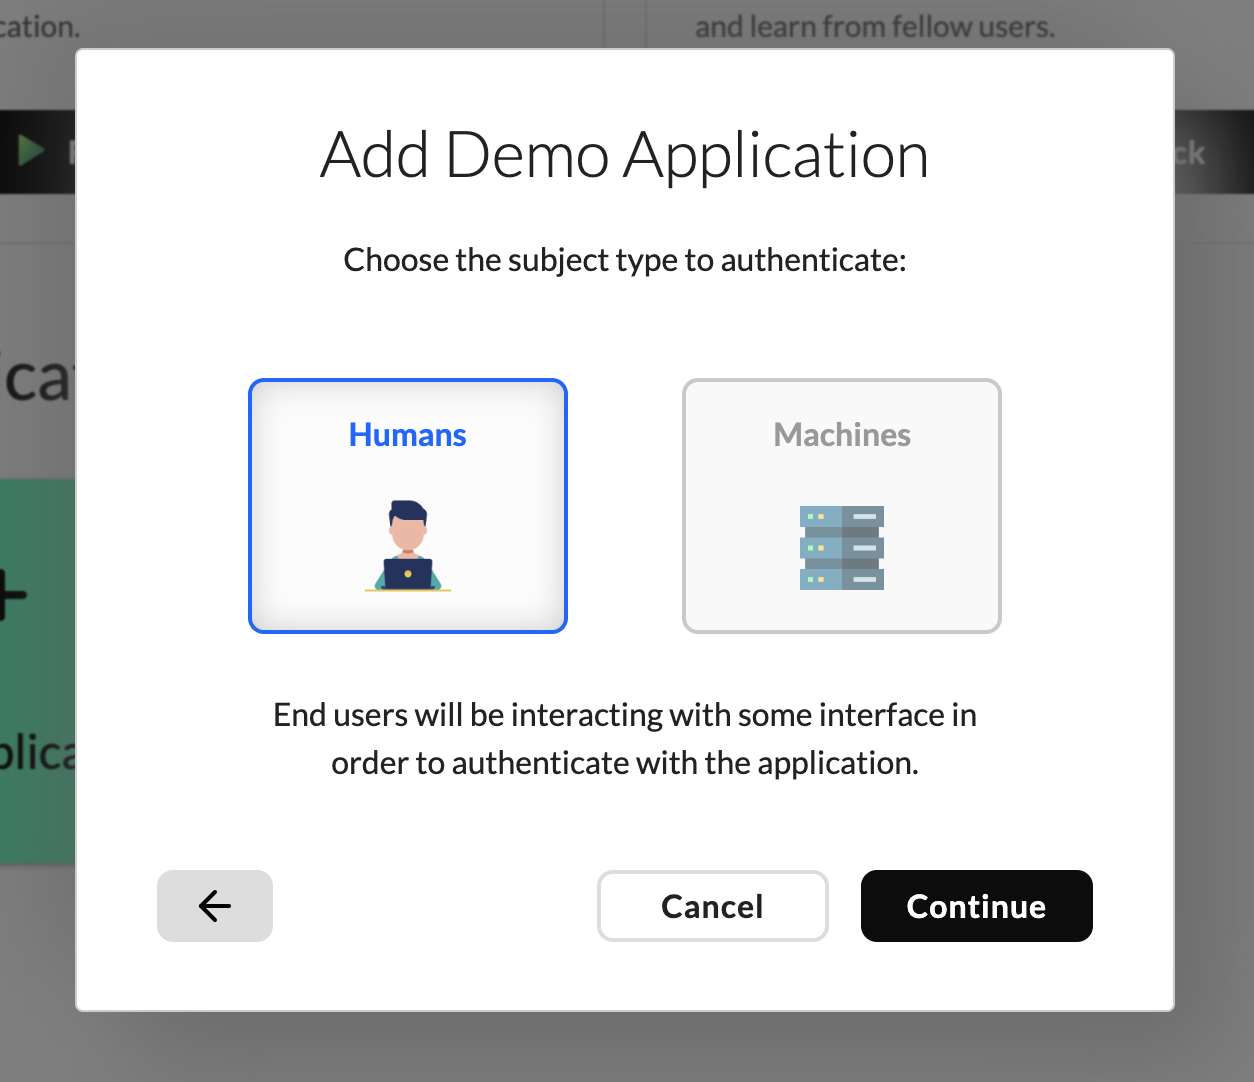
Add App Modal: Choose whether users or machines will authenticate
Authenticating Users
Selecting "Humans" as the authentication subject means human users will authenticate via Wristband-hosted login pages. They’ll receive an access token, ID token with OpenID user attributes, and a refresh token for seamless session continuity without re-authentication.
Authenticating Machines
Choosing "Machines" as the authentication subject designates an automated service or system for authentication. In this setup, the service makes an API call to the Wristband Token Endpoint at startup to obtain an access token. Since this is a machine-to-machine interaction, no ID token or refresh token is issued.
Choosing Your Application Framework
After selecting the authentication subject, you'll be prompted to choose your preferred application framework. The options on this screen will dynamically adjust based on your previous selection.
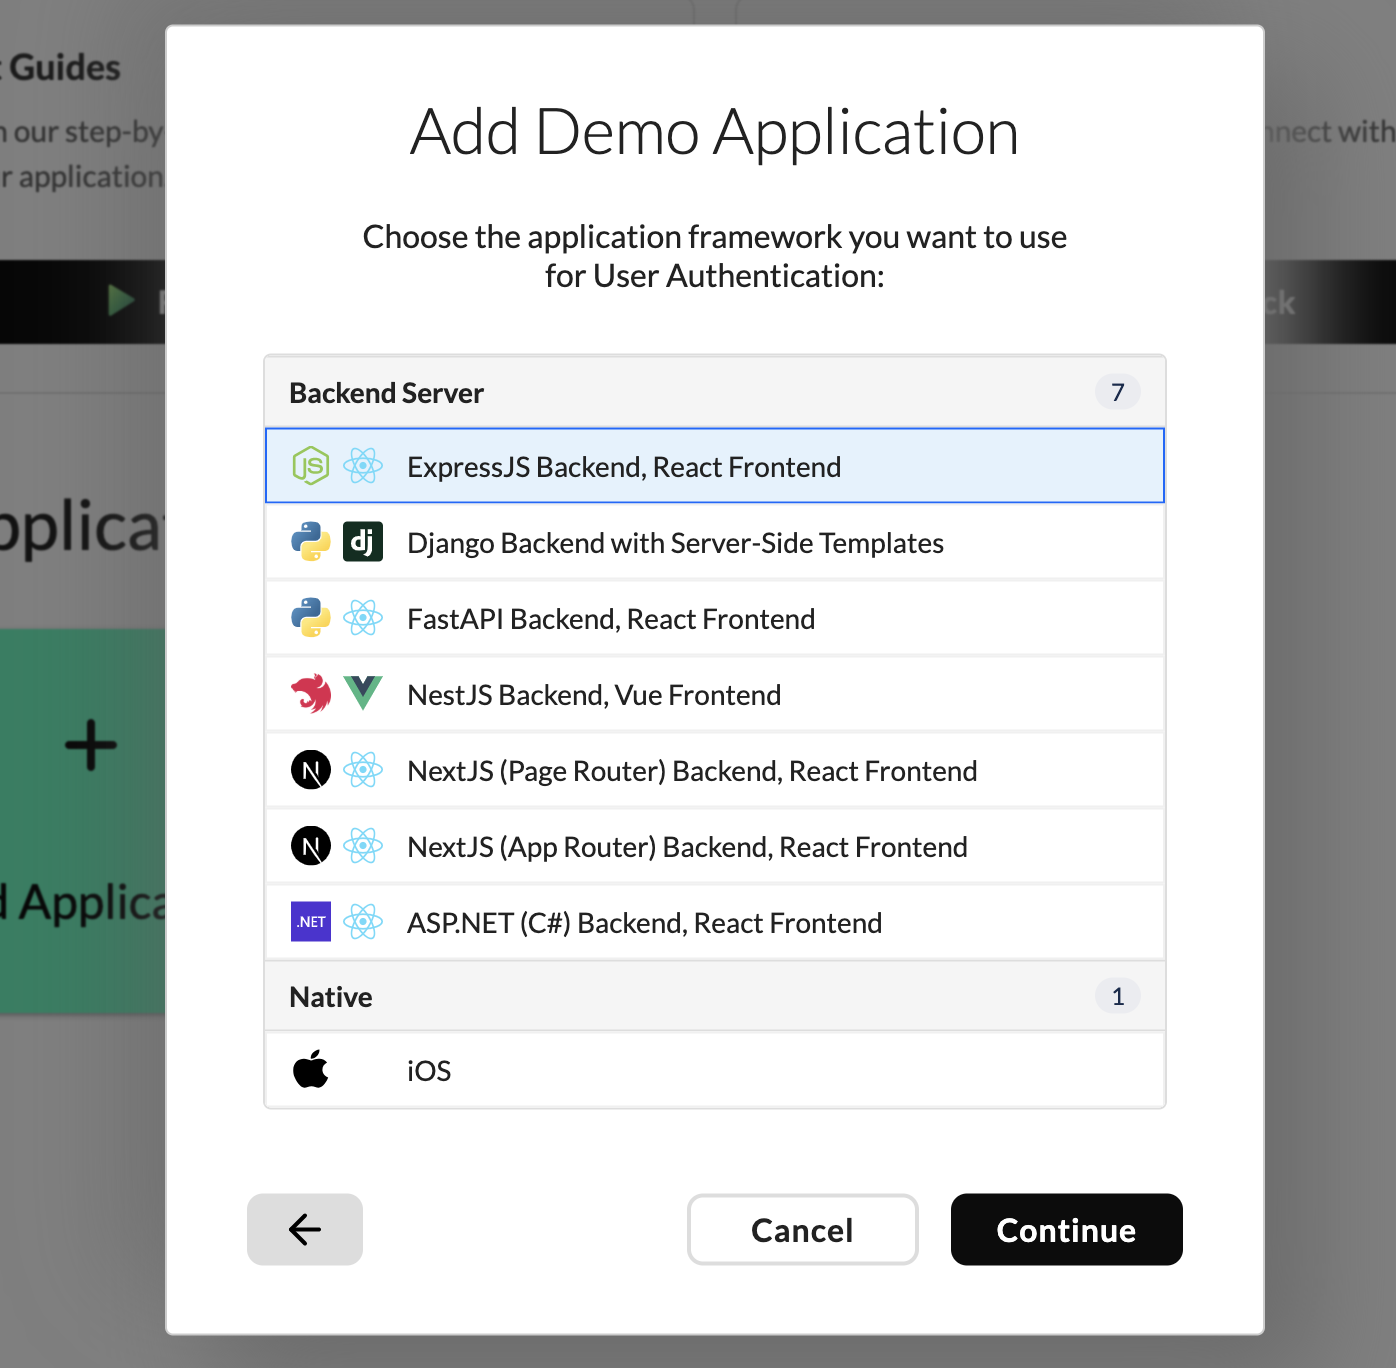
Add App Modal: Choose your demo application framework
Provisioning the Demo App
Once you've made all the necessary selections for your demo app configuration, you'll receive a preview of the different entities that Wristband will create to support your demo app. At this point, you can simply click the "Create" button to automatically provision all the entities as previewed.
Copying Values Into Environment Variables
After a successful creation, you will encounter two elements: a link to the GitHub repository associated with the chosen demo app and a set of string values available for copying. Before closing the modal, you should proceed to the GitHub repository and clone the project.
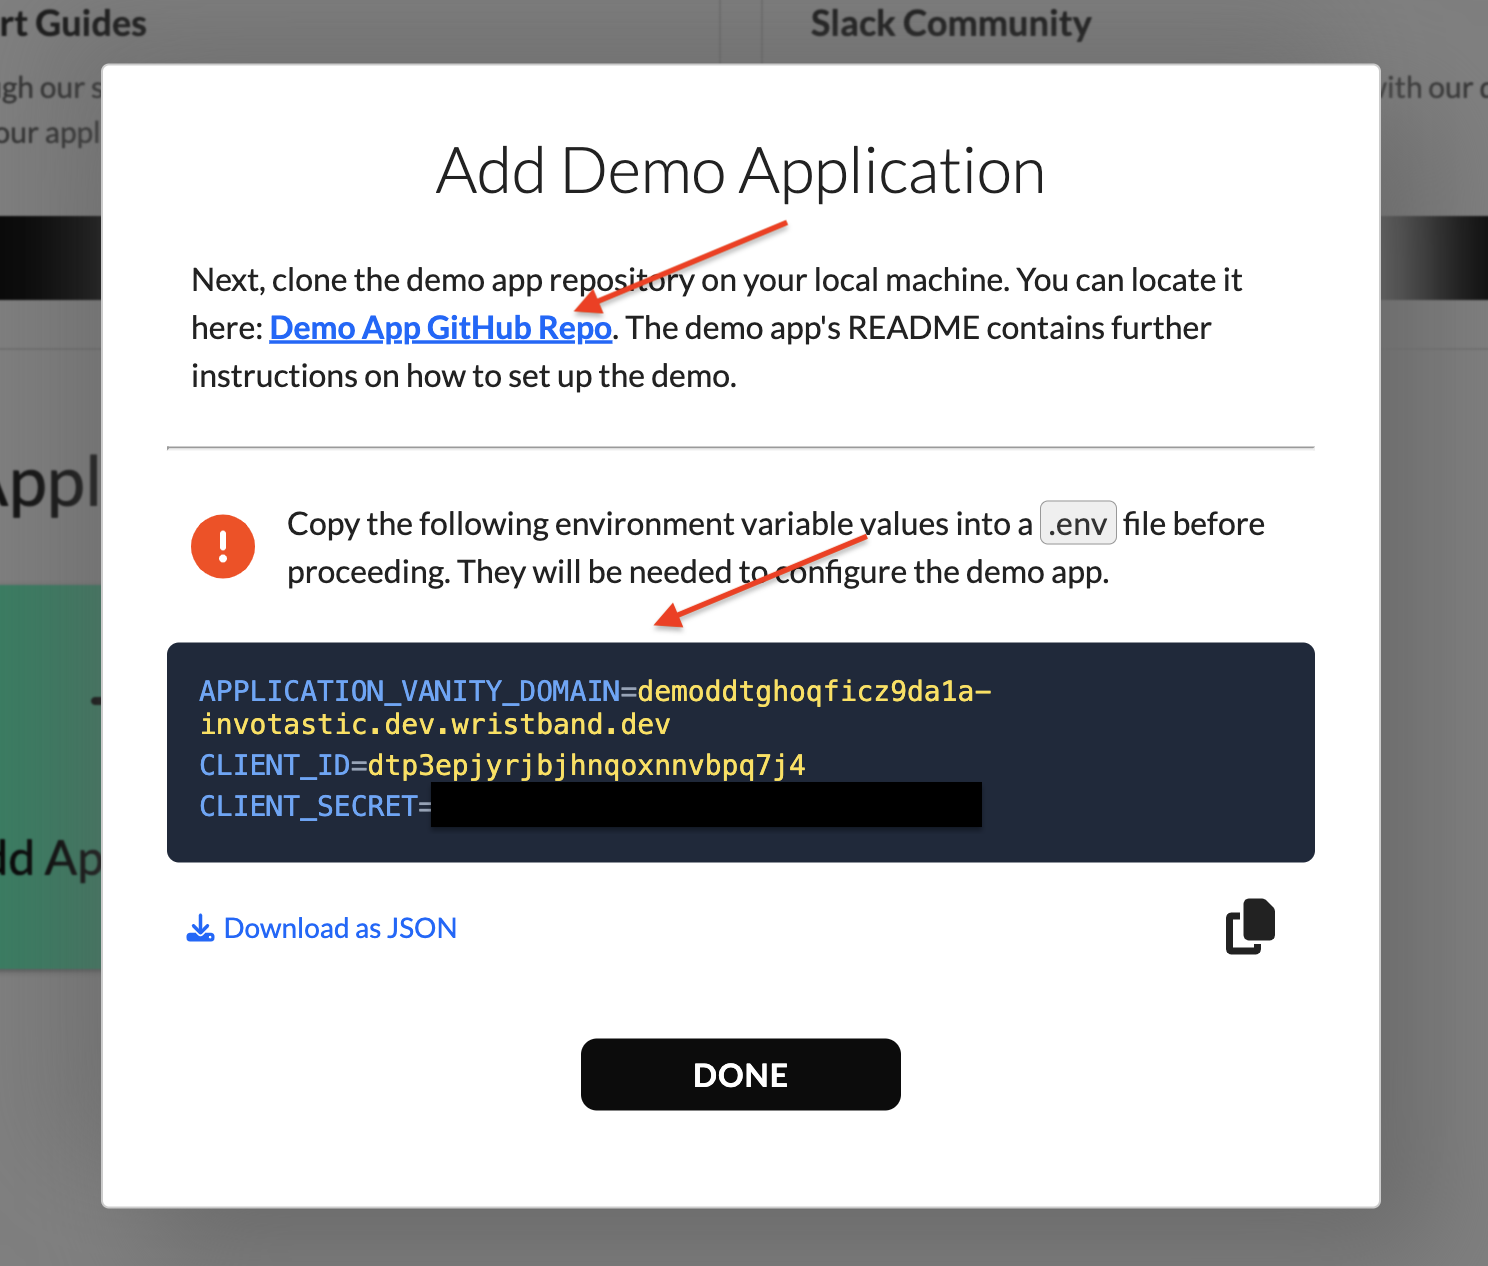
Add App Modal: Values to copy into the environment variable configuration of the demo app
Once you've cloned the repository, you'll copy and paste the string values from the modal into the .env file located within your demo app repository. You will see the following values on this screen:
| Name | Description |
|---|---|
| Application Vanity Domain | String value representing the Application-level vanity domain for your Wristband application. This base URL is used when redirecting to Wristband during authentication flows and when making API requests to Wristband. |
| Client ID | String value representing the unique identifier assigned to your demo application's OAuth2 Client. |
| Client Secret | String value representing the confidential, shared key between the demo application's OAuth2 Client and Wristband. This will not be present if you selected a Native App framework. |
Below is an example demonstrating where these values should be inserted:
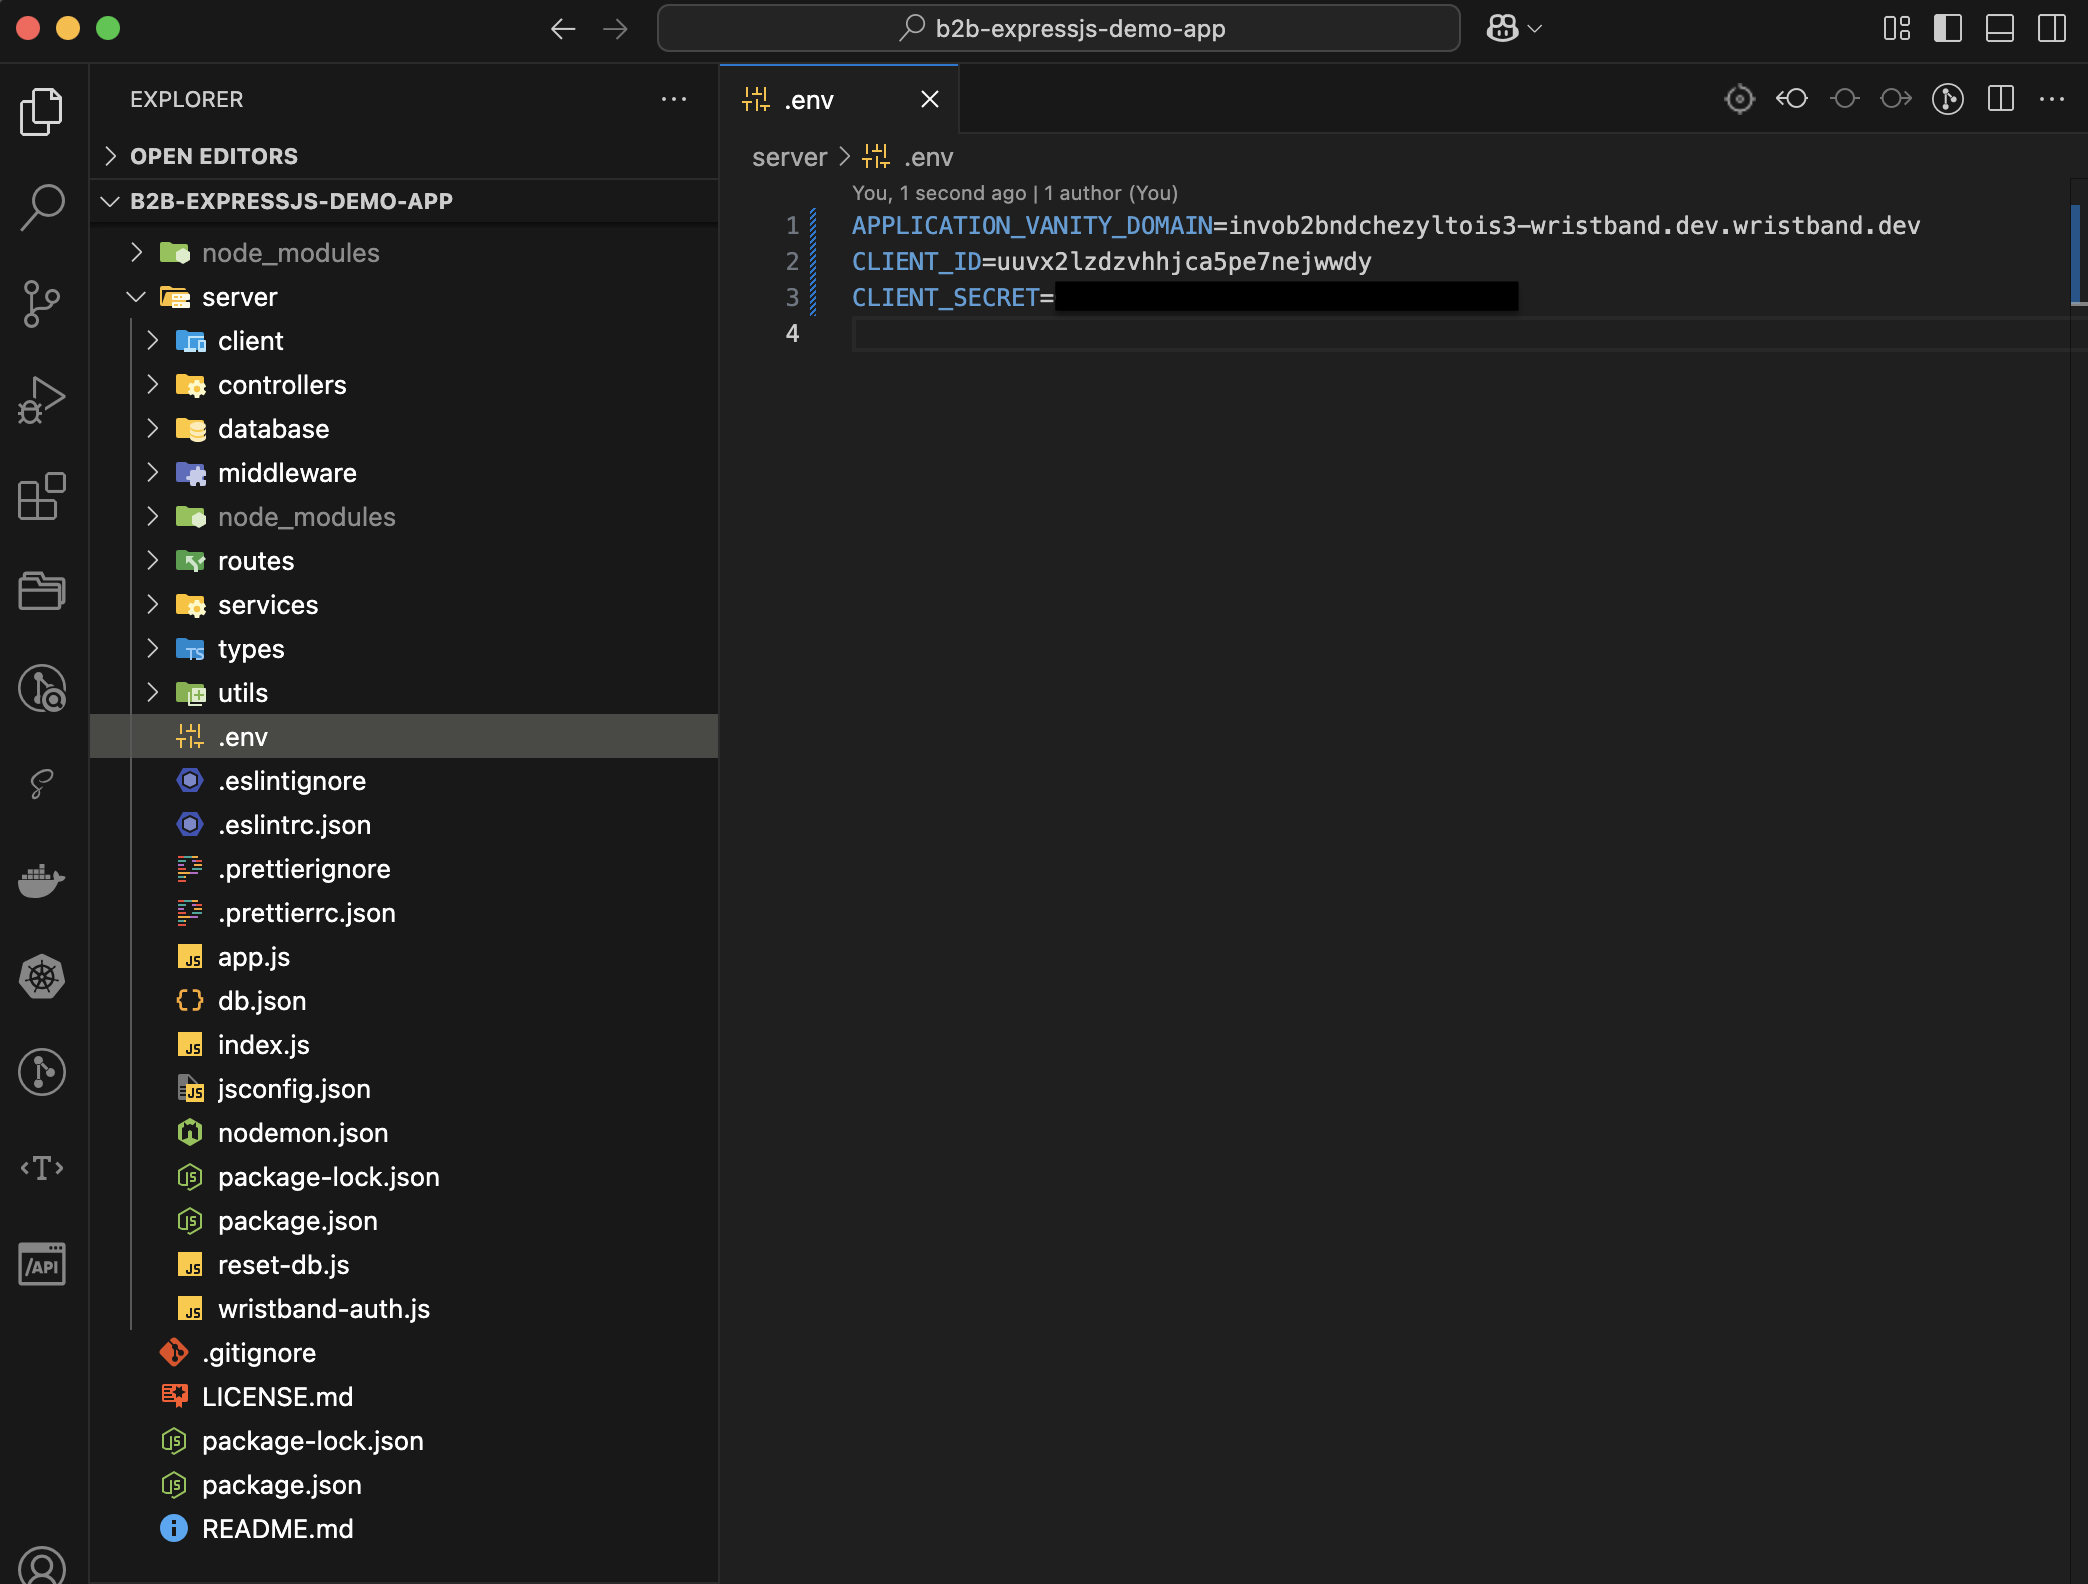
Example of the environment variable configuration for a demo app.
Next StepsFrom here, you can follow the steps inside your demo app's GitHub README file on how to build and run the demo app locally.
Updated 3 months ago