New User Invitation: Wristband-Hosted UI
Use Wristband's hosted pages to onboard new users through the invitation flow.
Wristband Identity Provider Invitation
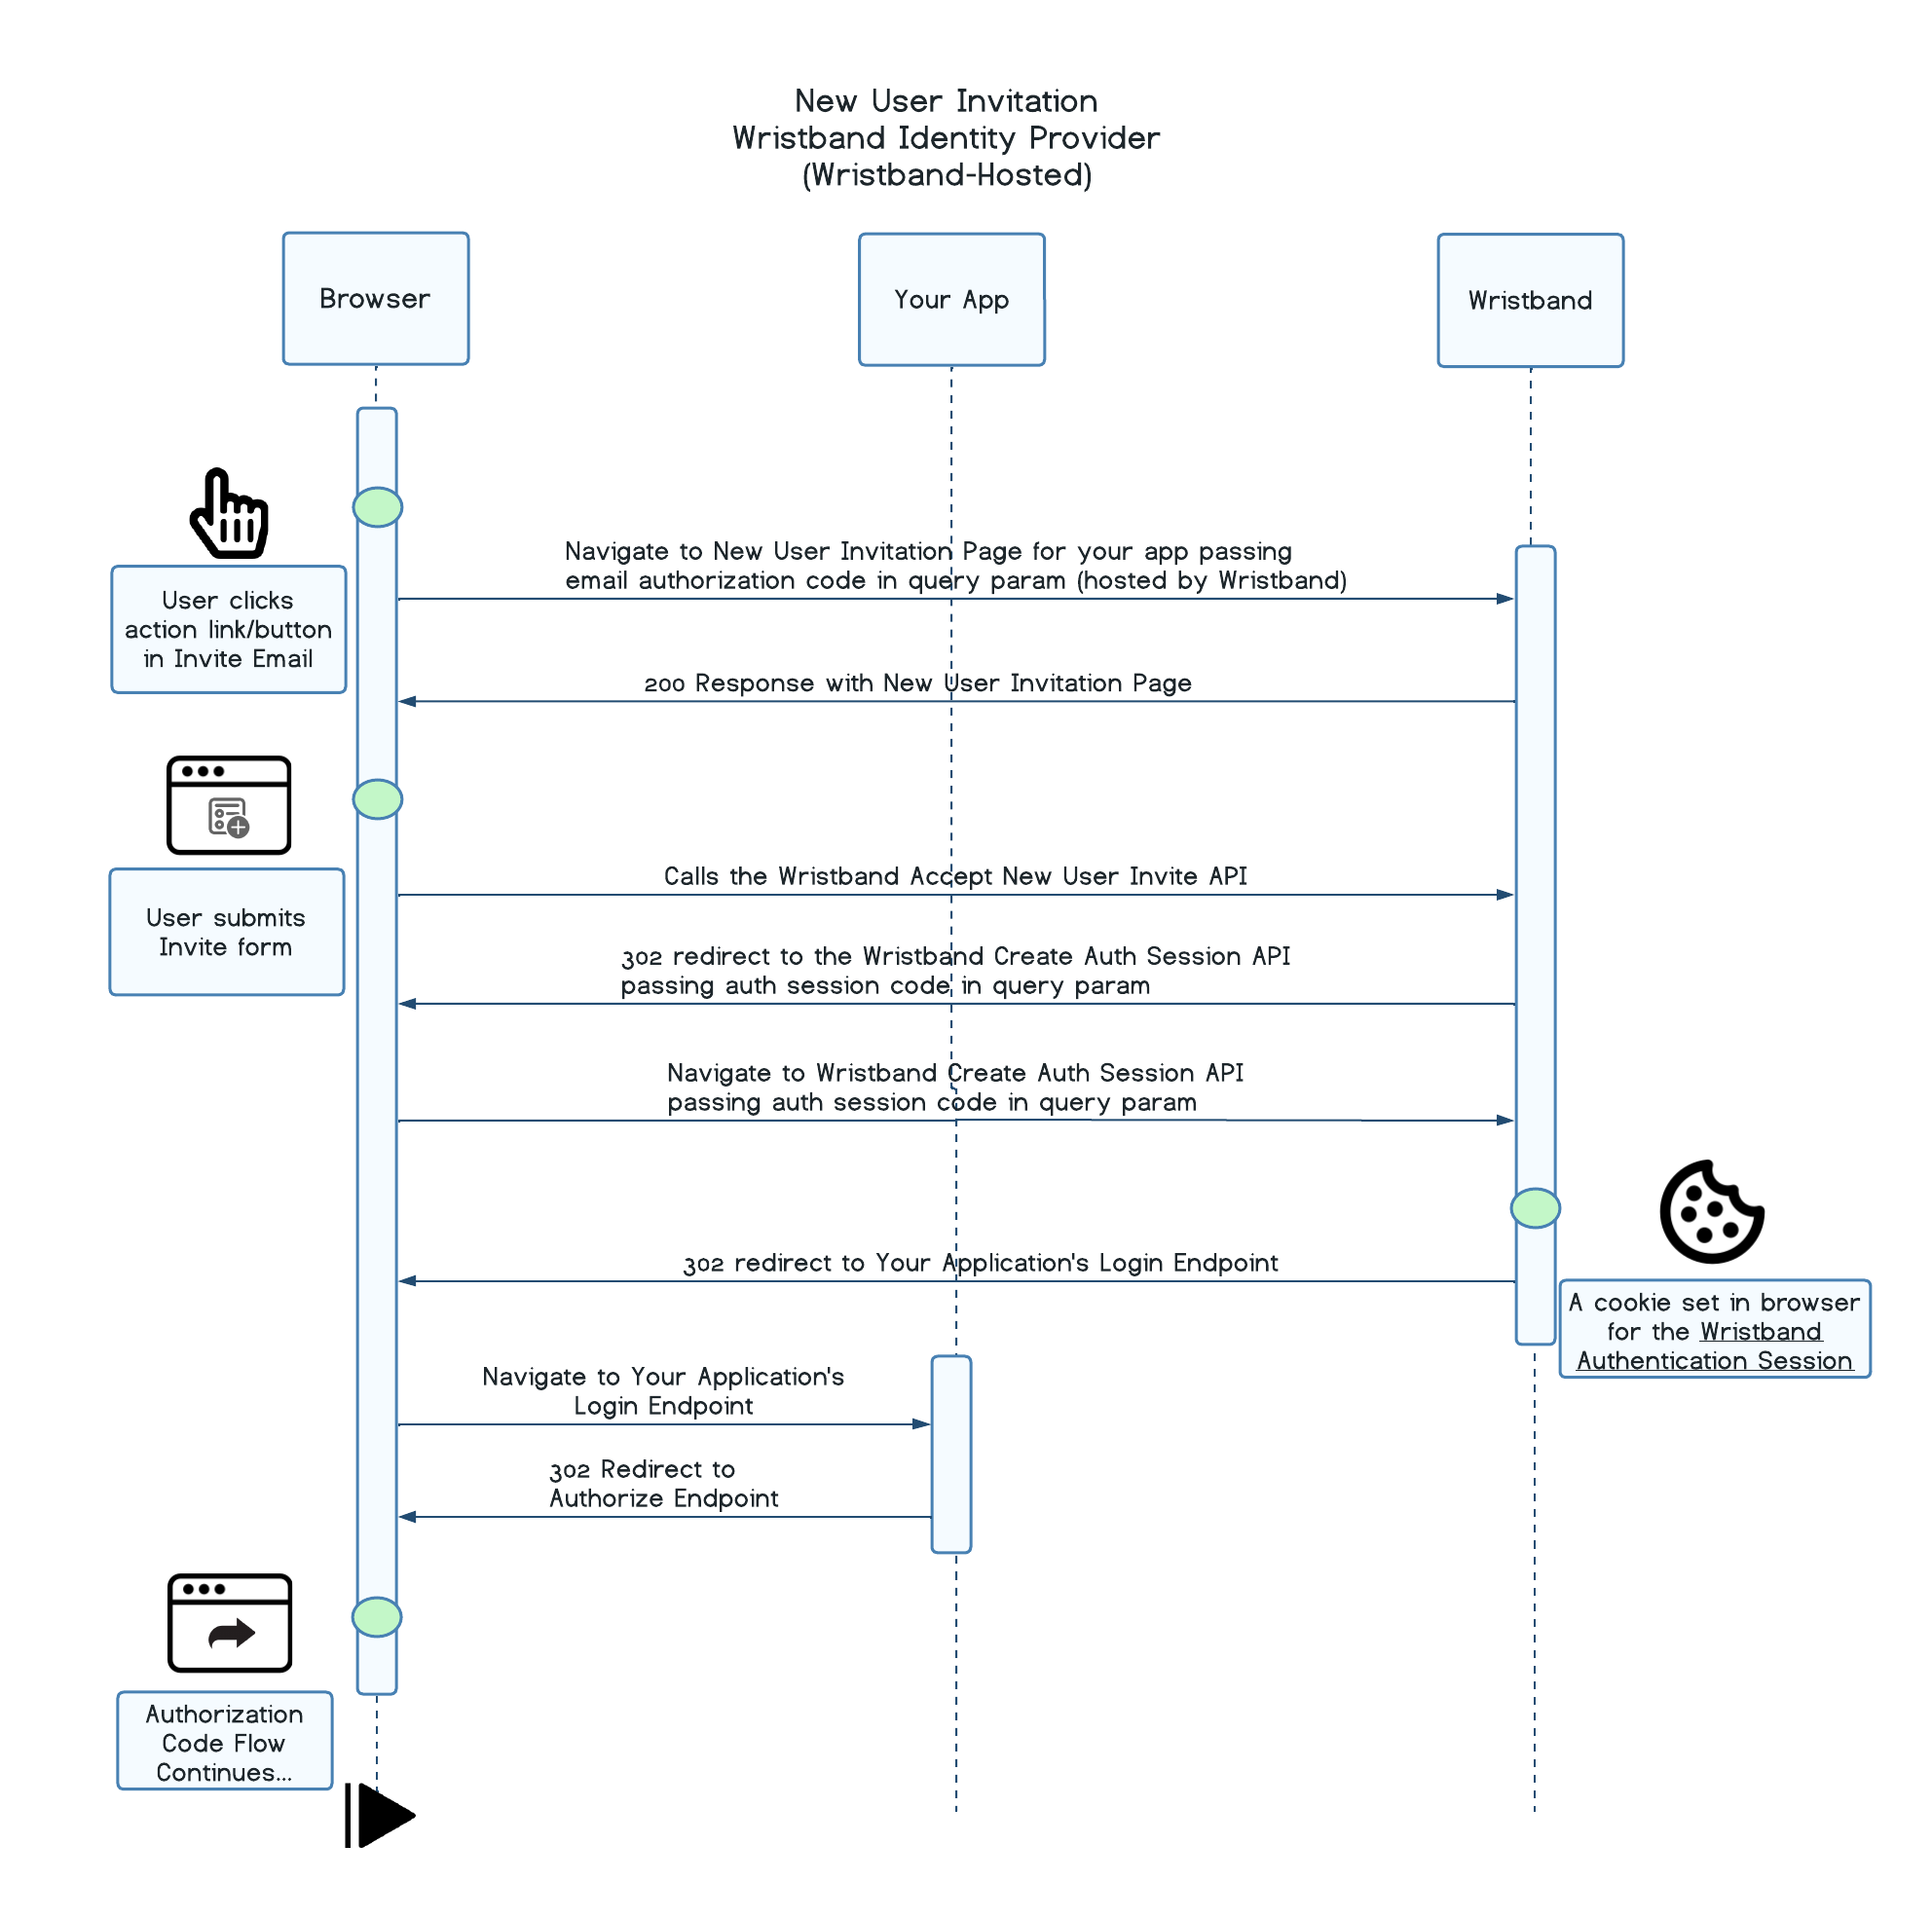
By default, the Action Link in the New User Invitation email directs users to a Wristband-hosted New User Invitation Page.
At a high level:
- The user clicks on the Action Link in the New User Invitation Email that was sent to their inbox.
- The user is redirected to the Wristband-hosted New User Invitation Page.
- The user provides all information on the form and clicks the submit button.
- Wristband calls the Wristband Accept New User Invite API, passing along the Email Authorization Code.
- Wristband redirects the user to the Login Endpoint implemented by your application.
From here, the user would be sent through the Authorization Code Flow in order to login and gain entry to the application. Because Wristband already created an Authentication Session for the user during the flow, the user gains immediate entry into the application without having to re-enter their credentials.
External Identity Provider Invitation
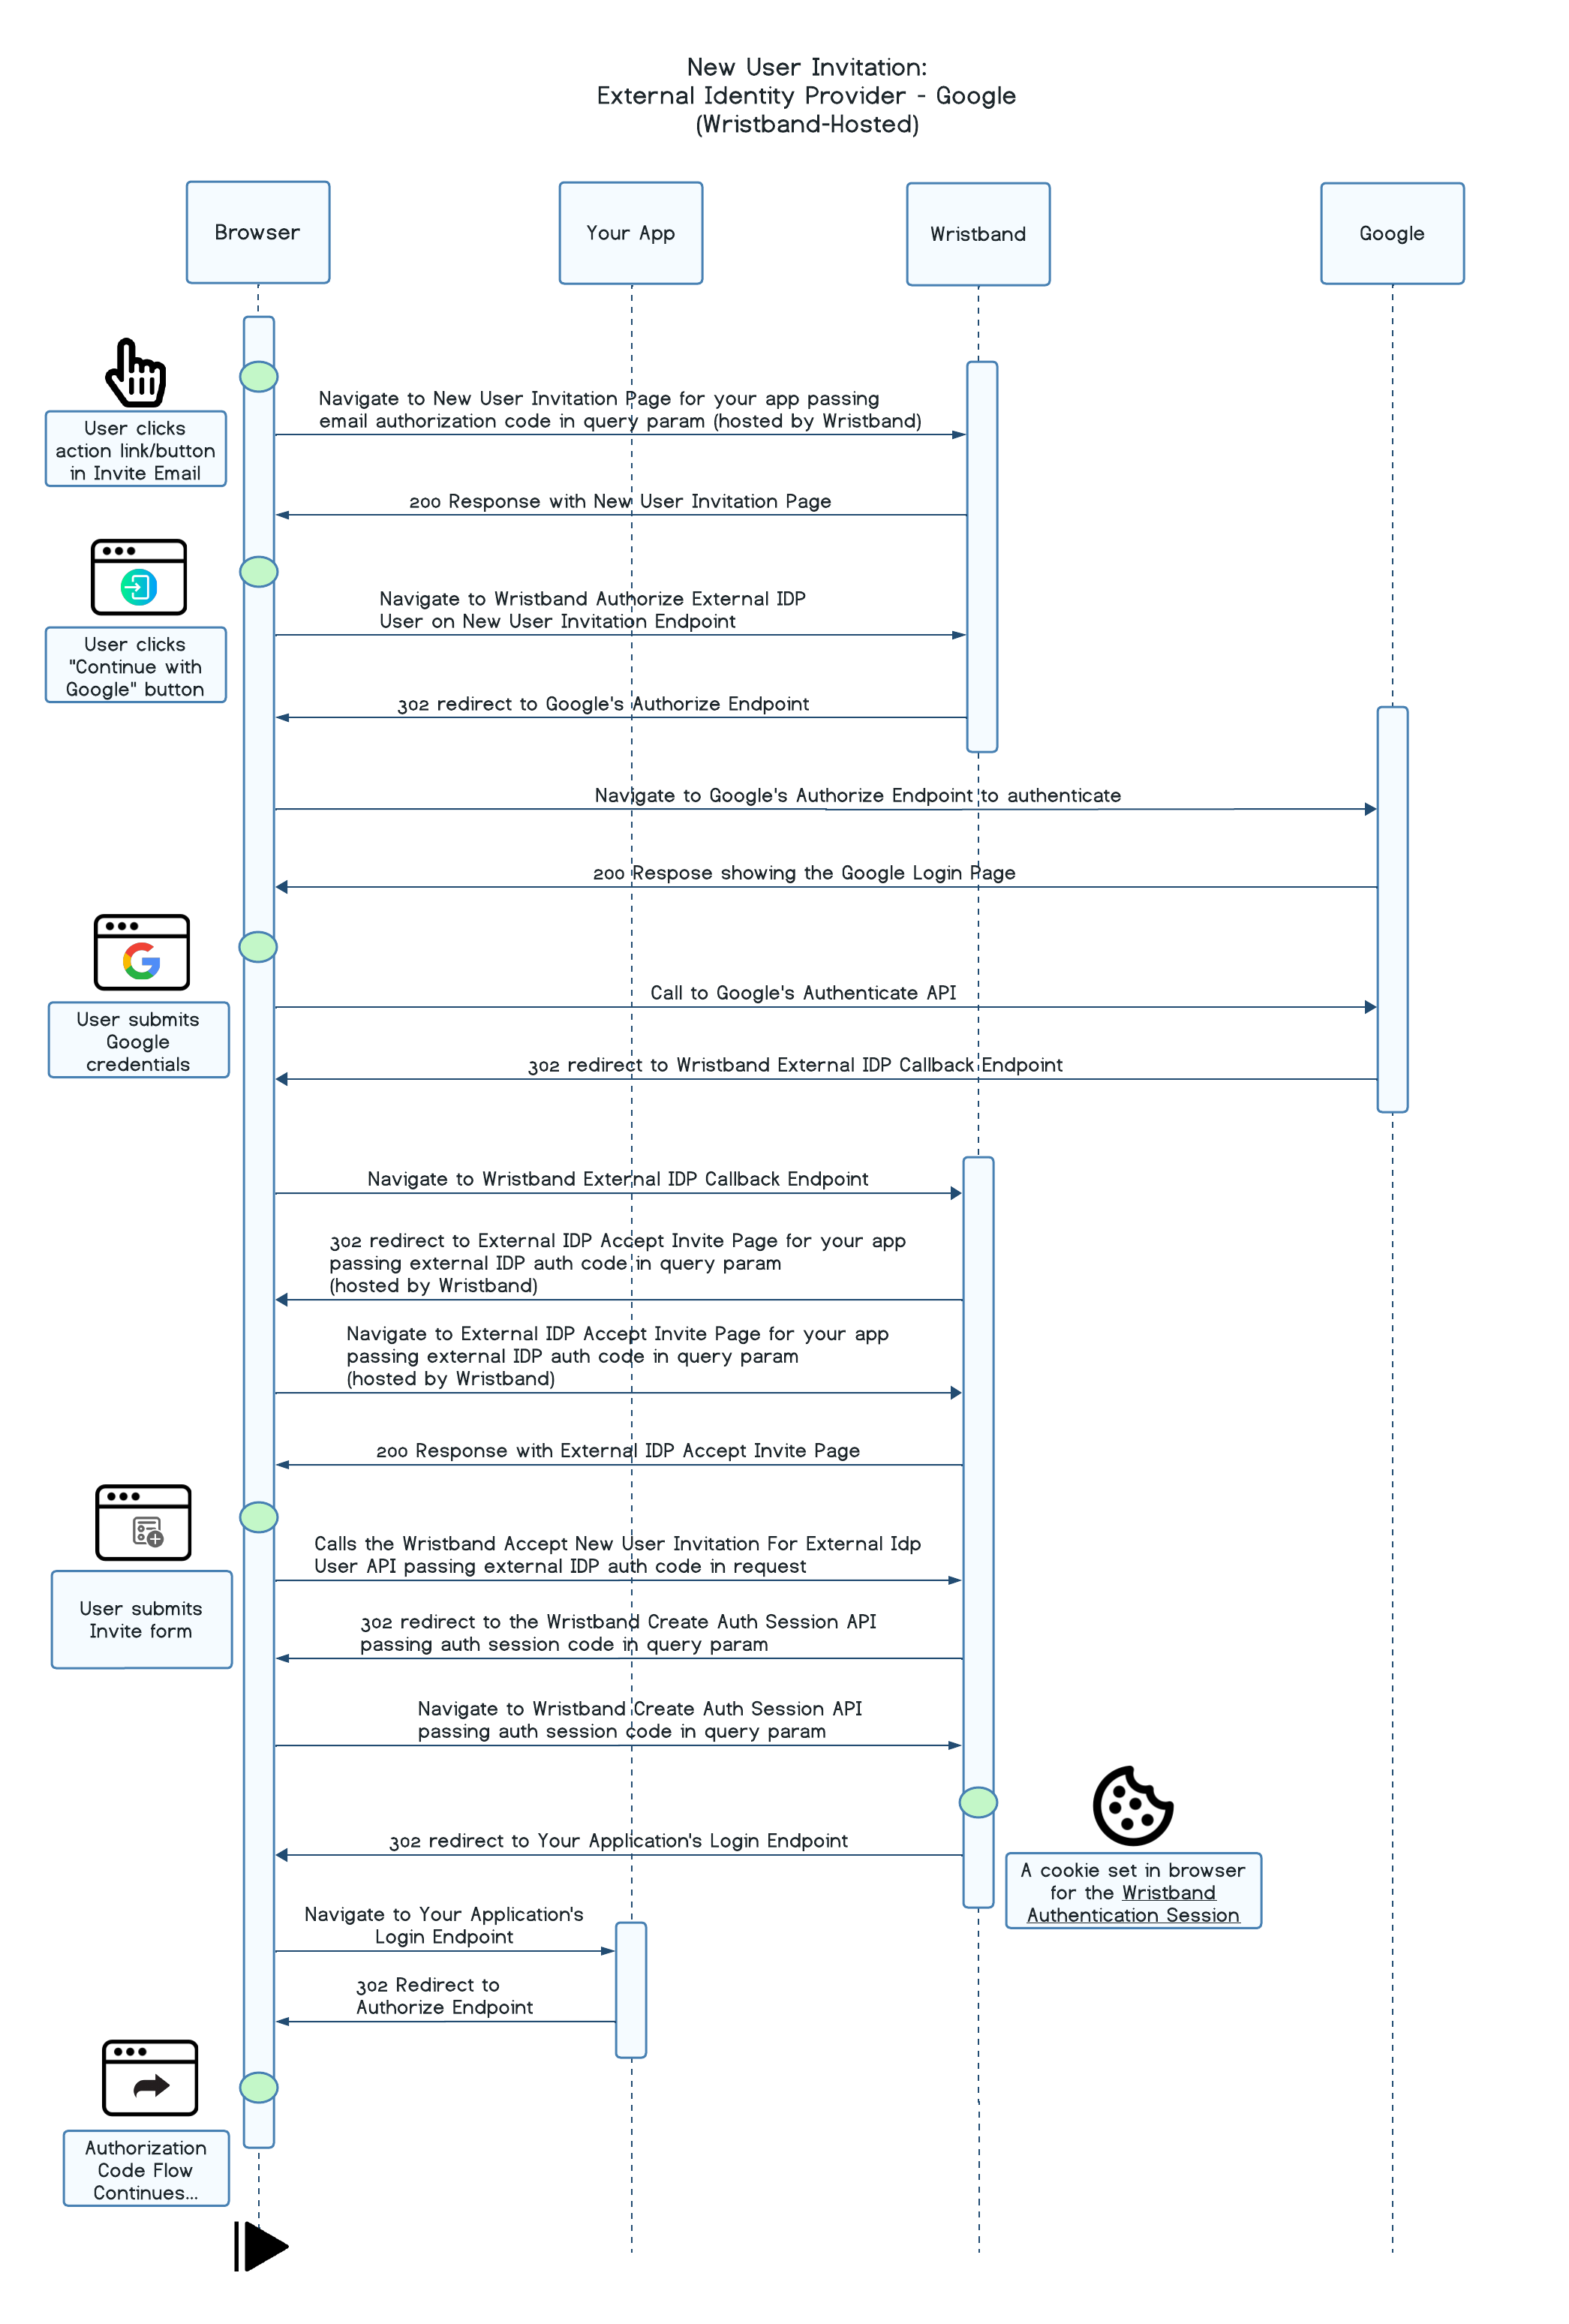
By default, the External IDP New User Invitation Page that users get redirected to after authenticating with their IDP is hosted by Wristband.
At a high level:
- The user clicks on the Action Link in the New User Invitation Email that was sent to their inbox.
- The user is redirected to the Wristband-hosted New User Invitation Page.
- The user clicks the "Continue with Google" button, which triggers a call to the Wristband Authorize External IDP User on New User Invitation Endpoint.
- Wristband redirects the user to Google's account login page.
- The user submits their Google credentials.
- Google redirects the user to the Wristband External IDP Callback Endpoint (which can be found in the Identity Providers section of the Wristband dashboard for your given IDP), where Wristband creates an External IDP Authorization Code required for completing authentication.
- Wristband redirects the user to the Wristband-hosted External IDP New User Invitation Page along with an External IDP Authorization Code that will be used for creating an Authentication Session.
- The user provides all information to the External IDP New User Invitation Form and clicks the submit button.
- Wristband calls the Wristband Accept New User Invitation For External Idp User API, passing along the External IDP Authorization Code.
- Upon successful authentication, Wristband creates an Authentication Session and redirects the user to the Login Endpoint implemented by your application.
From here, the user would be sent through the Authorization Code Flow in order to login and gain entry to the application. Because Wristband already created an Authentication Session for the user during the flow, the user gains immediate entry into the application without having to re-enter their credentials.
Updated 3 months ago