Customizing Wristband for Your Brand
This page details how to tailor Wristband to match your brand's look and feel.
You can tailor Wristband to reflect your brand’s unique identity with customizable login pages, emails, and other user-facing elements. This guide shows you how to configure these settings at both the application and tenant levels, ensuring a cohesive and branded user experience across your platform.
Customizing Hosted Pages
In the Wristband Dashboard, a preview pane lets you visualize your branding changes in real time as you edit. You can also cycle through different hosted pages to see how various configurations impact the appearance. All hosted auth pages inherit application-level page branding configurations by default. This applies to all tenants under the application.
Common Page Branding Configurations
You can customize a variety of common page and form elements to better align with your branding. These common configurations apply for hosted pages for the following workflows:
- Signup
- Tenant Discovery
- Login
- MFA Challenge and Enrollment
- User Invite
- Change Email
- User Activation
- Email Verification
- Password Reset
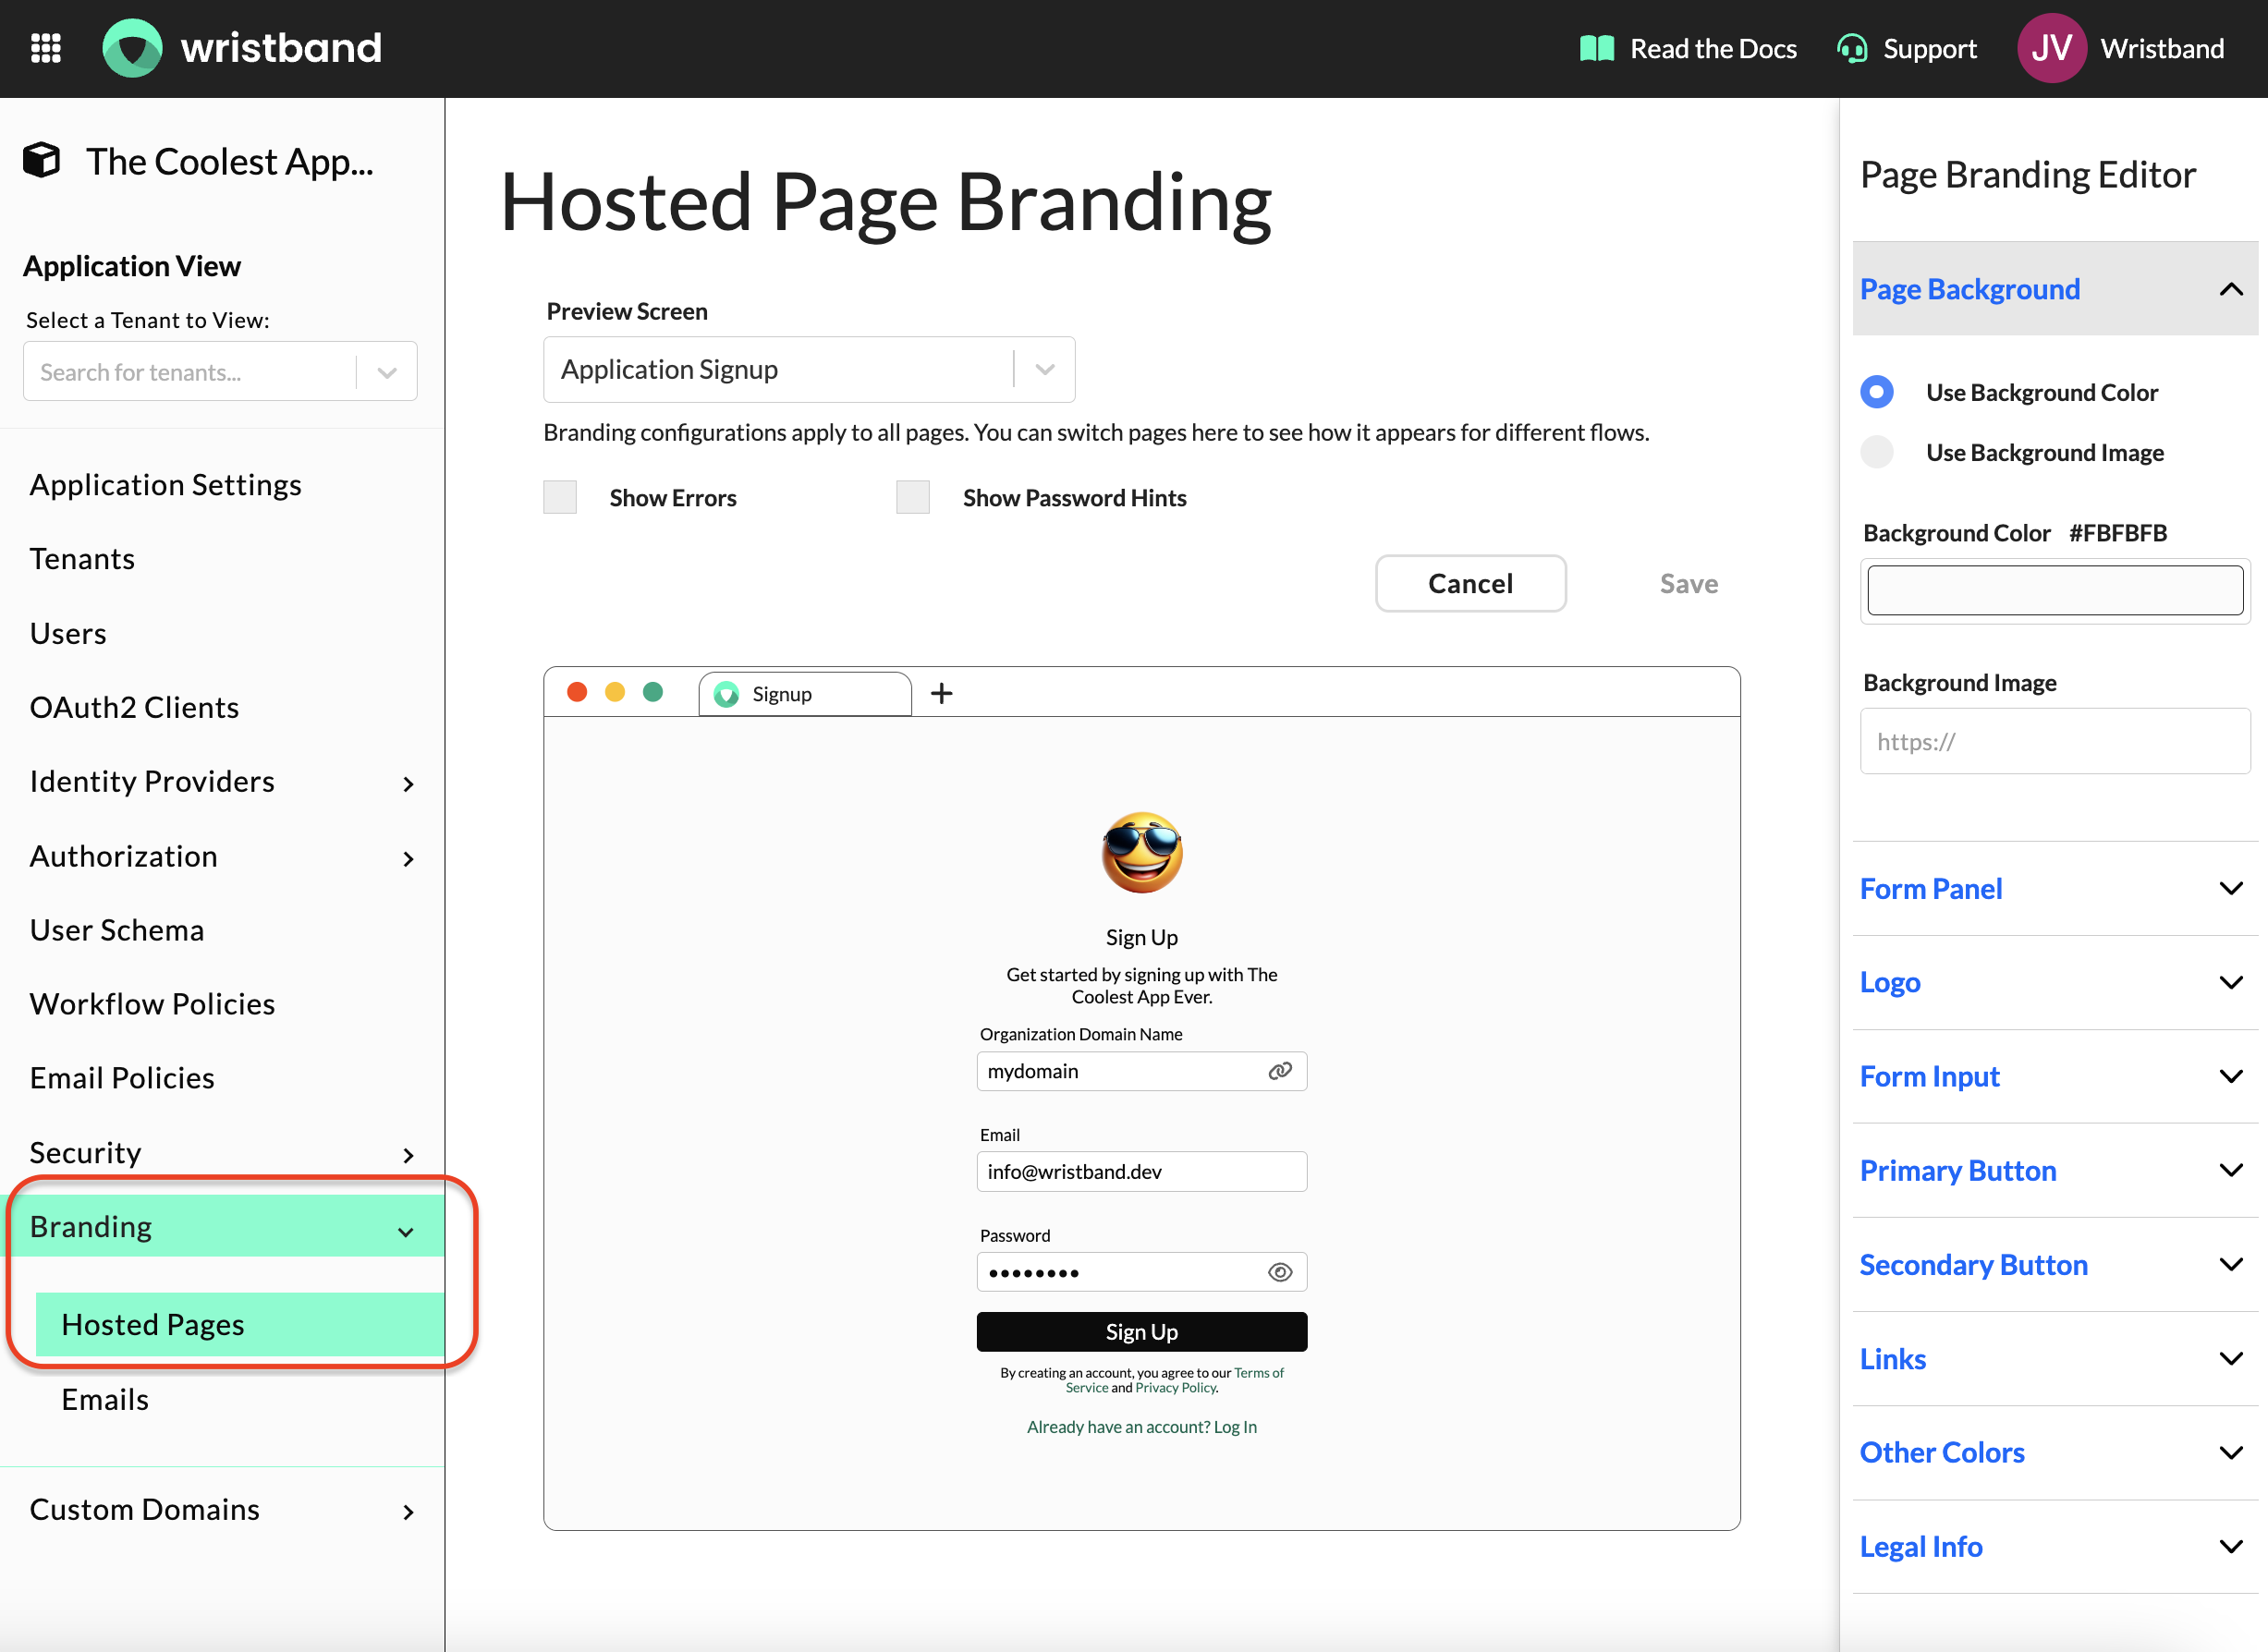
Hosted Page Branding Common Configurations
The below image shows how the common branding configurations map to various components on the hosted pages.
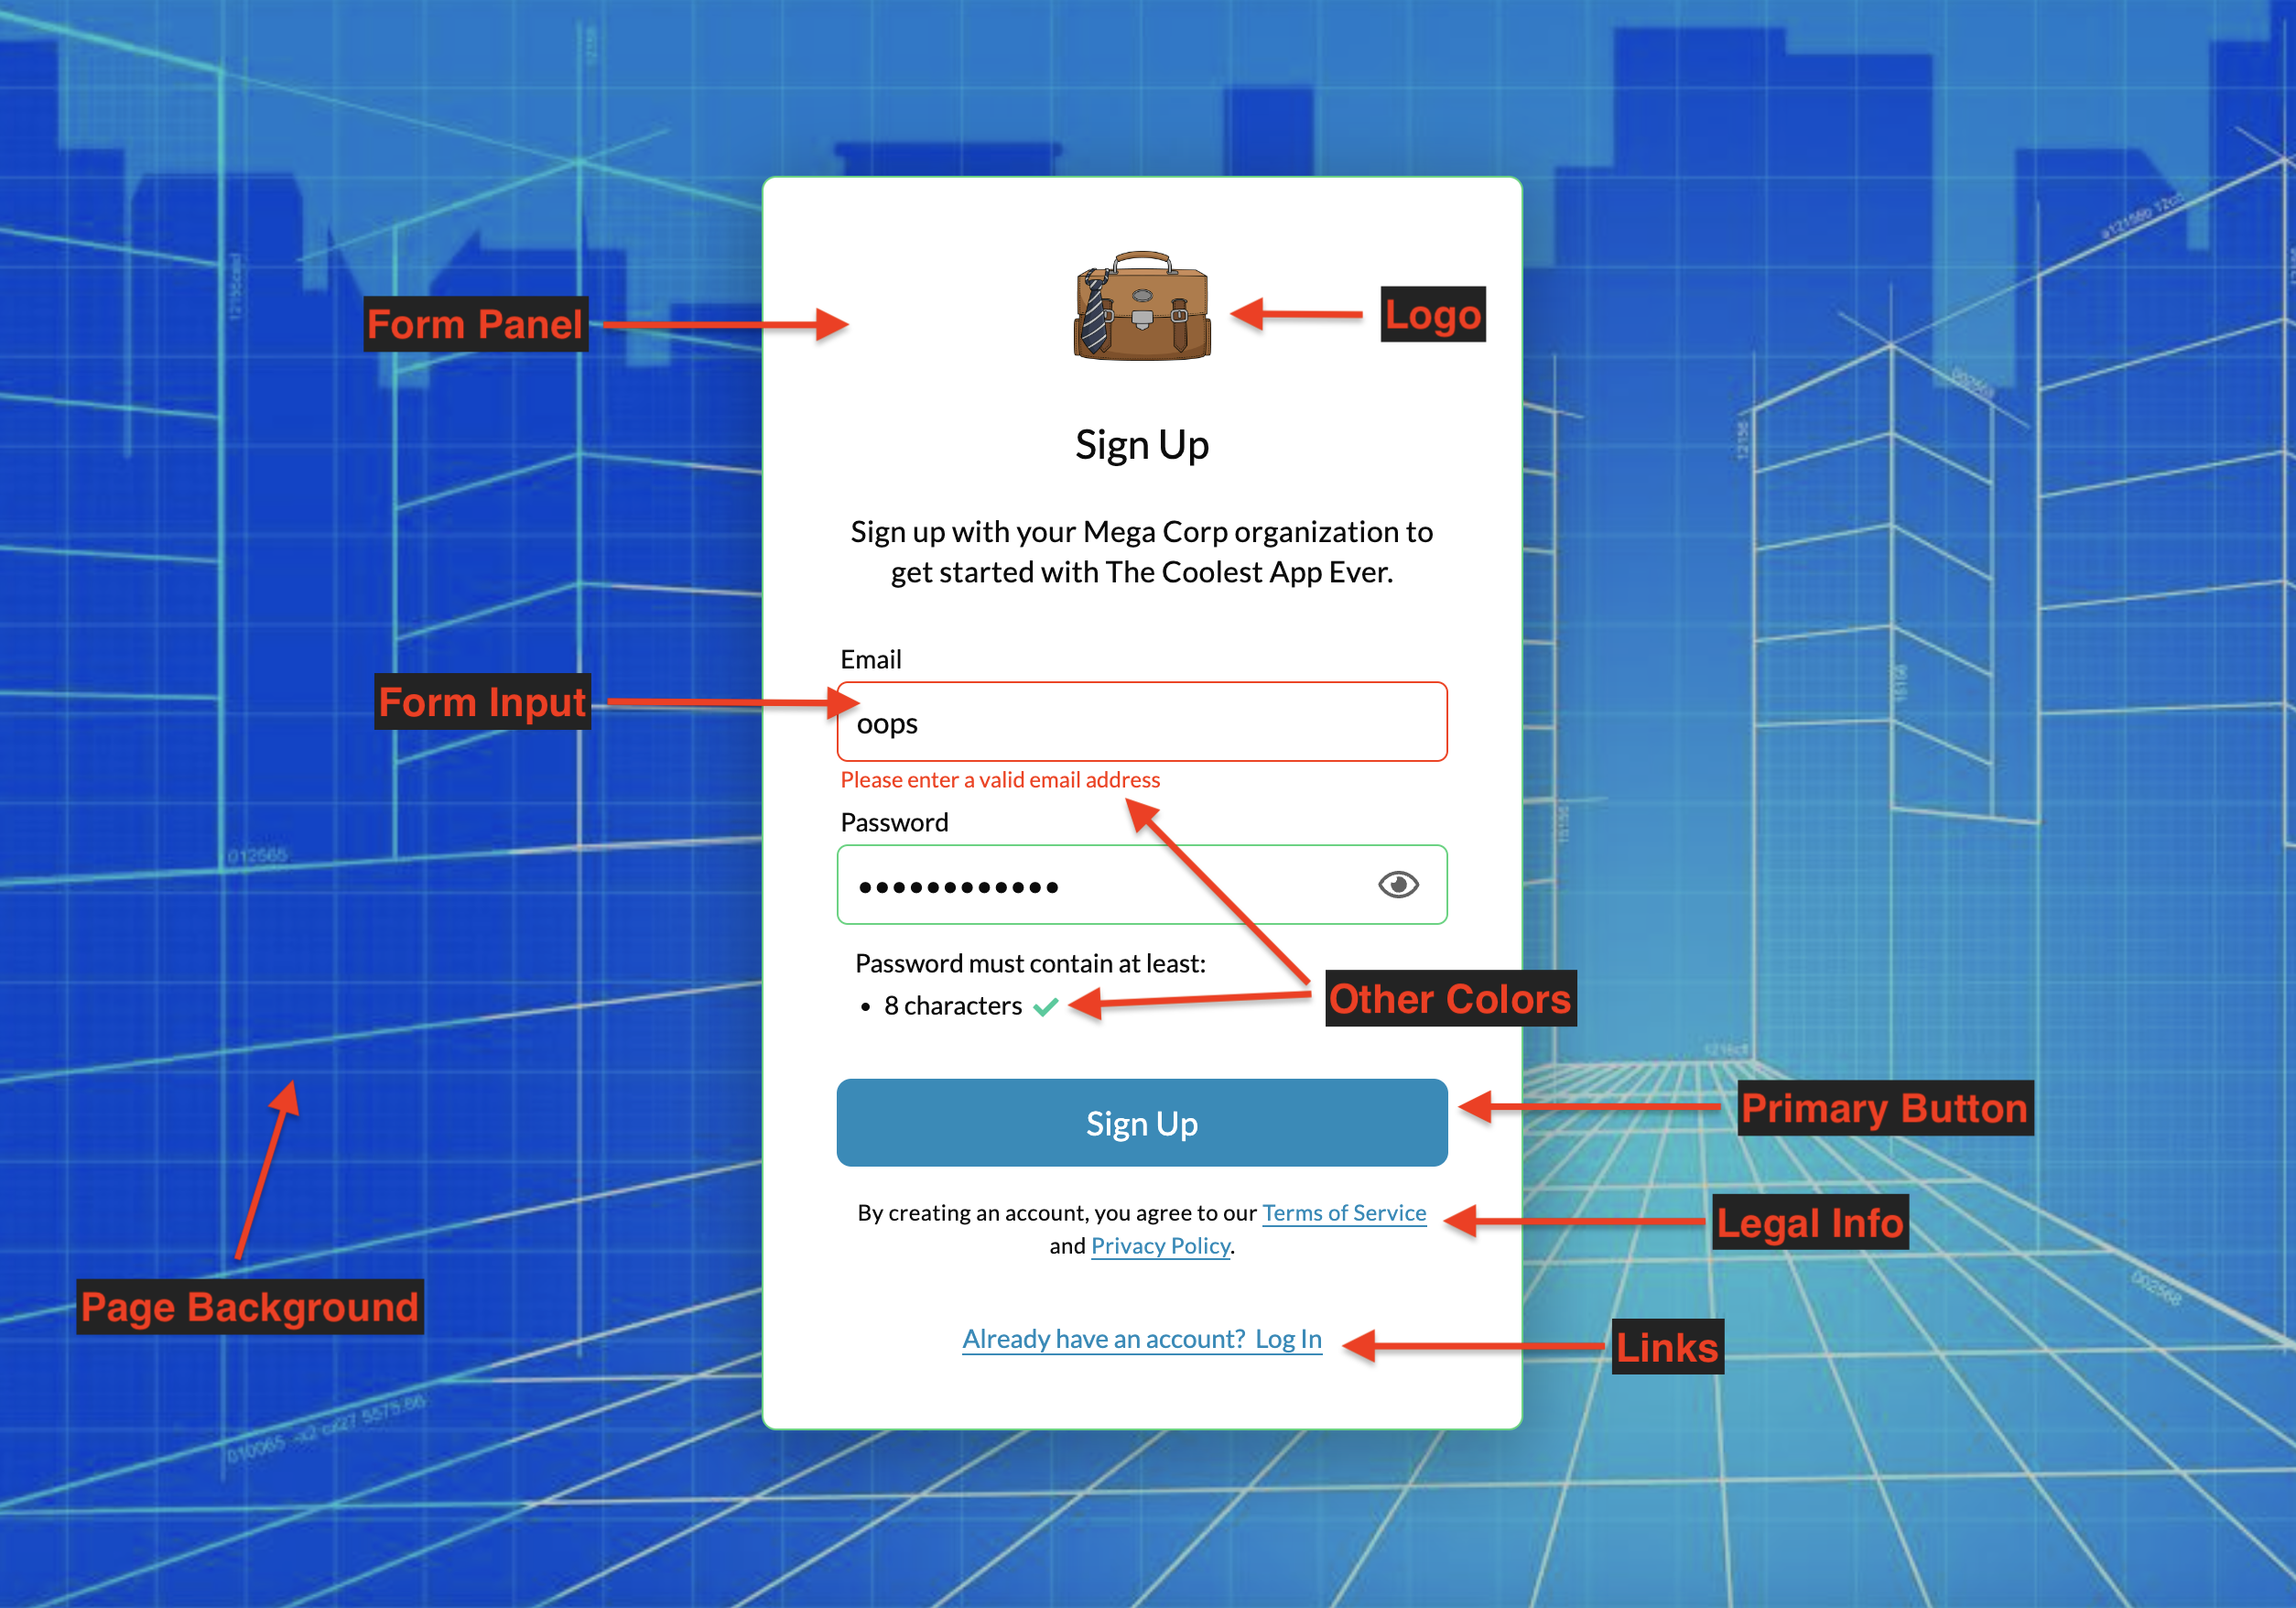
Hosted Page Branding Common Components
Page-Specific Page Branding Configurations
You can configure custom side panel content for hosted login and signup pages. This allows you to tailor messaging, imagery, or other content specific to your brand or user journey. Side panels can be customized individually for the following pages:
- Application-Level Login
- Application-Level Signup
- Tenant-Level Login
- Tenant-Level Signup
One powerful feature of side panel configuration is the ability to embed dynamic content by pointing to a custom URL. This gives developers full control to display rich, branded marketing content tailored to their audience. It also enhances white-labeling by allowing each tenant to have a completely customized experience.
All iframe URLs are sandboxed, and strict Content Security Policy (CSP) headers are applied to ensure robust security for embedded content.
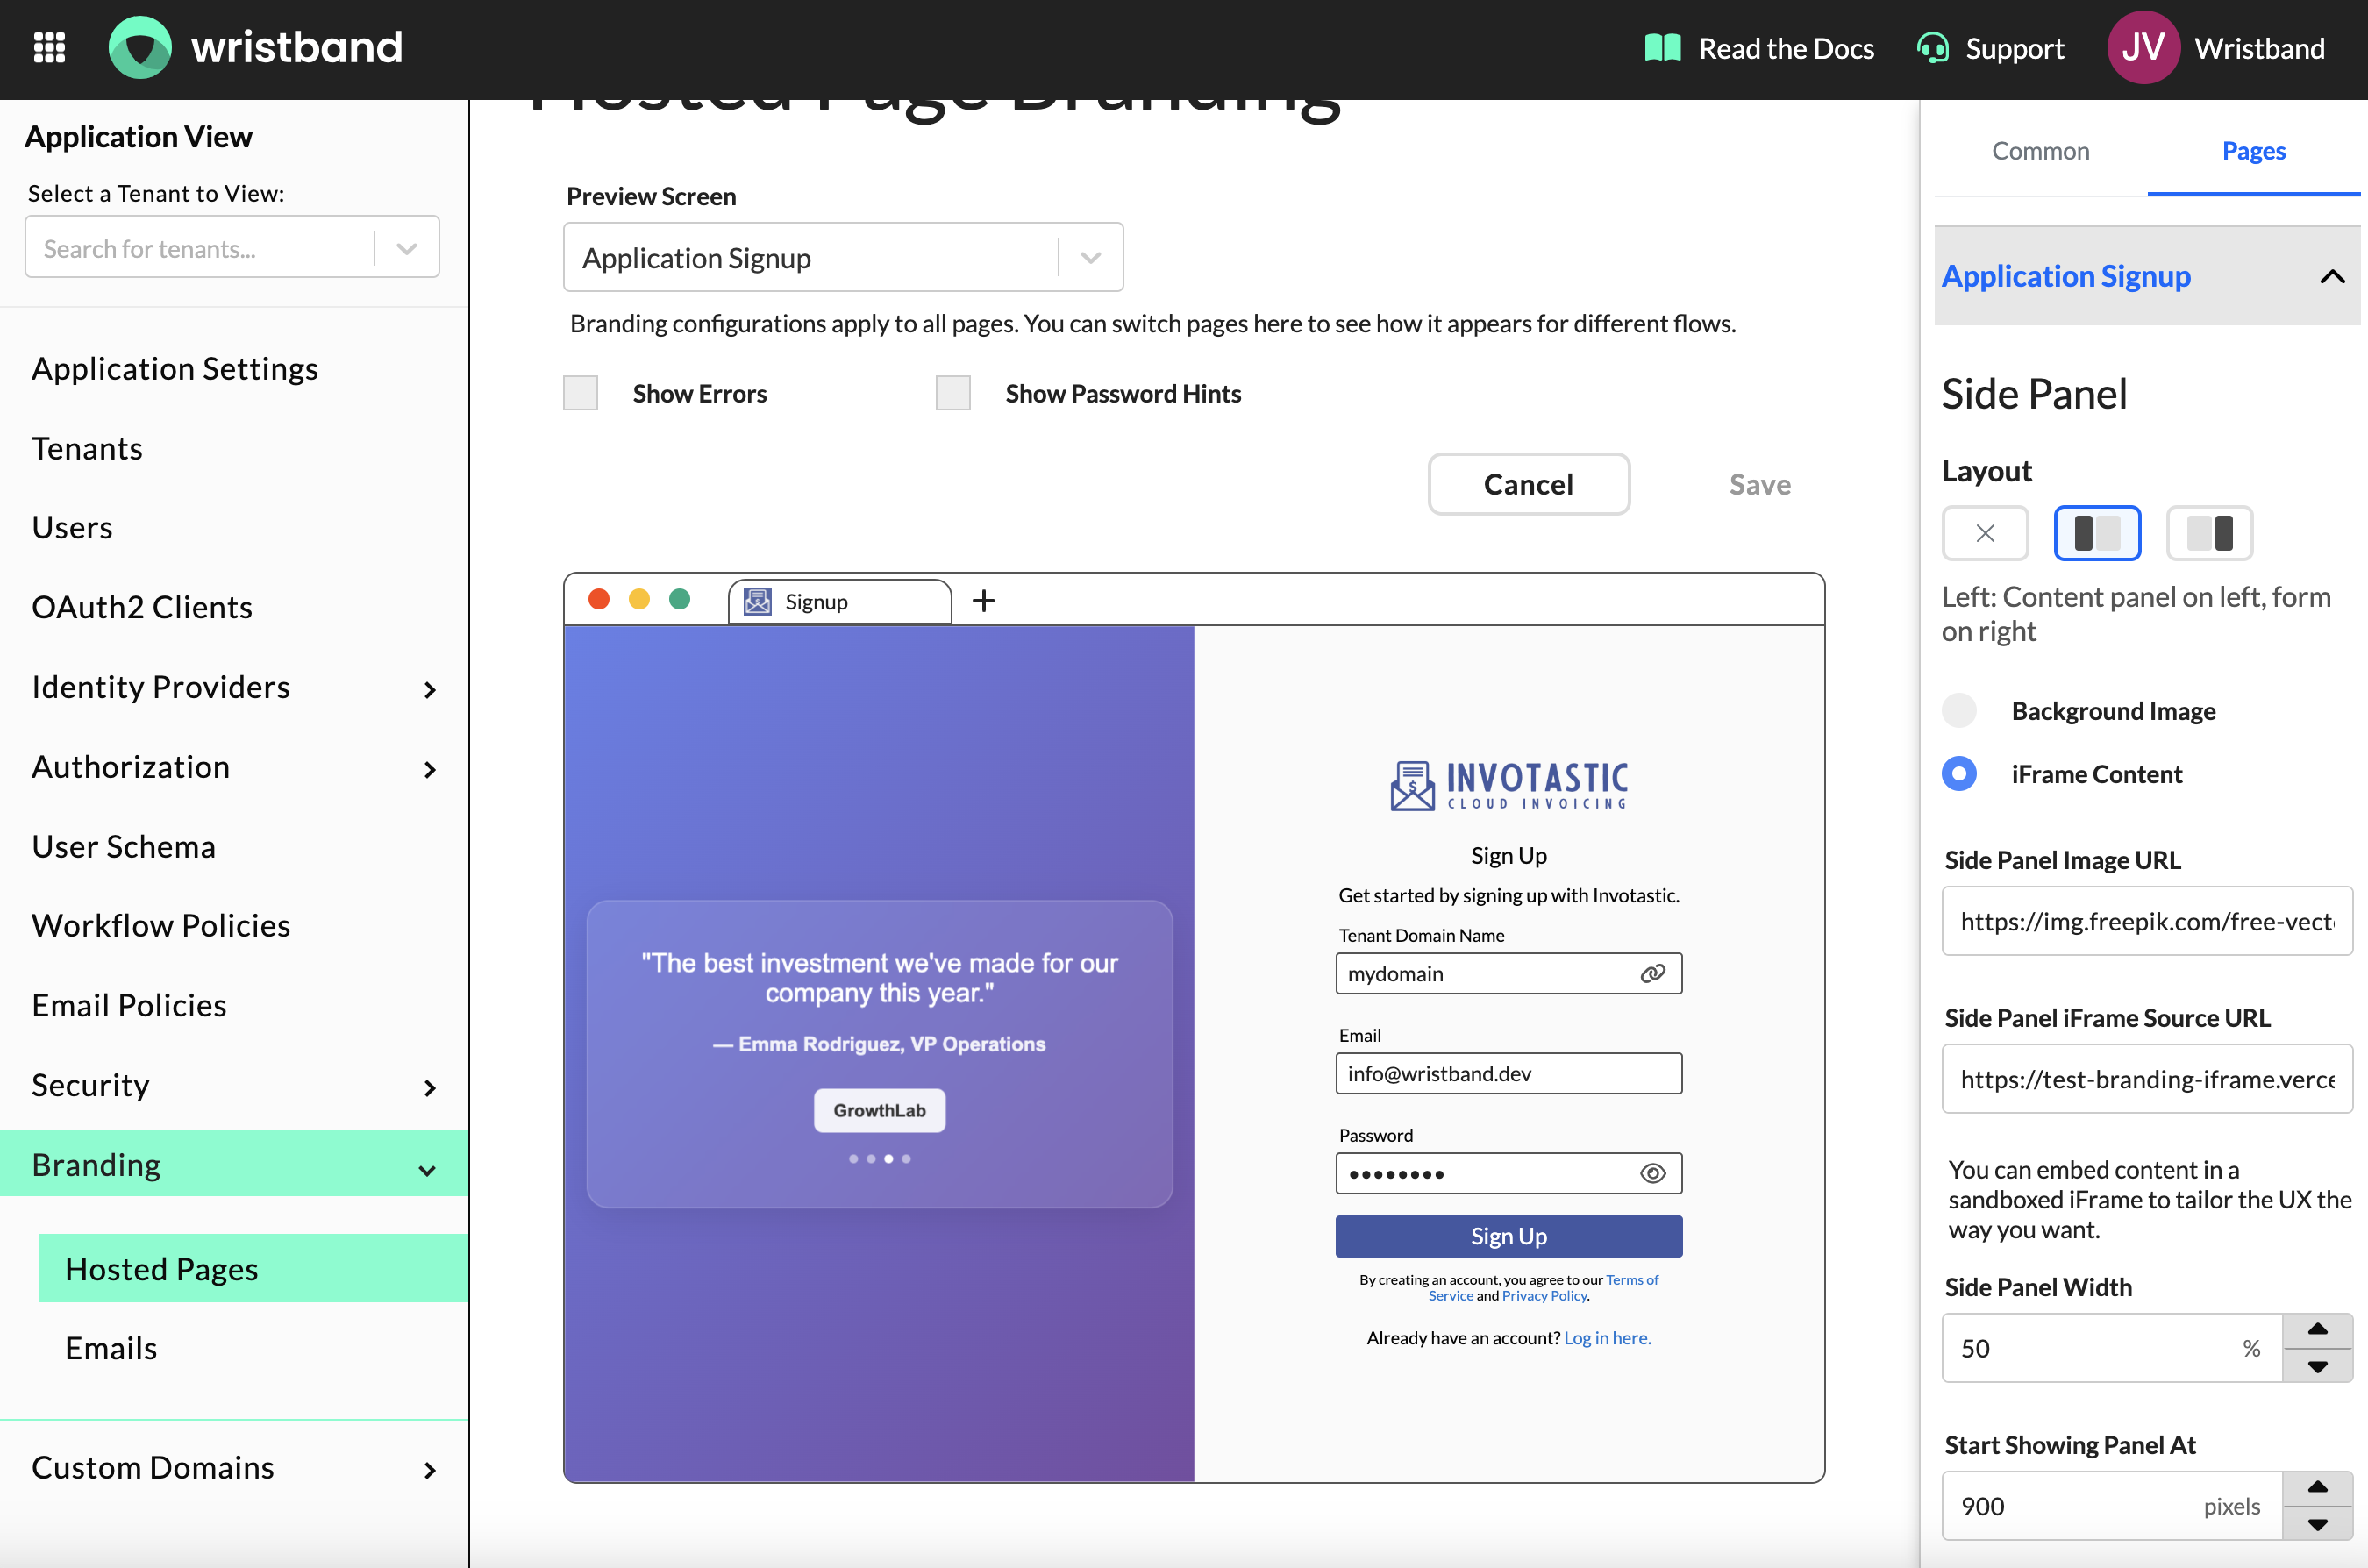
Hosted Page Branding Side Panel Configurations
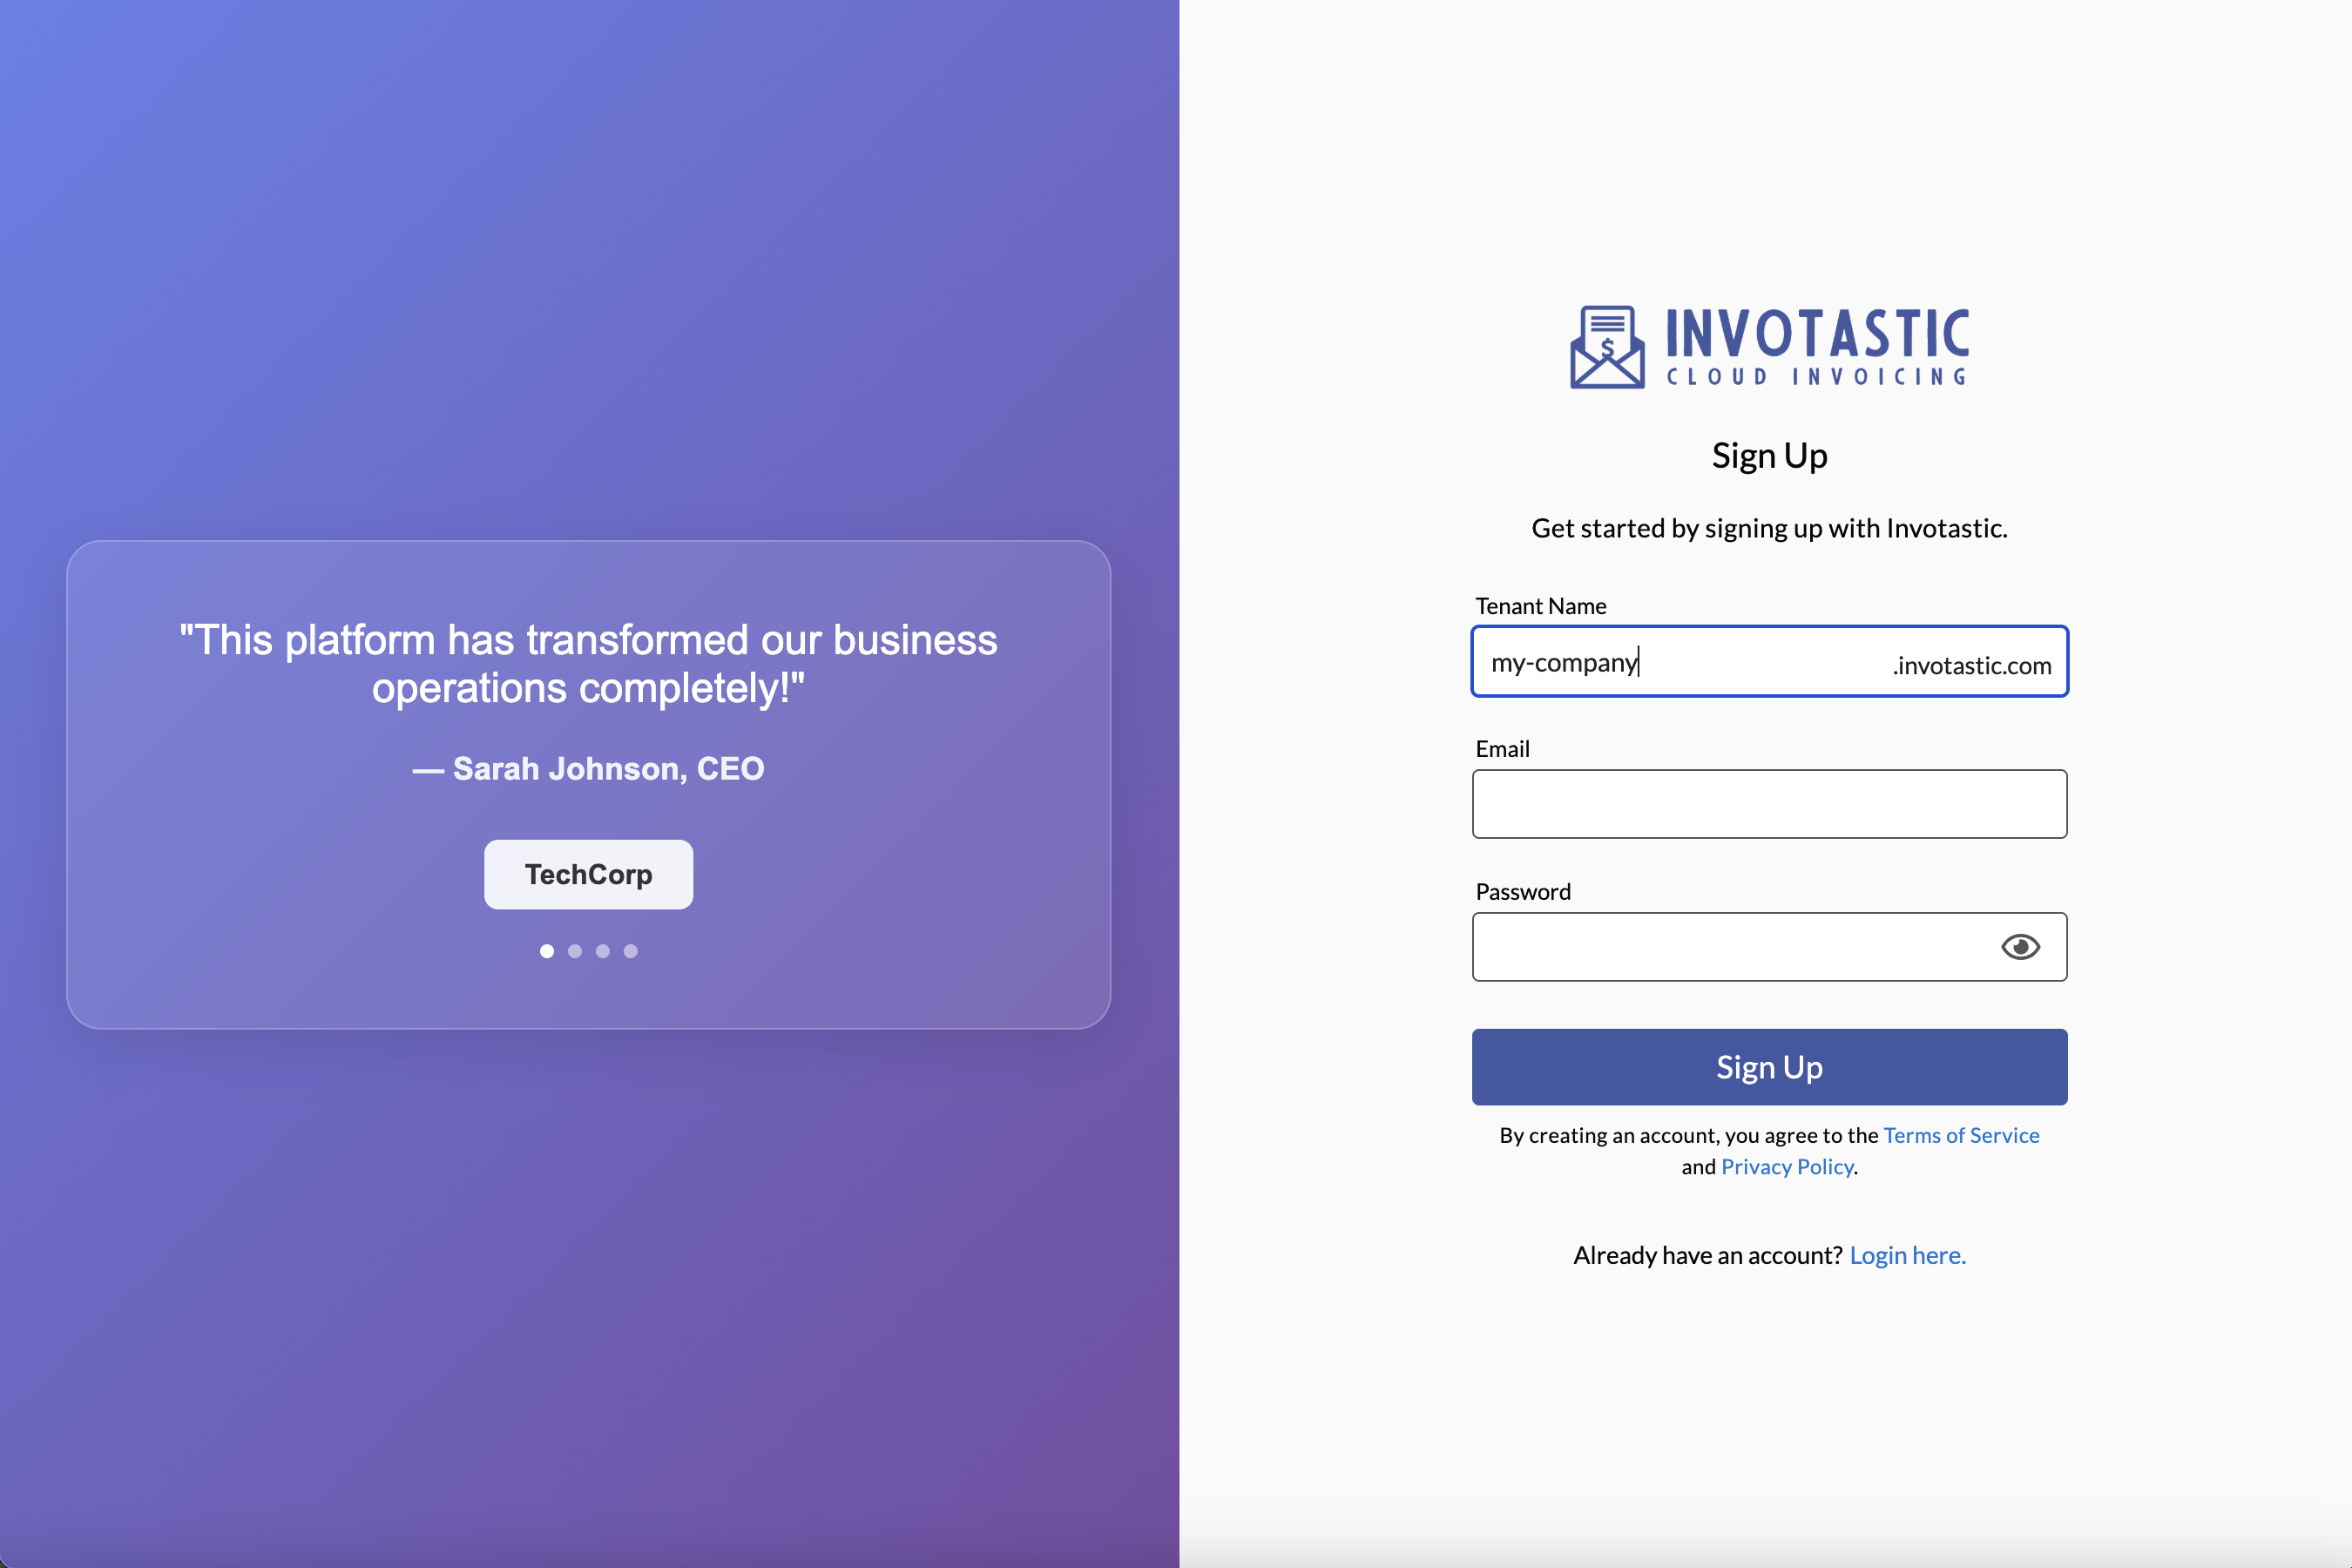
Hosted Page Branding App-level Signup Side Panel Example
Tenant-Level Page Branding Override
If you need to customize the page branding for a specific tenant, you can override the default configurations in the Tenant View of the Wristband Dashboard:
-
Select the tenant you want to customize from the side navigation menu.
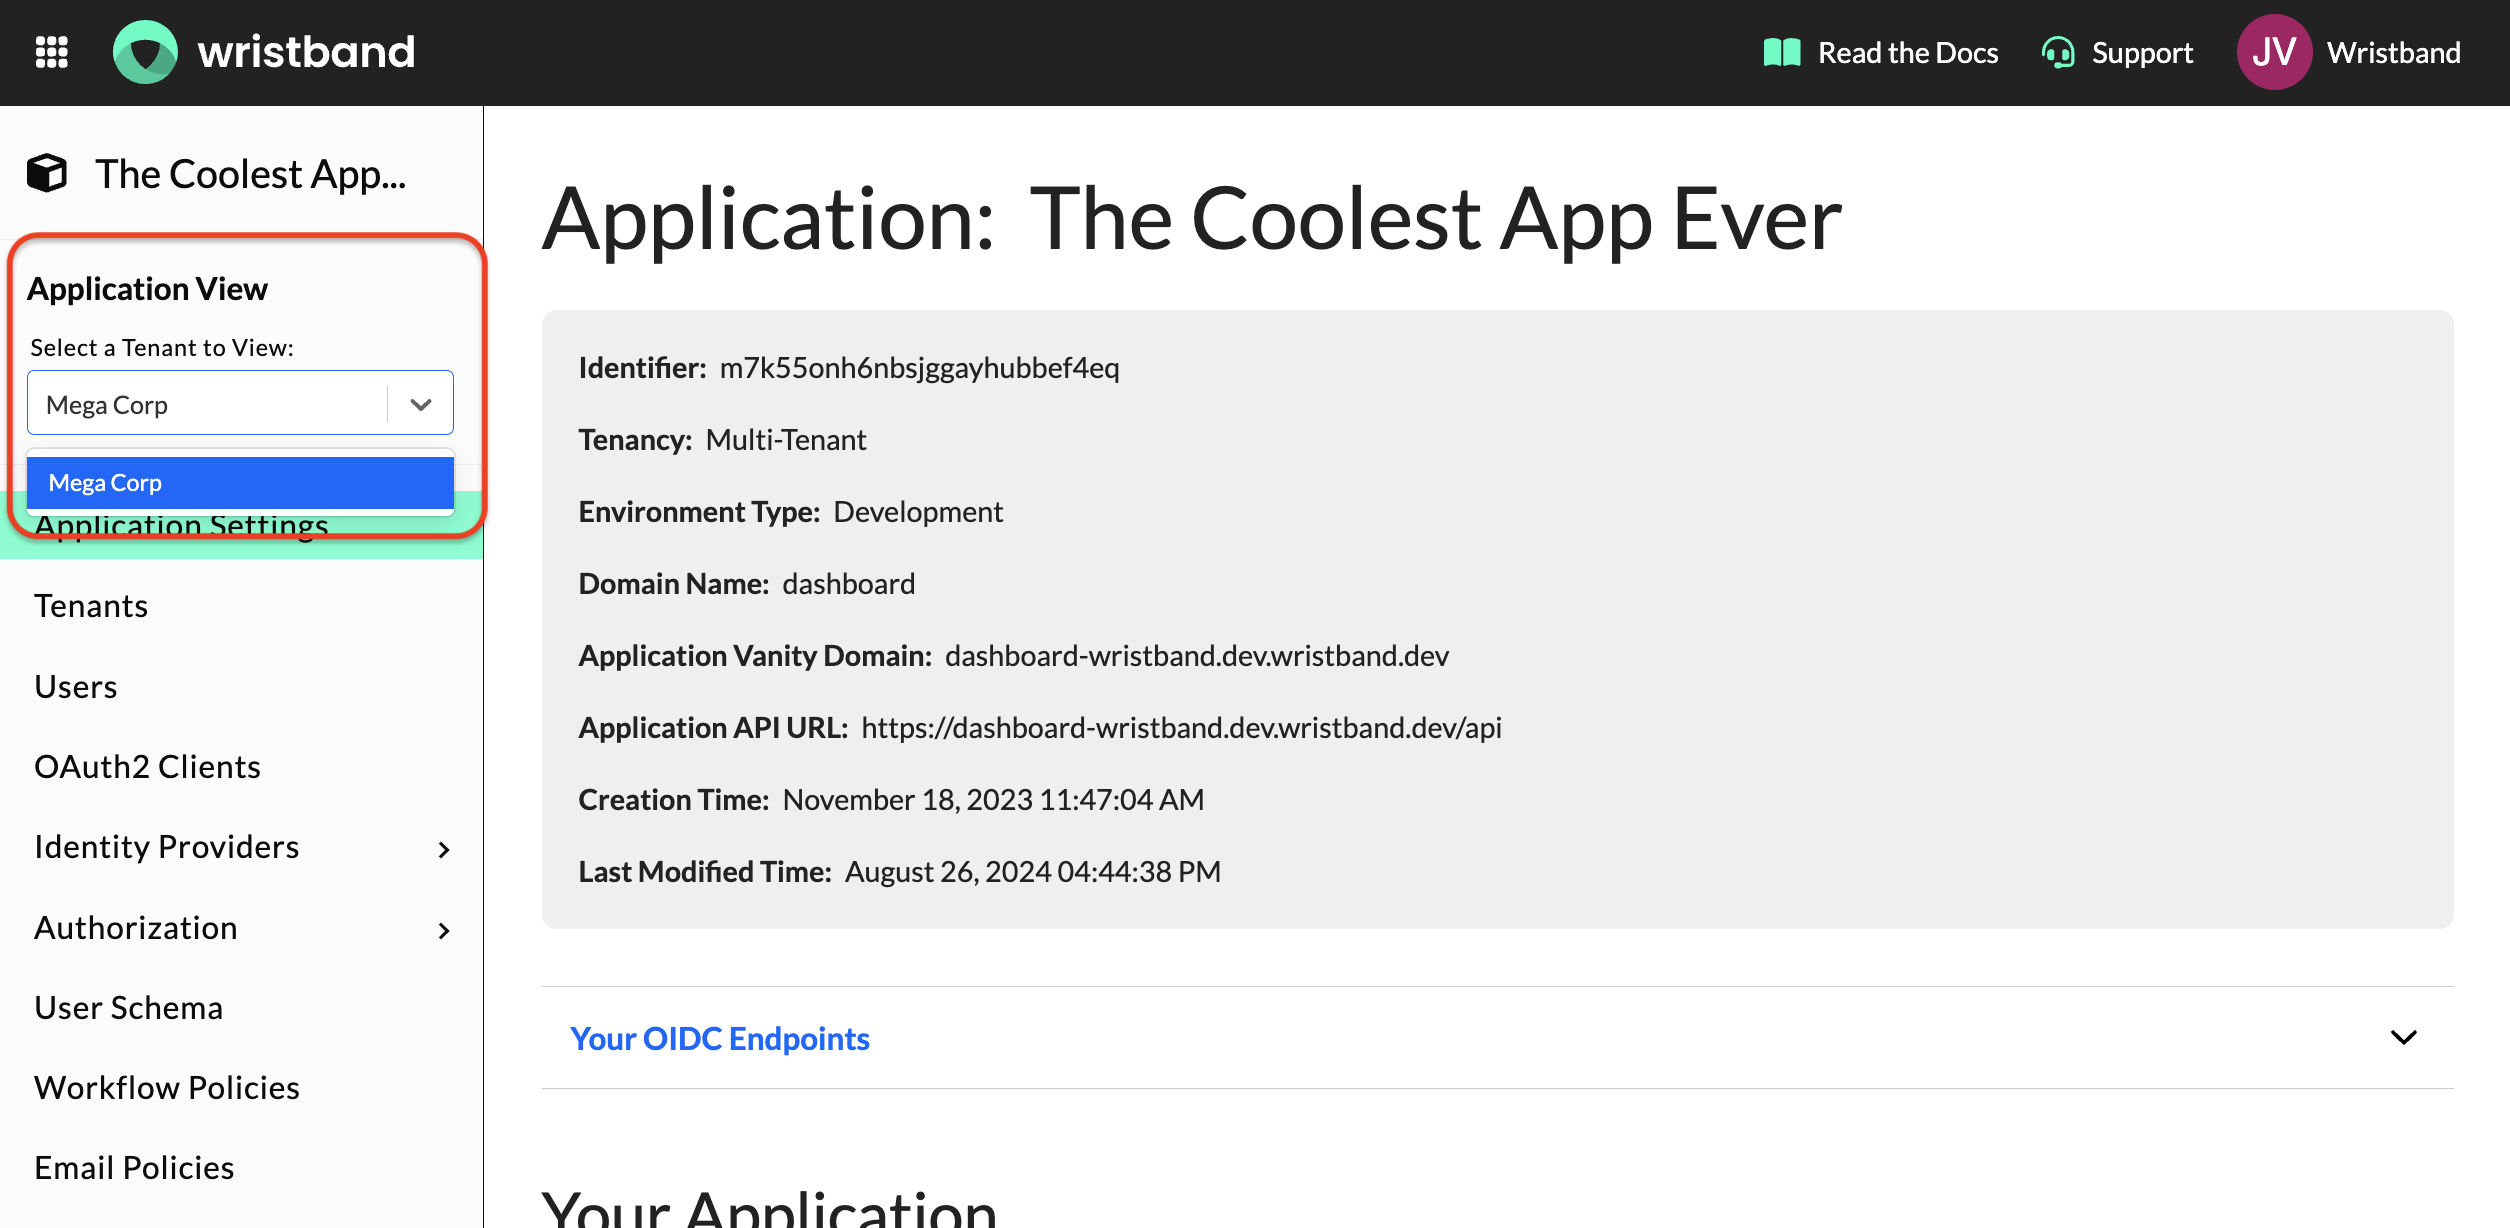
Side Navigation Tenant Select
-
Go to the 'Hosted Pages' submenu under the Branding section.
-
Enable the override by clicking the toggle at the top of the page to apply tenant-specific branding.
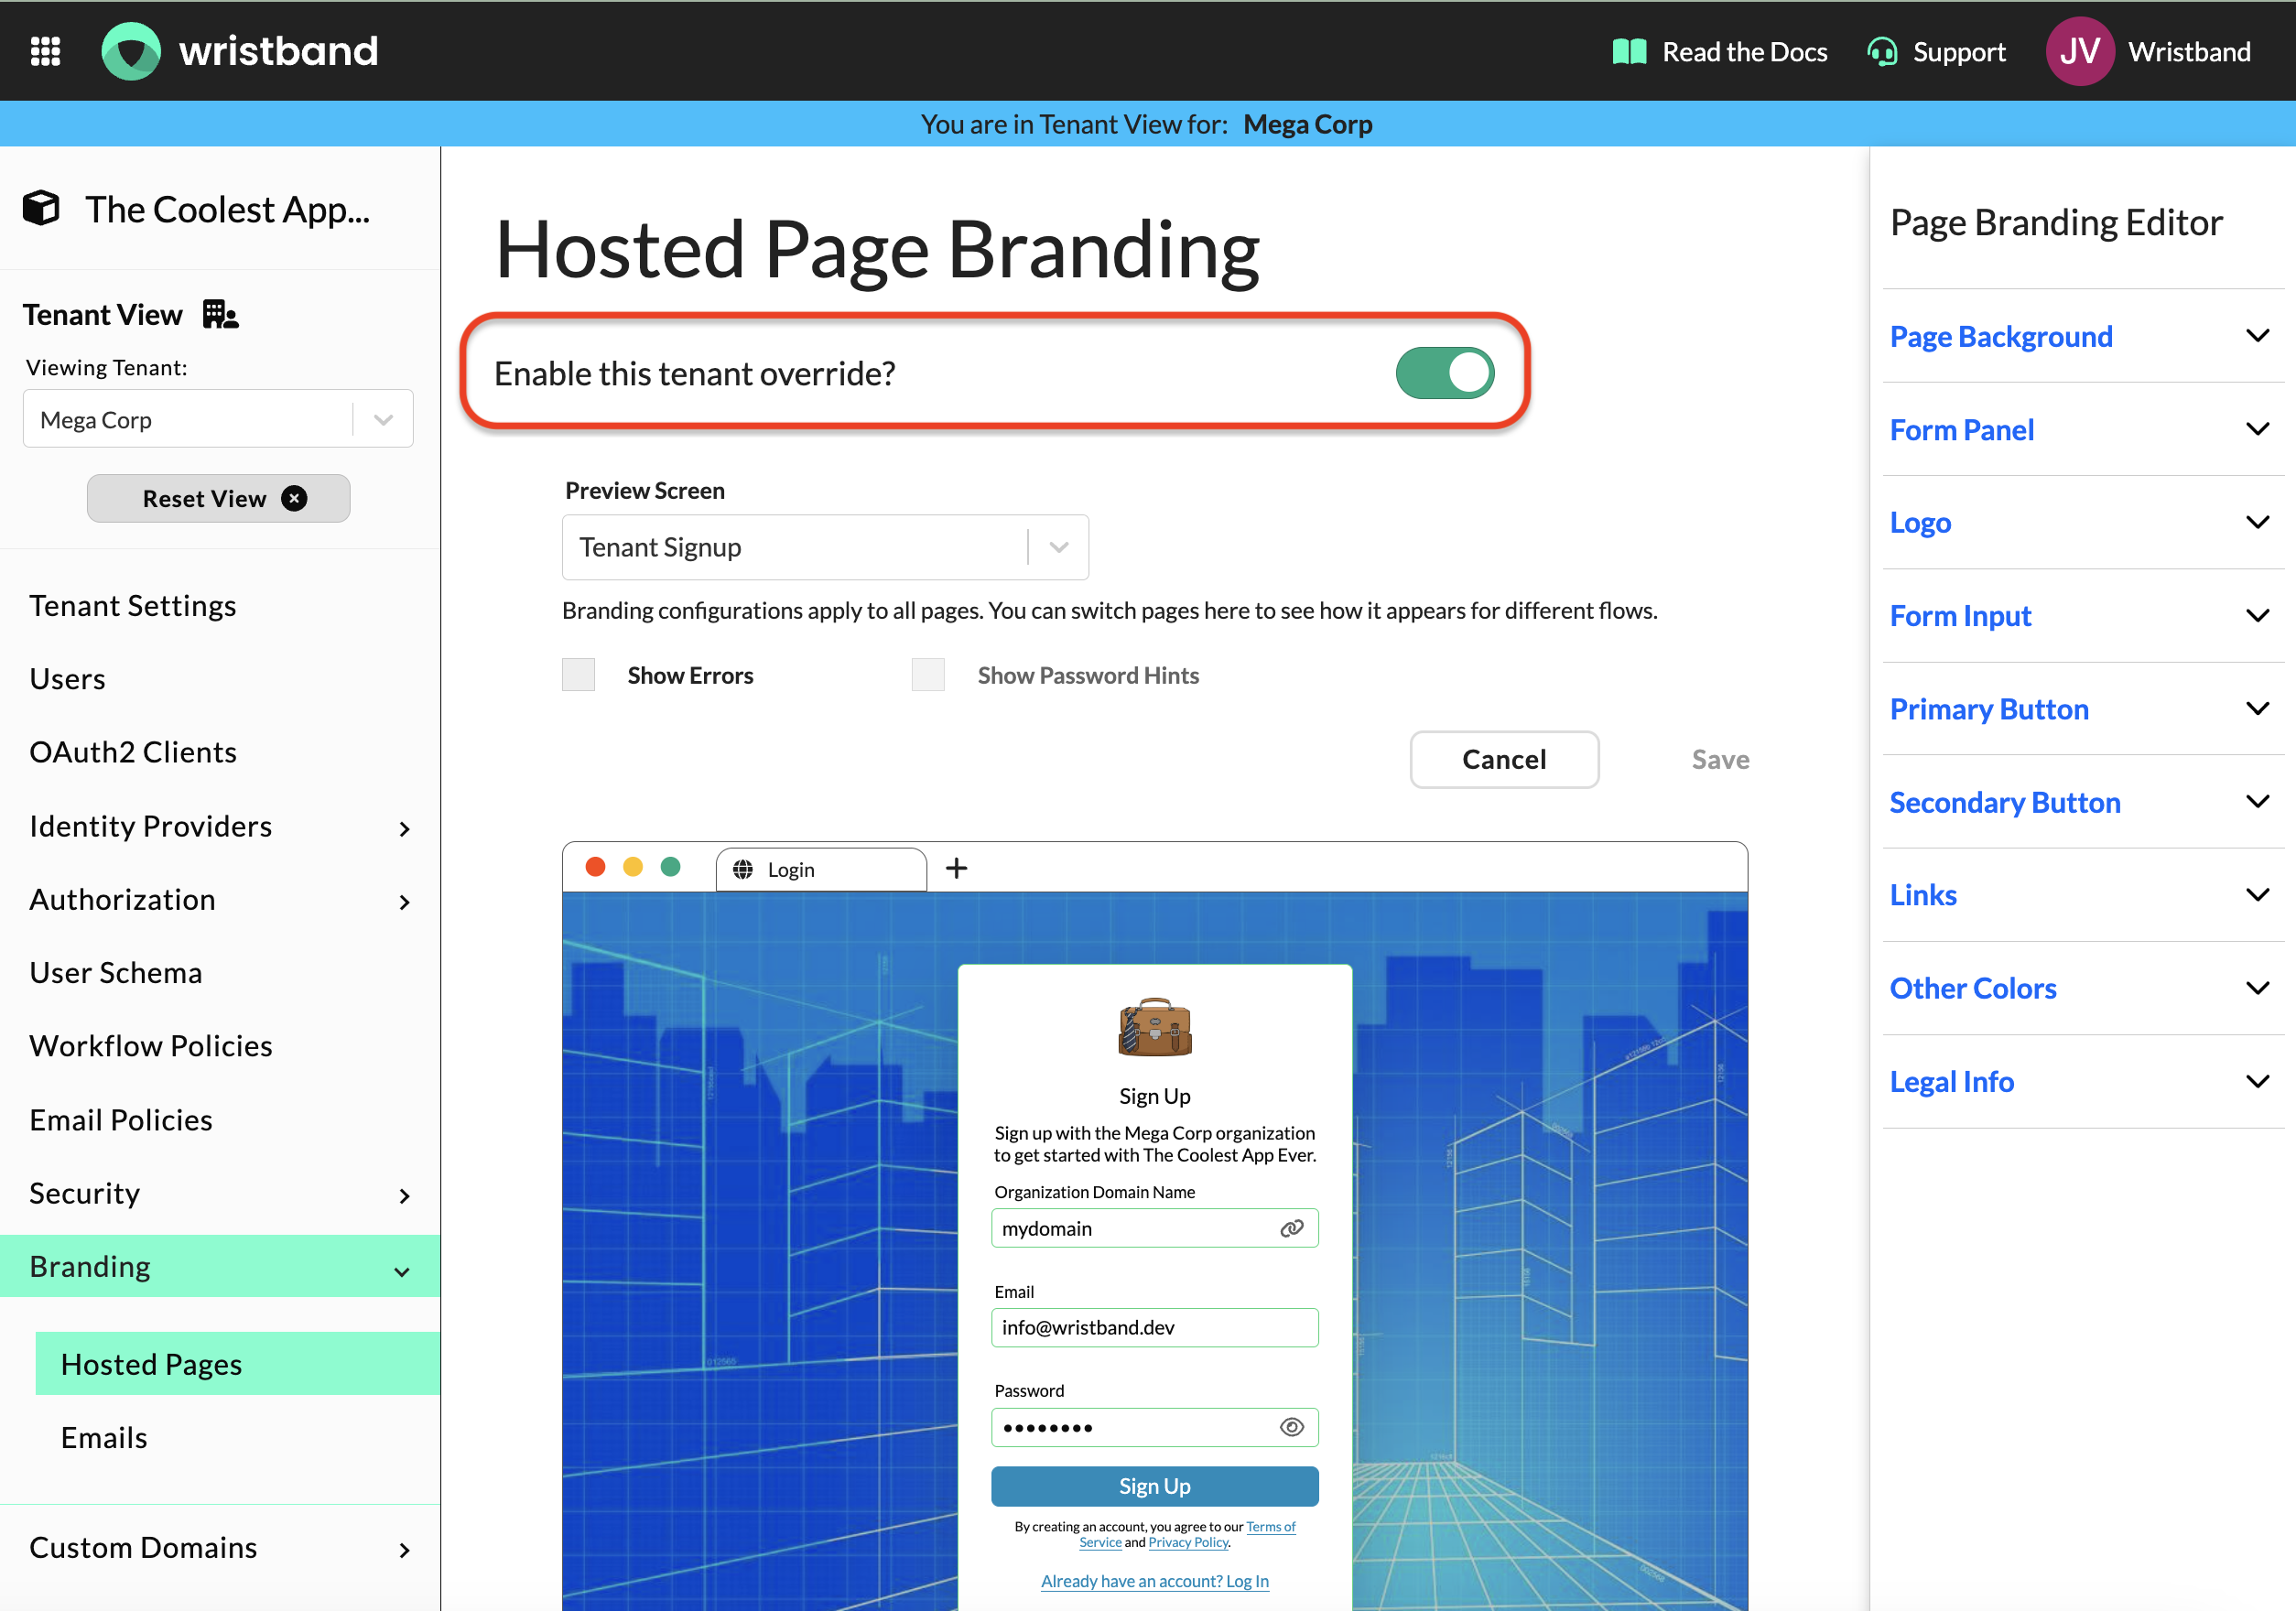
Page Branding Override Toggle
Once the tenant override for page branding is enabled, you can edit and save the tenant's branding configurations. These settings will take precedence over application-level branding for all hosted auth pages, except in the following cases:
- Application-Level Signup
- Tenant Discovery
Custom Application and Tenant Domains
Custom domains are another critical aspect of branding your application. To learn more about domain structures in Wristband, refer to the Domains and URLs page.
Custom Application Domain
If you need to configure an application-level custom domain, you can do so in the Application View of the Wristband Dashboard:
-
Navigate to the 'Application Domains' submenu under the Custom Domains section.
-
Create the custom domain you wish to use for your application.
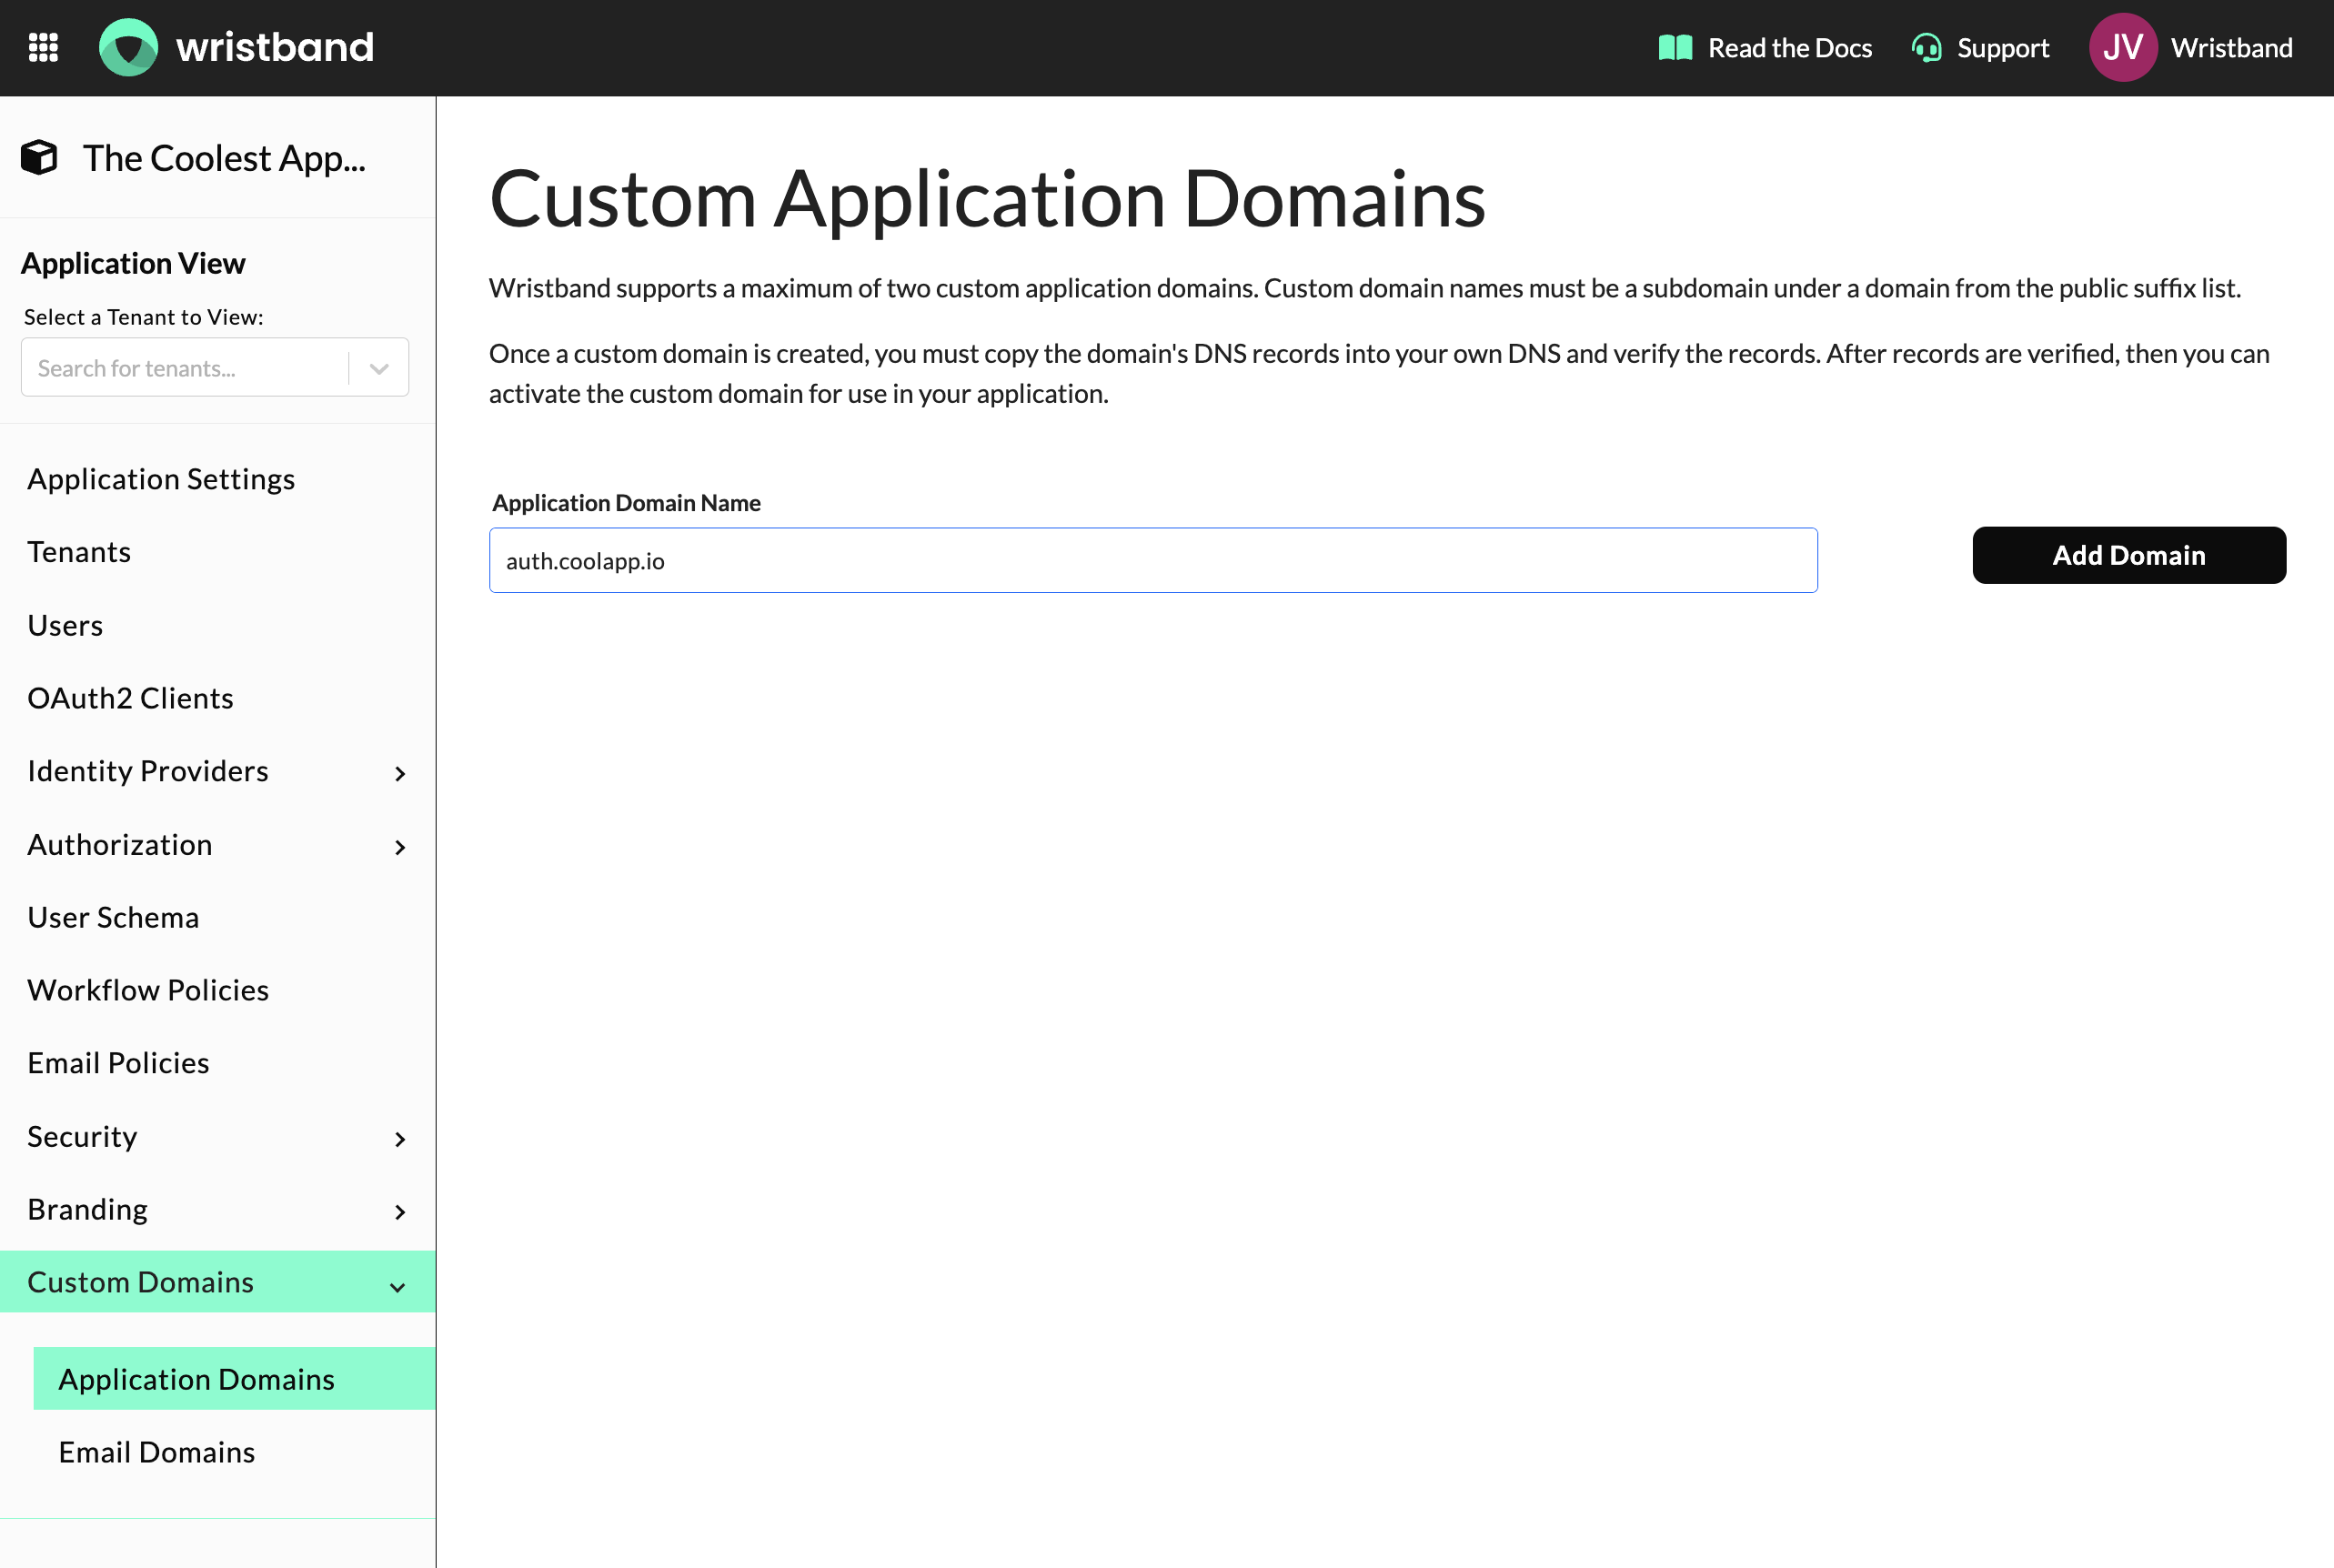
Add Custom Application Domain
-
After adding your custom domain, configure the DNS records with your domain registrar. The dashboard will display the necessary records for you to copy.
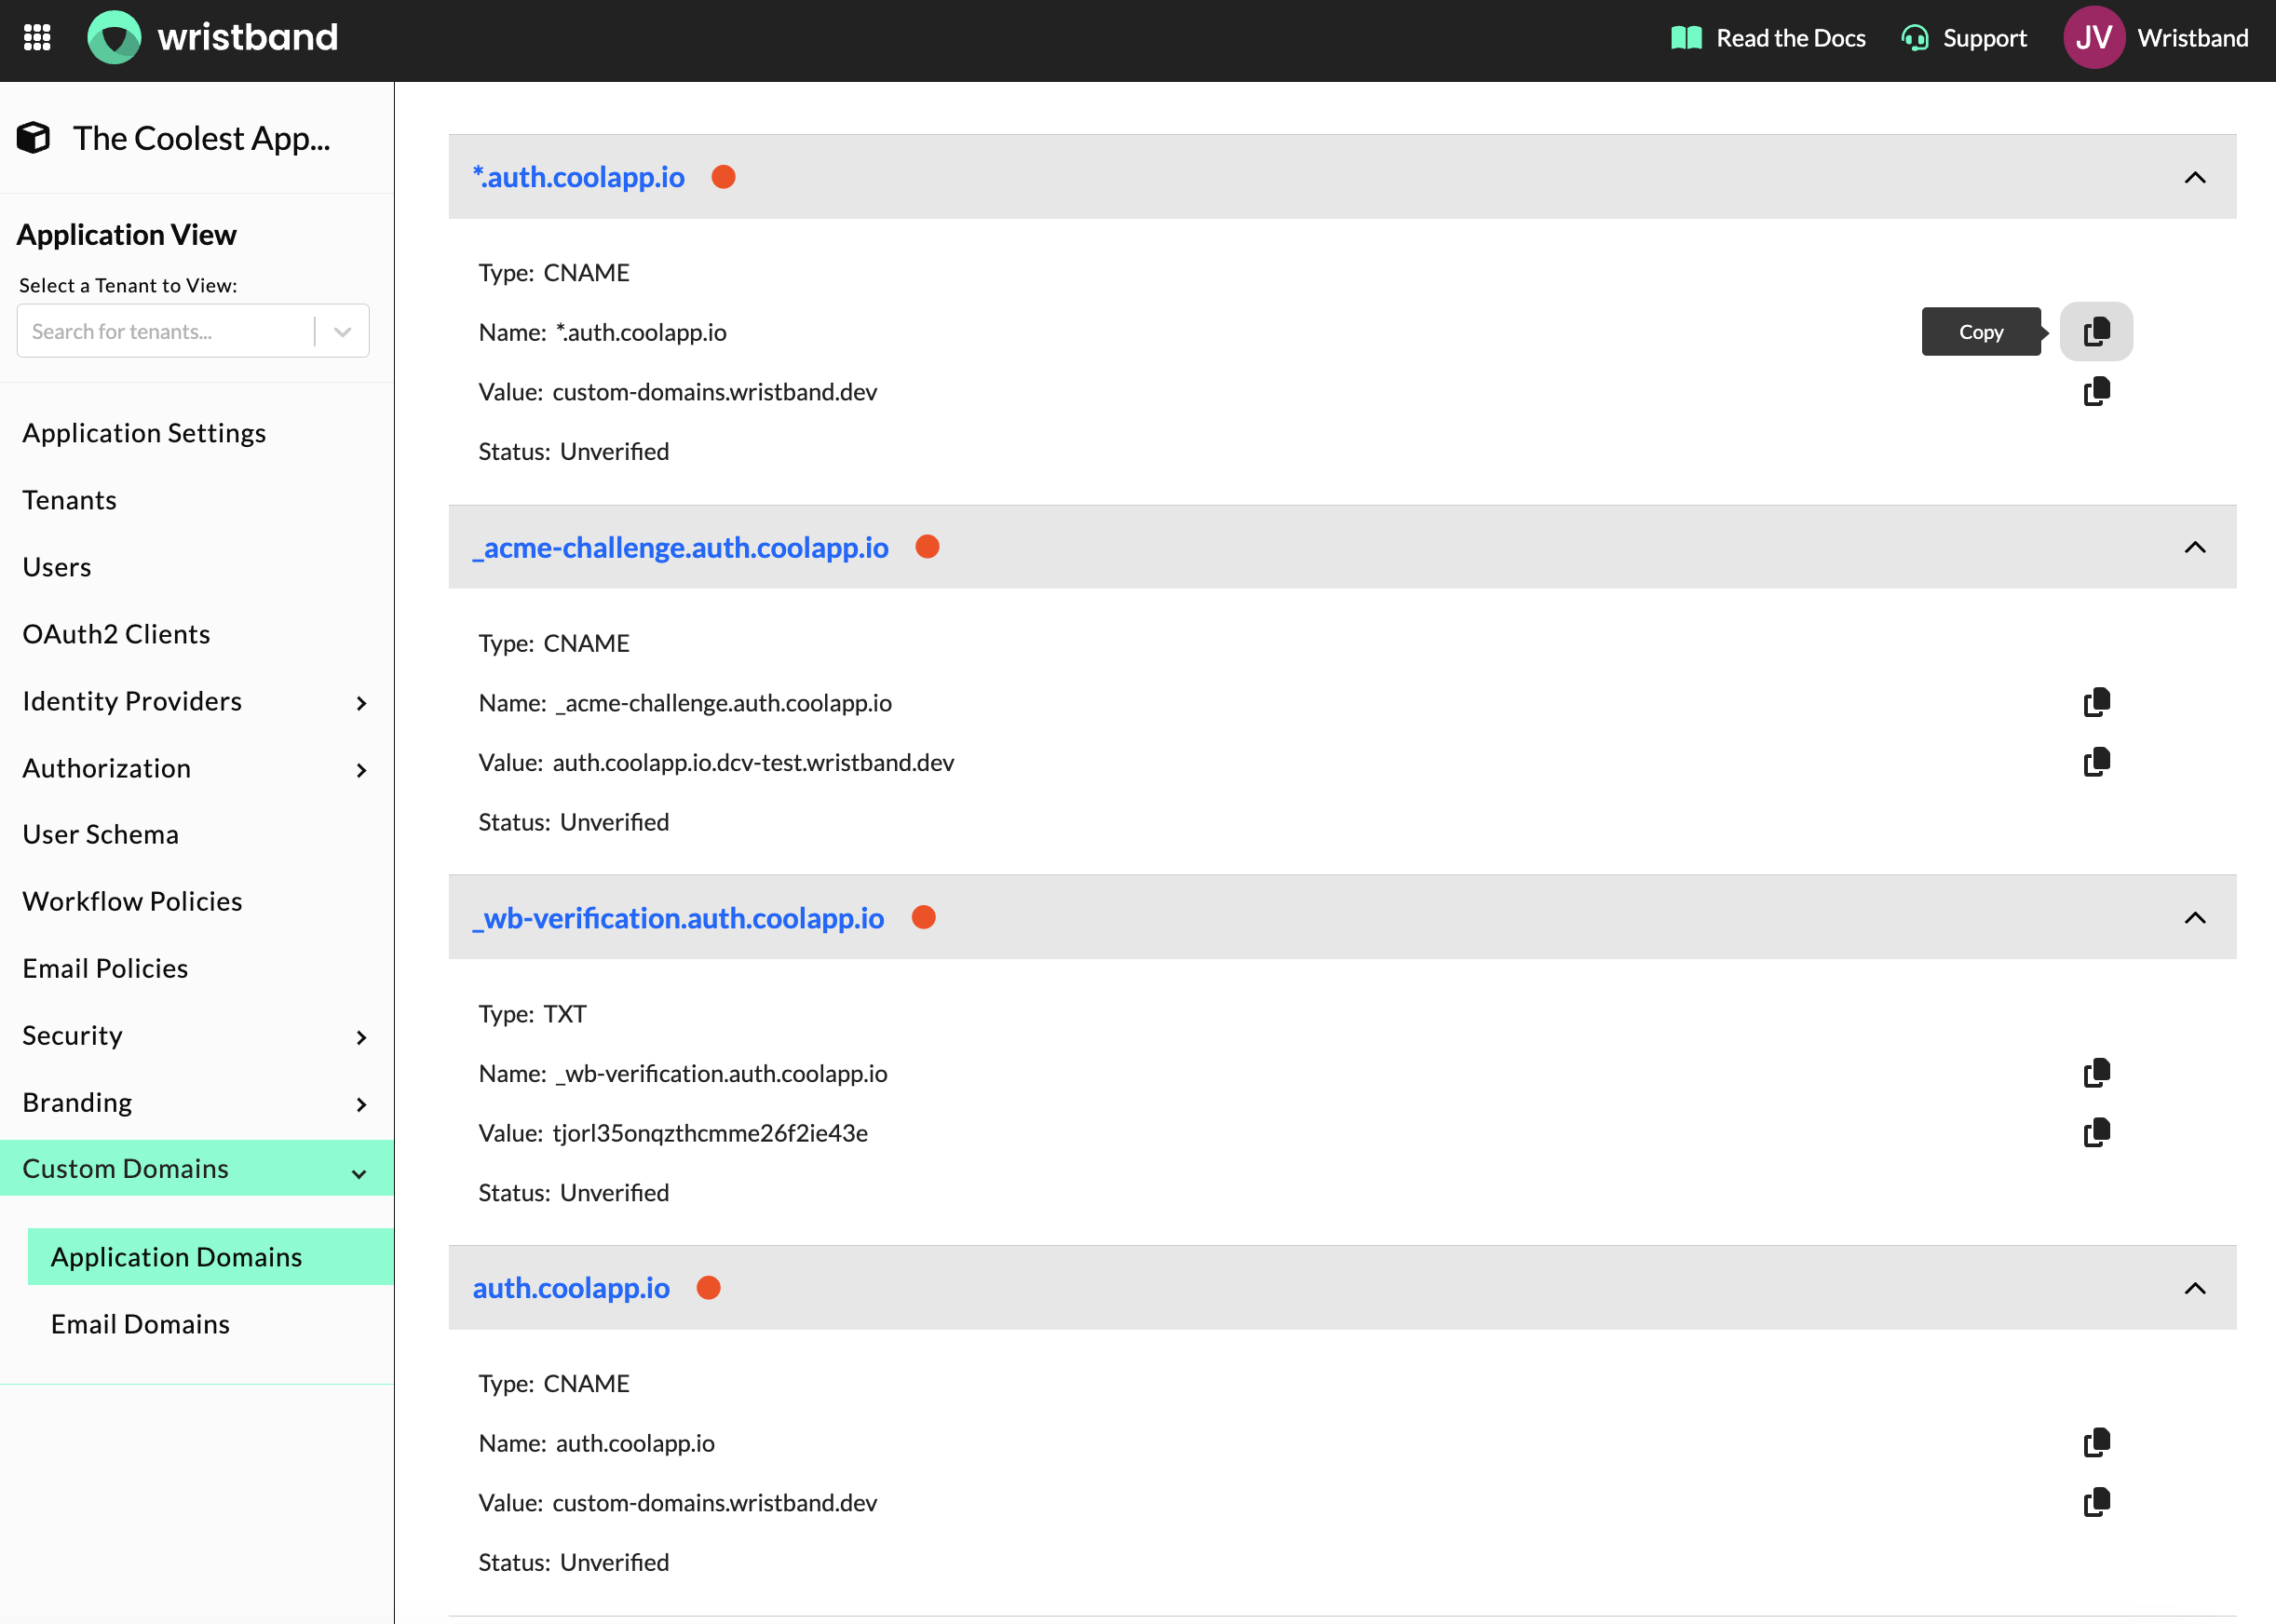
Copy DNS Records
-
Once the DNS records are set, trigger the domain verification by clicking the verification button in the dashboard. This can be done multiple times if needed, and the status will update in the UI once the domain is verified and ready for use.
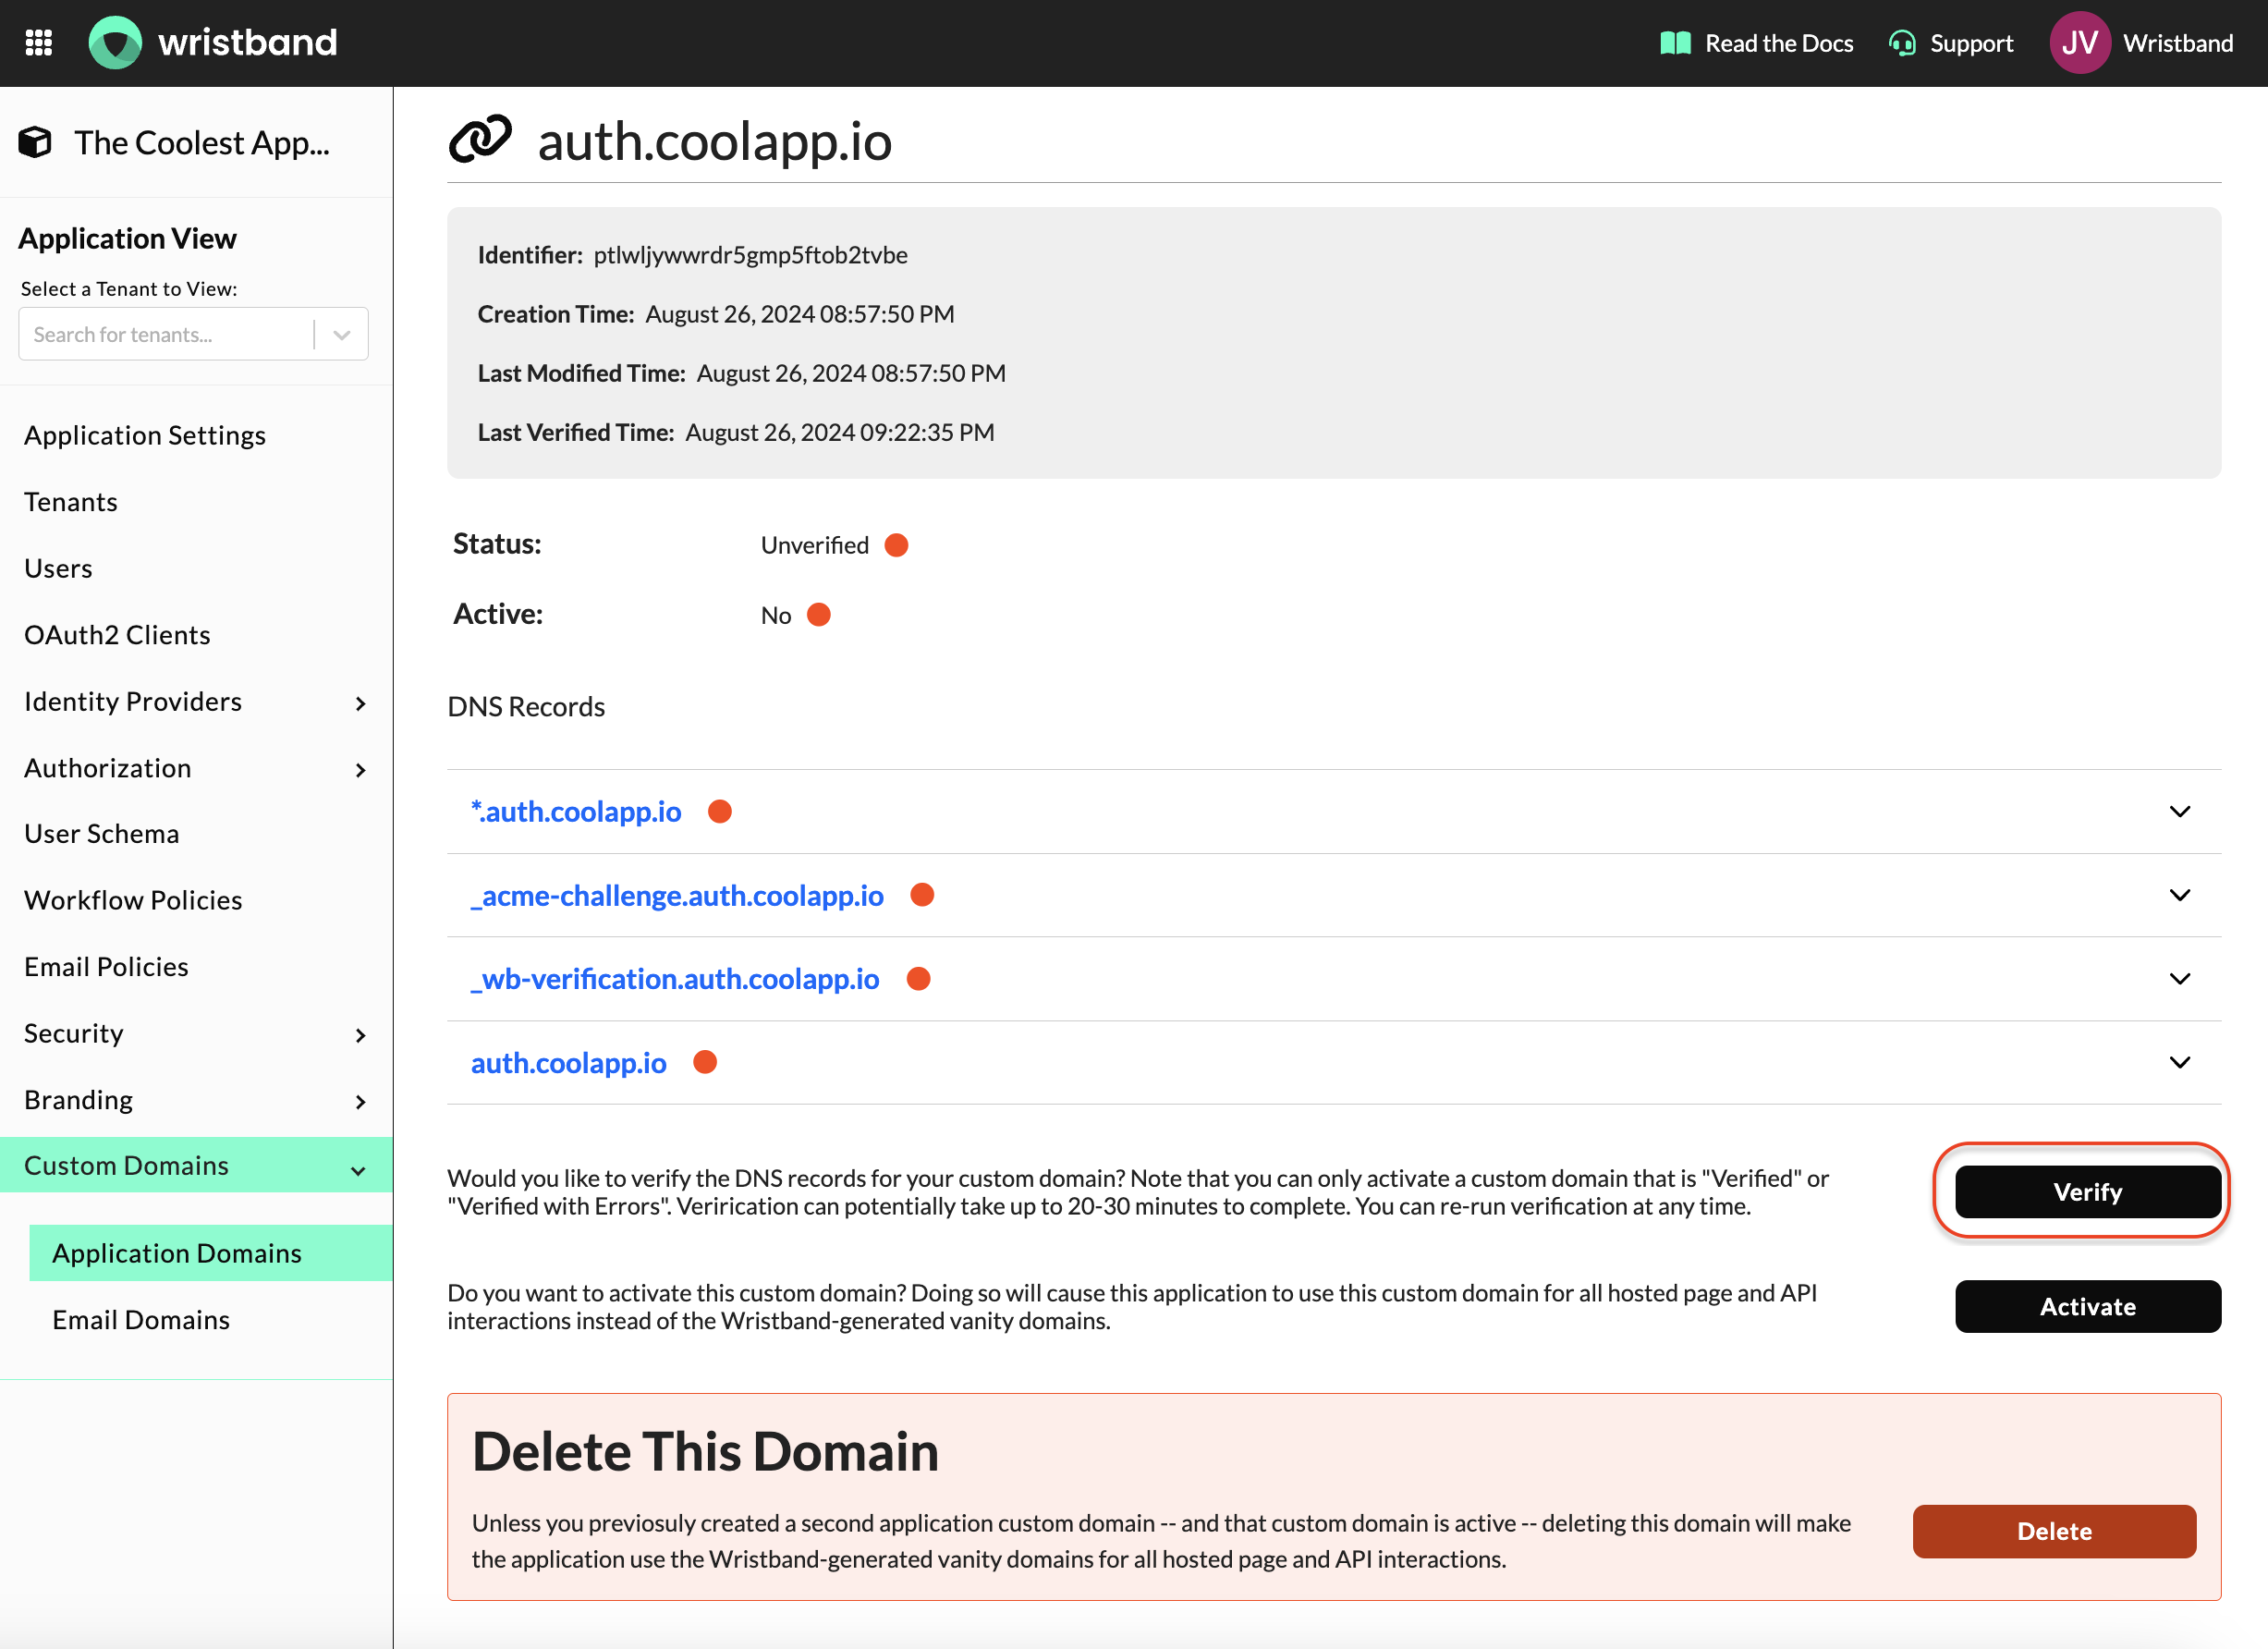
Verify Custom Domain
-
After verification, activate the domain to enable it for your application. You can activate or deactivate the domain at any time.
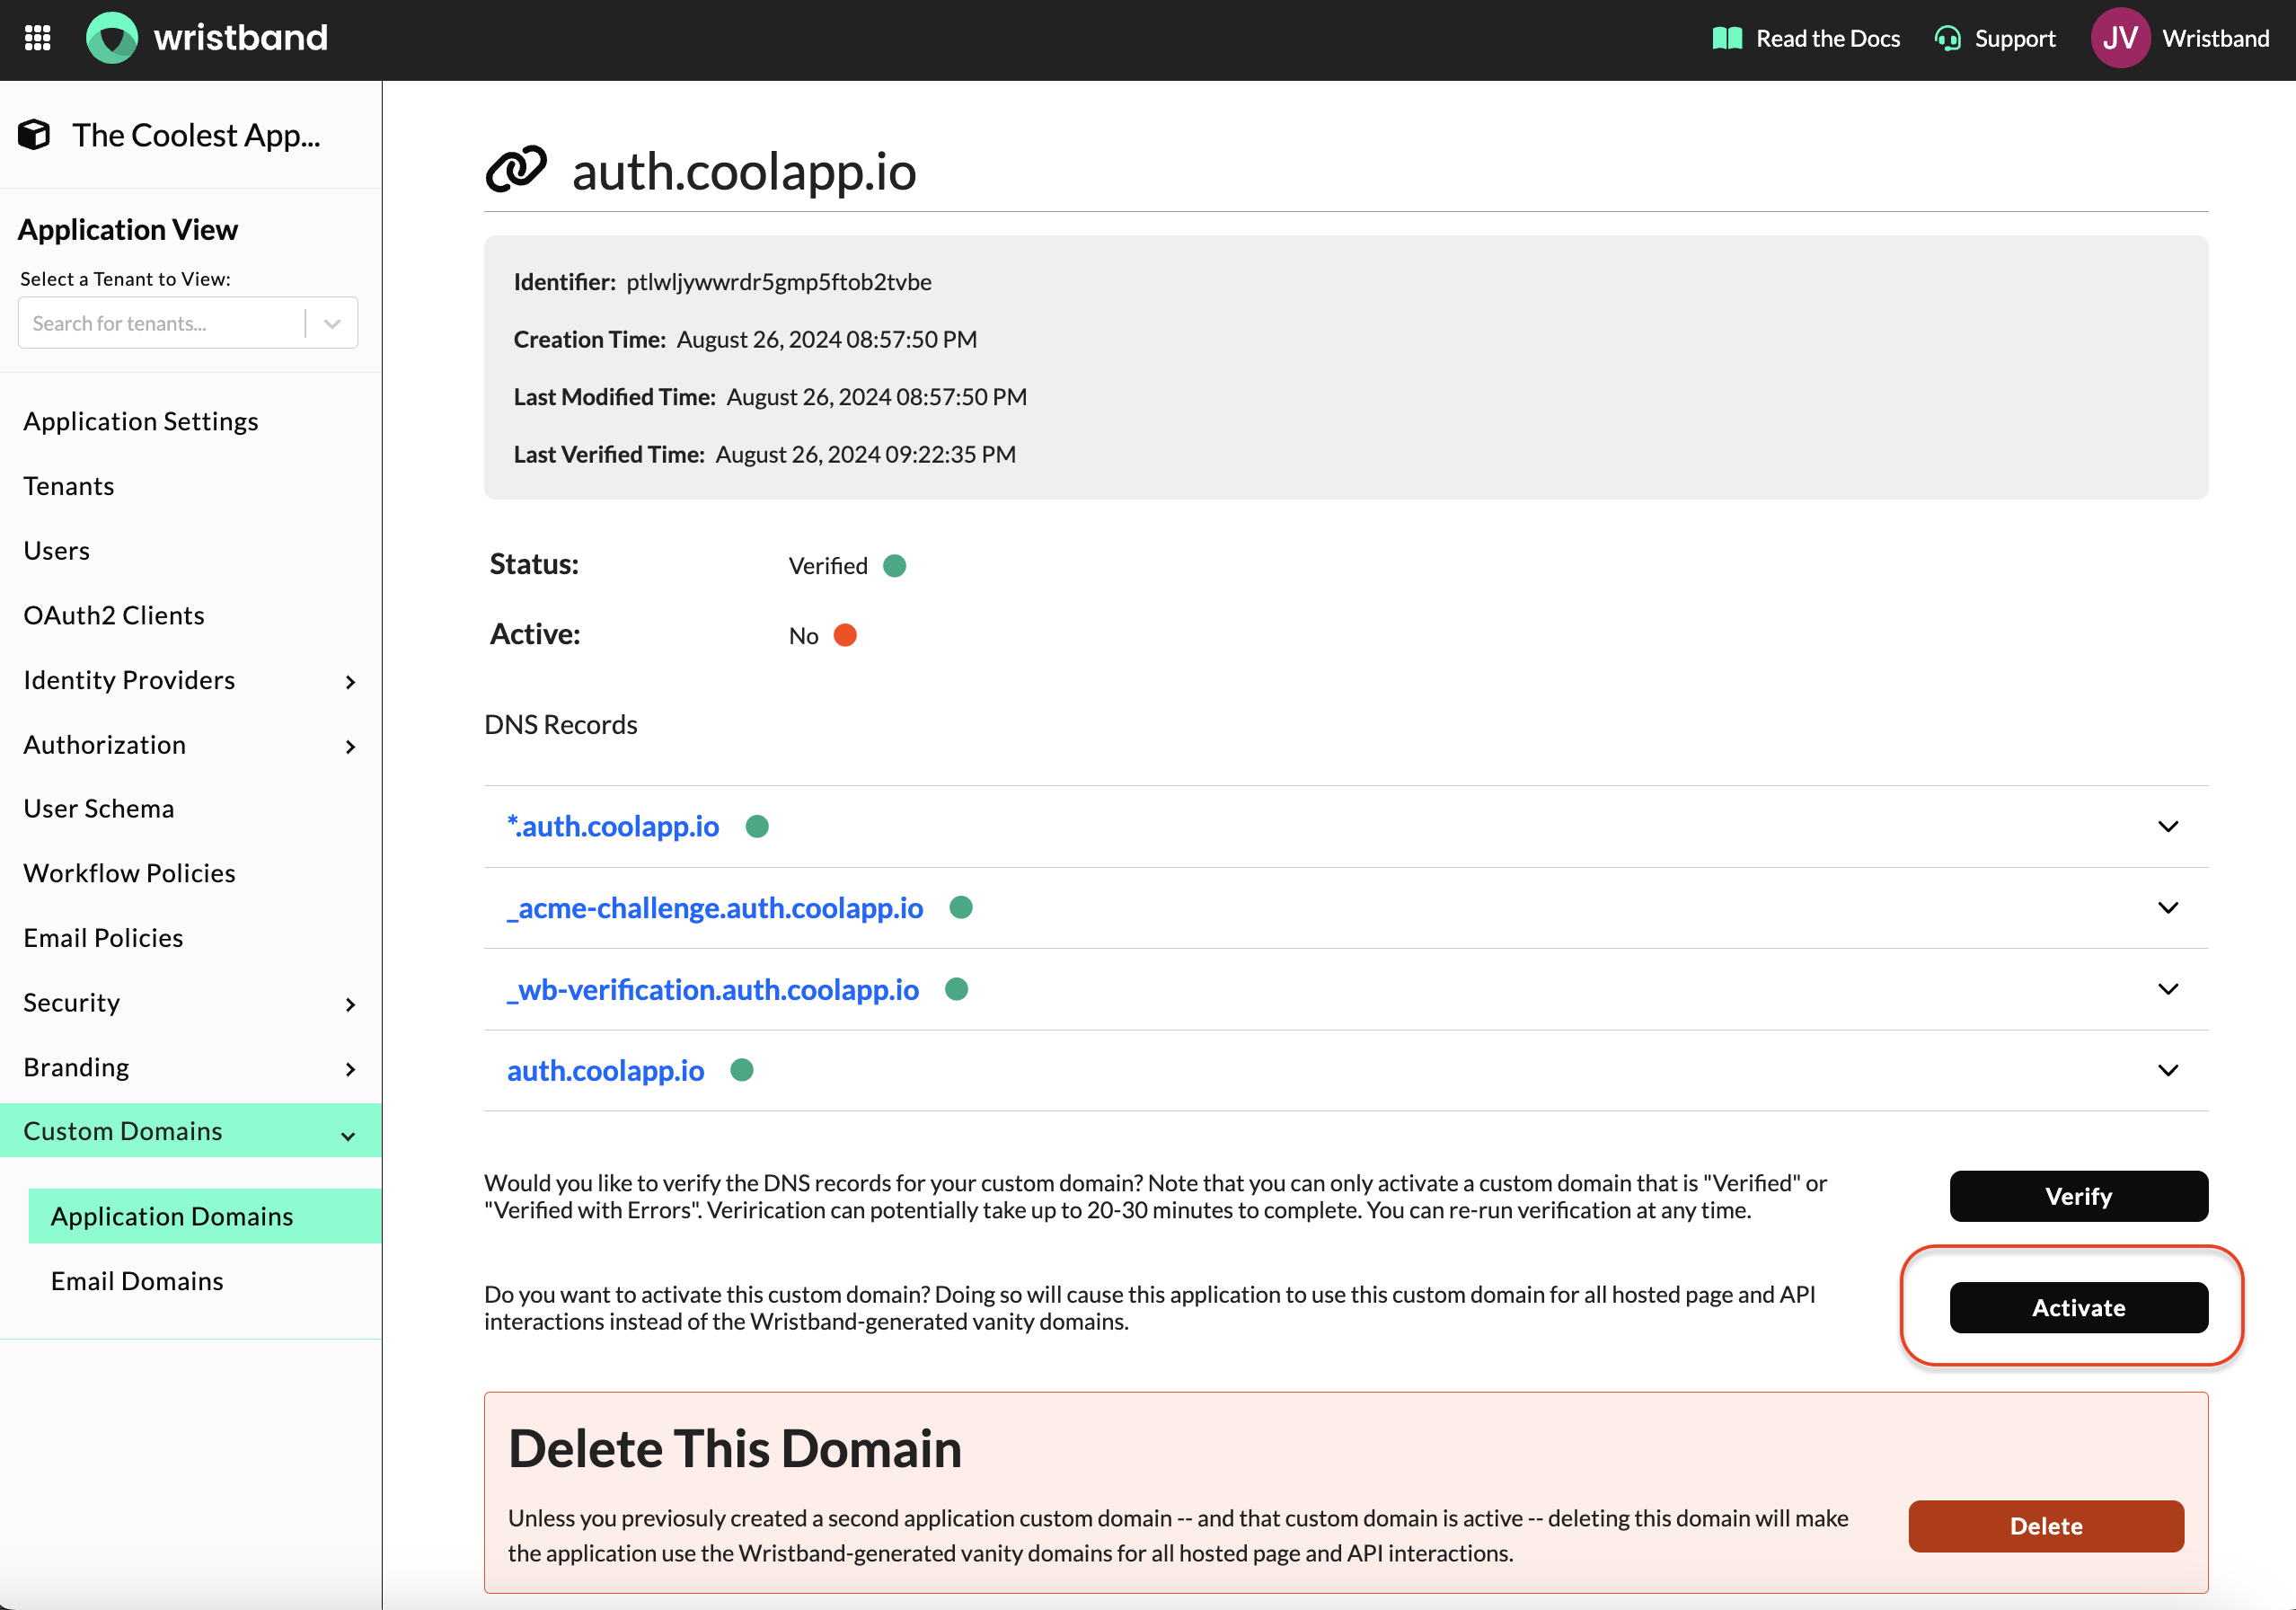
Activate Custom Domain
Custom Tenant Domain
If you prefer to use a fully custom domain for a specific tenant instead of relying on tenant subdomains, you can configure this in the Tenant View of the Wristband Dashboard. The steps to create, verify, and activate a tenant custom domain are the same as for an application-level domain. When a tenant custom domain is active, it will take precedence and be used for hosted auth pages instead of the custom application domain.
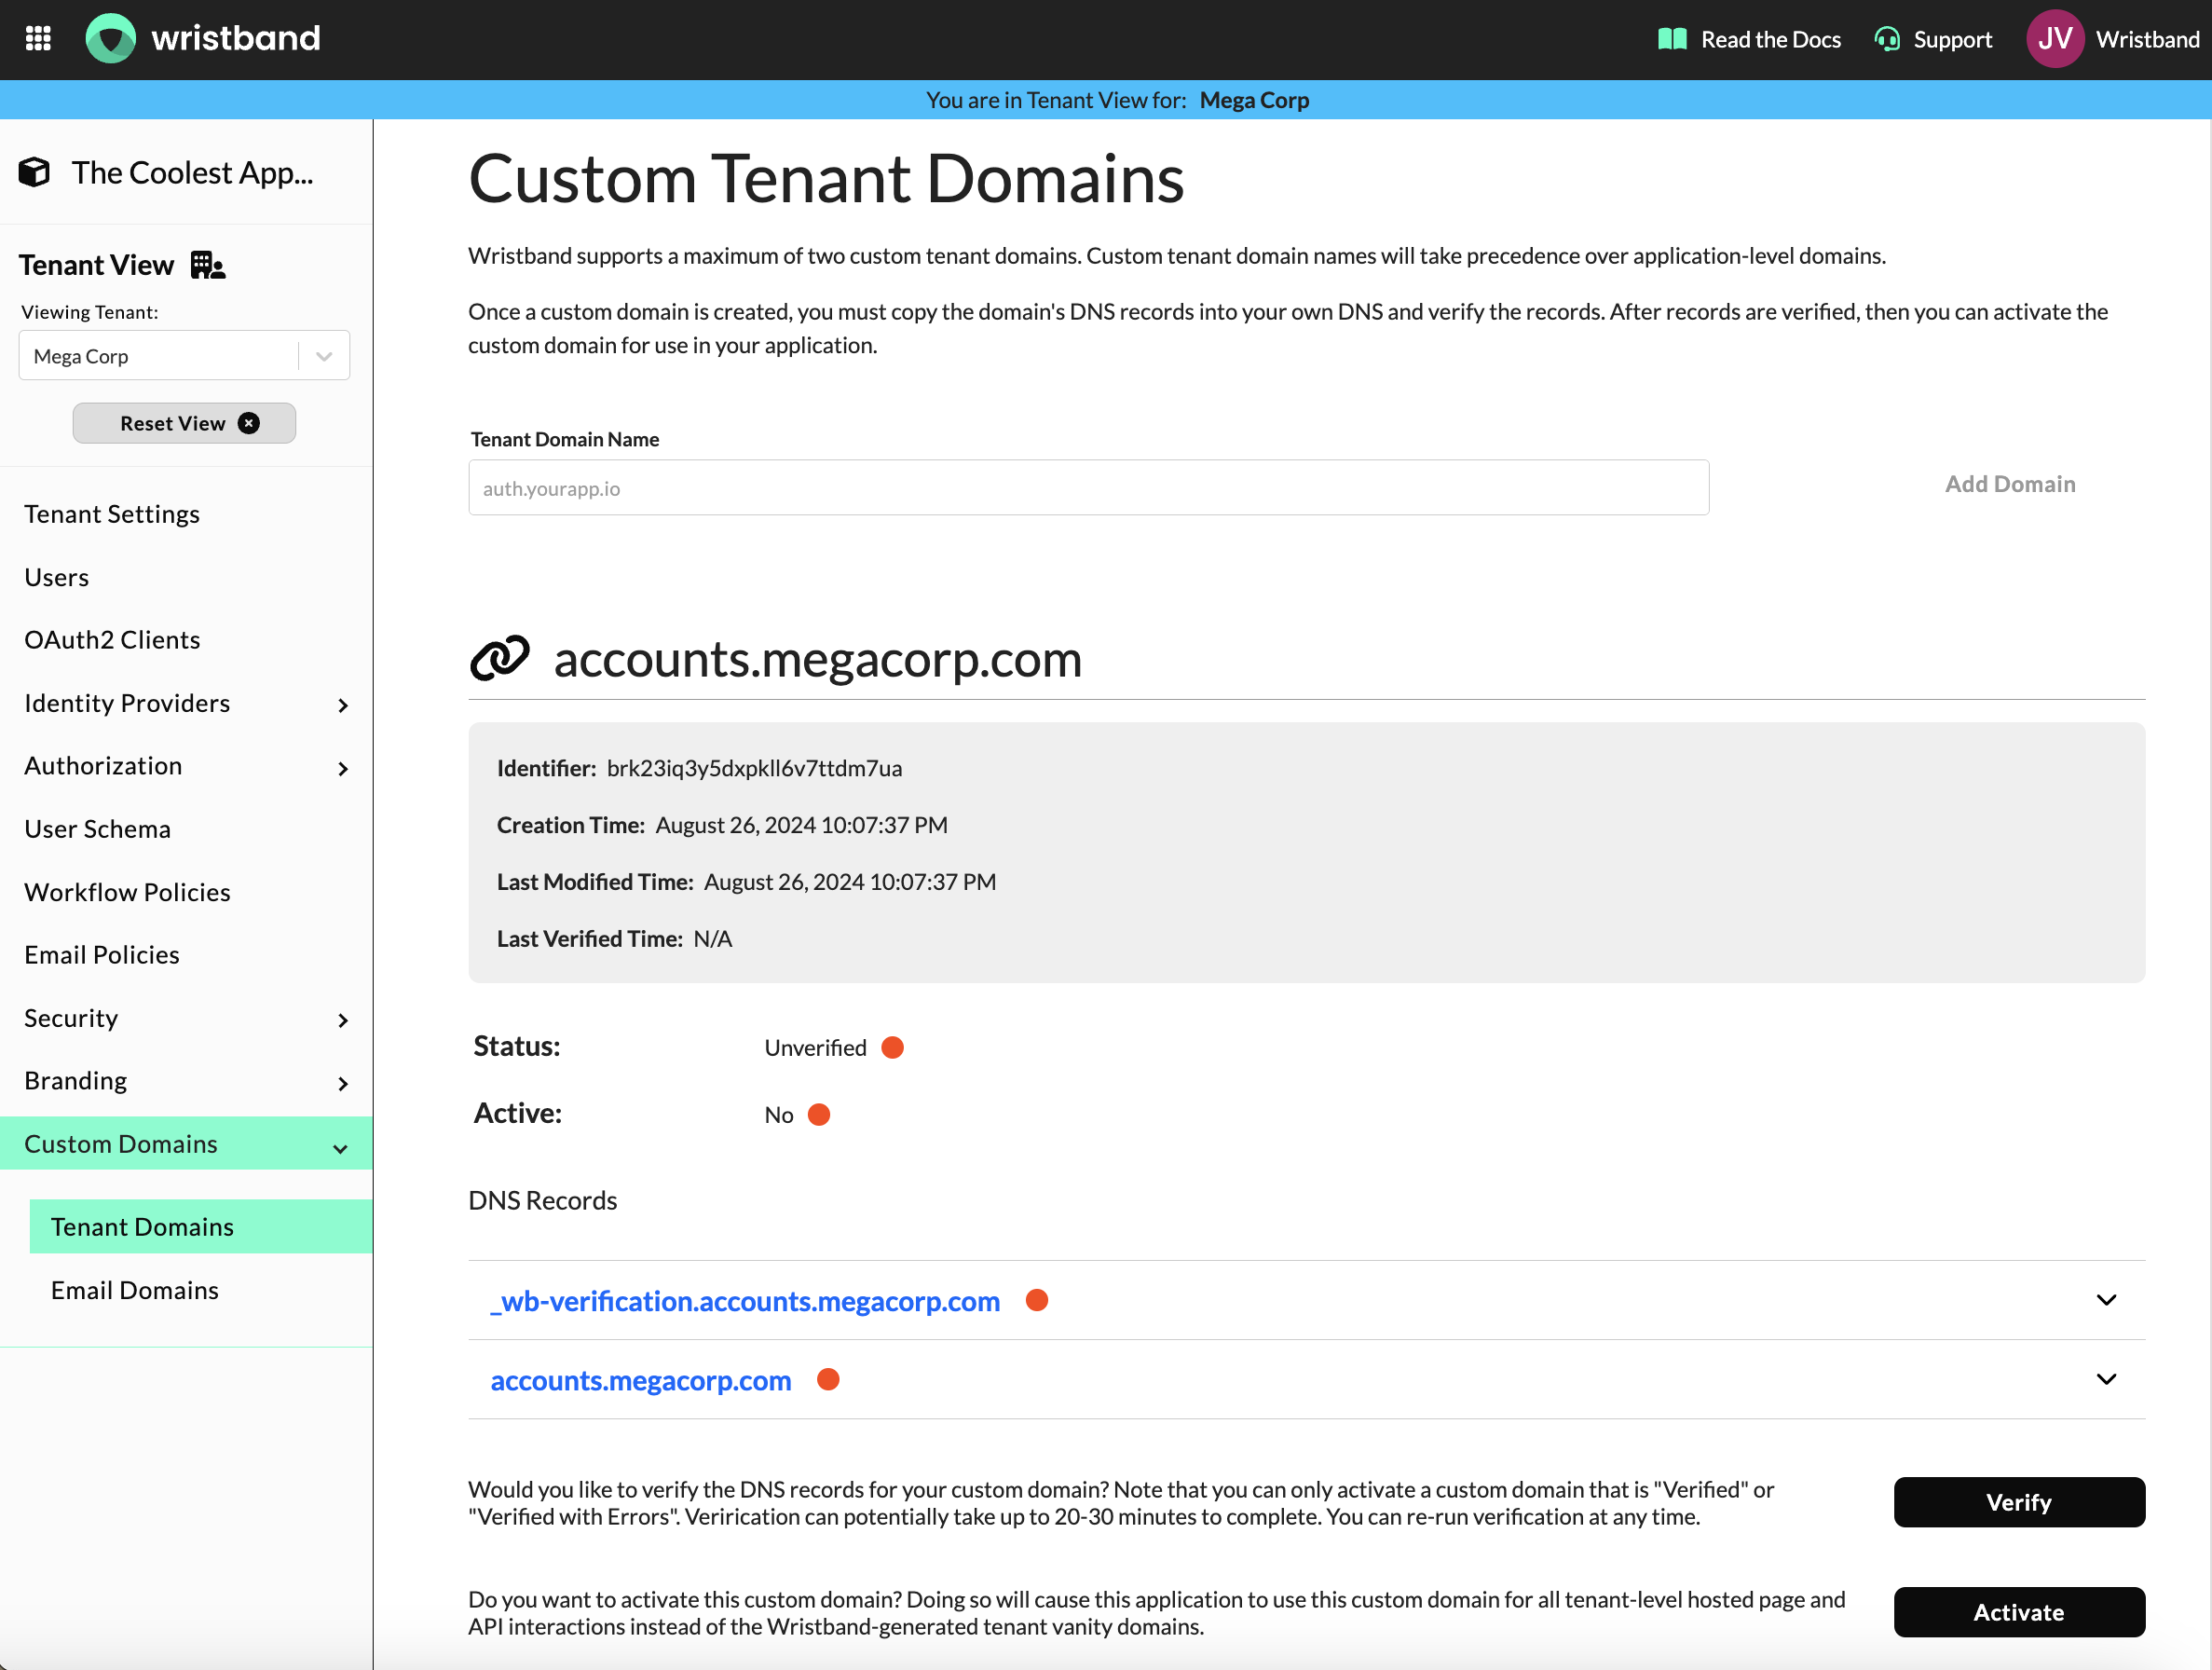
Tenant Custom Domains
Customizing Emails
All transactional emails sent to your customers by Wristband default to the application-level email branding configurations. These email branding configurations can be modified through the Wristband Dashboard.
Email Branding Customization Options
In the Wristband Dashboard, a preview pane lets you visualize your branding changes in real time as you edit.
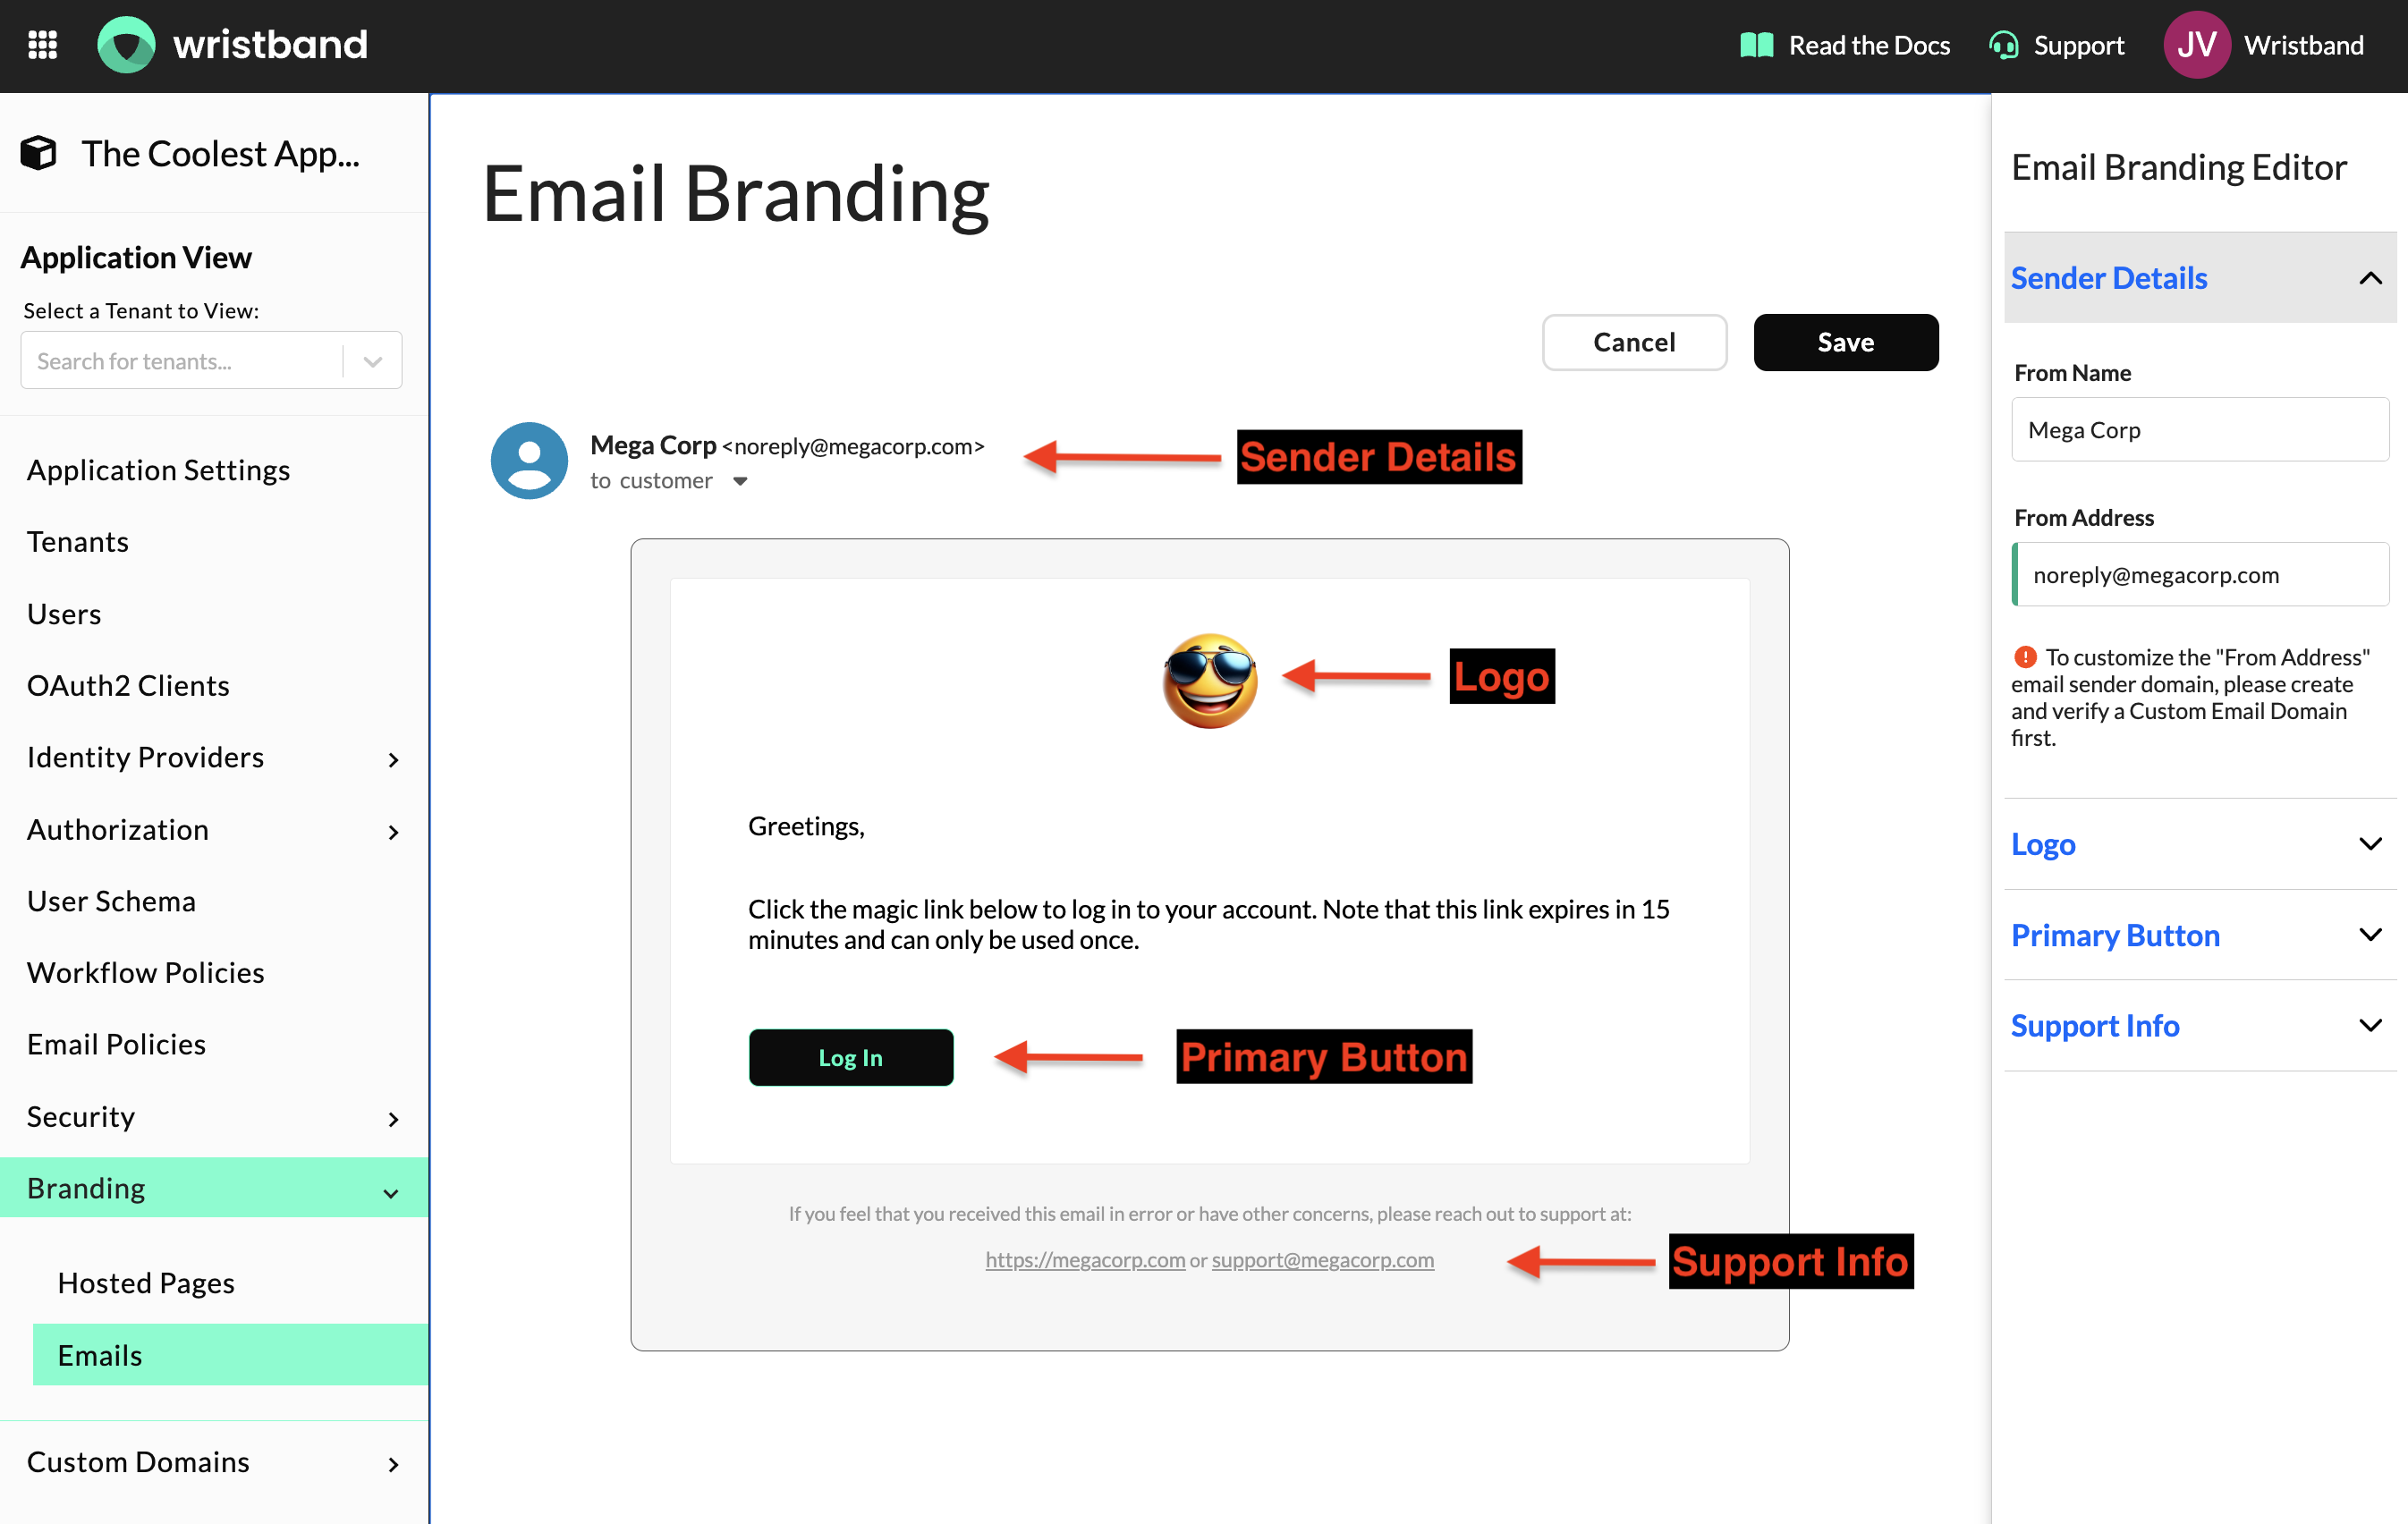
Email Branding Configurations
Tenant-Level Email Branding Override
If you need to customize the email branding for a specific tenant, you can override the default configurations in the Tenant View of the Wristband Dashboard:
- Select the tenant you want to customize from the side navigation menu.
- Go to the 'Emails' submenu under the Branding section.
- Enable the override by clicking the toggle at the top of the page to apply tenant-specific branding.
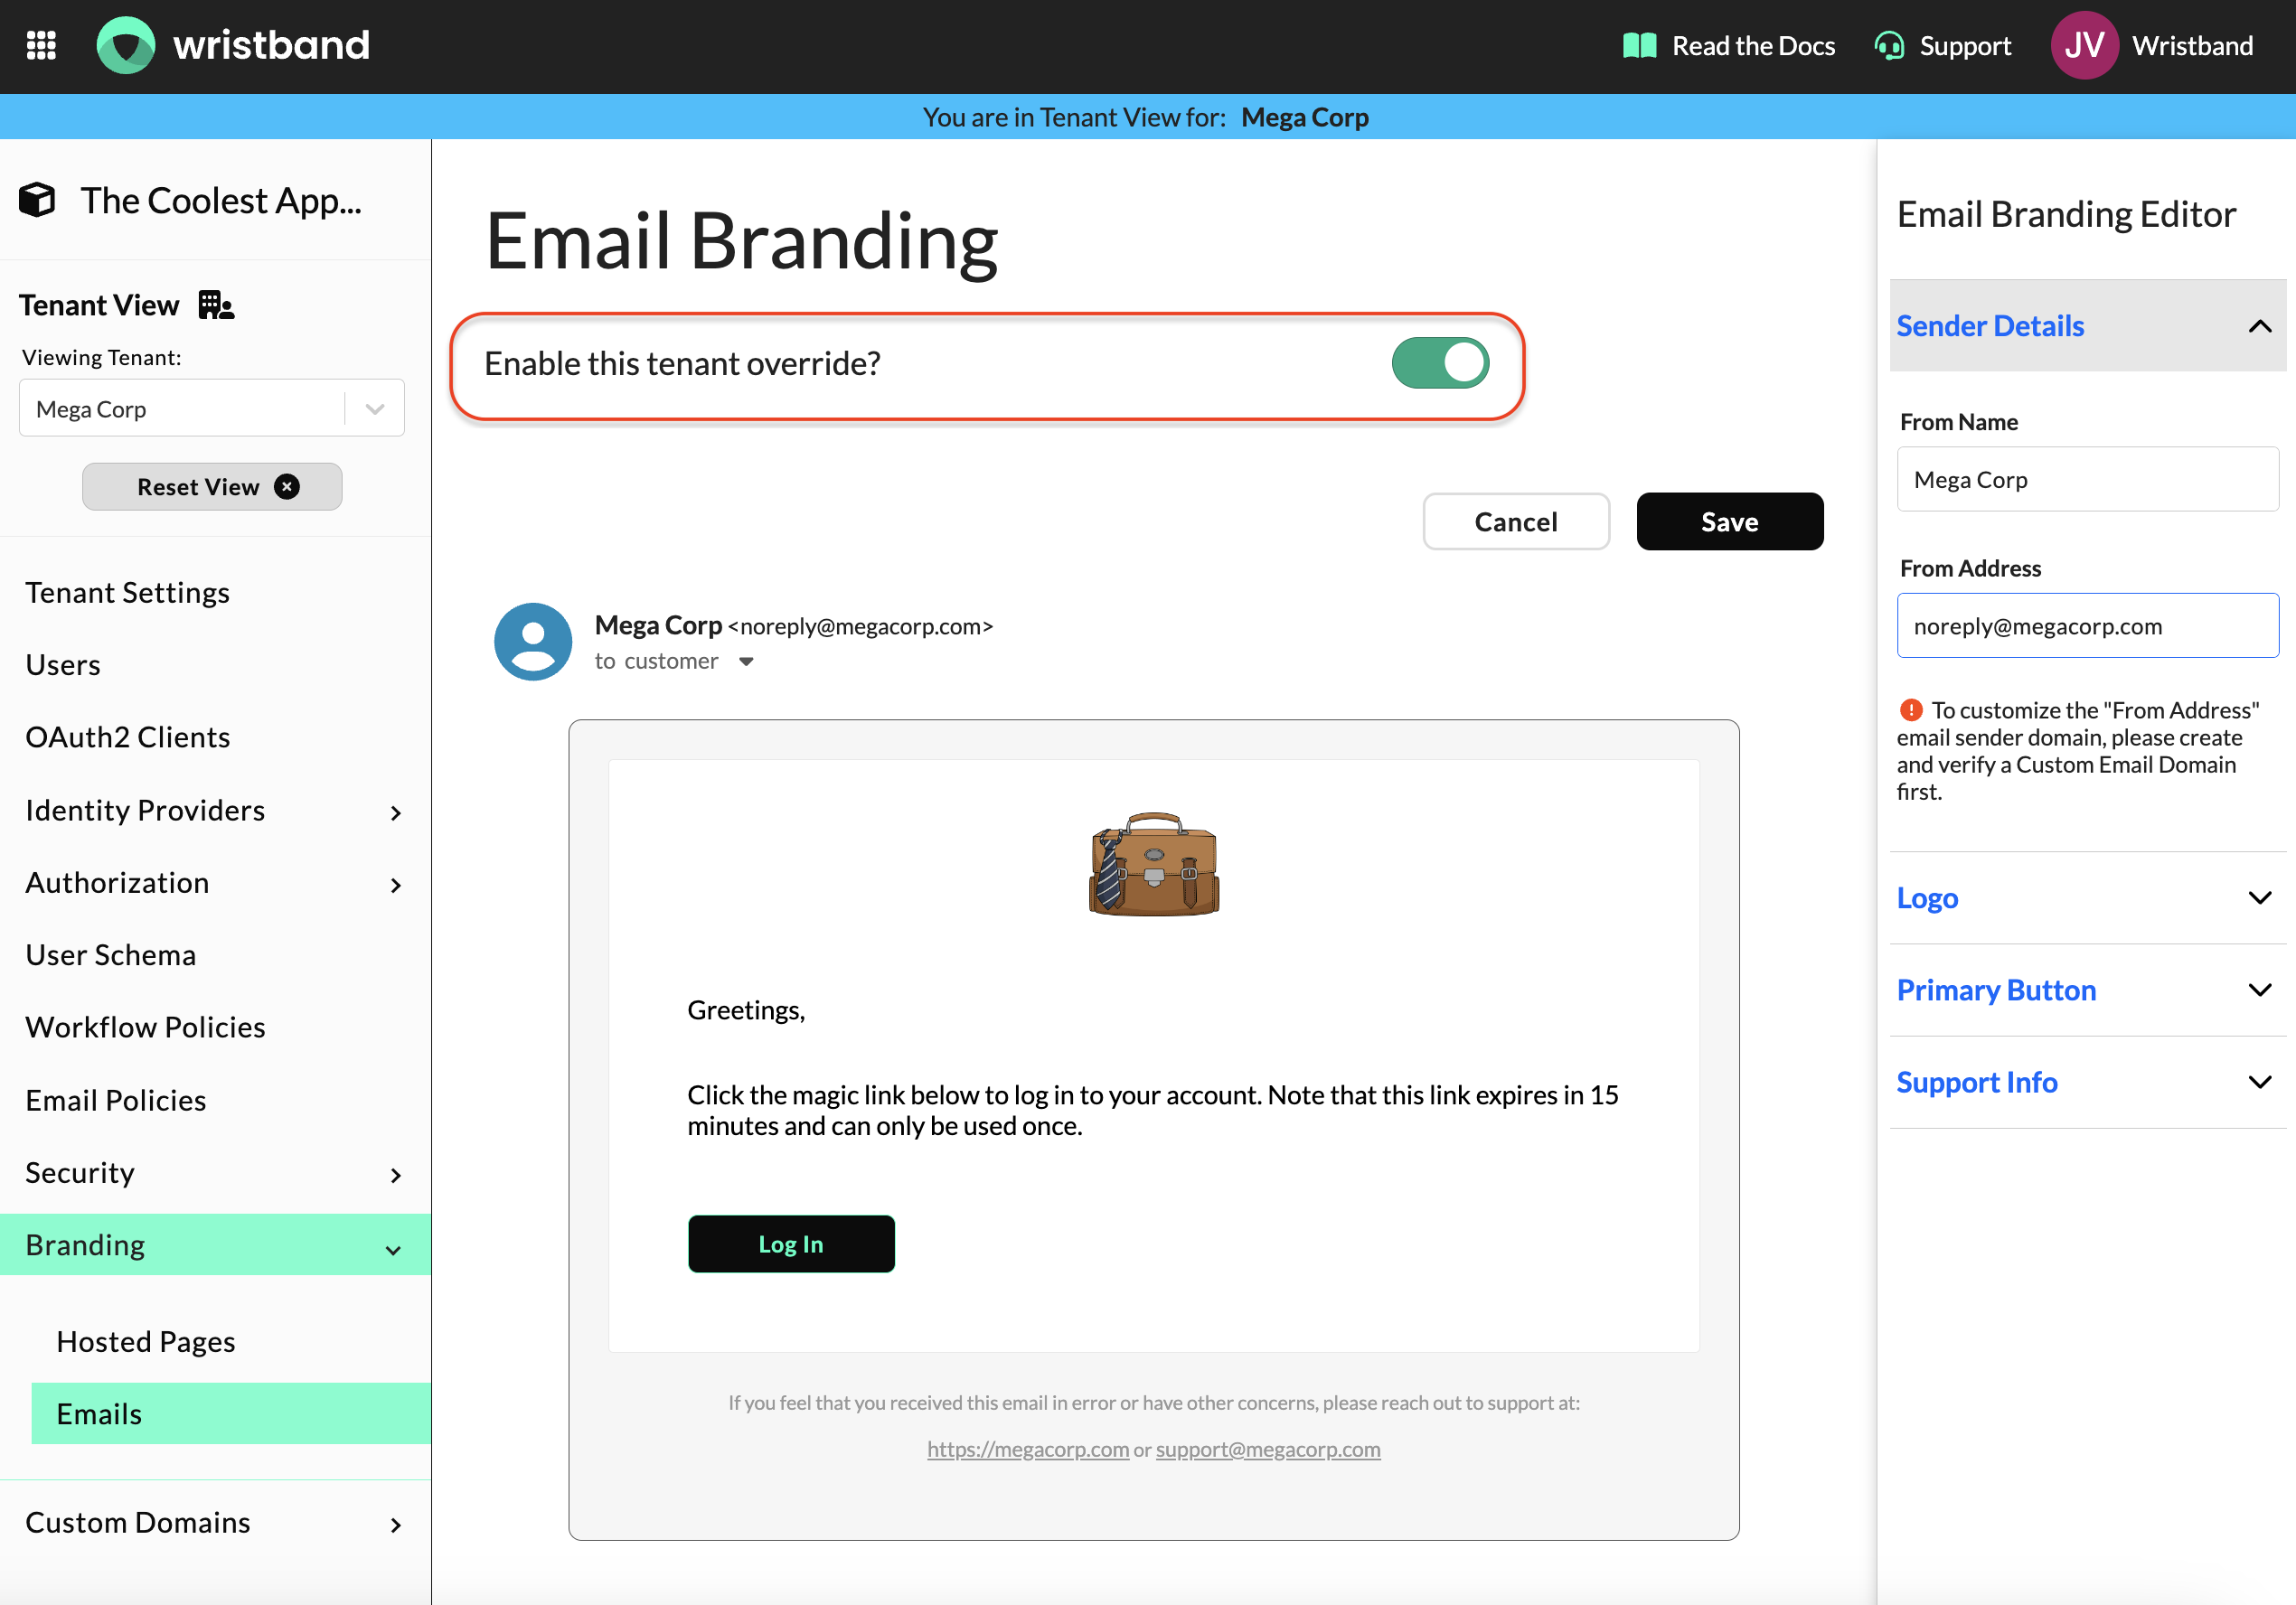
Email Branding Override Toggle
Once the tenant override for email branding is enabled, you can edit and save the tenant's branding configurations. These settings will take precedence over application-level branding for all possible transactional emails, except in the following cases:
- Tenant Disambiguation
Custom Email Domains
The domain used in the email "from" address can also be customized.
Application-Level Custom Email Domain
If you need to configure an application-level custom email domain, you can do so in the Application View of the Wristband Dashboard:
-
Navigate to the 'Email Domains' submenu under the Custom Domains section.
-
Create the custom domain you wish to use for your email sender address.
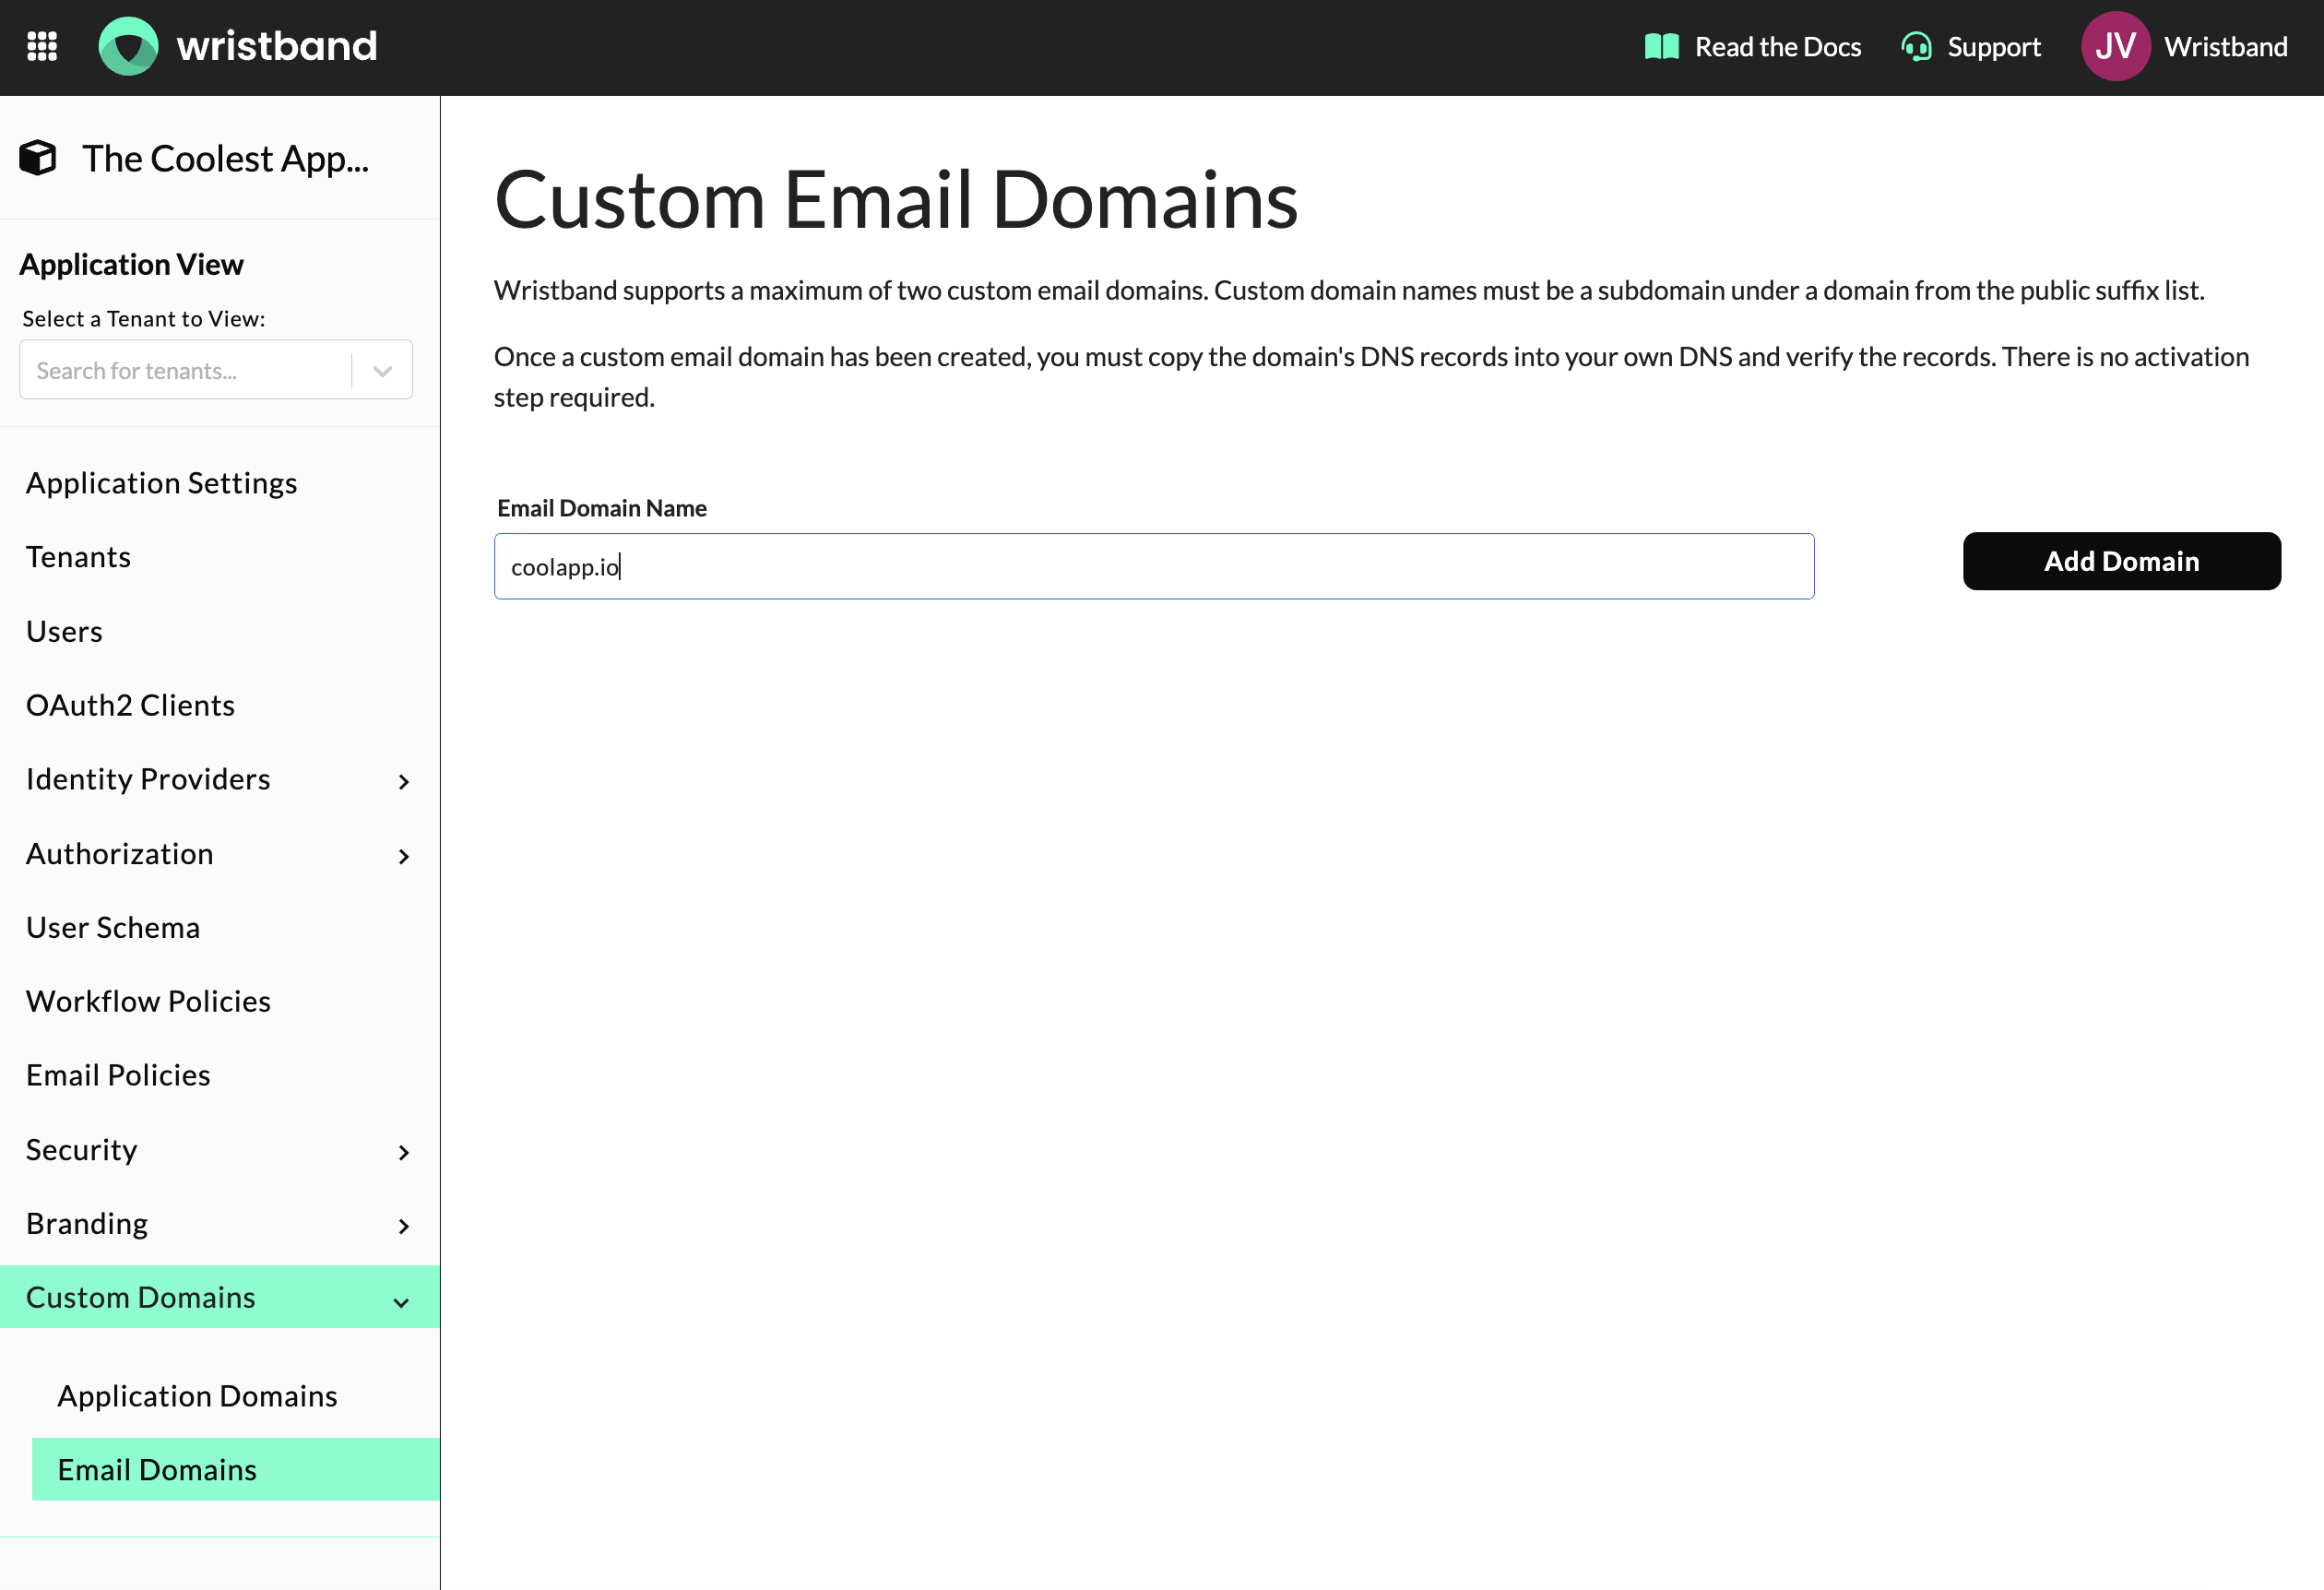
Add Application-Level Custom Email Domain
-
After adding your custom domain, configure the DNS records with your domain registrar. The dashboard will display the necessary records for you to copy.
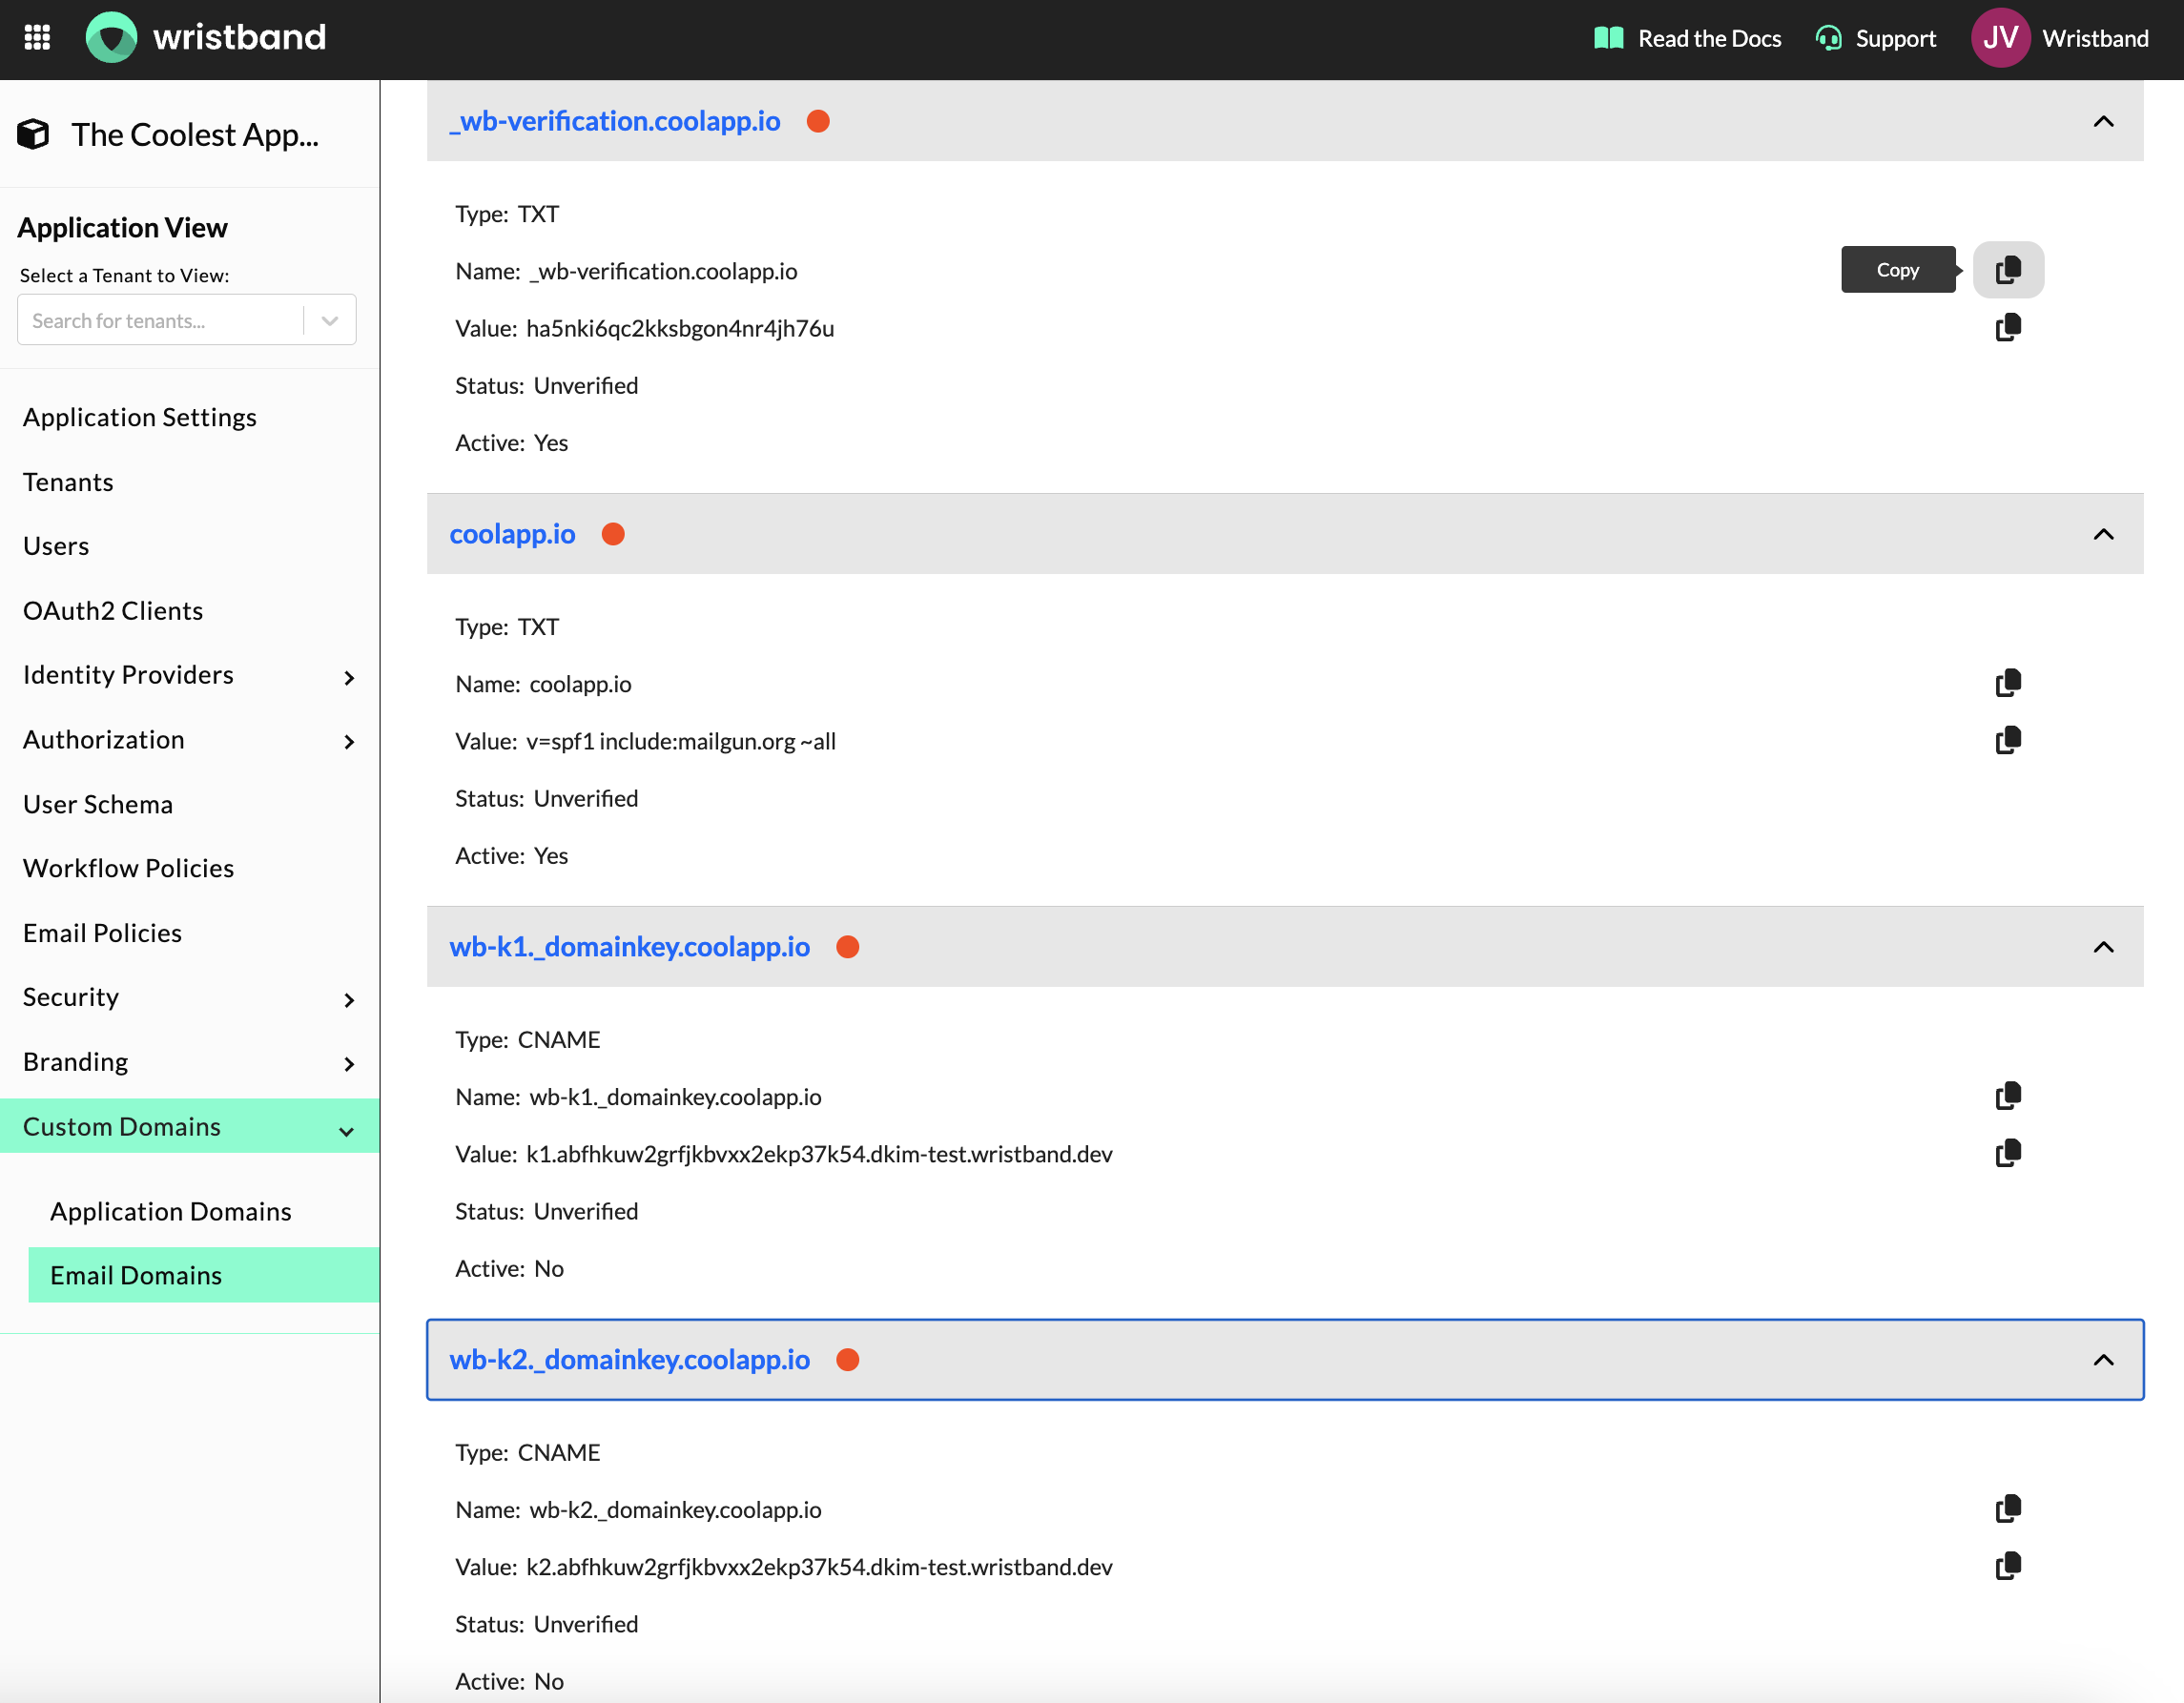
Copy Email Domain DNS Records
-
Once the DNS records are set, trigger the domain verification by clicking the verification button in the dashboard. This can be done multiple times if needed, and the status will update in the UI once the domain is verified and ready for use.
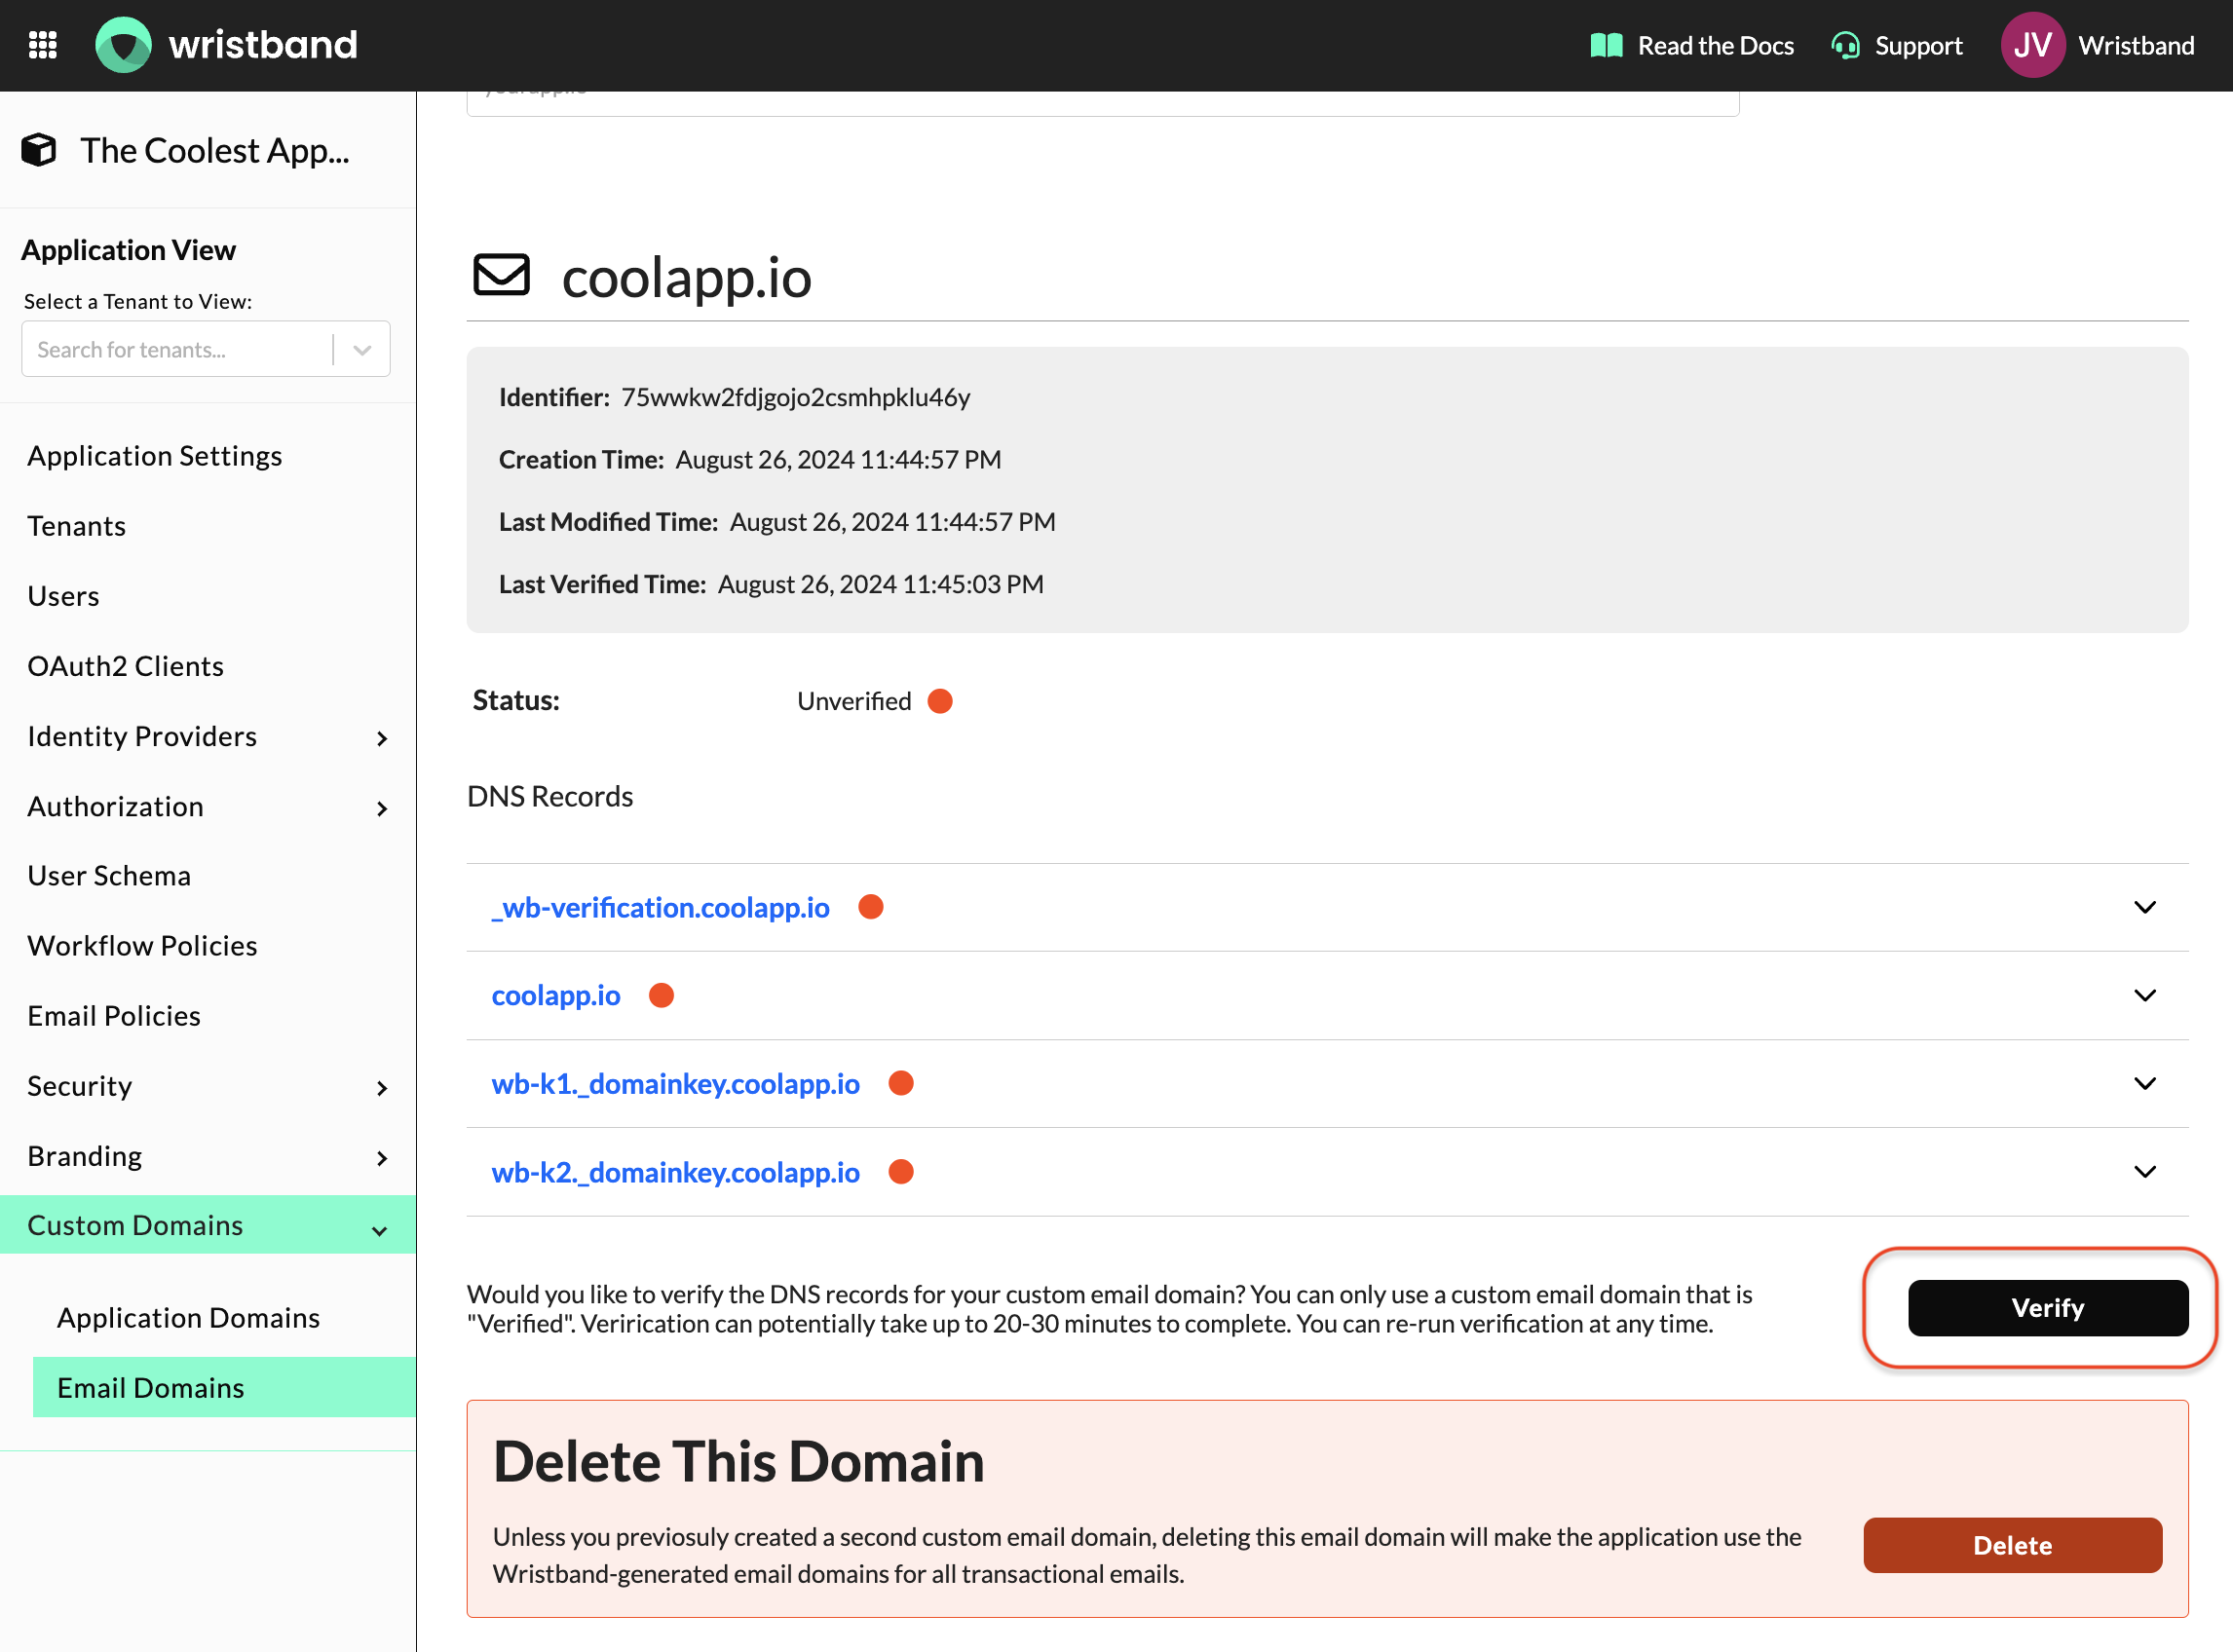
Verify Custom Email Domain
-
After verifying the email custom domain, go to the Email Branding configurations and update the "Sender Details" > "From Address" field to utilize the custom email domain. Emails will now be sent using that "From Address" value.
Tenant-Level Custom Email Domain
If you prefer to use a custom sender domain for a specific tenant, you can configure this in the Tenant View of the Wristband Dashboard. The steps to create and verify the custom email domain, as well as update the branding configurations, are the same as for application-level custom email domains. When a tenant-level custom email domain is specified, it will take precedence over application-level custom email domain.
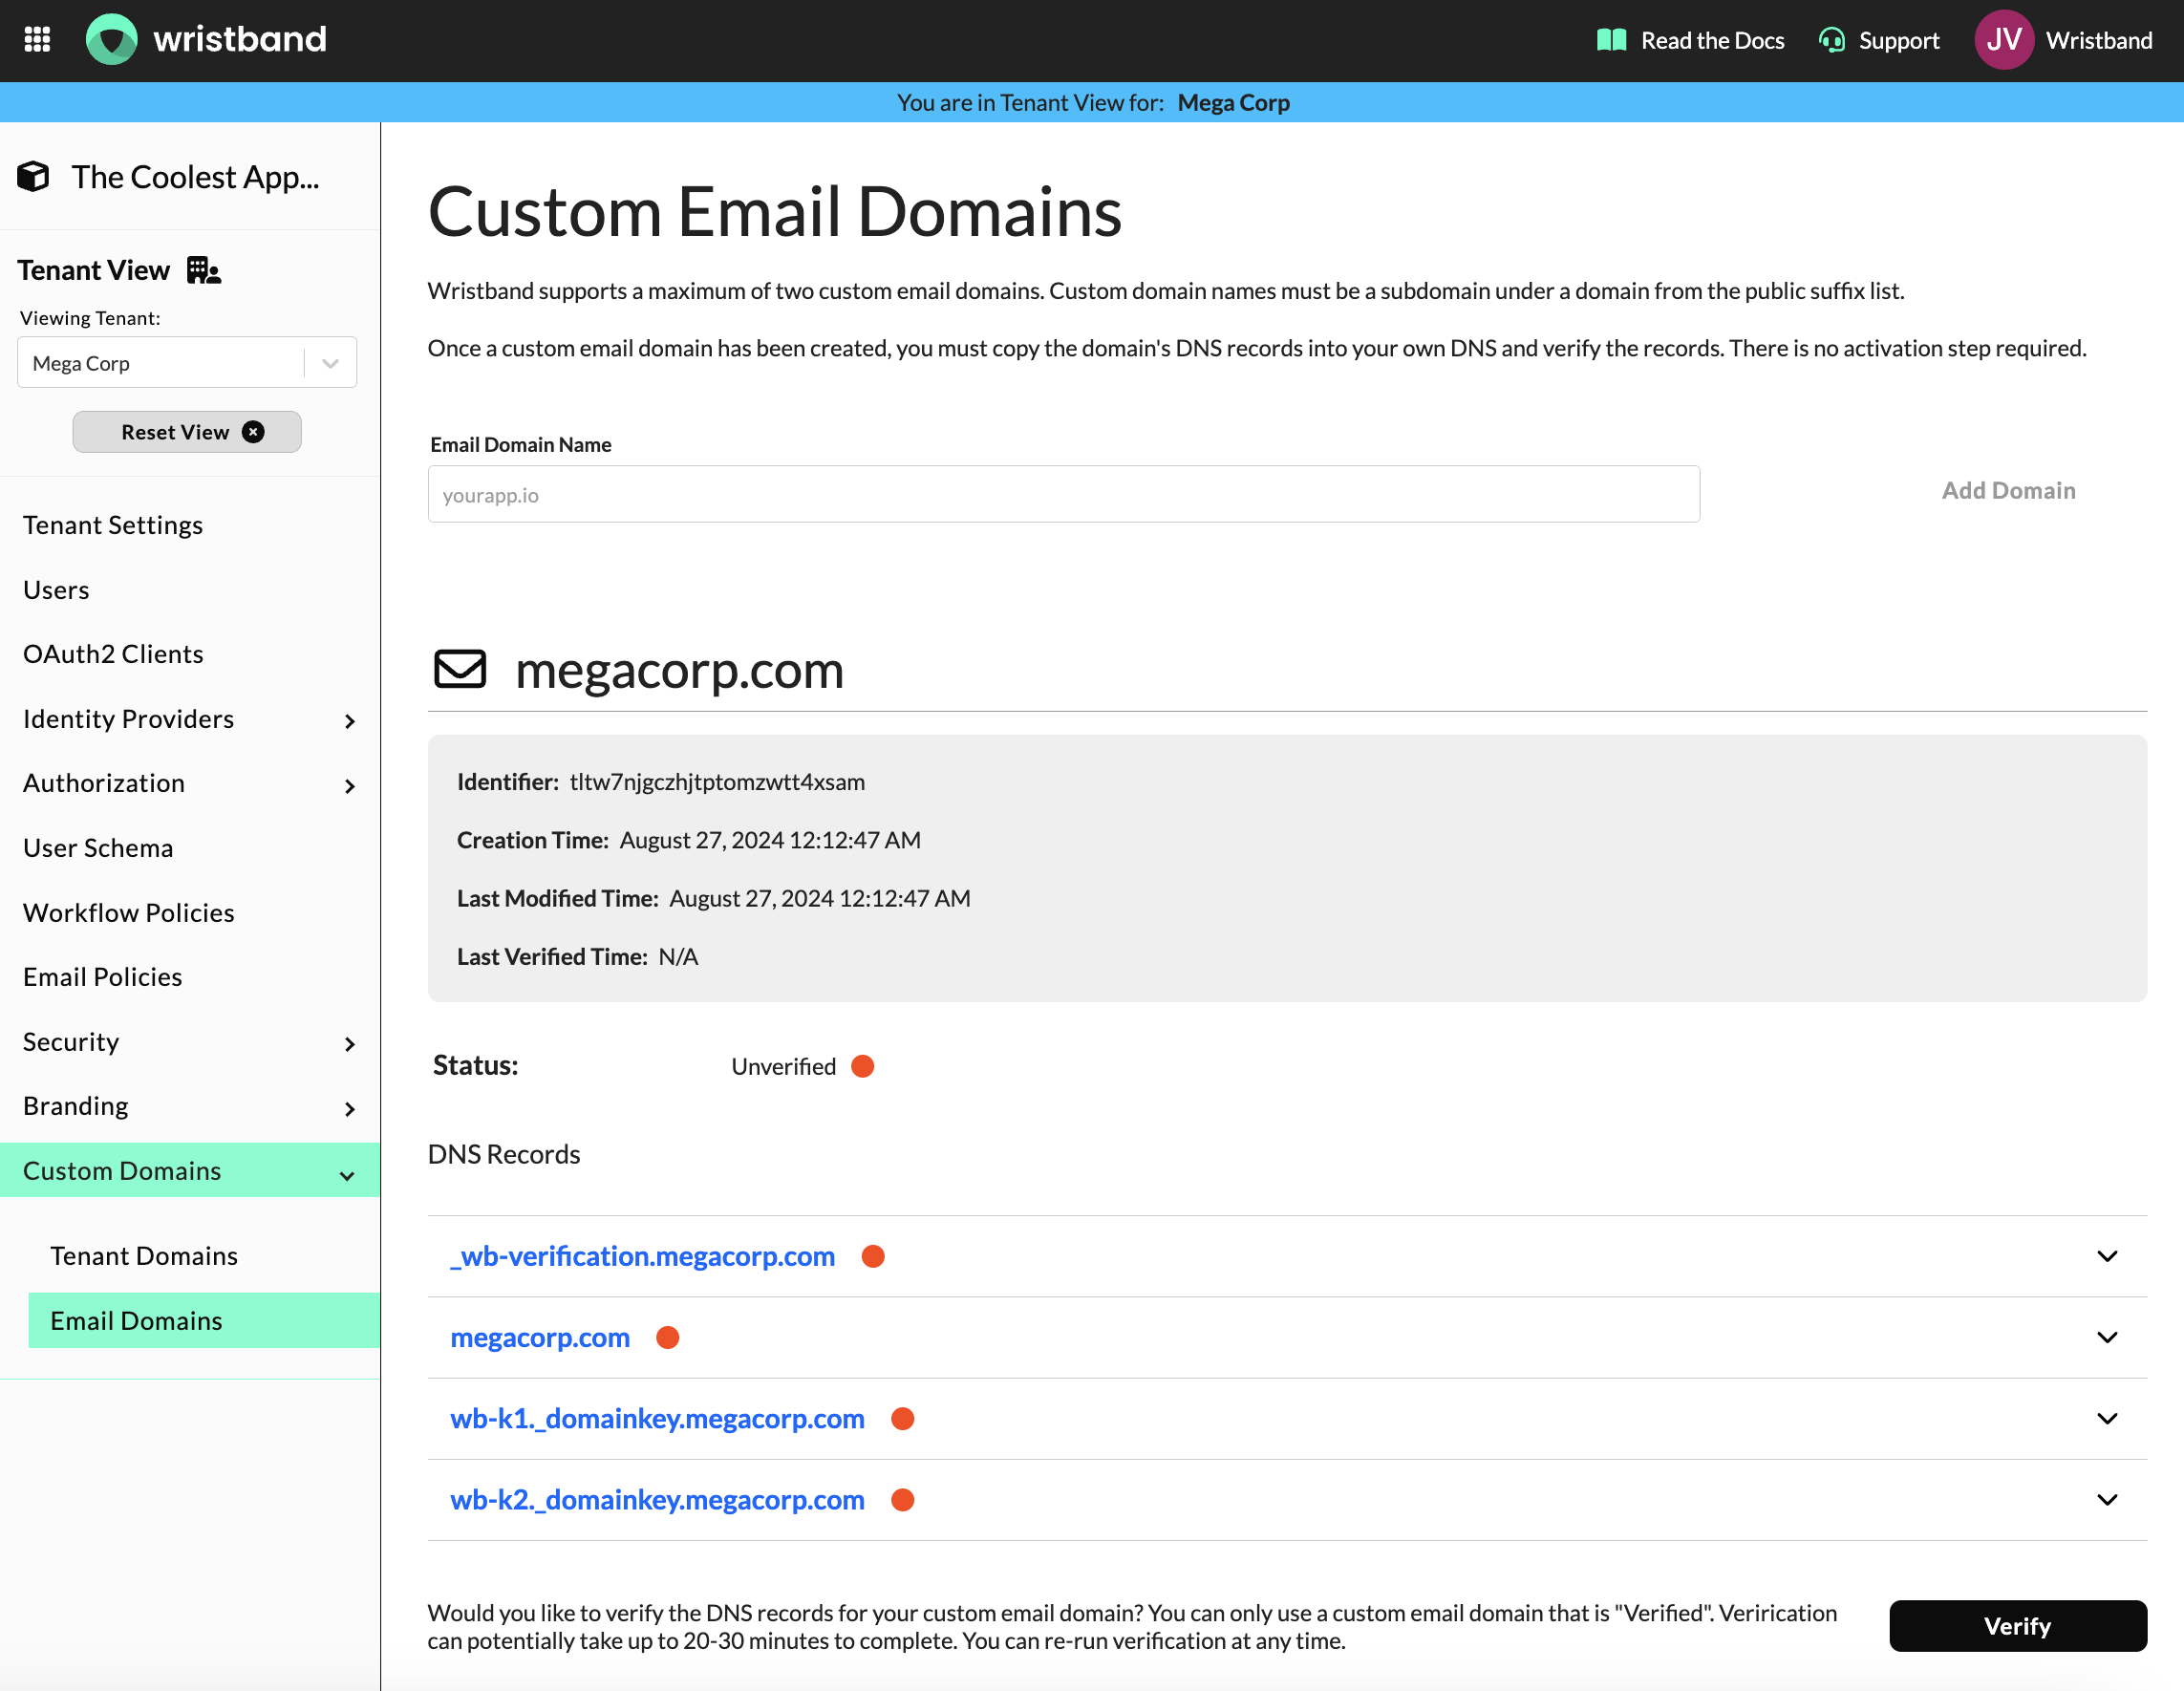
Tenant-Level Custom Email Domains
Updated 5 months ago