
GitHub
Setting Up a GitHub Integration
Learn how to set up GitHub social login in Wristband with this step-by-step guide.
Step 1: Locate Your External IdP Callback URL
- In the Wristband dashboard, enter Application View for the application you want to integrate with GitHub.
- Navigate to the
Identity Providers > Socialmenu in the side navigation. - After landing on the Social Identity Providers page, select the GitHub provider icon at the top.
- Copy the Redirect URL from the form.
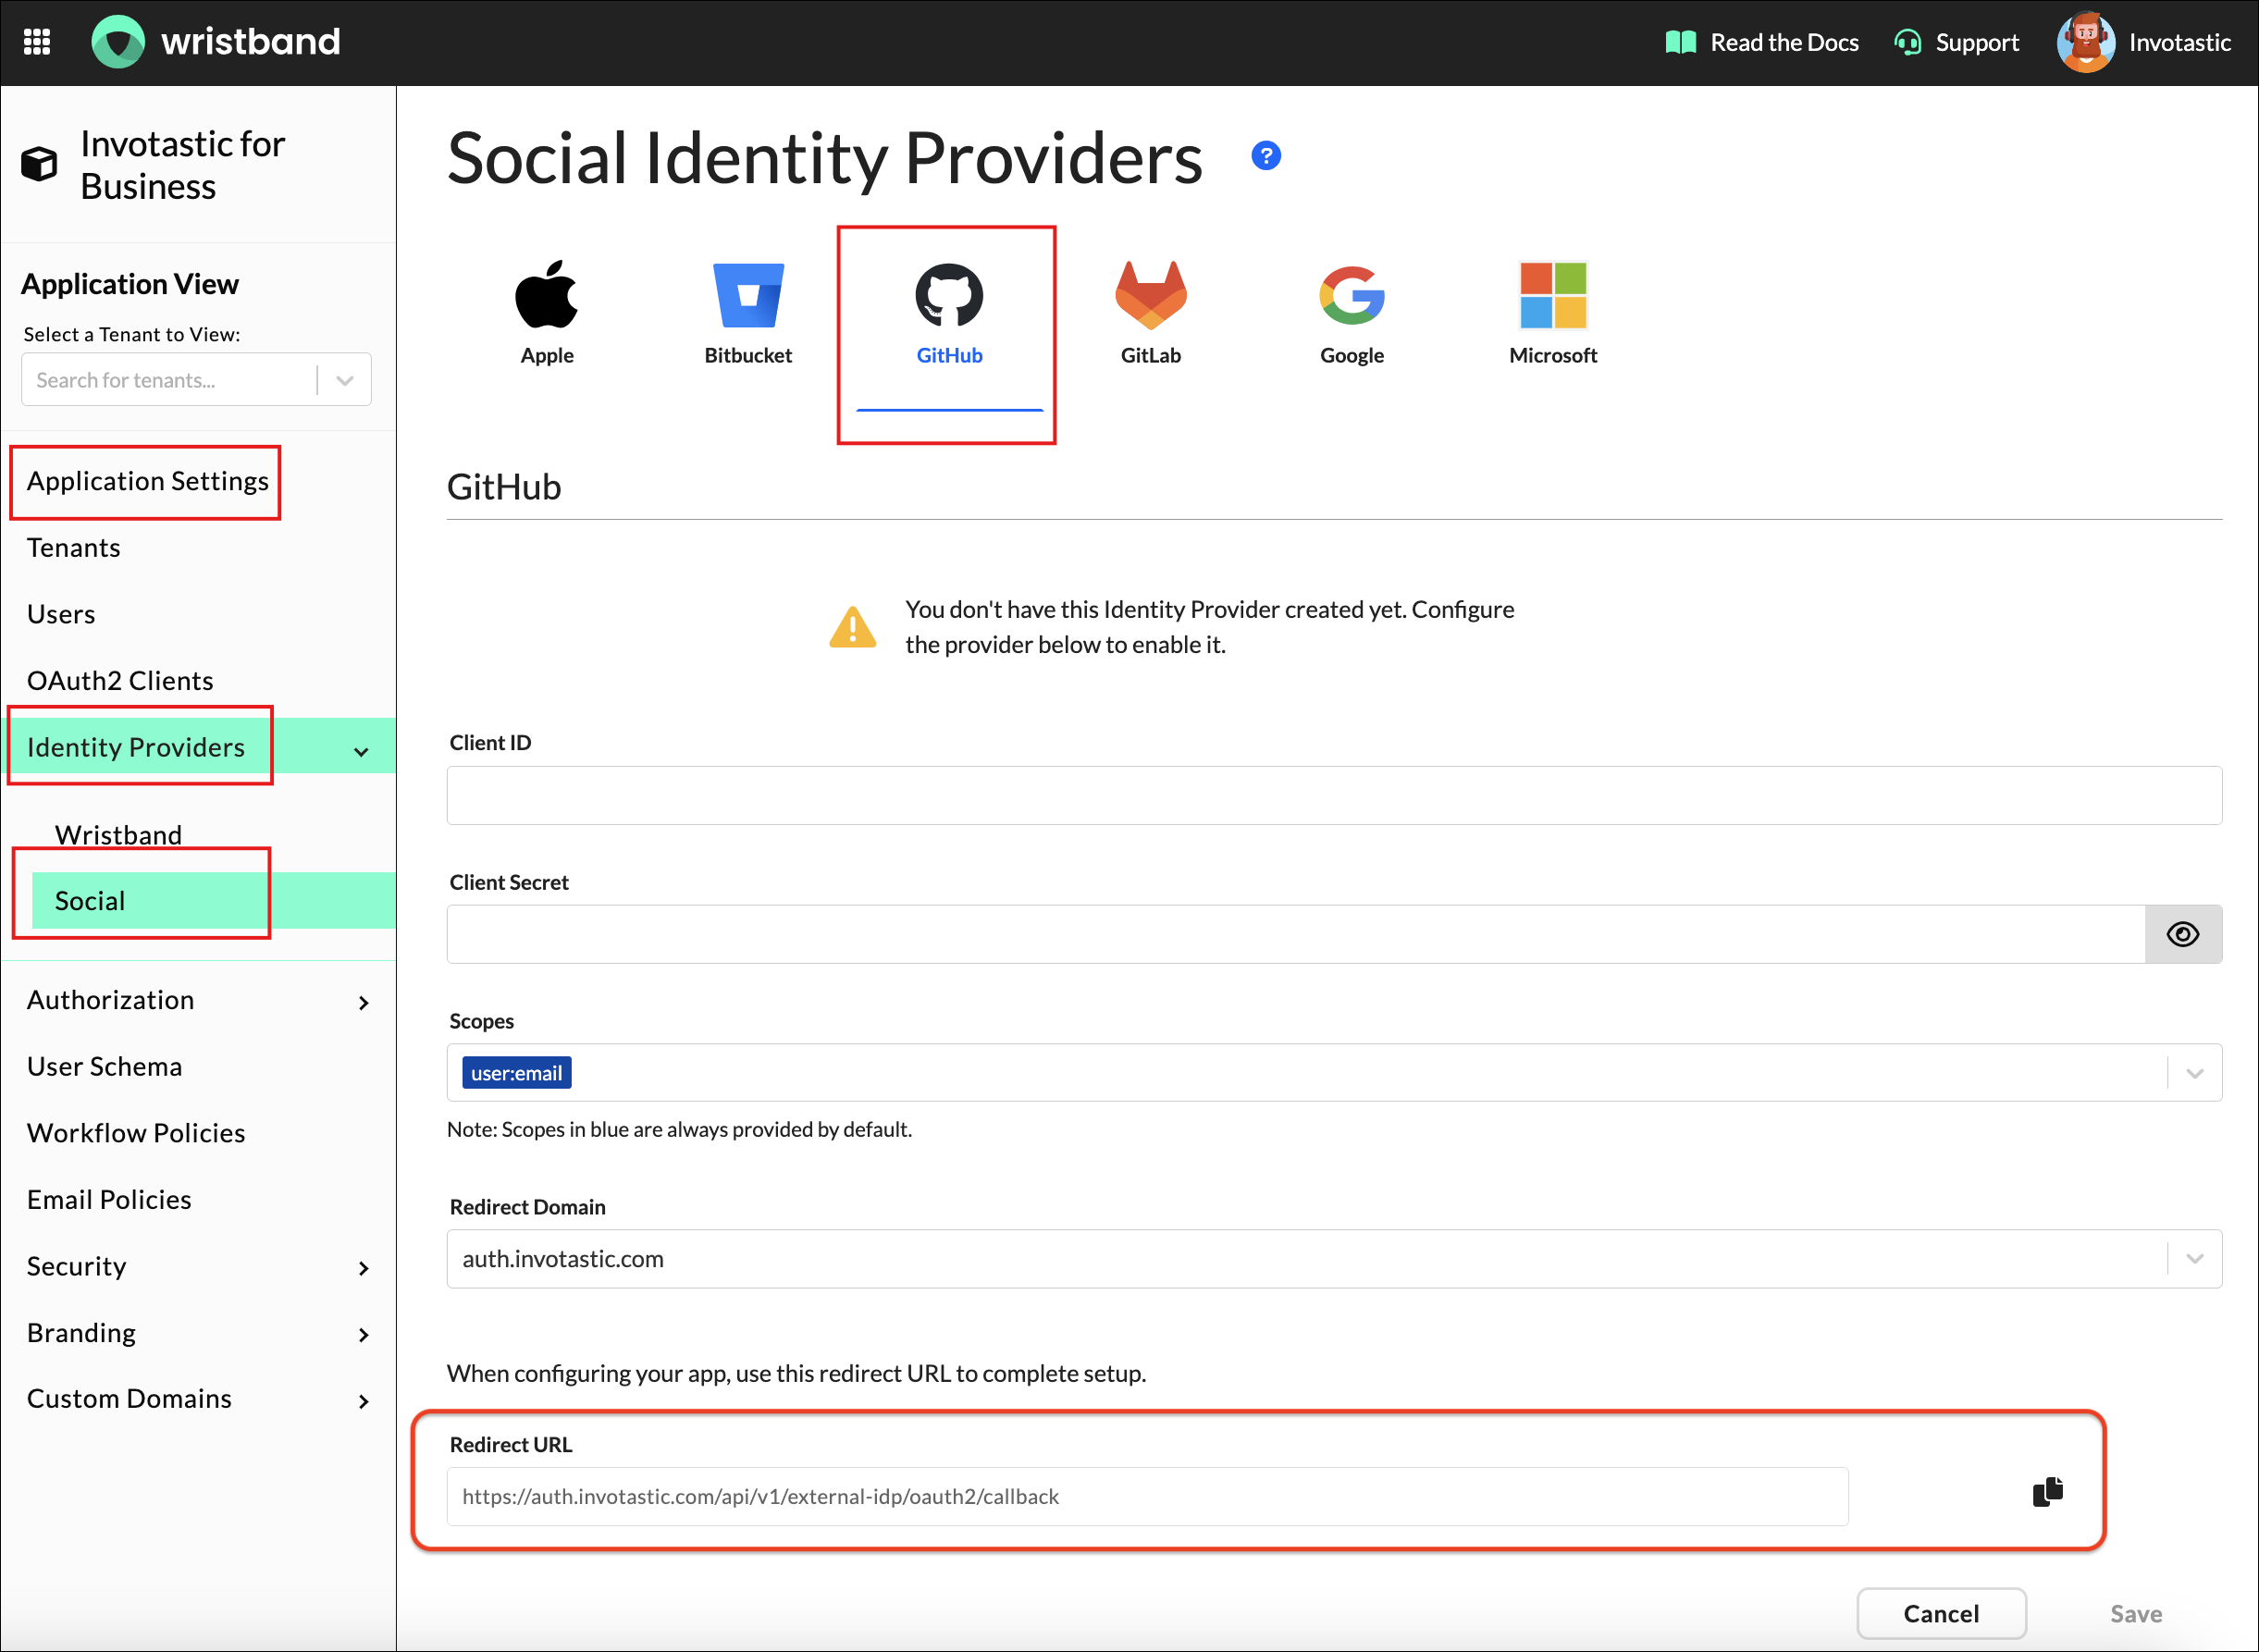
Figure 1: Select GitHub on the Wristband Social Identity Providers page.
Step 2: Sign Up/Login to Your GitHub Account
Before configuring the GitHub Social Login Identity Provider in the Wristband dashboard, ensure you are logged into your GitHub account.
Step 3: Register an OAuth Application
- Click your profile icon in the navigation bar and select Settings.

Figure 2: Open Settings from the GitHub profile menu.
- From the left sidebar, select Developer Settings.

Figure 3: Select Developer settings in GitHub settings.
Navigate to OAuth Apps in the left sidebar and click the Register a new application button.
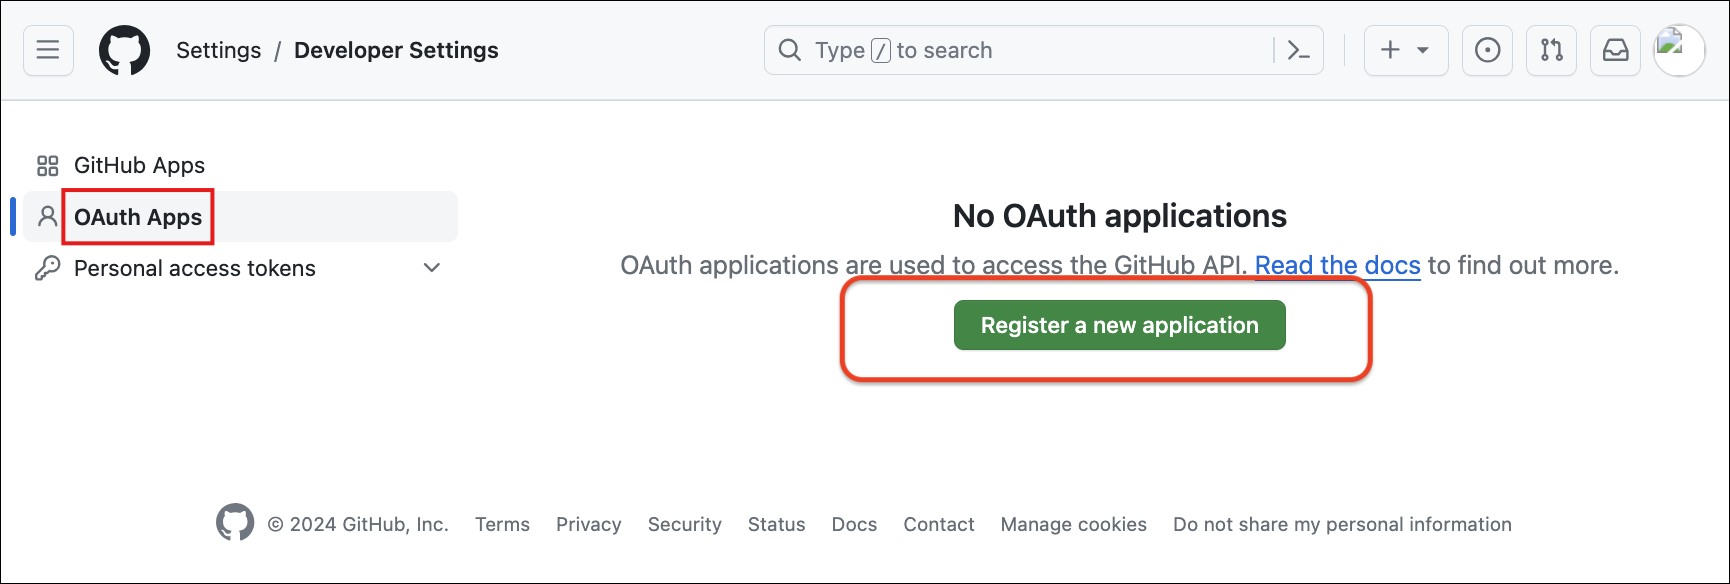
Figure 4: Open OAuth Apps and select Register a new application.
- Complete the form by filling out the following required fields:
- Application Name: Any appropriate value.
- Homepage URL: Any appropriate value.
- Authorized callback URL: Paste the External IdP Callback URL from step 1.
- Click Register application to finish.
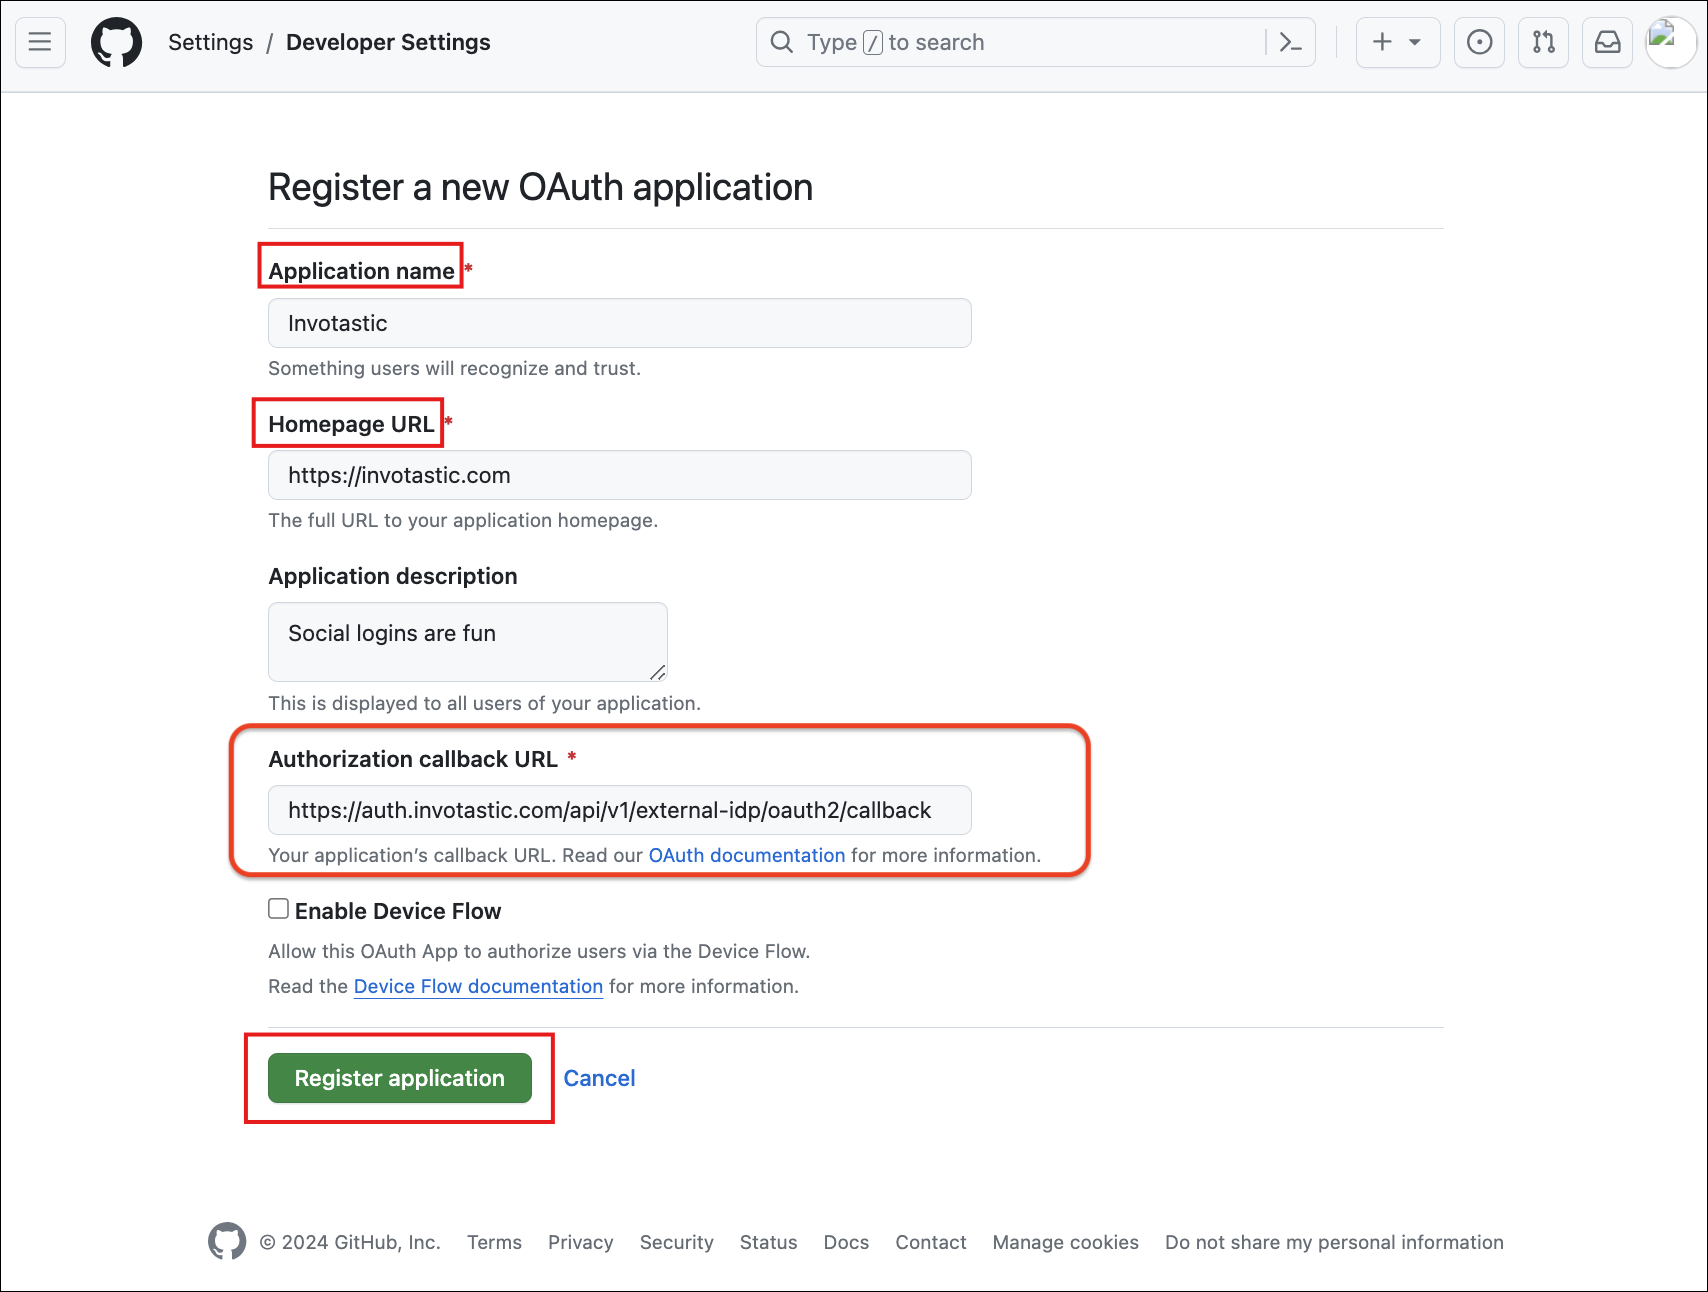
Figure 5: Enter the OAuth application details.
Step 4: Create OAuth Credentials
- Once registered, you will be directed to your app's General Settings page. Copy the Client ID, as you will need it for the next steps.
- Click Generate a new client secret to create a client secret.

Figure 6: Copy the GitHub OAuth application's Client ID.
- Copy the Client Secrets value as it appears on the page.

Figure 7: Generate and copy the GitHub OAuth application's Client Secret.
- You have now completed the required configuration on GitHub for your social login integration.
Step 5: Configure the GitHub IdP in Wristband
- Return to the Social Identity Provider page in the Wristband dashboard (from step 1) and enter the following values into the form:
- Client ID: The Client ID from step 4.
- Client Secret: The Client Secret from step 4.
- Wristband requests the following scopes by default during GitHub authorization (any additional scopes are optional):
- user:email
- Click Save to finish. The GitHub External IDP will be in an
ENABLEDstatus.
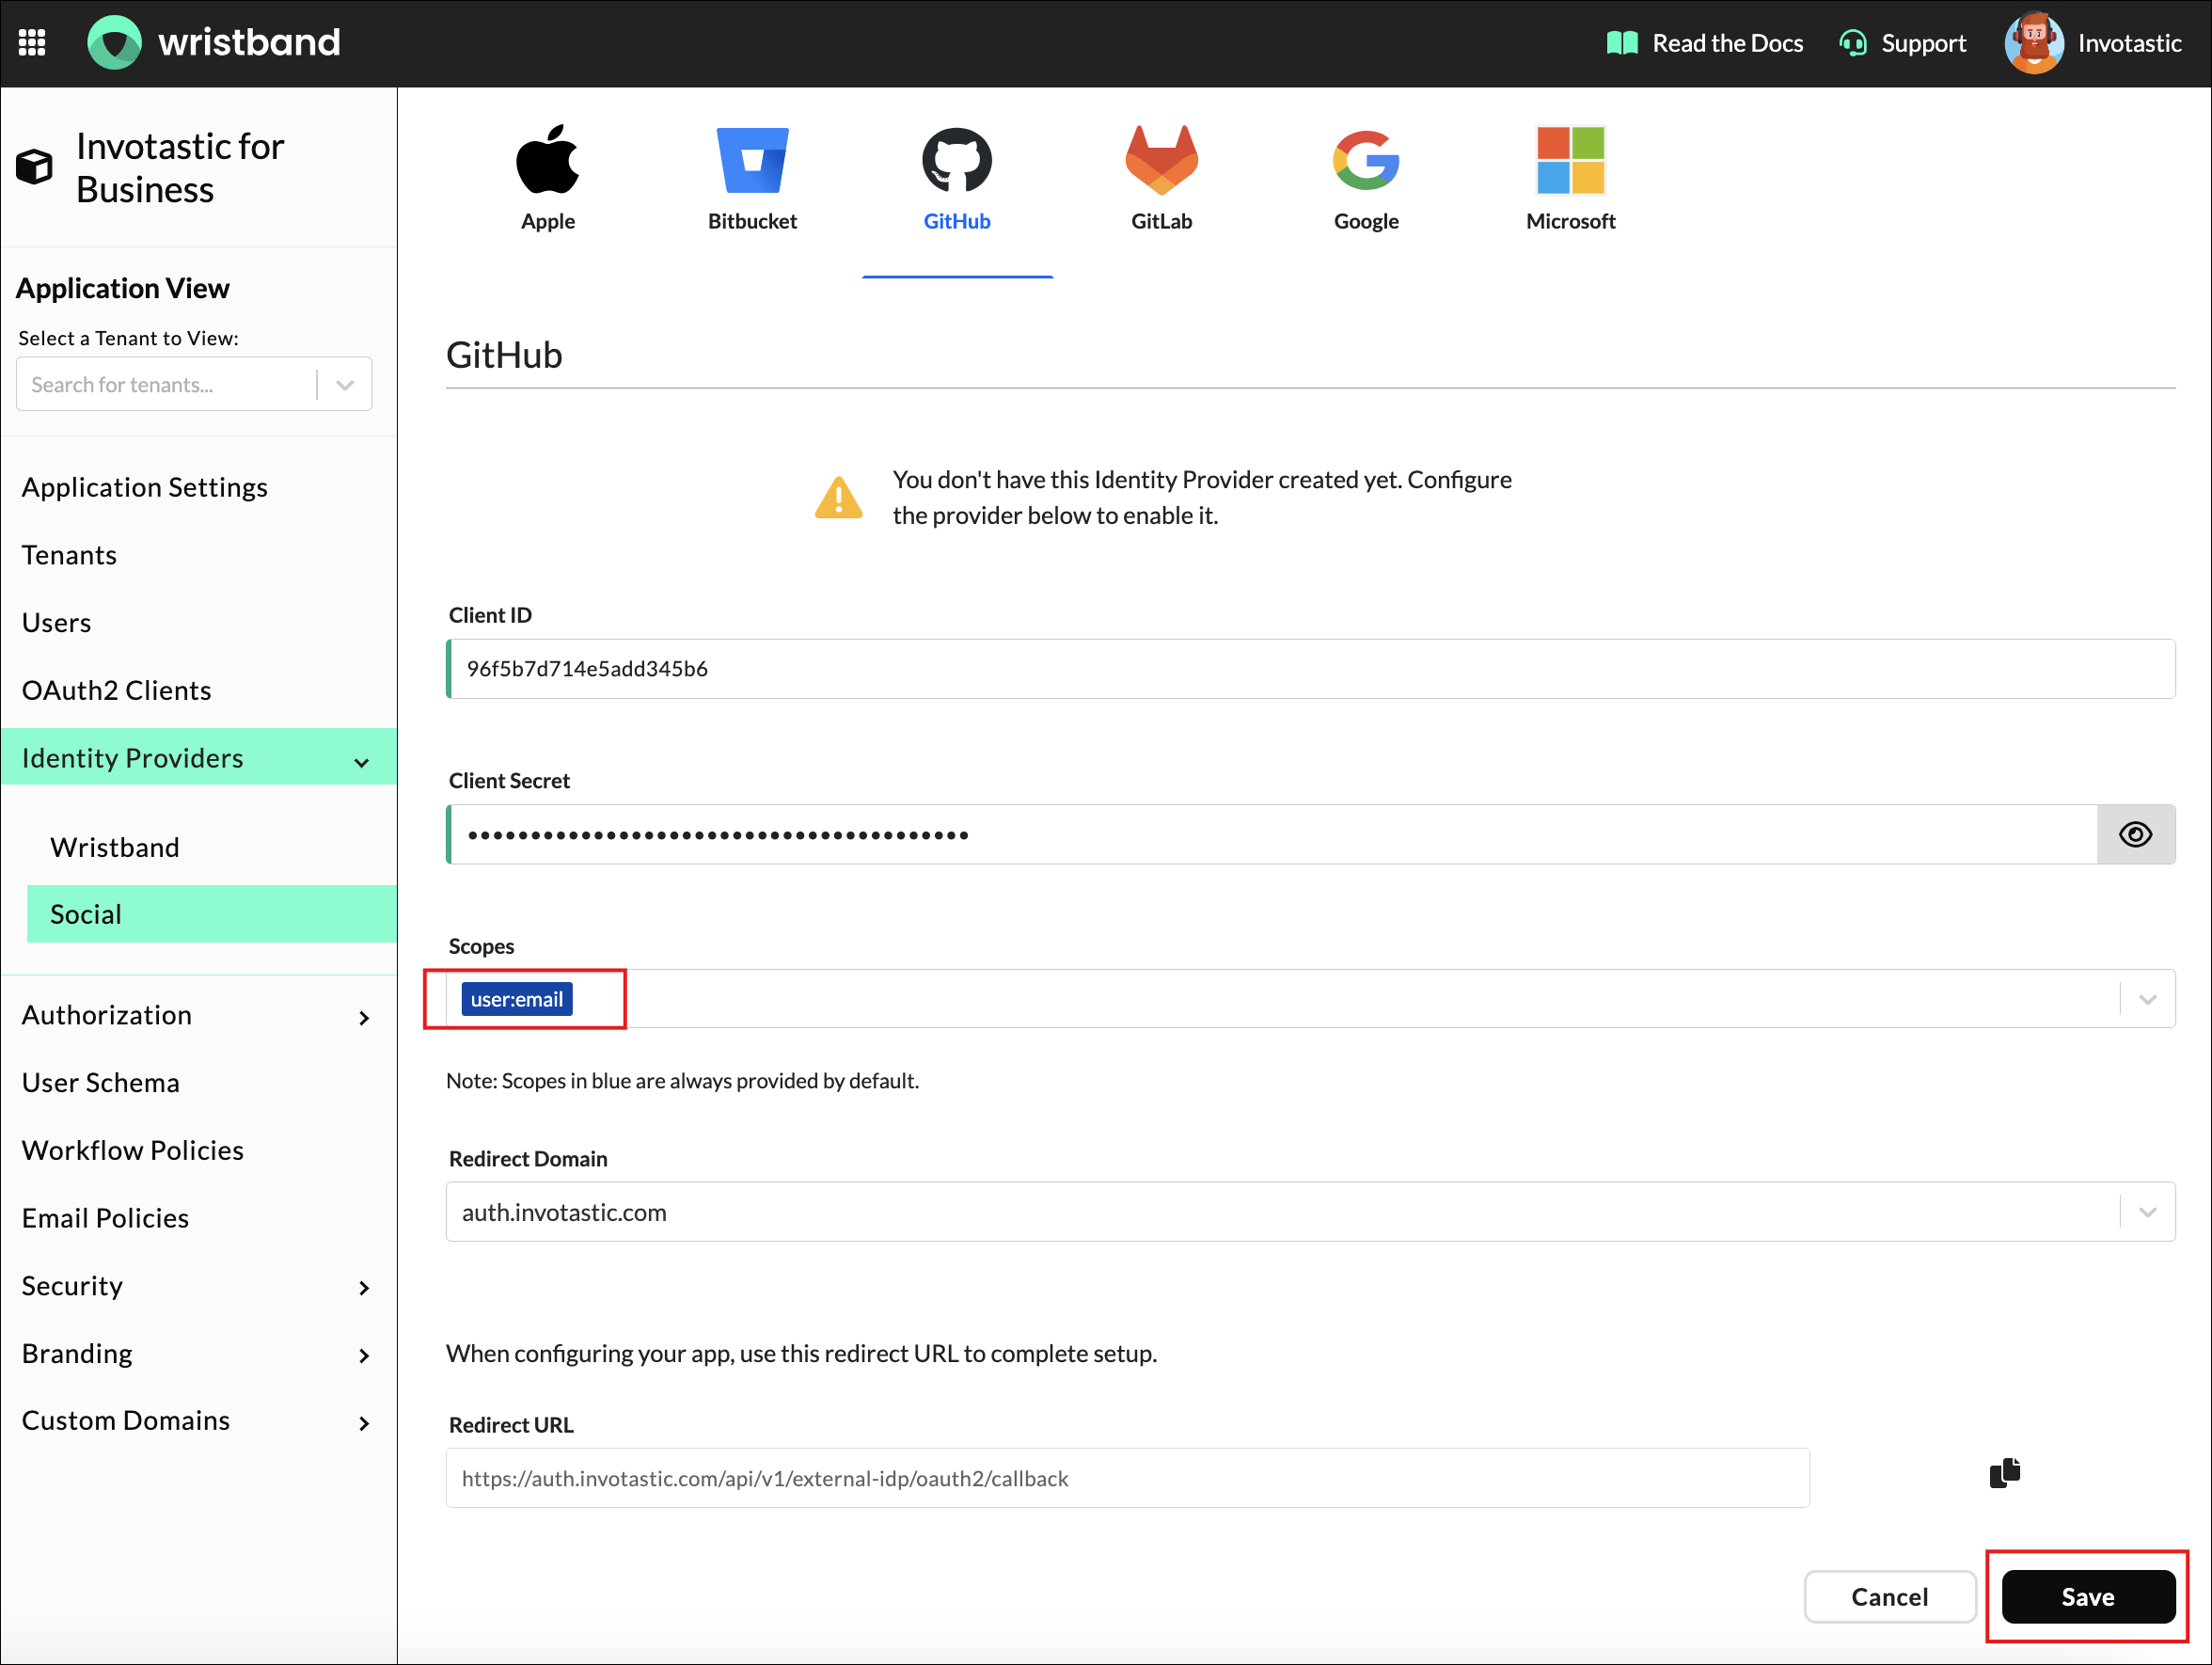
Figure 8: Enter the GitHub Client ID and Client Secret in Wristband, then save the identity provider.
The GitHub social login integration is now complete. Unless Tenant Overrides are enabled, users will see a GitHub login button the next time they visit the Tenant-level Login Page.
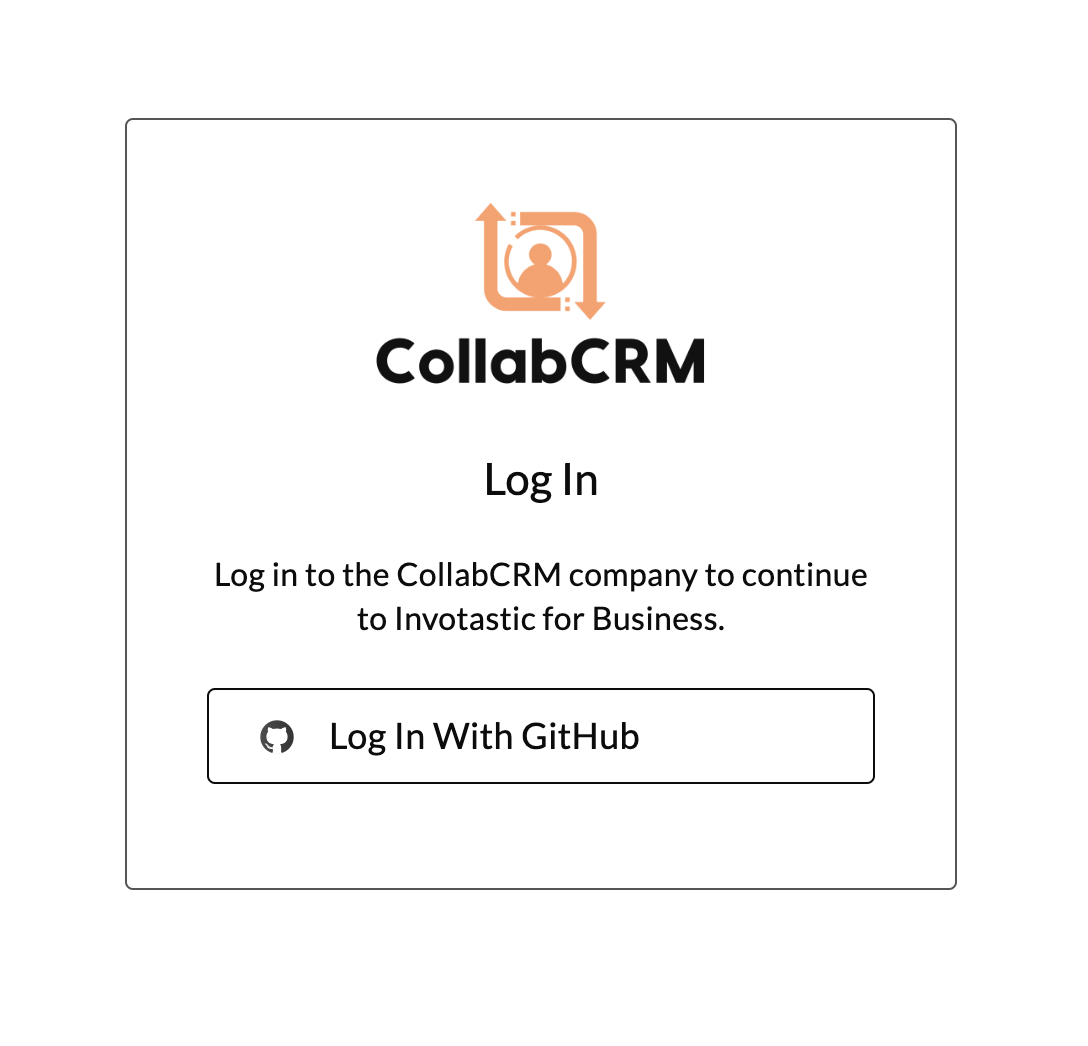
Figure 9: GitHub sign-in button on the tenant-level login page.
Updated 14 days ago