
Google Workspace
Setting Up a Google Workspace Integration
Follow this guide to set up and deploy Google Workspace SSO in Wristband.
Step 1: Create the Google Workspace IdP in Wristband
- In the Wristband dashboard:
- Enter Tenant View for the tenant.
- Navigate to
Identity Providers > Enterprise. - Select the Google provider icon and click "Add IdP".
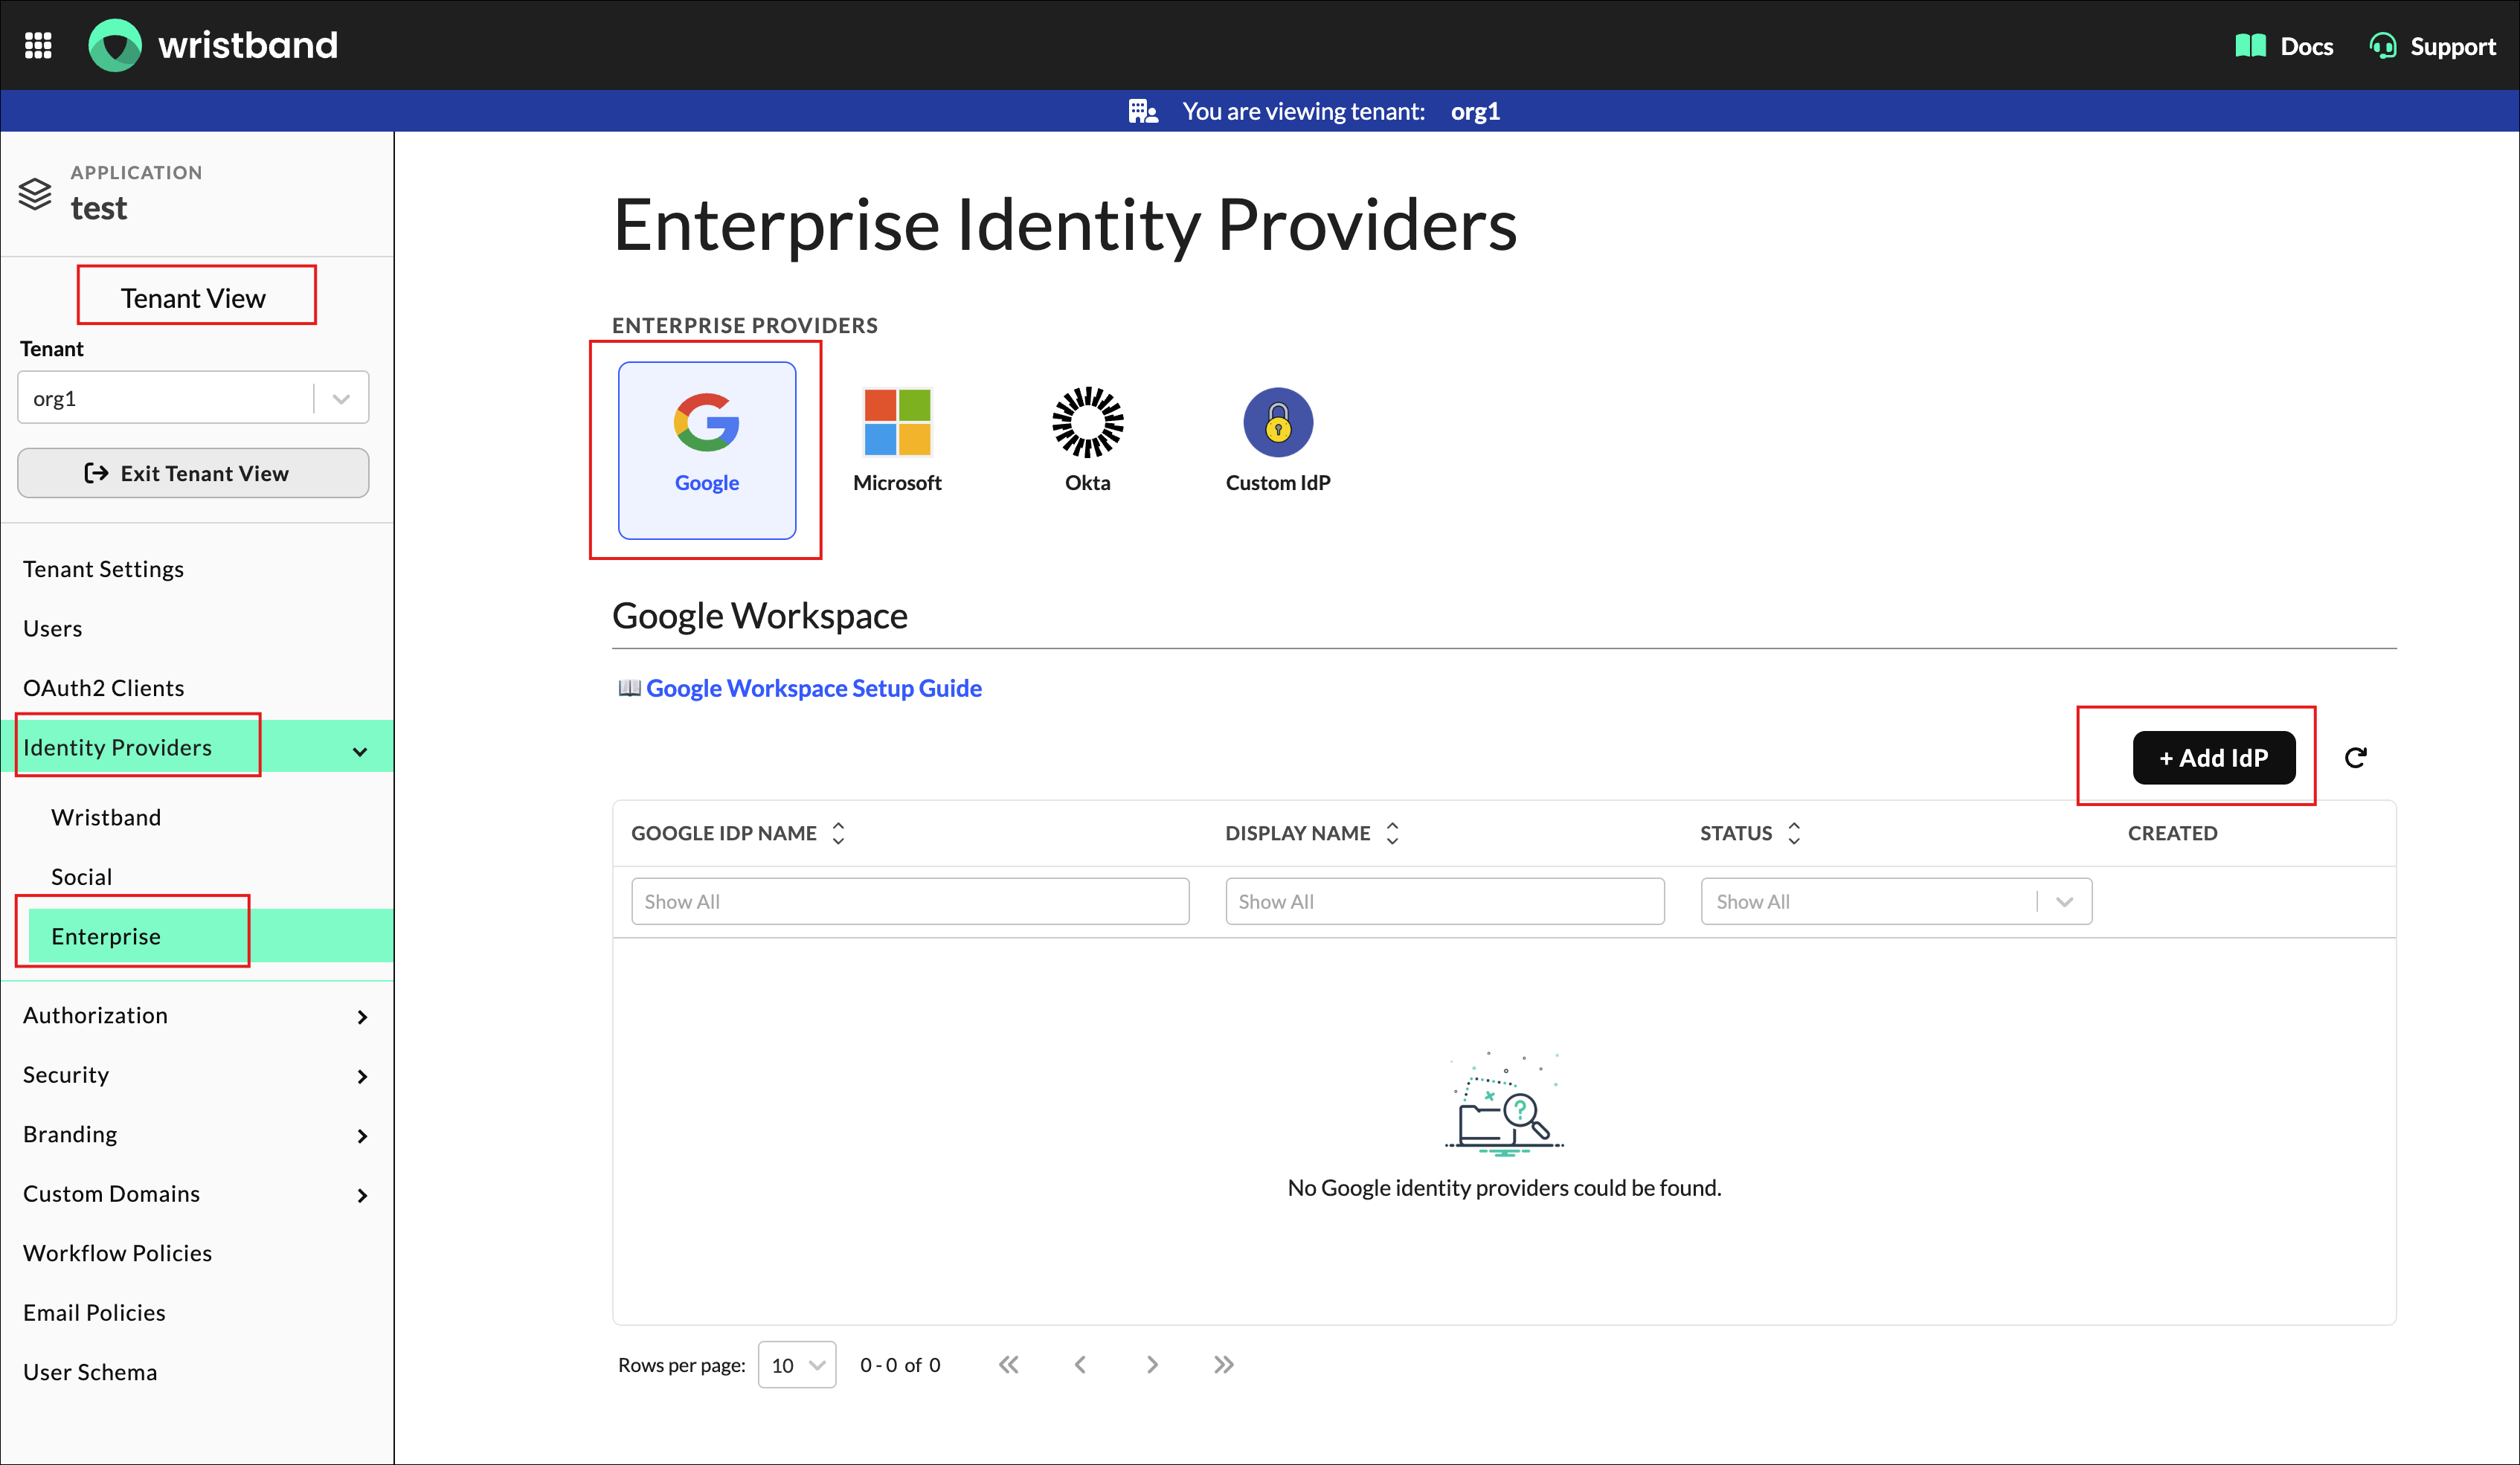
Figure1: Select Google under Enterprise Identity Providers and click Add IdP.
- Complete the form by entering the required information in each field.
- IdP Name: A unique name for this IdP within the tenant.
- Display Name: A human-readable name for this IdP that will be displayed on Wristband-hosted UIs.
- Click Create to create the Google Workspace IdP.
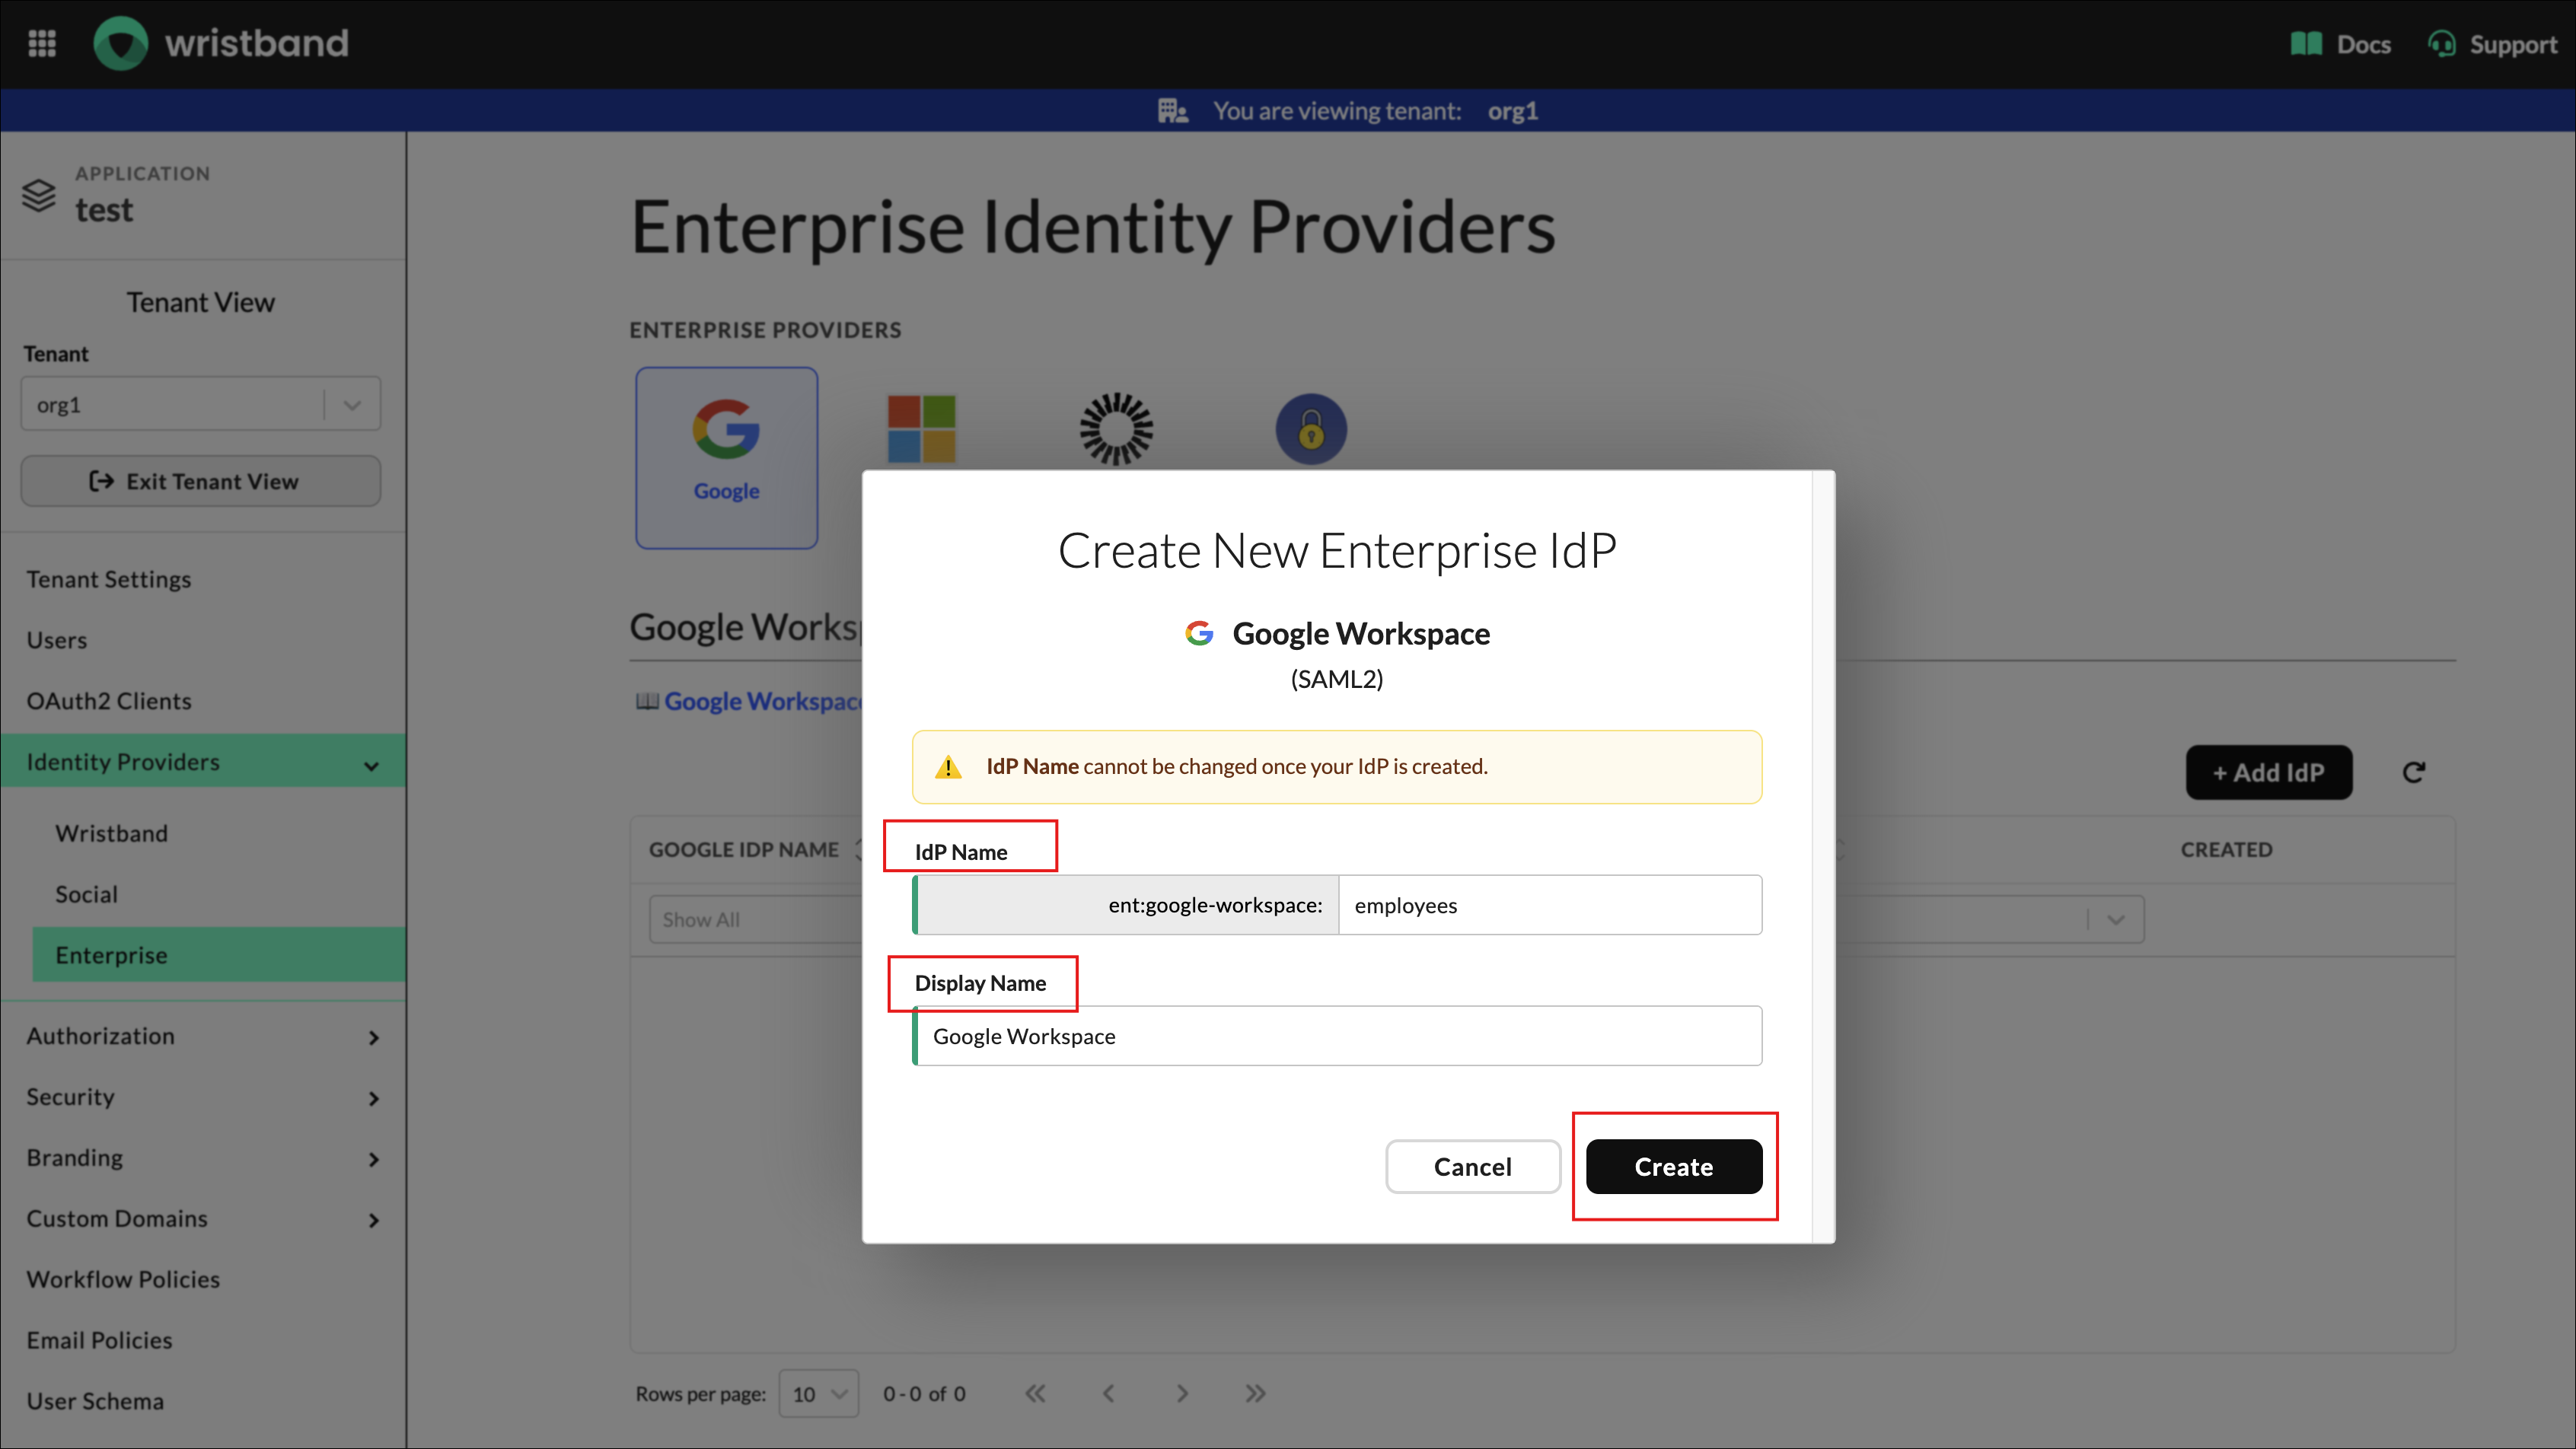
Figure 2: Enter the IdP name and display name, then click Create.
- Once the IdP is created, a form will display the IdP's SP Entity ID and ACS URL. Copy both values, as you will need them to finish registering your SAML application in Google.
- After copying the values, click the Configure IdP button to go to the IdP Settings page.
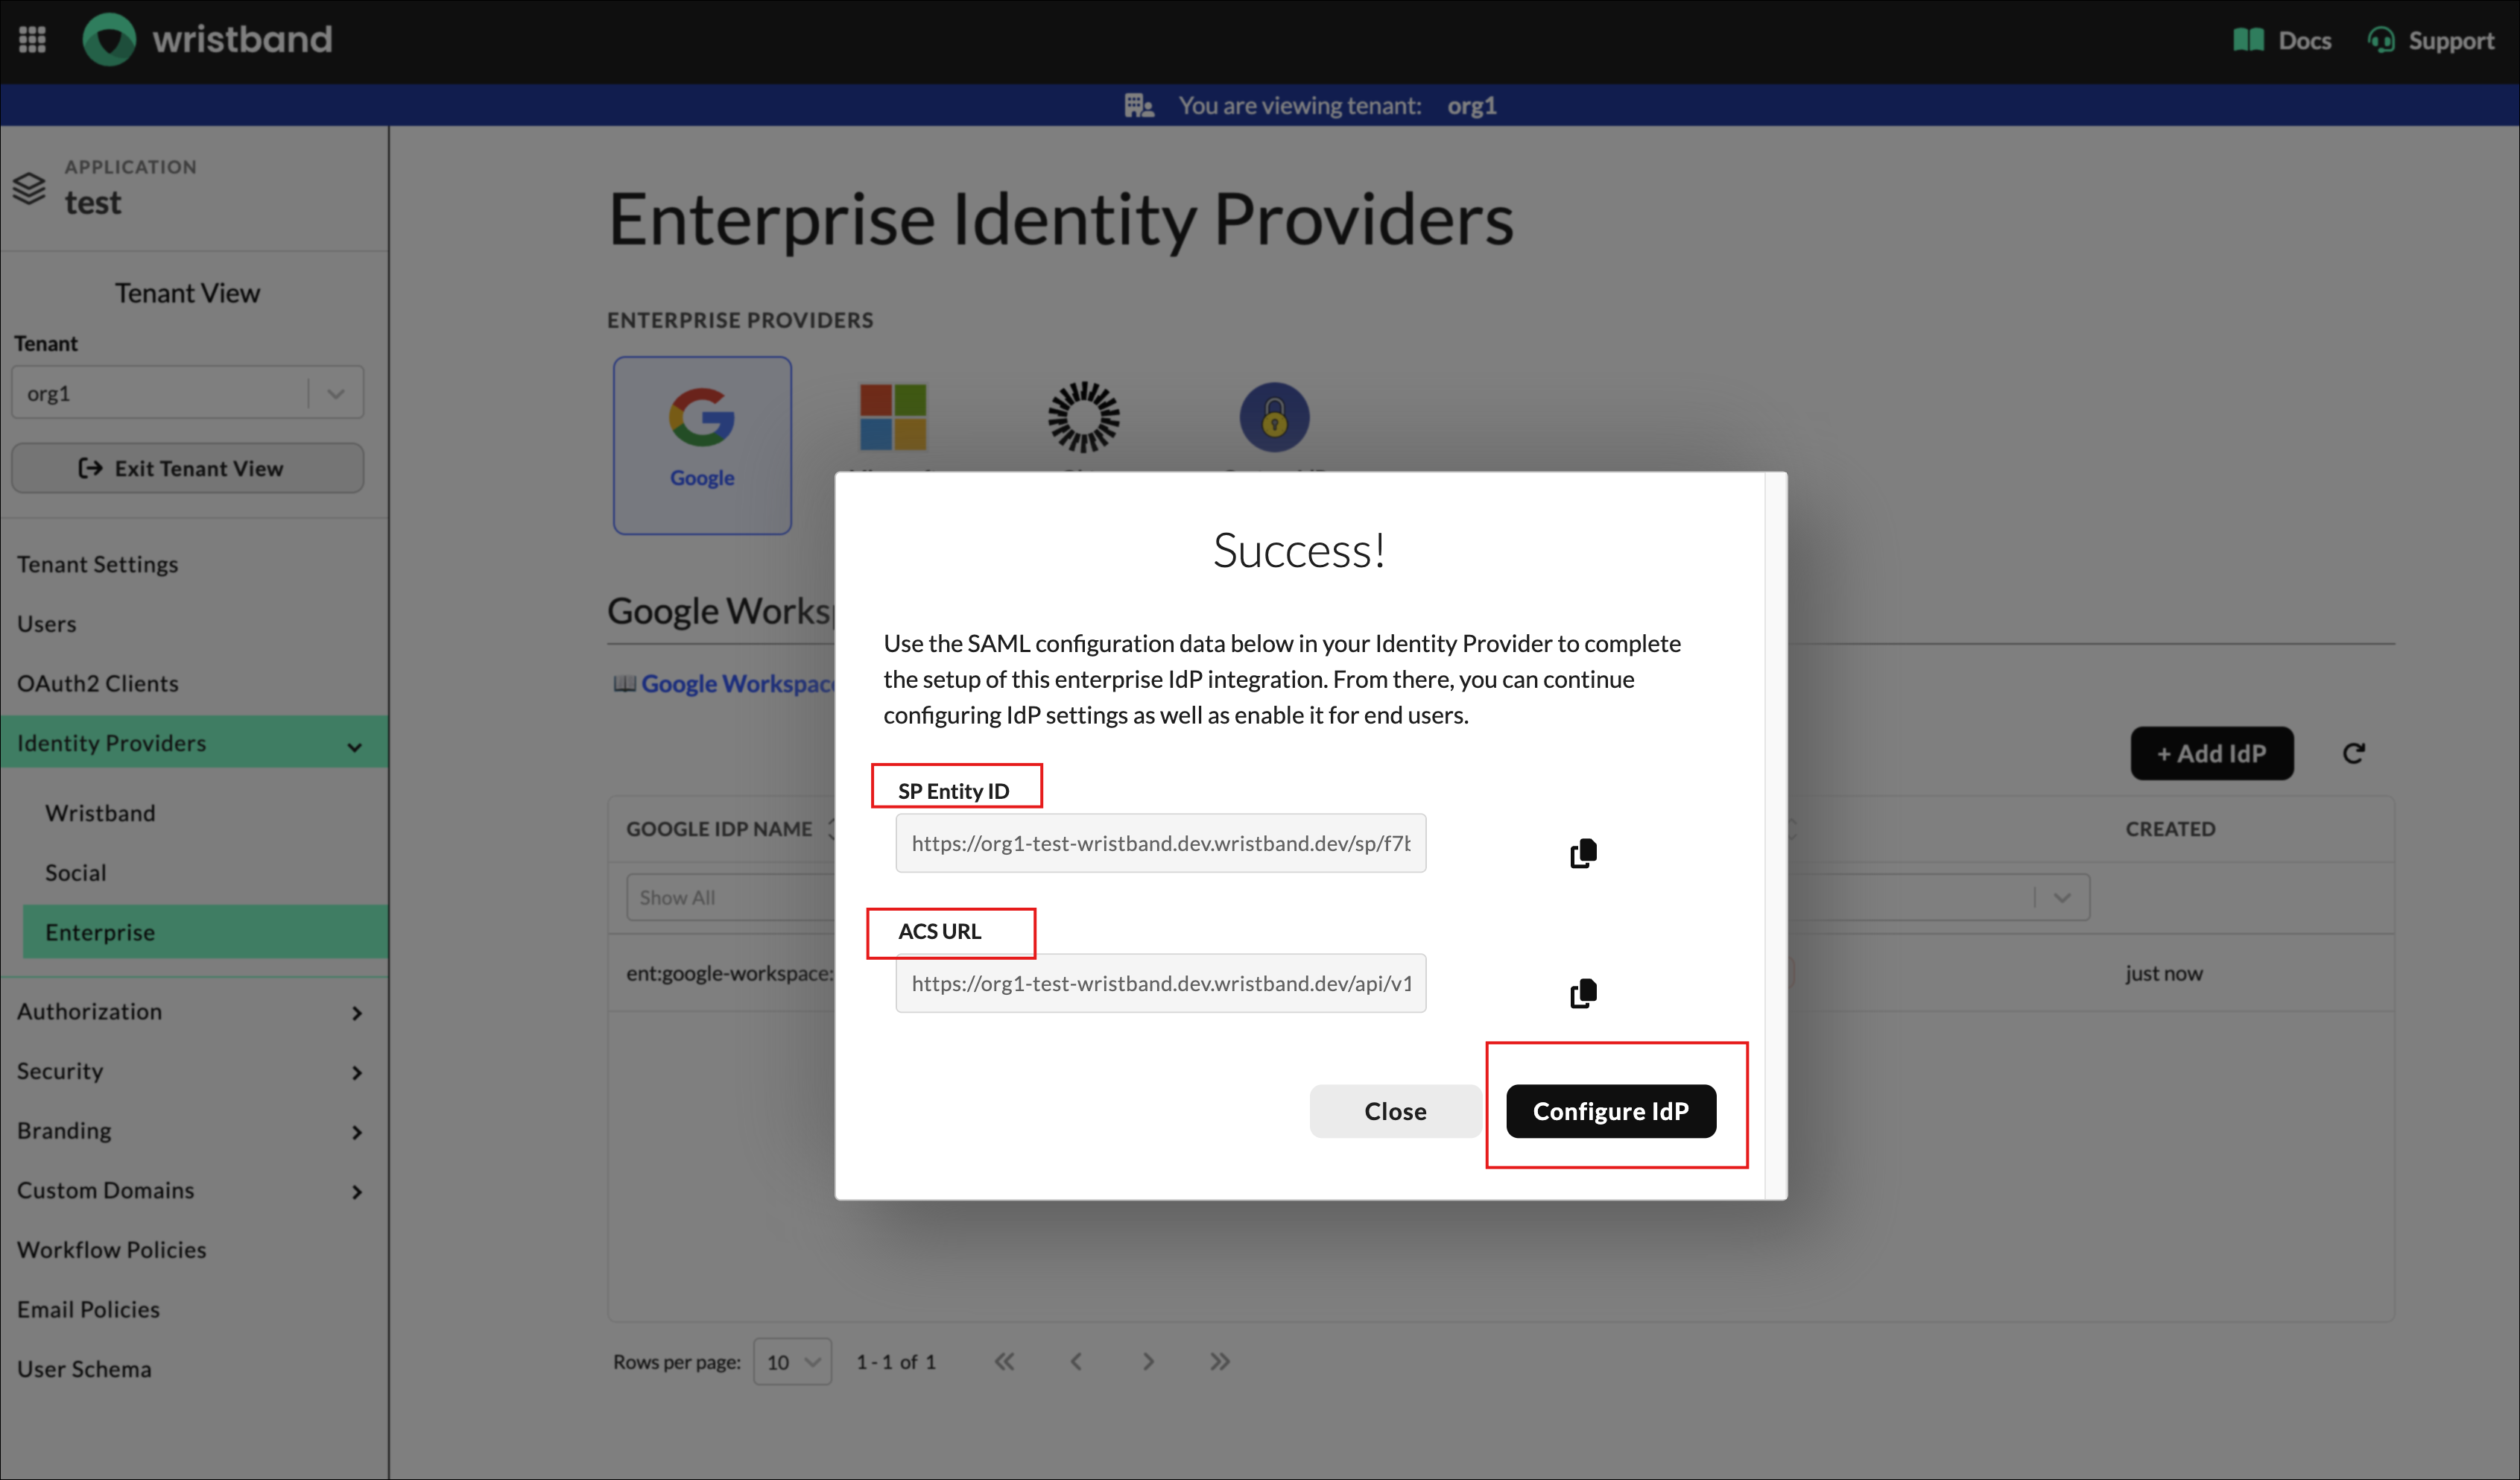
Figure 3: Copy the SP Entity ID and ACS URL from Wristband.
- Keep this tab open, as you will return here in Step 3 to finish the IdP setup. If your customer is configuring the Google Workspace SAML application themselves, make sure to forward these two values to them.
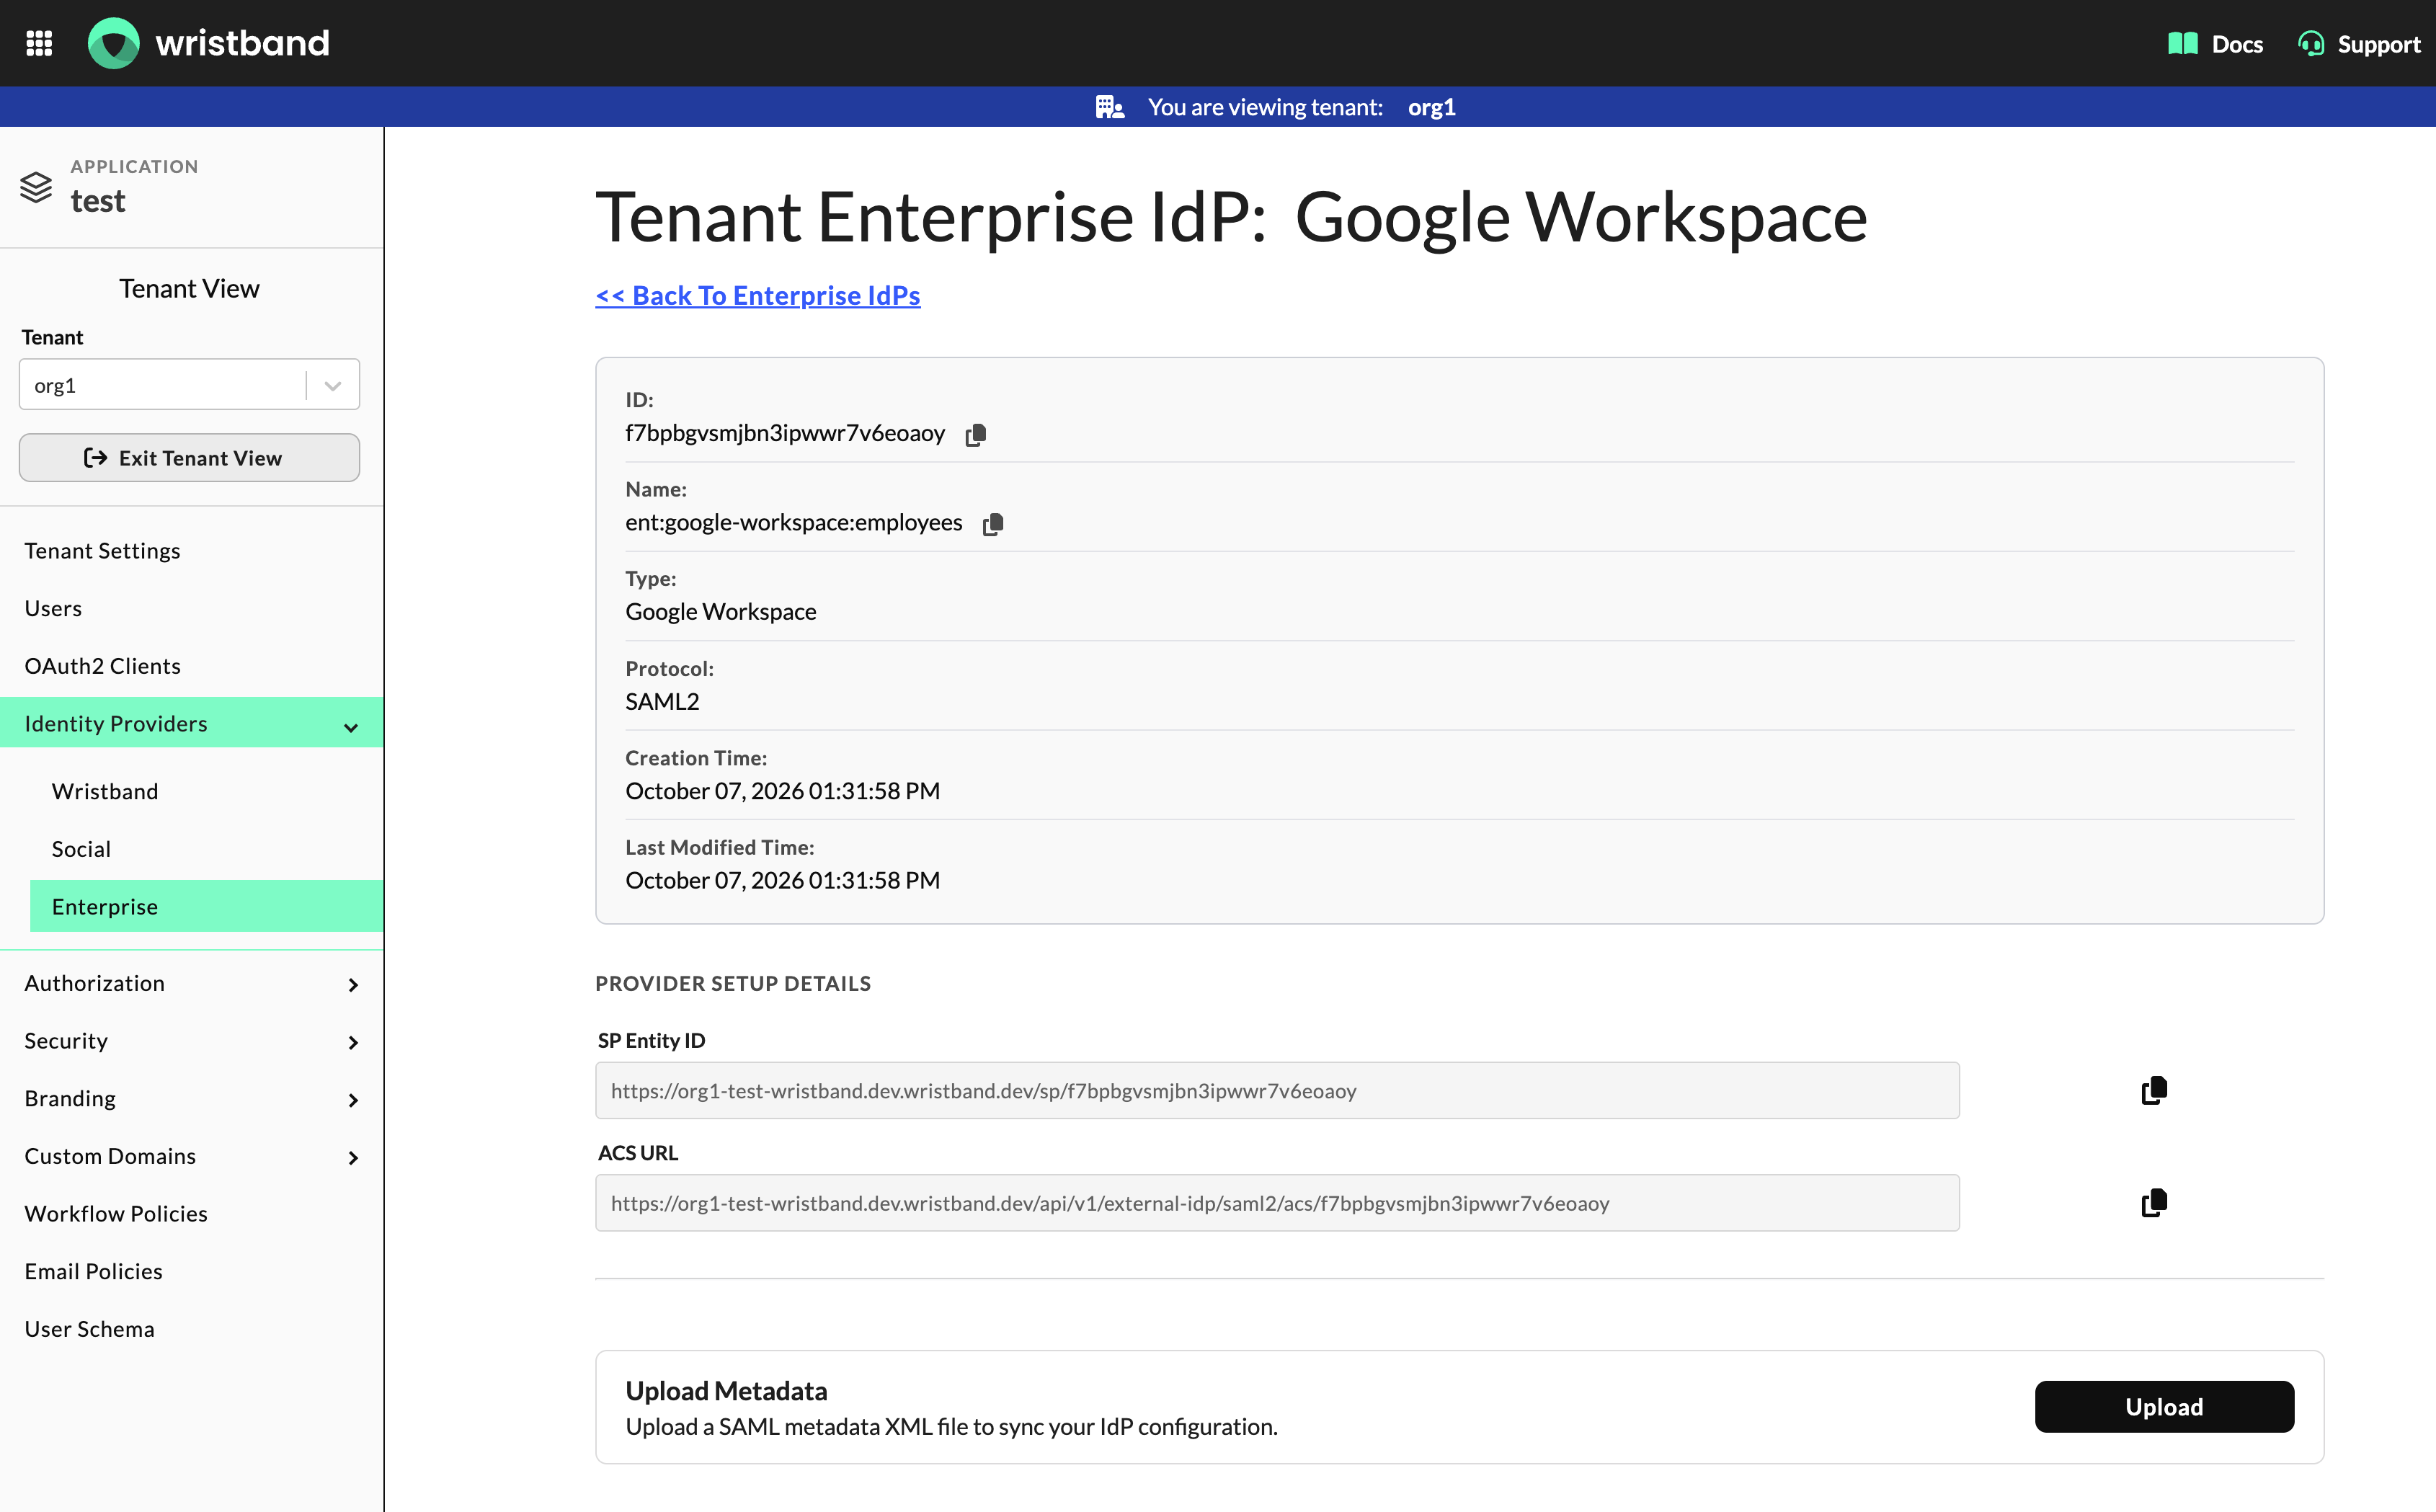
Figure 4: Keep the Wristband IdP Settings page open for the final configuration step.
Step 2: Set Up Your Customer's Google Workspace SAML Application
NoteYour customer typically needs to complete this step, as the setup must occur in their Google Workspace account. However, for testing or development, you can use your own personal Google Workspace account.
If your customer is performing this step, you'll need to provide them with the following values from Step 1:
- SP Entity ID
- ACS URL
- Log in to the customer's Google Workspace account, or register a new account here.
- Open the Admin Console side menu, go to Apps > Web and mobile apps, and click Add app > Add custom SAML app.
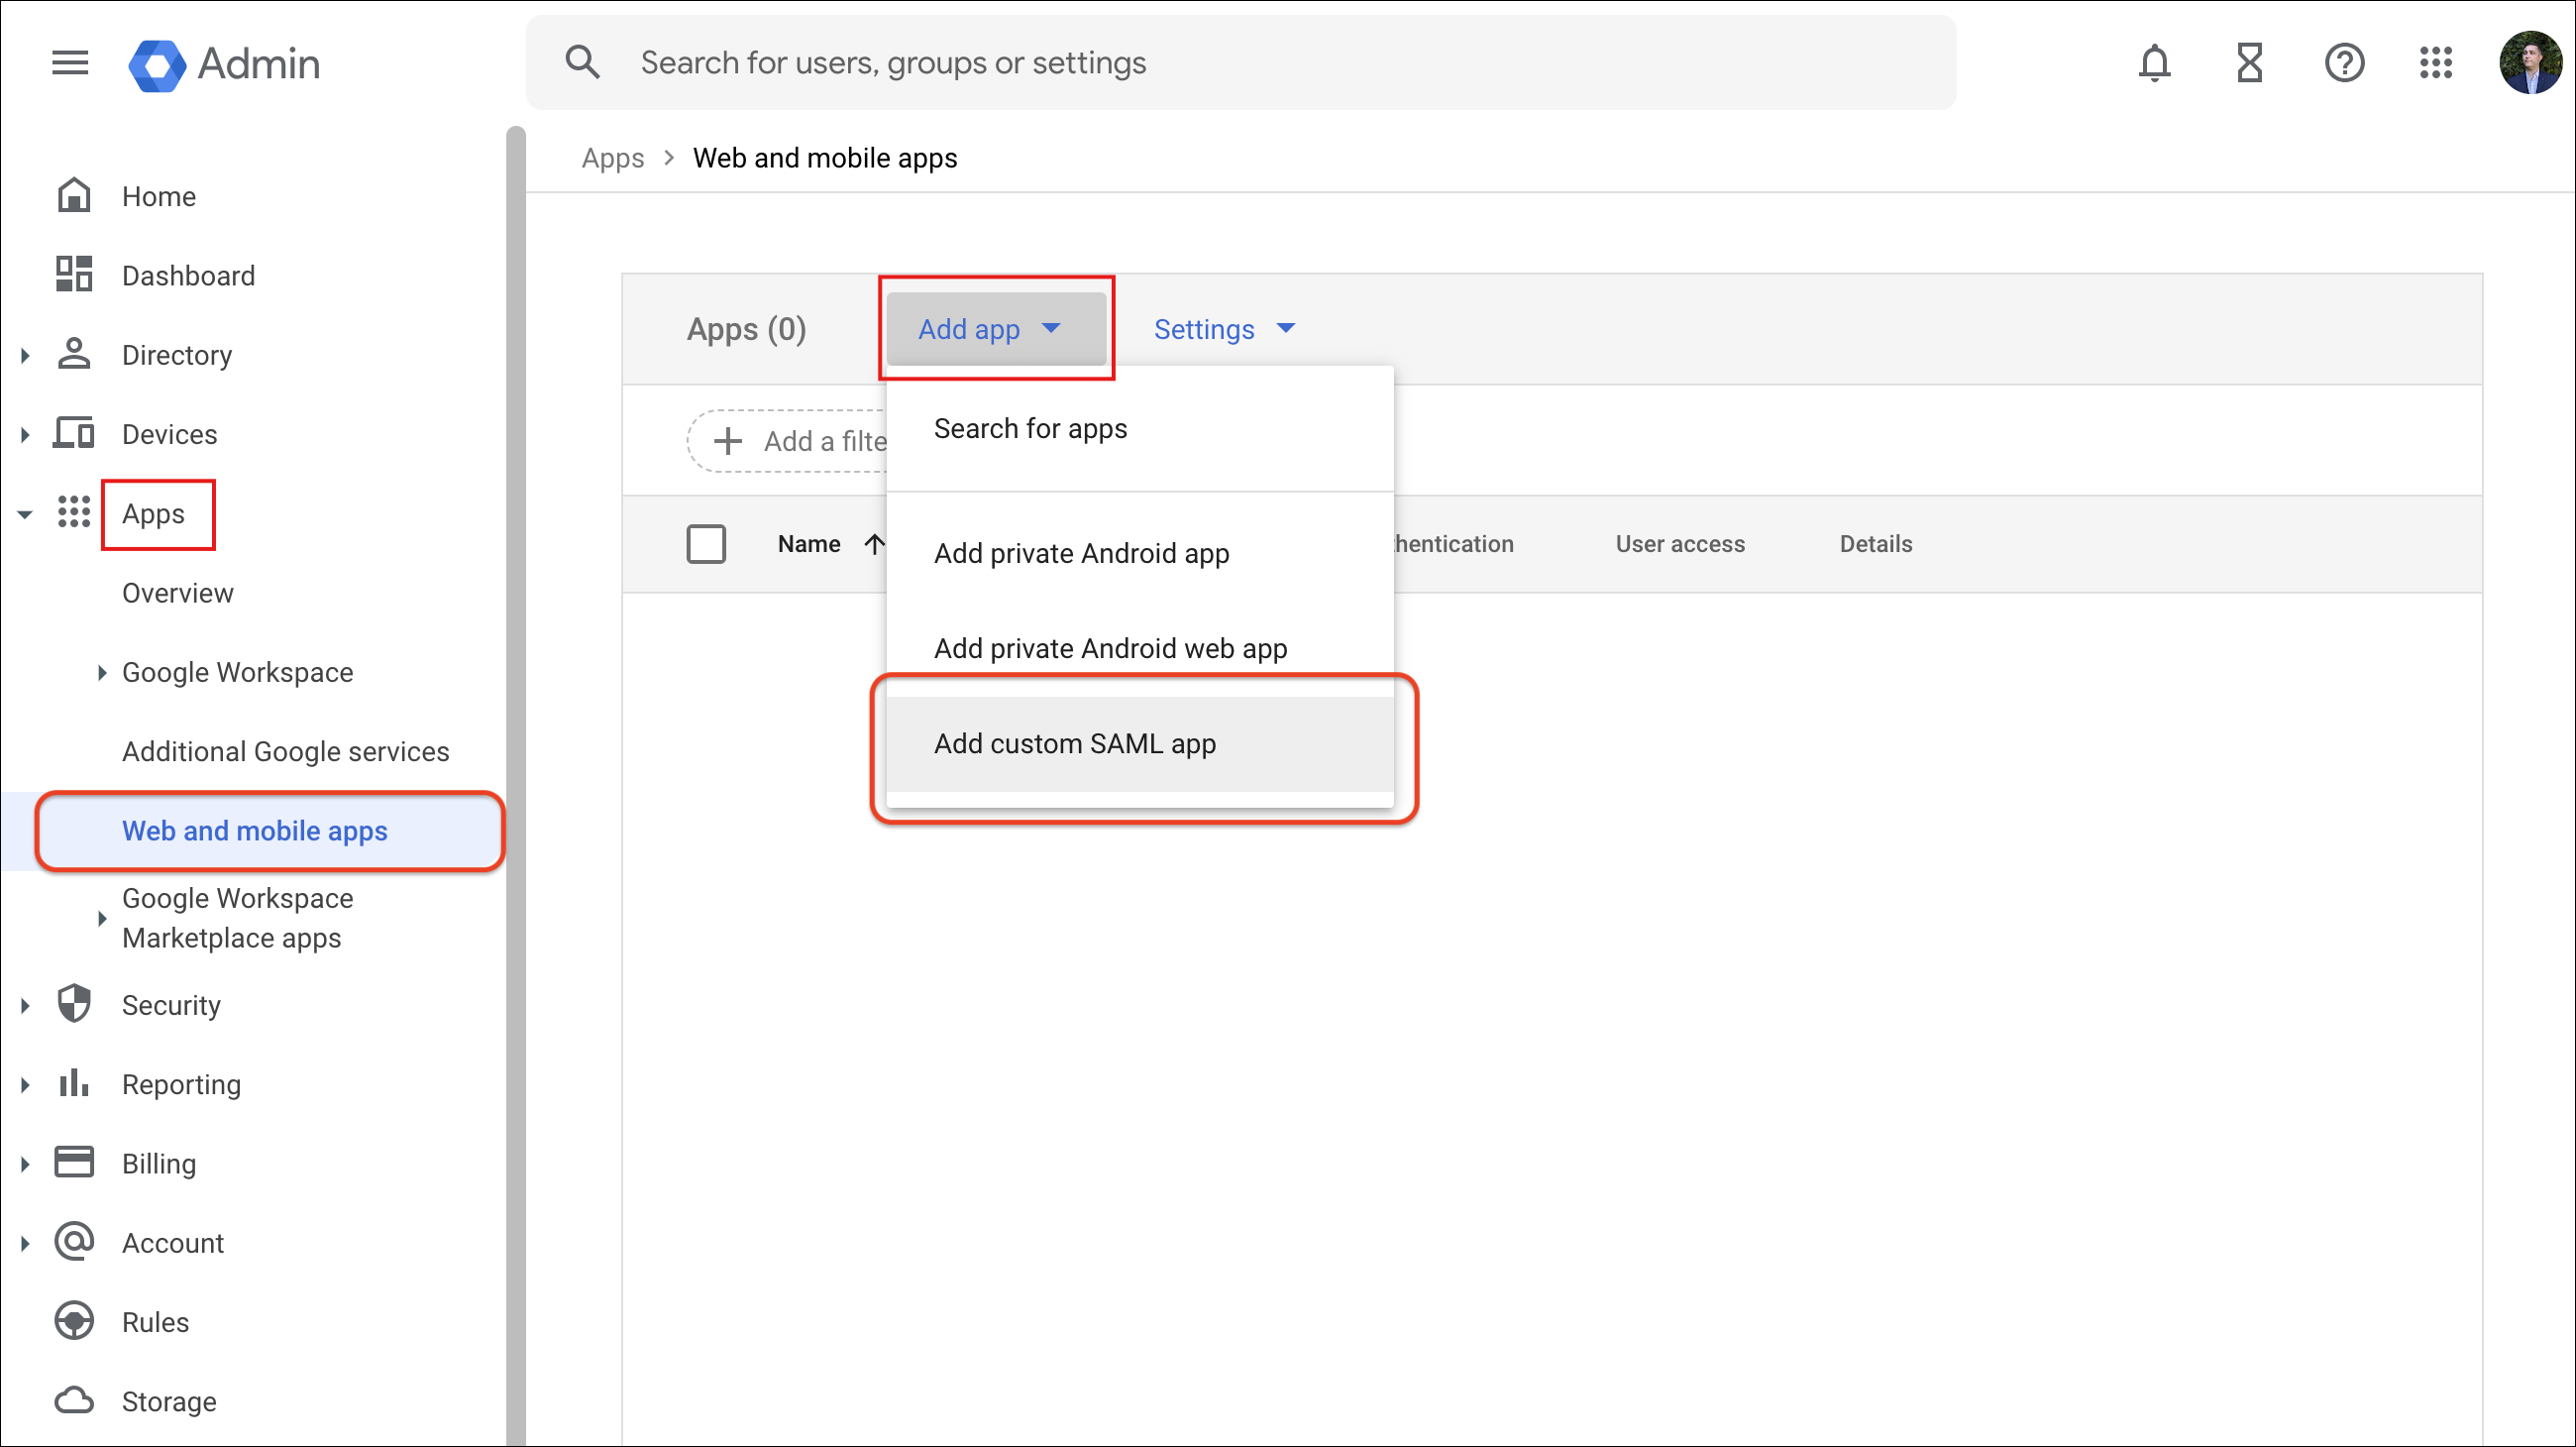
Figure 5: Select Add custom SAML app in the Google Admin console.
- Enter the following App Details:
- Name: The name of your application.
- Description (Optional): Text describing your application.
- App Icon (Optional): An icon for your application that will be displayed on the Google login screen.
- Click Continue
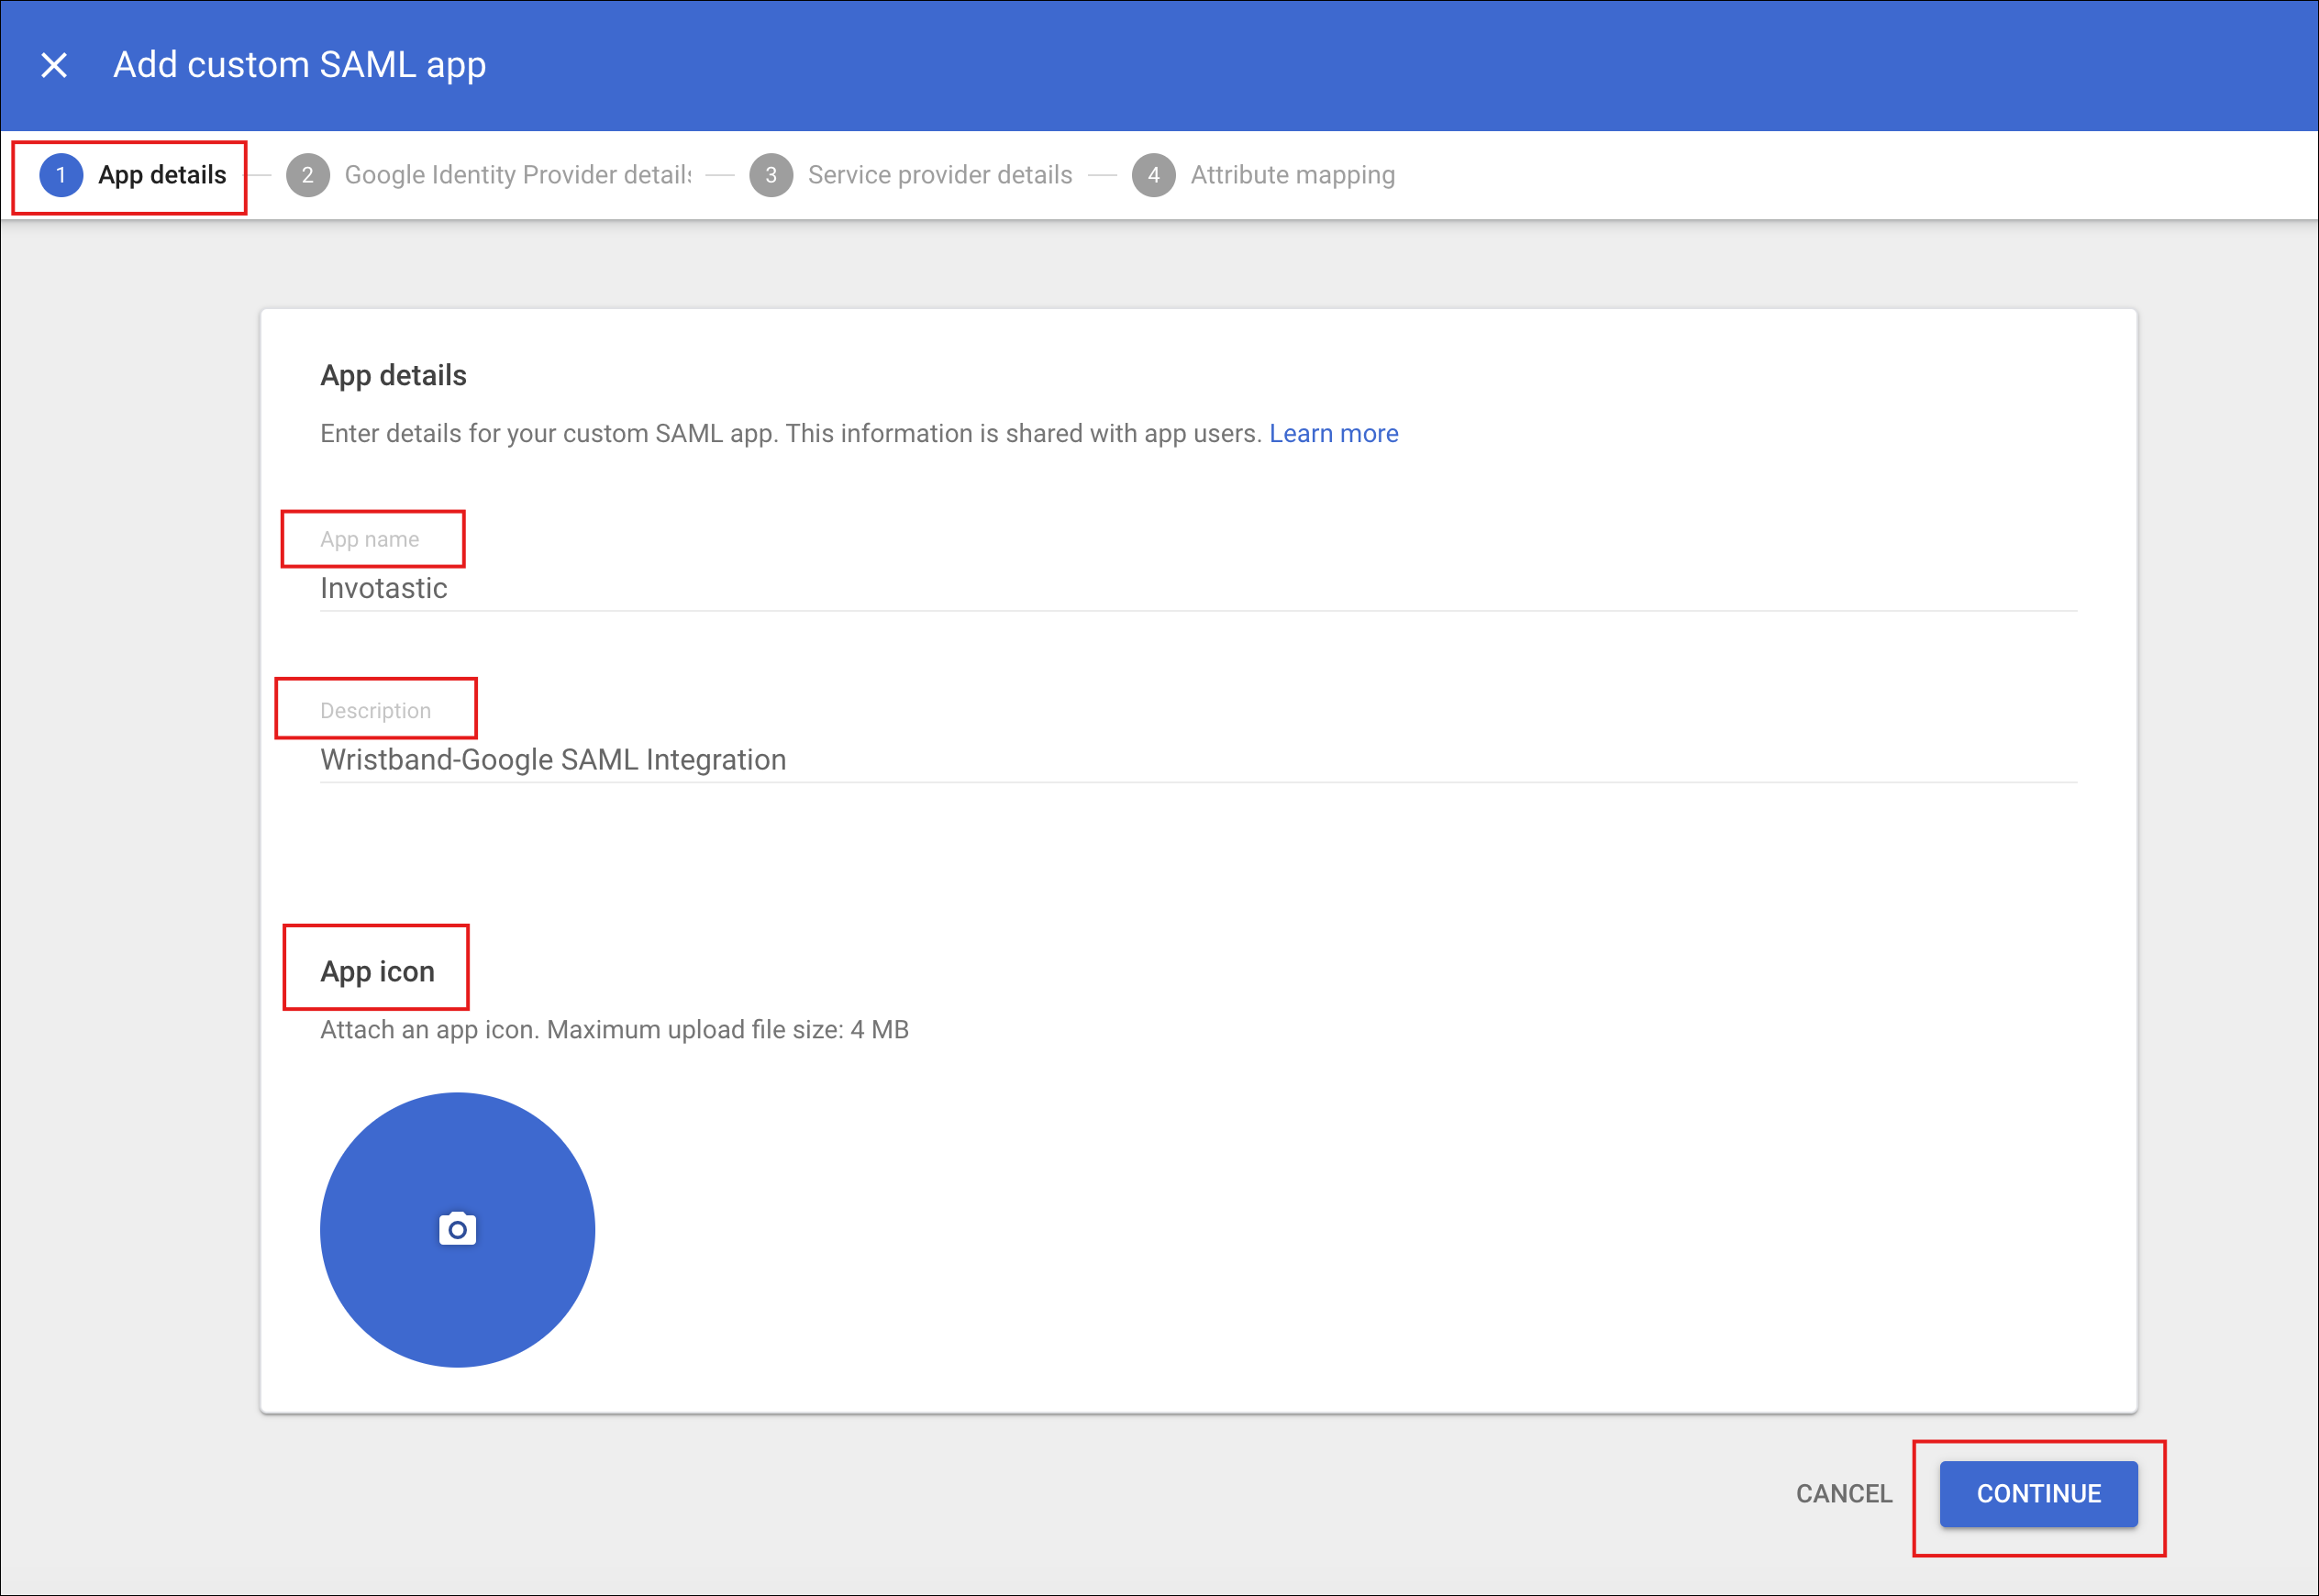
Figure 6: Enter the SAML app name and optional app details.
- Click Download Metadata to save the XML file containing the SAML application's configuration details. You will need this file in Step 3 to complete the Wristband IdP setup.
- Click Continue.
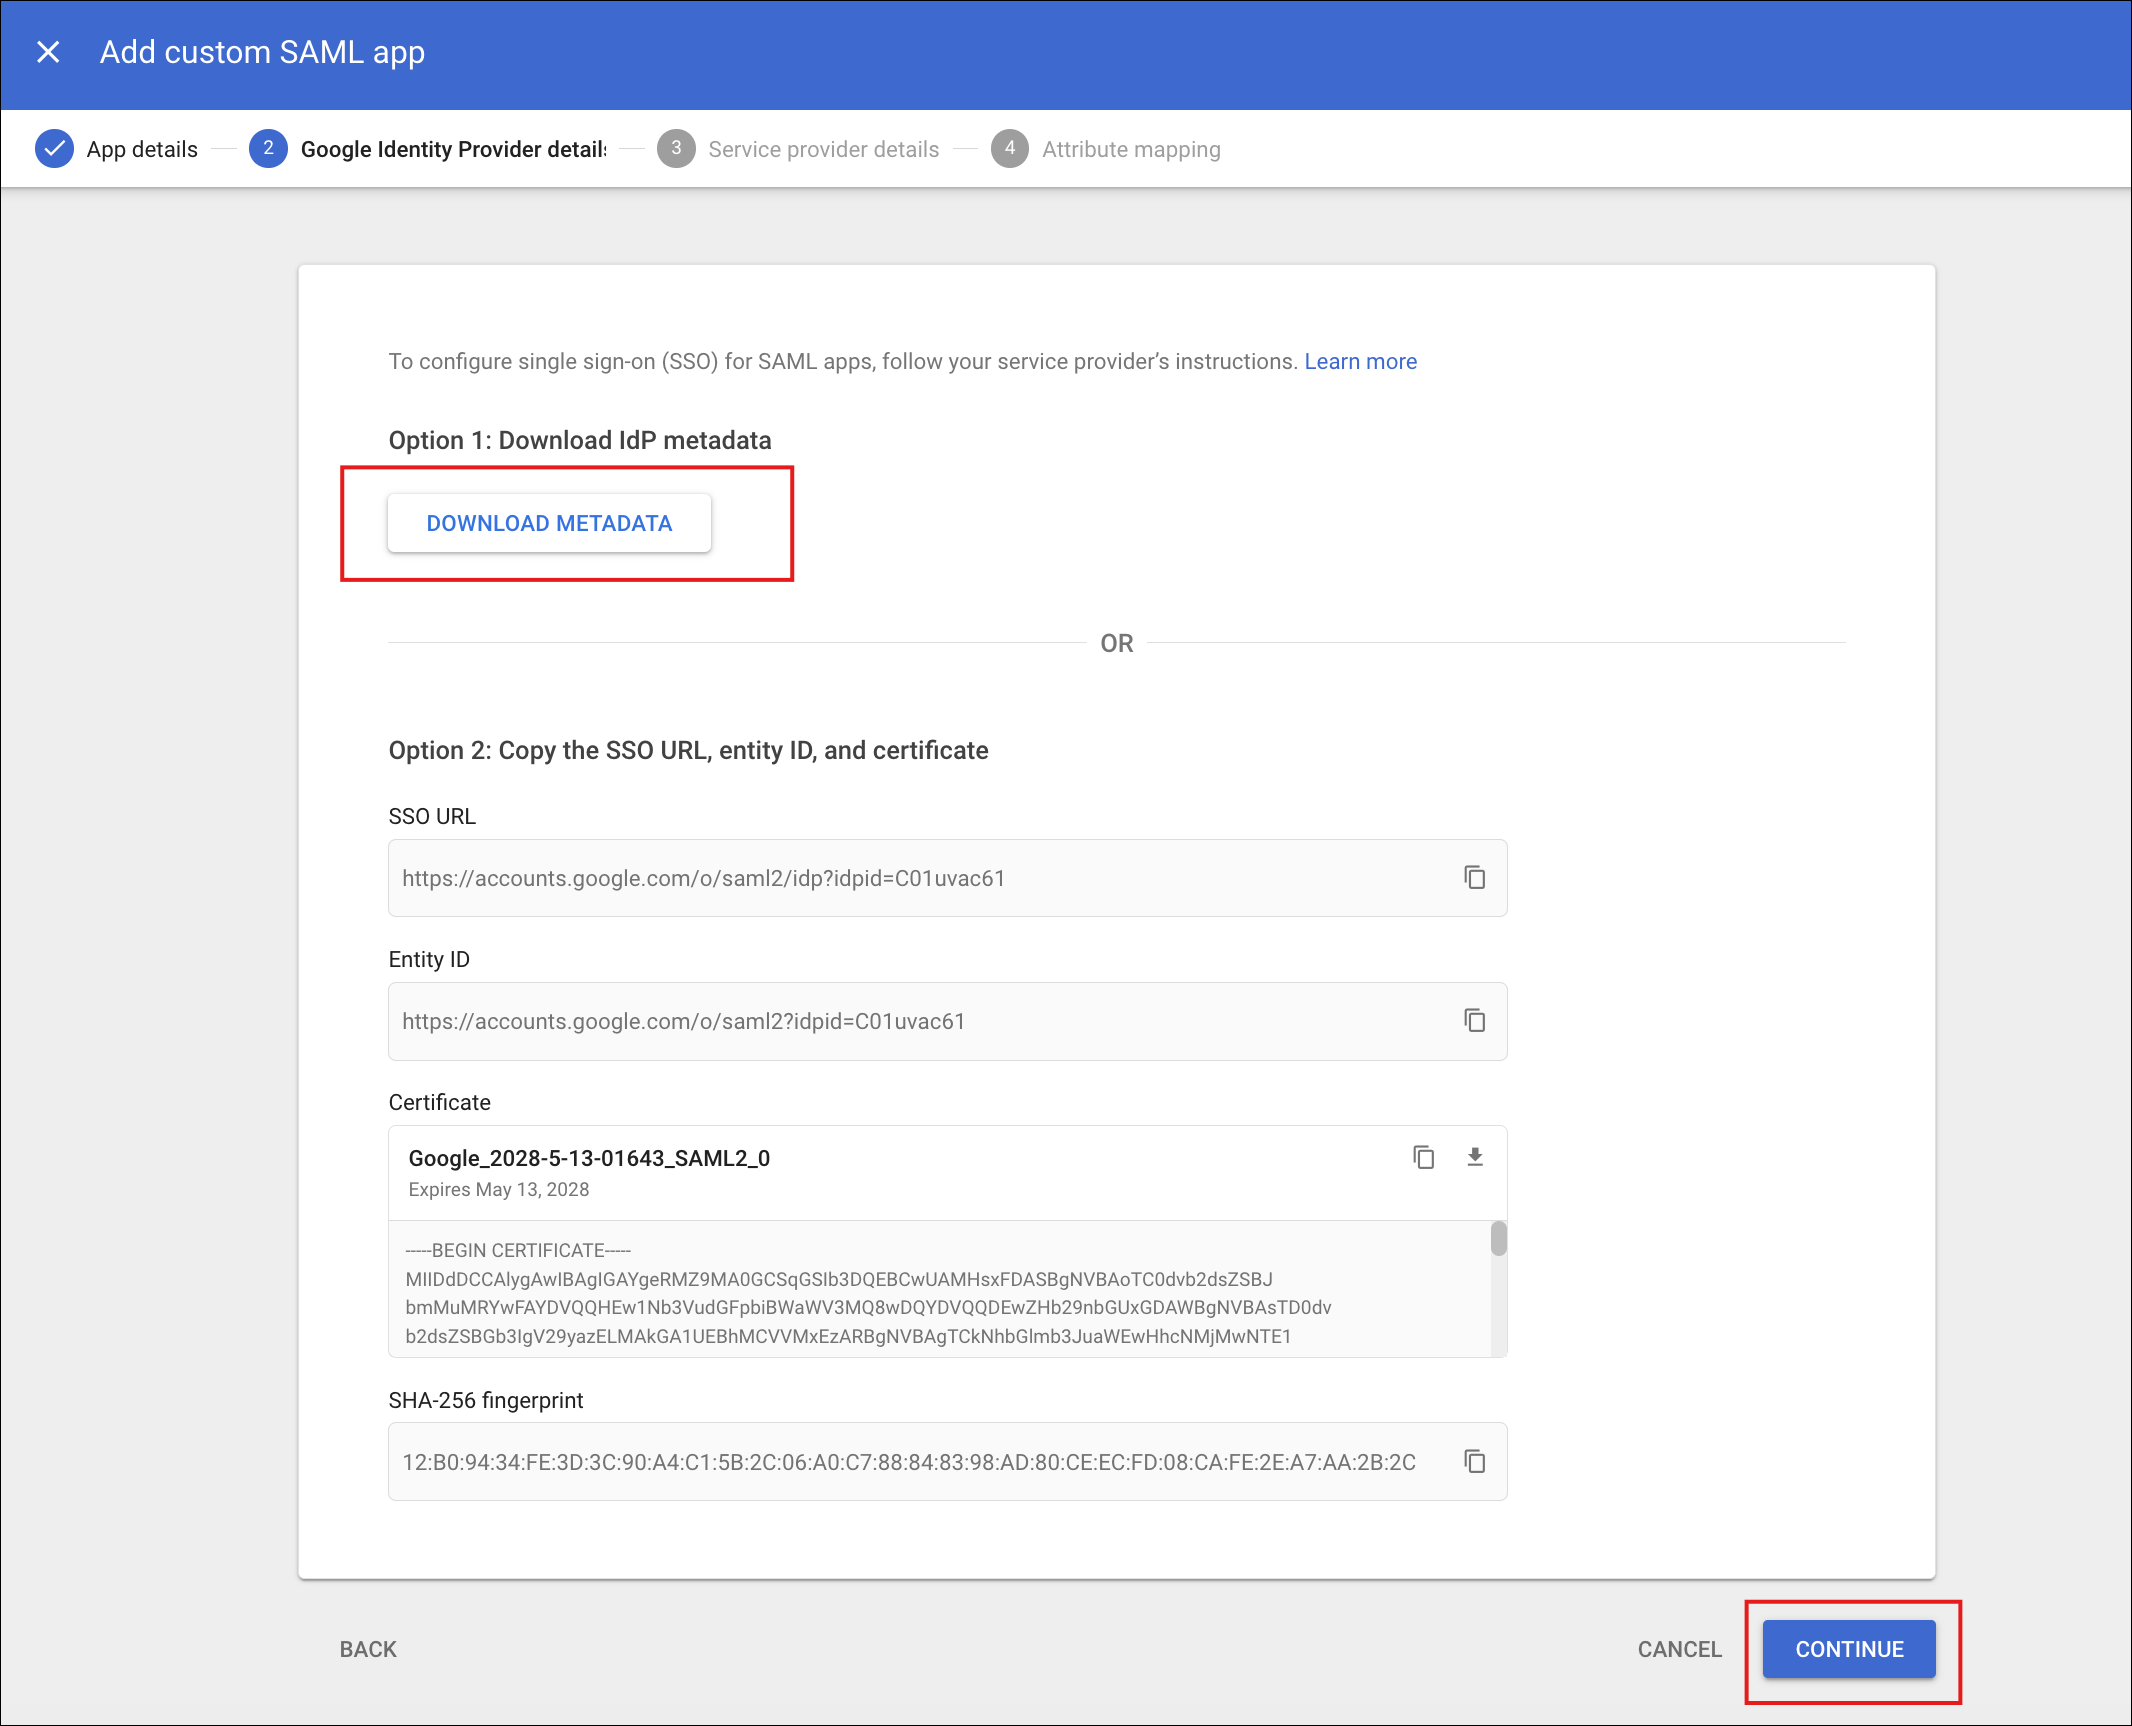
Figure 7: Download the Google Workspace SAML metadata file.
- Enter the following Service Provider Details:
- ACS URL: Your Wristband Google Workspace IdP ACS URL, copied from Step 1.
- Entity ID: Your Wristband Google Workspace SP Entity ID, copied from Step 1.
- Click Continue.
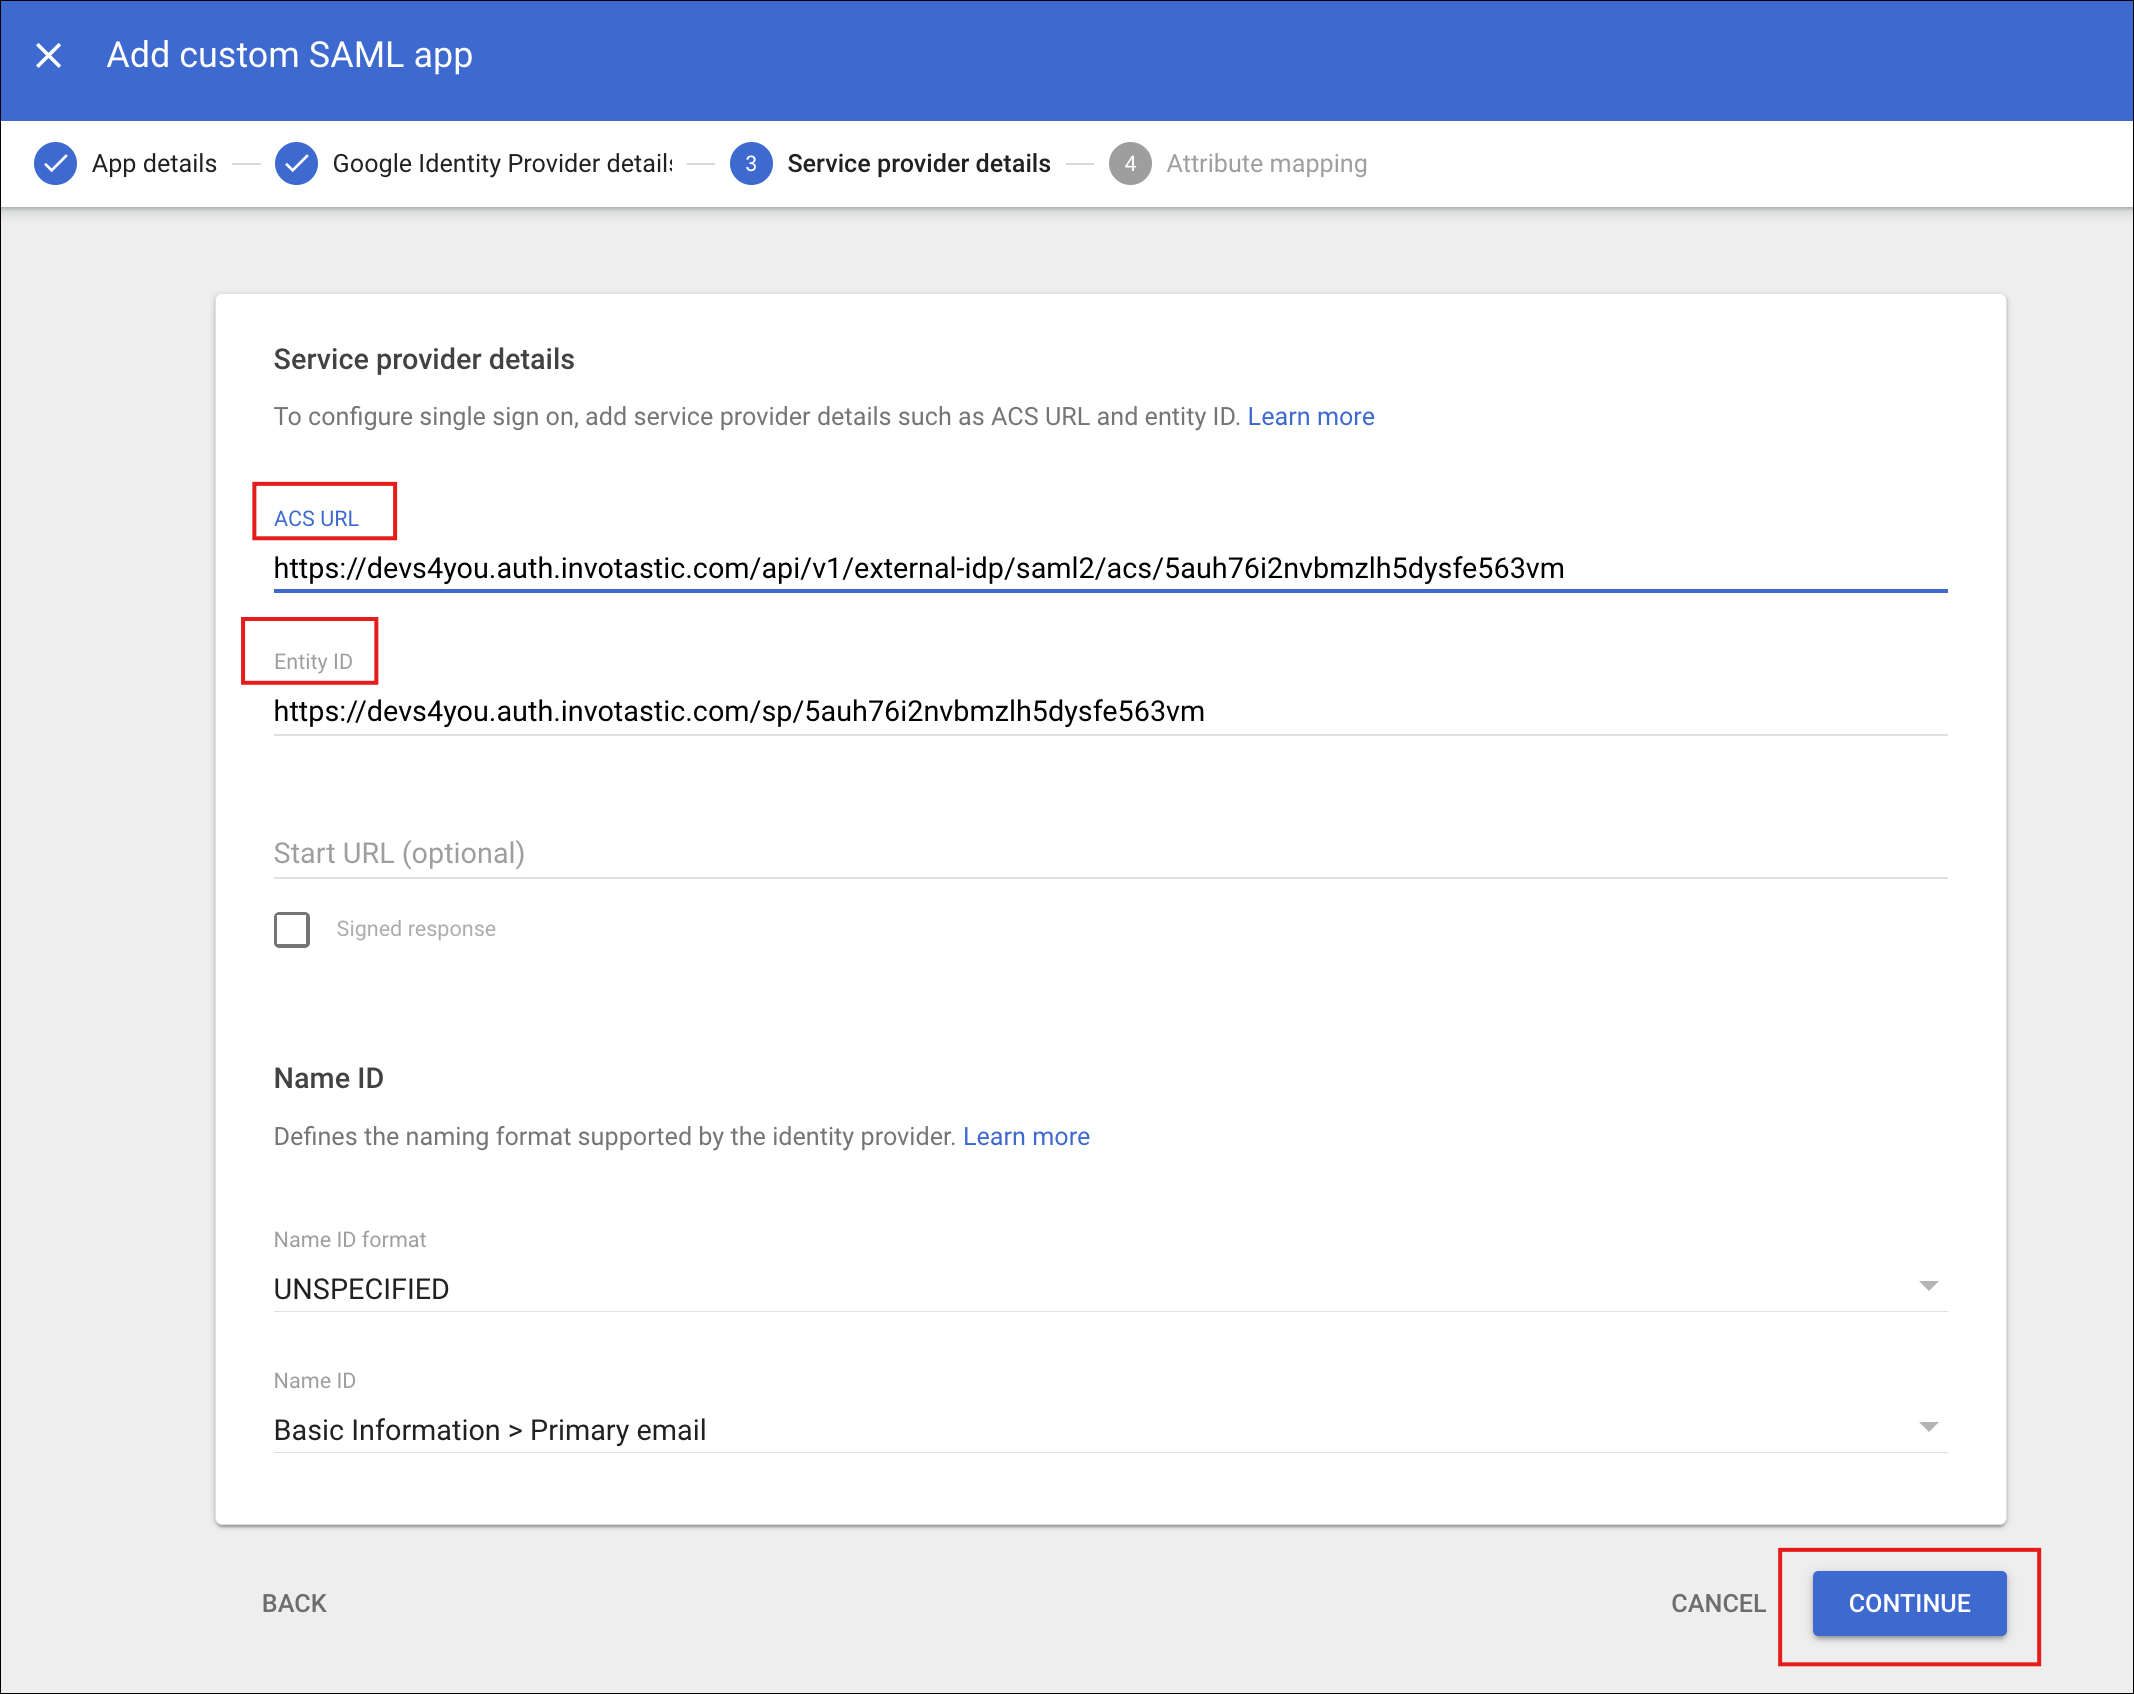
Figure 8: Enter Wristband’s ACS URL and SP Entity ID as the service provider details.
- Create the following attribute mappings:
| Google Directory Attribute | App Attribute |
|---|---|
| First name | givenName |
| Last name | familyName |
| Primary email | |
| Phone number | phoneNumber |
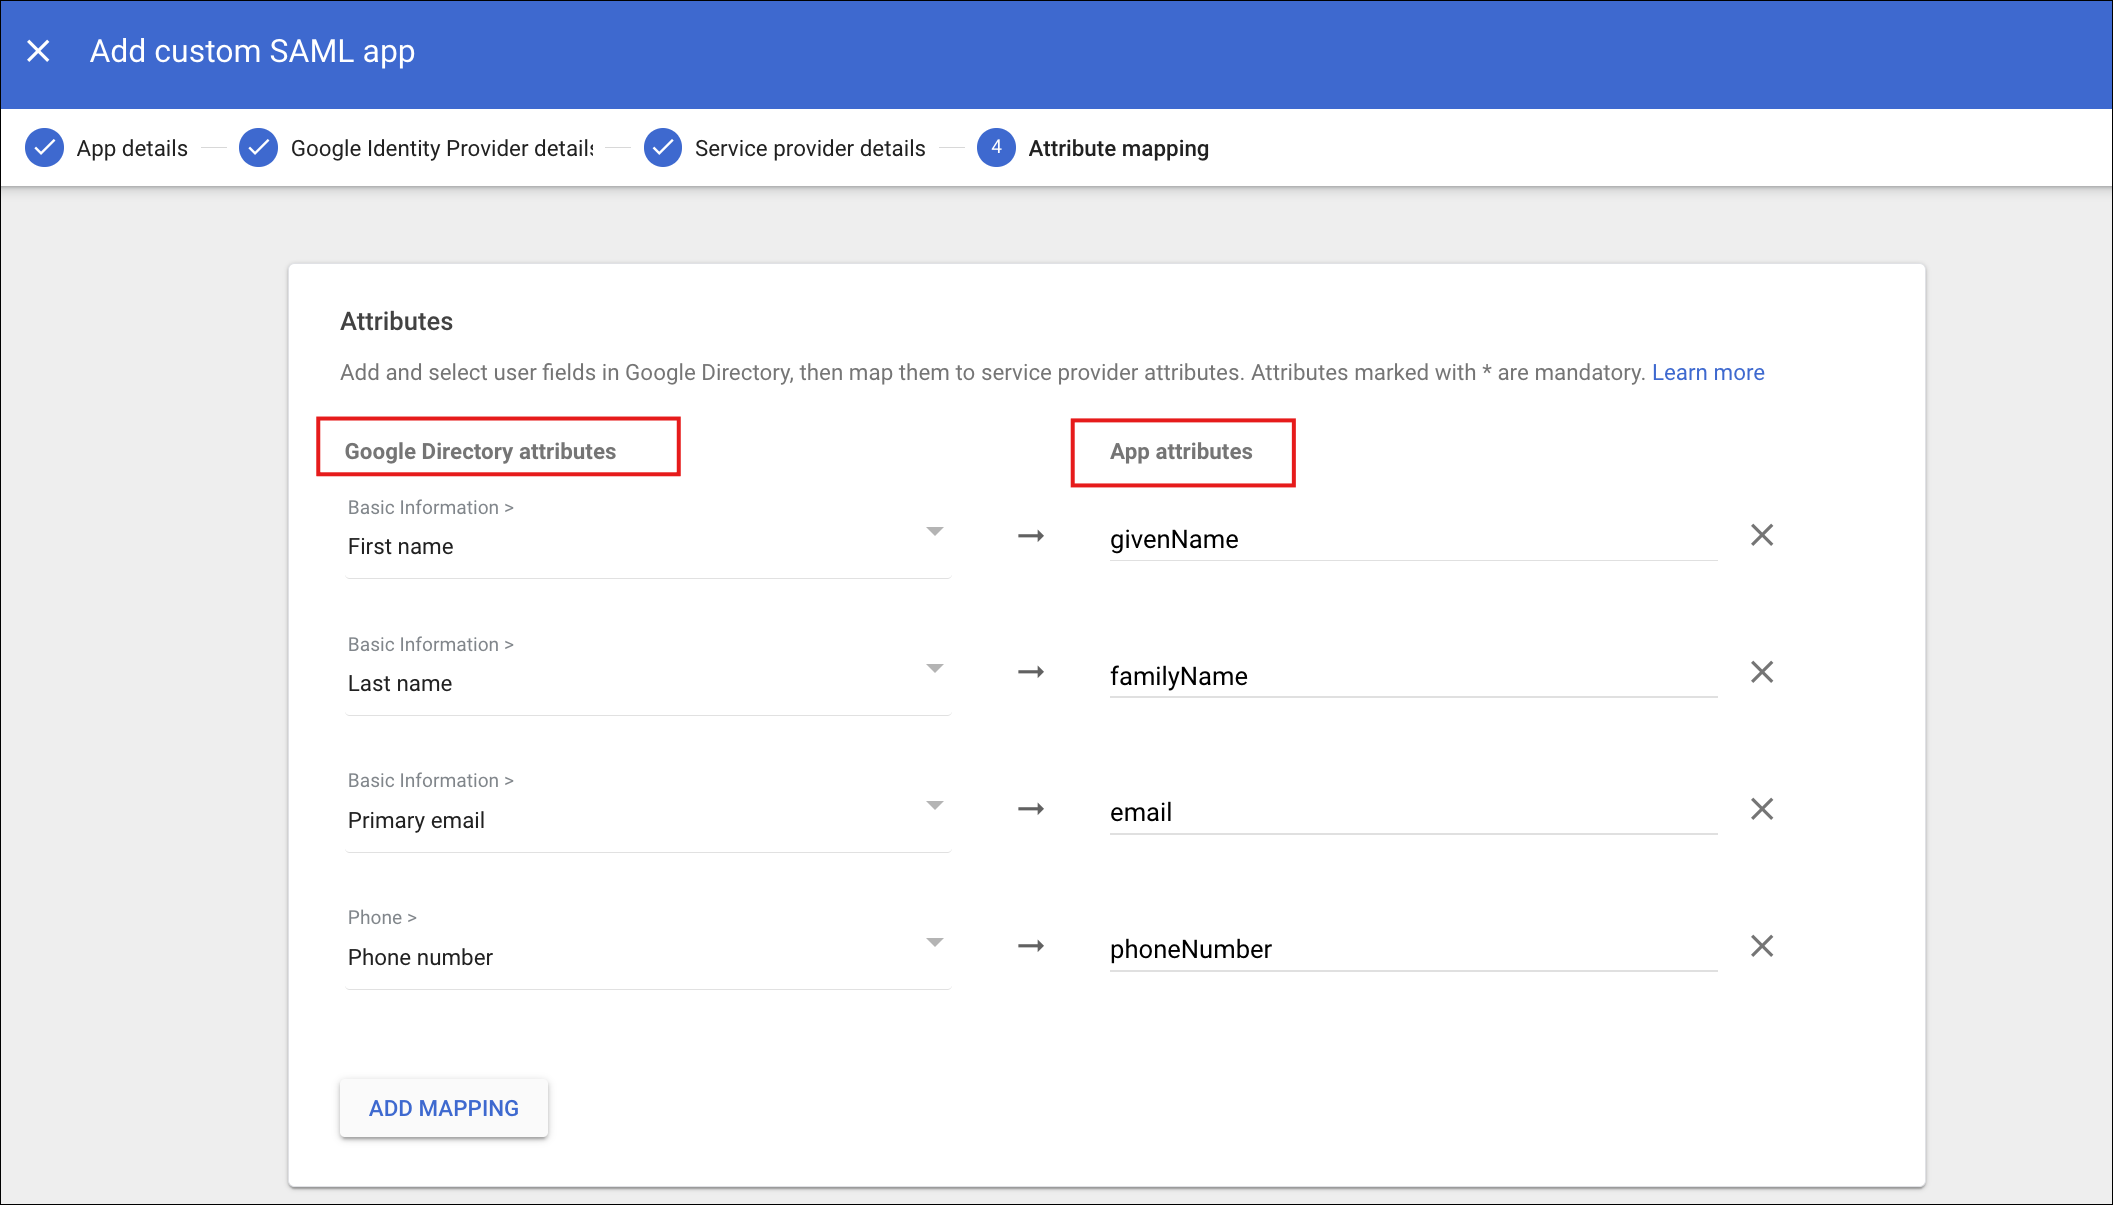
Figure 9: Map Google Directory attributes to the SAML app attributes.
- To use Wristband's role mapping feature, map your Google Groups to the Wristband
groupsattribute in the Group membership section. In the Google groups field, list all groups you plan to map. If you are not using role mapping, you can leave this section blank. - Click Finish.
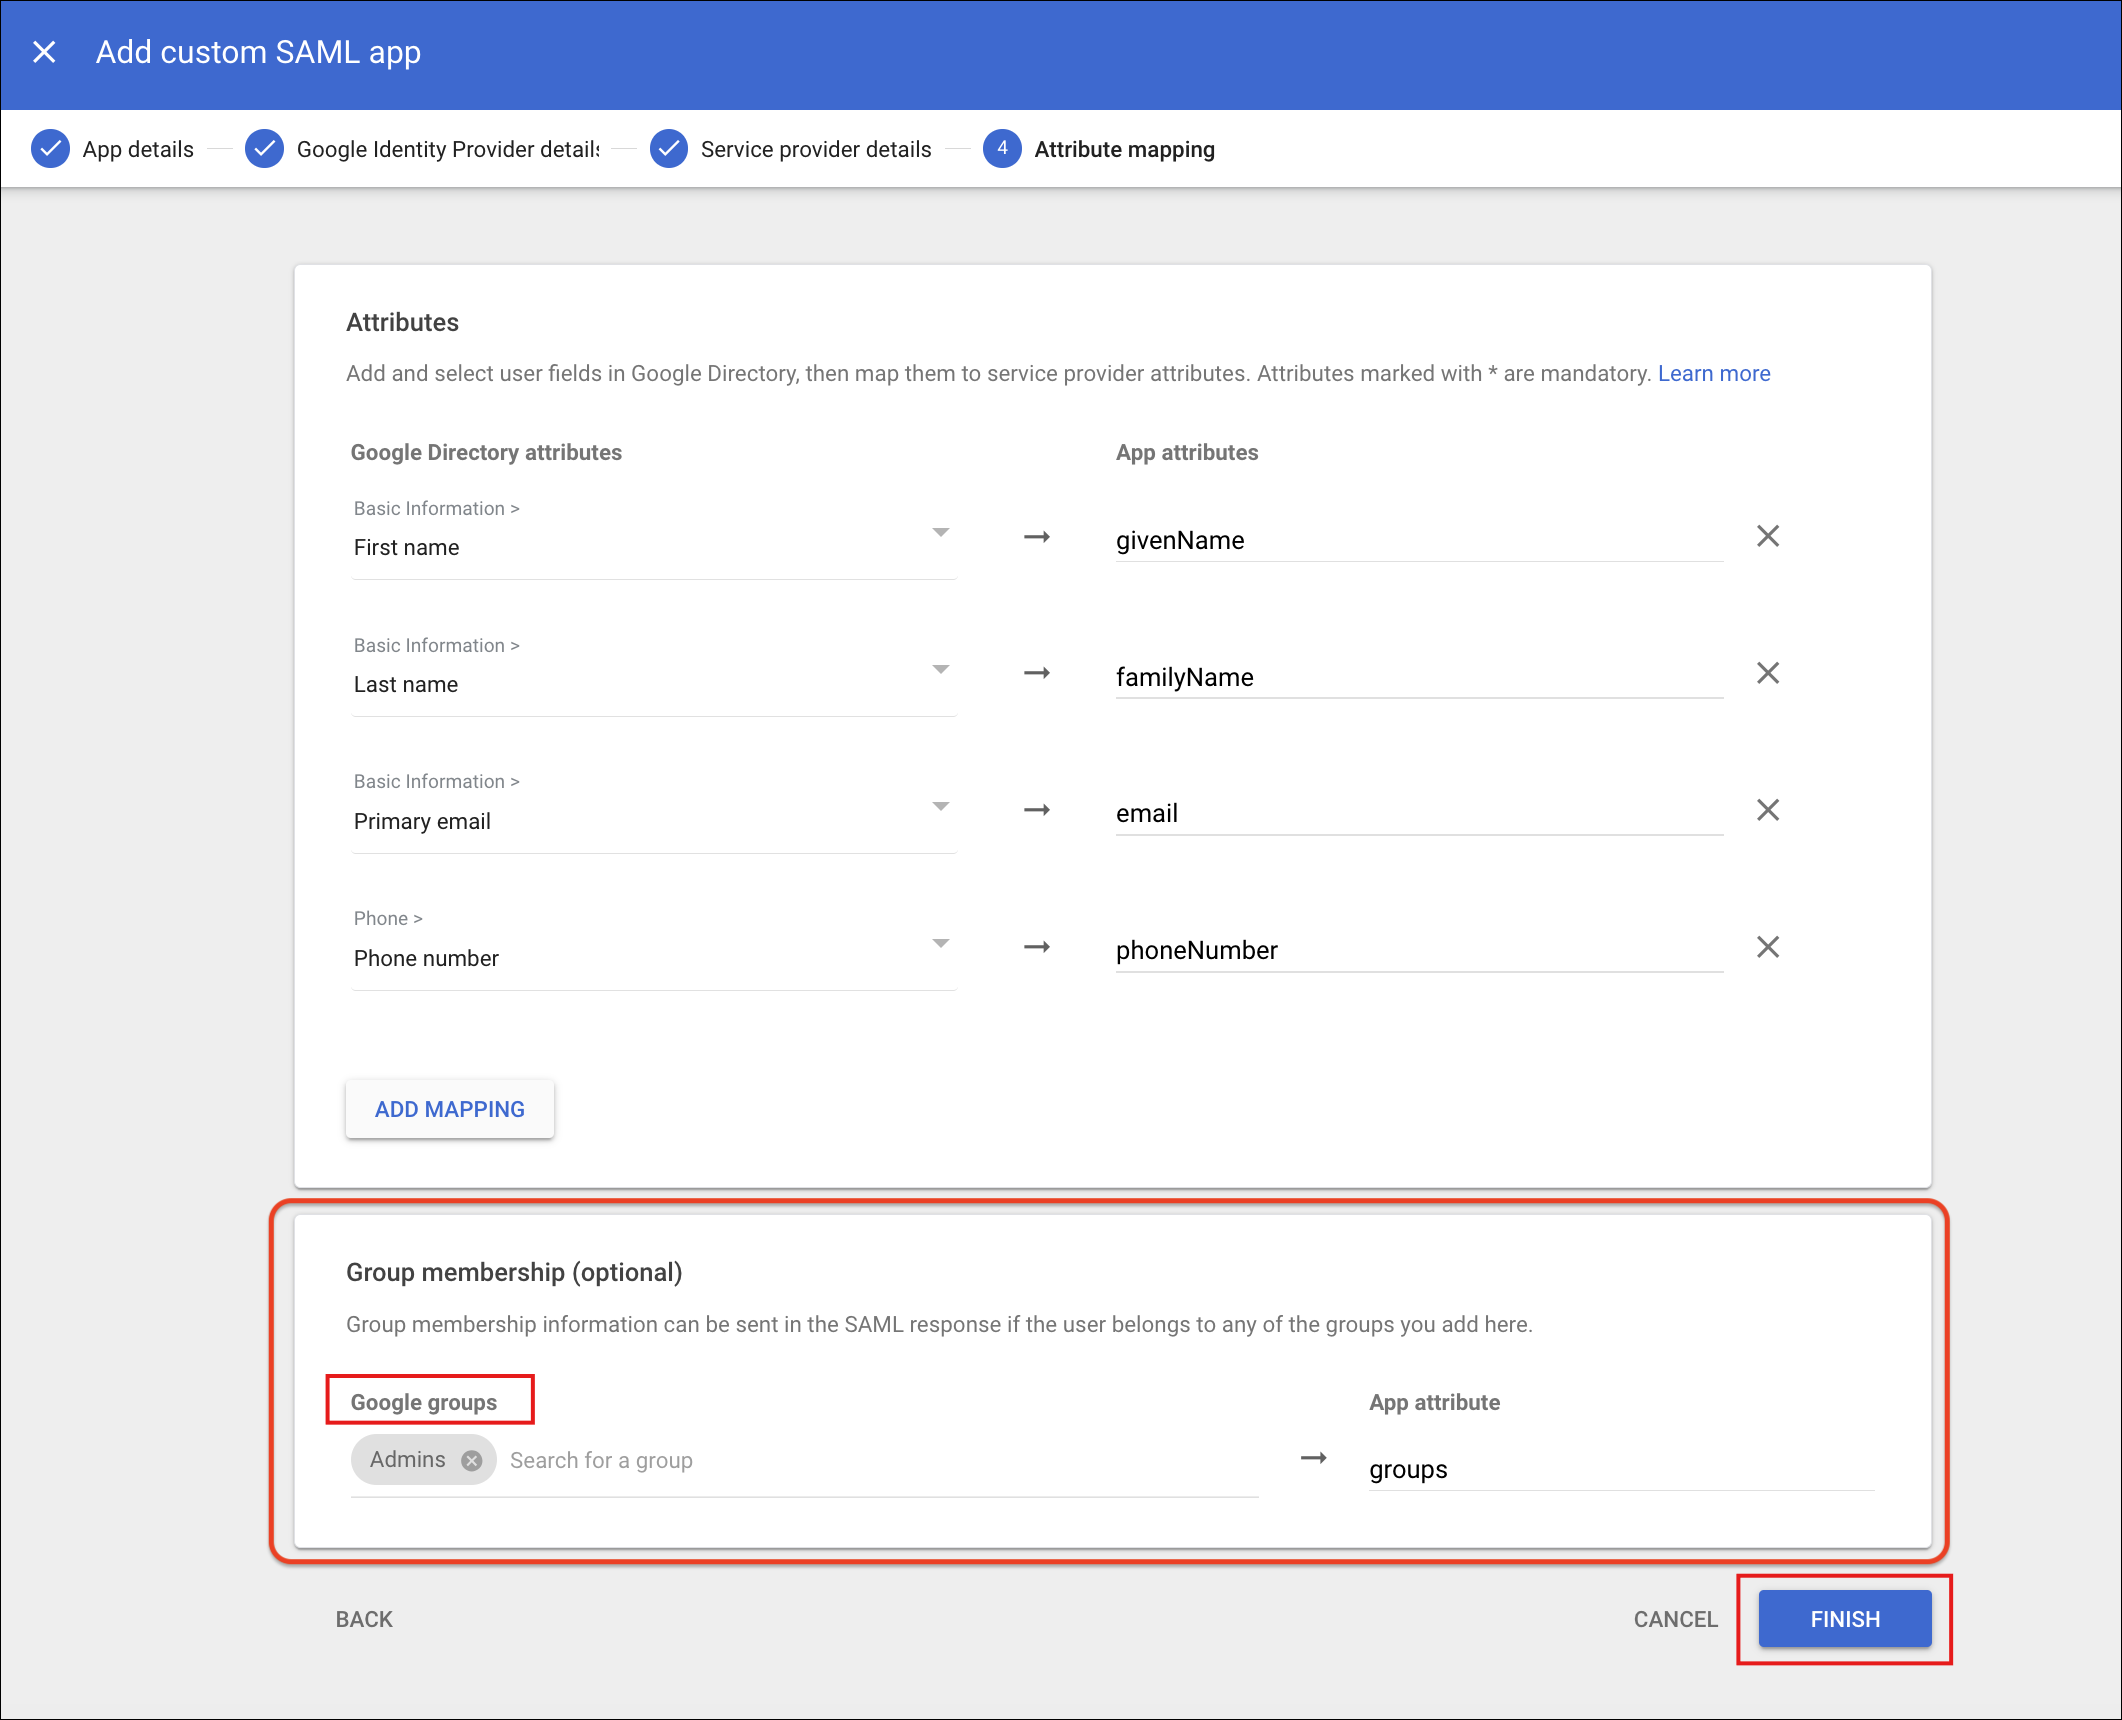
Figure 10: Add Google Groups for role mapping, if you use that feature.
Step 3: Complete Google Workspace IdP Configuration in Wristband
- Return to the Wristband IdP Settings page for your Google Workspace IdP.
- Click the Upload button in the Upload Metadata section.
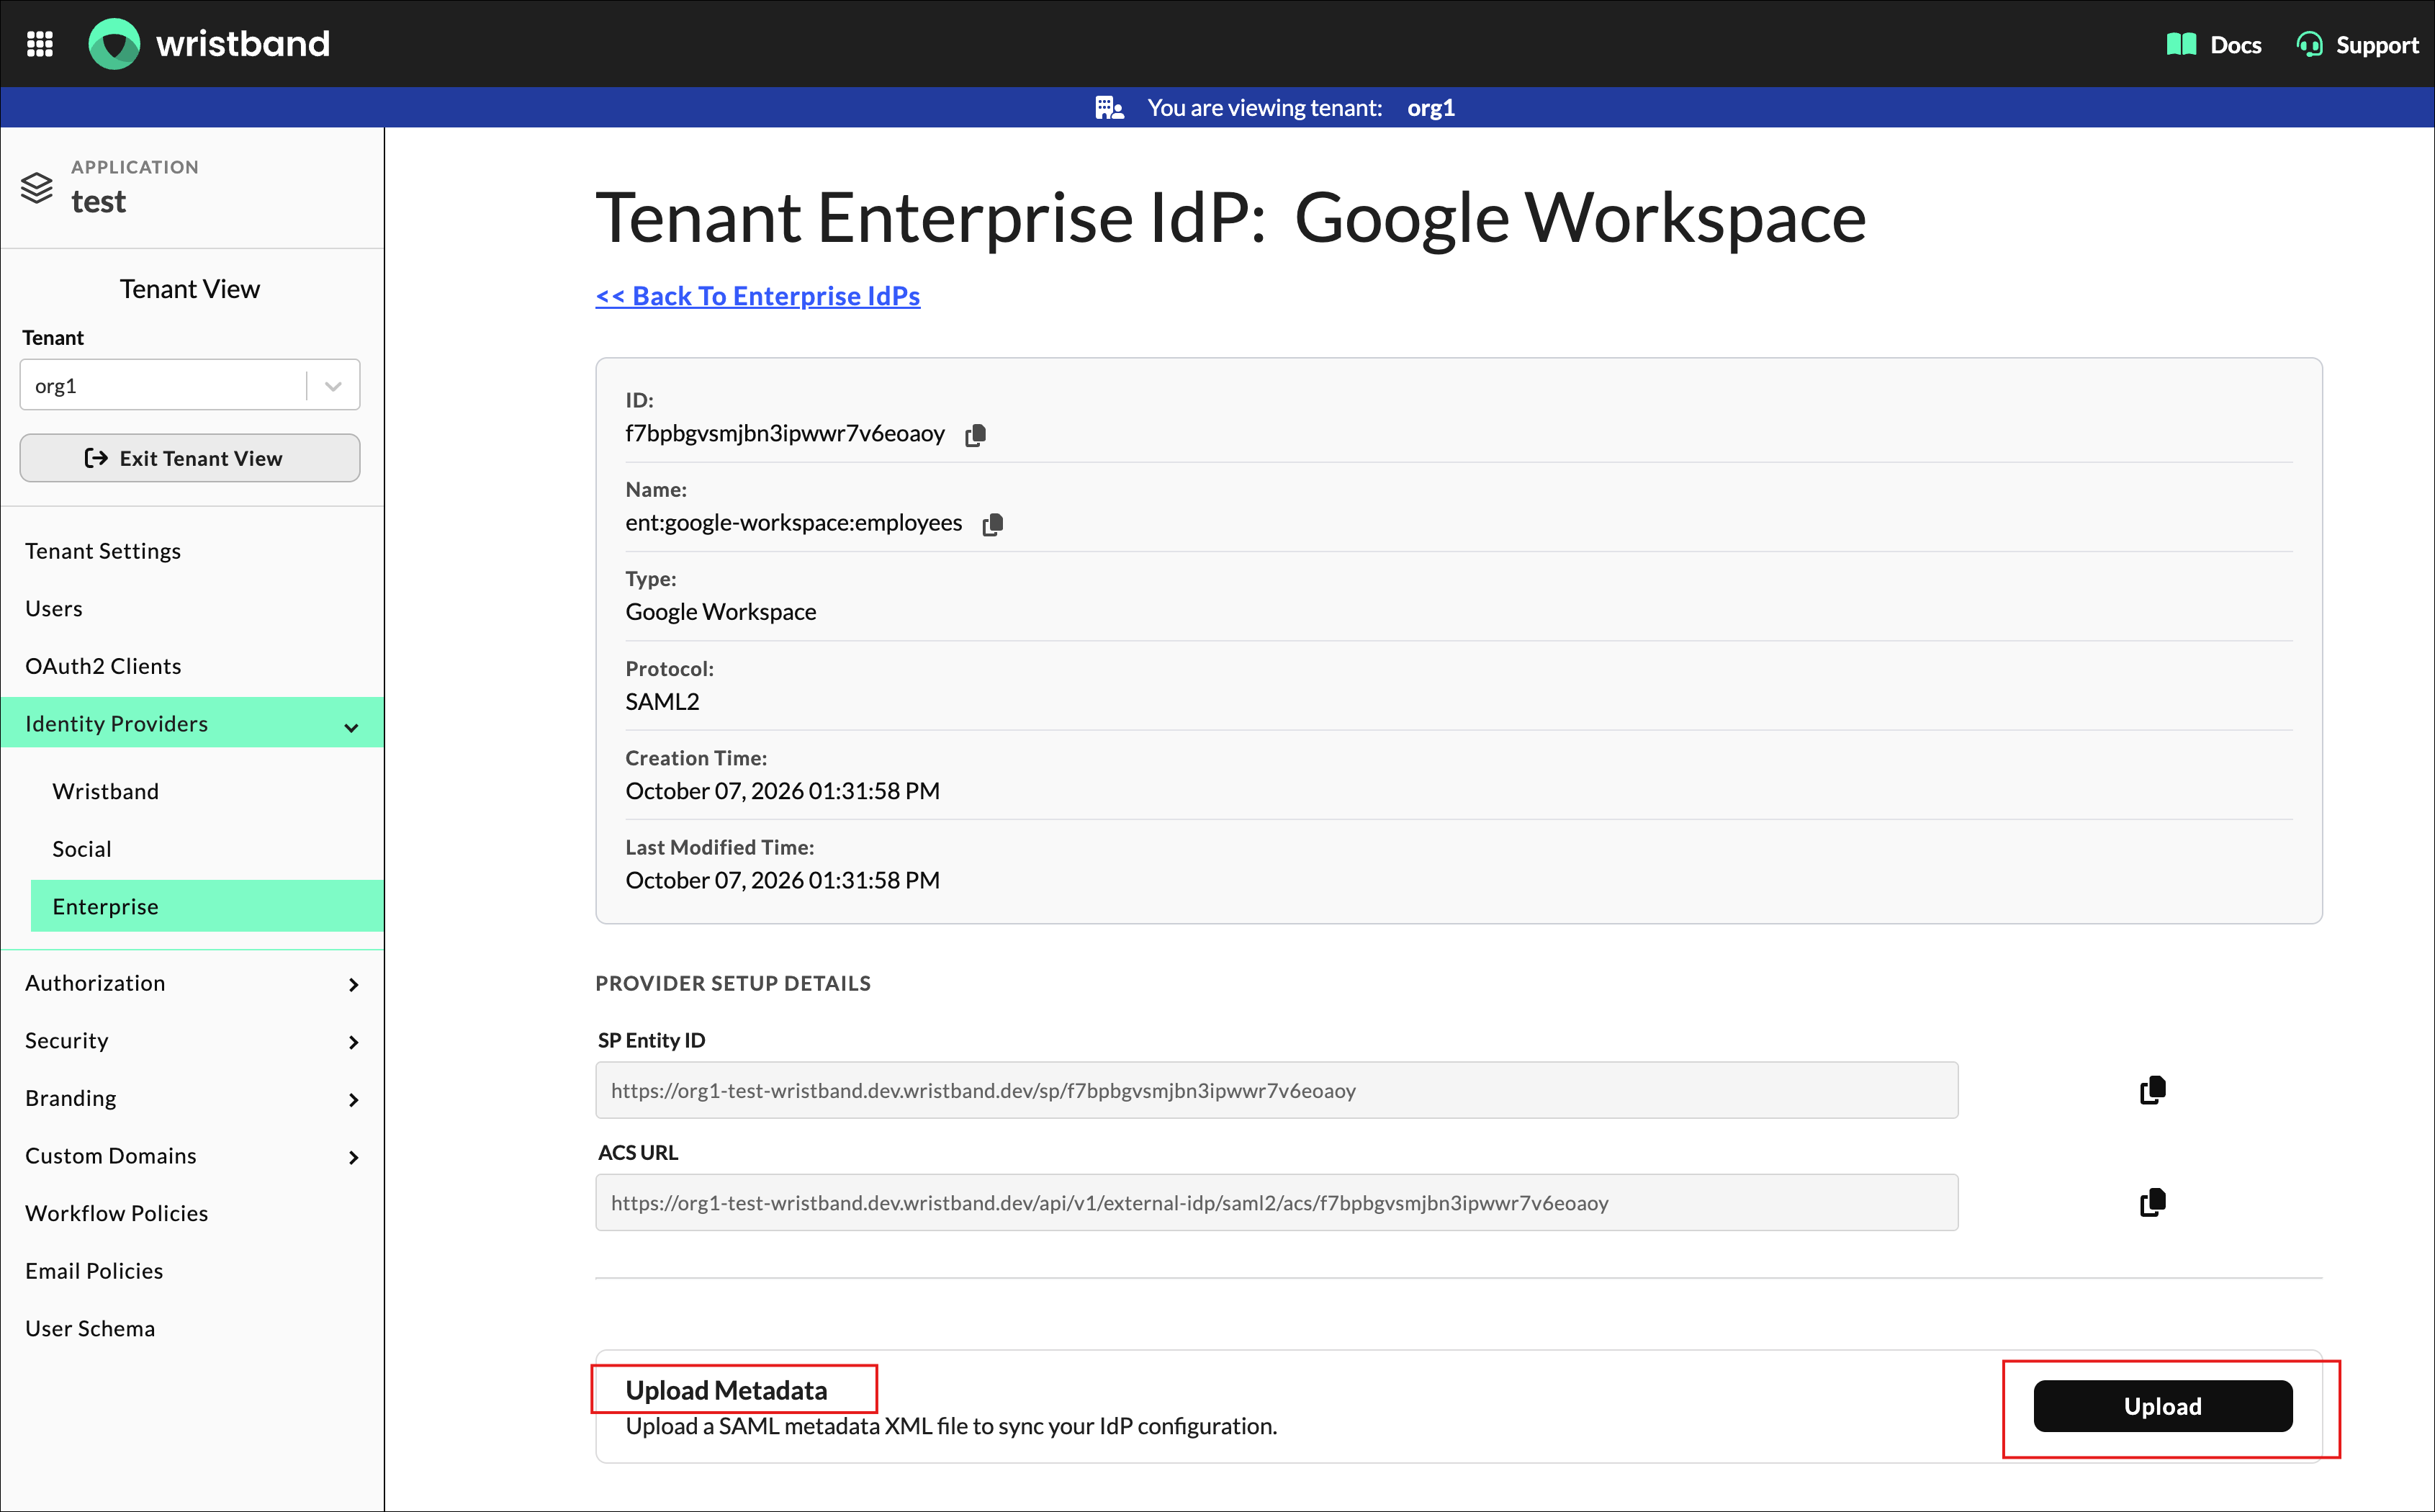
Figure 11:Select Upload in Wristband’s Upload Metadata section.
- Select Choose File
- Select the metadata XML file that was downloaded in Step 2. Note, if your customer was the one to configure the Google Workspace SAML application, then they will need to send you this file.
- Click the Update button
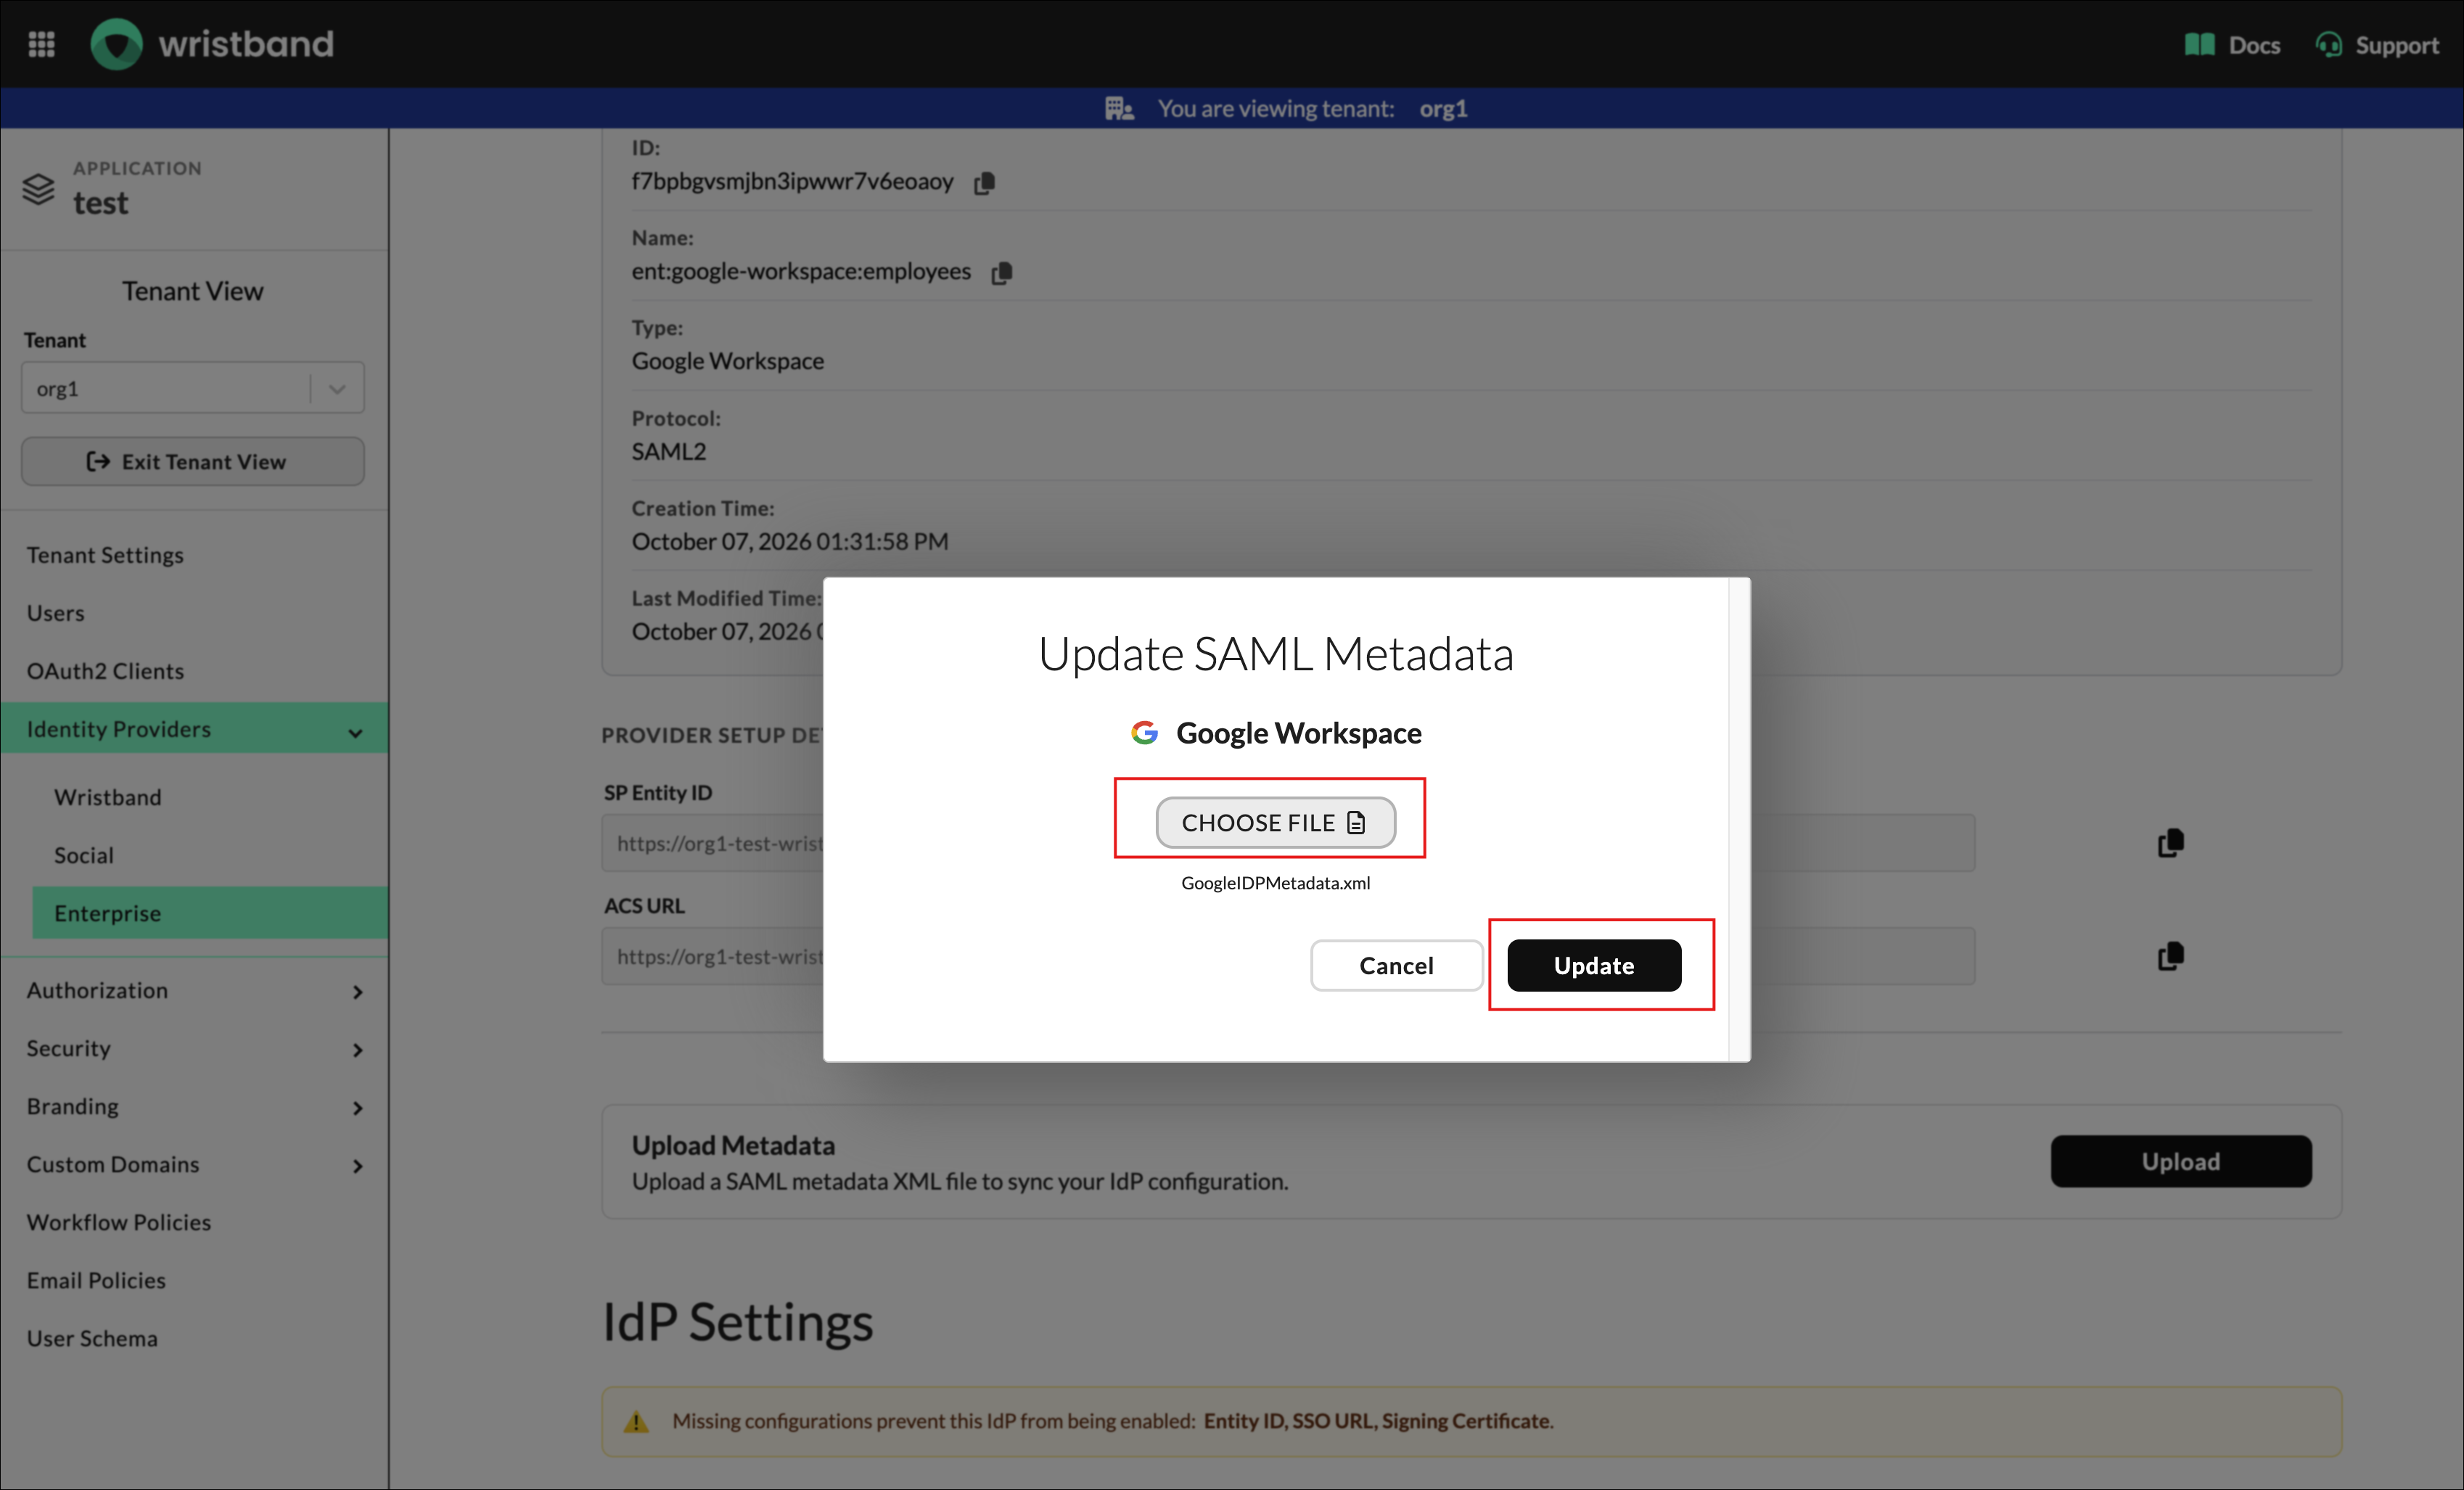
Figure 12: Choose the metadata XML file and click Update.
- Enable the Google Workspace IdP by clicking the toggle next to Enable Identity Provider.
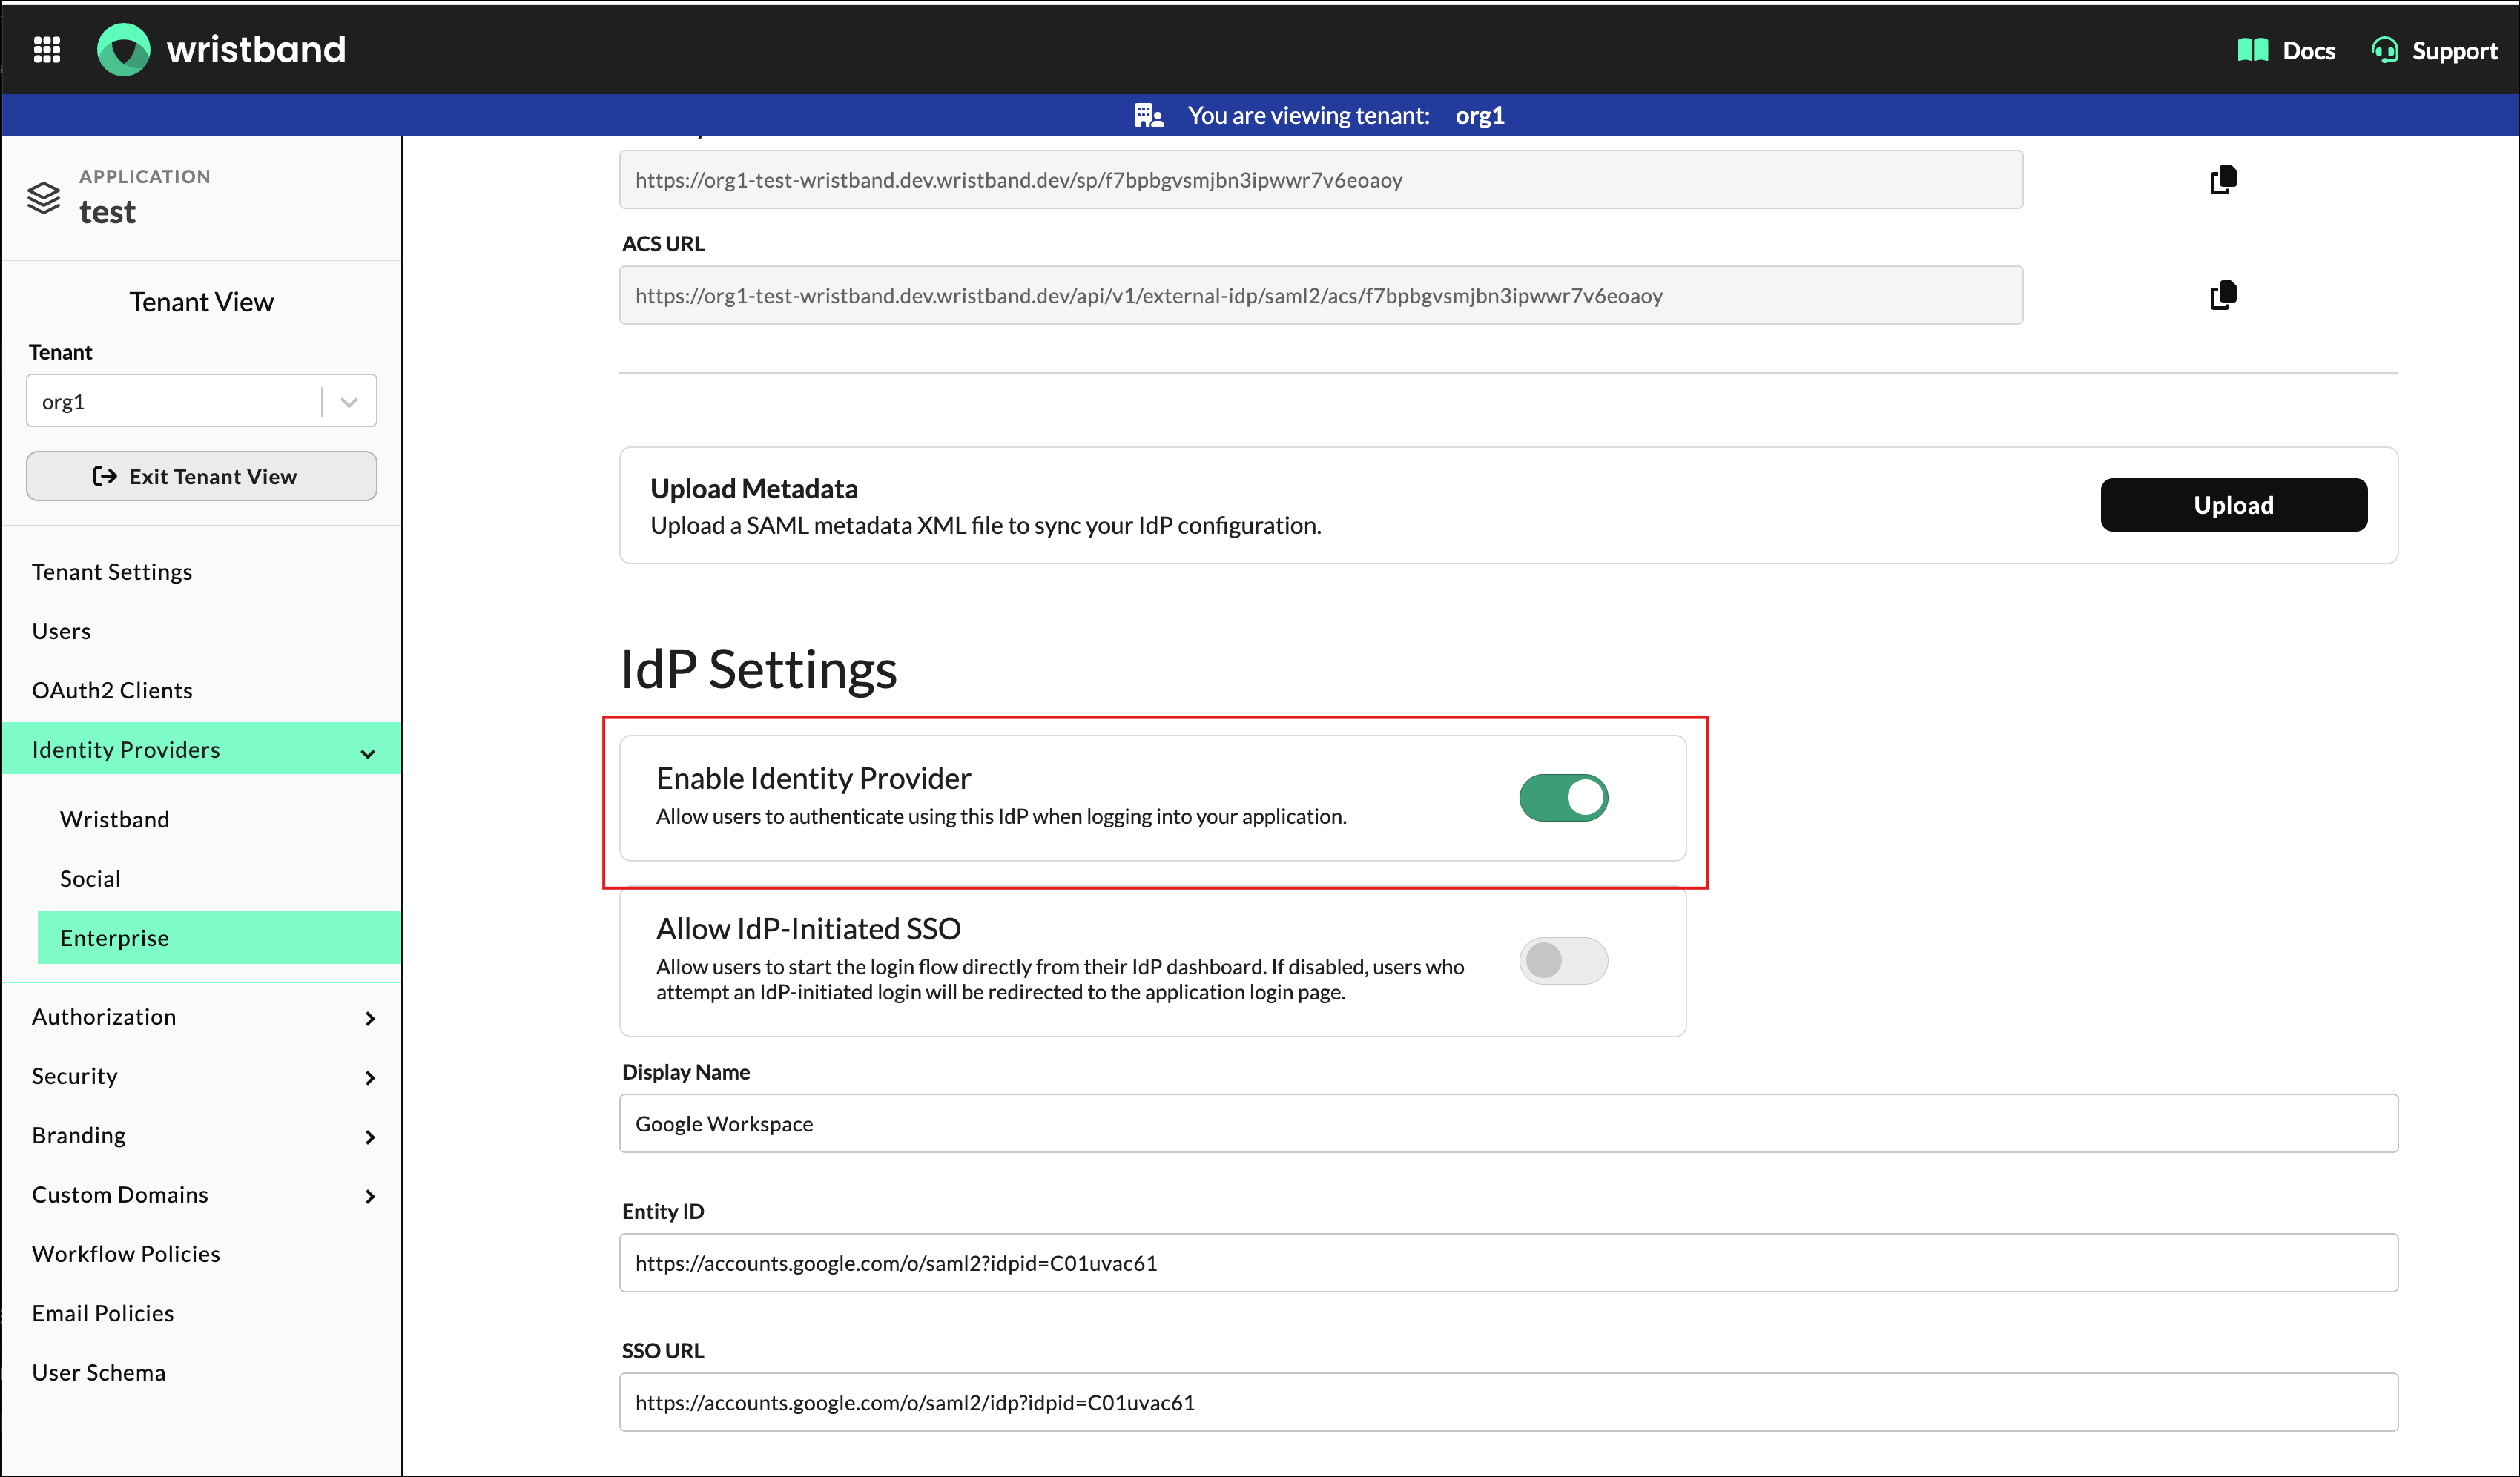
Figure 13: Turn on Enable Identity Provider for the Google Workspace IdP.
- Enable the Identity Providers tenant override toggle.
- Select Identity Providers from the left navigation menu.
- Enable the toggle next to Enable this tenant override.
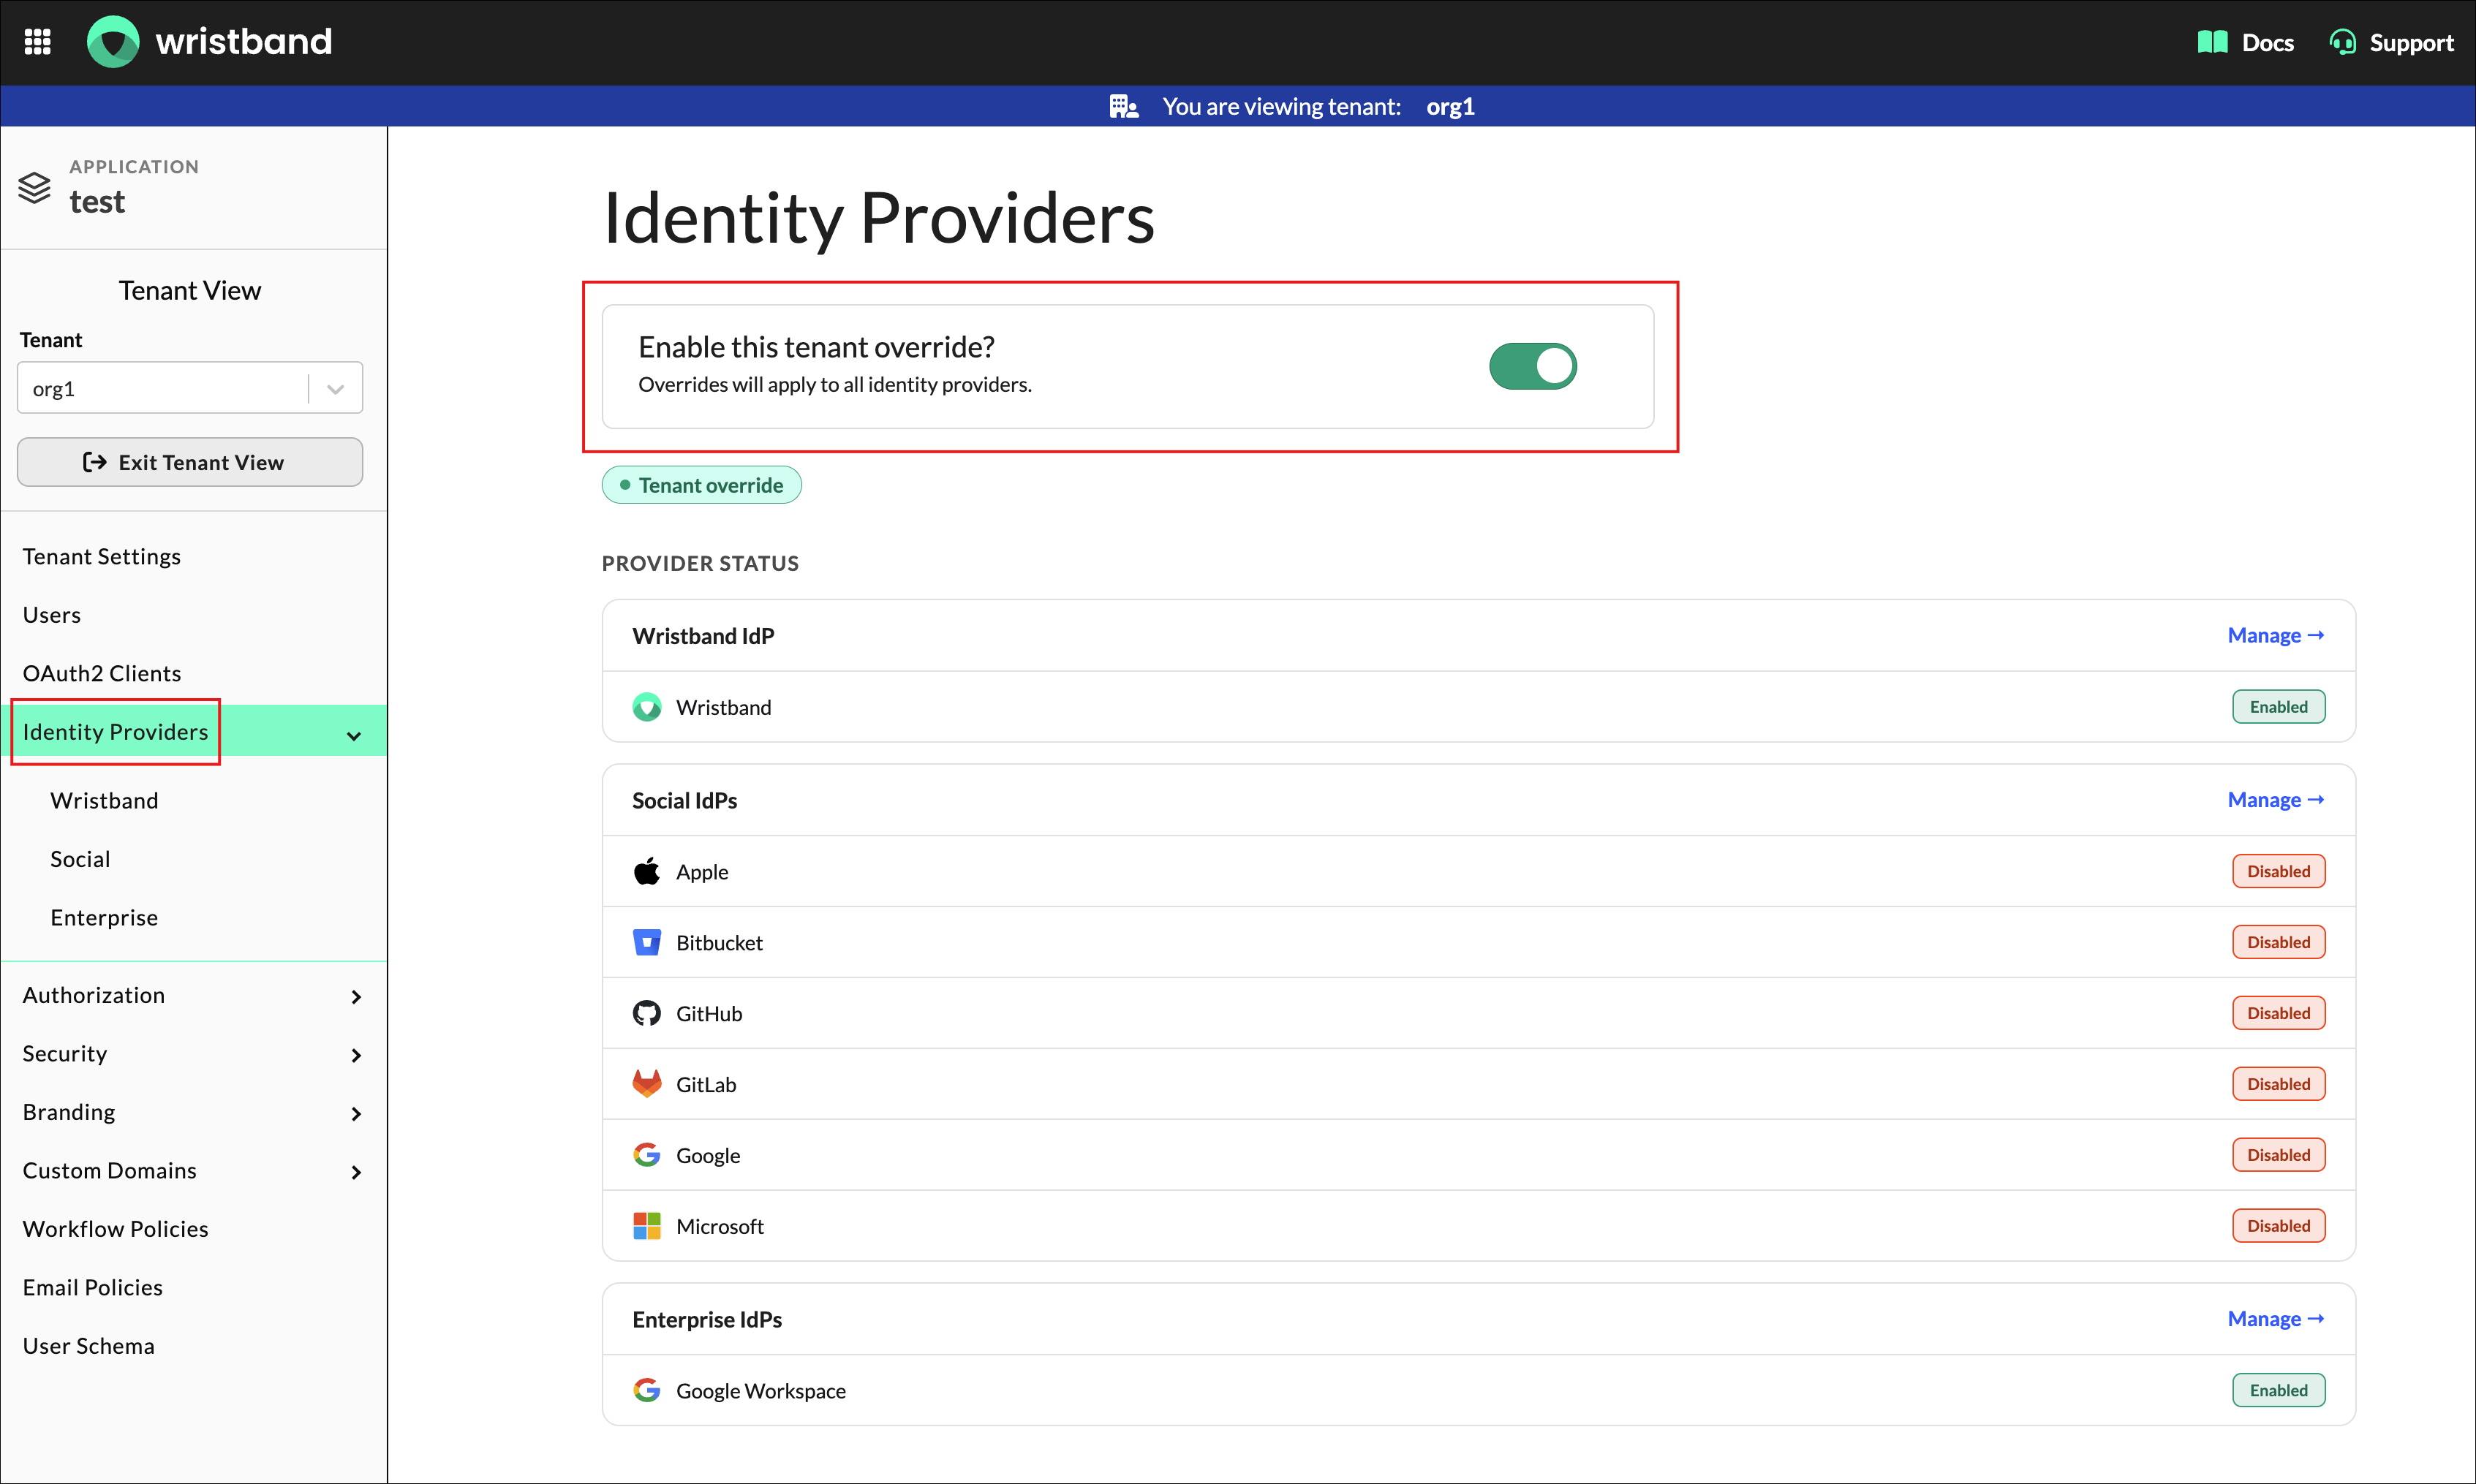
Figure 14: Turn on Enable this tenant override under Identity Providers.
The Google Workspace SSO integration is now complete. Users will now see a Google Workspace login button on the Tenant-level Login Page.
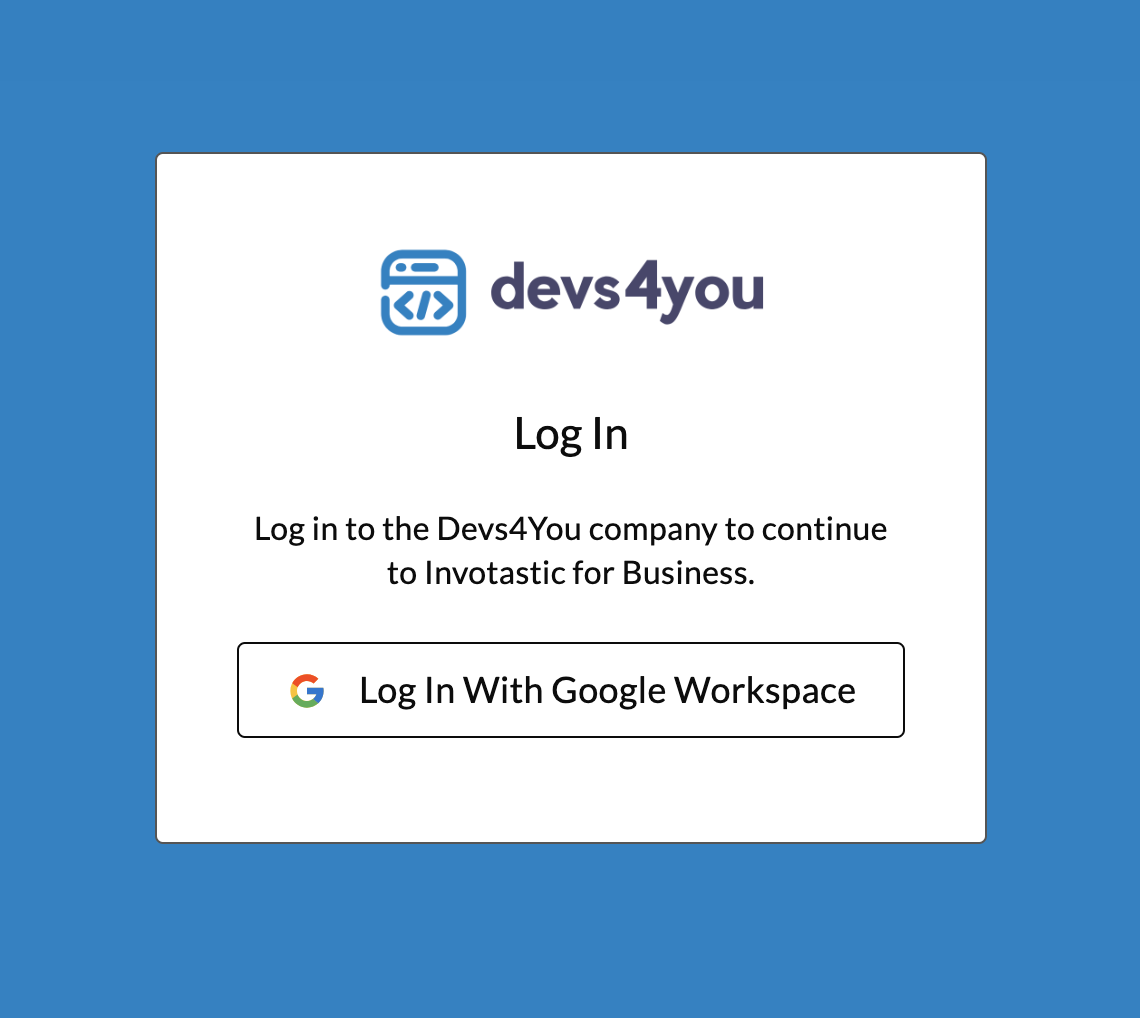
Figure 15: Google Workspace sign-in button on the tenant-level login page.
Updated about 3 hours ago