Signup: Self-Hosted UI
Implement your own custom Signup Pages using Wristband APIs.
If you intend to self-host any of the Signup Pages, you can configure Wristband to reference the URLs where your pages are located. Wristband will then direct users to your pages wherever they need to be presented during the Signup flow.
Configuration
Depending on which pages you intend to self-host, configure the relevant settings below in the Wristband Dashboard.
Custom Page URLs
Under Application Settings → Custom Page URLs, configure the following fields as needed:
- Application Signup Page URL: The location of your self-hosted Wristband IdP application-level Signup Page. Wristband uses this URL anywhere it needs to direct users to your signup page.
- Tenant Signup Page URL: The location of your self-hosted Wristband IdP tenant-level Signup Page. Supports the
{tenant_name}placeholder for tenant subdomains. - External IdP Application Signup Page URL: The location of your self-hosted application-level External IdP Signup Page. Wristband redirects users here after they authenticate with an external identity provider during application-level signup, along with an External IdP Authorization Code needed to complete provisioning.
- External IdP Tenant Signup Page URL: The location of your self-hosted tenant-level External IdP Signup Page. Wristband redirects users here after they authenticate with an external identity provider during tenant-level signup. Supports the
{tenant_name}placeholder for tenant subdomains.
Note: When the Application Signup Page URL is set, the signup action link at the bottom of the Wristband-hosted Application-level Login Page will point to that URL. When the Tenant Signup Page URL is set, the signup action link at the bottom of the Wristband-hosted Tenant-level Login Page will point to that URL.
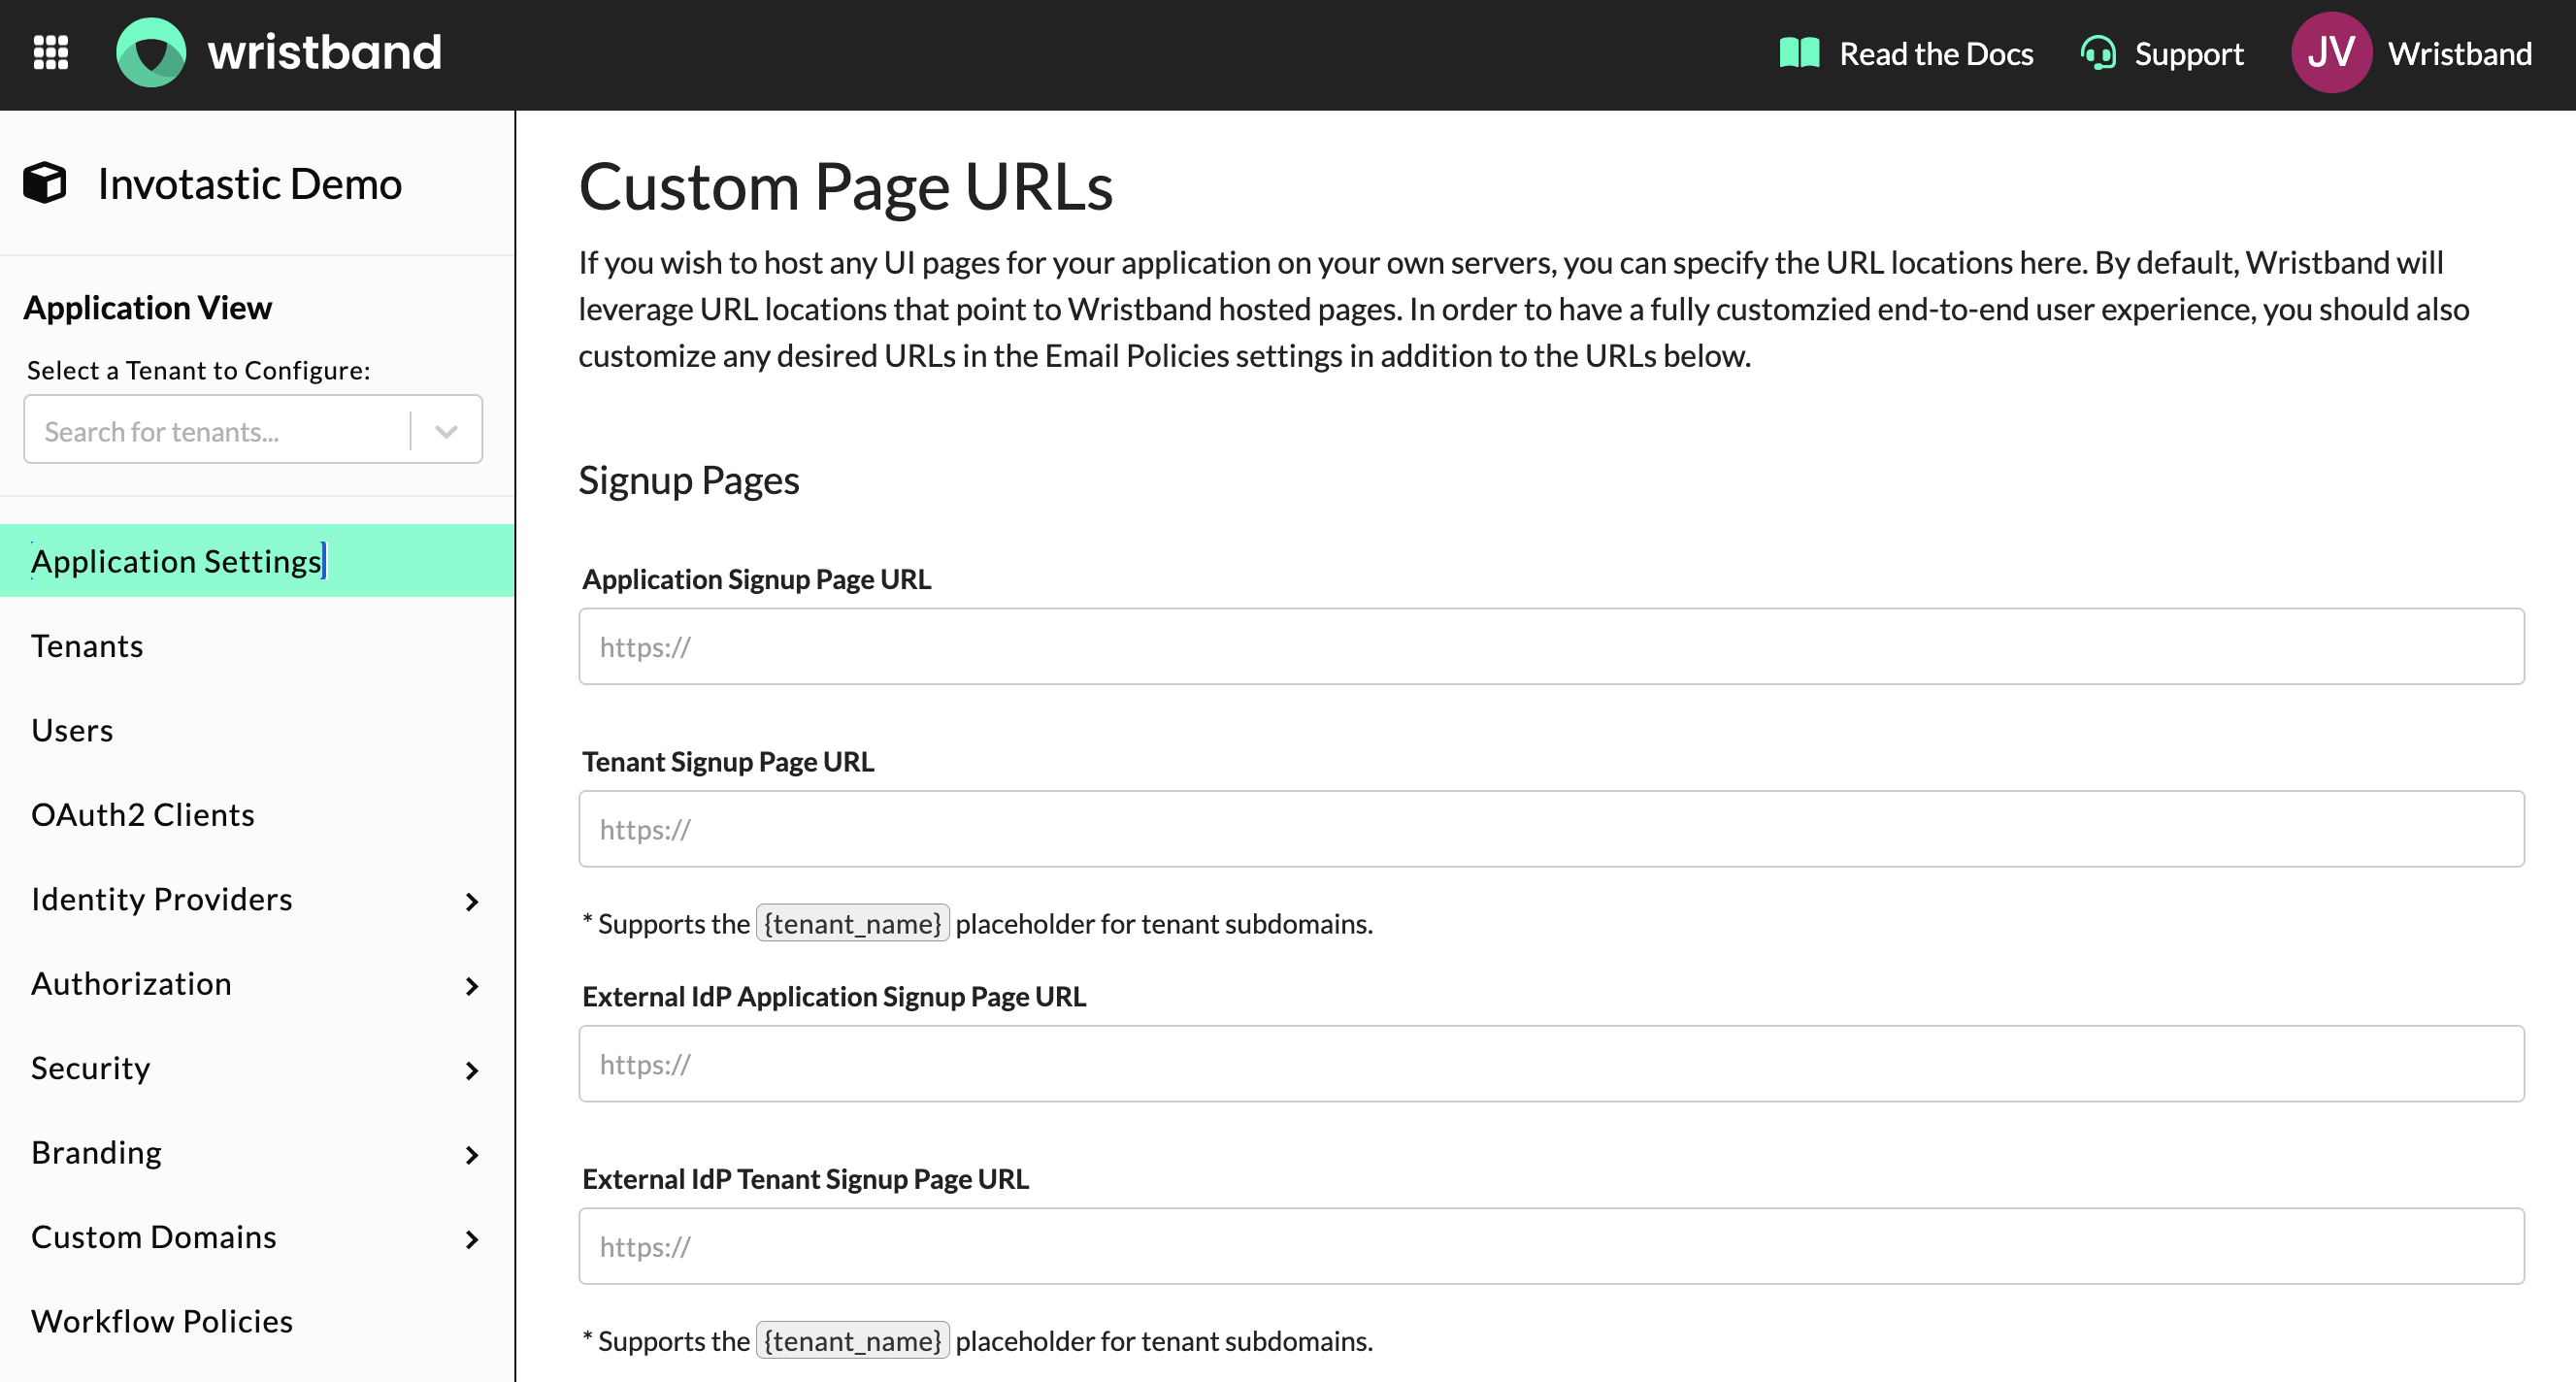
Custom Page URLs showing all four Signup Page URL fields
Email Policies
If you are self-hosting the pages that users land on after clicking links in signup-related emails, configure the relevant Action Link URLs under Email Policies in the Wristband Dashboard:
- User Activation: See User Activation: Self-Hosted UI for configuration details.
- Email Verification: See Email Verification: Self-Hosted UI for configuration details.
Wristband Identity Provider Signup
User Activation Signup
At a high level:
- The user clicks on the Signup button either on your website or within your application.
- The user gets sent to your application's self-hosted Signup Page.
- The user provides all information to the Signup Form and clicks the submit button.
- Your application calls the Provision User API to complete the Signup for the user.
- An Activation Email is sent to the email address that the user provided on the Signup Form.
From here, the user would then complete the User Activation Workflow to finish activating themselves, verify their email, and gain entry into the application. It is up to your application what to display to the end user at this point of the workflow.

Email Verification Signup
- The user clicks on the Signup button either on your website or within your application.
- The user gets sent to your application's self-hosted Signup Page.
- The user provides all information to the Signup Form and clicks the submit button.
- Your application calls the Provision User API to complete the Signup for the user. During API execution, an Email Verification email is sent to the email address that the user provided on the Signup Form. The user is also set to
ACTIVEstatus. - Your application then redirects the user to the Wristband Create Auth Session API in order to create a Wristband Authentication Session for the user. The redirect URL is returned in the response from the prior step as well as an Auth Session Code that is required to successfully create the session.
- Wristband redirects the user to the Login Endpoint implemented by your application.
From here, the user would be sent through the Authorization Code Flow in order to login and gain entry to the application. Because Wristband already created an Authentication Session for the user during signup, the user gains immediate entry into the application without having to re-enter their credentials. However, they will still need to separately complete the Email Verification Workflow in order to have their email verified.

External Identity Provider Signup
At a high level:
- The user clicks on the Signup button either on your website or within your application.
- The user gets sent to your application's self-hosted Signup Page.
- The user clicks on a "Signup With Google" button.
- Your application redirects the user to Google's Authorization Endpoint where they will enter their Google login credentials.
- Google redirects the user back to the Wristband External IDP Callback Endpoint (exact URL is located in the Wristband Dashboard for the corresponding external identity provider).
- Wristband redirects the user to your application's Custom External IDP Signup Page URL (configured in the Wristband dashboard) along with an External IDP Authorization Code that will be used for creating an Authentication Session.
- Prior to rendering your application's self-hosted External IDP Signup Page, your application will call the Wristband Fetch External IDP Userinfo API, passing along the External IDP Authorization Code. This is necessary for syncing the External IDP Userinfo into Wristband during Signup.
- Your application now renders the self-hosted External IDP Signup Page along with an External IDP Authorization Code that will be used for creating an Authentication Session.
- The user provides all information to the External IDP Signup Form and clicks the submit button.
- Your application calls the Provision External IDP User API, passing along the External IDP Authorization Code.
- Your application then redirects the user to the Wristband Create Auth Session for External IDP User API in order to create a Wristband Authentication Session for the user. The redirect URL is returned in the response from the prior step as well as an Auth Session Code that is required to successfully create the session.
- Wristband redirects the user to the Login Endpoint implemented by your application.
From here, the user would be sent through the Authorization Code Flow in order to login and gain entry to the application. Because Wristband already created an Authentication Session for the user during signup, the user gains immediate entry into the application without having to re-enter their credentials.
Unverified Emails from External Identity ProvidersIf the email address synchronized from the external identity provider is not verified, the user must undergo either the User Activation Workflow or the Email Verification Workflow to complete External IDP Signup, depending on the configured Signup Workflow Policy.

Updated 3 months ago