Set Up a Wristband Application
Application setup instructions for this quickstart guide.
In Wristband, everything starts with an application. Applications sit at the top of the entity hierarchy: tenants, users, and OAuth2 clients all exist within an application.
Key aspects of Wristband applications
- Environment separation: Wristband uses separate applications to isolate environments, such as QA and production. You can enable or disable production-level validations per application.
- Hierarchy: Every downstream entity, including tenants, users, and OAuth2 clients, is scoped to a specific application.
- Domain assignment: Each application gets a unique domain name that routes users to its custom-branded login and registration pages.
- OAuth2 clients: A single application can contain multiple OAuth2 clients, such as clients for different device types or frontend frameworks, that can initiate authentication requests.
Create a New Application
Log in to the Wristband Dashboard. From the Home Page, create an application:
- Click Add Application.
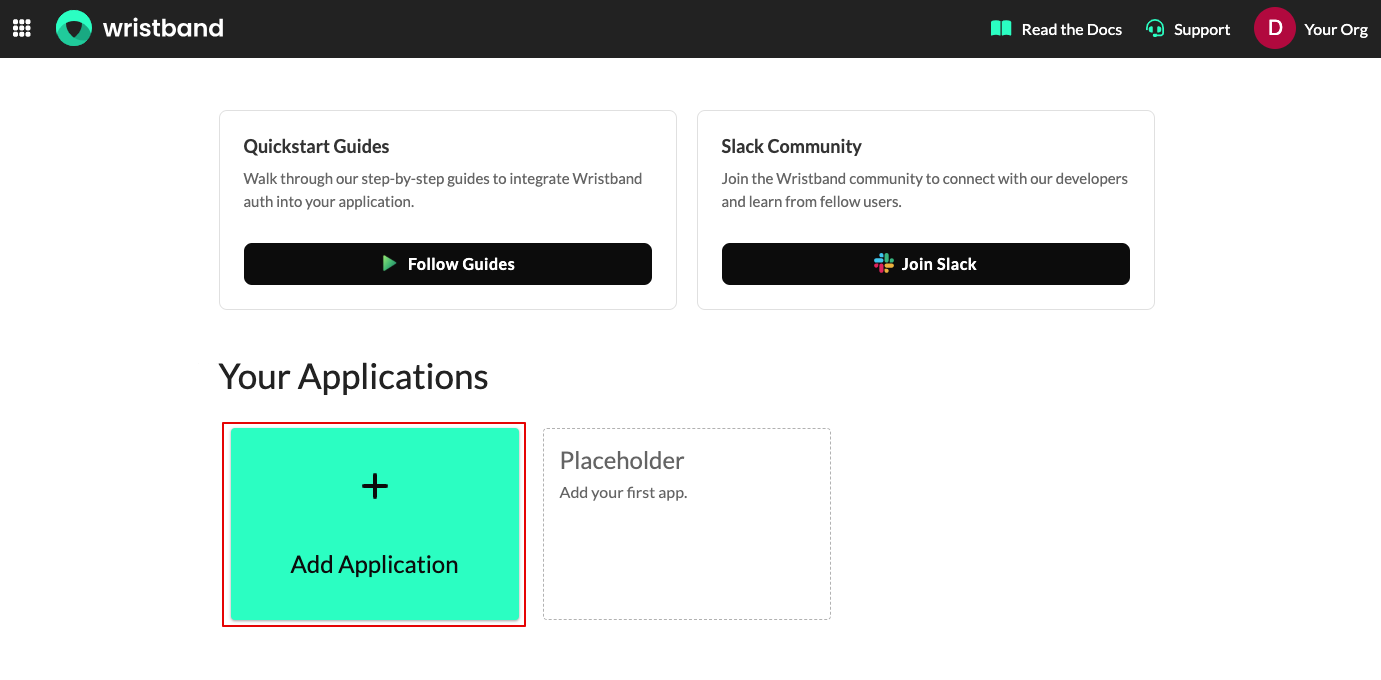
Figure 1: Create an application from the Dashboard.
- Select Quickstart, then click Continue.
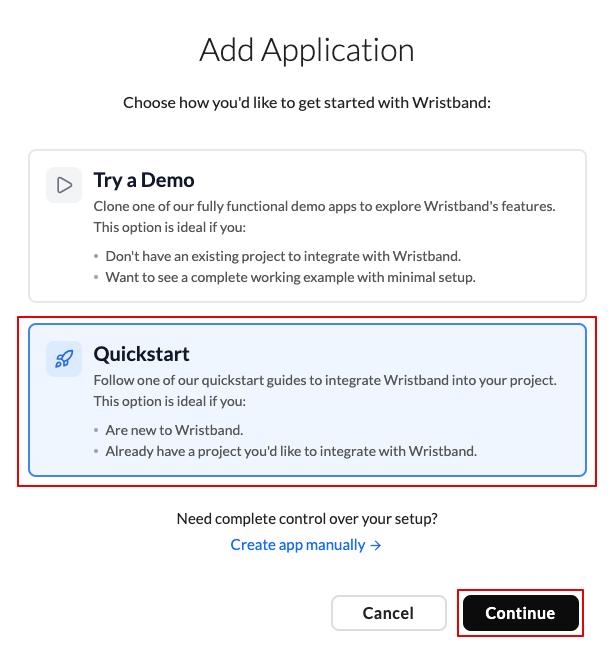
Figure 2: Select the Quickstart type.
- Choose your web framework, then click Continue.
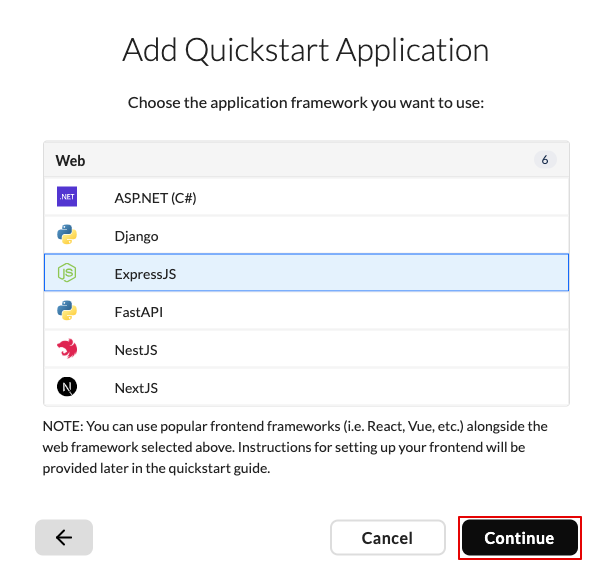
Figure 3: Choose your framework.
- Enter your application name, then click Continue.
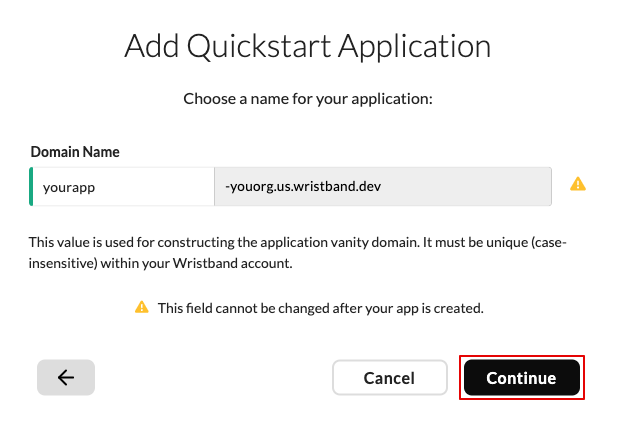
Figure 4: Name your application.
- Review the summary, then click Create.
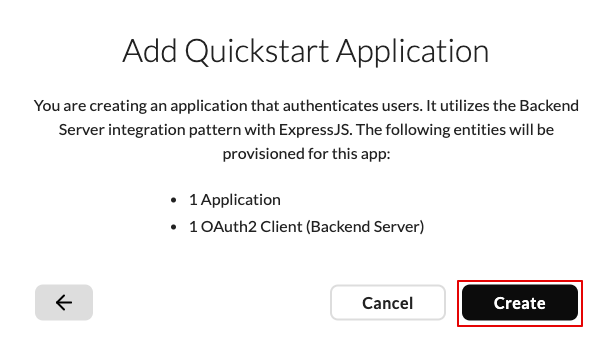
Figure 5: Review and create.
-
After provisioning completes, copy the displayed environment variables. You need them to configure the Wristband SDK.
Click Done to close the modal, or follow the link to open the integration guide for your framework.
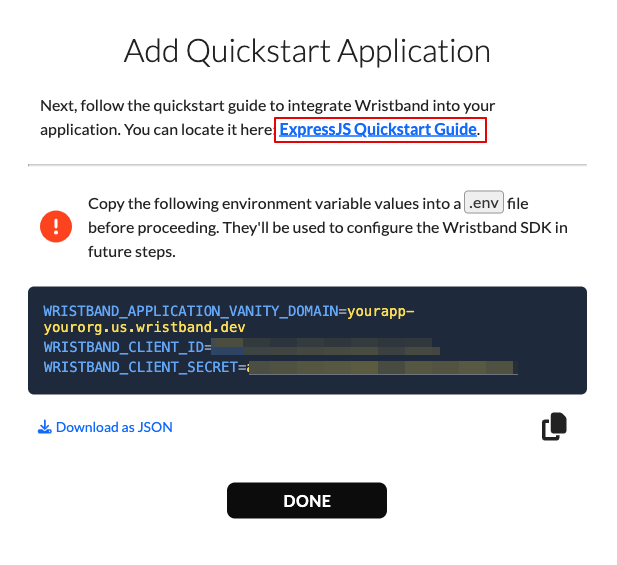
Figure 6: Copy SDK variables.
Manually Retrieving SDK Configuration Values
NoteThis optional section explains how to retrieve configuration values from the Quickstart Application modal.
The final screen of the Add Quickstart Application modal displays three environment variables required to configure the Wristband SDK:
-
WRISTBAND_APPLICATION_VANITY_DOMAIN -
WRISTBAND_CLIENT_ID -
WRISTBAND_CLIENT_SECRETIf you need to retrieve these values later, use the following steps:
-
WRISTBAND_APPLICATION_VANITY_DOMAINSelect your application from the Dashboard Home page. On the Settings page, locate the Application Vanity Domain field in the top information section.
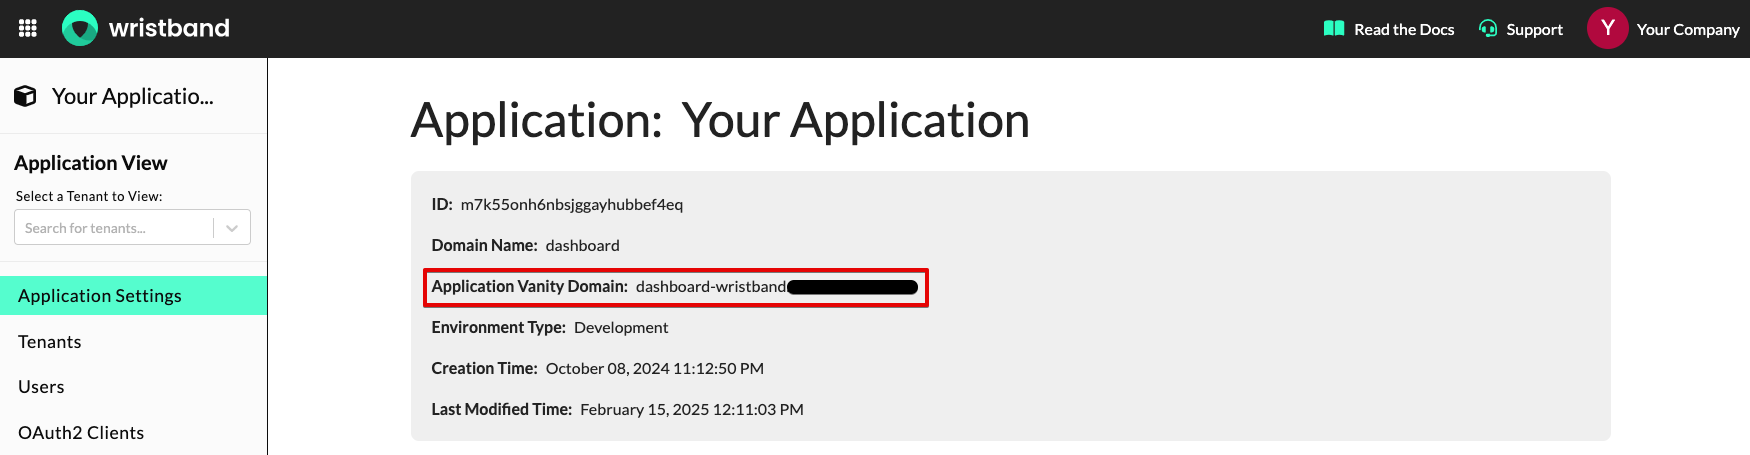
Figure 7: Find the vanity domain.
-
WRISTBAND_CLIENT_IDFrom the Dashboard Home page, select your application, then click OAuth2 Clients in the left navigation. Select the relevant client to view its Client ID in the top information section.
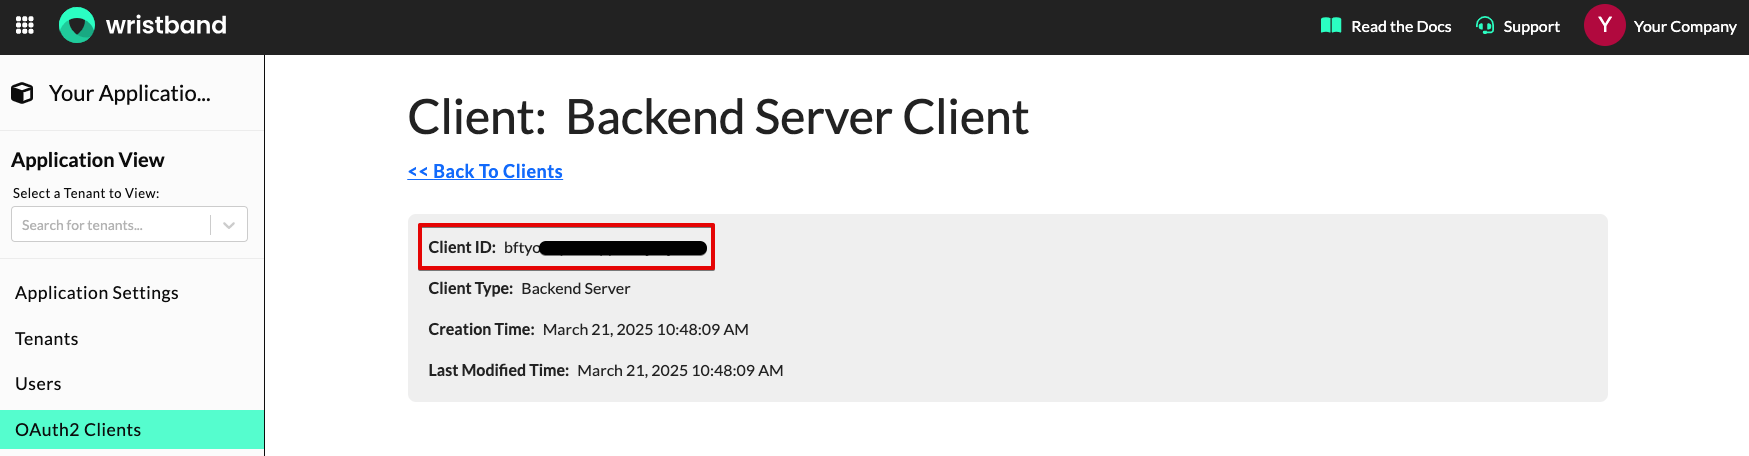
Figure 8: Find the client ID.
-
WRISTBAND_CLIENT_SECRETClient secrets are only shown once when they are created. If you lose the secret, rotate it to generate a new one:
- Go to OAuth2 Clients.
- Select your client.
- On the Edit Client page, scroll to Client Secret Settings.
- Click Rotate.
- Copy the new client secret from the pop-up modal.
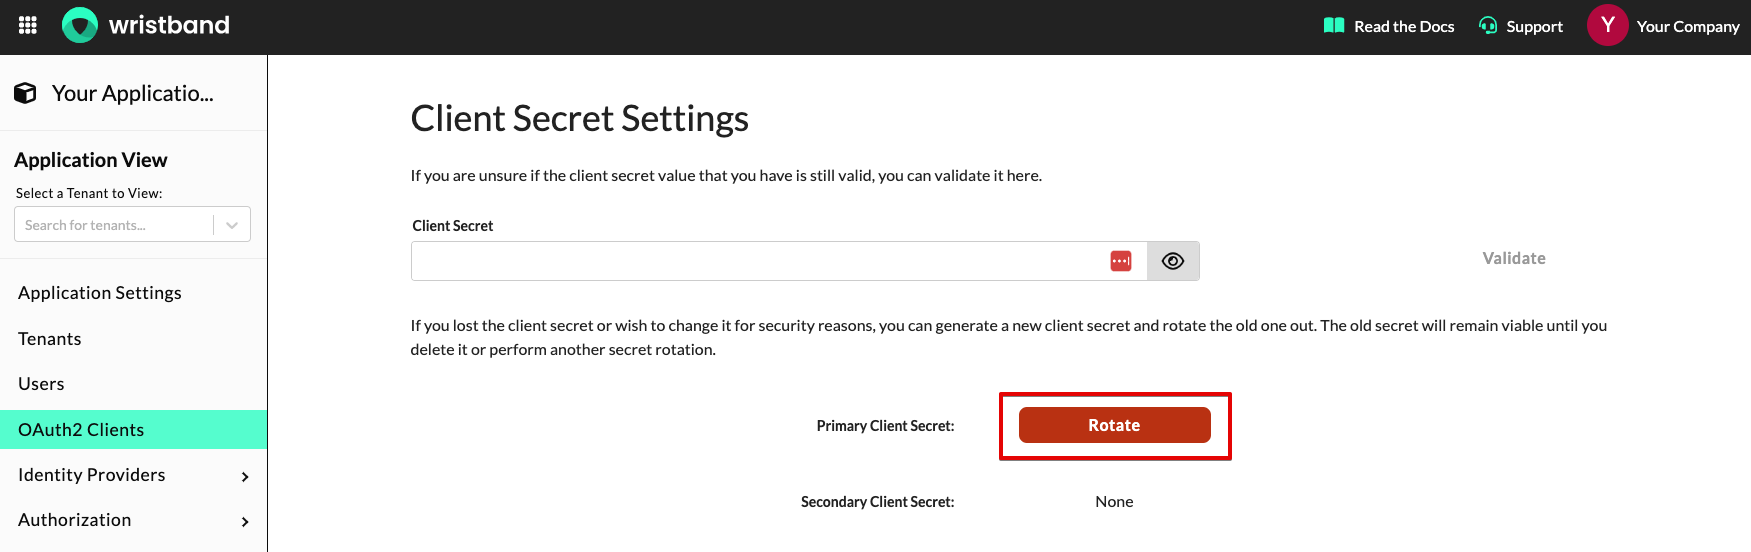
Figure 9: Rotate the client secret.