
Test Auth Flows
In this section, you'll run tests to verify that your auth endpoints are set up correctly.
Tests not working?
If you get stuck, contact us - our development team will work directly with you to get unblocked.
Test basic authentication flows to verify your new endpoints work correctly.
Before You BeginEnsure that your Next.js server is running before executing the tests below.
Test 1: Verify Signup Flow
First, test the Application-Level Signup flow by following these steps.
- Select your application from the Dashboard Home Page.
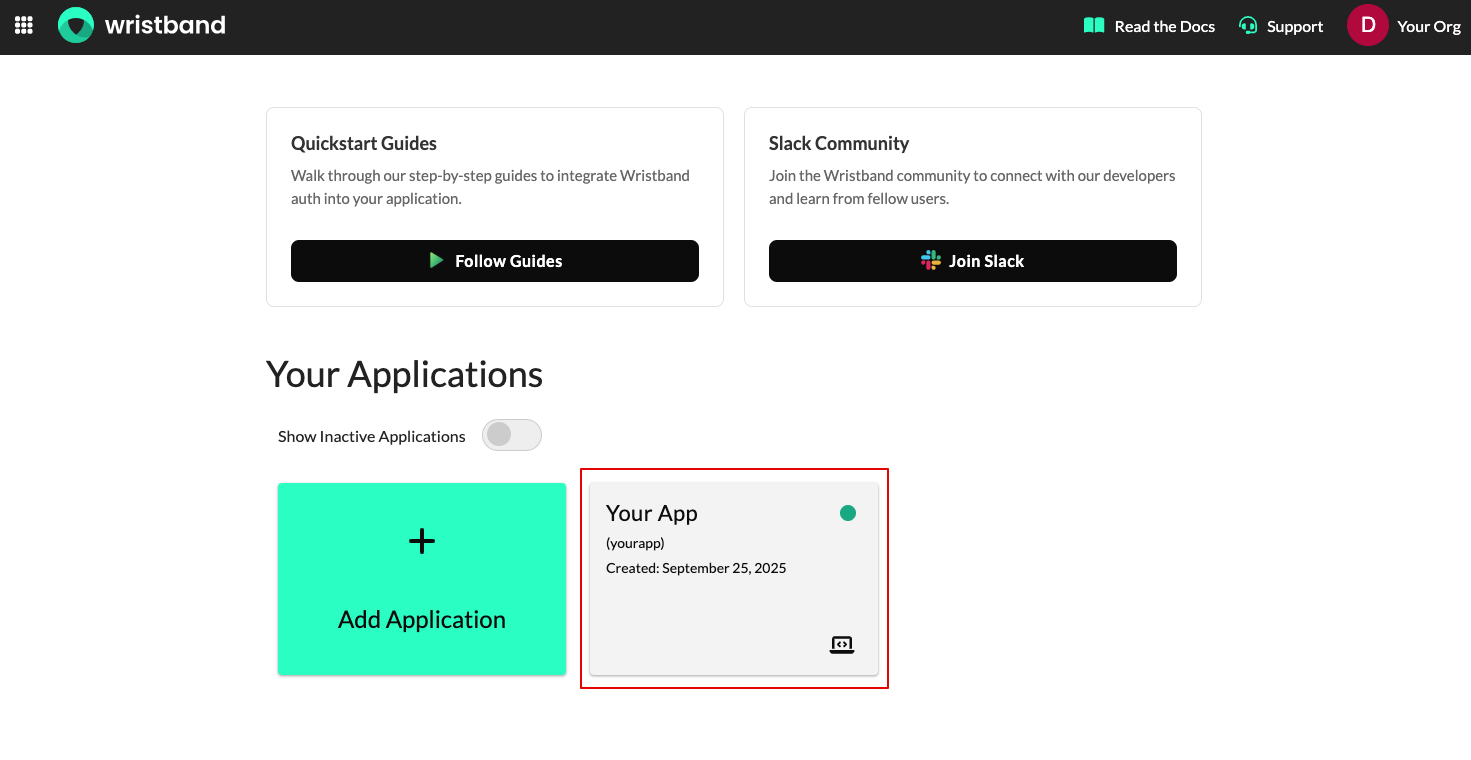
Figure 1: Select your Wristband application.
- Expand the Application URLs accordion on the settings page. Click the external link icon next to the Application-level Signup URL field.
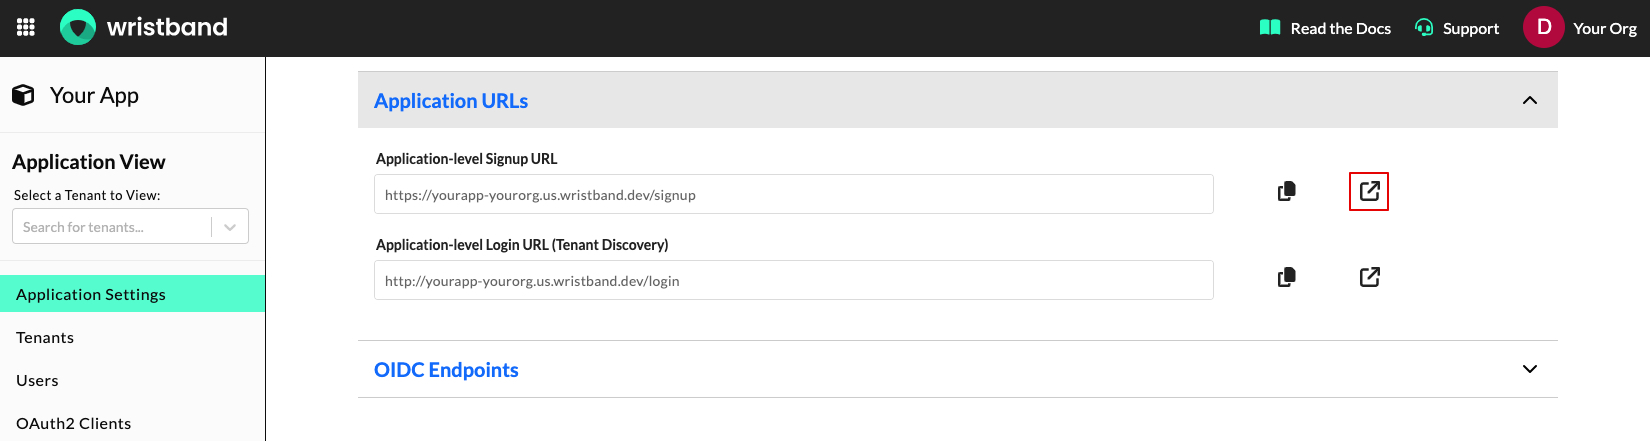
Figure 2: Open the Application-level Signup URL.
-
The link opens the Application-Level Signup page in a new browser tab. Fill out the form and submit it to create your new tenant.
- Tenant Name - The name of the tenant that application-level signup creates under your application.
- Email - A valid email address you have access to. You'll need to view an activation email sent here to complete signup.
- Password - The password you'll use to log in.The password that you will use to log in.
- Click Sign Up.
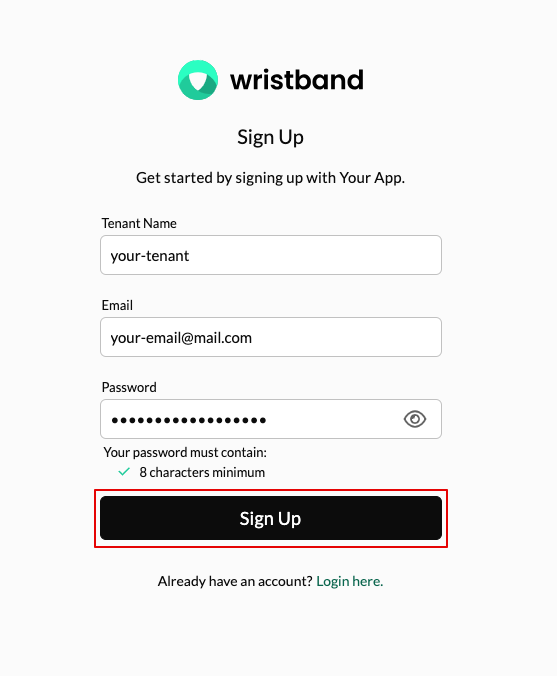
Figure 3: Complete the signup form.
- Check your inbox for an email containing a one-time code. Copy that code, enter it into the Verification Code form field, and click the Verify button to complete the process.
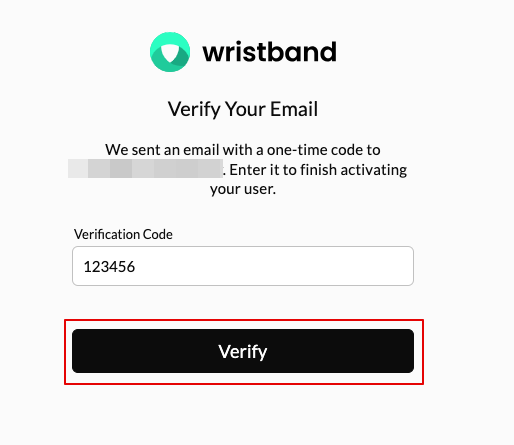
Figure 4: Verify the signup email address.
- A successful signup redirects you to the final landing URL defined in your Callback Endpoint. This destination (typically your application's home page) is determined by the returnUrl logic configuration established during your Add Auth Endpoints setup.
Congratulations, you successfully completed the Application-Level Signup flow! Here is a summary of the operations performed behind the scenes during this process.
- A new tenant was created under your application with the "Tenant Name" that you provided.
- A new user was created under the tenant with the email and password that you specified.
- The user was activated using an email containing a verification code.
- A Wristband auth session was created for the user.
Test 2: Verify Login Flow
Clear any active Wristband sessions before testing the user login flow. If a session remains active from your recent signup test, the application will automatically authenticate you and bypass the login screen entirely.
Clearing the User's Active Auth Sessions
Clear your user's active authentication sessions by following these setup steps.
- Select your application from the Dashboard Home Page.
Figure 5: Select your Wristband application.
- Navigate to the user details page to view your newly registered user.
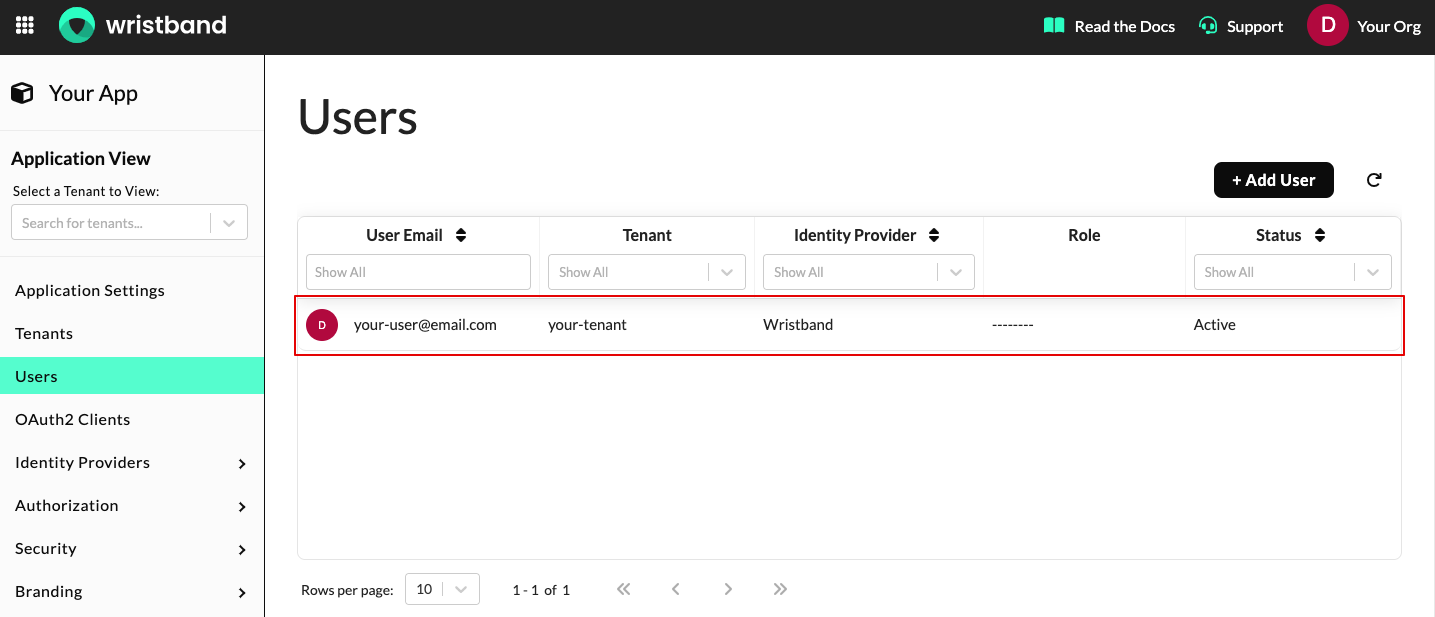
Figure 6: Select the new user.
- Scroll down to the Active Auth Sessions section on the Edit User screen and click Delete Sessions.
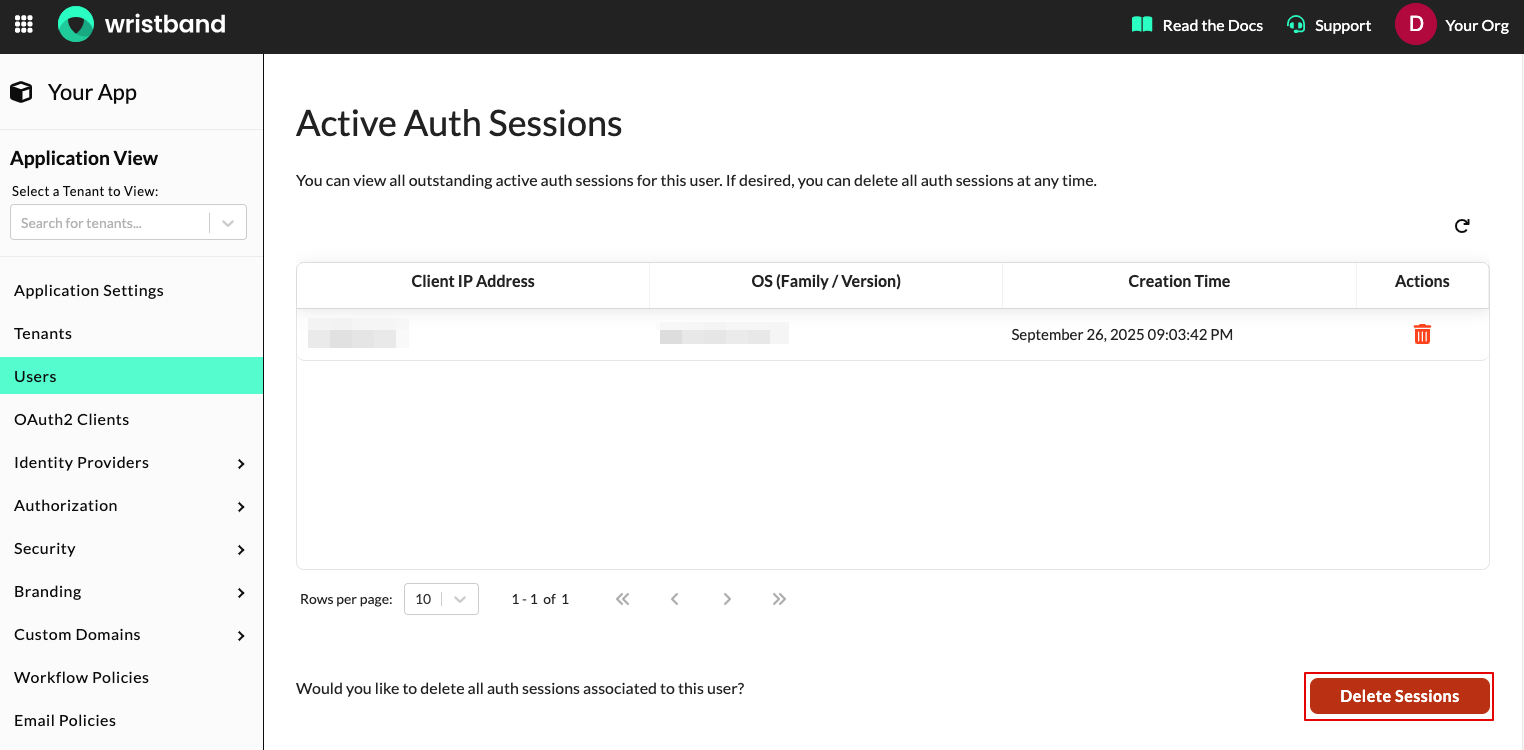
Figure 7: Clear the user's active auth sessions.
Perform User Login
Now that you have cleared the active sessions, start the user login flow test by accessing your app configuration.
- Select your application from the Dashboard Home Page.
Figure 8: Select your Wristband application.
-
On the Application Settings page:
• Expand the section: Locate the Application URLs area and click its header to open the accordion menu.
• Launch the URL: Click the external link icon adjacent to the Application-level Login URL field to open the endpoint in a new tab.
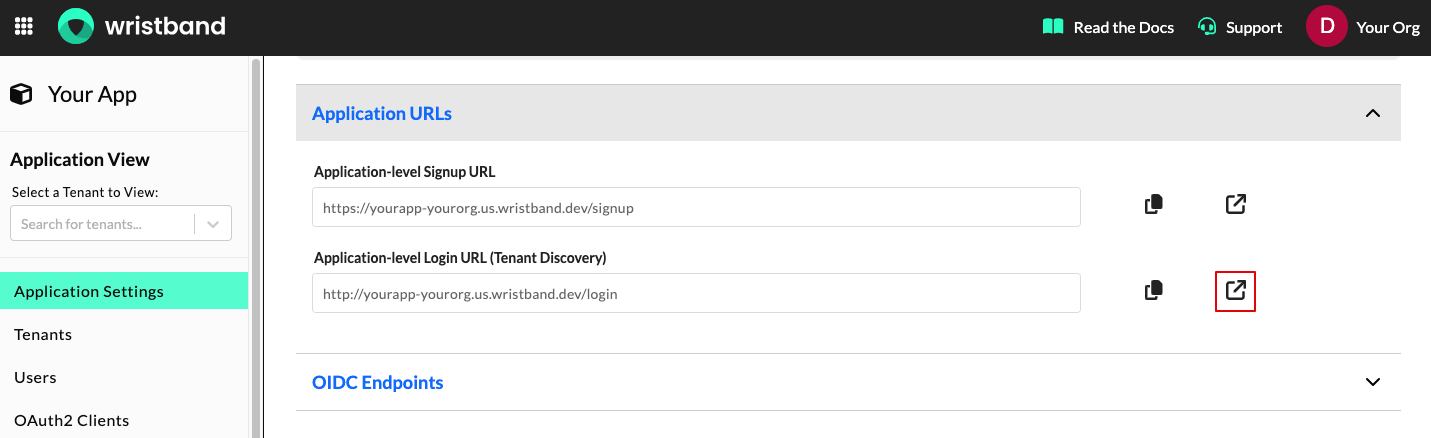
Figure 9: Open the Application-level Login URL.
-
After clicking the external link icon:
• Review the tenant list: Locate the tab containing the newly opened Application-Level Login dashboard.
• Choose your tenant: Identify the specific tenant environment from your earlier signup workflow.
• Proceed: Click the Select button adjacent to that tenant's name to route to its login portal.
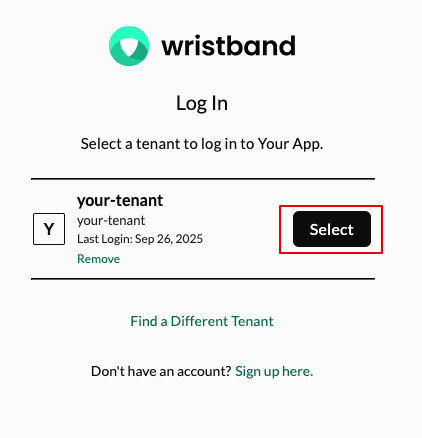
Figure 10: Select your tenant.
-
On the login page for the selected tenant:
• Provide credentials: Type the registered user's email address and password into the input fields.
• Submit the form: Click the Log In button to initiate the authentication process.
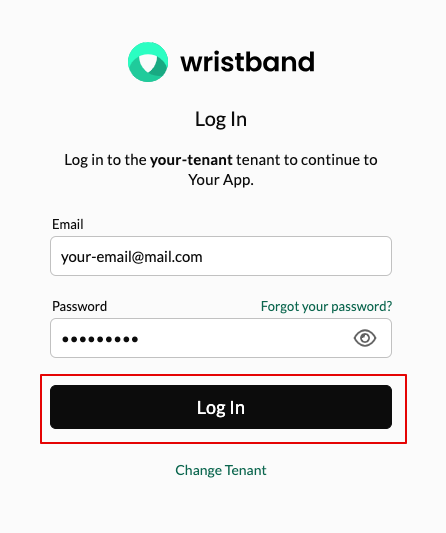
Figure 11: Log in as the new user.
- A successful login redirects you to the final landing URL defined in your Callback Endpoint. This destination (typically your application's home page) is determined by the returnUrl logic configuration established during your Add Auth Endpoints setup.
Test 3: Verify Auth Session
Revisiting the tenant login page with an active session will bypass the credential screen entirely as Wristband detects your logged-in state. Follow these steps to verify this automatic authentication behavior:
- Navigate to your Application-Level Login page by entering your specific login URL directly into your browser. If you need to retrieve this URL, you can locate it on the Application Settings page under the Application URLs section.
Figure 12: Open the application-level login URL.
- The Application-Level Login page displays a list of your previously authenticated environments. Click Select next to your tenant to route directly to its login page.
Figure 13: Select the tenant you created during signup.
- Because an active session already exists for this tenant, Wristband skips the credential prompt entirely. You will be logged in automatically and redirected to your Callback Endpoint's final landing page.
Test 4: Verify Logout
Run the logout flow to securely terminate your user's active session across both your application and Wristband. Follow these steps to execute and verify the logout process:
- In your browser's address bar, enter the URL of your Logout Endpoint (e.g.,
http://localhost:3001/auth/logout) and press Enter to navigate to it. This will cause the logic within your Logout Endpoint to execute. - At the end of the logout flow, you should be redirected to your tenant's login page.
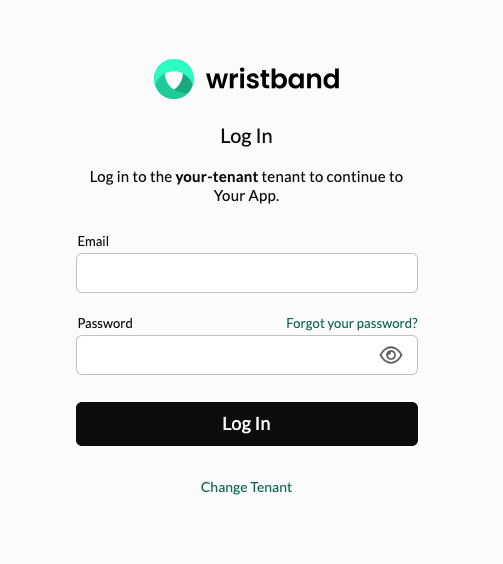
Figure 14: After logout, Wristband prompts the user to sign in again.
- The fact that the tenant login page is now prompting for your credentials indicates that your user's auth session has been terminated and that the logout flow executed successfully.
Congratulations! Reaching this point means your authentication endpoints are fully functional and properly integrated.
Now that you've verified your auth flows are working, let’s secure your frontend routes and components so only authenticated users can access them.