
Role Mapping
Use Role Mapping to automatically assign roles to users based on their IdP group memberships.
Role Mapping allows you to map groups from an enterprise IdP to Wristband roles. When enabled, Wristband evaluates a user's group memberships each time they authenticate and assigns roles according to the configured mappings.
Configure Your Enterprise IdP to Provide Group Information
Before enabling Role Mapping, configure your enterprise IdP to include a list of group names or identifiers in its OIDC response or SAML assertion.
For natively supported enterprise IdPs, refer to the relevant setup guide for instructions on configuring the groups claim:
- Google Workspace: Configure the groups claims
- Microsoft Entra Id: Configure the groups claims
- Okta Workforce: Configure the groups claims
For Custom SAML IdPs, refer to your IdP's documentation for instructions on including group information in the SAML assertion. The groups claim should be a multi-valued attribute containing the names of the groups that the user is a member of.
Configure the Groups Attribute Mapping (Custom SAML IdPs Only)
For custom SAML IdPs, configure an attribute mapping that maps the groups attribute in the SAML assertion to Wristband's groups attribute.
- Navigate to Tenant View in the Wristband dashboard.
- Select Identity Providers -> Enterprise from the side navigation.
- Find and select your target enterprise IdP to update its configurations.
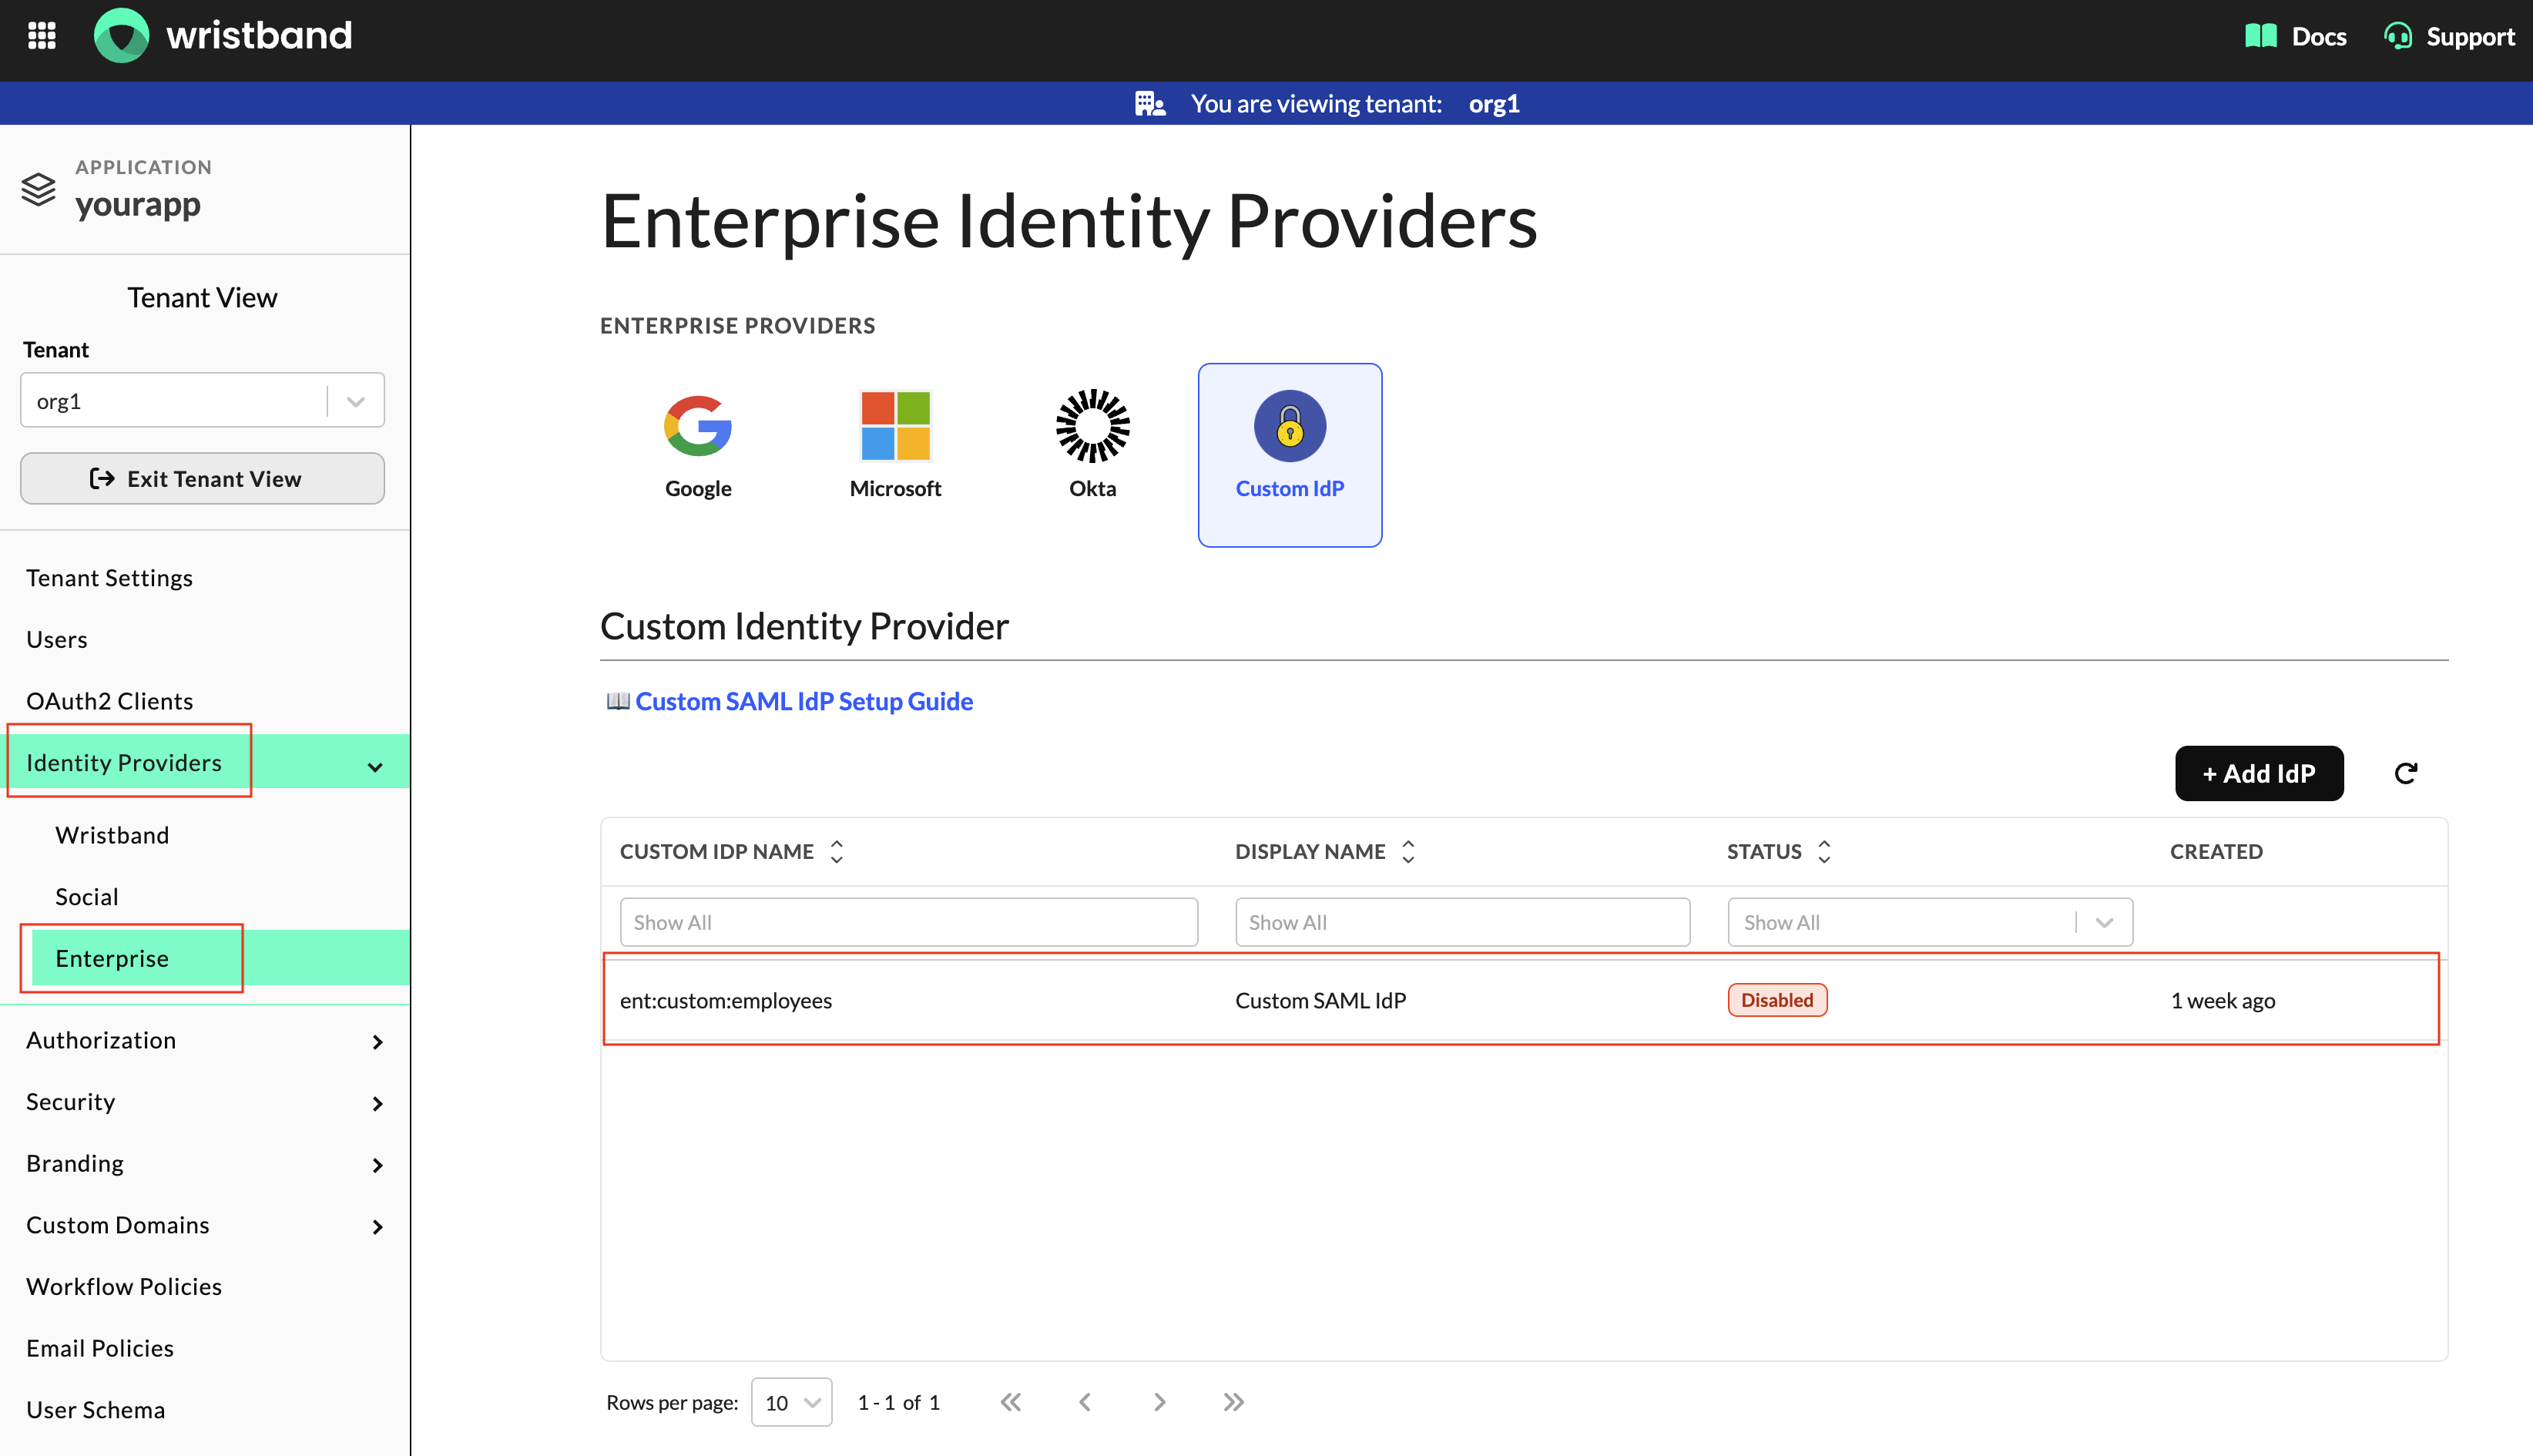
Figure 1: Select the custom SAML IdP whose groups attribute mapping you want to configure.
- Go to its User Syncing section.
- Click the Add Mapping button.
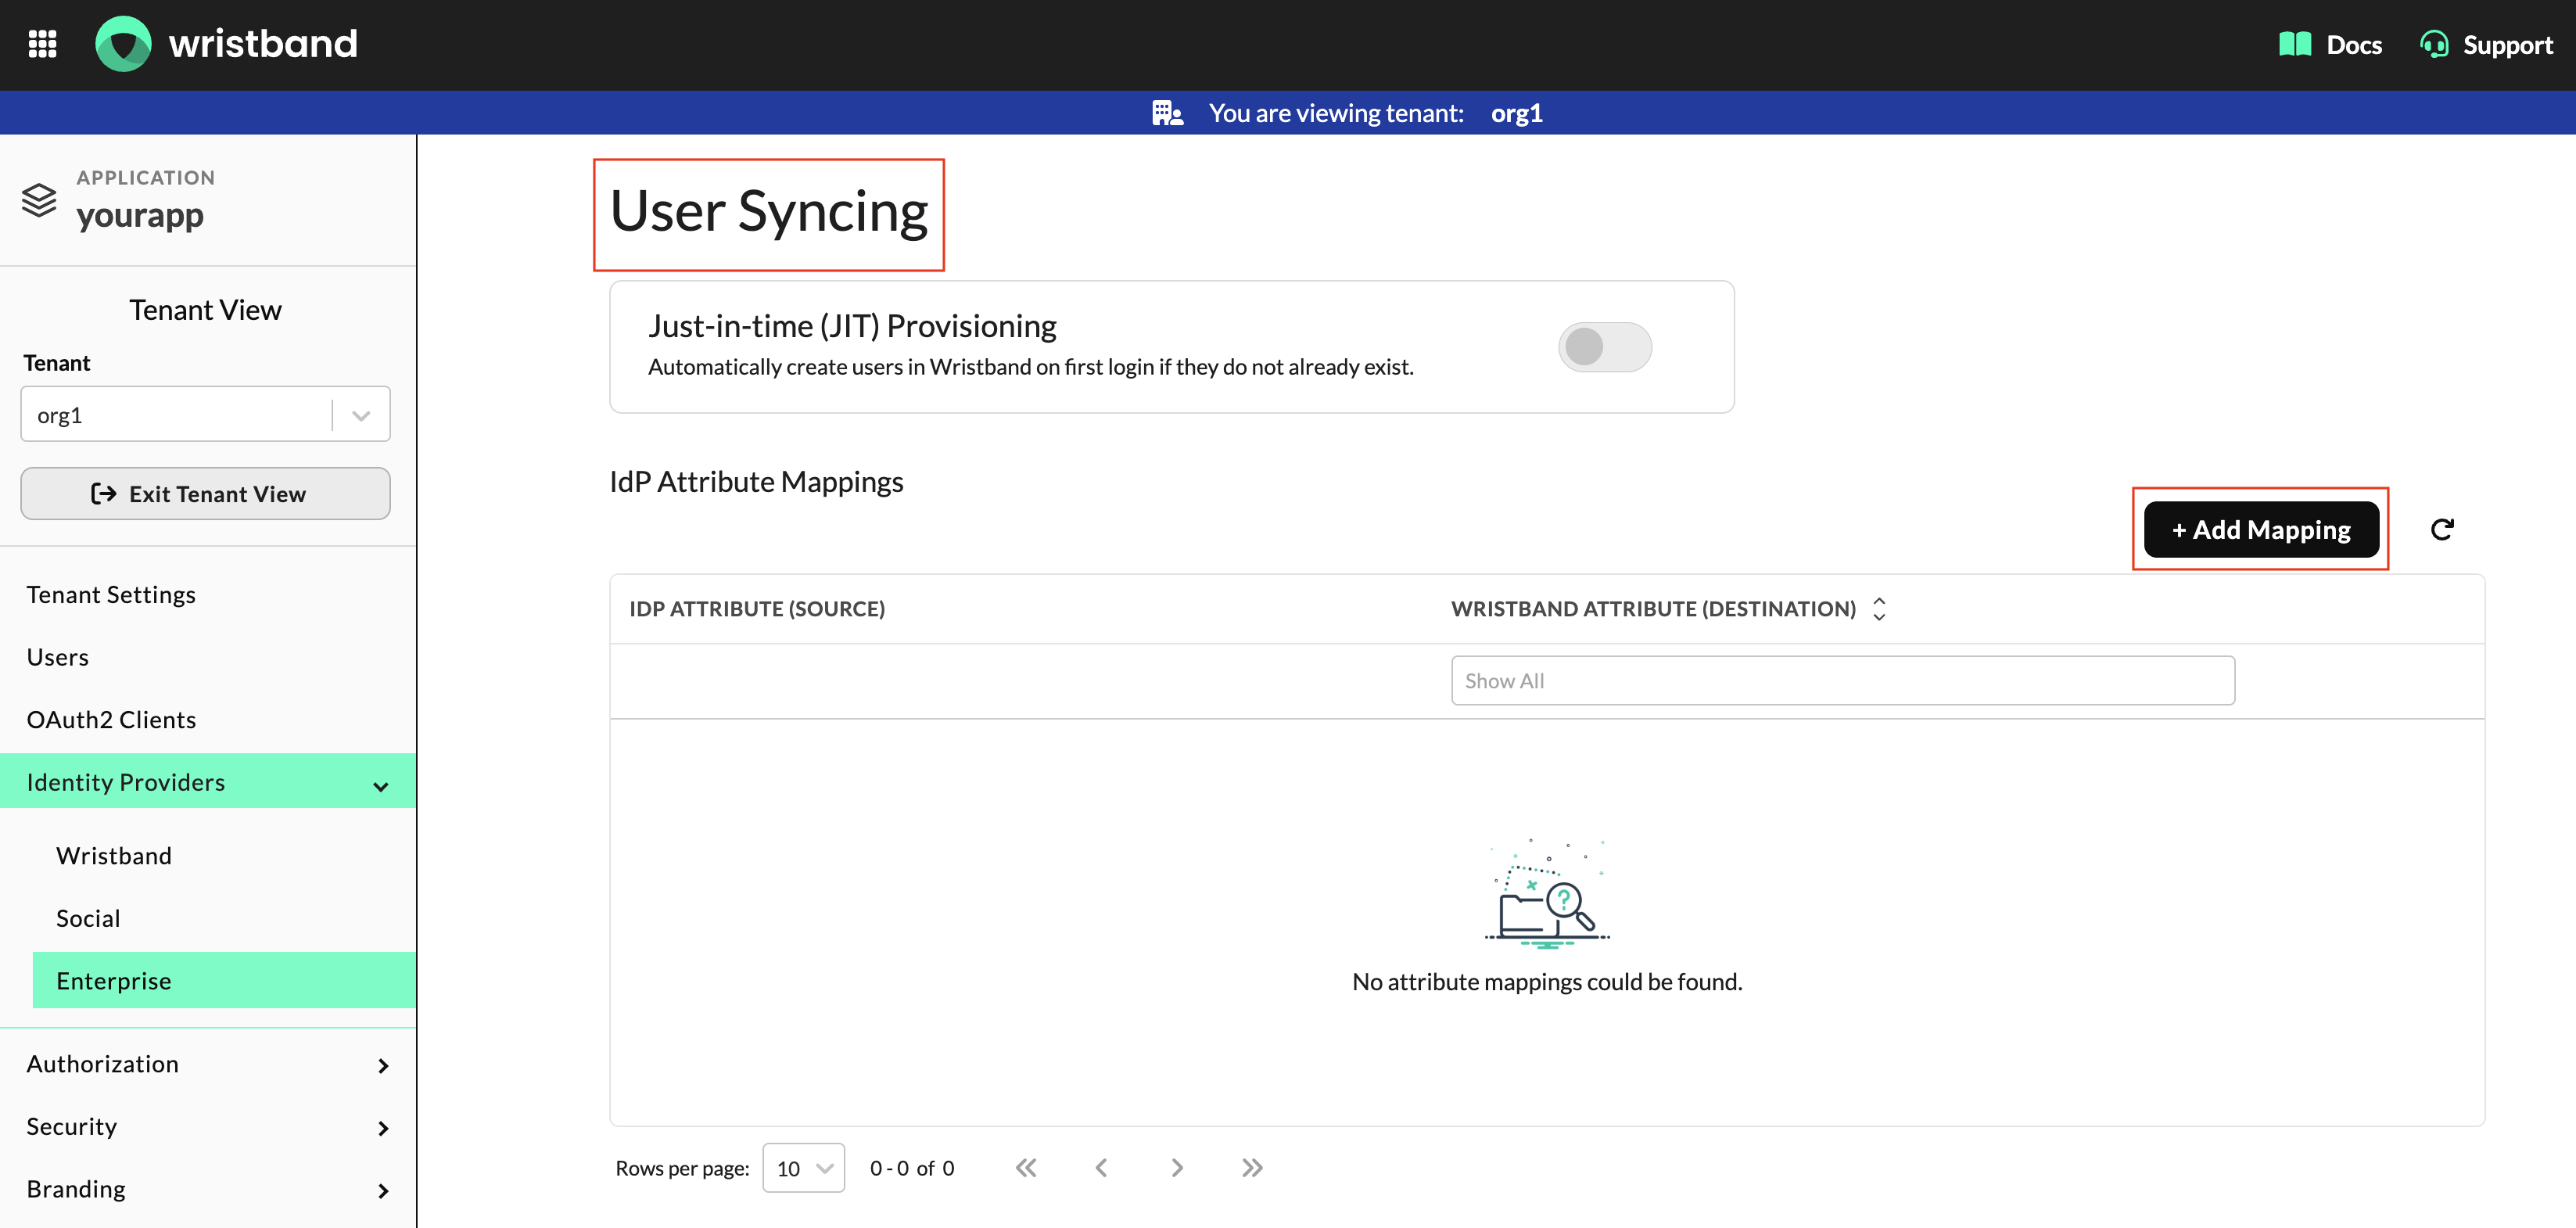
Figure 2: Click Add Mapping in the User Syncing section.
- In the modal that pops up, enter the following values:
- IdP Attribute (Source): The exact name of the groups attribute as it appears in the SAML assertion.
- Wristband Attribute (Destination): Select
groupsfrom the dropdown.
- Click Create to finalize the mapping.
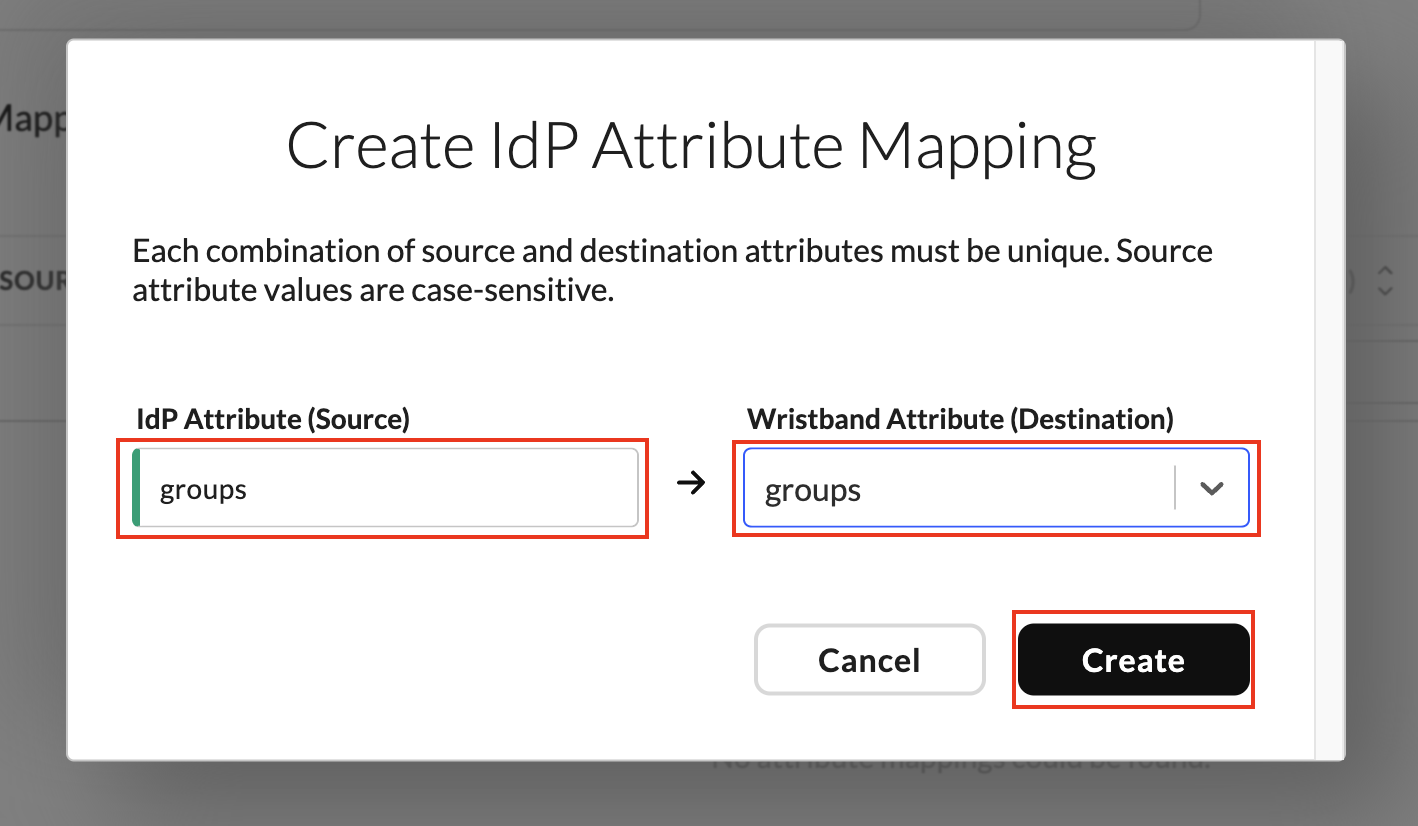
Figure 3: Map the SAML groups attribute to Wristband's groups attribute, then click Create.
Enable Role Mapping
To enable Role Mapping in Wristband, configure the group-to-role mappings and enable Role Mapping for the enterprise IdP.
- Navigate to Tenant View in the Wristband dashboard.
- Select Identity Providers -> Enterprise from the side navigation.
- Find and select your target enterprise IdP to update its configurations.
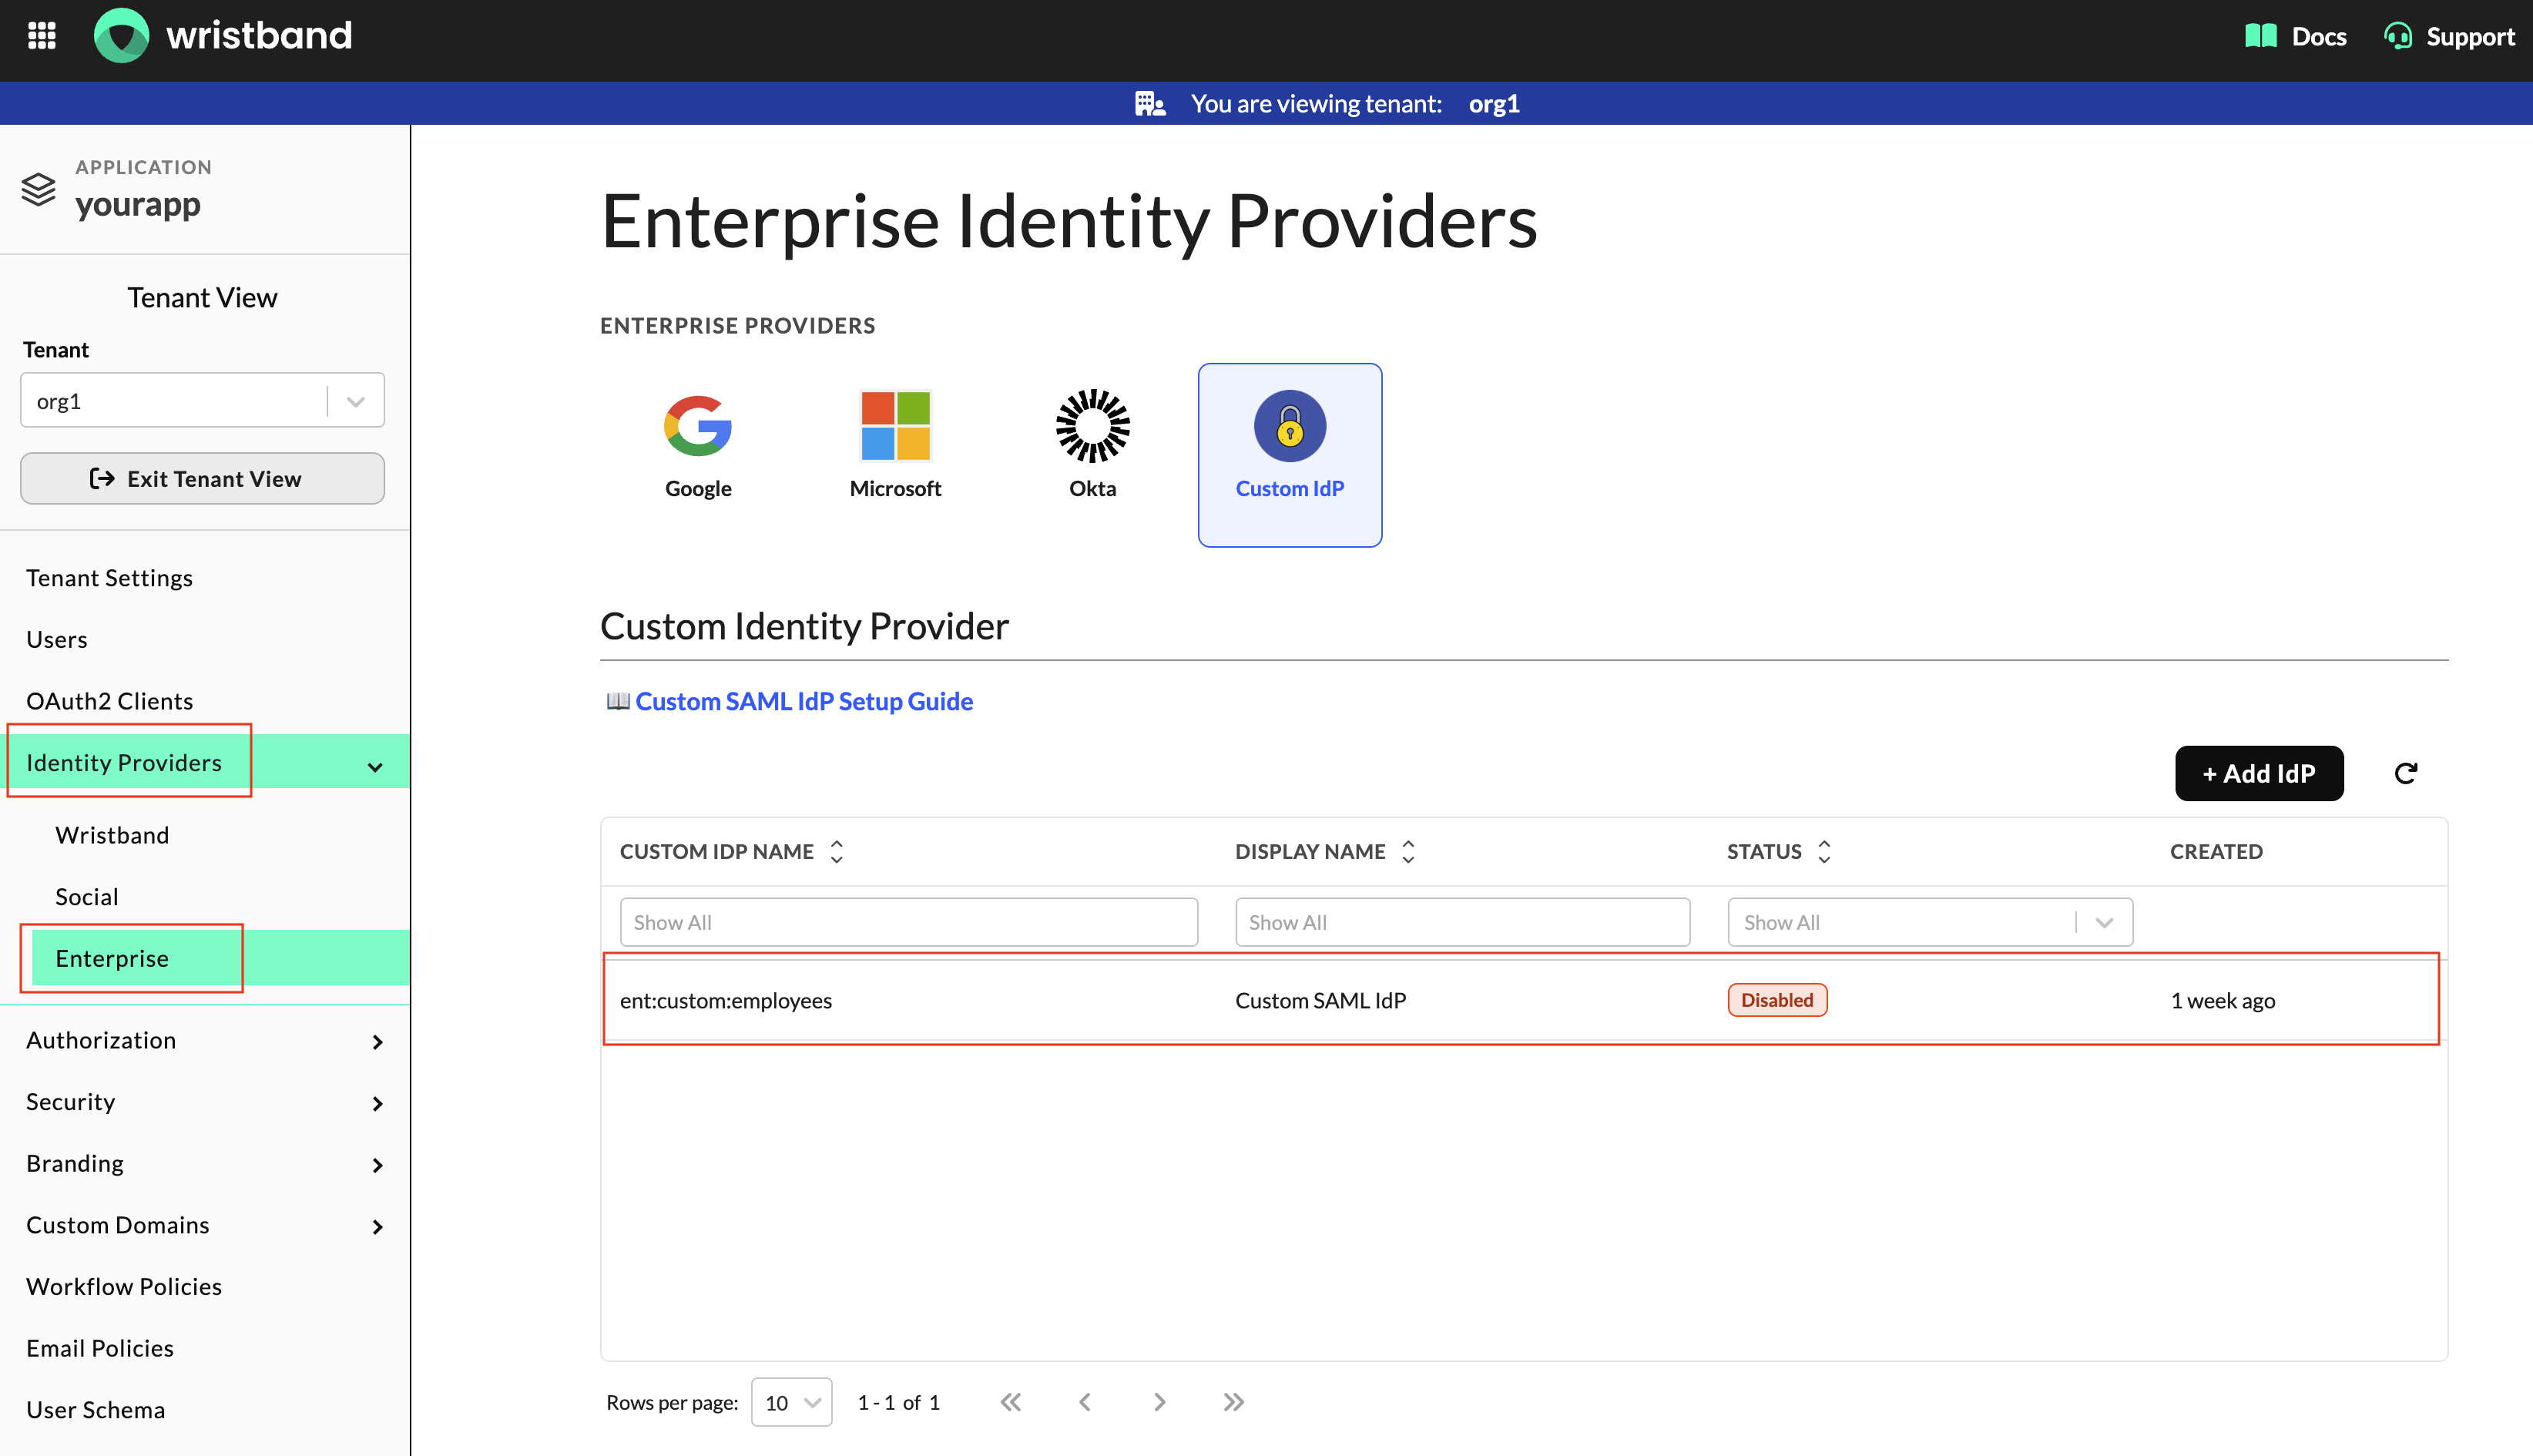
Figure 4: Select the enterprise IdP whose role mappings you want to configure.
- Go to its Role Mapping section.
- Click the Add Mapping button.
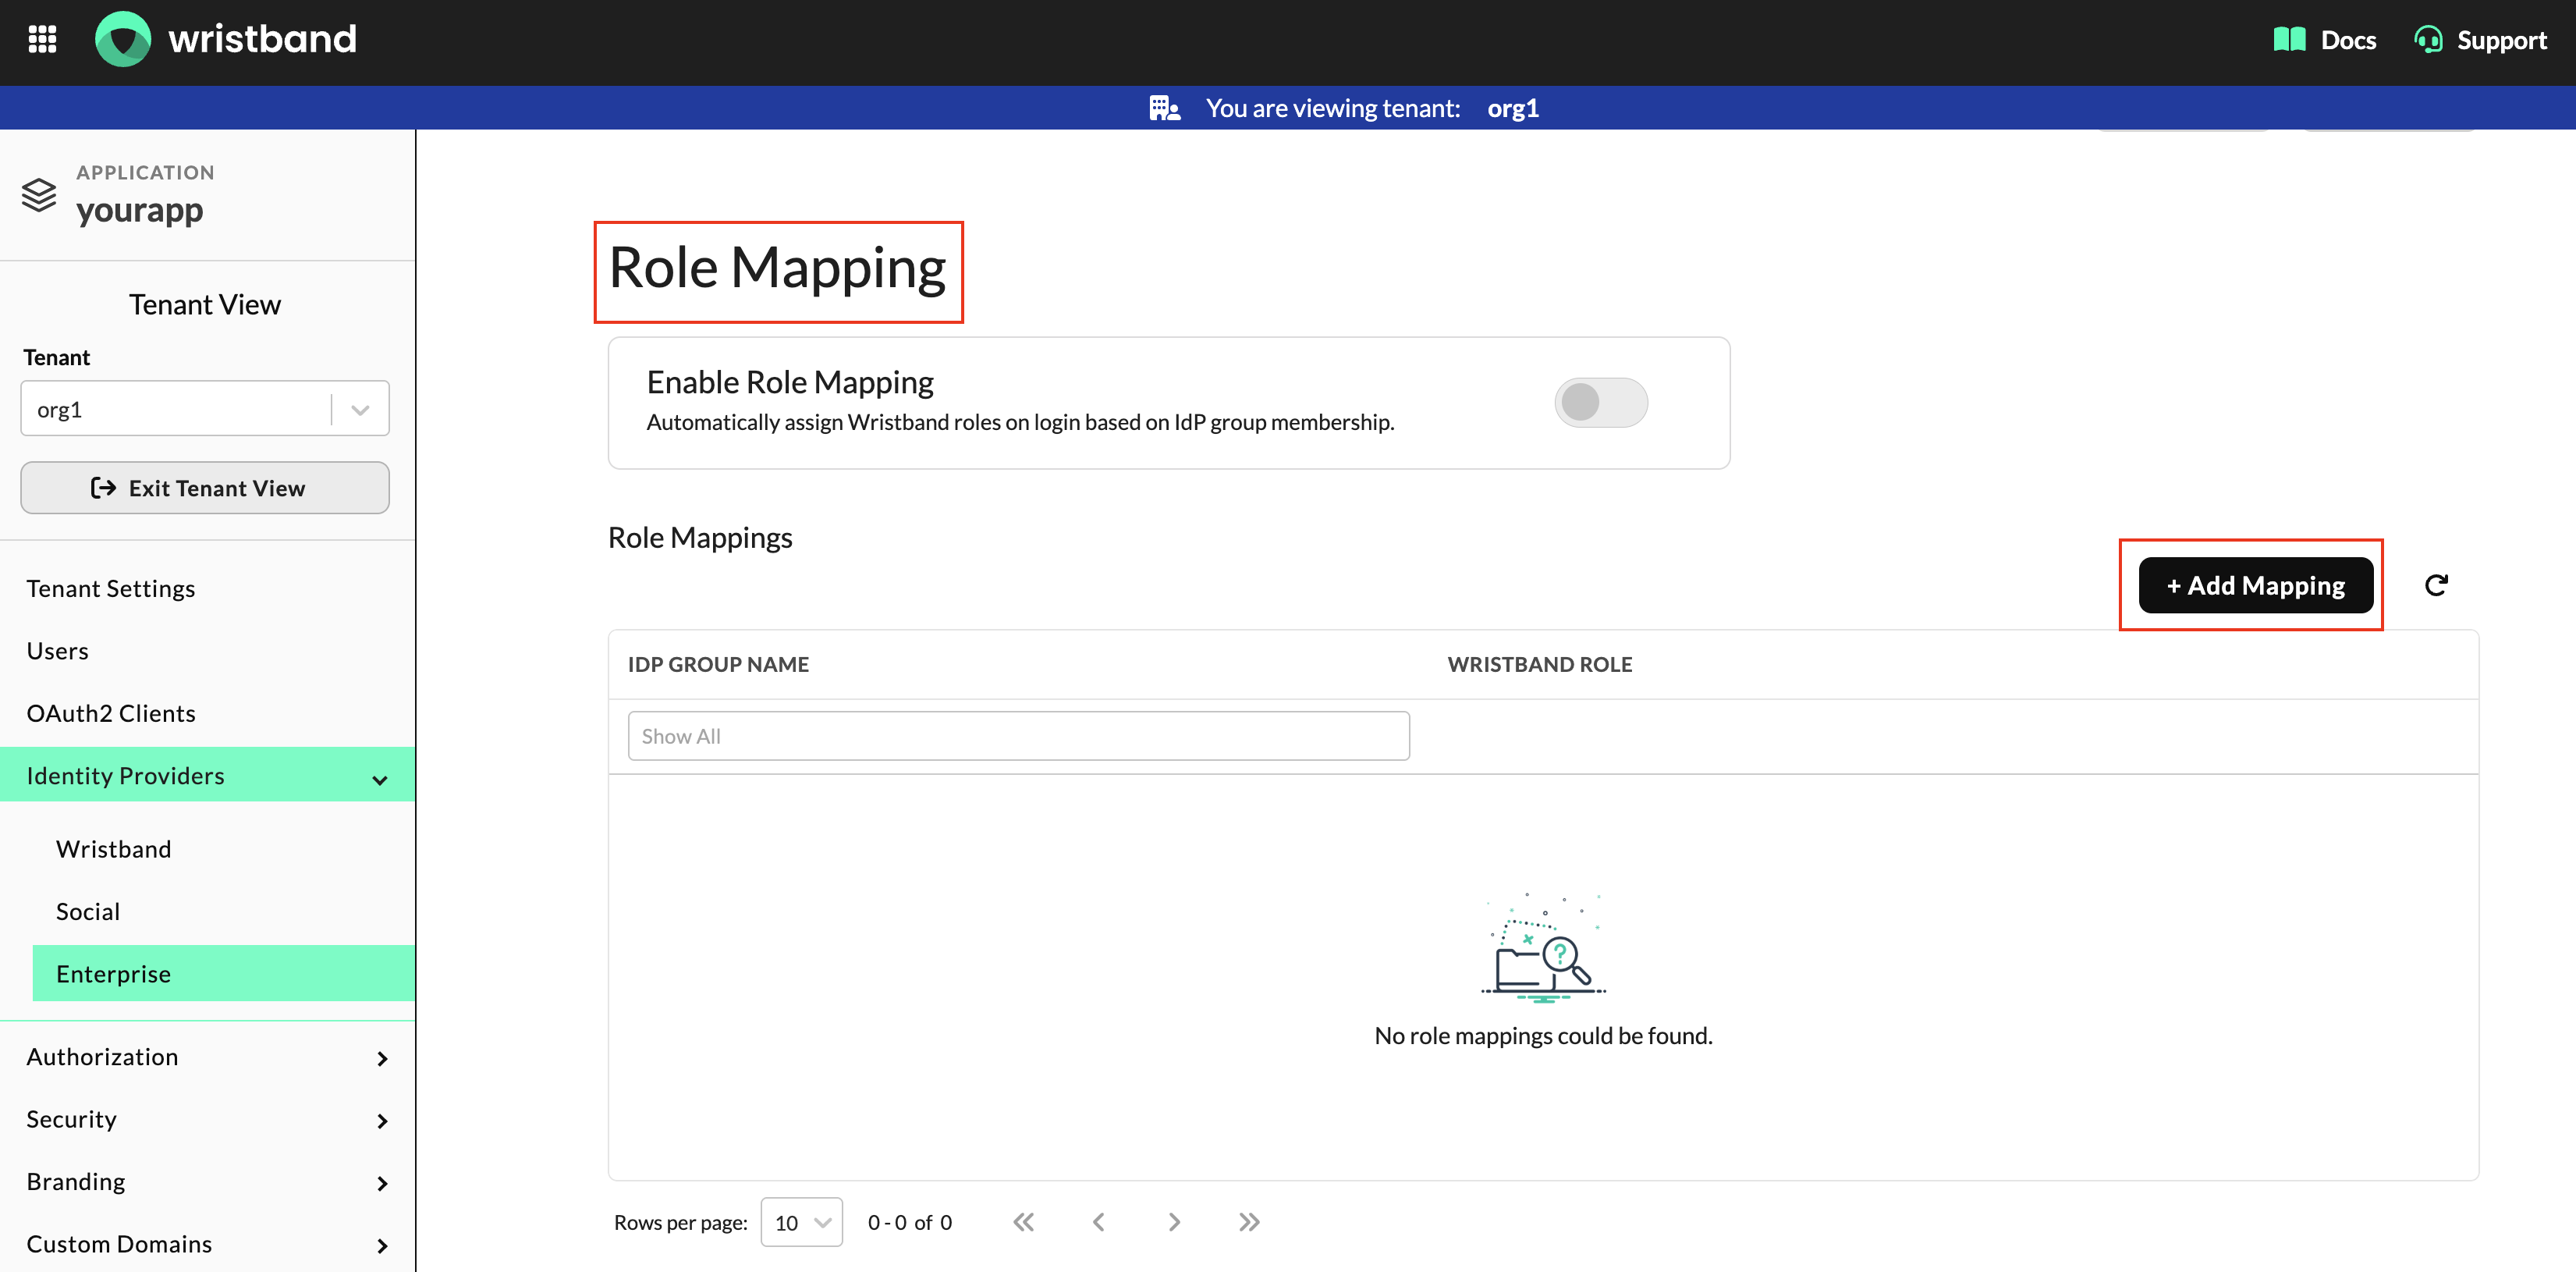
Figure 5: Click Add Mapping in the Role Mapping section.
- In the modal that pops up, enter the following values:
- IdP Group Name: The exact name of the group that should map to the Wristband role.
- Wristband Role: The Wristband role that should be assigned to users who are members of the group.
- Click Create to finalize the mapping.
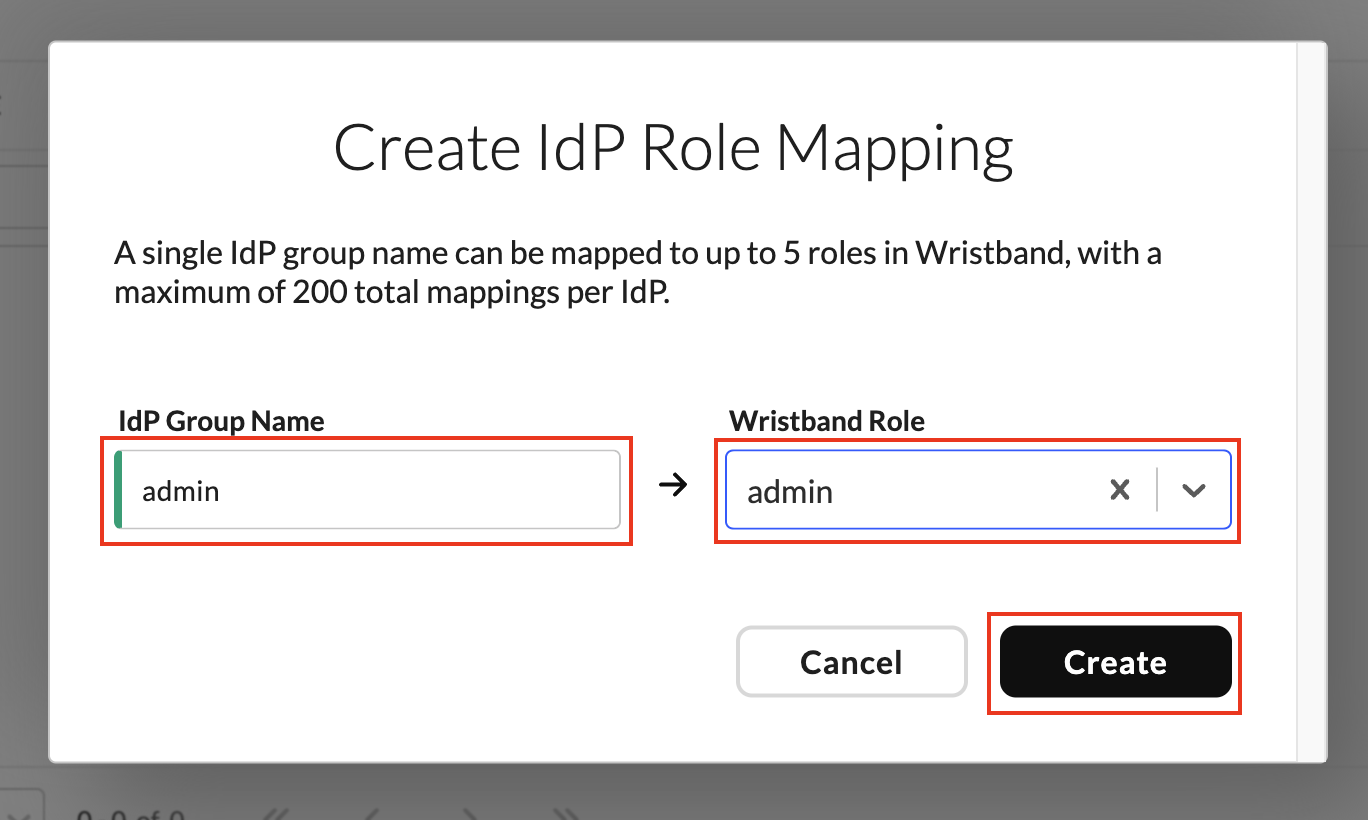
Figure 6: Enter the exact IdP Group Name, select a Wristband Role, then click Create.
- Enable the Role Mapping toggle.
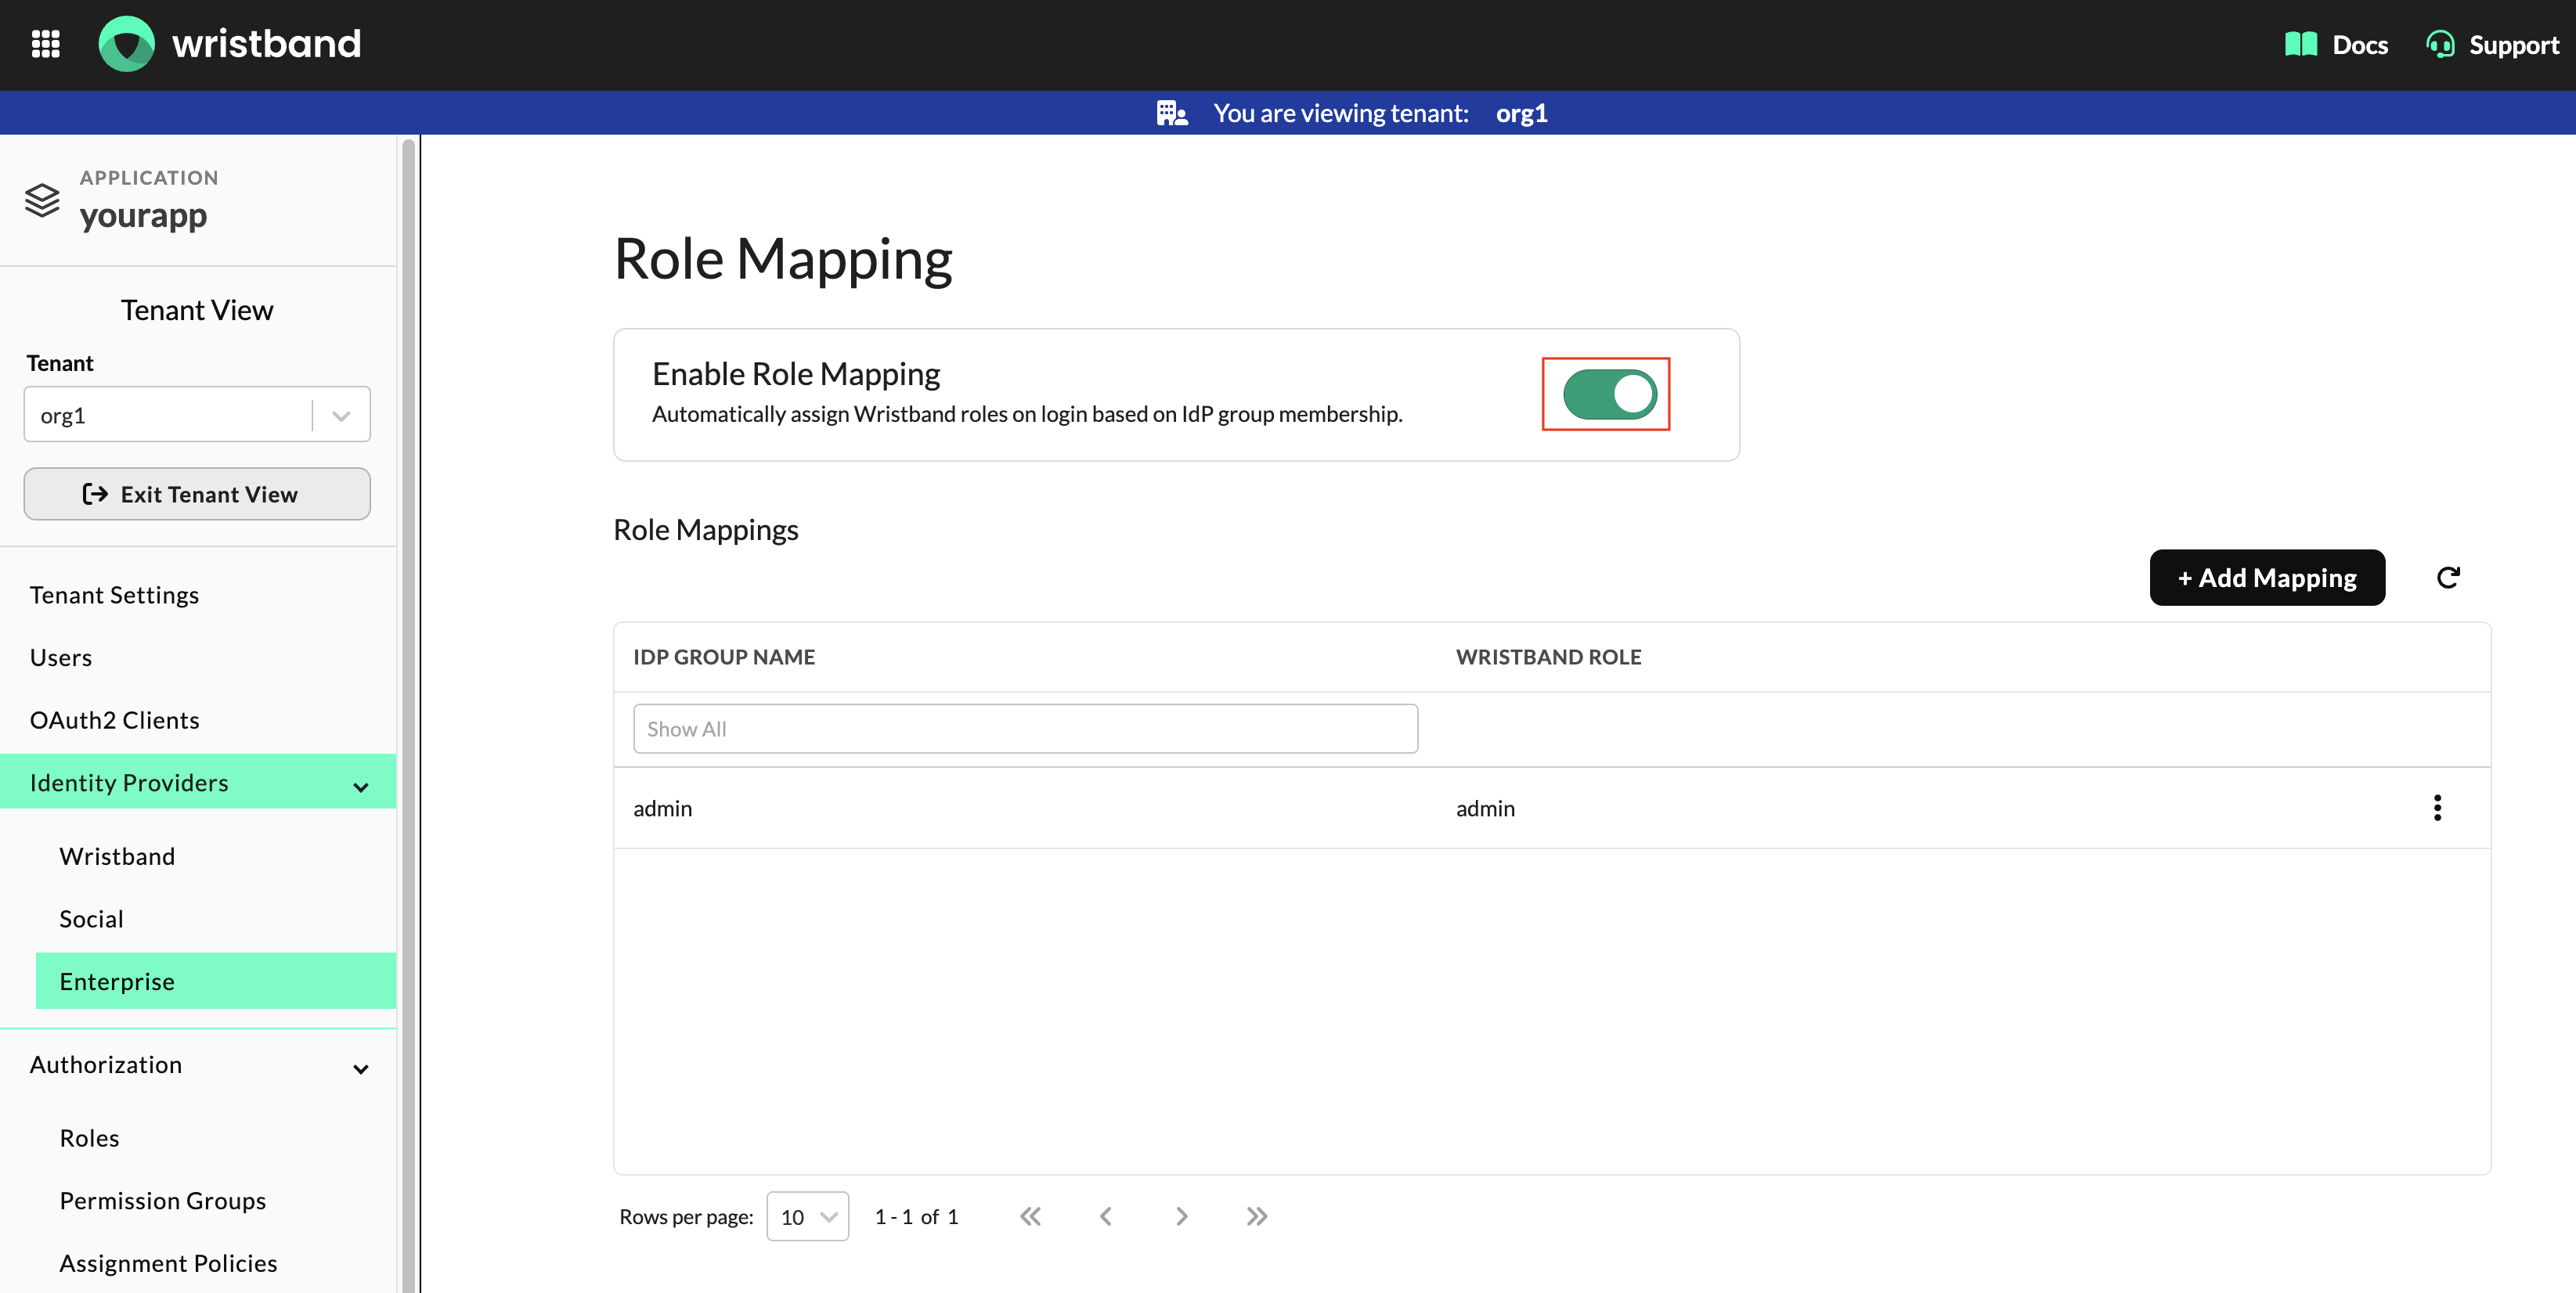
Figure 7: Enable Role Mapping to assign Wristband roles based on users' IdP group memberships.
Role Mapping is now configured for your IdP. When users authenticate through this IdP, Wristband evaluates their group memberships against your configured mappings and automatically assigns the corresponding roles.
Default Role Assignments
When Role Mapping is enabled, Role Assignment Policies can be used to assign default roles to users who don't match any configured group-to-role mappings. If the Default IdP User Sync Roles setting is configured in the applicable Role Assignment Policy, Wristband assigns those roles to the user. Otherwise, if no default roles are configured, Wristband clears the user's roles.
For more information, see the Role Assignment Policies guide.
Updated 14 days ago