Tenant Discovery: Self-Hosted UI
Implement your own Application-level Login Page and Tenant Discovery Workflow using Wristband APIs.
If you intend to self-host the Application-level Login Page, you can configure Wristband to reference the URLs where your pages are located. Wristband will then direct users to your pages wherever they need to be presented during the Tenant Discovery flow.
Configuration
Depending on which pages you intend to self-host, configure the relevant settings in the Wristband Dashboard.
Custom Page URLs
Under Application Settings → Custom Page URLs in the Application View of the Wristband Dashboard, set the Application Login Page URL to the location of your self-hosted Application-level Login Page. Wristband uses this URL anywhere it needs to redirect users to your application's login page (e.g., the action link at the bottom of Wristband-hosted Application-level Signup Page).
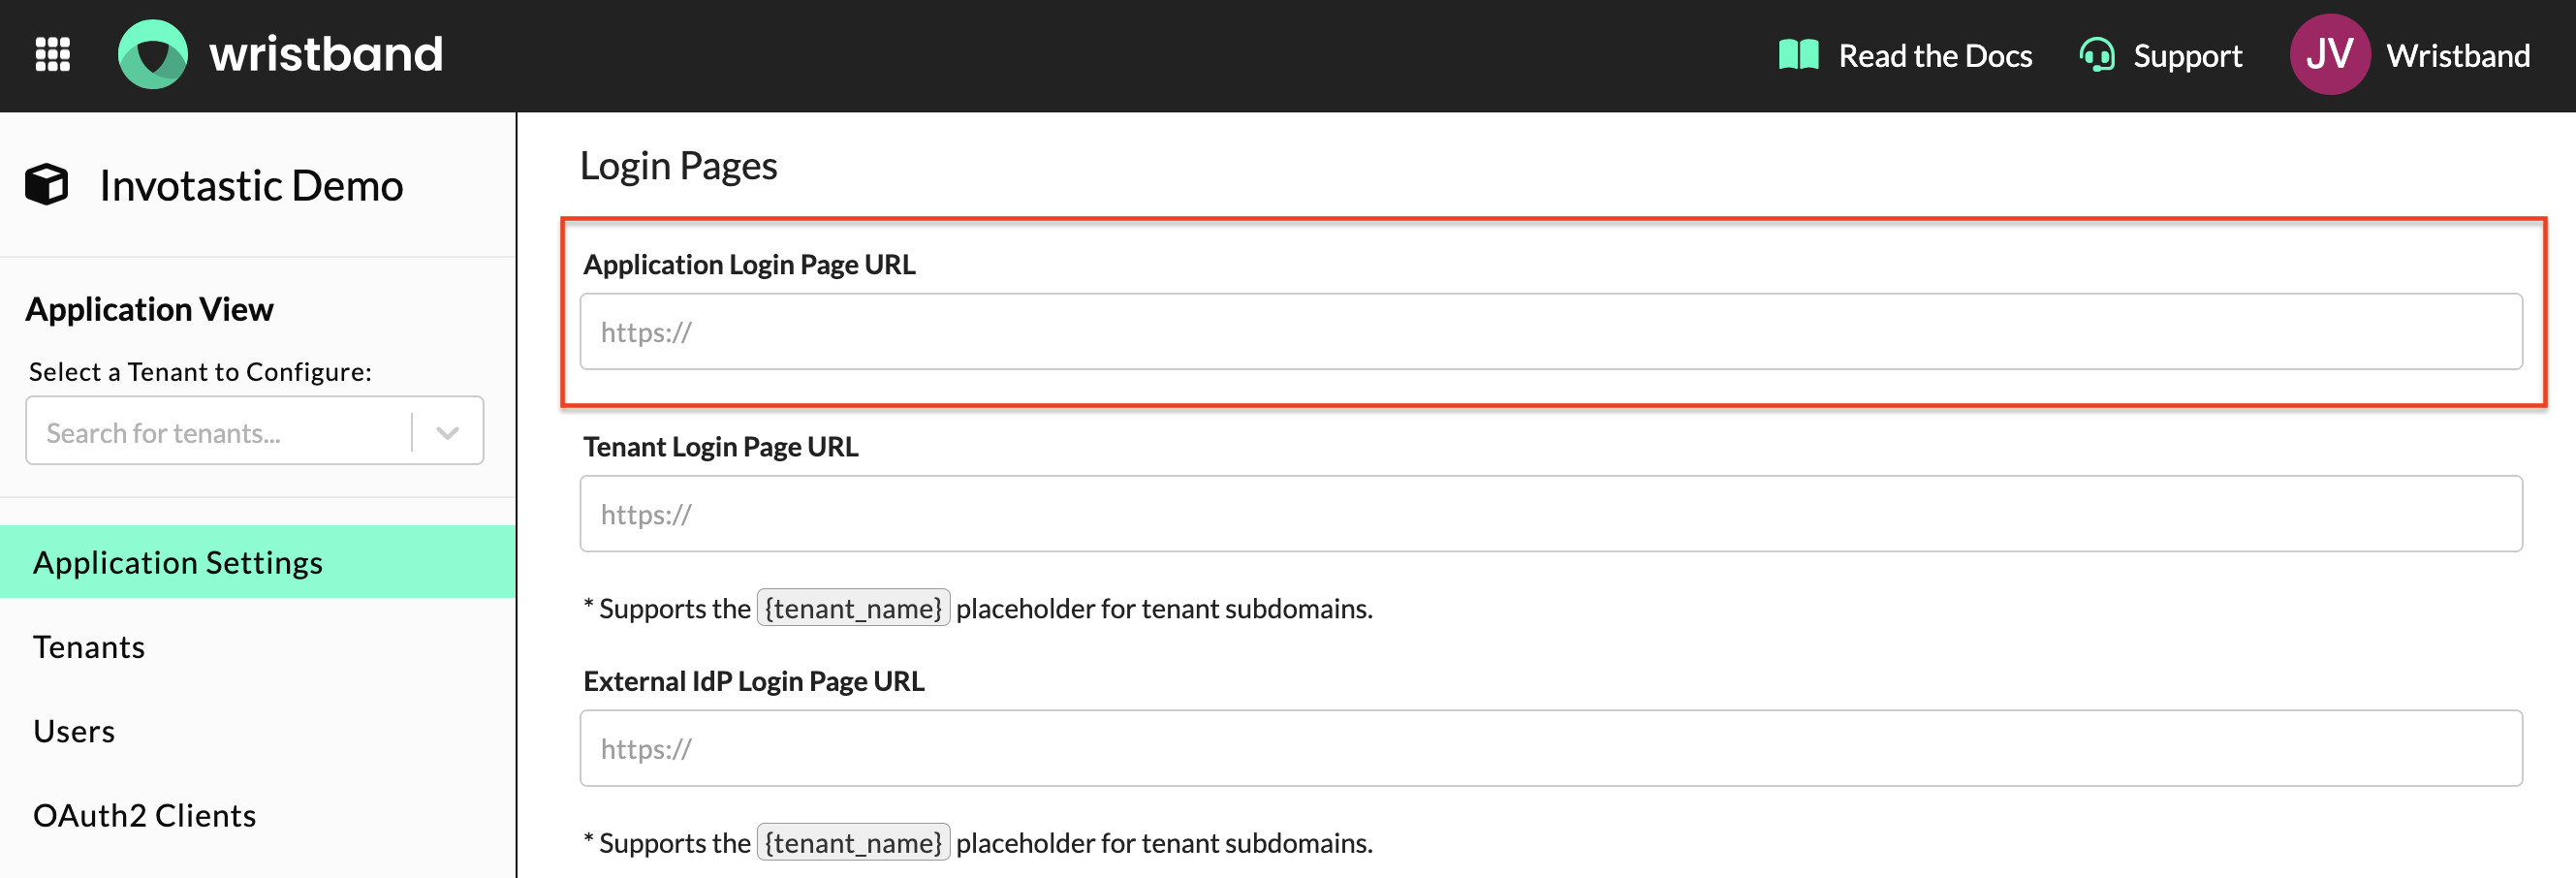
Application Login Page URL field in Application Settings → Custom Page URLs.
Email Policies
Under Email Policies in the Application View of the Wristband Dashboard, set the Action Link URL for the Tenant Discovery email template to the location of your self-hosted Tenant Selection Page. This applies when the Email Verification Strategy policy is set to Verification Link. Wristband sends this URL in the tenant discovery email when a user belongs to multiple tenants.
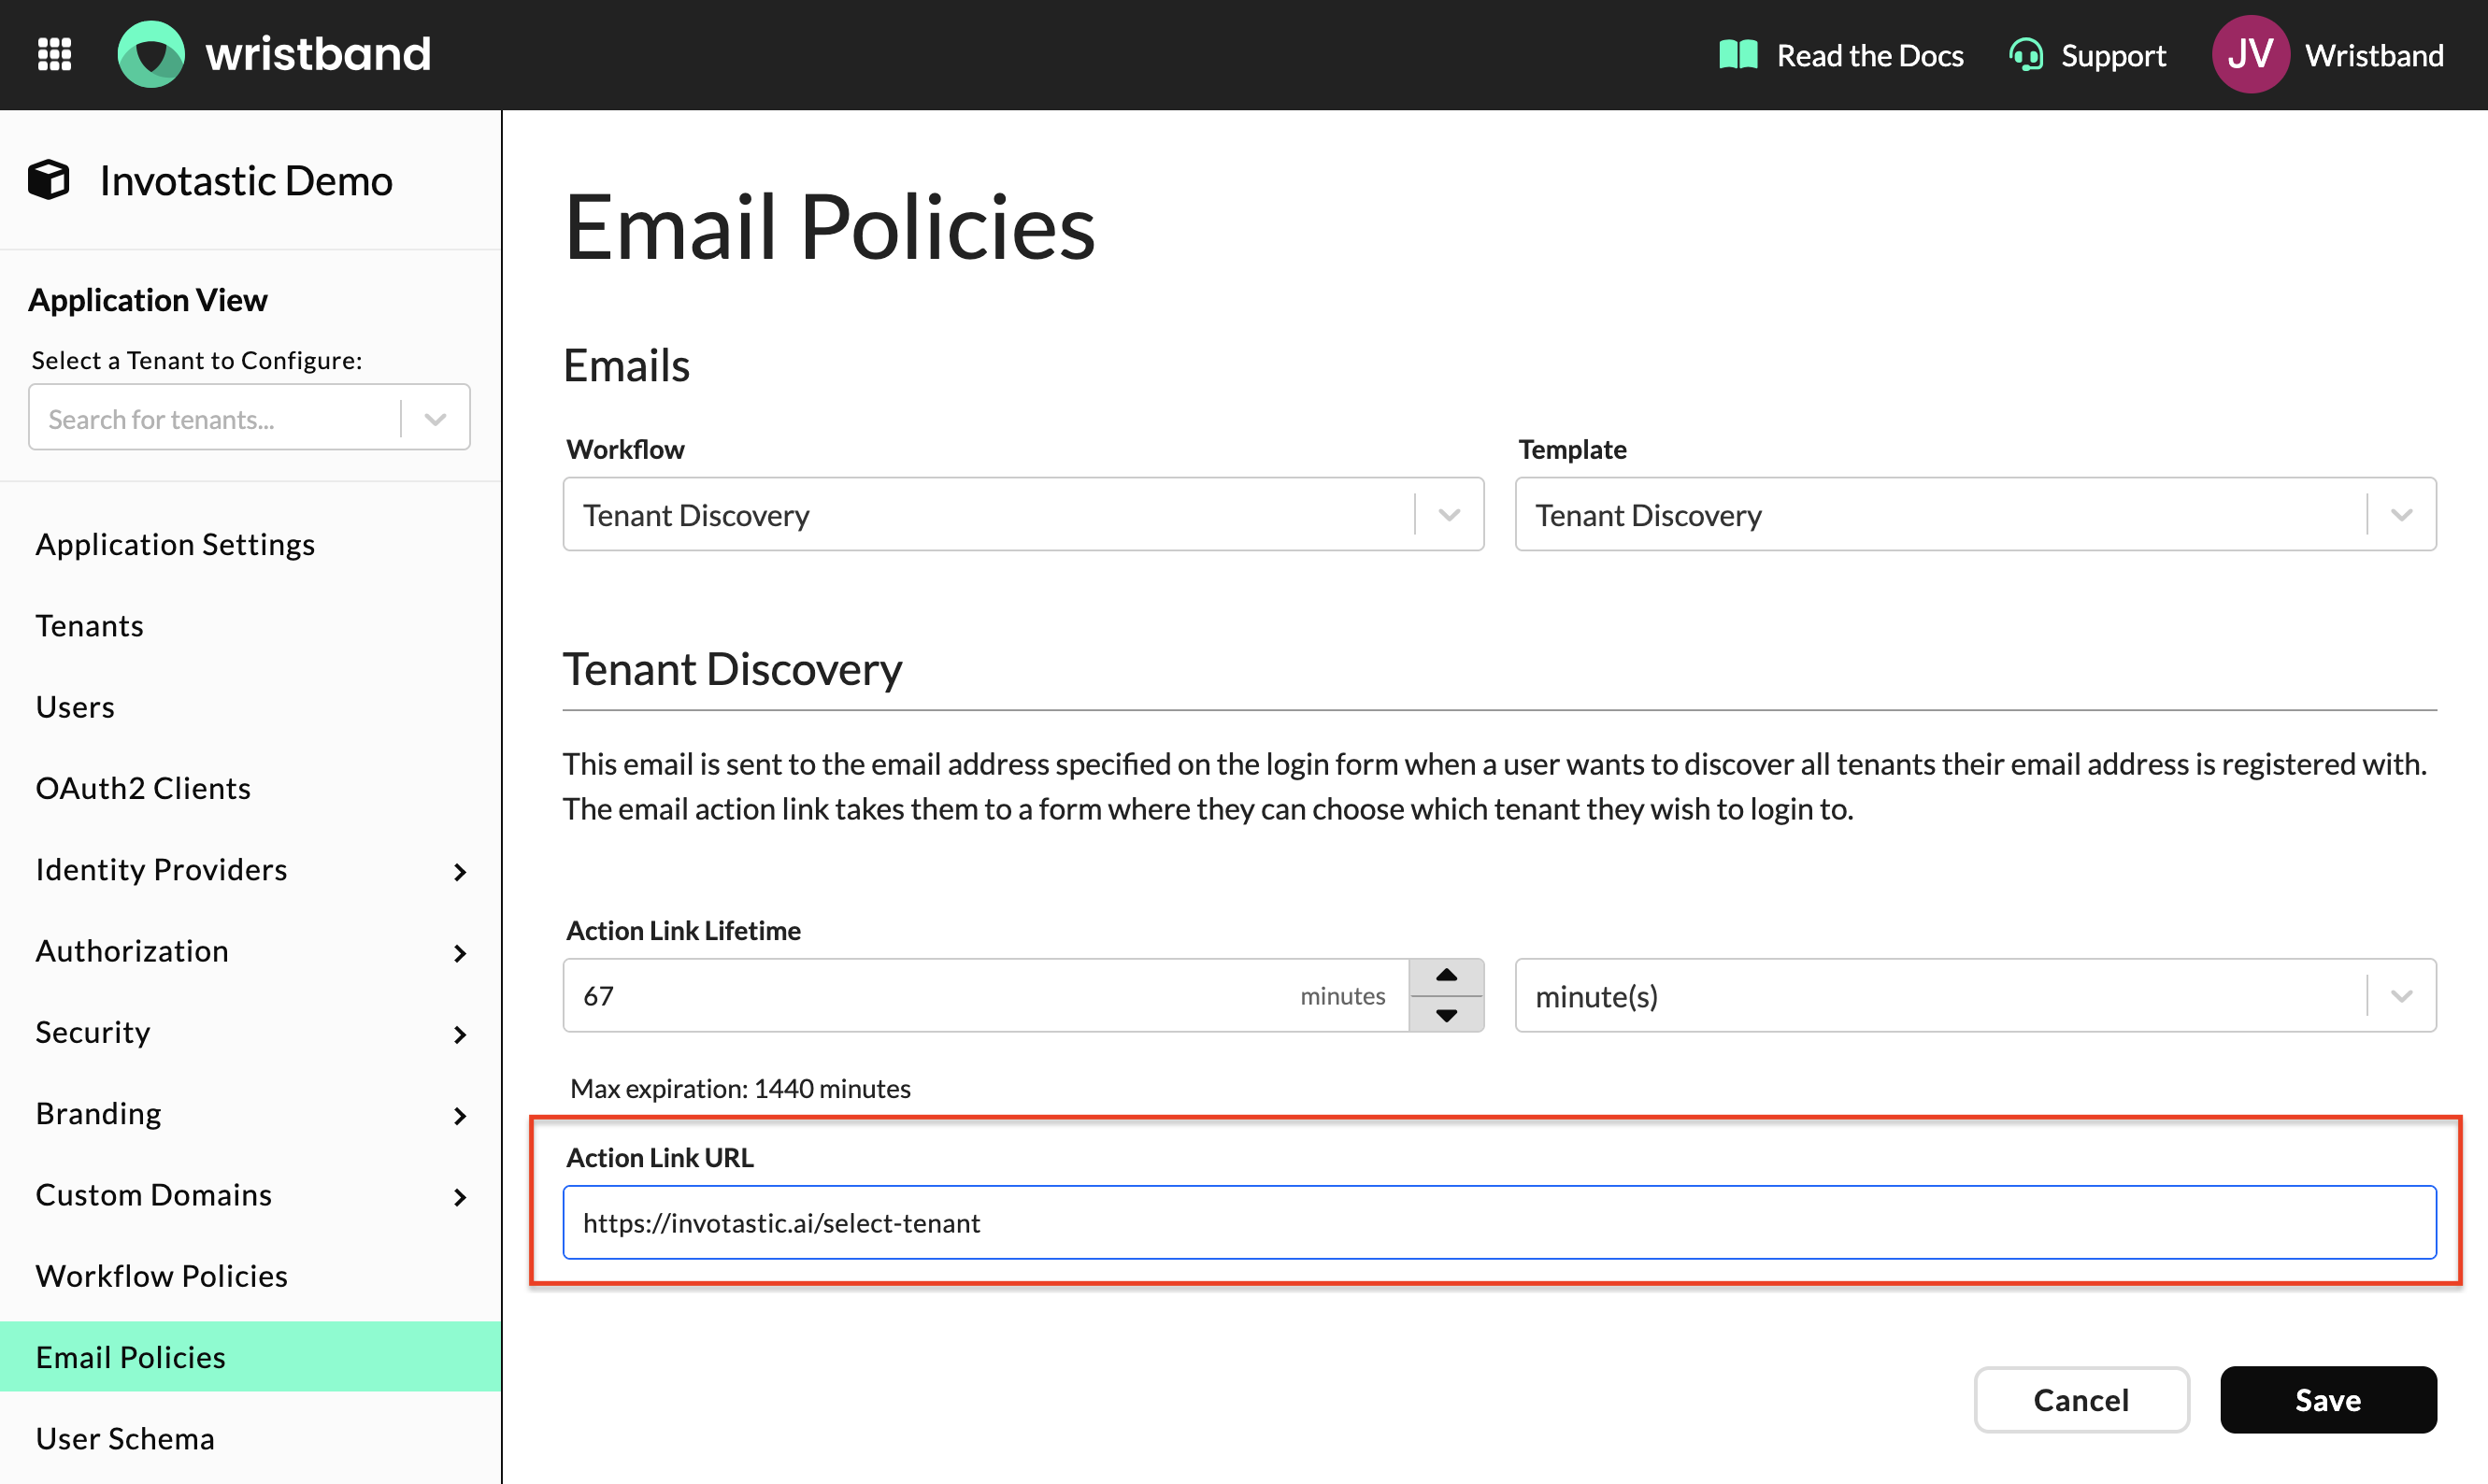
Tenant Discovery email template Action Link URL field in Email Policies
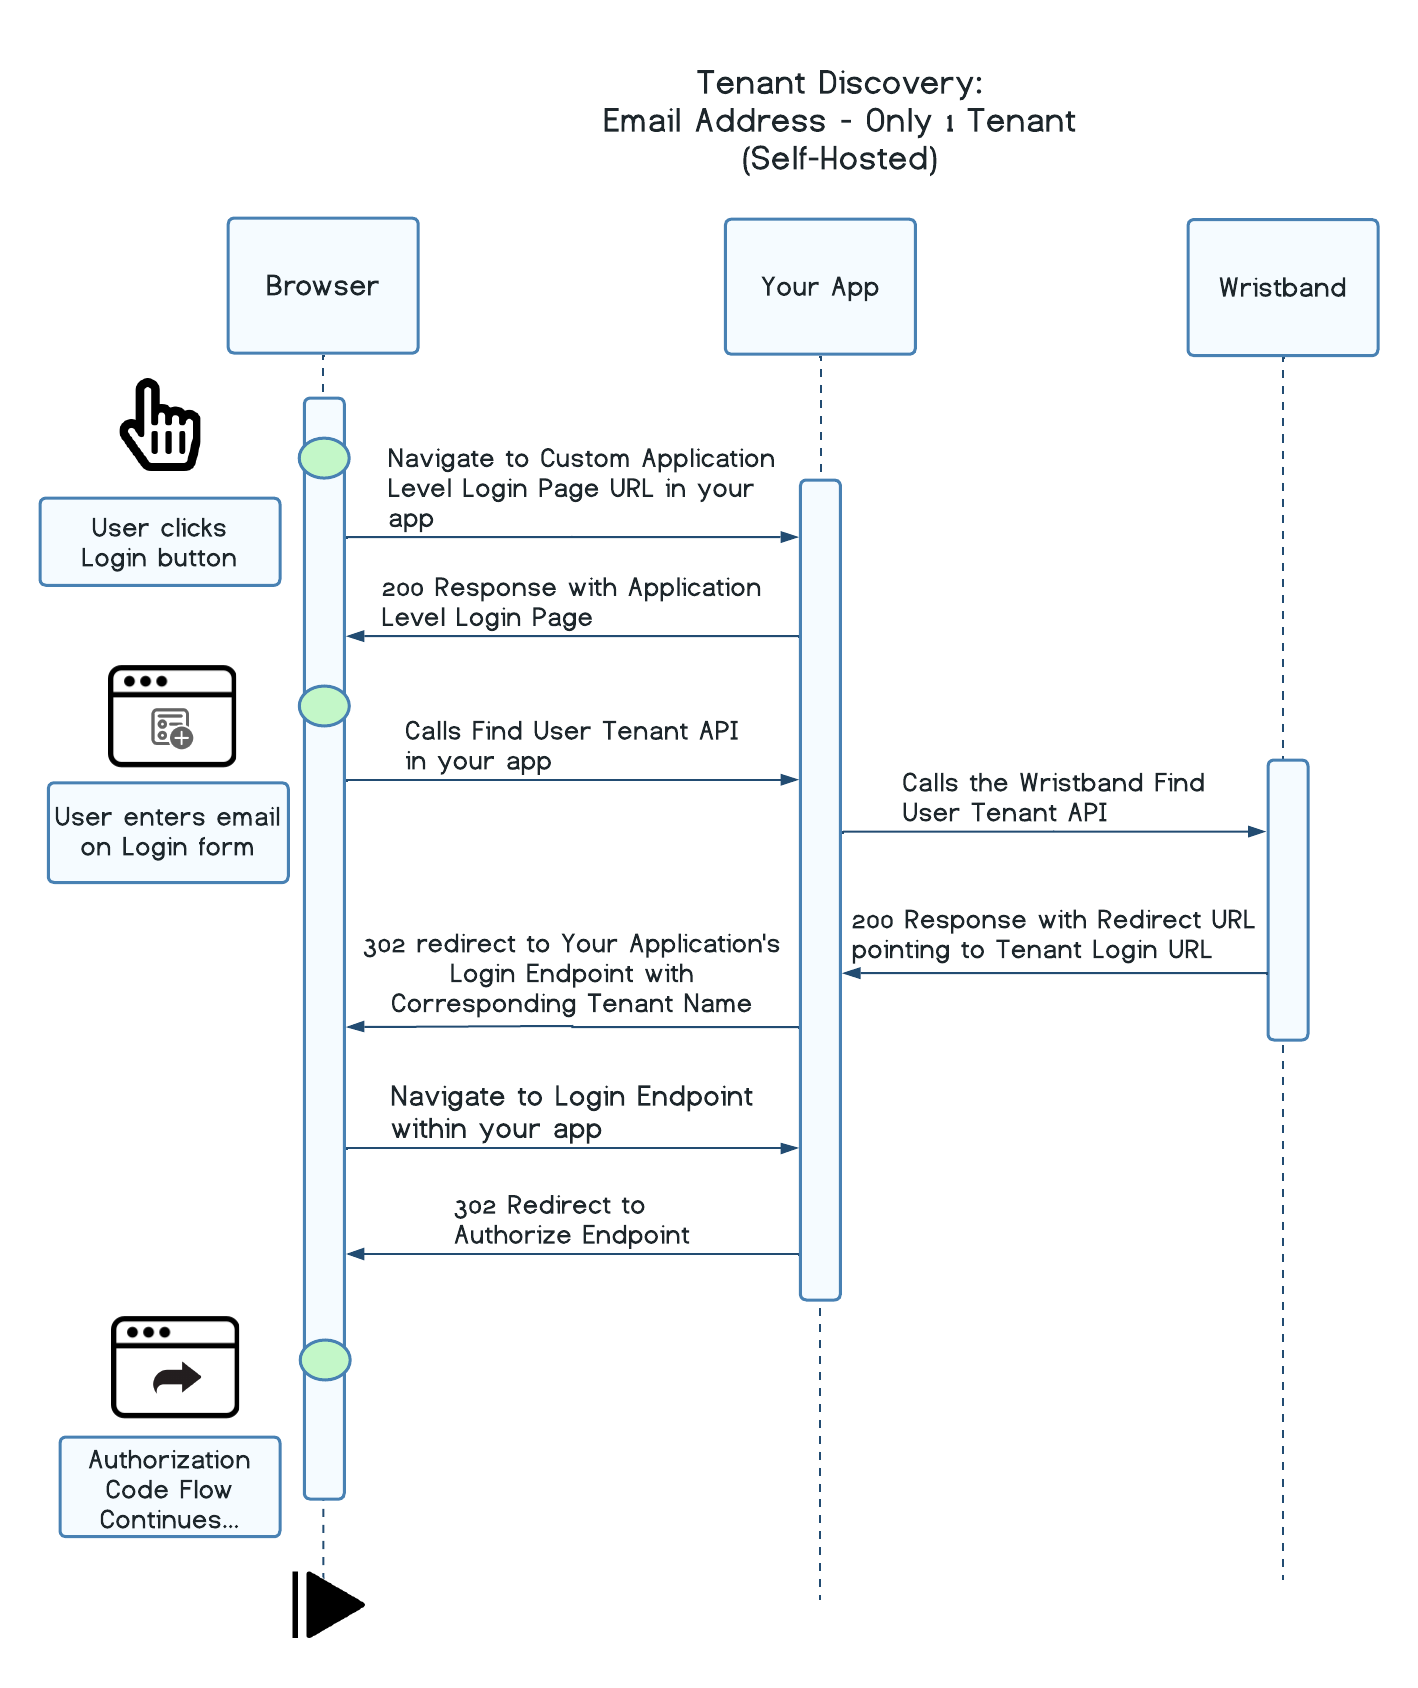
Email Address (1 Tenant)
At a high level:
- The user clicks on the Login button either on your website or within your application.
- The user gets sent to your application's self-hosted Application-level Login Page.
- The user enters their email address and clicks the submit button.
- Your application calls the Wristband Find User Tenant API to find the Tenant-level Login URL.
- Your application redirects the user to the Login Endpoint implemented by your application with the appropriate tenant name.
From here, the user would be sent through the Authorization Code Flow in order to login to their tenant and gain entry to the application.
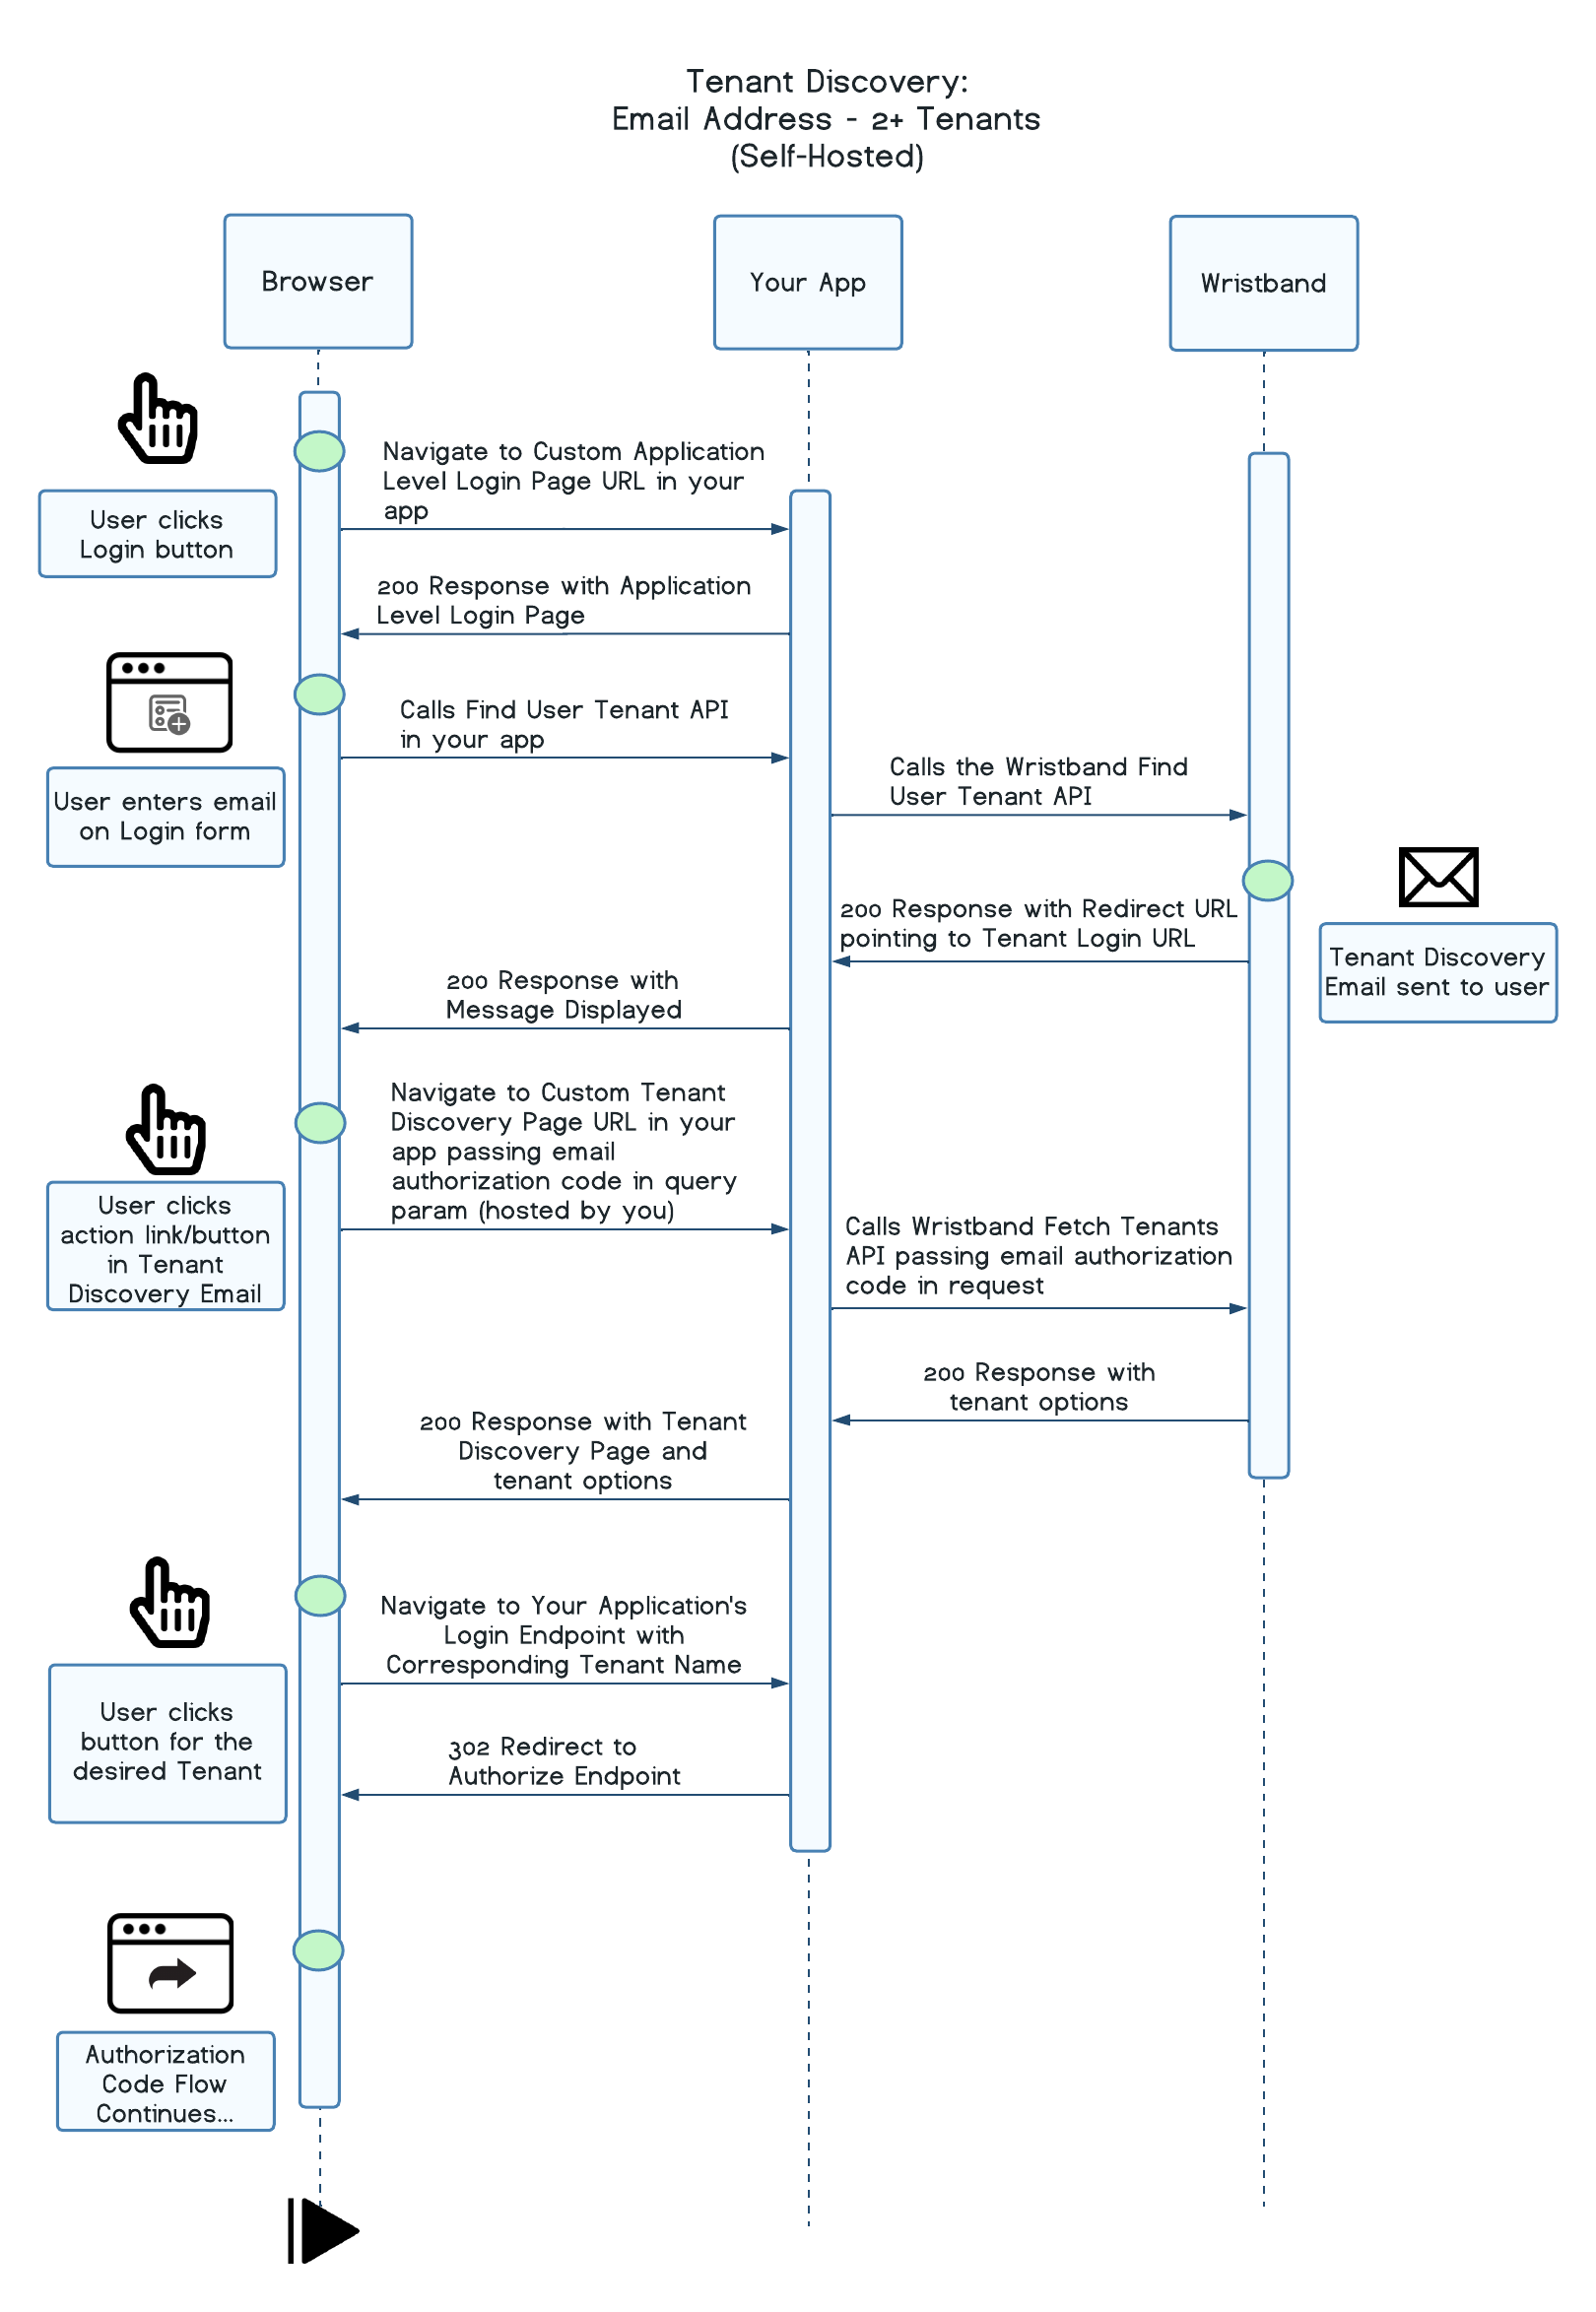
Email Address (2+ Tenants)
At a high level:
- The user clicks on the Login button either on your website or within your application.
- The user gets sent to your application's self-hosted Application-level Login Page.
- The user enters their email address and clicks the submit button.
- Your application calls the Wristband Find User Tenant API to find the Tenant-level Login URL. During API execution, a Tenant Discovery email is sent to the email address that the user provided on the Login Form.
- Your application displays a message to the user to check their email inbox.
- The user clicks on the Action Link in the Tenant Discovery email that was sent to their inbox.
- The user is redirected to your application's self-hosted Tenant Discovery Page along with the Email Authorization Code query parameter.
- Your application calls the Wristband Fetch Tenants API, passing along the Email Authorization Code.
- The user clicks on the Tenant Login button for the tenant they wish to be redirected to.
- Your application redirects the user to the Login Endpoint implemented by your application with the appropriate tenant name.
From here, the user would be sent through the Authorization Code Flow in order to login to their tenant and gain entry to the application.
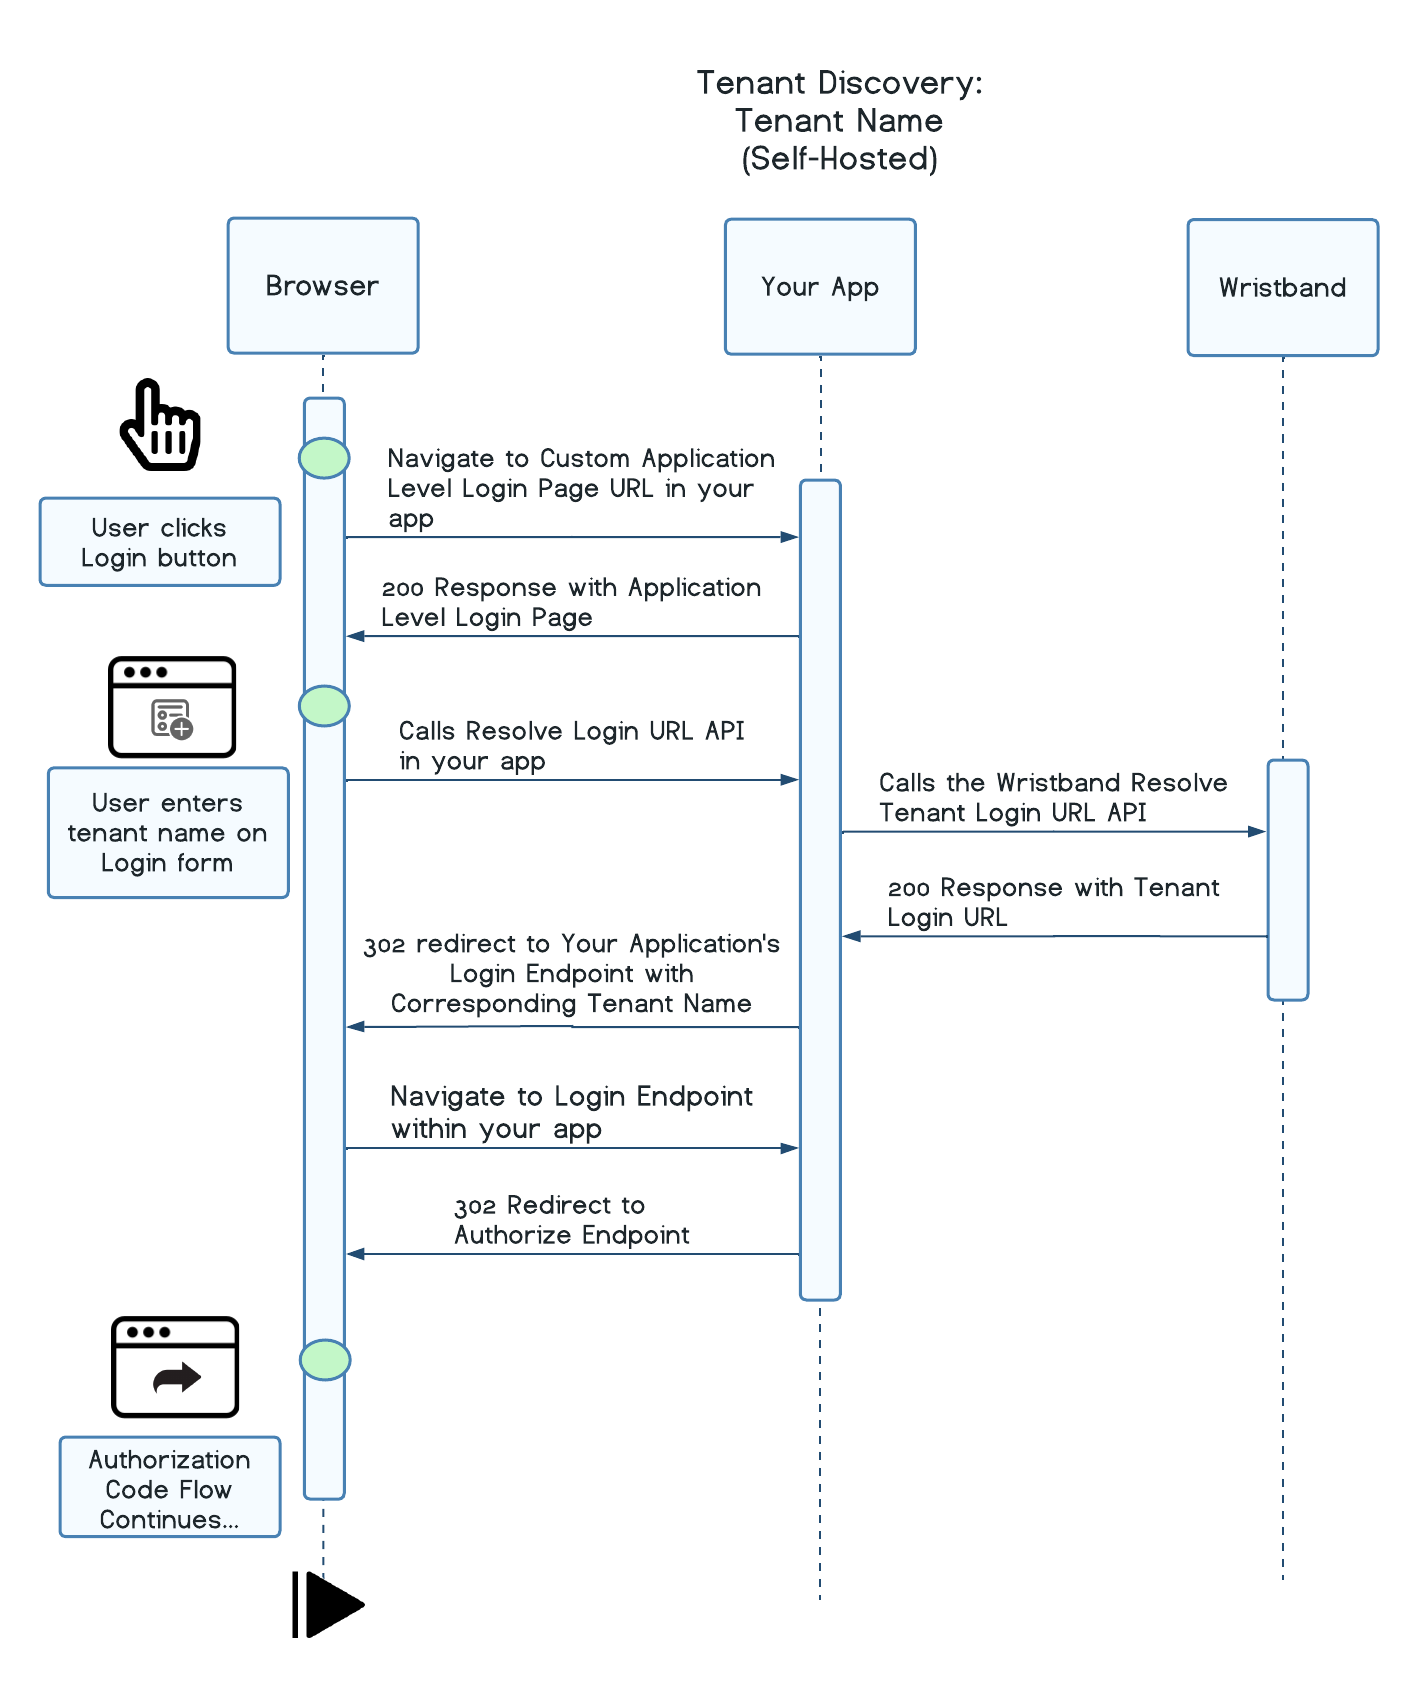
Tenant Name
At a high level:
- The user clicks on the Login button either on your website or within your application.
- The user gets sent to your application's self-hosted Application-level Login Page.
- The user enters their tenant name and clicks the submit button.
- Your application calls the Wristband Resolve Tenant Login URL API to find the Tenant-level Login URL.
- Your application redirects the user to the Login Endpoint implemented by your application with the appropriate tenant name.
From here, the user would be sent through the Authorization Code Flow in order to login to their tenant and gain entry to the application.
Updated 3 months ago