Signup Workflow
Allow users to create a new account and provision a tenant or join an existing one.
In Wristband, users can sign up at two levels:
- Application-level Signup
- Tenant-level Signup
Each signup type has distinct implications for how tenants and users are provisioned and what the user experiences during the flow.
Workflow Policies
The Signup workflow provisions new users in your application. Several policies control key aspects of the signup experience, including how users verify their account after signing up and where they land when the workflow completes.
Signup policies are configured under Workflow Policies in the Application View of the Wristband Dashboard. They can also be overridden at the tenant level under Workflow Policies in the Tenant View.
- Verification Step: Controls the verification process a user must complete after signing up. Options are activation email workflow or email verification workflow after signup. To learn more about each option, see User Activation vs Email Verification below. Defaults to activation email workflow.
- User Activation Strategy: Only applicable when the activation email workflow is selected. Controls whether the activation email contains a verification link or a one-time code. Defaults to verification link.
- Custom Redirect URL: An optional URL to redirect users to after completing the signup workflow, instead of the default login endpoint. Supports the
{tenant_name}placeholder for tenant subdomains.
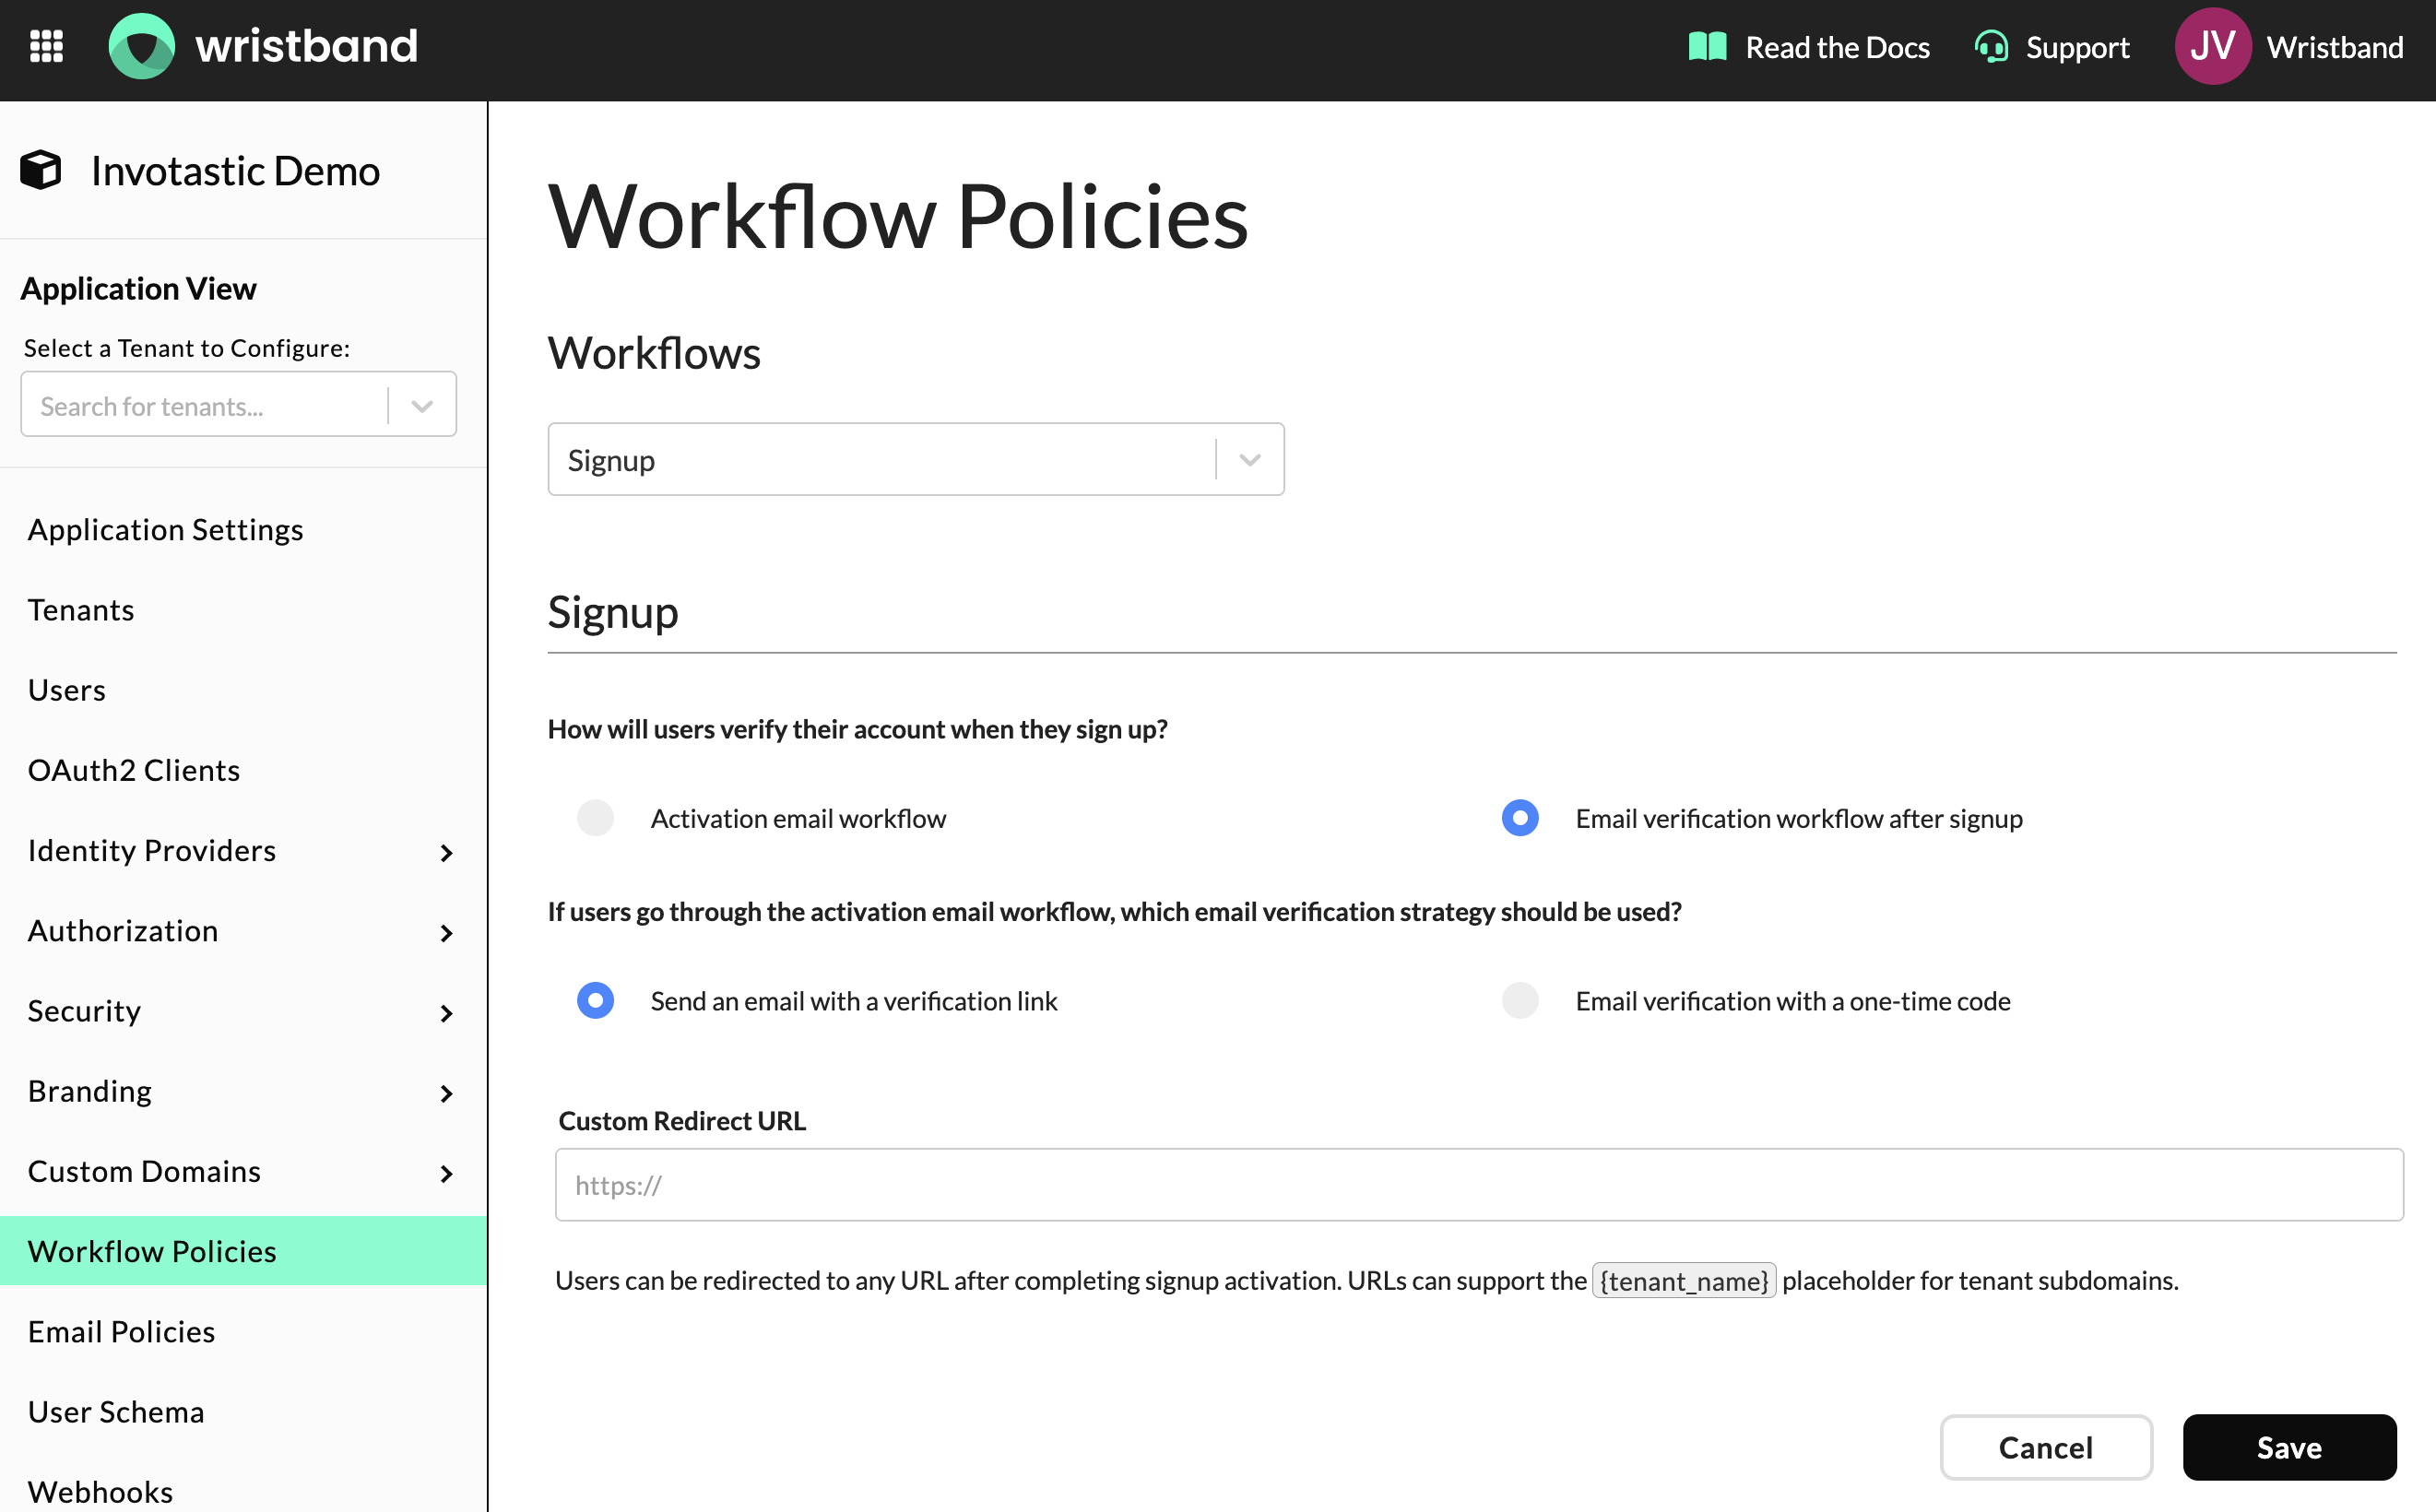
Signup Workflow Policies in the Wristband Dashboard
Application Signup
You can enable Application-level Signup via the Application Settings in the Application View of the Wristband Dashboard. If disabled, users cannot access the Wristband-hosted Application Signup Page, and the Signup link on the Wristband-Hosted Application Login Page (Tenant Discovery) will not appear. It is disabled by default.
Note: Tenant-level Signup Pages can still be accessed on a per-tenant basis if Tenant-level Signup is enabled for a given tenant.
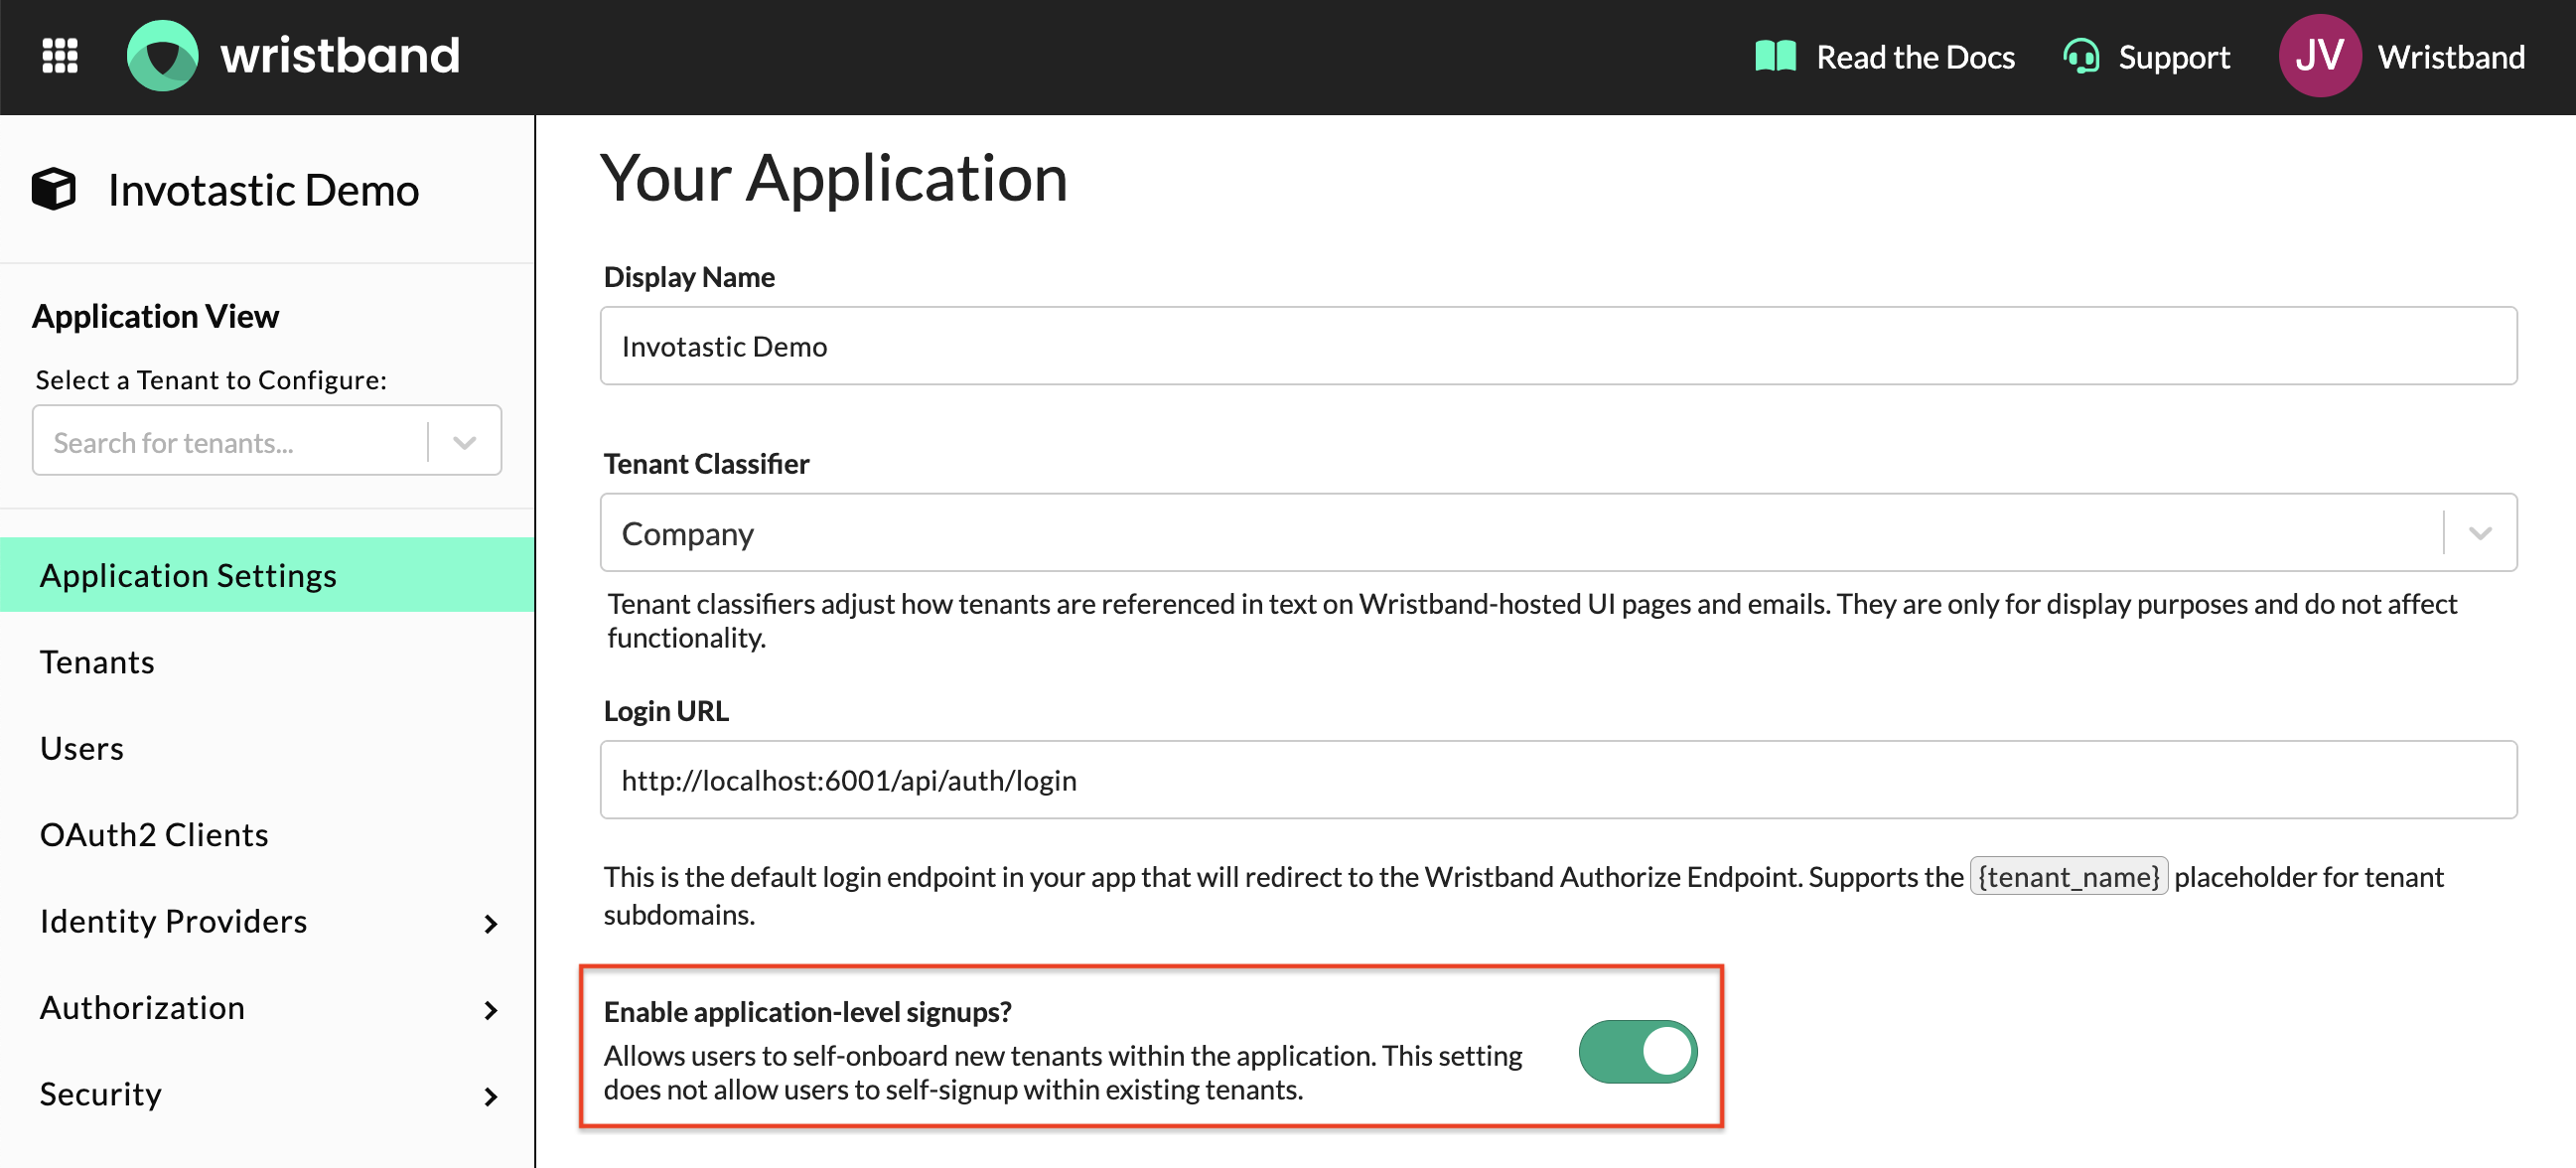
Application Settings page showing the Enable application-level signups toggle
When a user signs up at the application level, they are not only creating their own account but also provisioning a new tenant. The Application-level Signup Page requires providing a tenant name in order to create the tenant.
Upon successful completion of a Signup Workflow at the Application level, the following occurs:
- A tenant is created with the provided name under the application.
- A user is created under the newly provisioned tenant.
- If a Role Assignment Policy has been configured for the application, the role(s) are automatically assigned to that user.
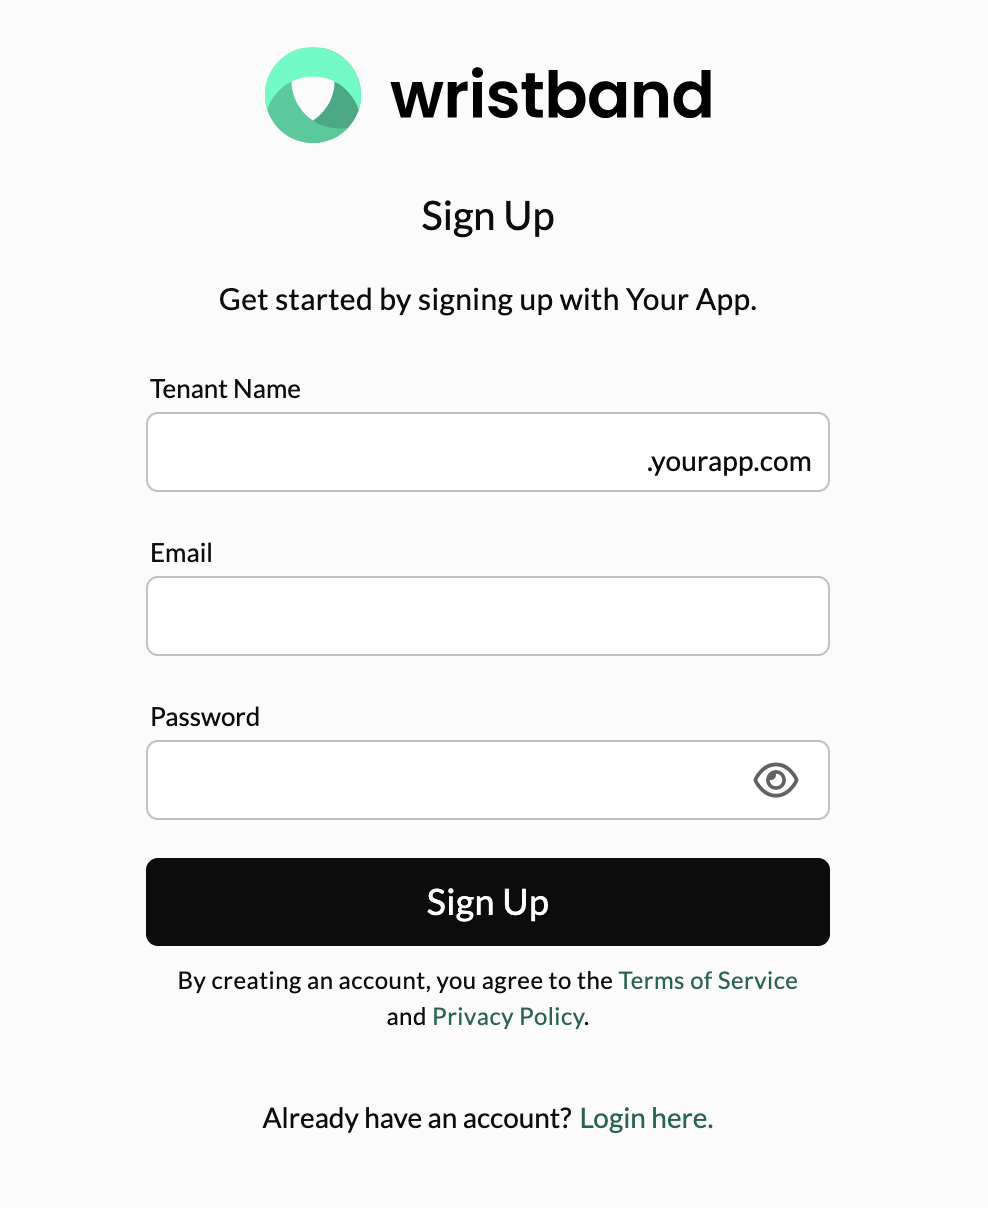
Application-level Signup Page showing tenant name and user credential fields
Tenant Signup
You can enable Tenant Self-Signup individually for each tenant in your application under Tenant Settings in the Tenant View of the Wristband Dashboard. Enabling it for one tenant does not impact any other tenants, and it operates independently of Application-level Signup.
The following can be configured per tenant:
- Tenant Self-Signup: Enables or disables self-signup for this tenant. If disabled, users cannot access the Wristband-hosted Tenant Signup Page for that tenant, the Signup link on the Wristband-Hosted Tenant Login Page will not appear, and Wristband APIs that provisions new users into that tenant will fail to execute. It is disabled by default.
- Allowed Signup Email Domains: Restricts which email domains are permitted to self-signup into this tenant. Typically used when the owning organization wants to limit signups to their own domain. Maximum of 10 email domains per tenant.
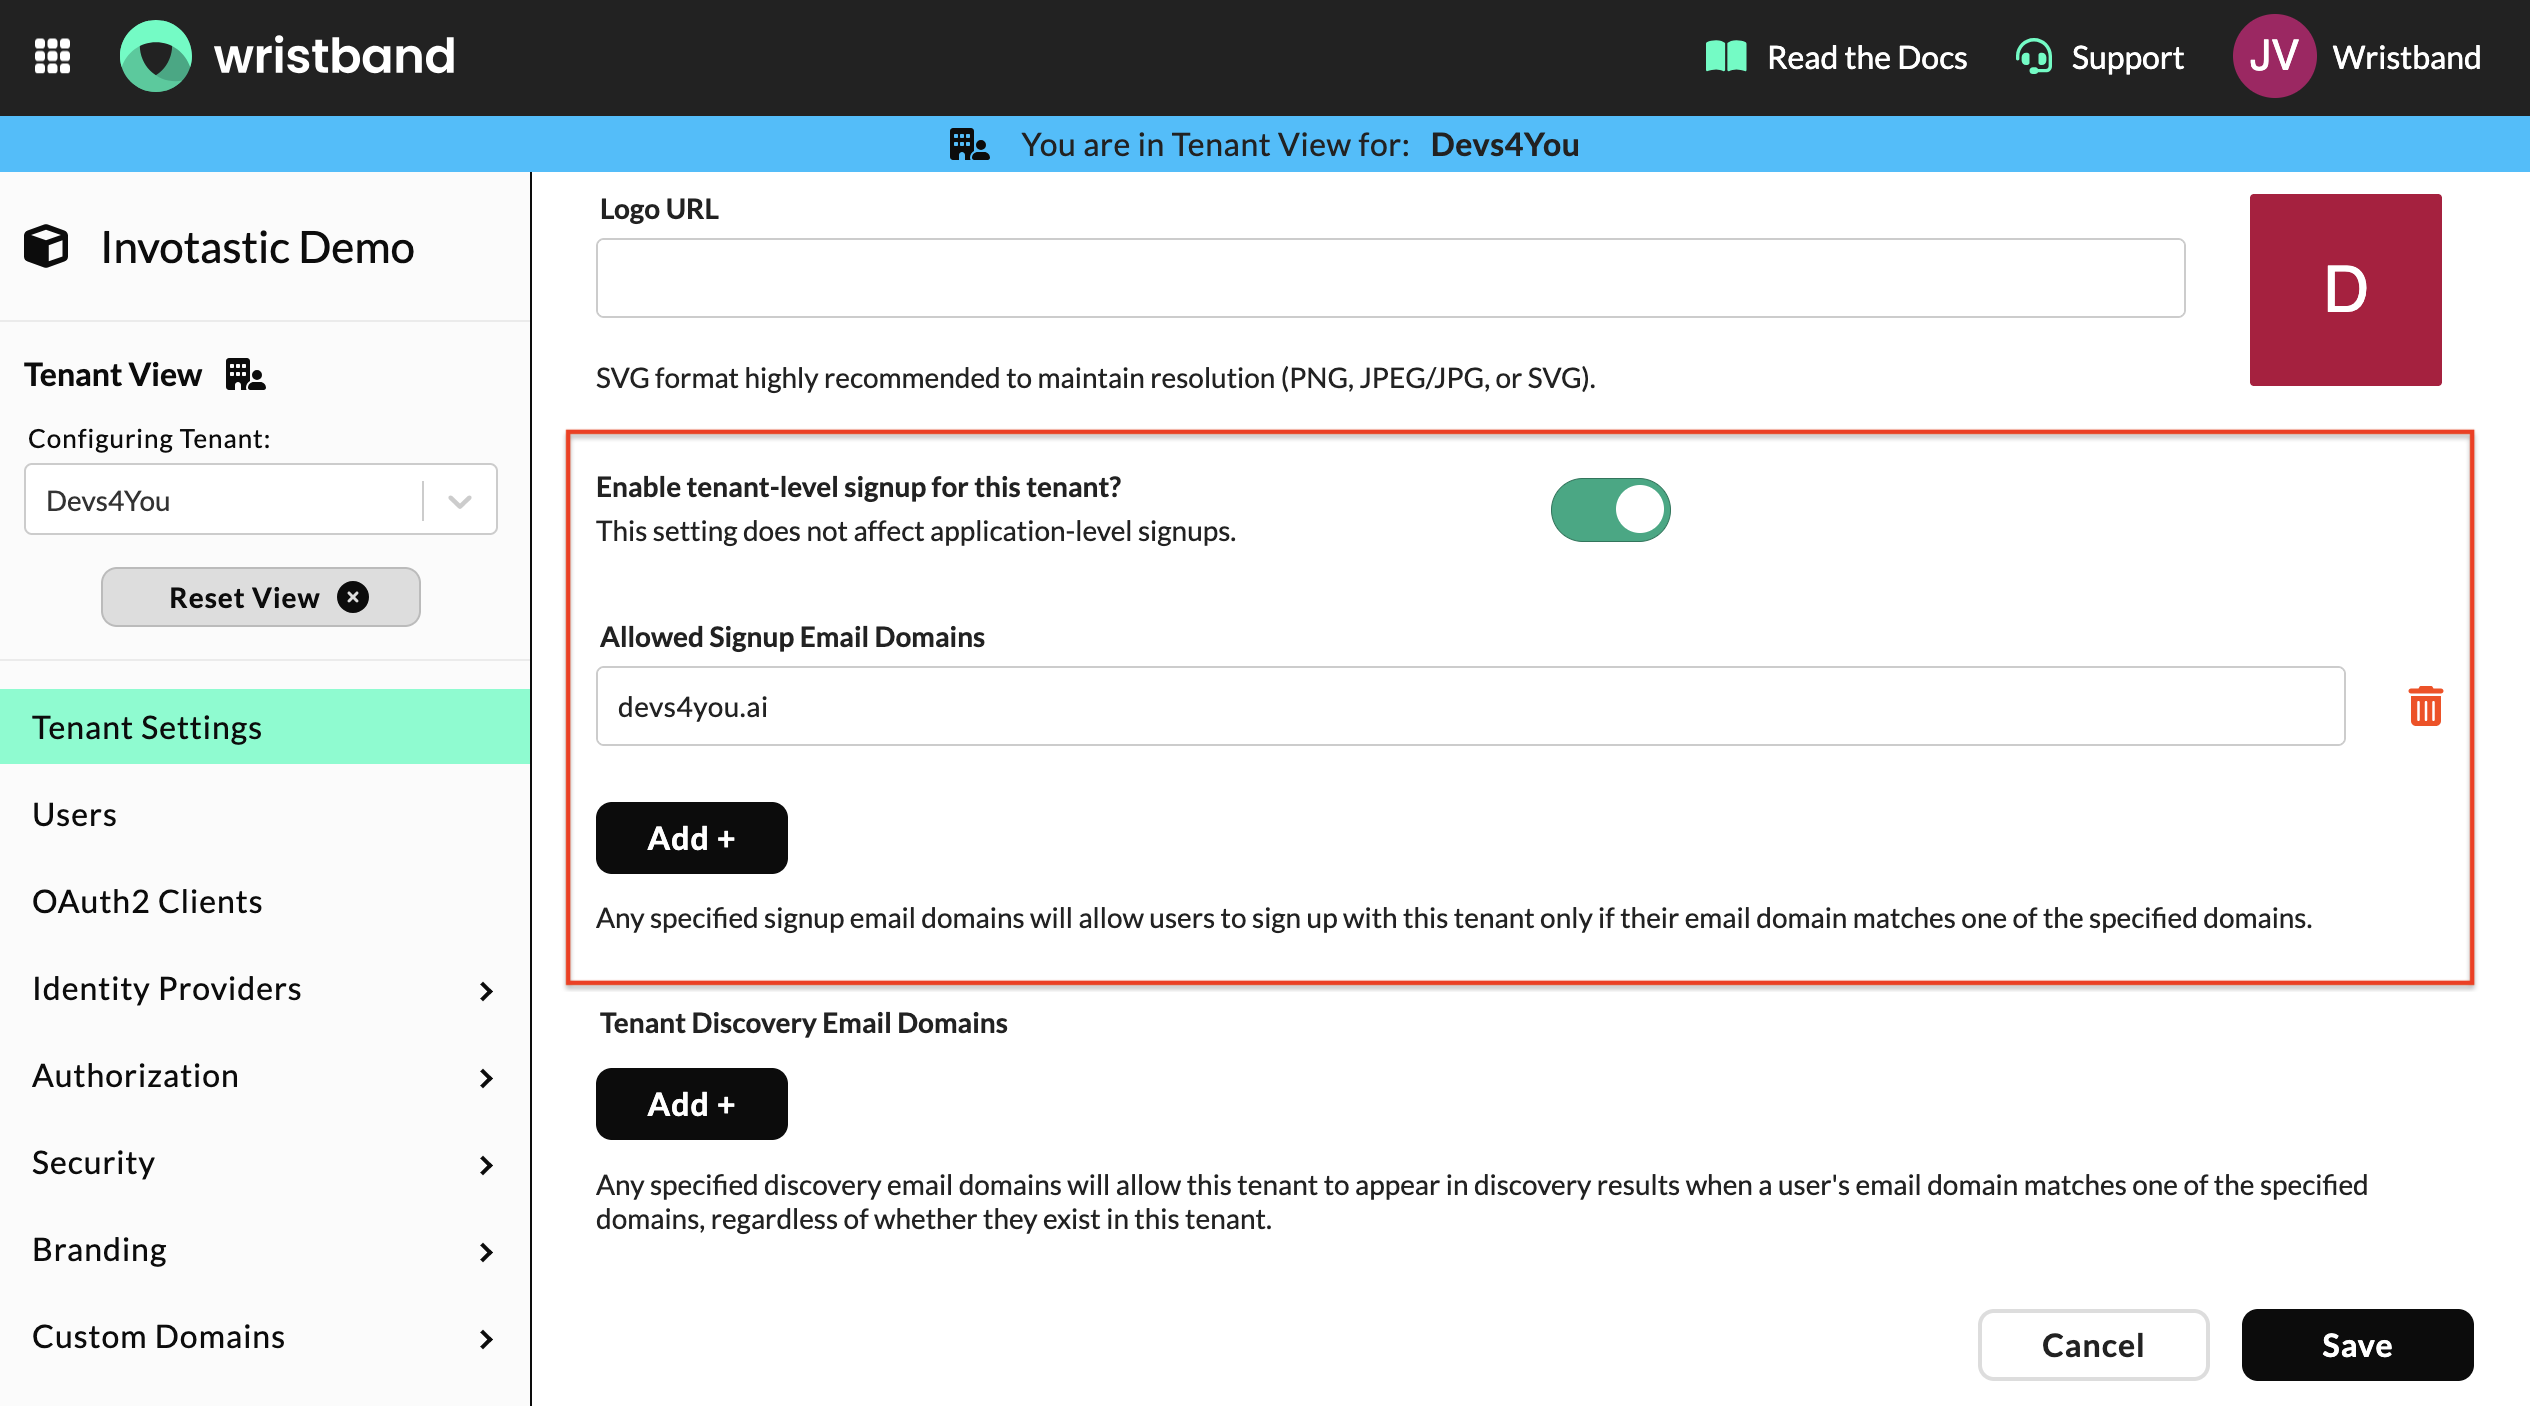
Tenant Settings page showing the Tenant Self-Signup toggle and allowed email domains
Upon successful completion of a Tenant Self-Signup, the following occurs:
- A user is created under the tenant for which they are signing up.
- If a Role Assignment Policy has been configured for the application, the role(s) are automatically assigned to that user.
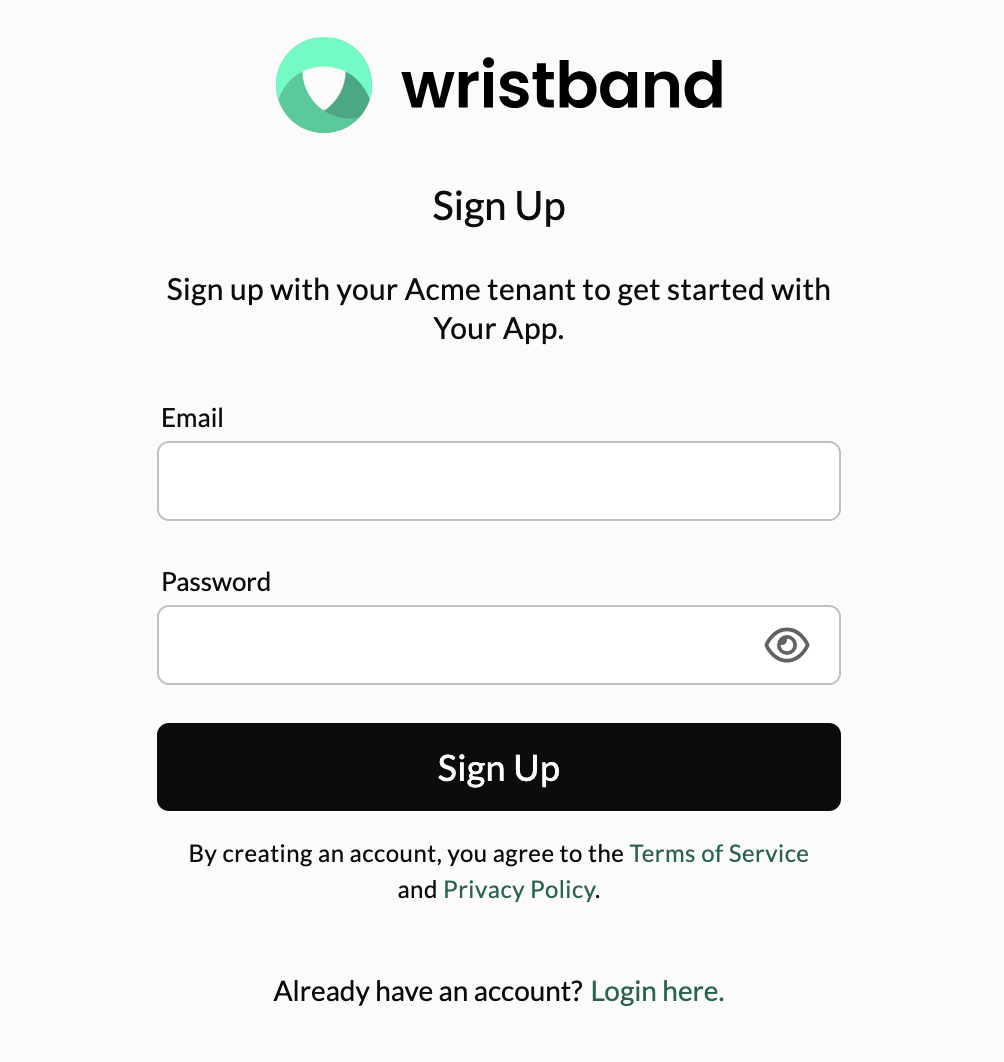
Tenant-level Signup Page showing user credential fields
Signup URLs for Wristband-hosted Pages
There are publicly available URLs where you can reach the Wristband-hosted Signup Pages for both the Application level and the Tenant level (if enabled).
Wristband Vanity Domains
Let's say we had a Wristband application named "Your App" with a tenant named tenant1. The various signup URLs would look like the following:
| Signup Type | URL |
|---|---|
| Application Level | https://yourapp-yourcompany.us.wristband.dev/signup |
| Tenant Level | https://tenant1-yourapp-yourcompany.us.wristband.dev/signup |
Custom Domains
If you had custom domain auth.yourapp.io enabled for your application, the various signup URLs would look something like the following:
| Signup Type | URL |
|---|---|
| Application Level | https://auth.yourapp.io/signup |
| Tenant Level | https://tenant1.auth.yourapp.io/signup |
Supported Query Parameters
The URLs for the Wristband-hosted Signup pages can support certain query params that will be processed and utilized by the Wristband platform. You can use the following query params for enhanced functionality:
| Query Parameter | Description |
|---|---|
client_id | If your application accommodates multiple OAuth2 clients for authentication, you can designate the login URL that Wristband redirects to at the end of the signup process. This is achieved by specifying the clientId associated with the desired OAuth2 Client whose login URL you intend to utilize. |
state | You can propagate any necessary arbitrary state during the signup flow by utilizing the state parameter. Refer to the Propagating State Through the Signup Flow section below for more details. |
User Schema
If your application's User Schema includes required fields, these fields will be displayed on the signup form for both Application-level and Tenant-level signups (with the exception of externalId). Depending on application and/or tenant and configurations, possible fields that can appear on the Signup form include:
- Tenant Name (Application-level Signup only)
- Full Name
- Given Name (First Name)
- Family Name (Last Name)
- Phone Number
- Birthdate
- Username (configured in the Wristband IdP)
- Password (configured in the Wristband IdP)
User Activation vs Email Verification
The Verification Step workflow policy controls what happens after a user completes the signup form.
User Activation
When this option is selected, users receive an activation email after completing the signup form. They must complete the activation step before they can log in. Until the user completes activation, they are in the PROVISIONED state. If the activation step expires before they complete it, they can initiate the signup workflow again using the same email address (and tenant name for application-level signups). Wristband will send a fresh activation email without re-provisioning the user or tenant.
The activation experience depends on the User Activation Strategy workflow policy:
- Verification Link — The user clicks the action link in the activation email, which opens a new tab and takes them to the activation page where their account is activated.
- One-Time Code — The user receives a code in the activation email. When they return to their signup page, they are prompted to enter the code, and activation completes inline.
To learn more about the user activation workflow, see User Activation Workflow.
Email Verification
When this option is selected, users are logged into your application immediately after completing the signup form. An email verification email is sent asynchronously. The user is set to ACTIVE status immediately, but their email remains unverified until they click the verification link.
To learn more about the email verification flow, see Email Verification Workflow.
Redirecting Back to Your Application
When concluding the Signup workflow, Wristband typically redirects the user to your application's Login endpoint to initiate the Authorization code flow. At this juncture, the Wristband authentication session has already been established, enabling your application to acquire an access token without prompting the user to re-enter credentials on the Login page. However, it is possible that Wristband could redirect the user to a different URL aside from your application's Login endpoint depending on a few configurations.
The final destination URL that Wristband redirects to at the end of the Signup workflow is resolved in the following order:
- Check if a custom redirect URL workflow policy is enabled for the tenant which the user is signing up with.
- Check if an OAuth2 Client login URL is configured for the Client through which the user is signing up.
- Default to using the Application login URL.
Propagating State Through the Signup Flow
You can propagate any necessary arbitrary state during the signup flow by utilizing the state parameter. This is accomplished by incorporating the state parameter when executing a signup workflow. This feature is valuable for various product scenarios, including the application of promo codes. If needed, you can also encode a JSON object into a string to address more complex product requirements.
Wristband-Hosted Signup State
When utilizing Wristband-hosted signup pages, you can navigate to either the Application-level or Tenant-level signup pages while including the state query parameter in both instances. The Signup Page communicates this query parameter to Wristband through API requests. Upon the successful completion of the Signup workflow, Wristband redirects back to your application, preserving the state value query parameter.
Self-Hosted Signup State
When self-hosting any signup pages for your application, it is up to you to pass any state values to Wristband when invoking Wristband APIs. Refer to the Provision Wristband IDP User on Signup API or Authorize External IDP User on Signup API documentation for details on how to work with it.
Updated 3 months ago