
Application-Level Clients
Use application-level OAuth2 clients to authenticate your users and machines.
Application-level OAuth2 clients allow your application to initiate authentication requests with Wristband. Depending on the client type you choose, they can authenticate both human users and non-human identities (such as machines or services).
You can create the following types of clients at the application level:
A single application can support multiple client types to accommodate different authentication use cases. Additionally, any client configured at the application level can authenticate users across all tenants belonging to that application.
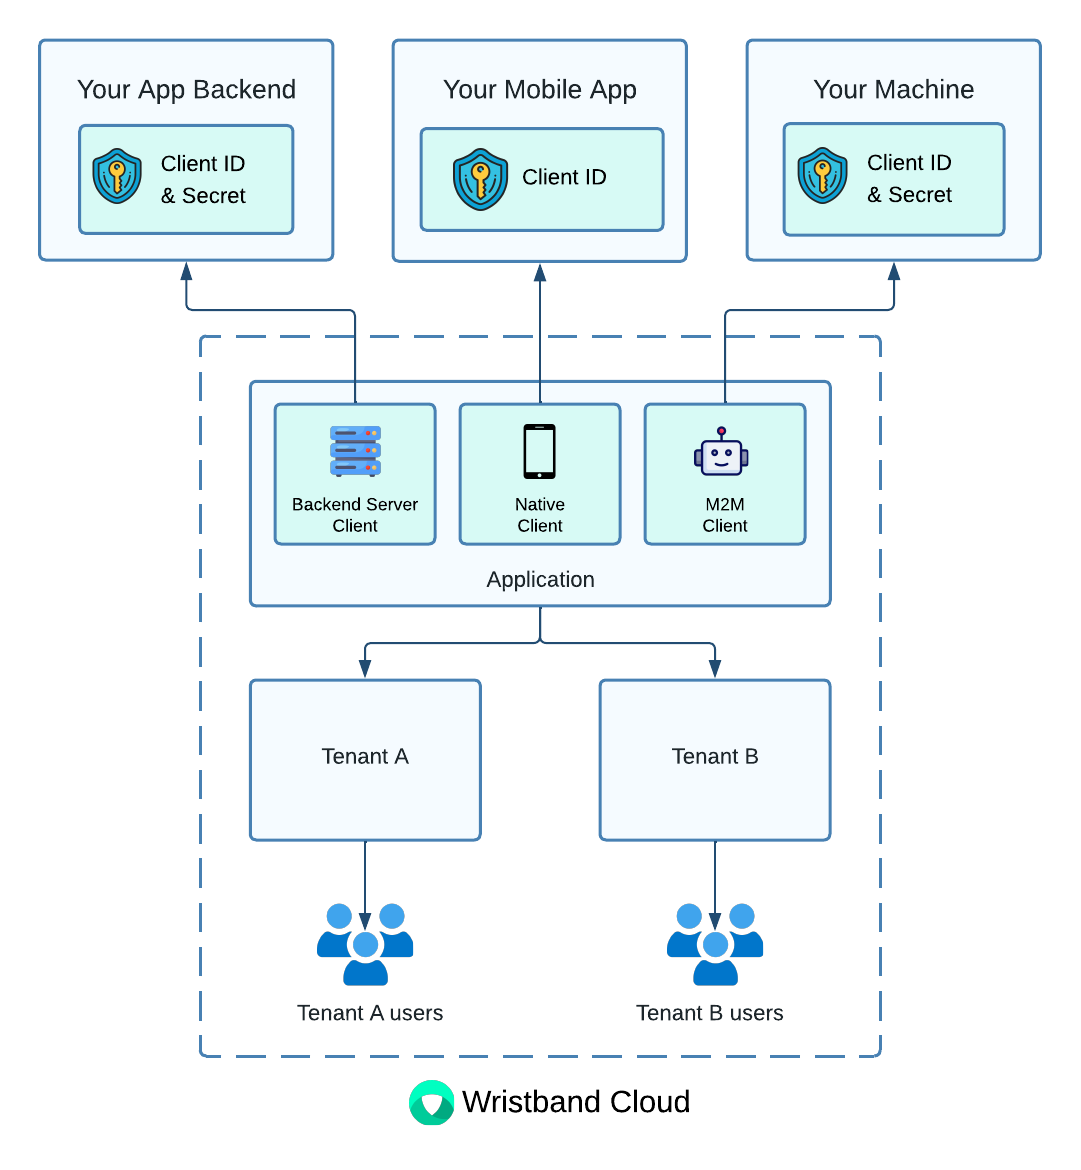
Figure 1: Illustration showing the different types of application-level clients that can be created.
Example Scenarios
Web Application + Mobile
Imagine an application accessible through three different interfaces:
- A Next.js web application served in the browser
- An Android mobile app
- An iOS mobile app
To support this, you would configure one unique OAuth2 client for each interface. Each of these three clients has the built-in capability to initiate authentication requests for all users under that application
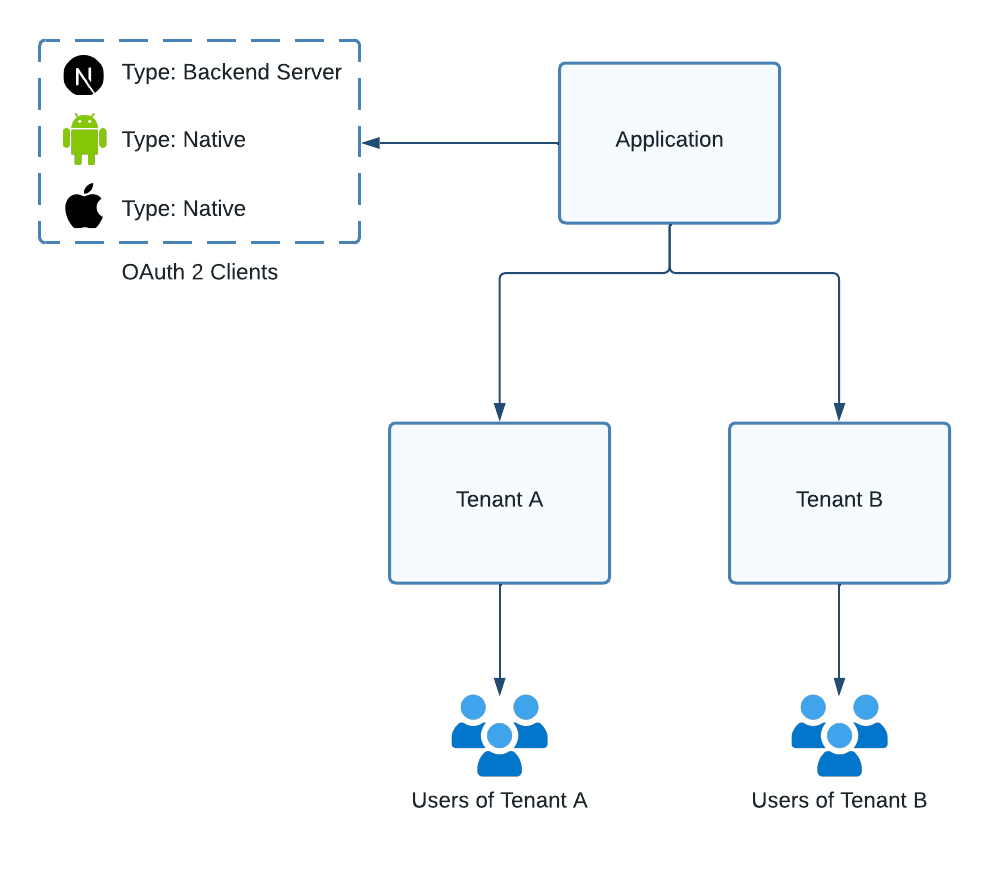
Figure 2: Illustration showing the clients for an application with a NextJS web app, Android app, and iOS app.
Backend Microservices
For microservice architectures, assign an application-level Machine-to-Machine (M2M) client to each service to handle secure service-to-service authentication.
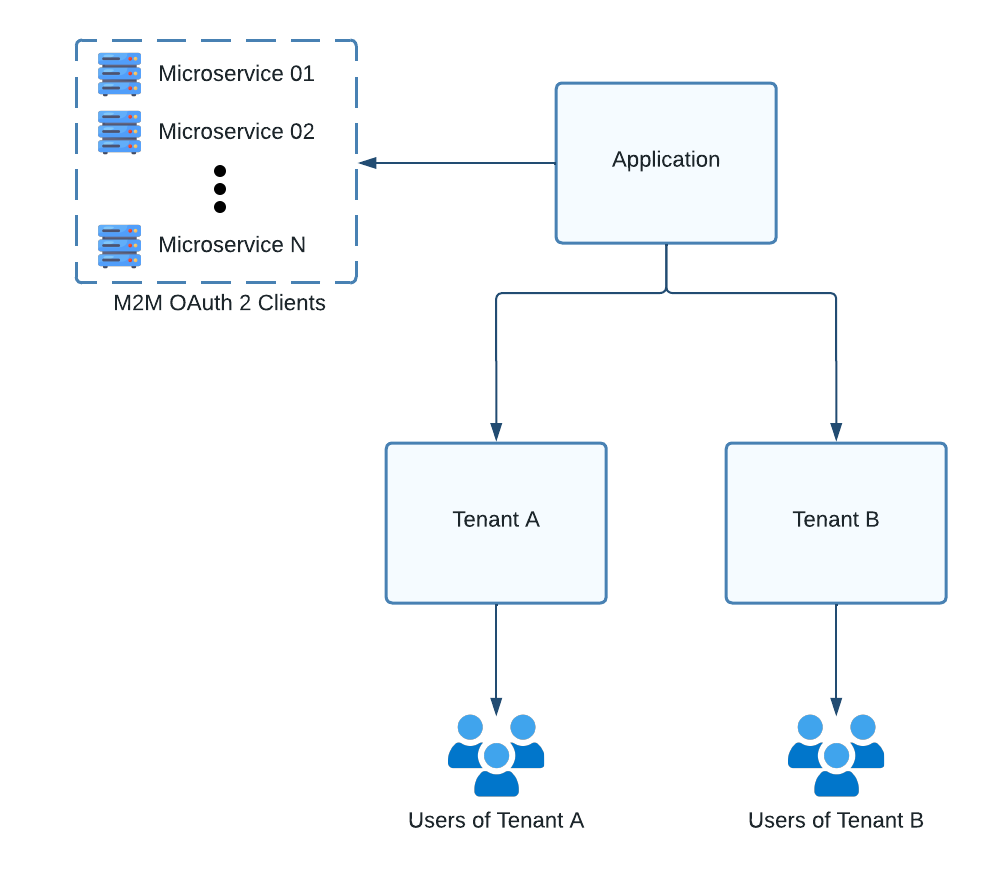
Figure 3: Illustration showing the clients for an application with backend microservices.
Managing Application Clients With Wristband's Dashboard
The Wristband dashboard offers a complete set of tools to manage your application's clients. The sections below detail the core client management features available in the dashboard.
Adding a Client
- In the Application View, select OAuth2 Clients from the left navigation menu.
- Click the + Add Client button.
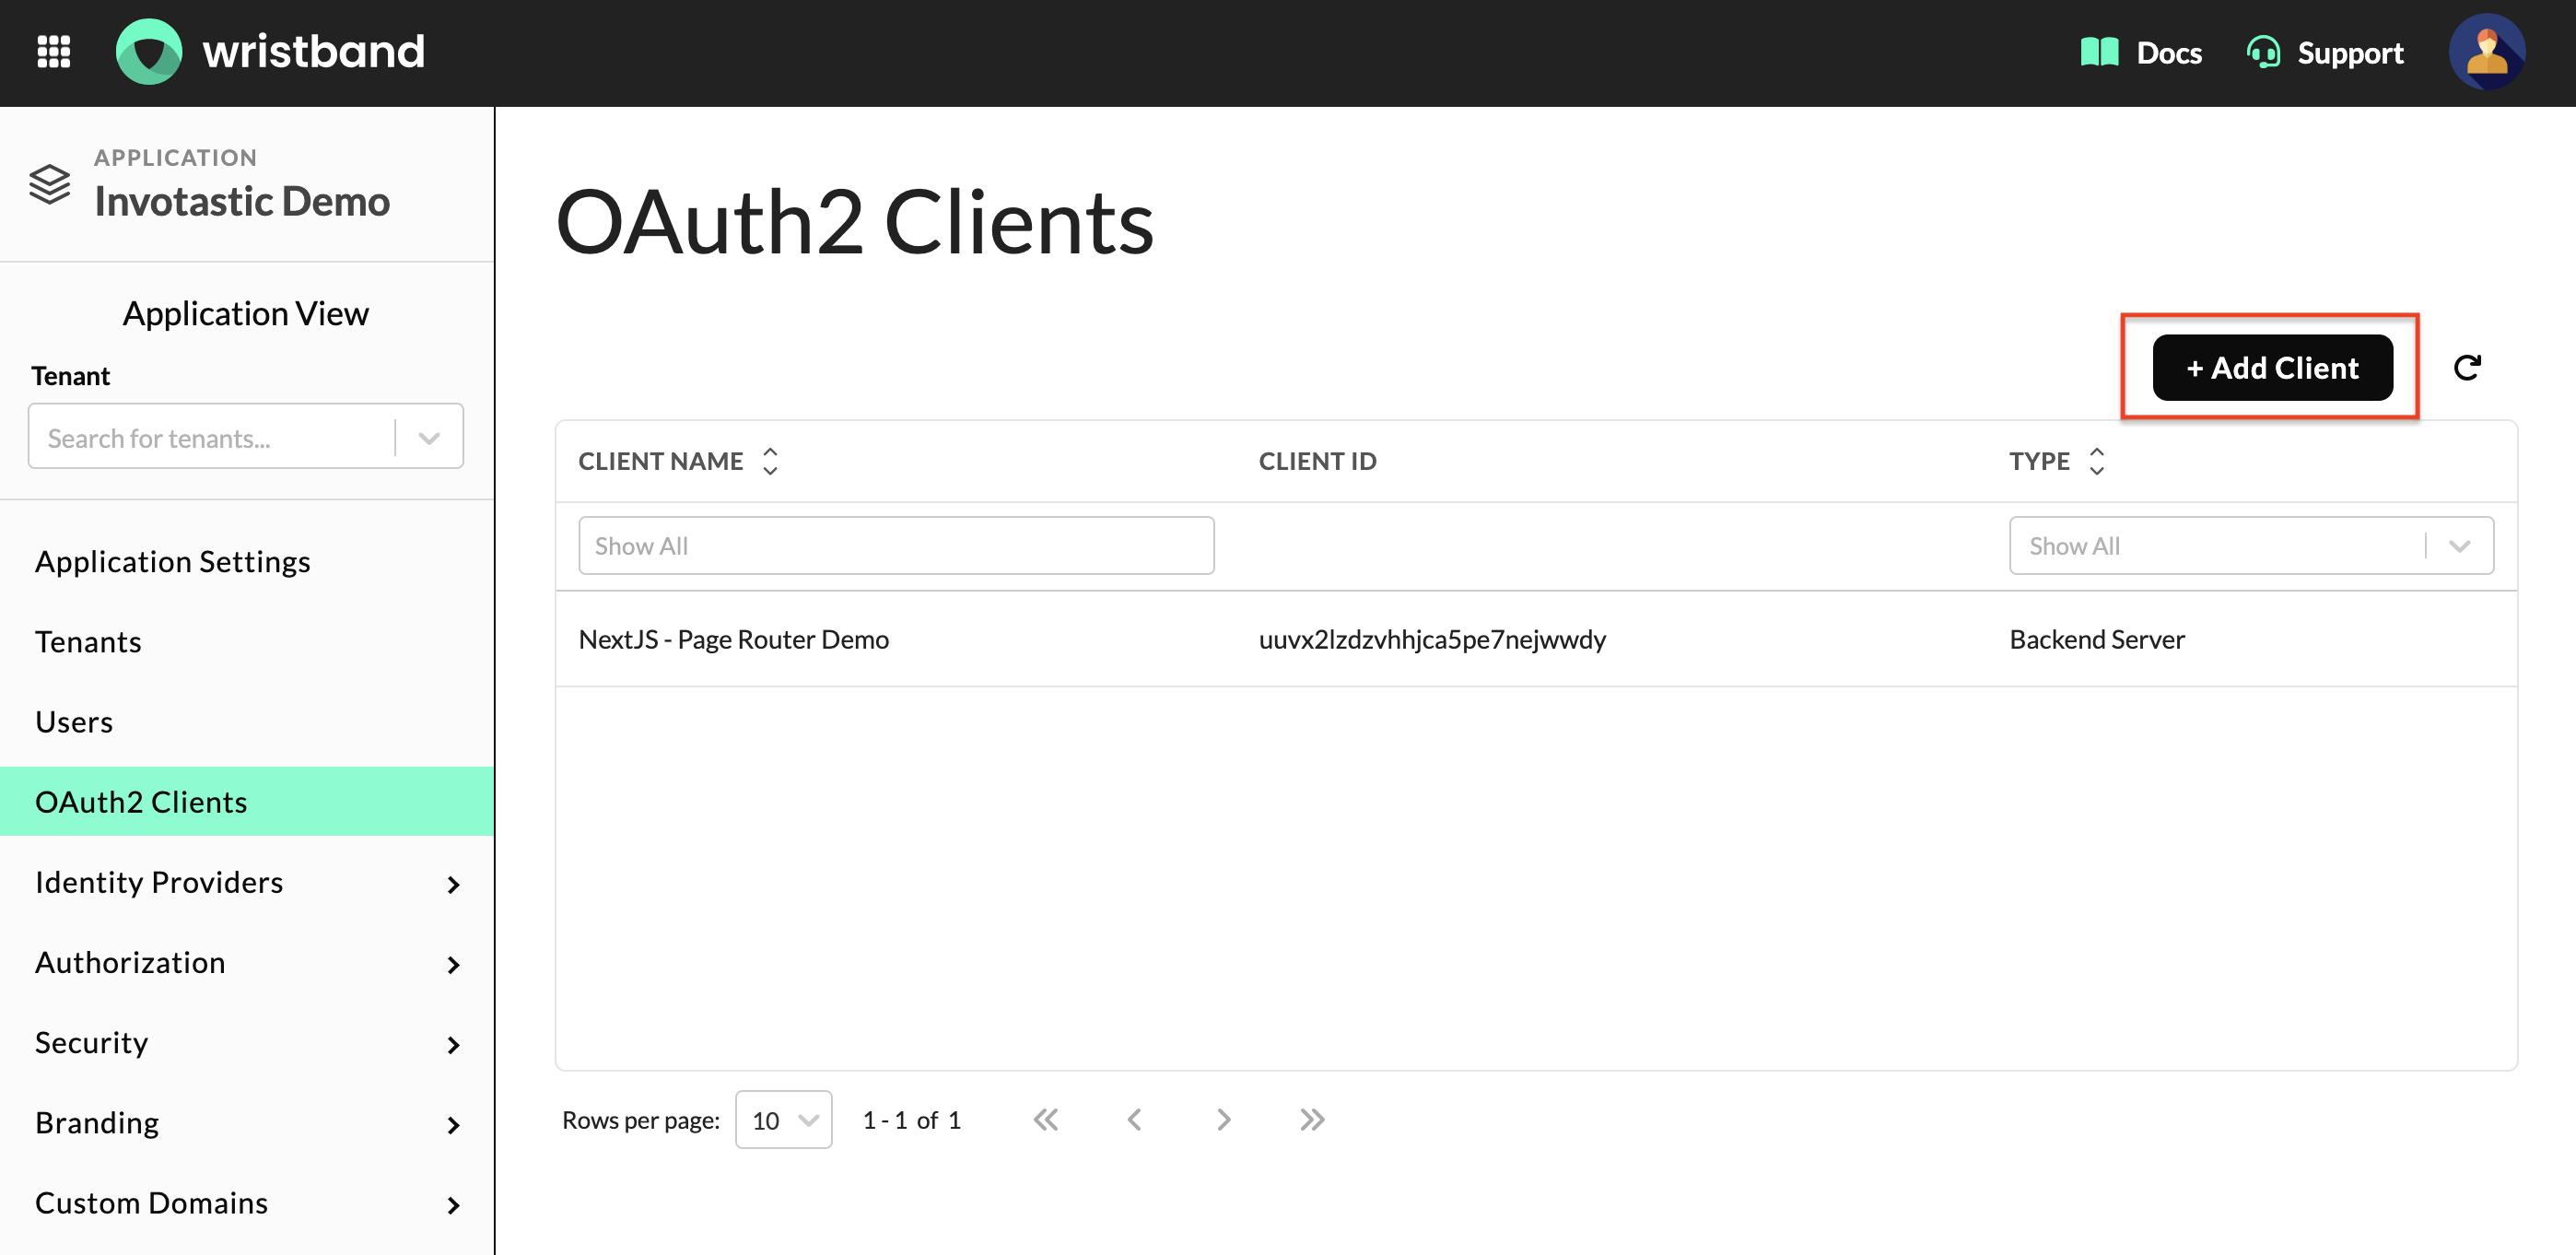
Figure 4: OAuth2 Clients page in Application View showing the Add Client button.
- Select a client type (Backend Server, Machine (M2M), or Native).
- Enter a Name for the client.
- Click the Create button.
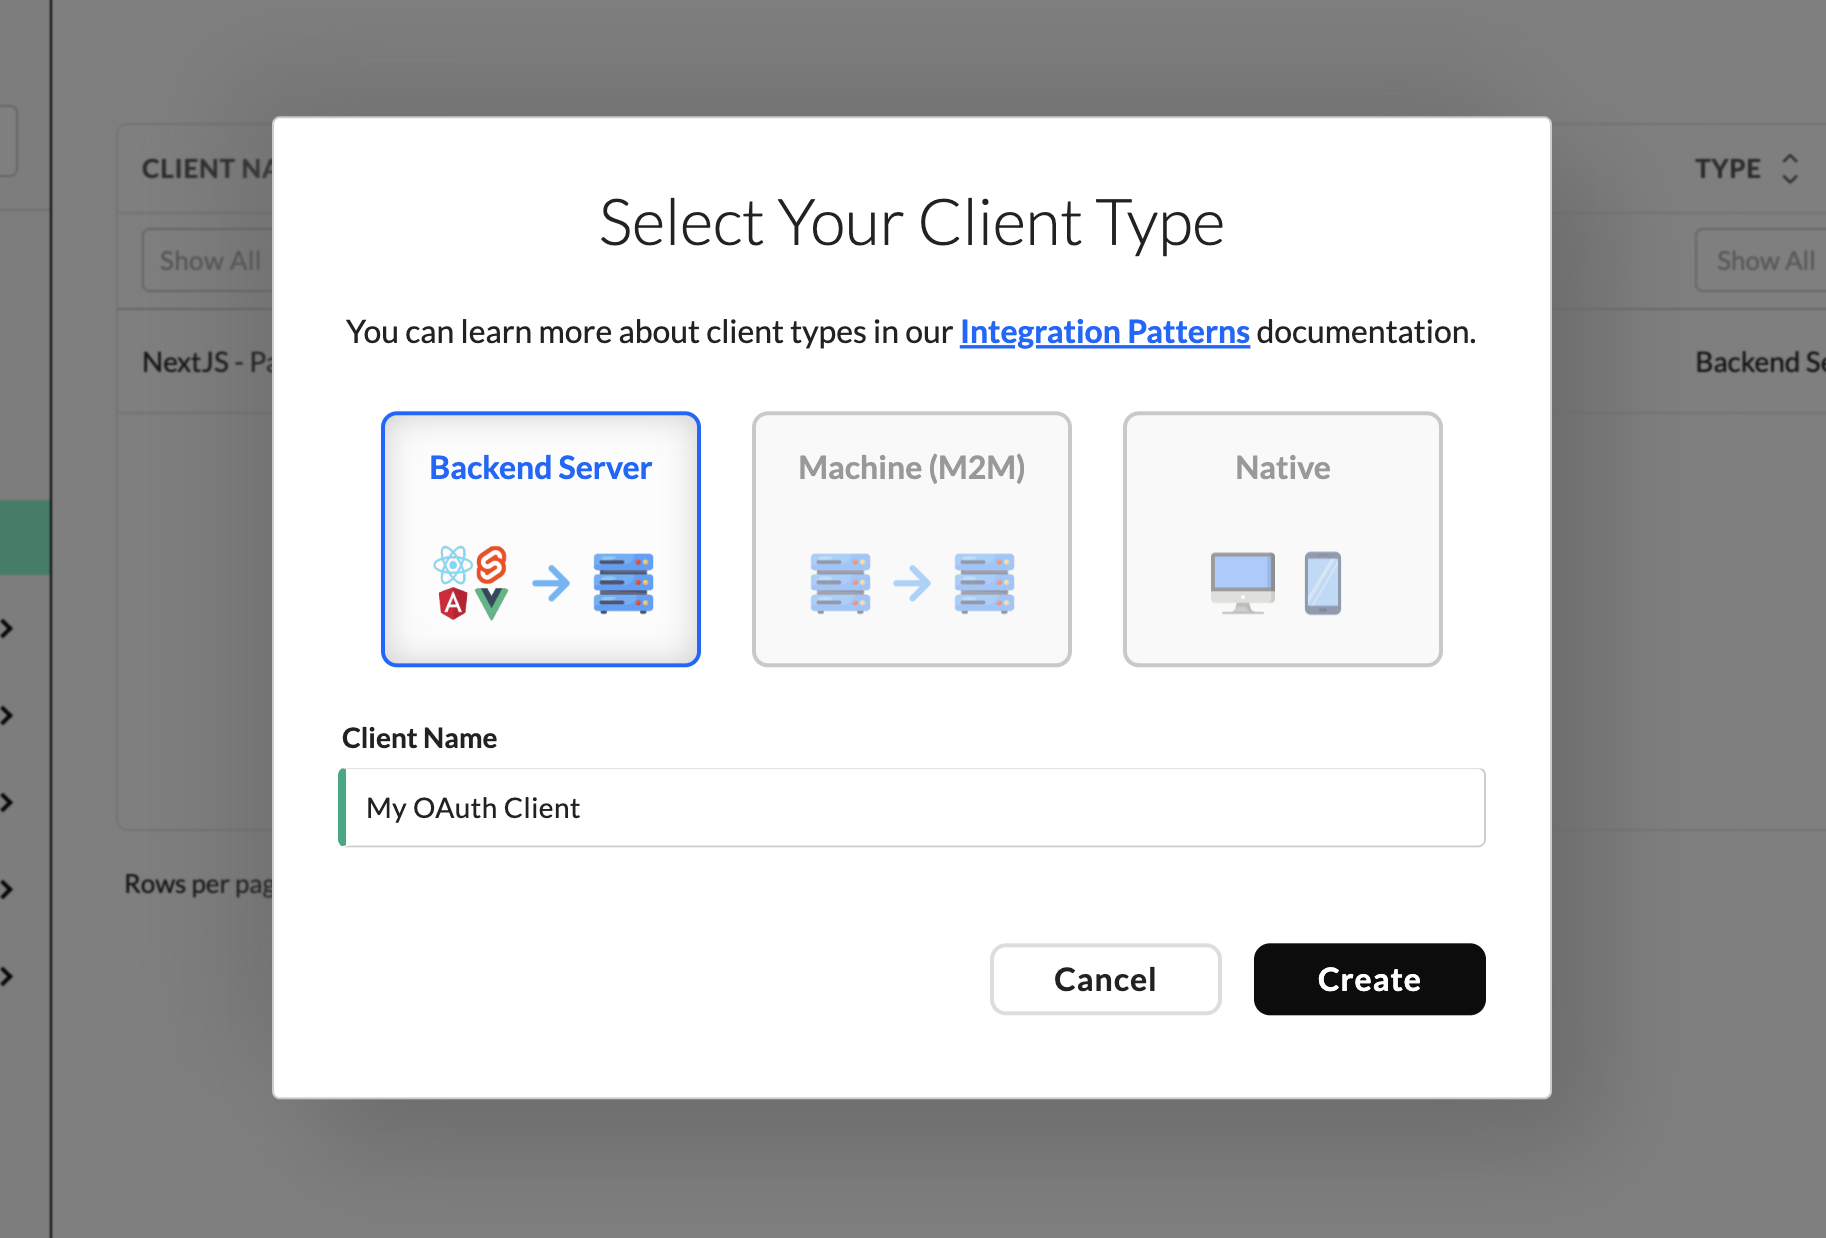
Figure 5: Create Client modal showing Backend Server, Machine (M2M), and Native options with a Client Name field.
-
View your newly generated
clientIdandclientSecret(applicable only to Backend Server and Machine (M2M) types). -
Securely save the plaintext secret immediately. Wristband only stores a one-way hash of the secret, meaning it cannot be retrieved or displayed again after you leave this screen.
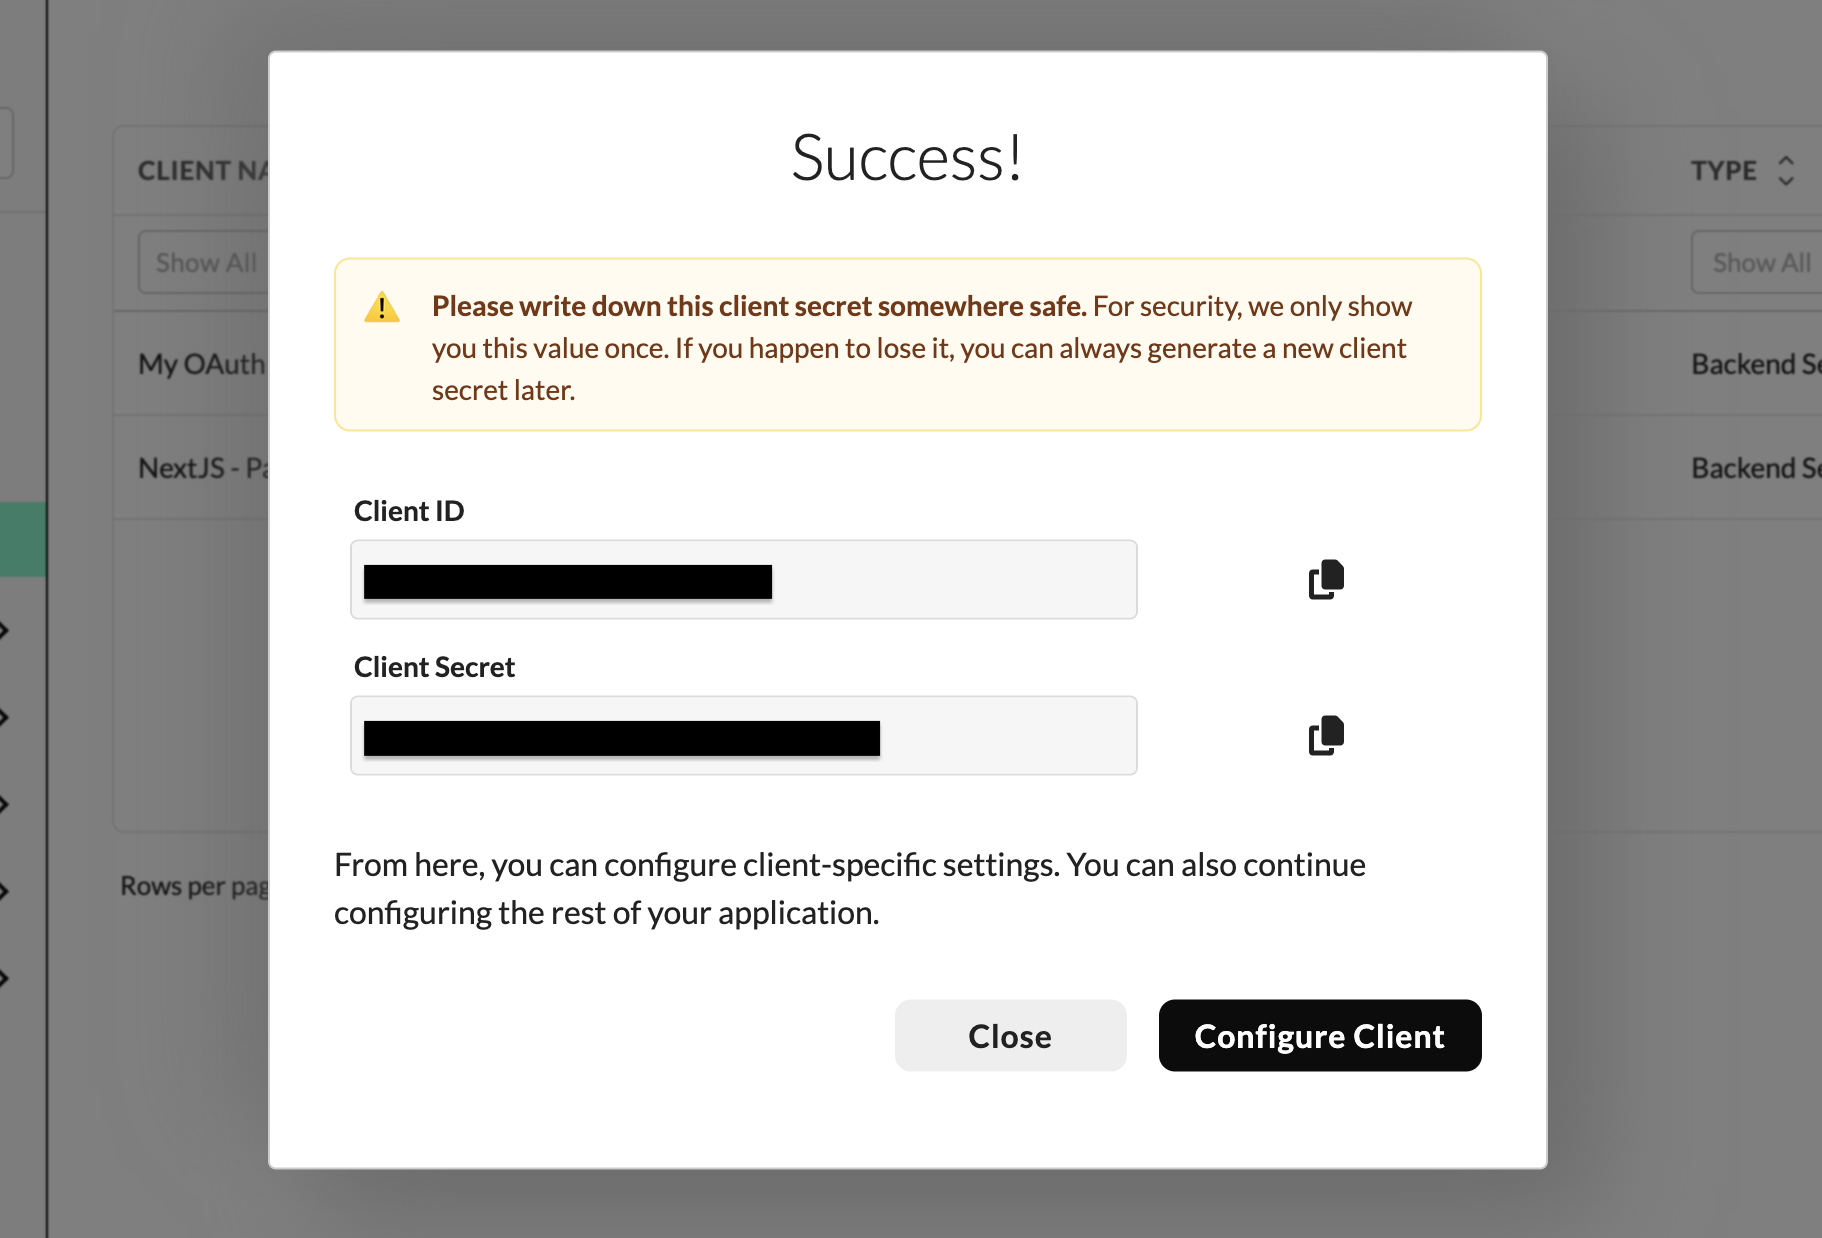
Figure 6: Success dialog displaying the newly created client's Client ID and Client Secret.
When a client is first created, it has no default permissions or routing paths. Depending on your client type, you must configure these settings before initiating requests:
- Roles: Required for Backend Server and Machine-to-Machine (M2M) clients to grant authorization.
- Redirect URIs: Required for Backend Server and Native clients to route authentication responses.
Review the sections below to learn how to edit your client's configuration.
Editing an Existing Client
- Select OAuth2 Clients from the left navigation menu.
- Click the name of the client you wish to update from the clients table.
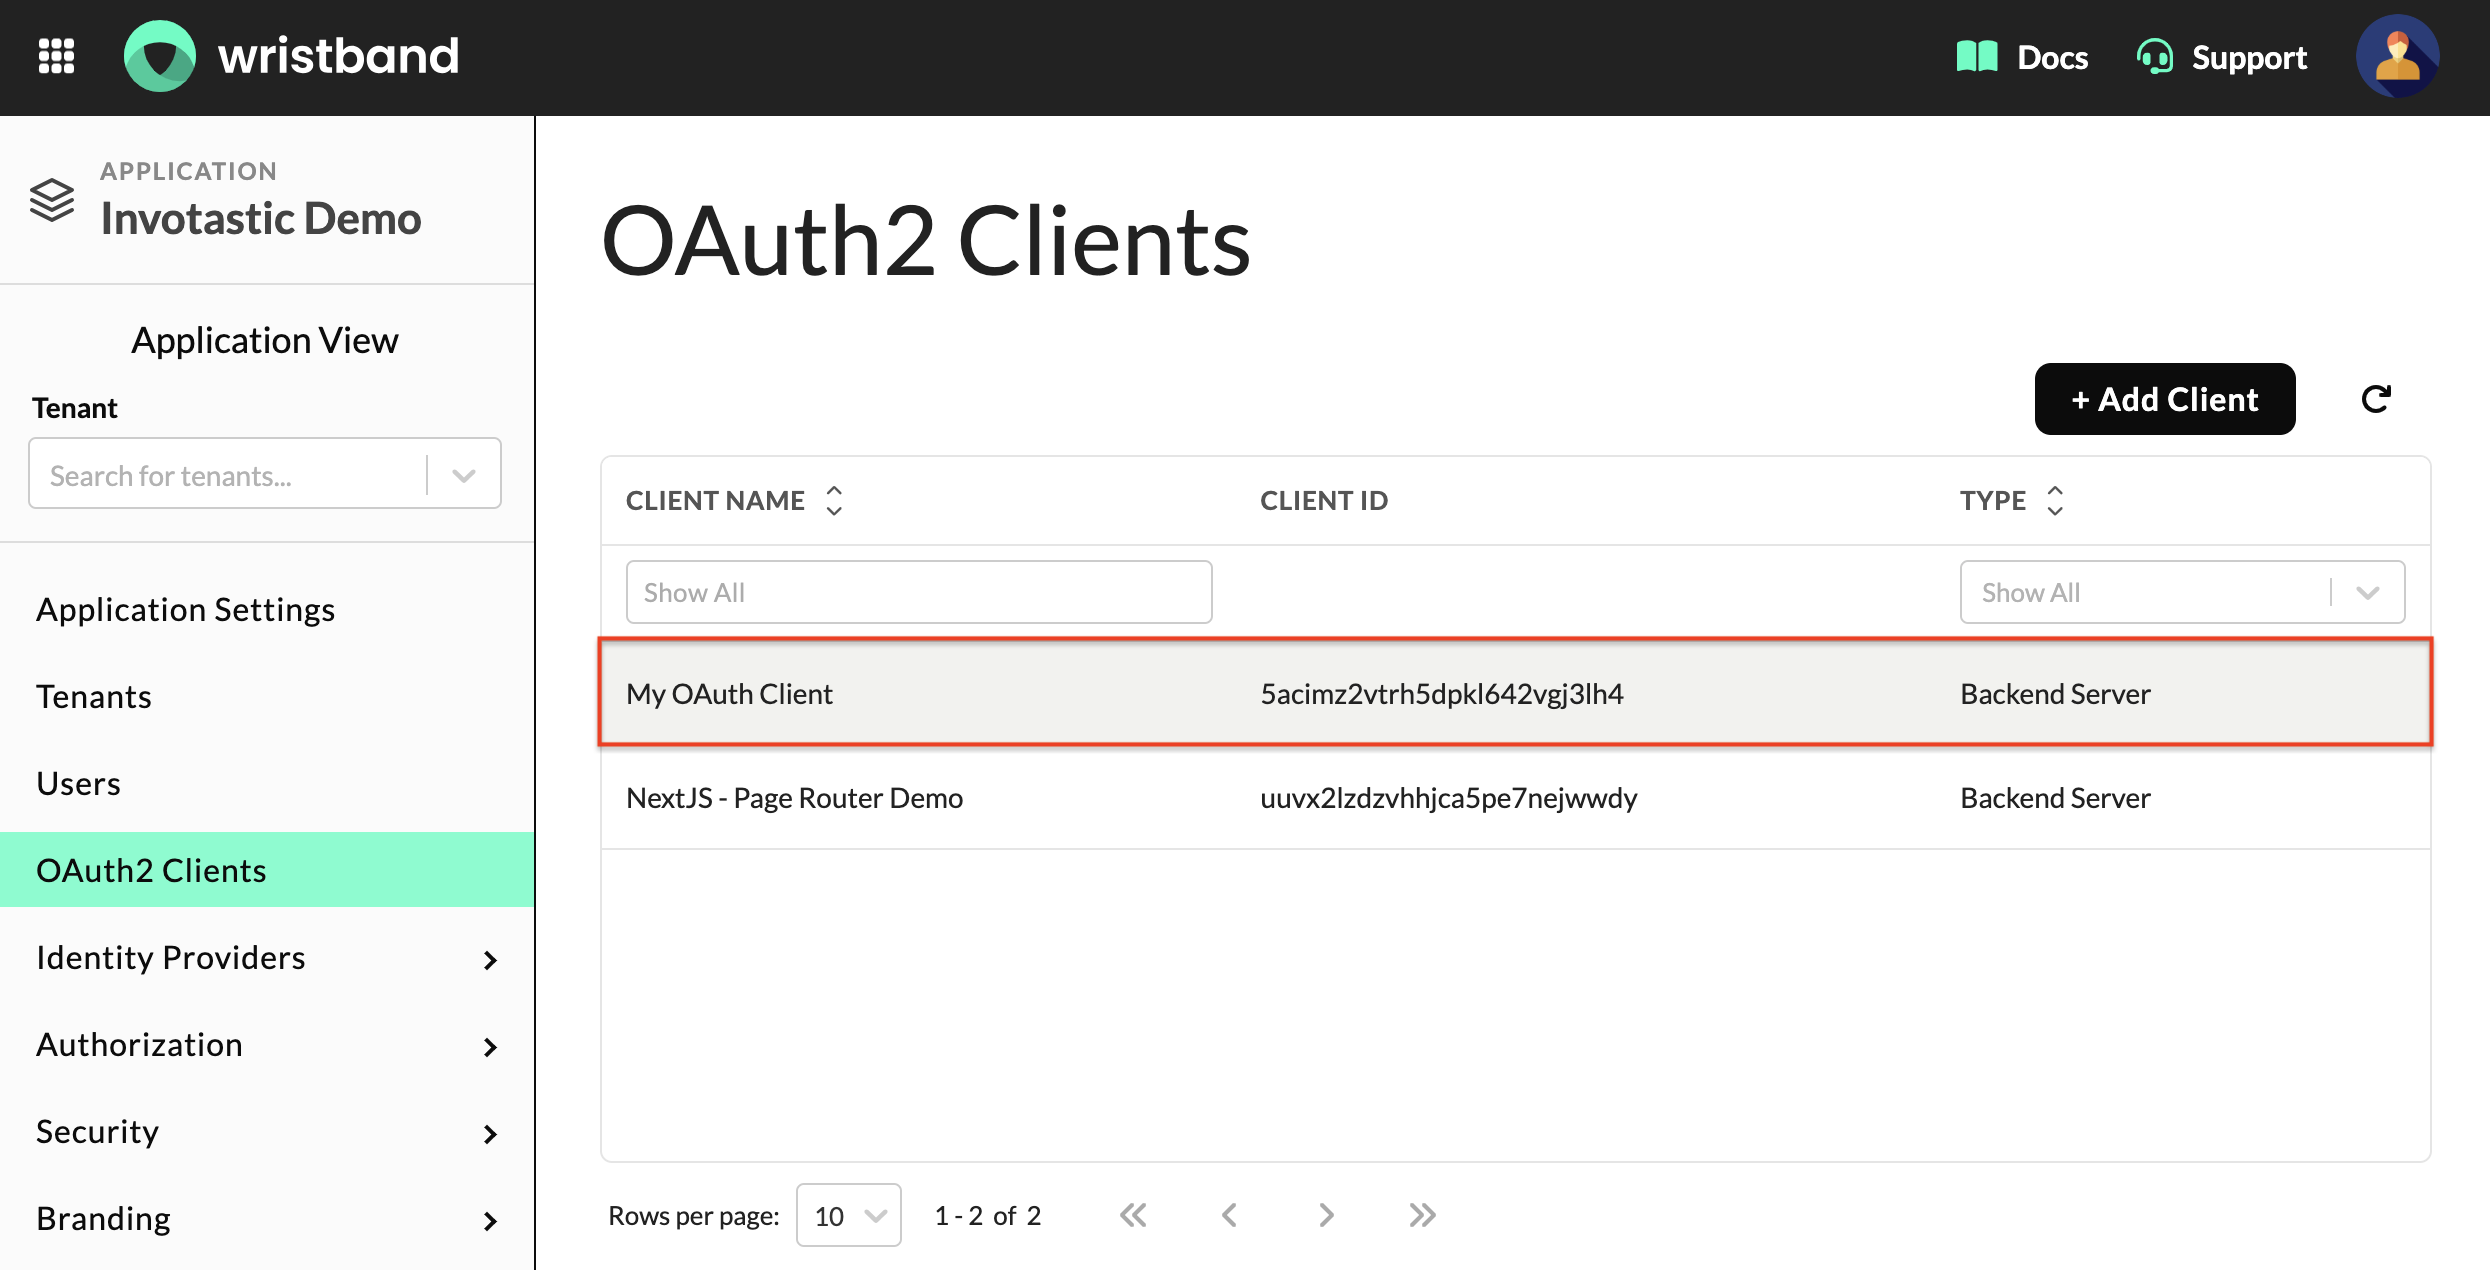
Figure 7: OAuth2 Clients table showing a list of clients to select for editing.
Configuring Client Settings
The Client Settings section allows you to configure the client's Name, Description, and Redirect URIs.
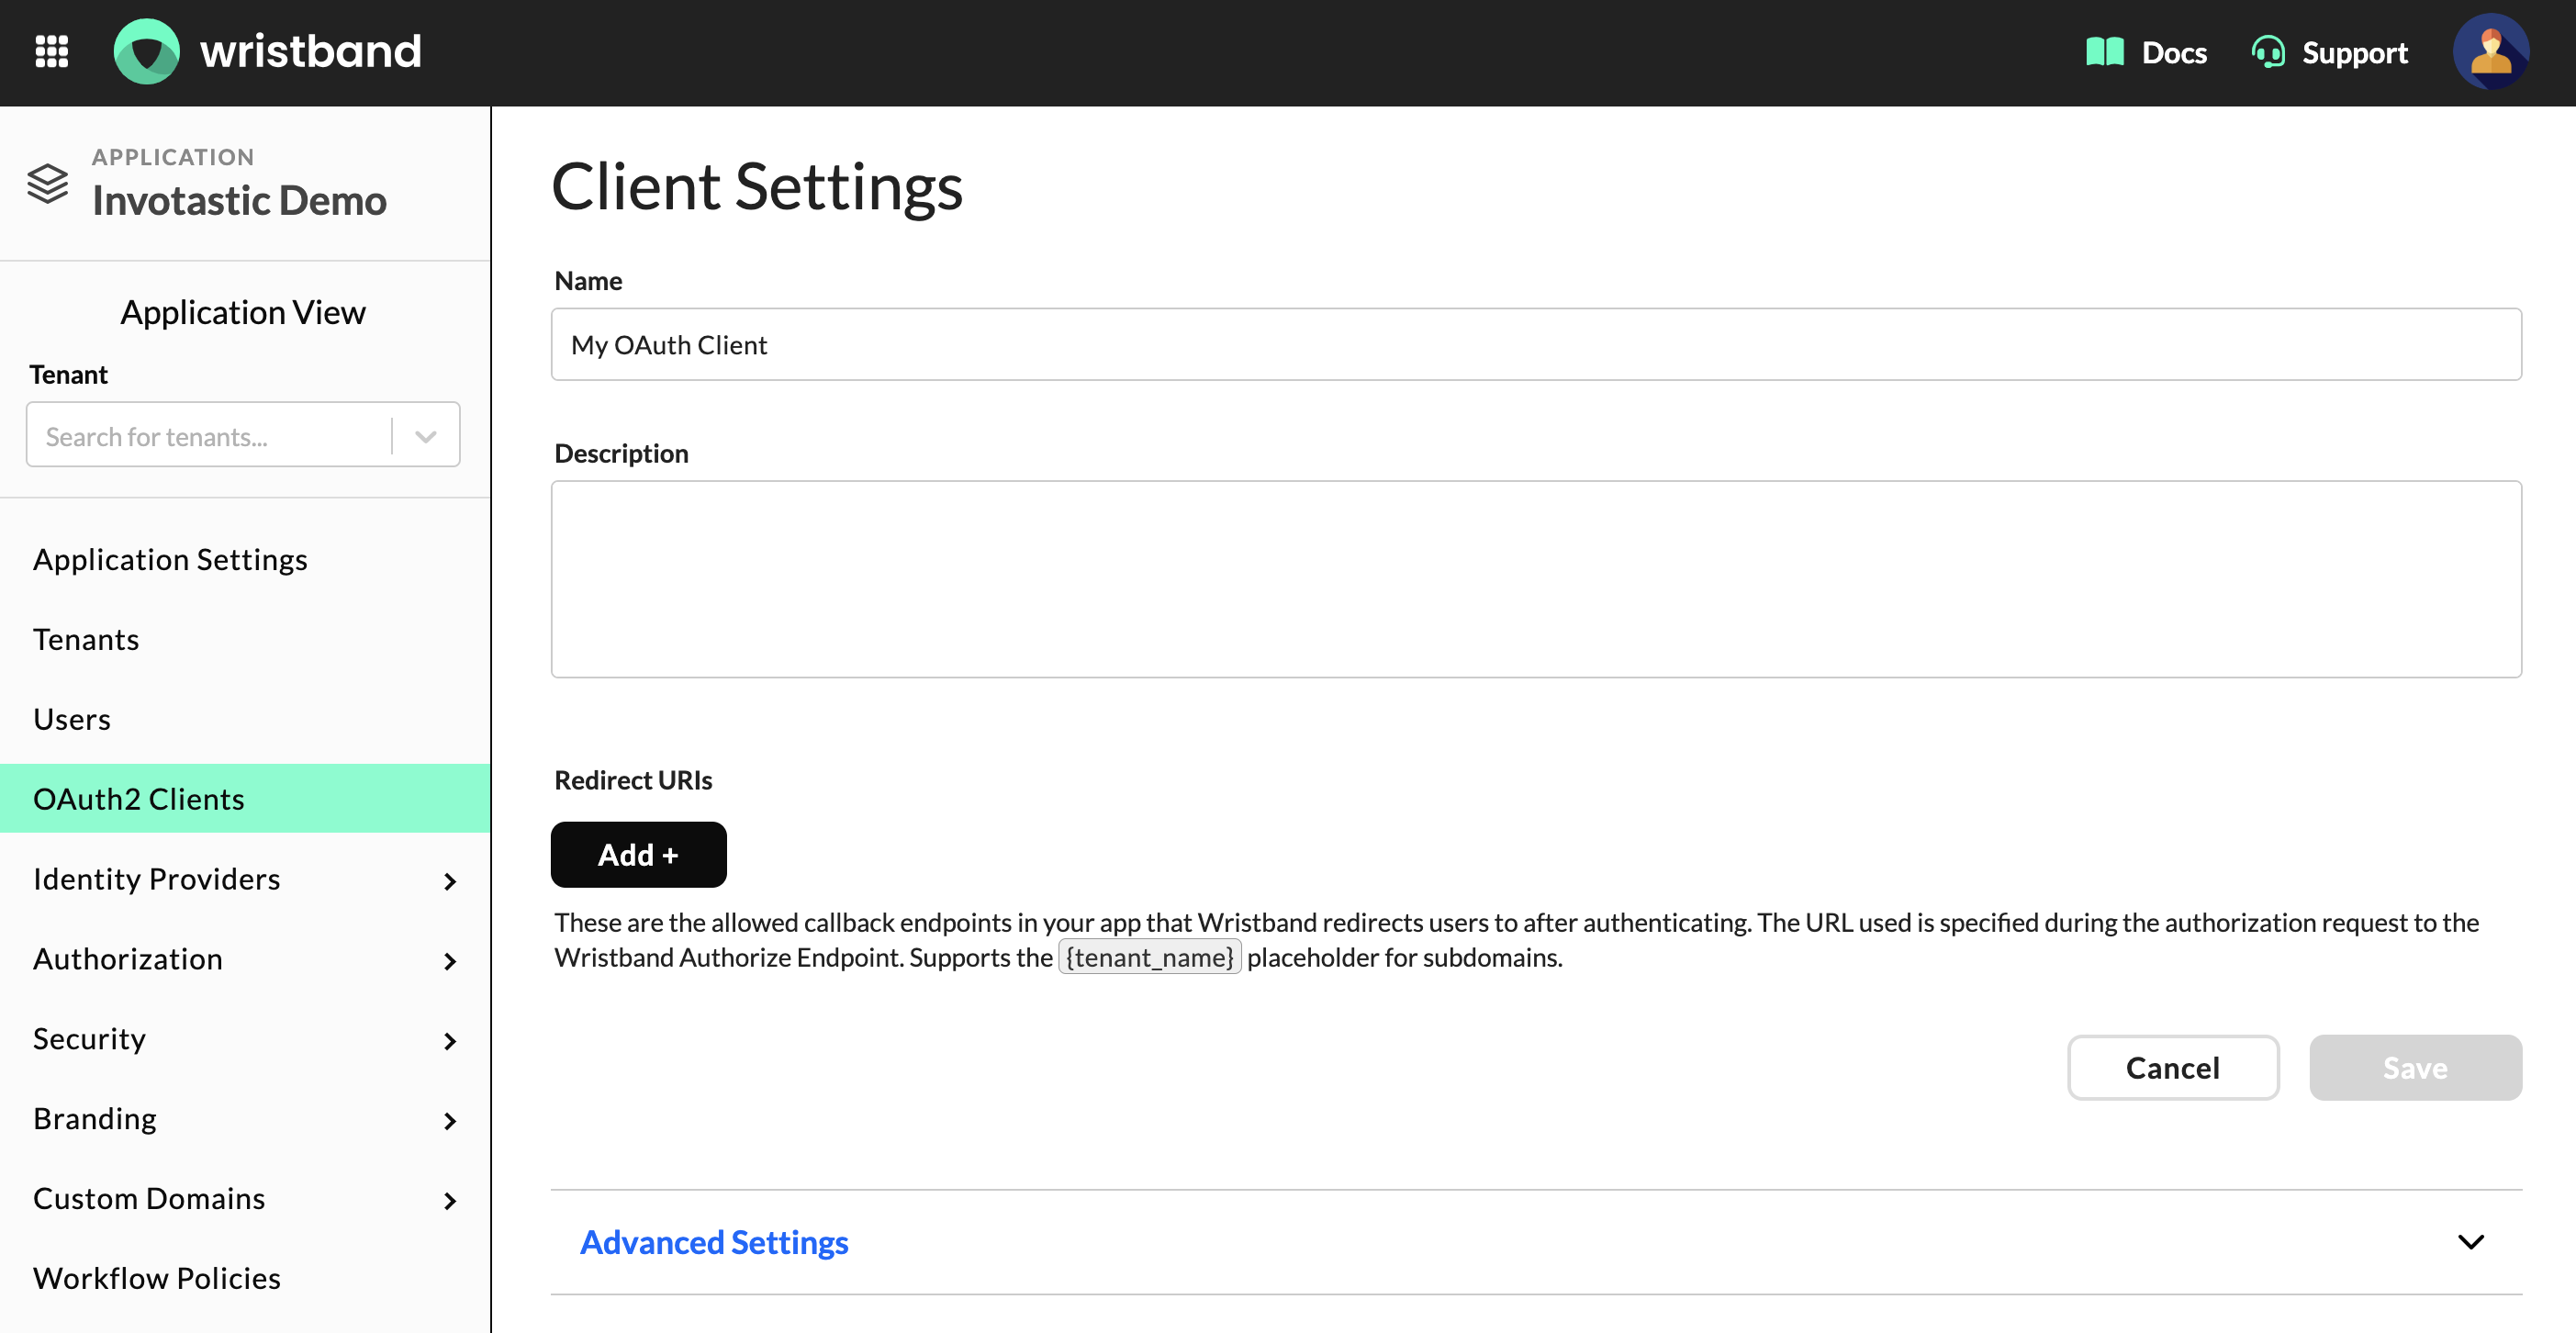
Figure 8: Client Settings section showing Name, Description, and Redirect URIs fields.
Expand the Advanced Settings panel to reveal additional configuration options.
Note: This section is hidden for Machine-to-Machine (M2M) clients, as it does not apply to them.
- Enable Refresh Token Grant Type: When enabled, this client can exchange refresh tokens for new access tokens to keep user sessions alive seamlessly.
- Enable Client Credentials Grant Type: Allows the client to use the Client Credentials grant to call Wristband's APIs on its own behalf. This setting applies strictly to Backend Server clients, as Native clients cannot maintain a client secret.
- Restrict Time to Complete Login: Enforces a fixed time window for users to complete their login. If disabled, the login flow does not expire, and users have unlimited time to authenticate.
- How Long Should Users Have to Complete Login: Available only when "Restrict Time to Complete Login" is enabled. The maximum allowed expiration time is 60 minutes.
- Login URL: Optionally overrides your application's global Login URL. When configured, authentication flows initiated by this specific client will redirect users to the client-level Login URL instead of the application-level fallback.
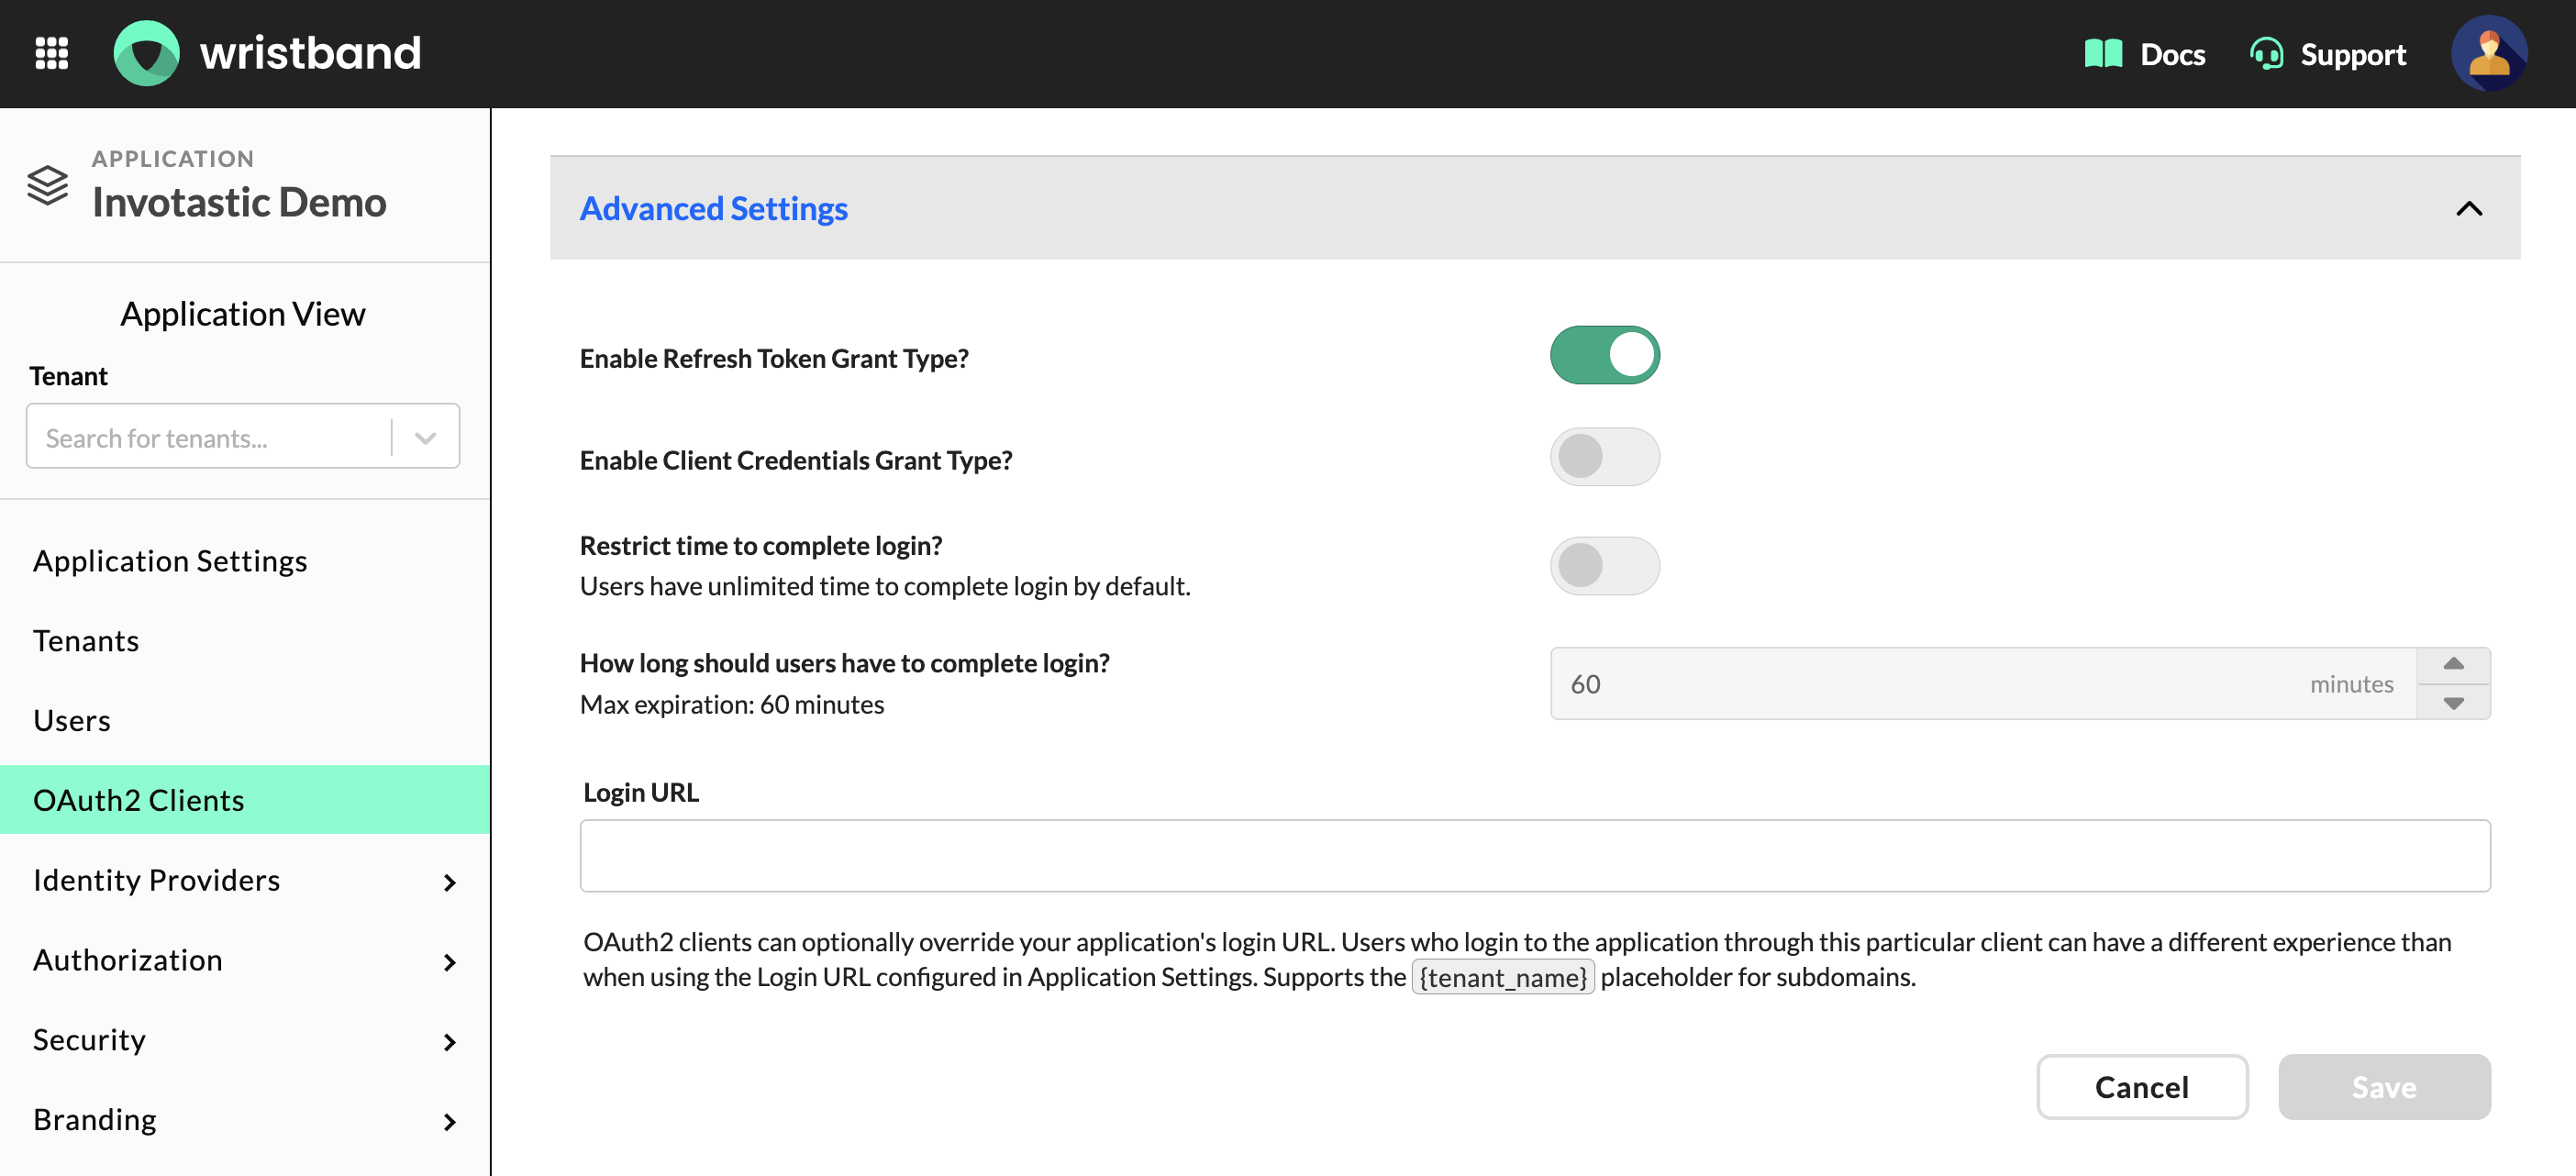
Figure 9: Advanced Settings section for a Backend Server client showing grant type toggles, login session duration, and Login URL.
Configuring JWT Settings
Scroll down to the JWT Settings section to configure the validity duration of tokens issued to this client.
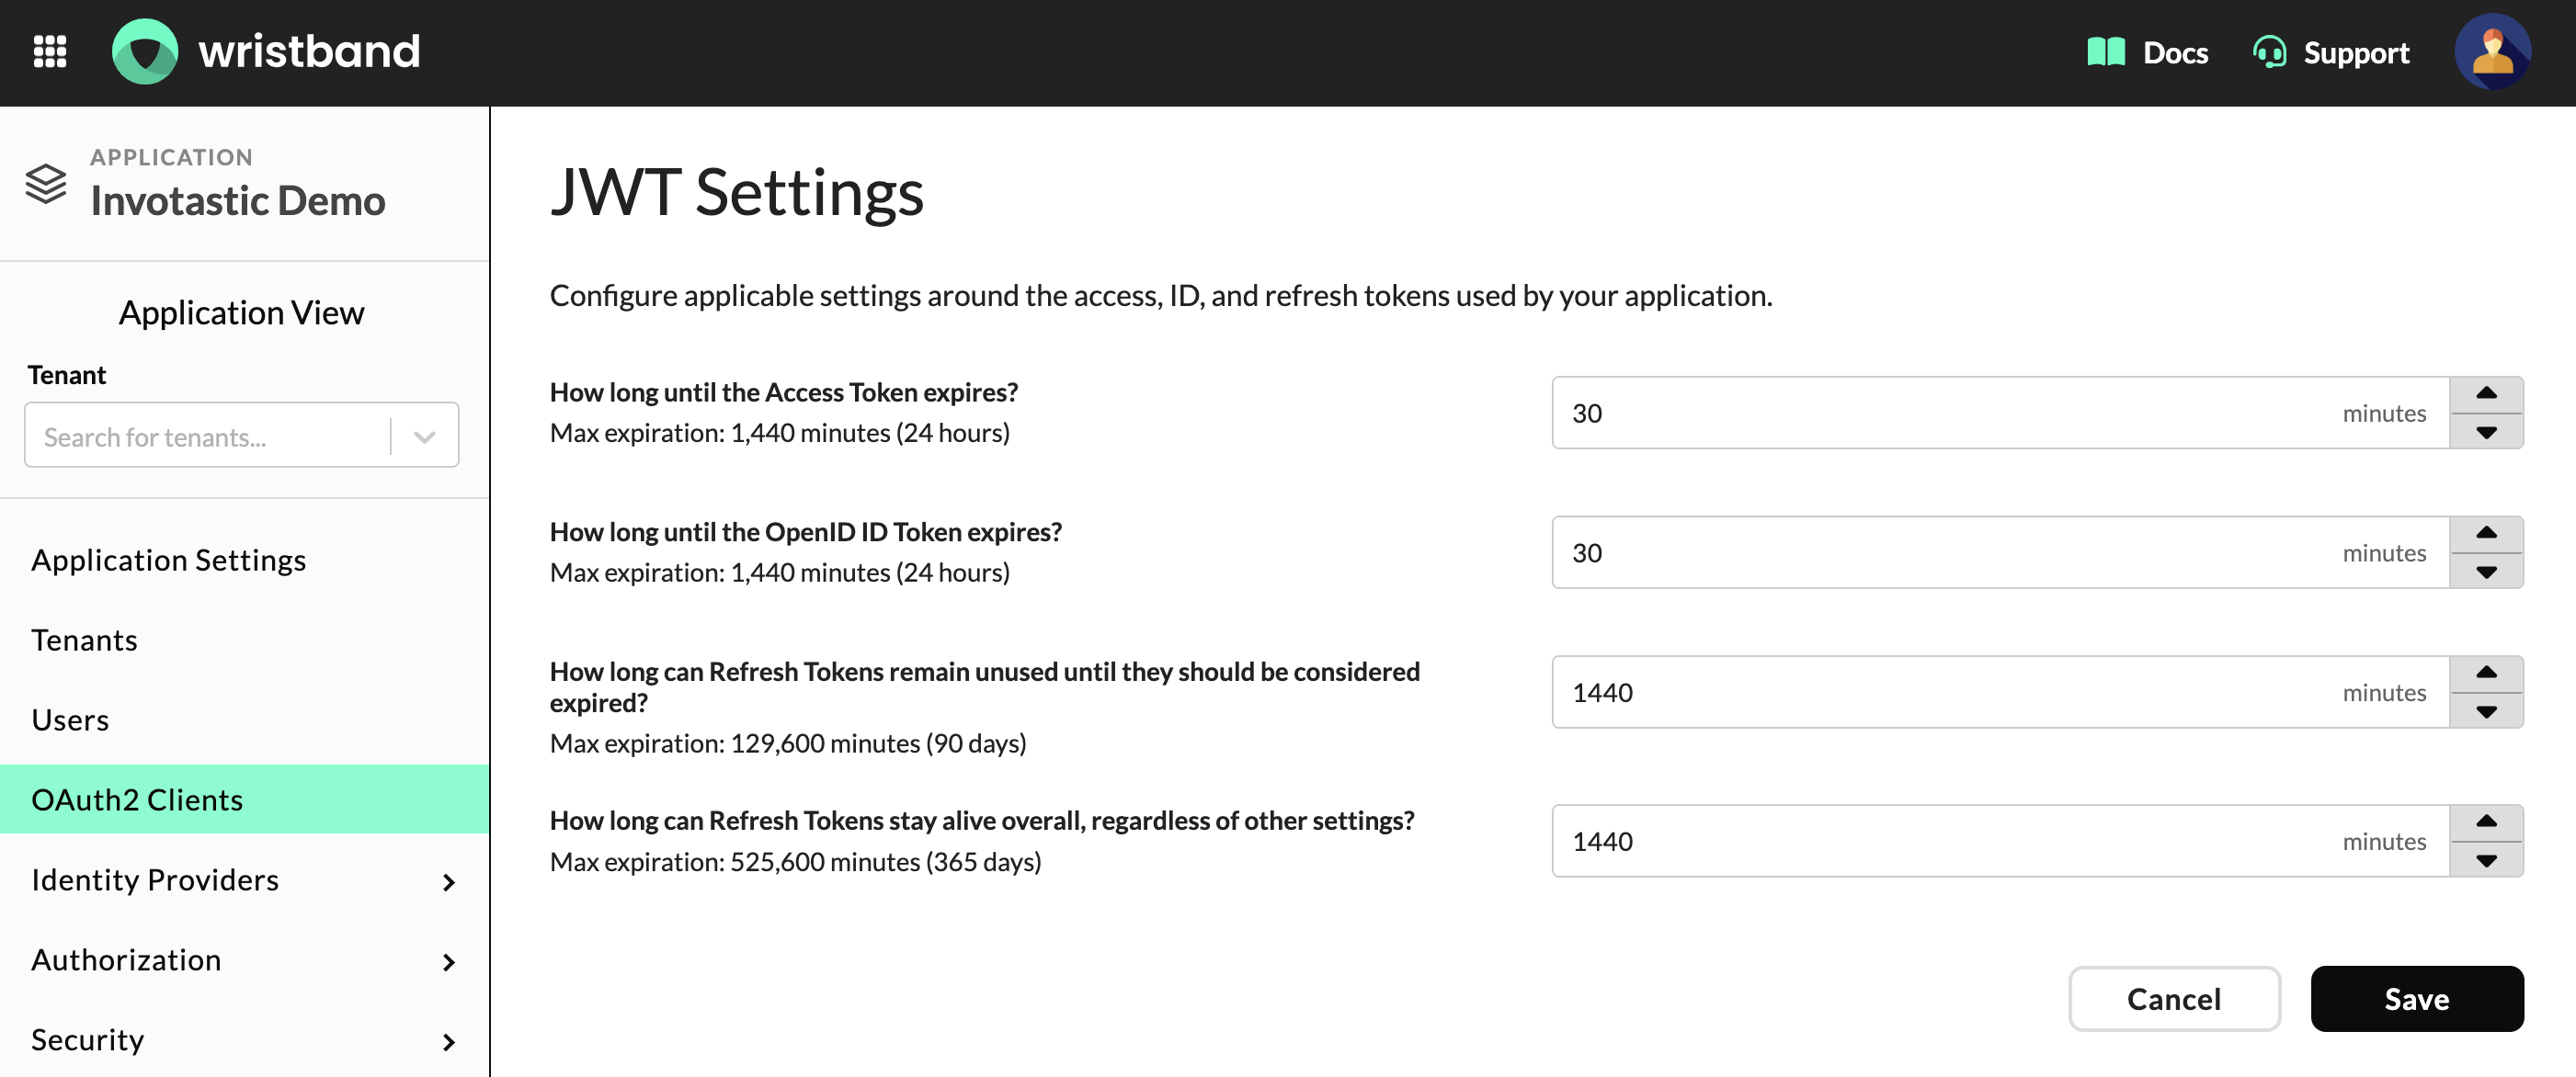
Figure 10: JWT Settings section for a Backend Server client showing the Access Token, ID Token, and Refresh Token expiration fields.
Assigning Roles to a Client
Scroll down to the Roles section and use the multi-select dropdown to add or modify the roles assigned to this client.
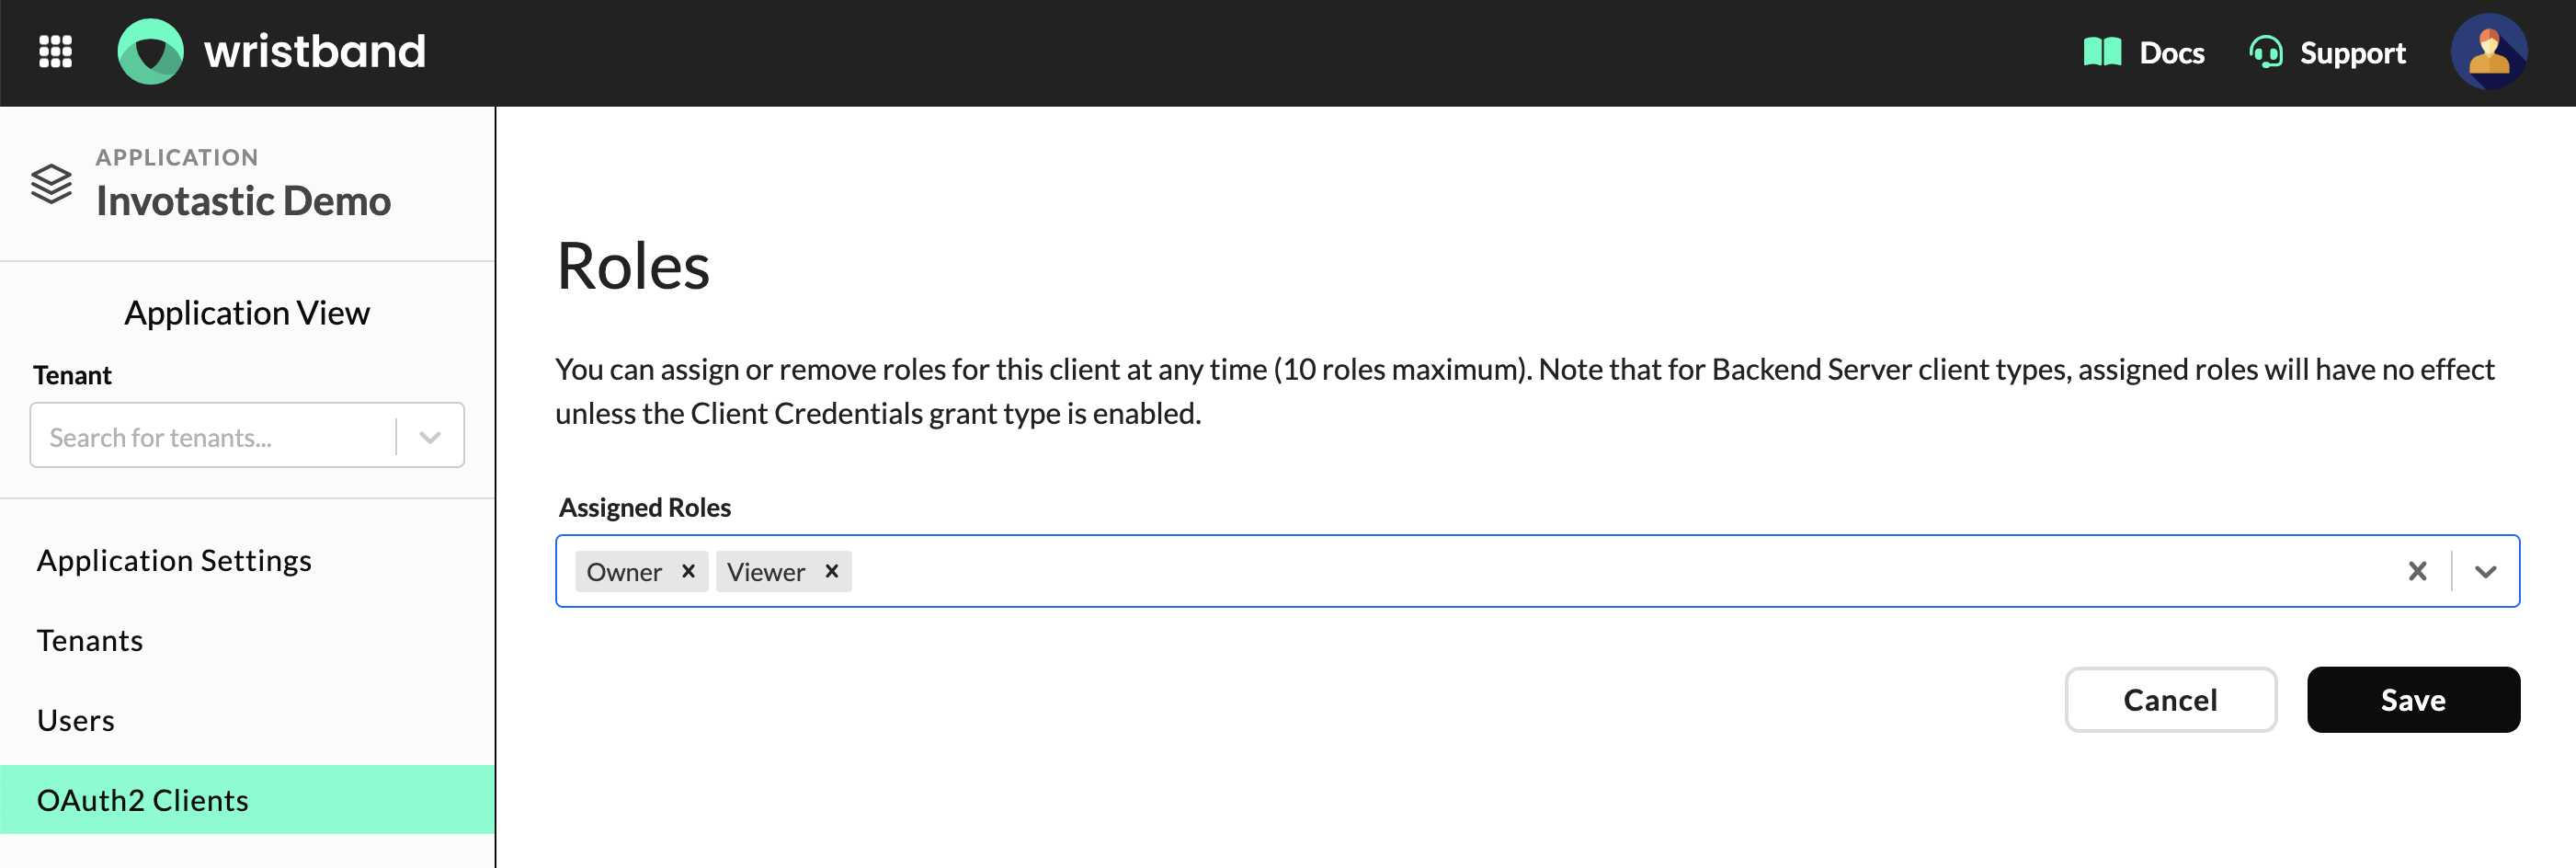
Figure 11: Roles section on the Edit Client page showing the Assigned Roles multi-select dropdown.
Validating a Client's Secret
- Scroll down to the Client Secret Settings section.
- Enter the secret value you want to test.
- Click the Validate button to check its status.
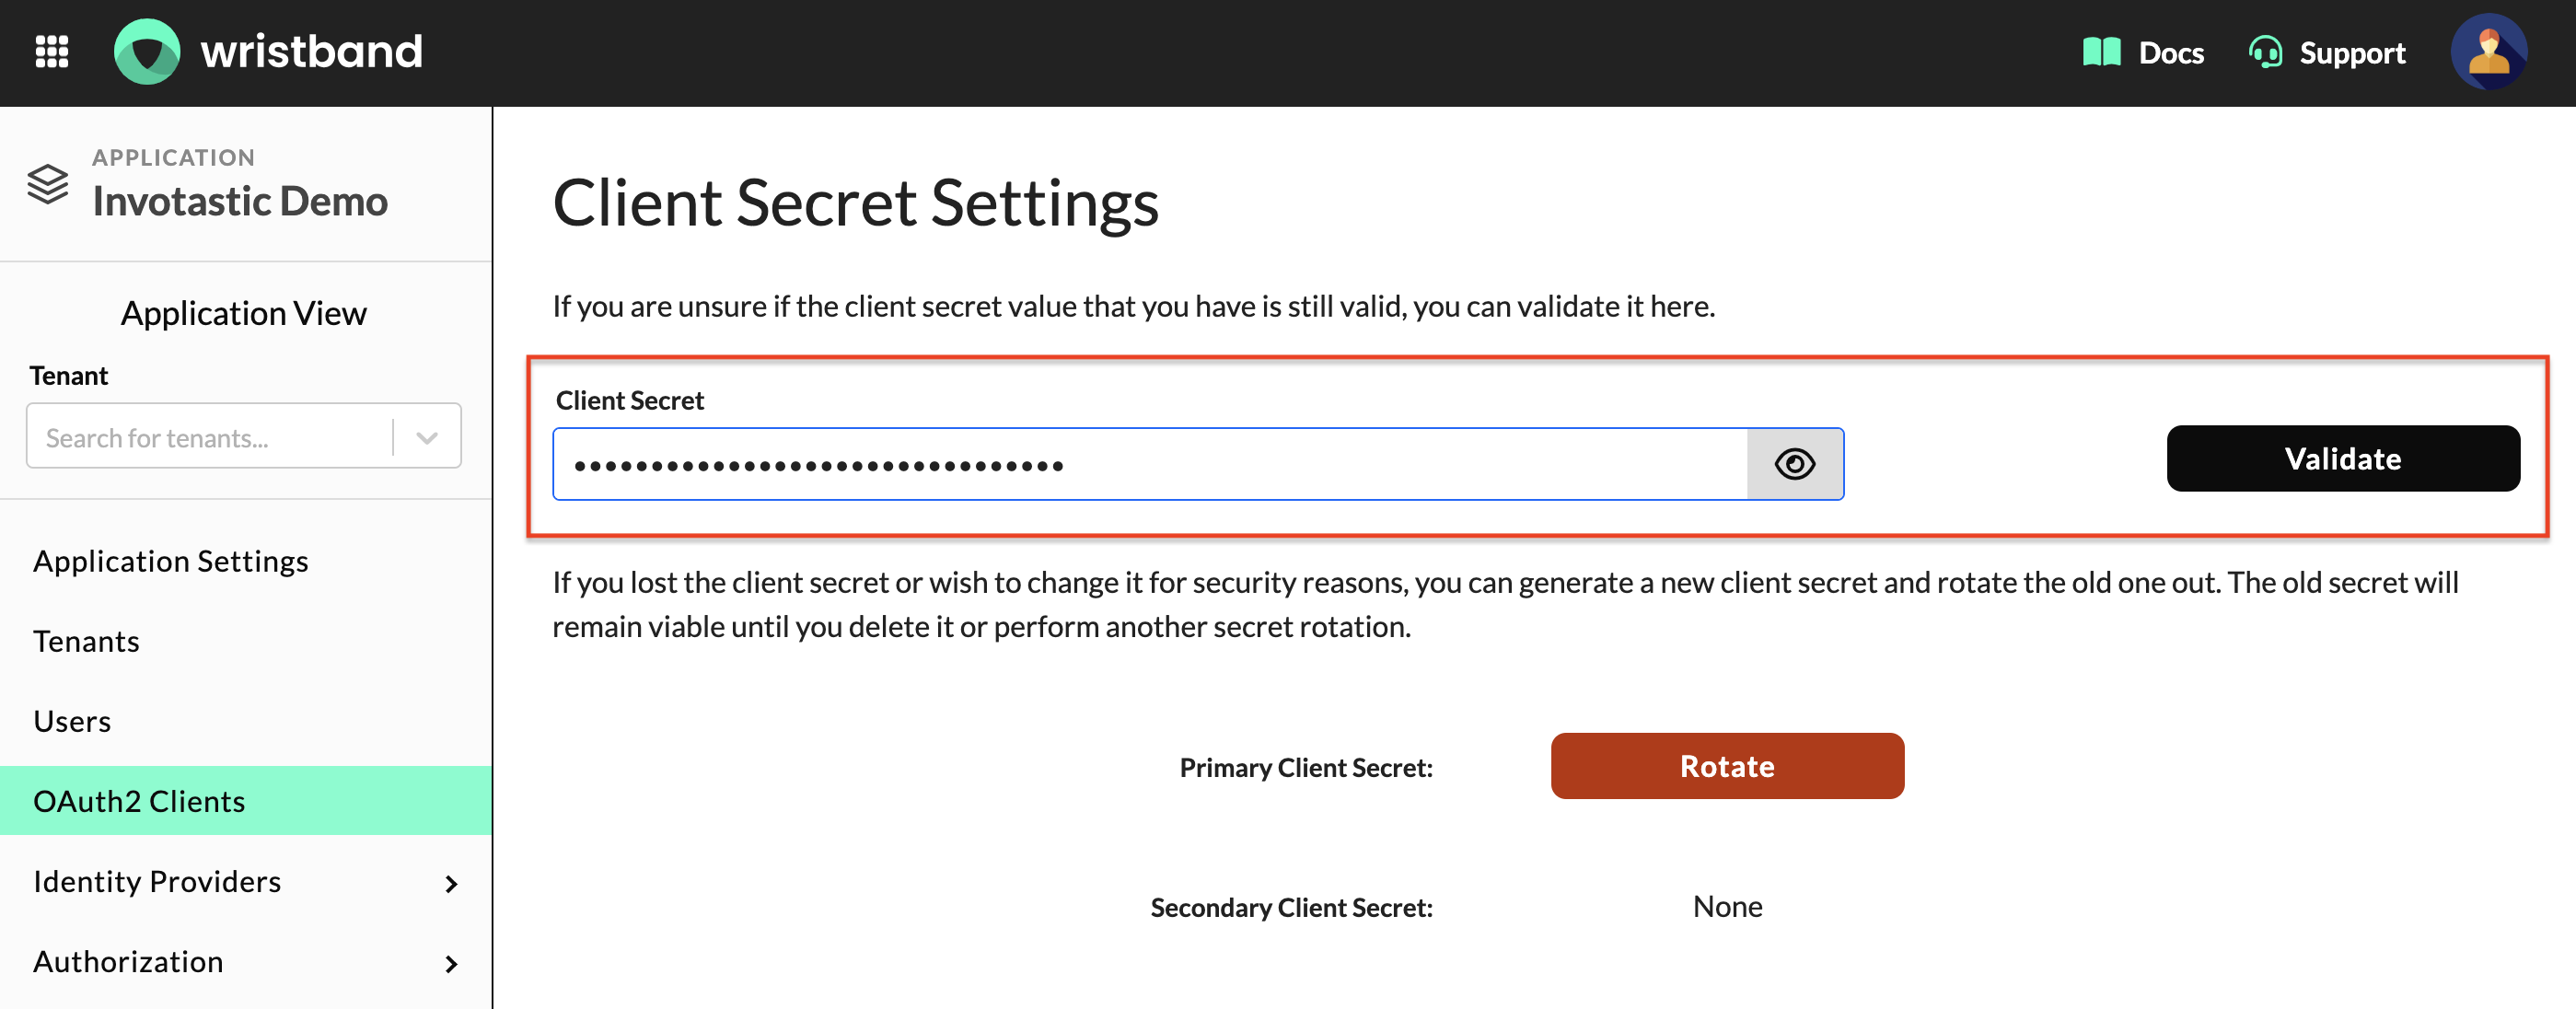
Figure 12: Client Secret Settings section showing the Client Secret field and Validate button.
Rotating a Client's Secret
- Scroll down to the Client Secret Settings section.
- Locate the Primary Client Secret.
- Click the Rotate button next to it.
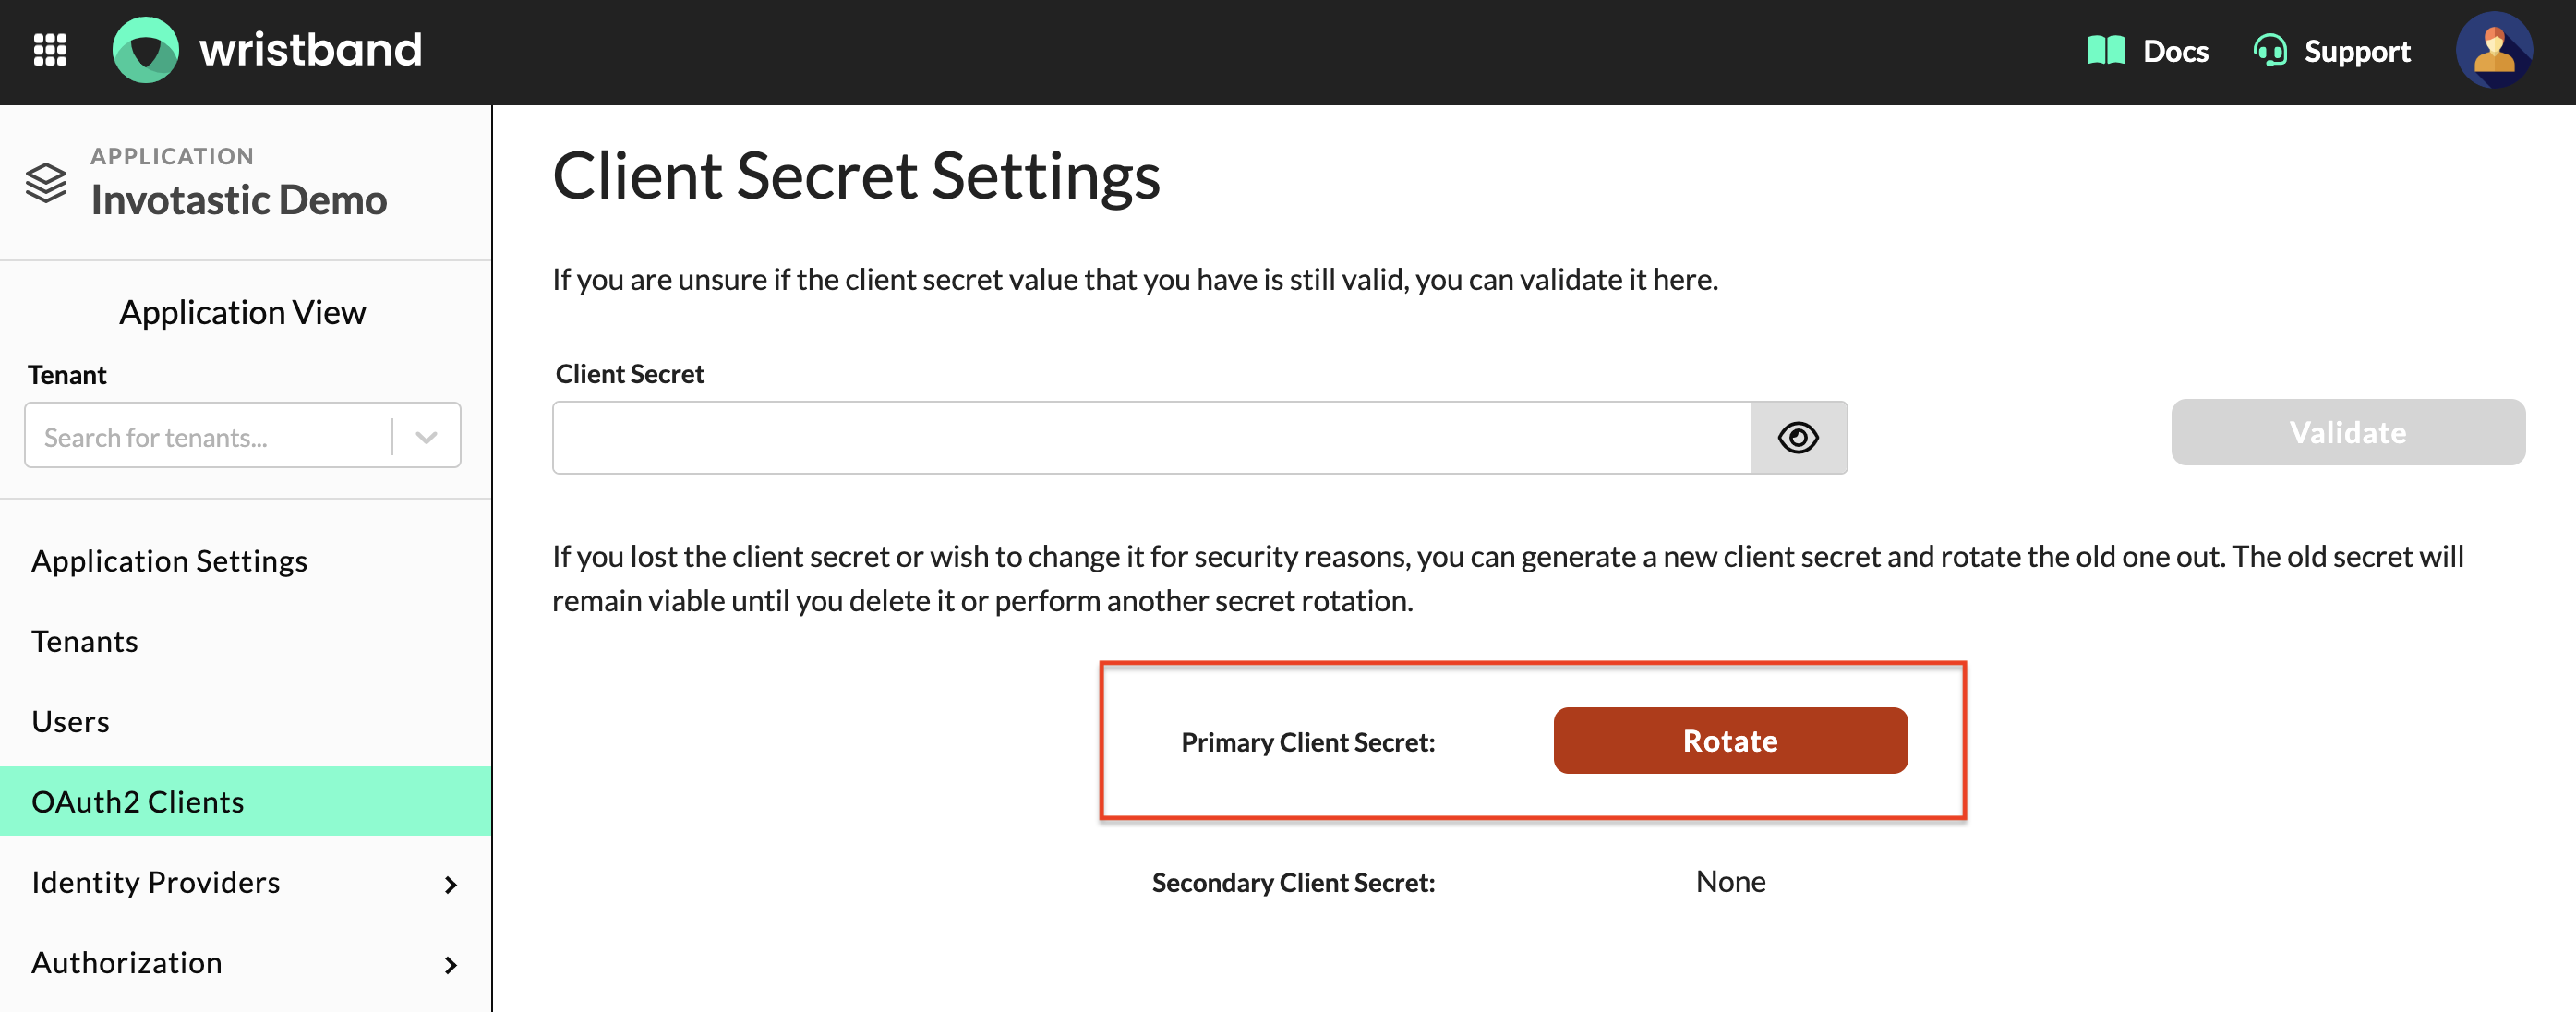
Figure 13: Client Secret Settings section showing the Rotate button for the Primary Client Secret
Secret Rotation Mechanics:
- New Secret: A new primary secret is generated immediately.
- Current Secret: Becomes the secondary secret so your application experiences zero downtime.
- Existing Secondary Secret: If you already have a secondary secret, it is permanently deleted.
To confirm: Type "rotate" and click Rotate.
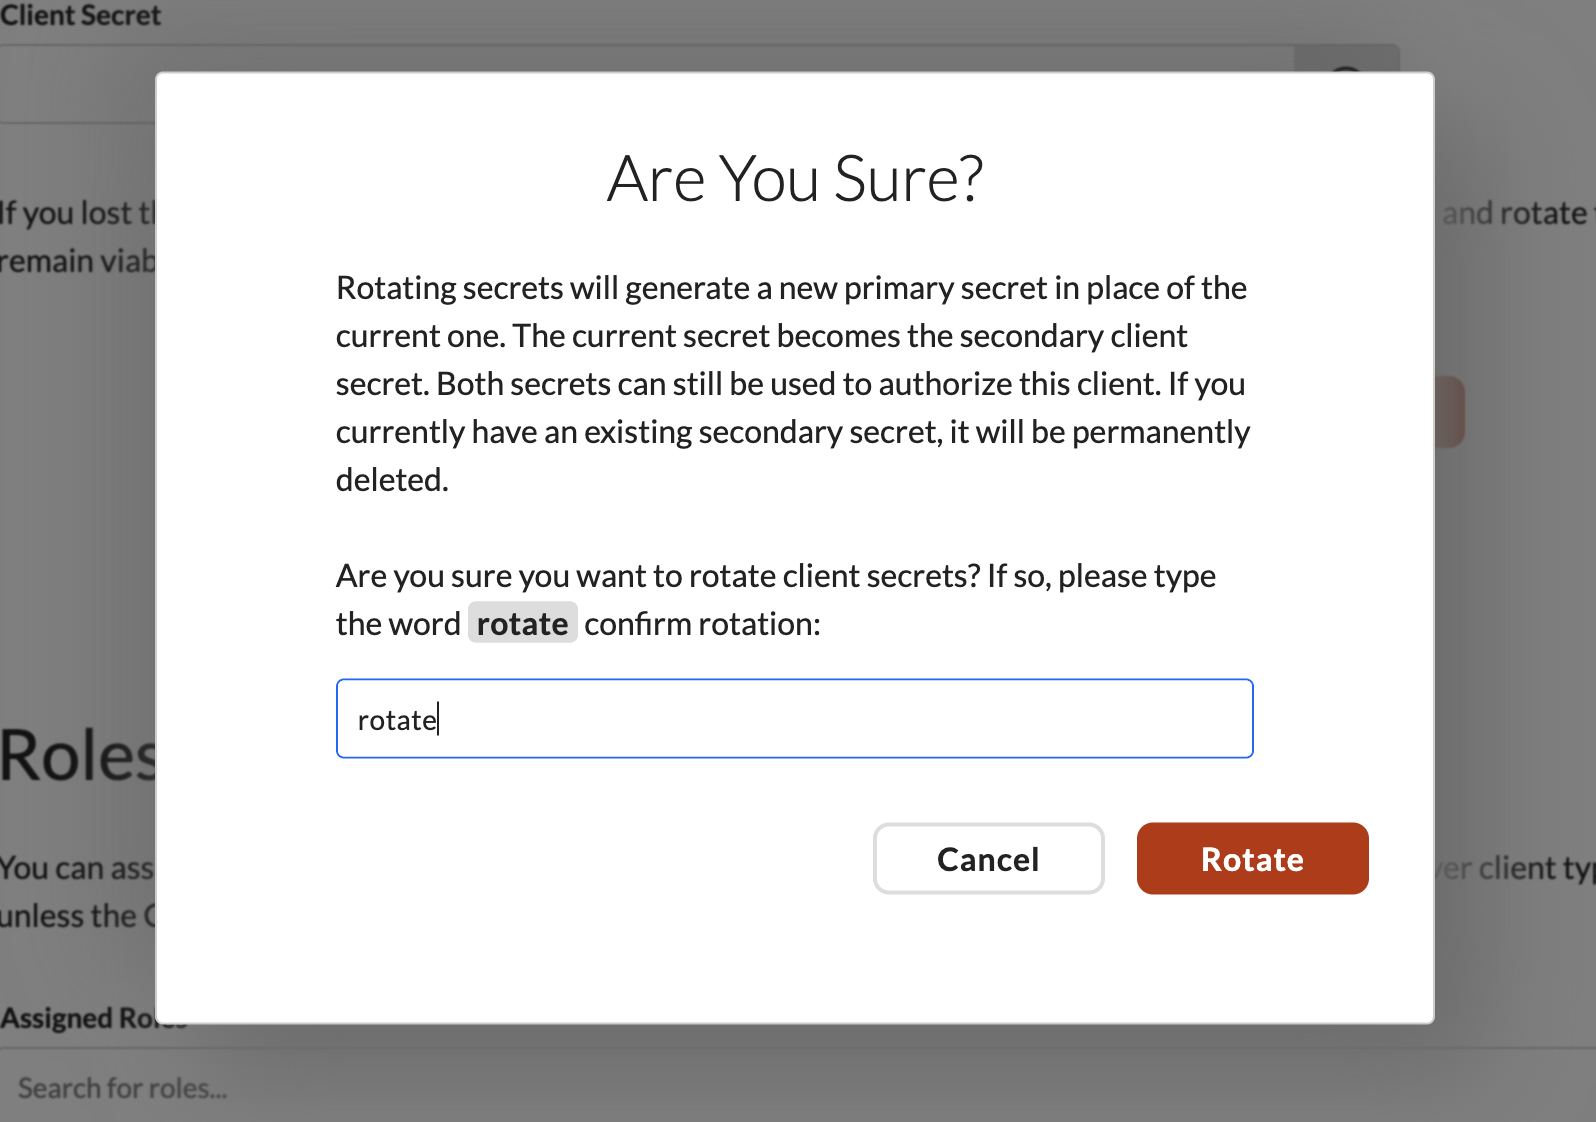
Figure 14: Are You Sure confirmation modal for rotating the client secret, requiring the word rotate to be typed to confirm.
Your new client secret will be displayed. Record it securely at this time, as it cannot be shown again.
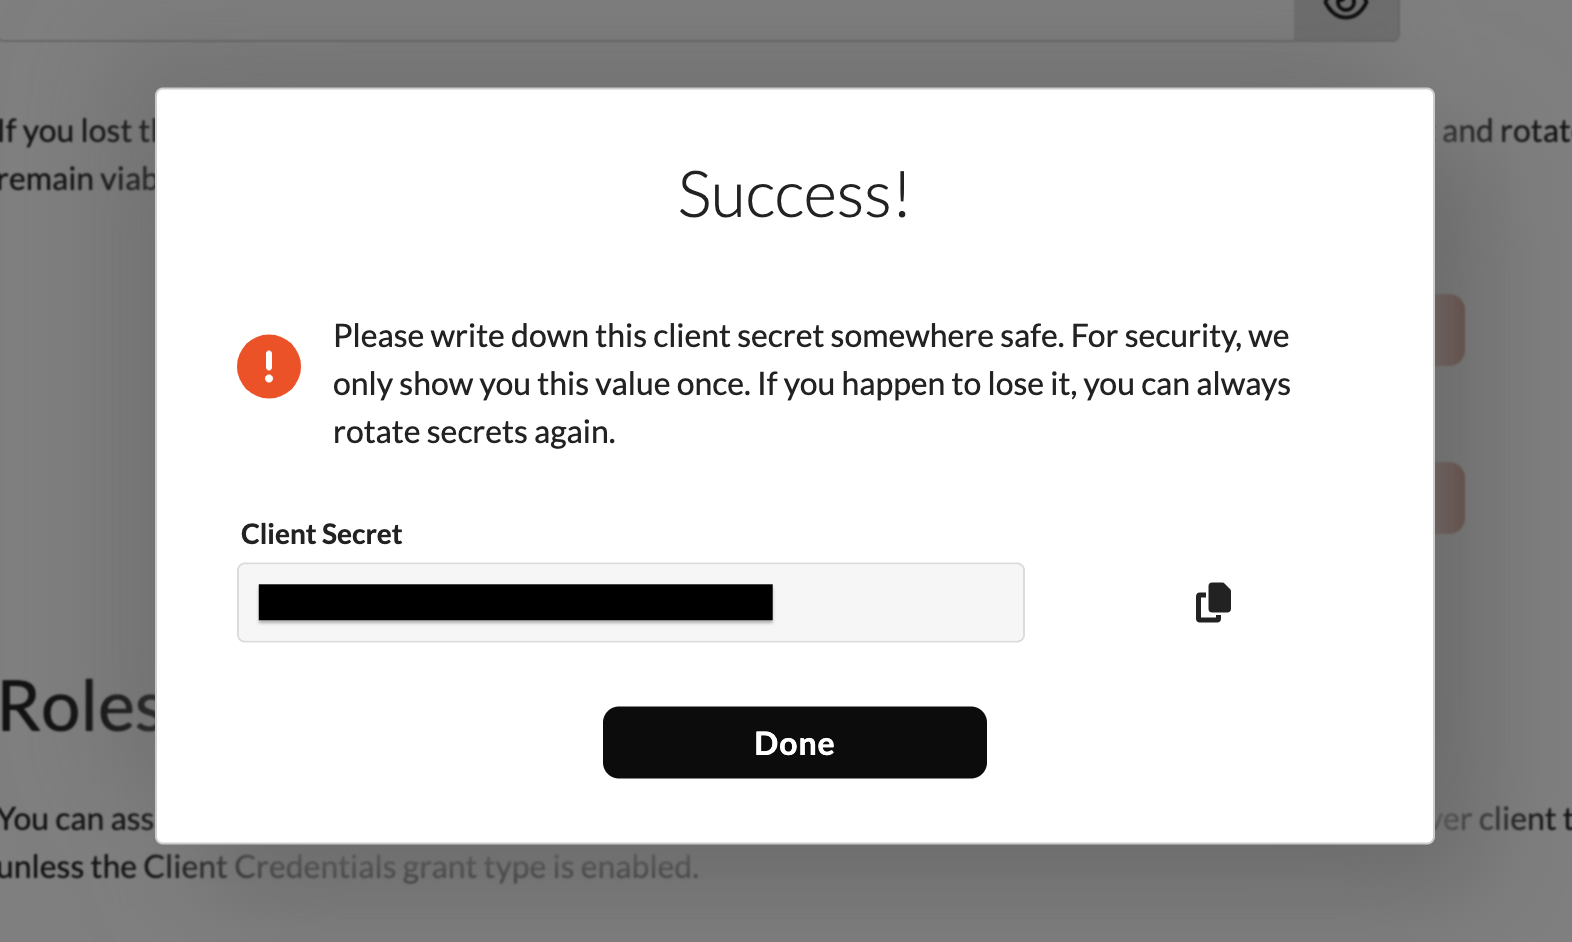
Figure 15: Success dialog showing the new client secret after rotation.
- Verify that your new primary secret has been rolled out to all environments.
- Go to Client Secret Settings.
- Click Delete next to the Secondary Client Secret to remove it permanently.
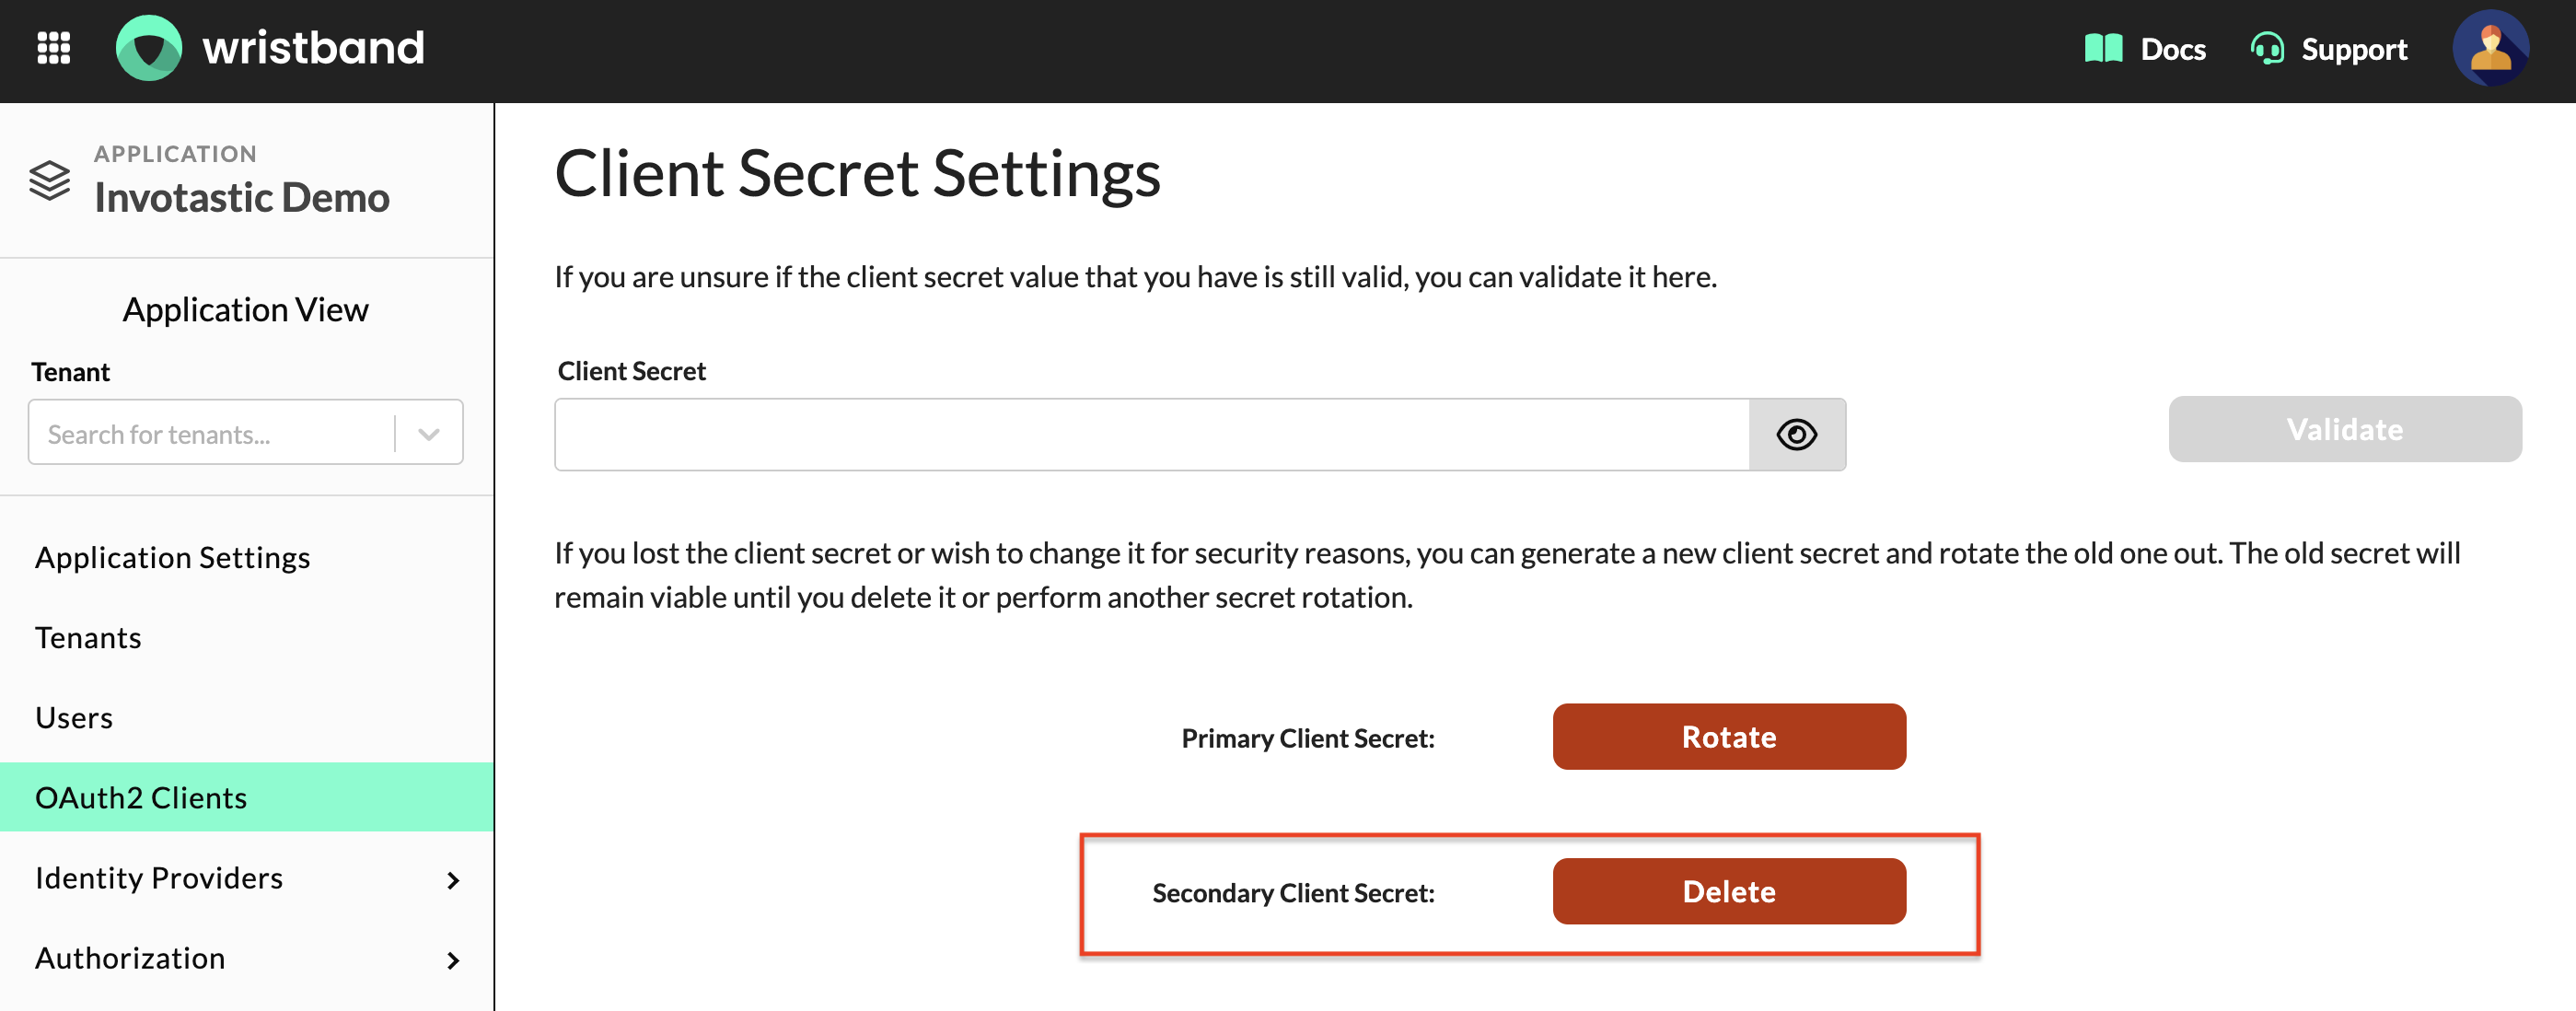
Figure 16: Client Secret Settings section showing the Delete button for the Secondary Client Secret.
To confirm: Type "delete" in the text field and click the Delete button.
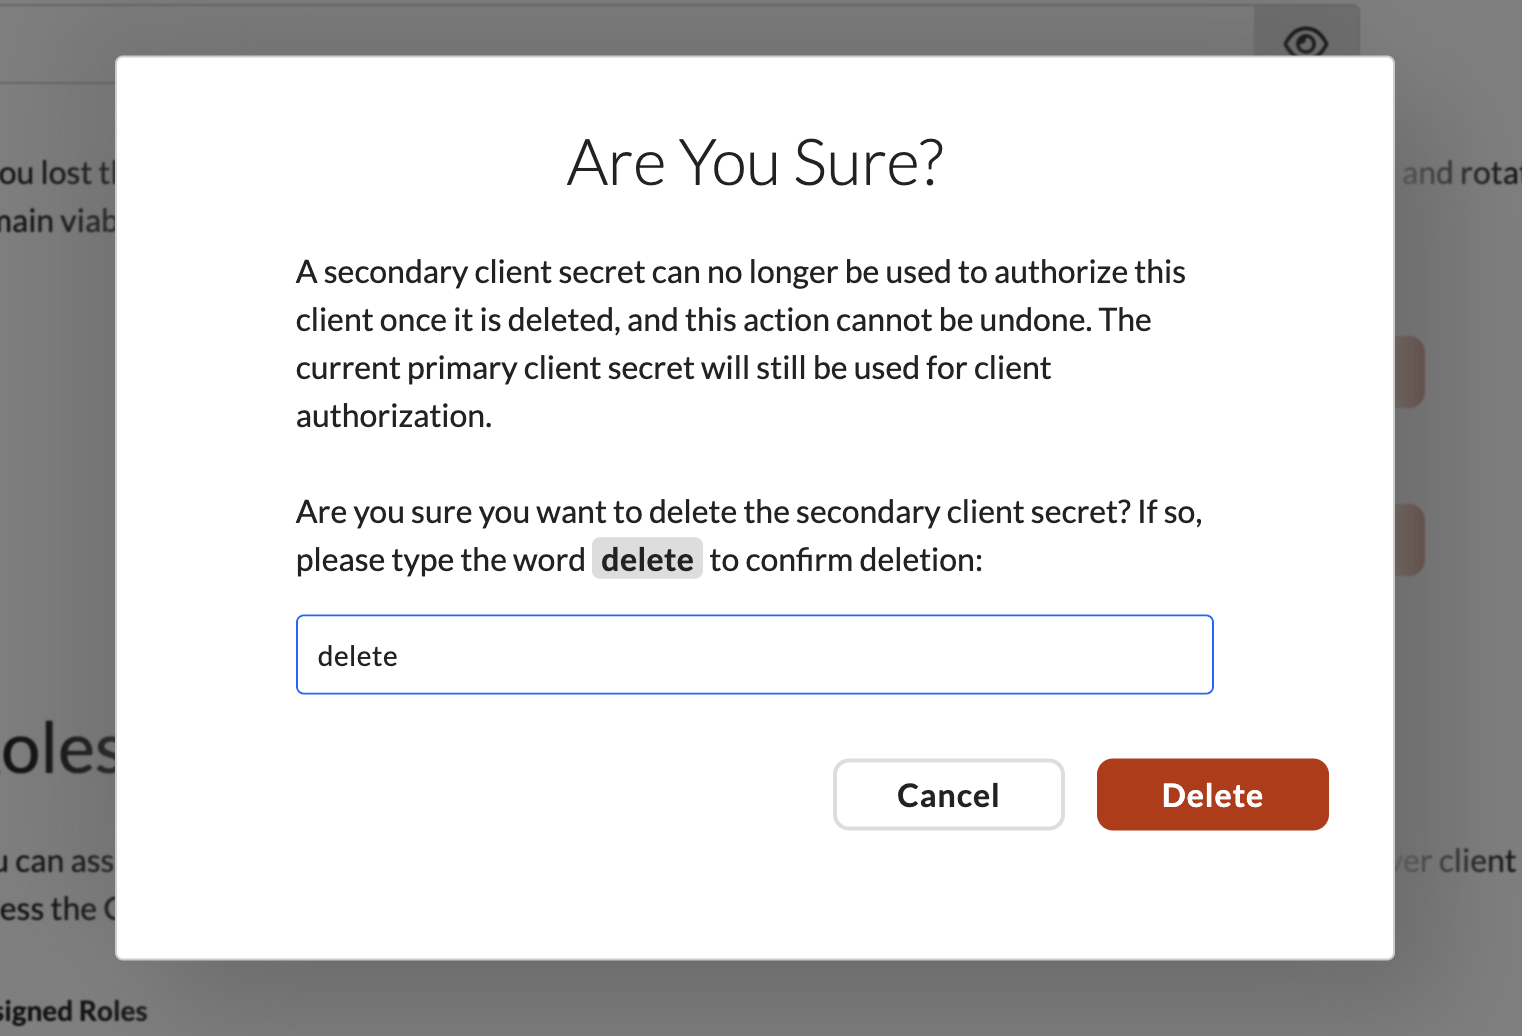
Figure 17: Are You Sure confirmation modal for deleting the secondary client secret.
Deleting a Client
- Scroll to the bottom of the Edit Client page to the Delete this Client section.
- Click the Delete button.
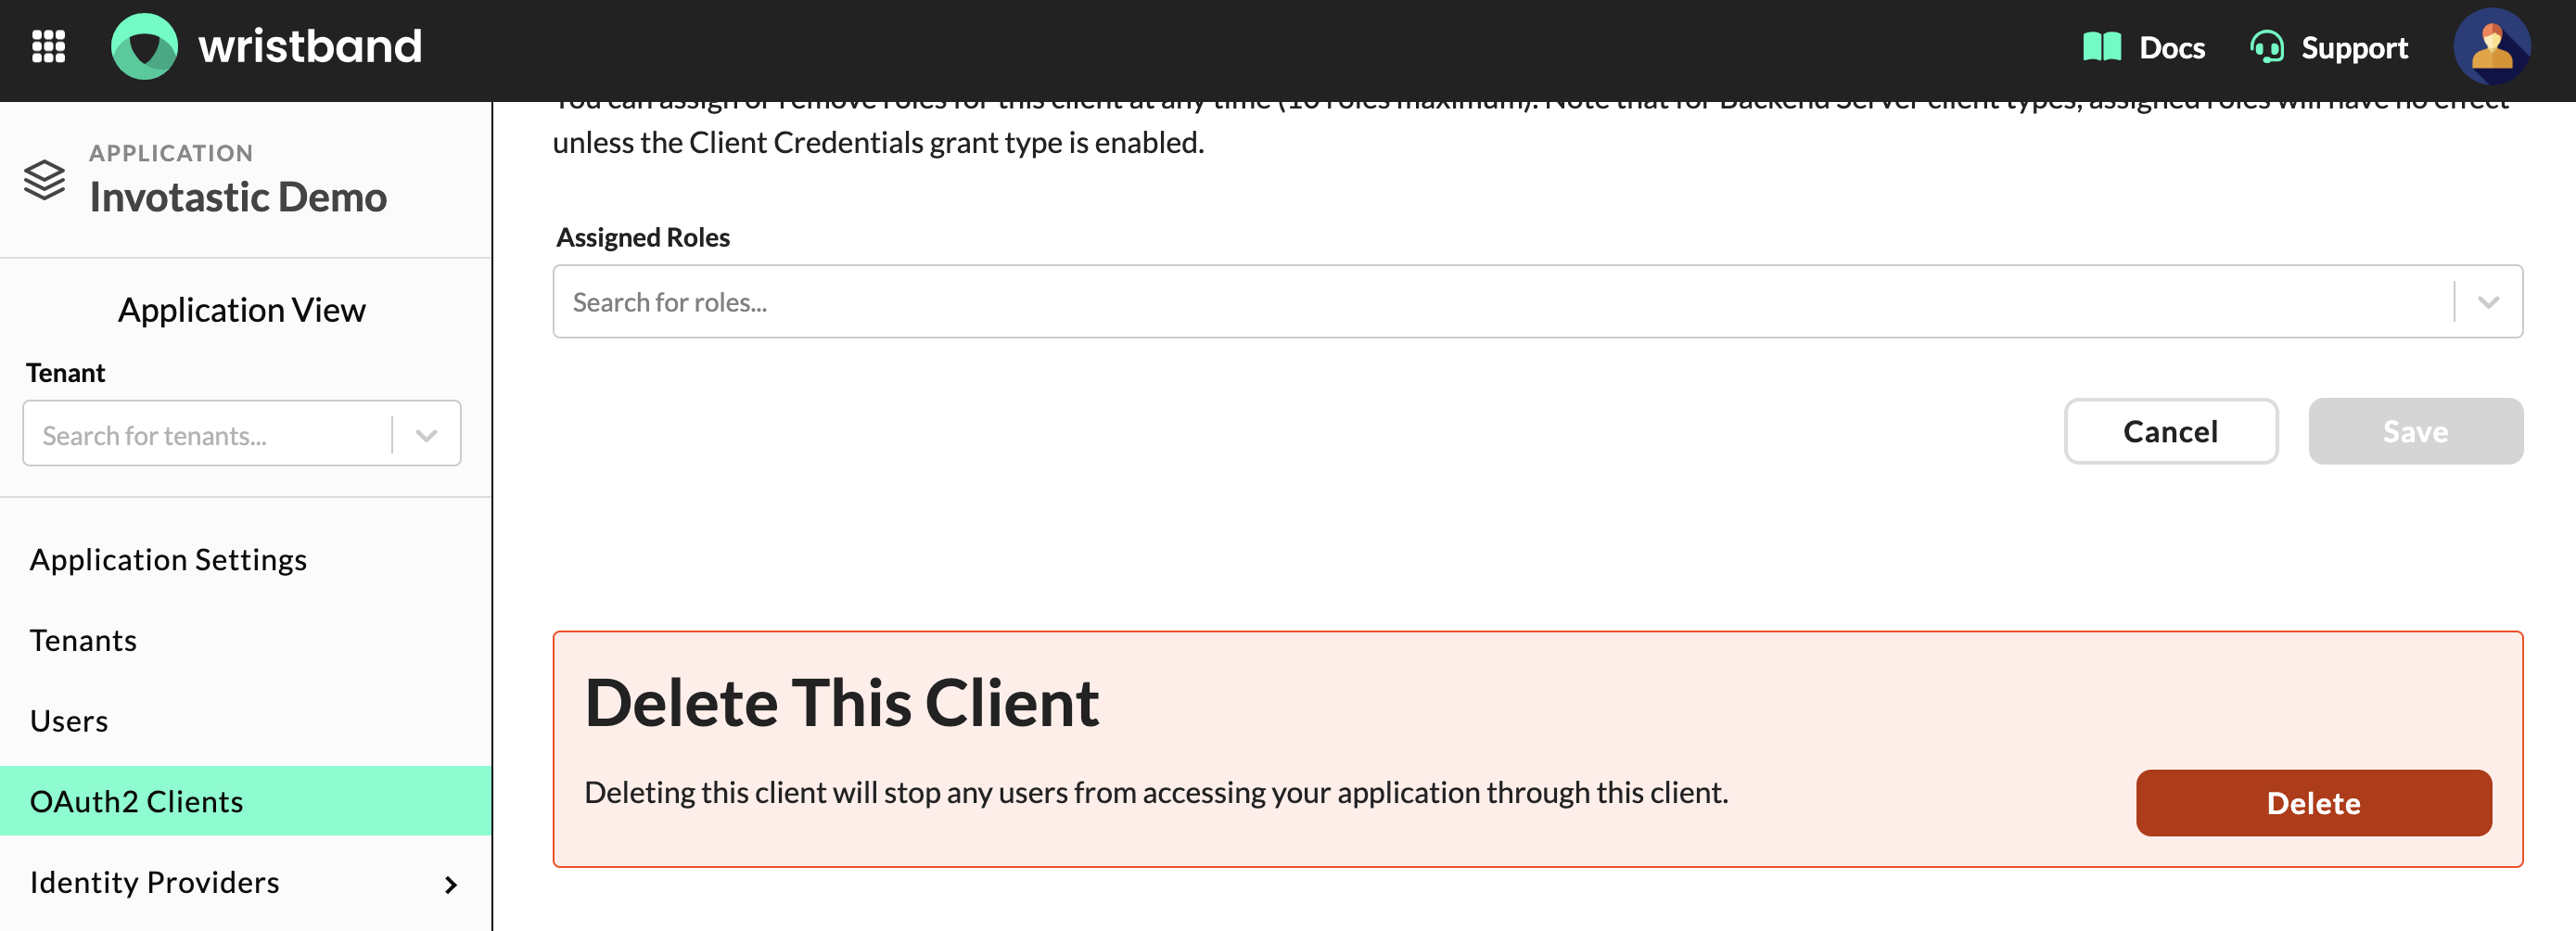
Figure 18: Delete This Client section on the Edit Client page with a warning and Delete button.
Deleting a client is permanent and cannot be undone. To confirm this action, type "delete" in the text field and click the Delete button.
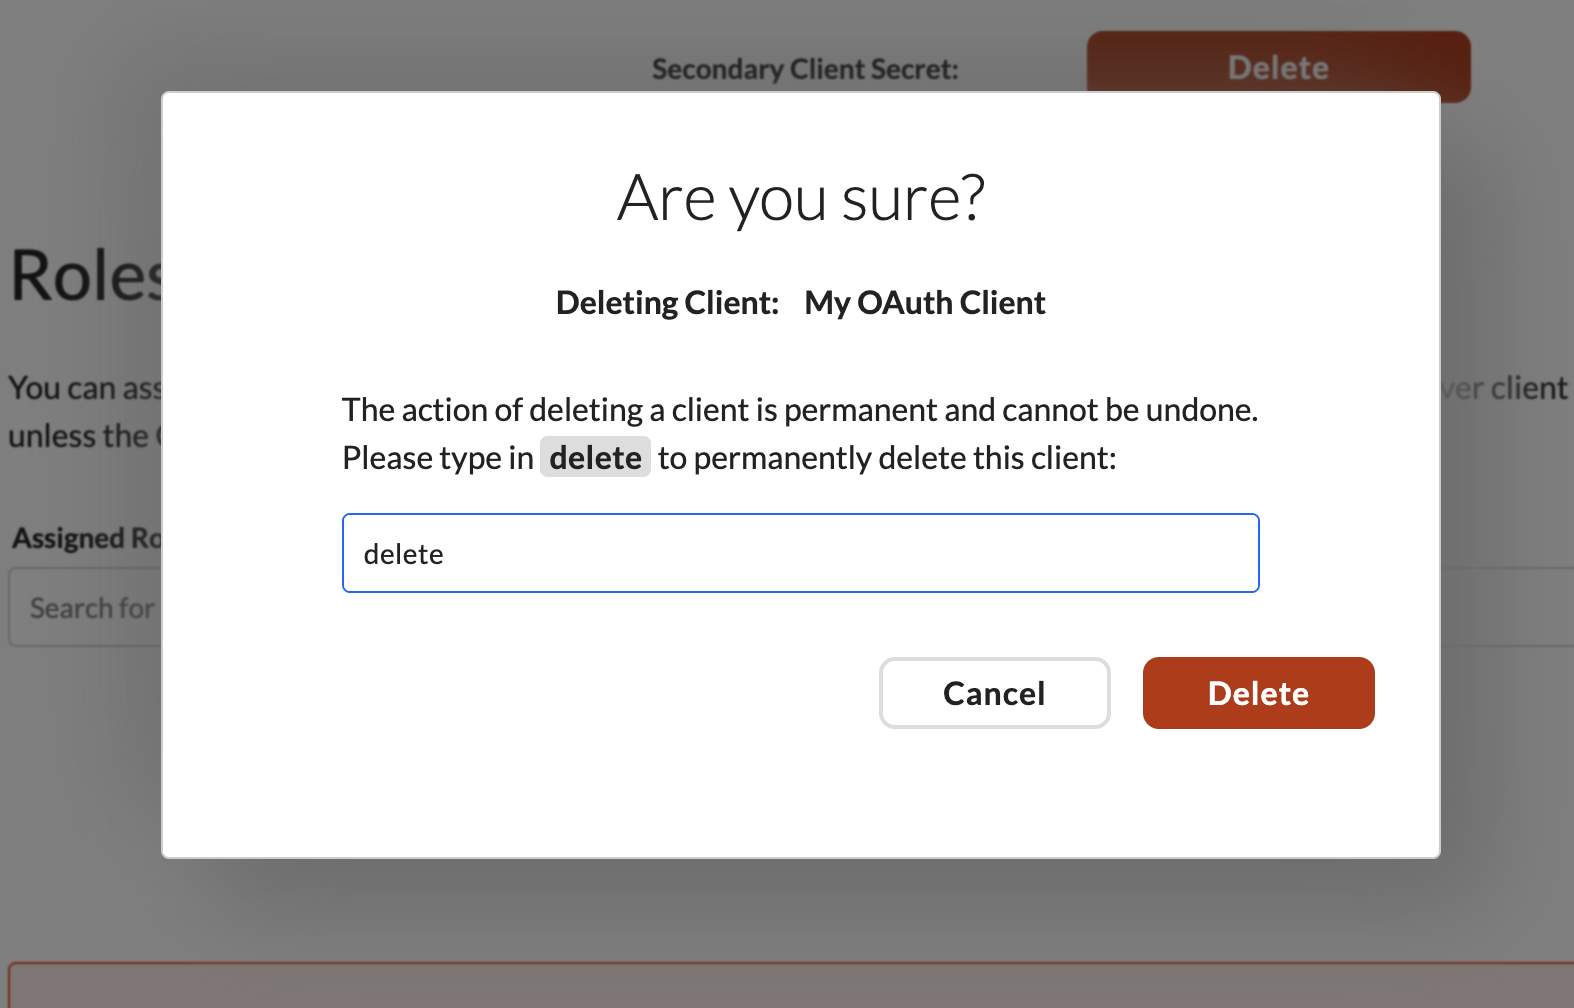
Figure 19: Are you sure confirmation modal for deleting a client, requiring the word delete to be typed to confirm.
Generating Access Tokens
Note: This is only available for Machine-to-Machine clients, or for Backend Server clients that have the
CLIENT_CREDENTIALSgrant type enabled.
- Scroll down to the Generate Access Tokens section on the Edit Client page.
- Paste your client secret into the field.
- Click the New Token button to instantly generate an access token for manual testing in tools like cURL or Postman.
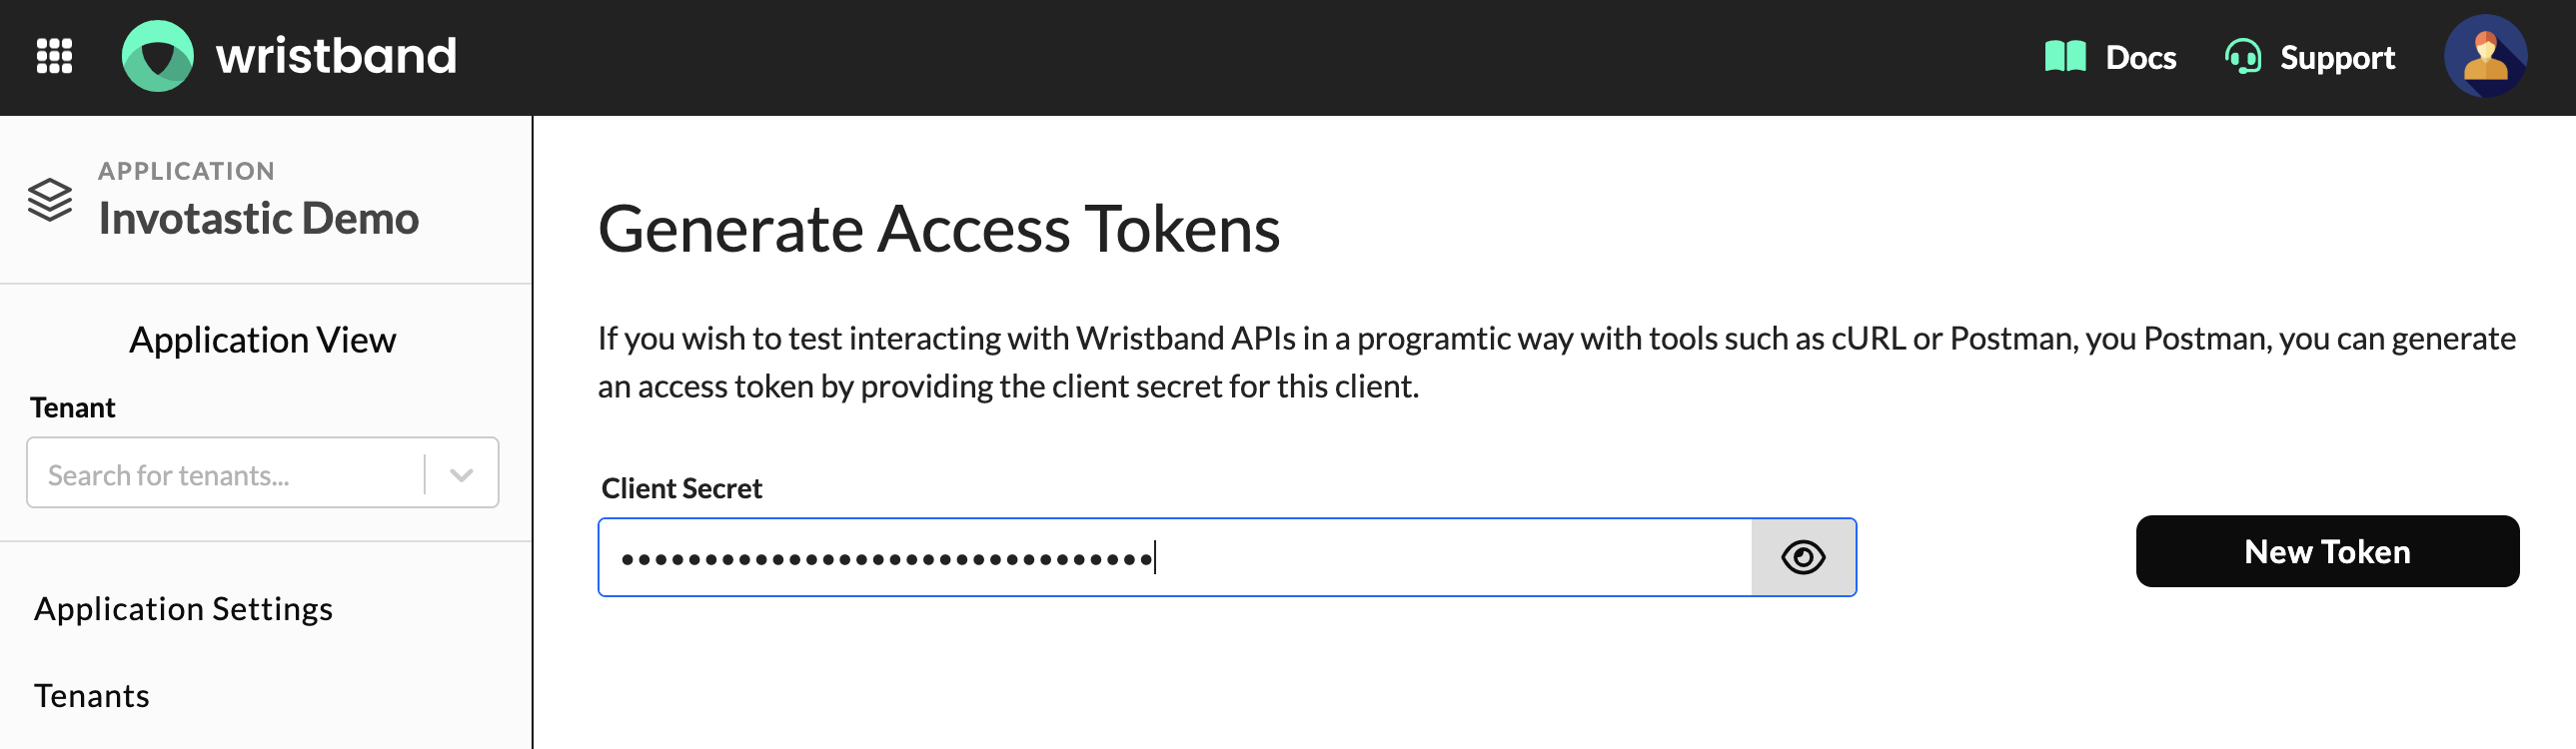
Figure 20: Generate Access Tokens section on the Edit Client page showing the Client Secret field and New Token button.
Your access token will be displayed below. Copy it somewhere safe immediately, as it cannot be shown again.
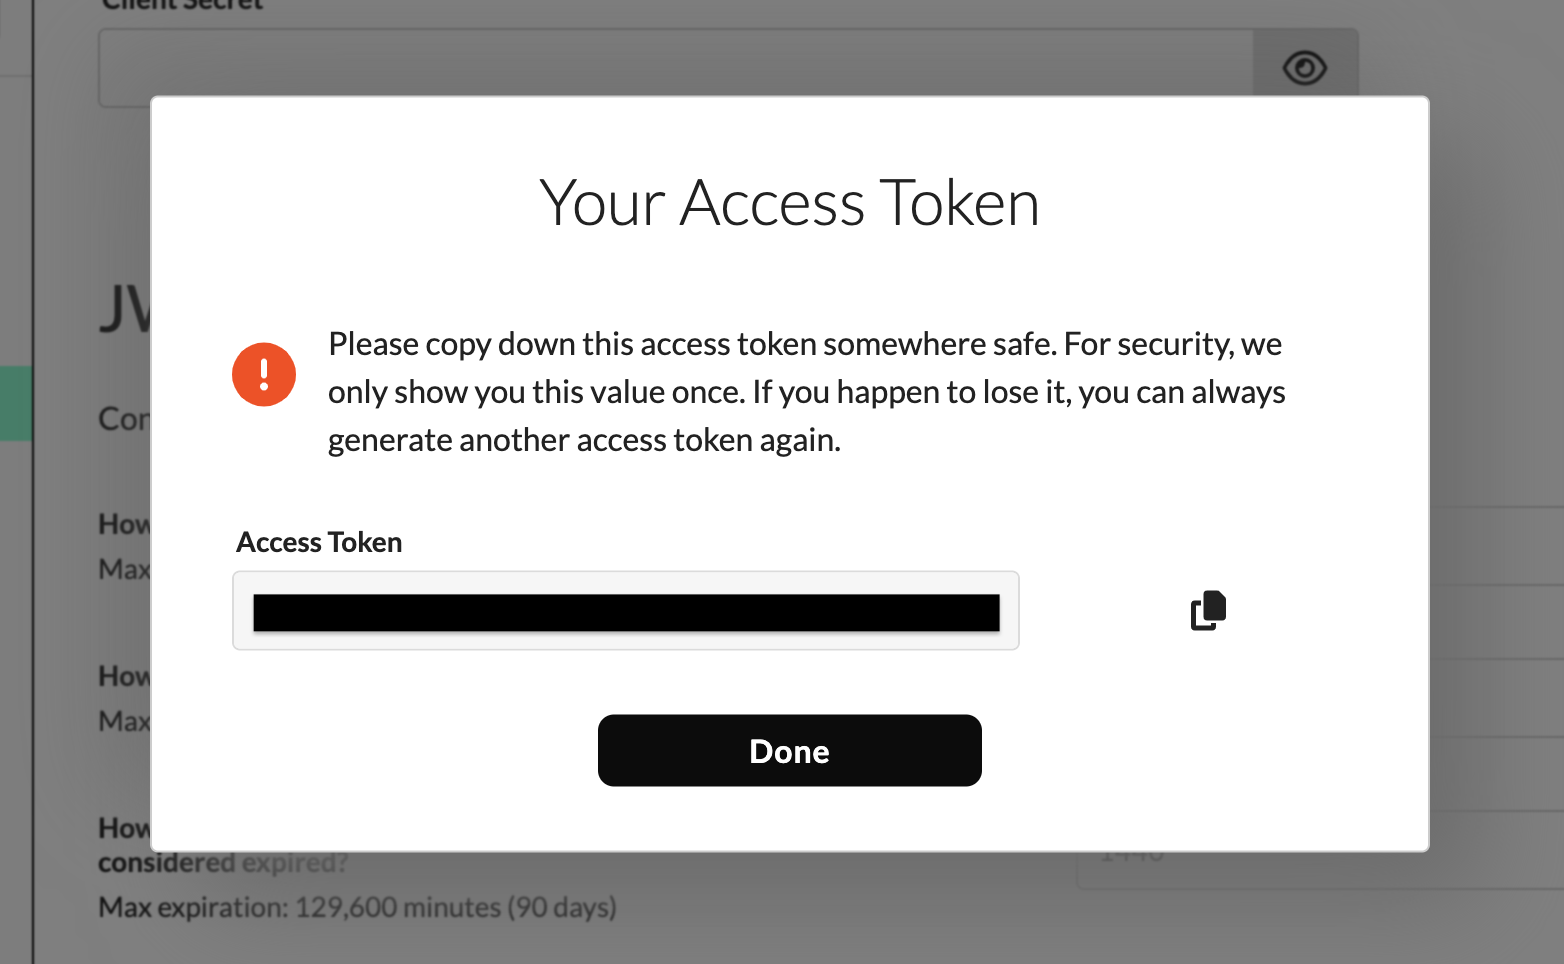
Figure 21: Your Access Token success dialog displaying the generated access token.
Updated 1 day ago