
Apple
Setting Up Sign In With Apple Integration
Learn how to configure Apple social login in Wristband with this step-by-step guide.
Step 1: Locate Your External IdP Callback URL
-
In the Wristband dashboard, enter Application View for the application you want to integrate with Apple.
-
Navigate to the
Identity Providers > Socialmenu in the side navigation. -
After landing on the Social Identity Providers page, select the Apple provider icon.
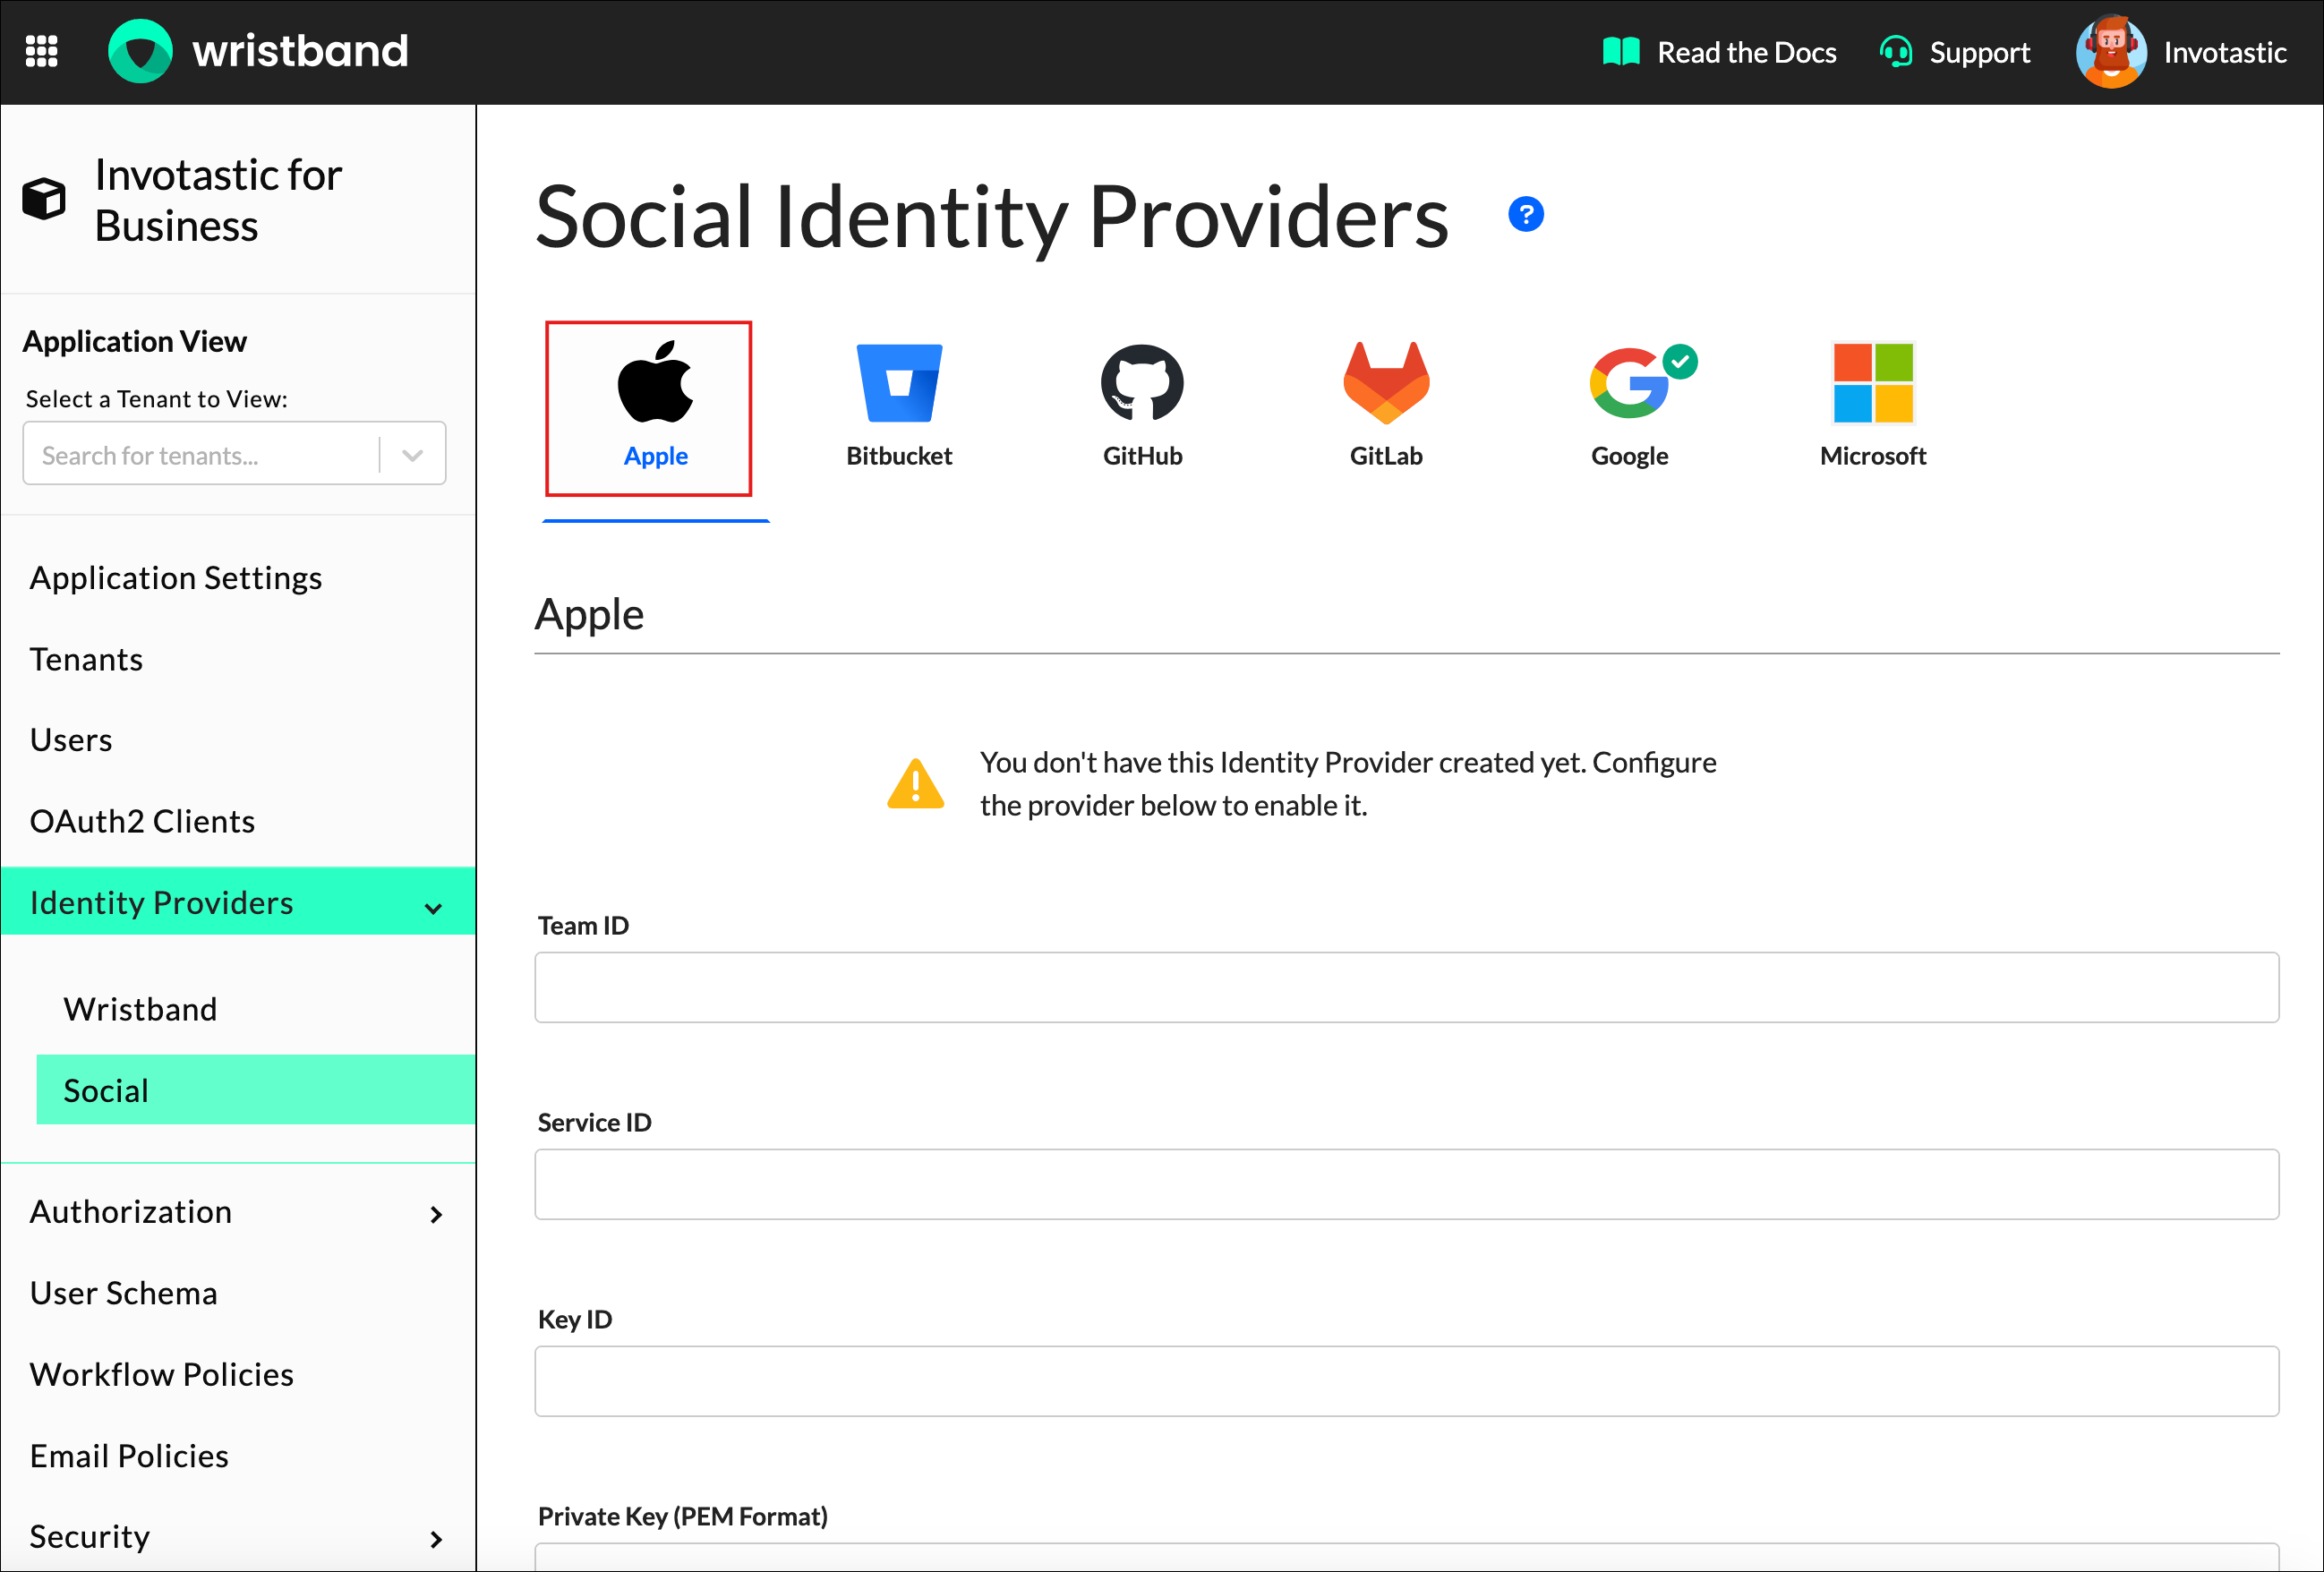
Figure 1: Select Apple on the Social Identity Providers page.
- Copy the Redirect URL from the form.

Figure 2: Copy the Wristband Redirect URL for the Apple provider.
Step 2: Sign Up/Login to Your Apple Developer Account
Create or log in to your Apple Developer account here. You will need to create and configure three entities:
- An App Identifier
- A Service Identifier
- A Sign In With Apple Key
Step 3: Register An App Identifier
- From the Developer Console home page, click on Identifiers.
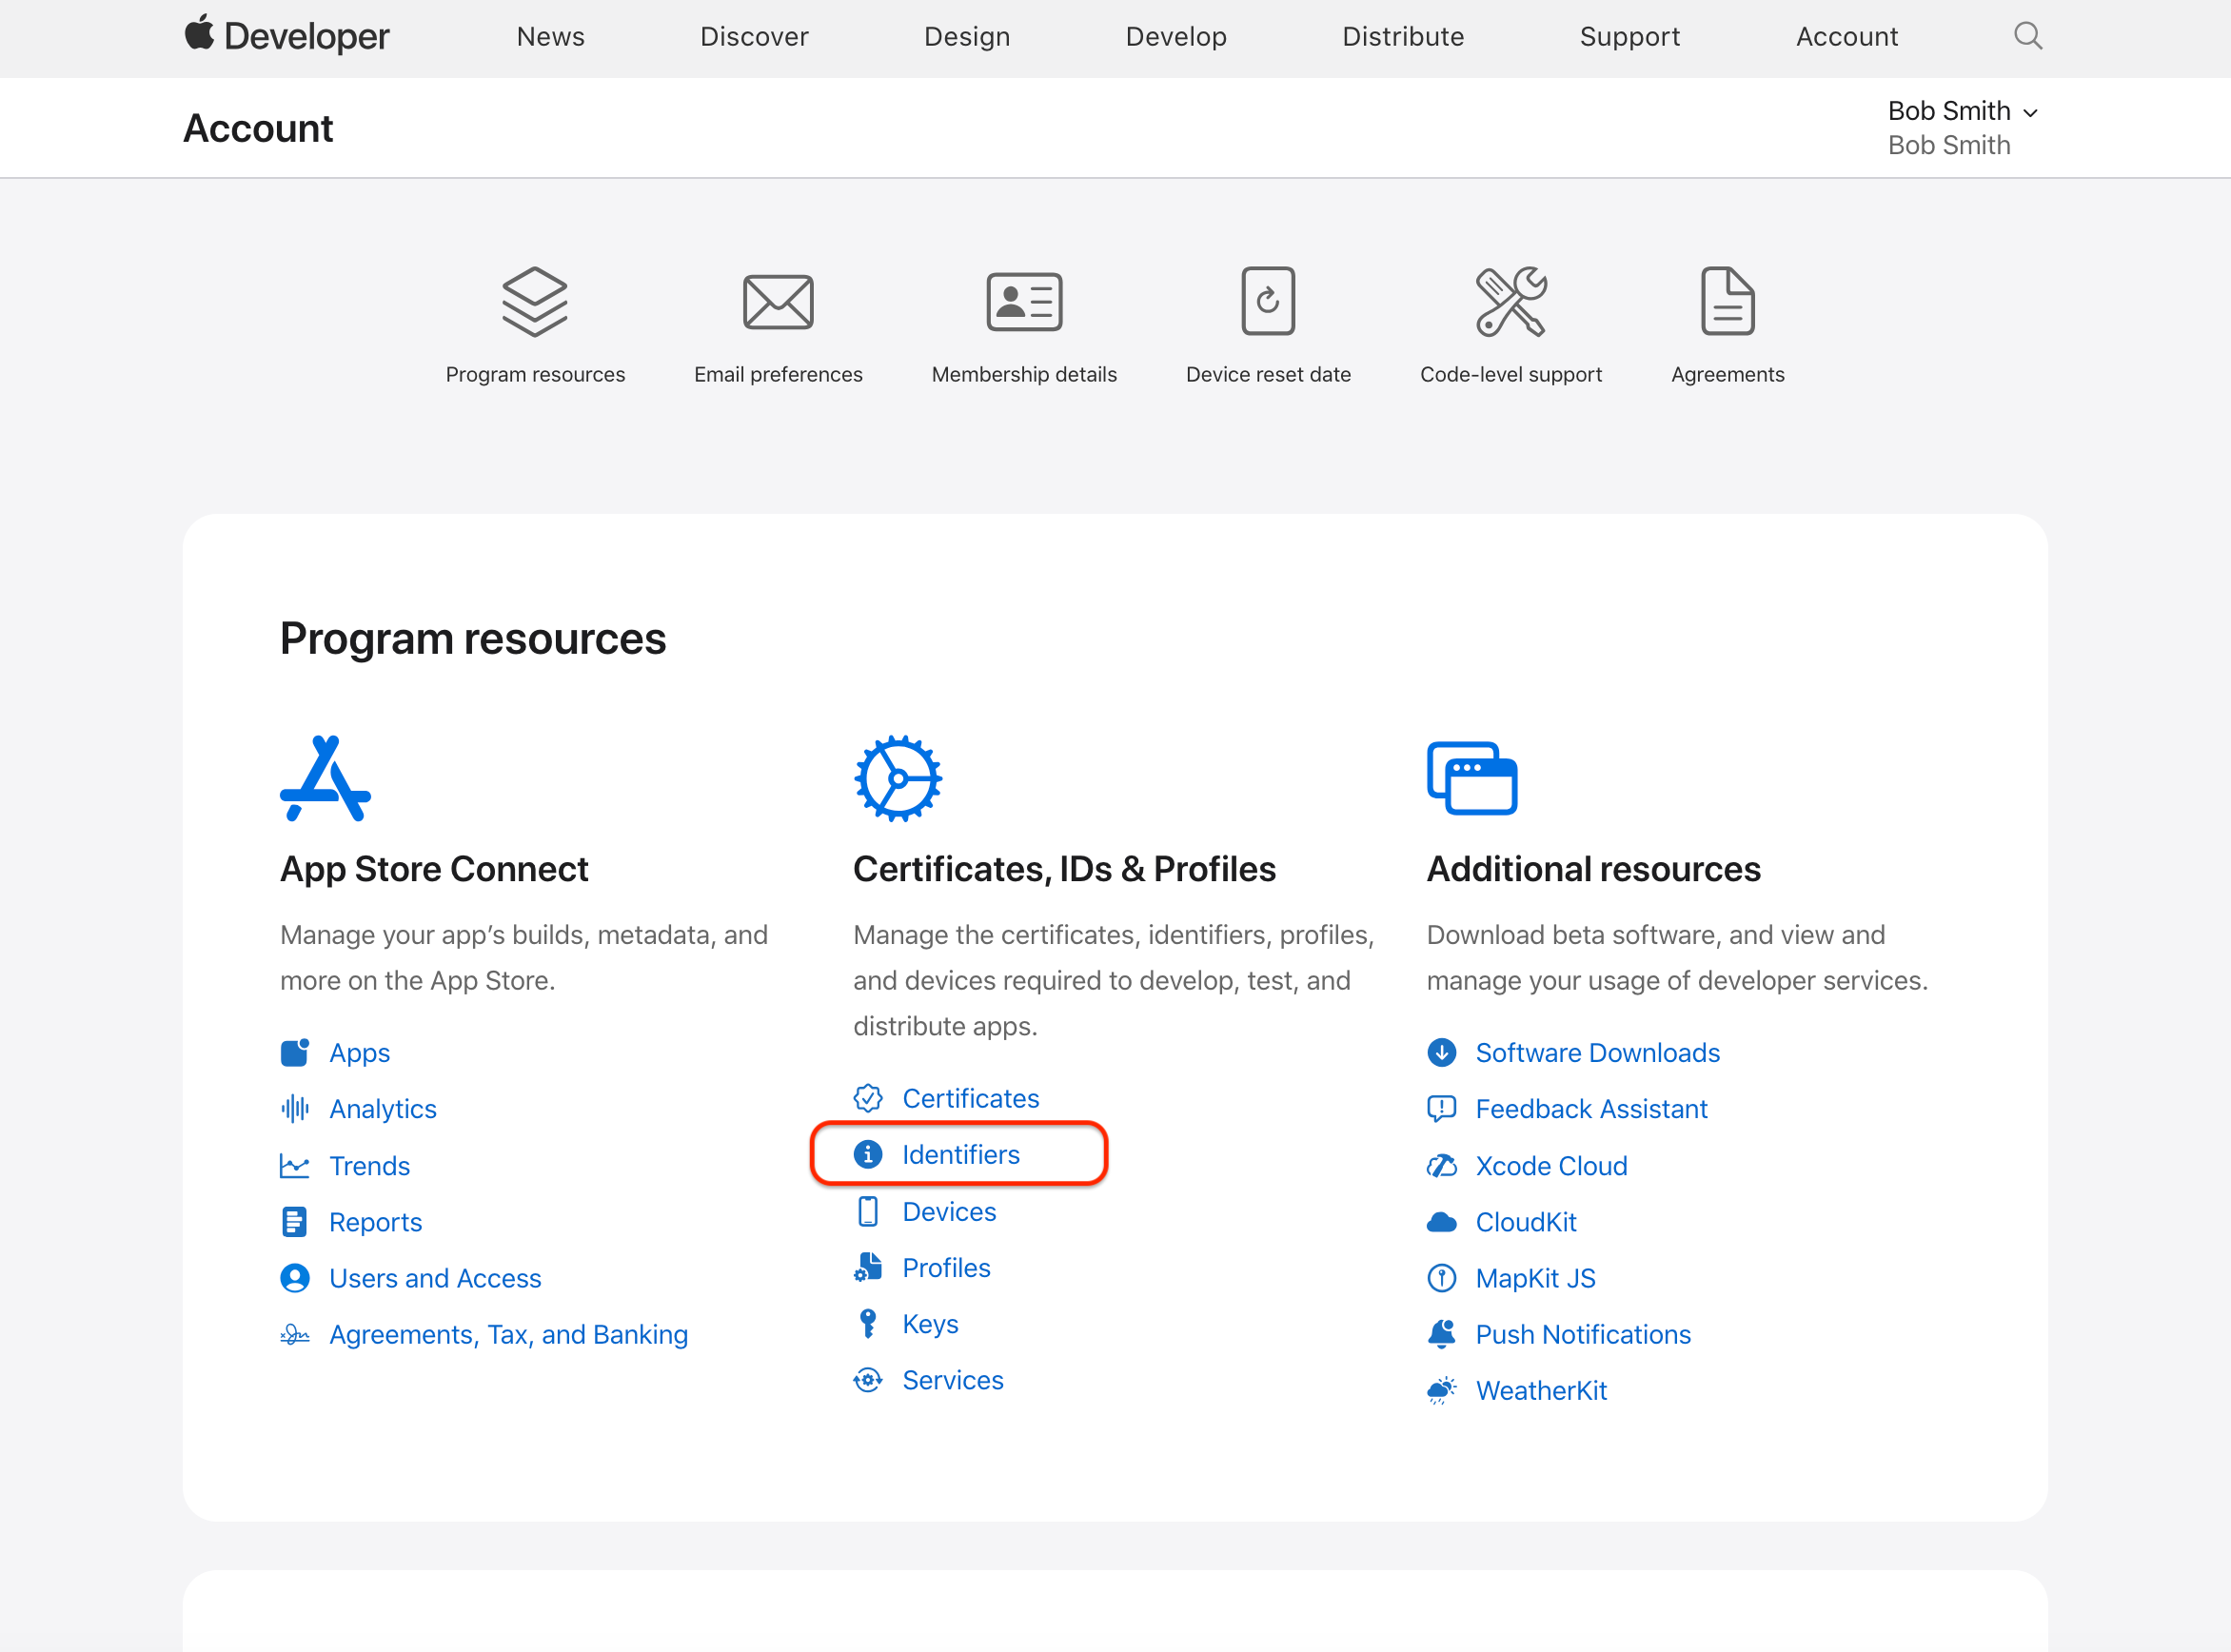
Figure 3: Open Identifiers in the Apple Developer console.
- Click the Identifiers + to start the registration process.
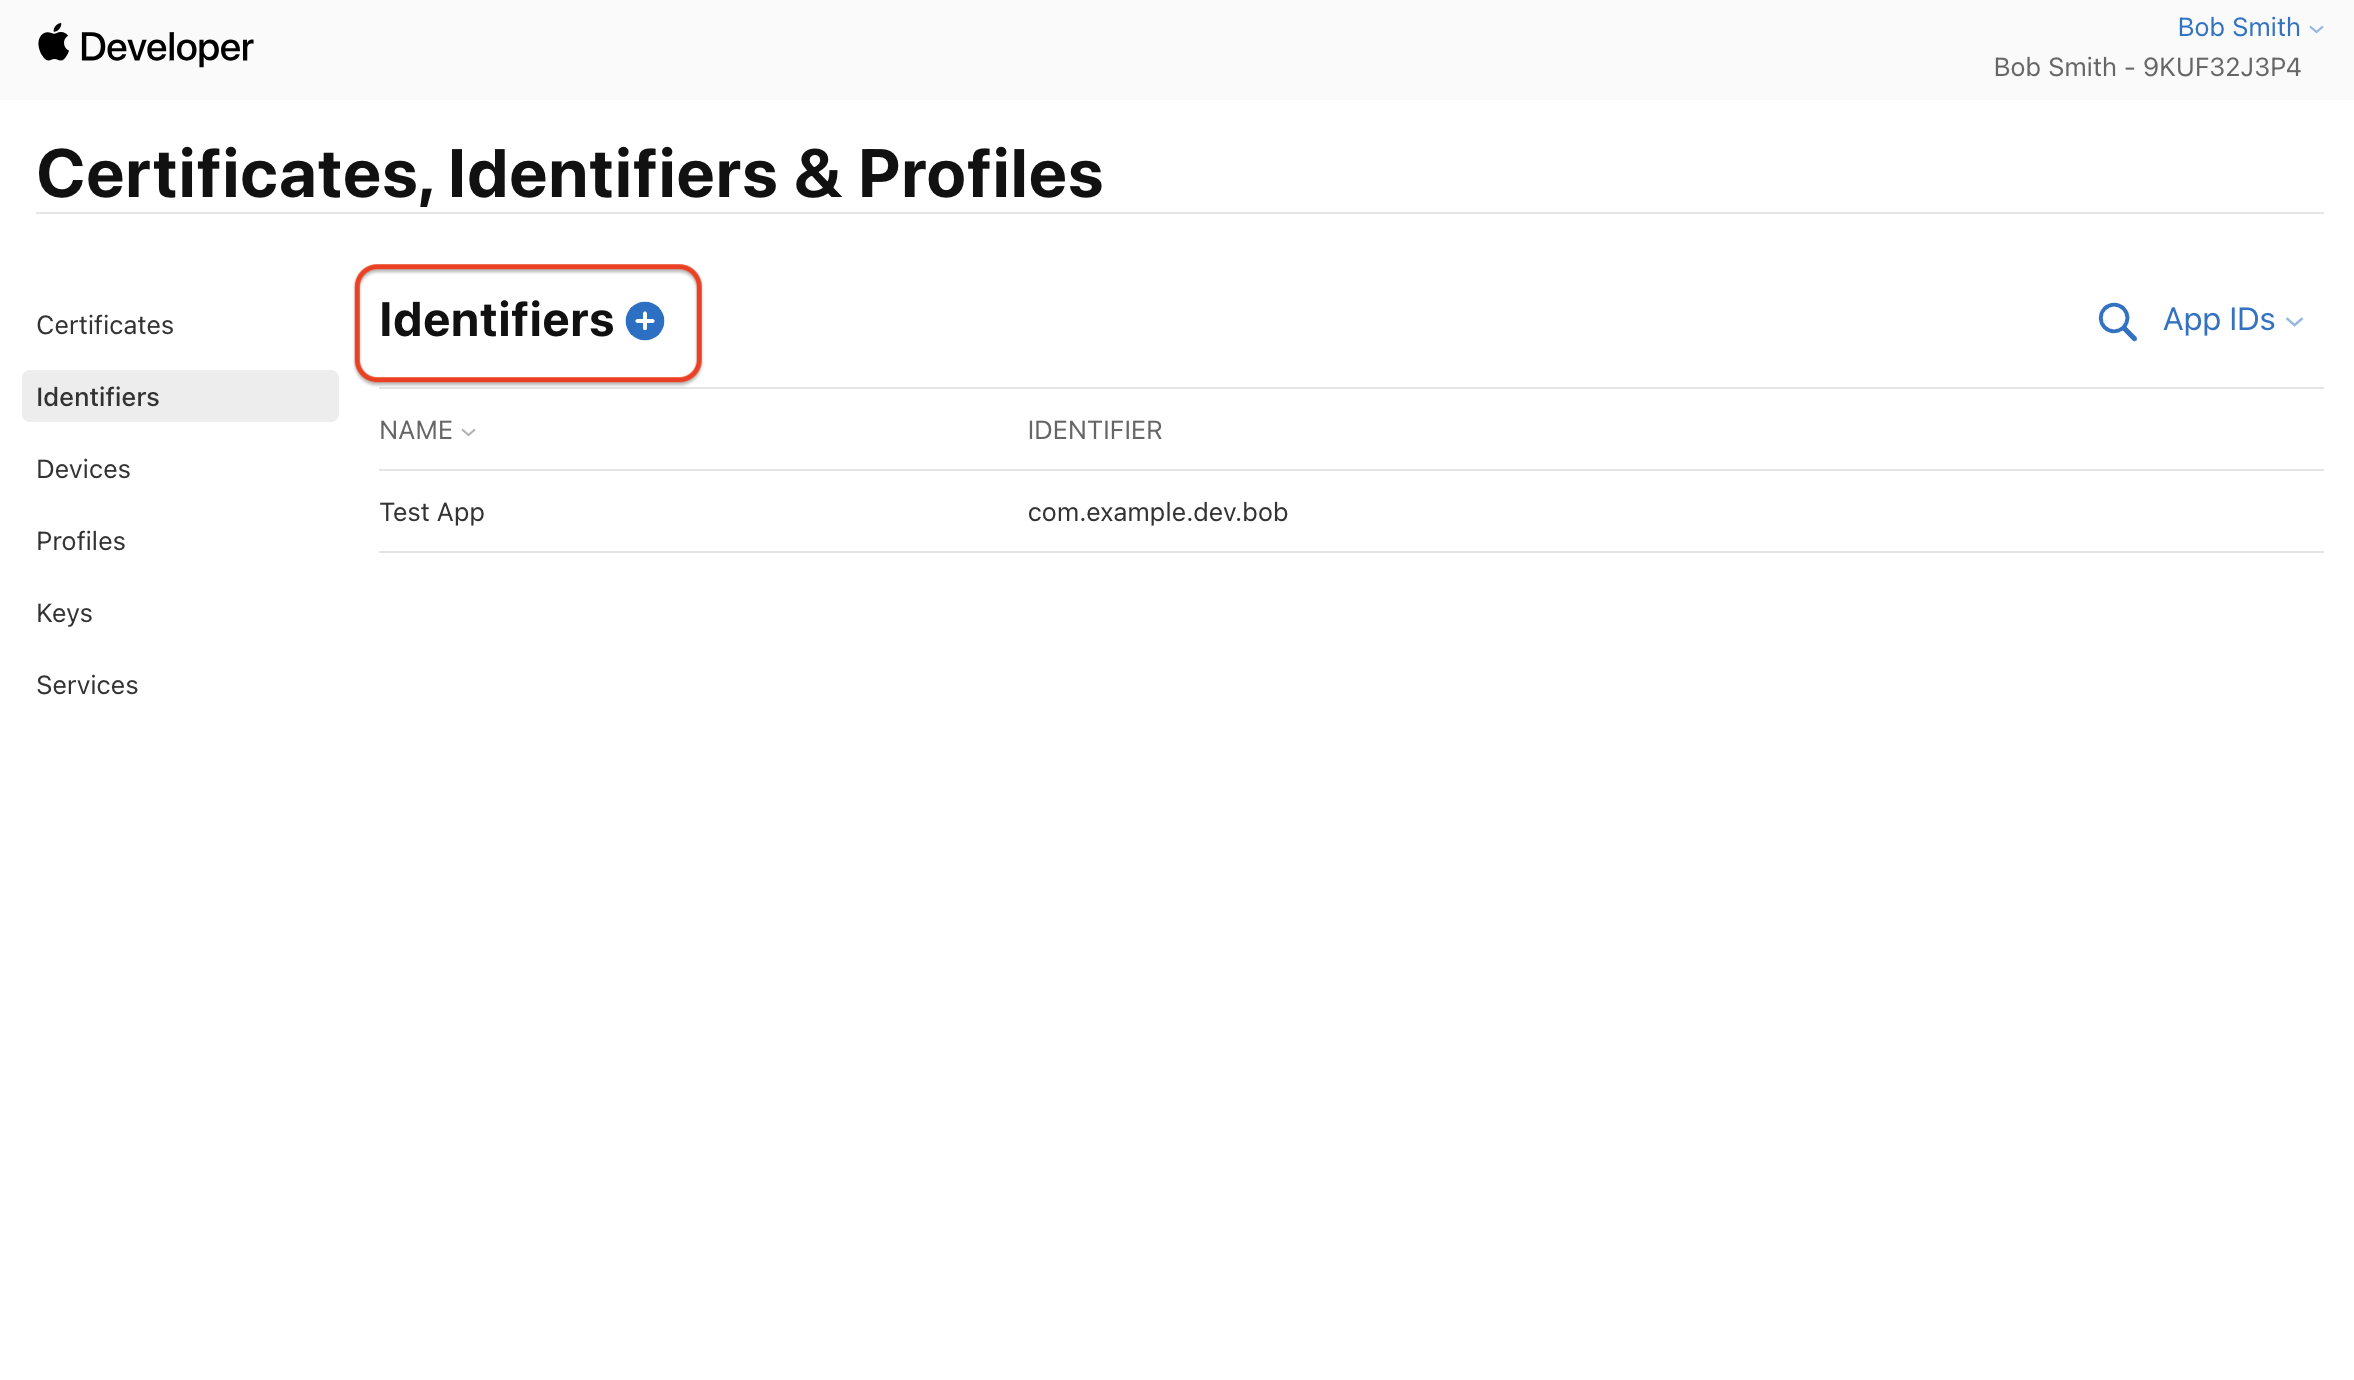
Figure 4: Start registering a new identifier.
- Select App IDs and click Continue.
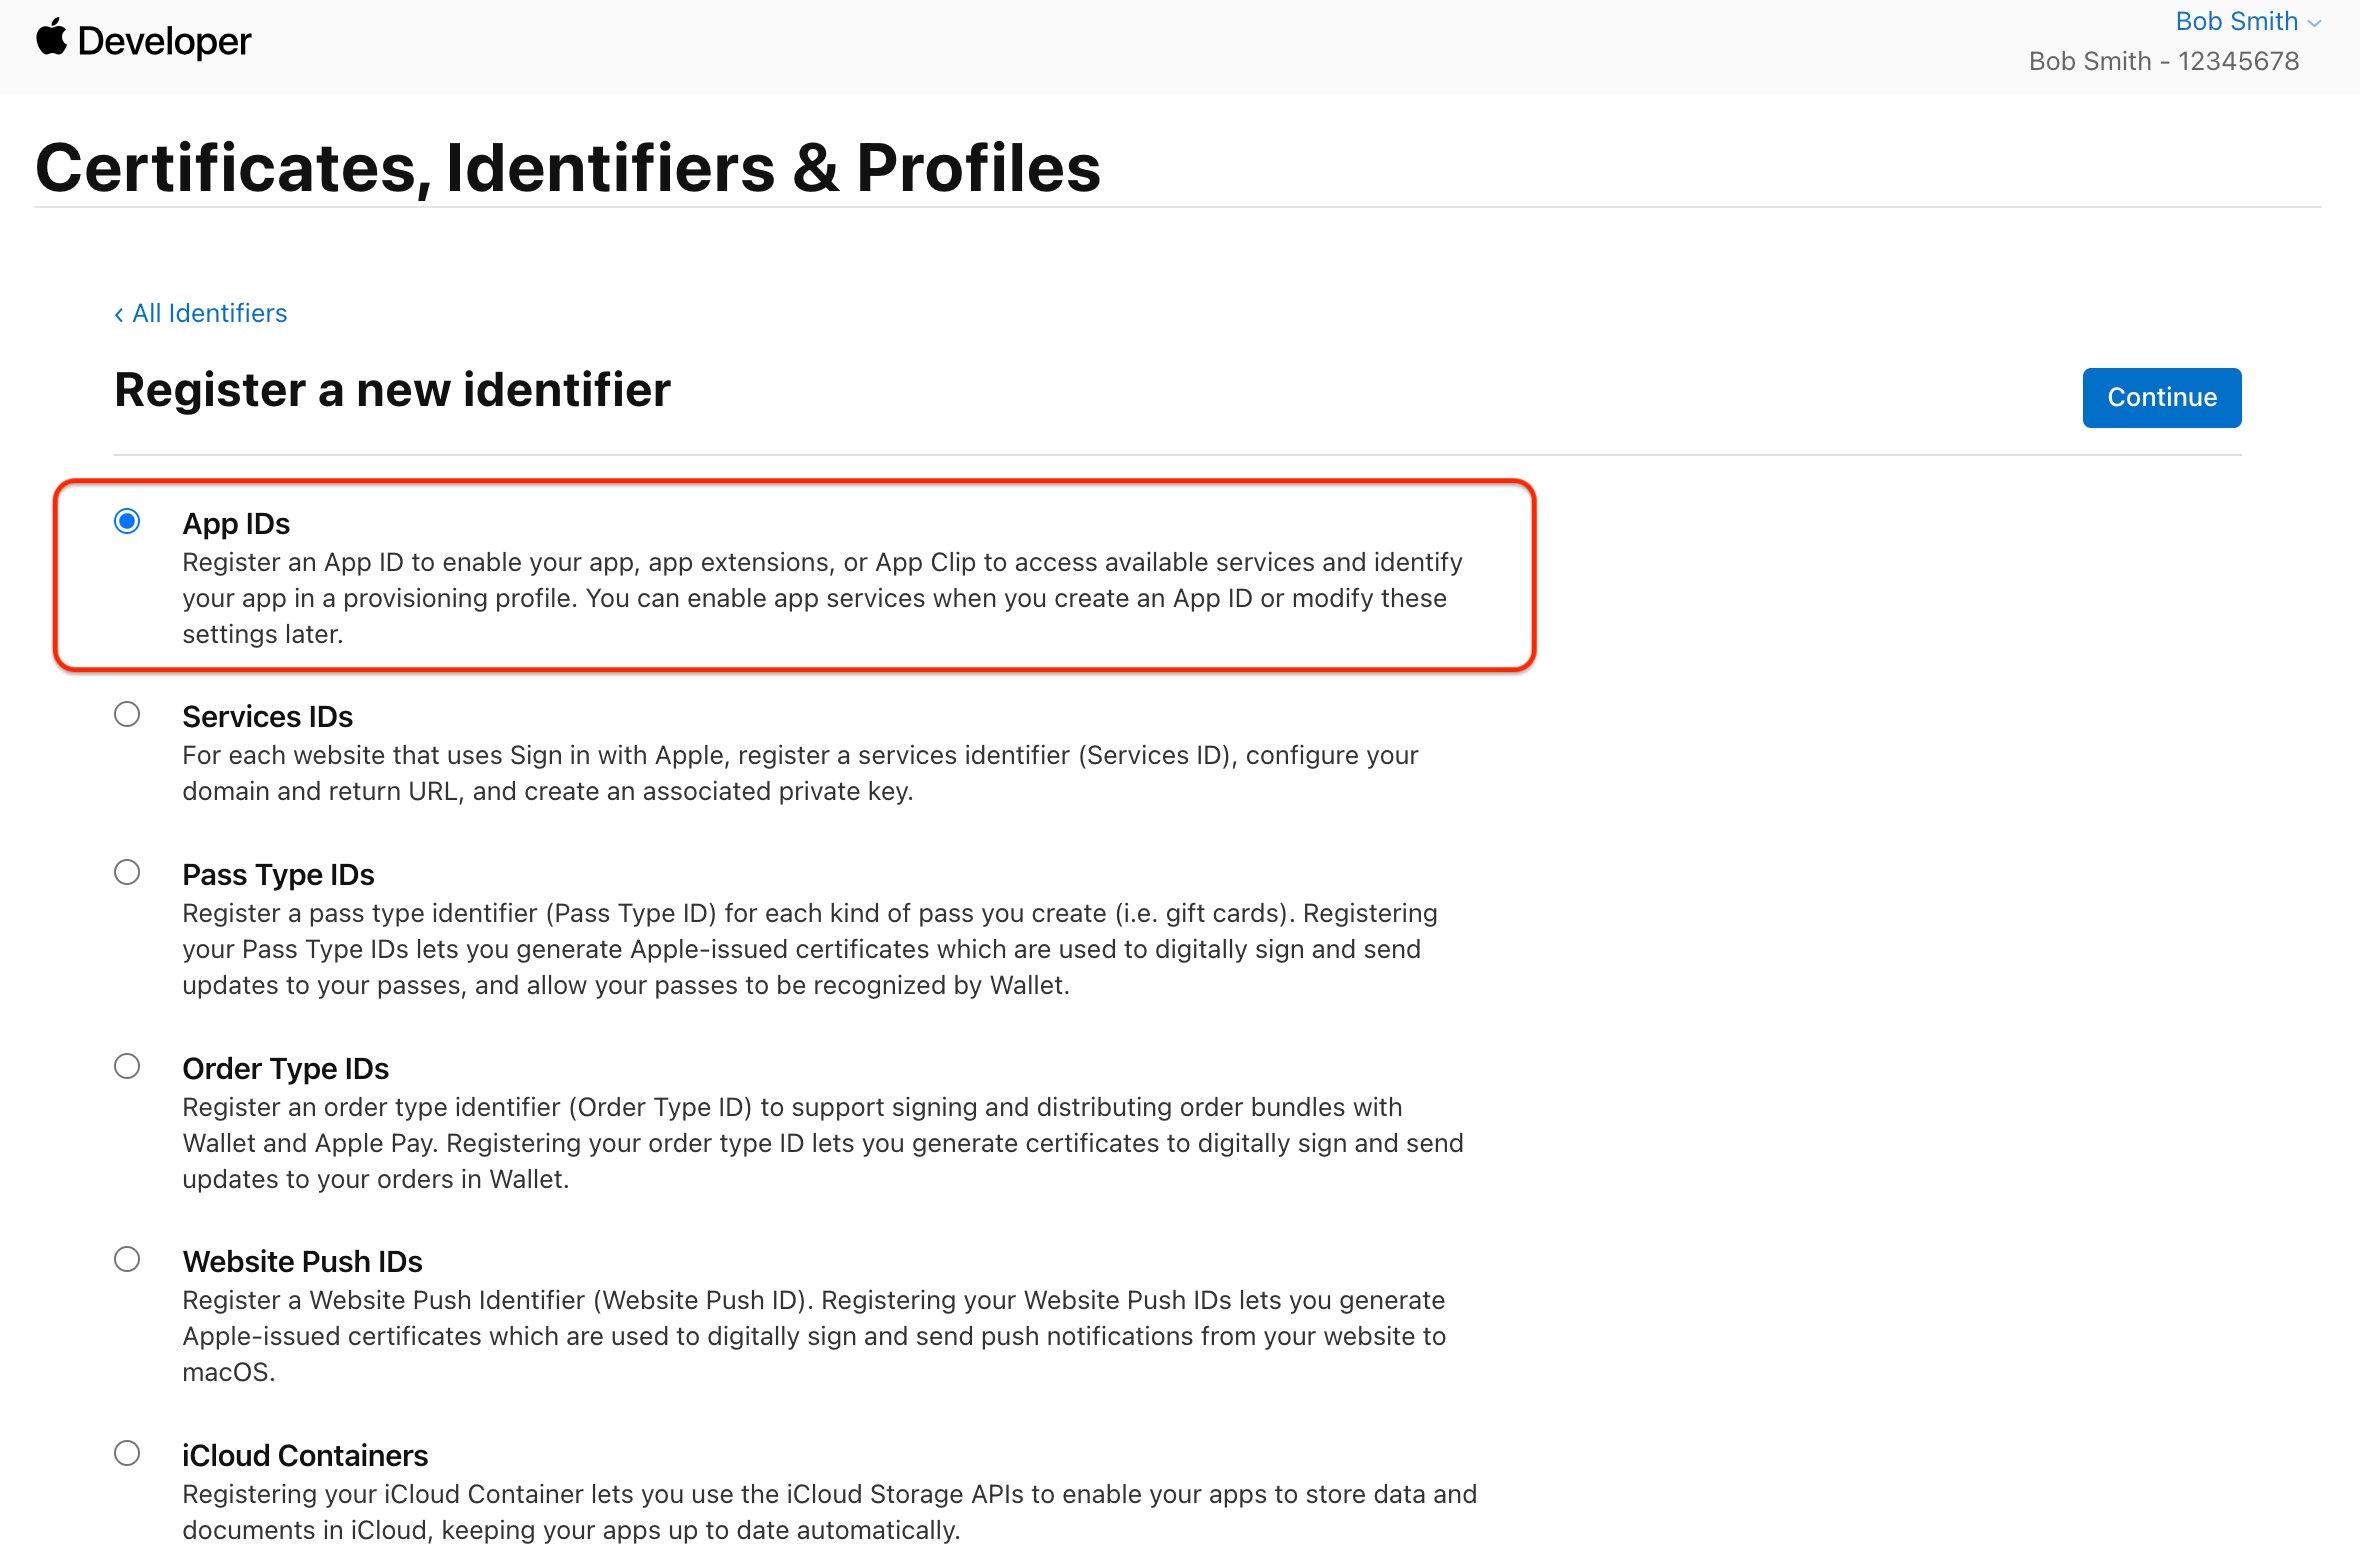
Figure 5: Select App IDs as the identifier type.
- Select App for the type of identifier.
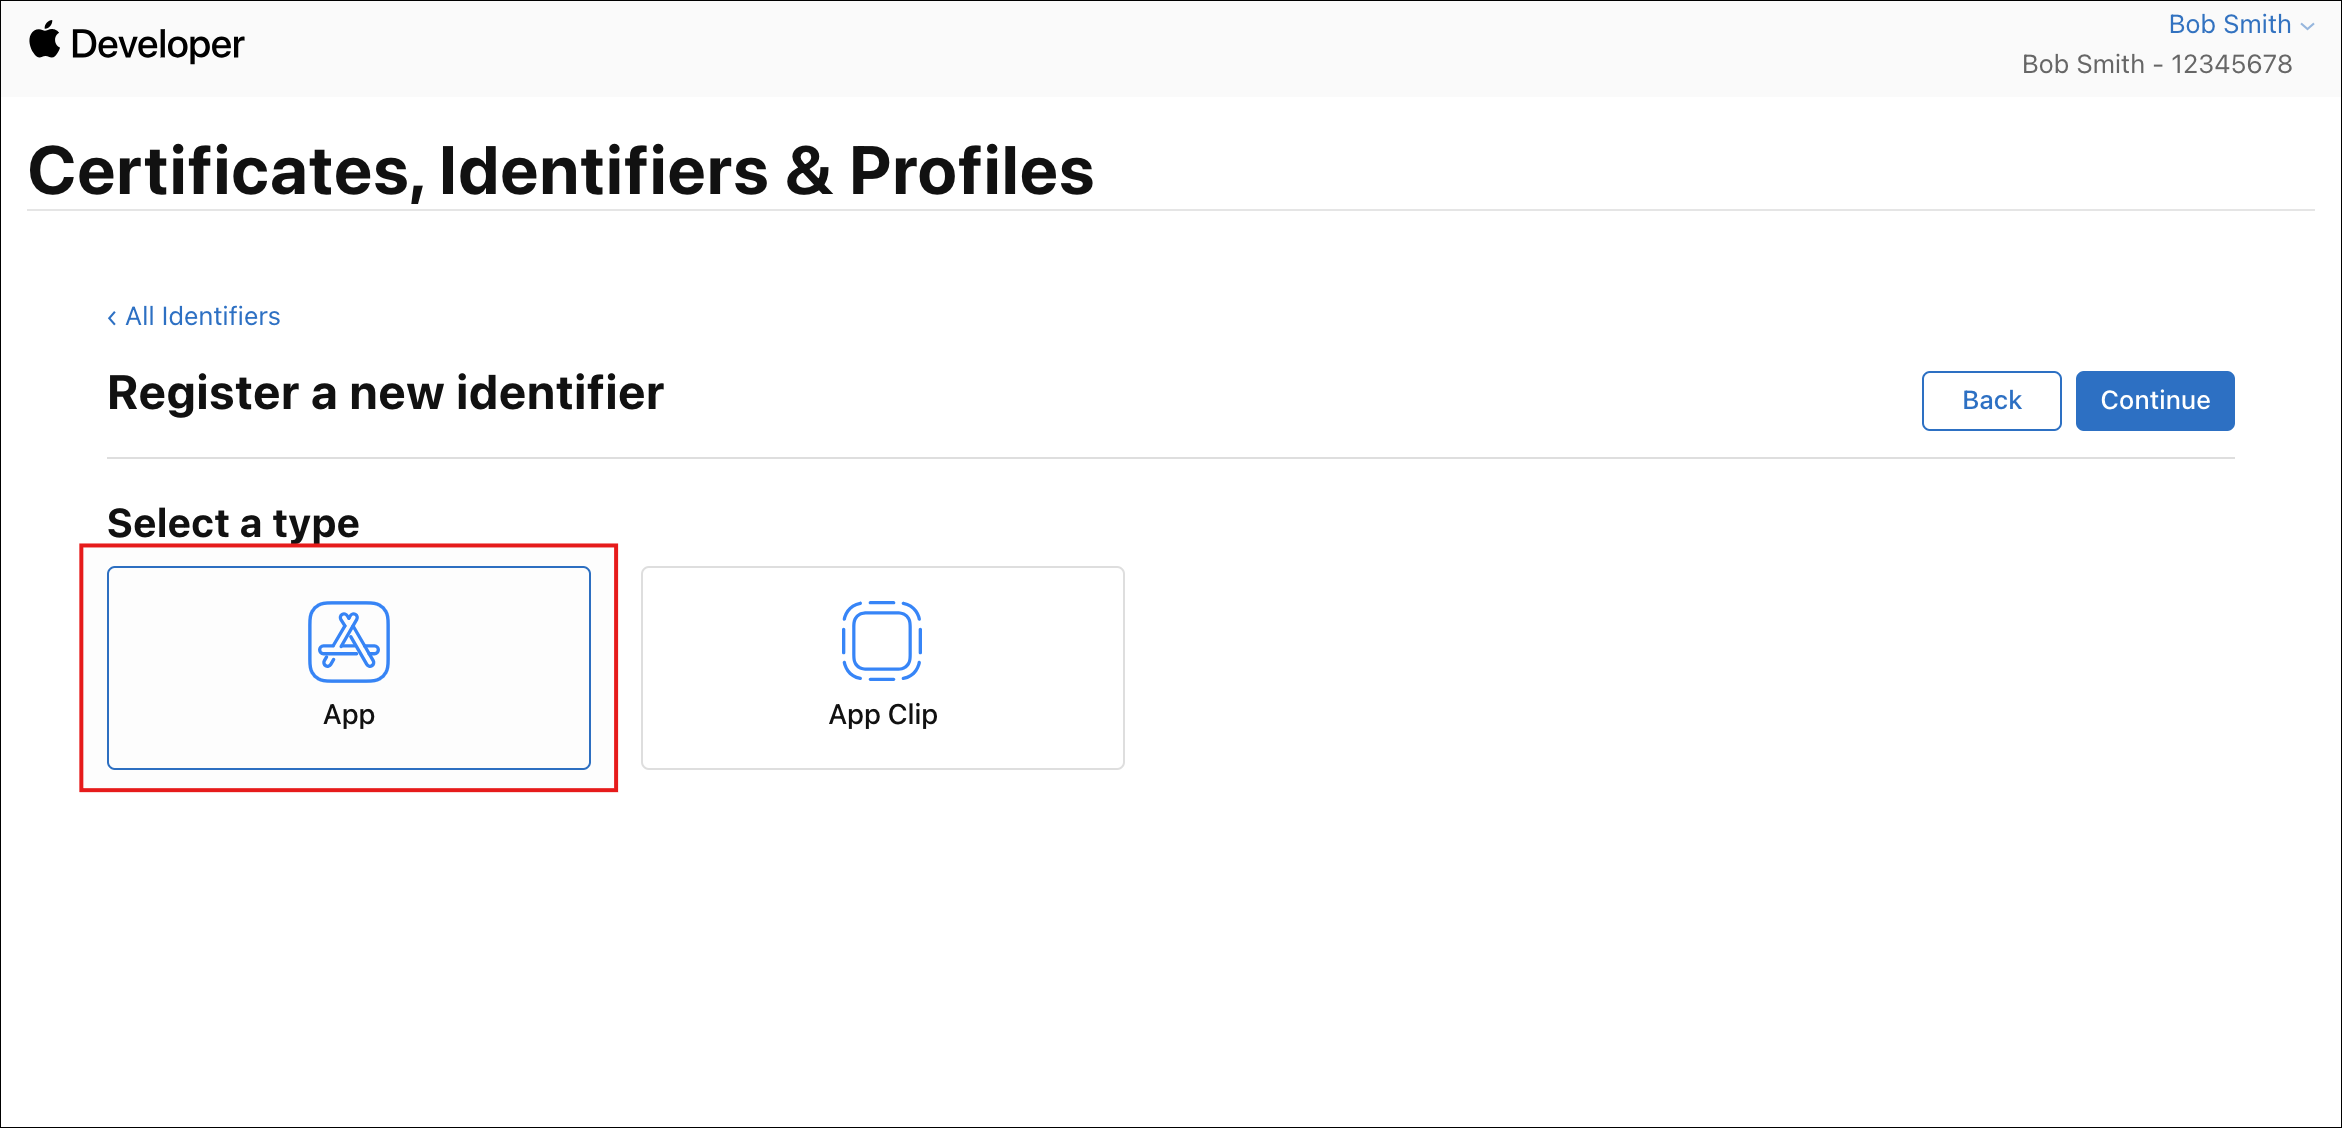
Figure 6: Select App as the App ID type.
- Description: Any appropriate value.
- Bundle ID: Select Explicit. Any appropriate value, usually the reverse domain of your application.
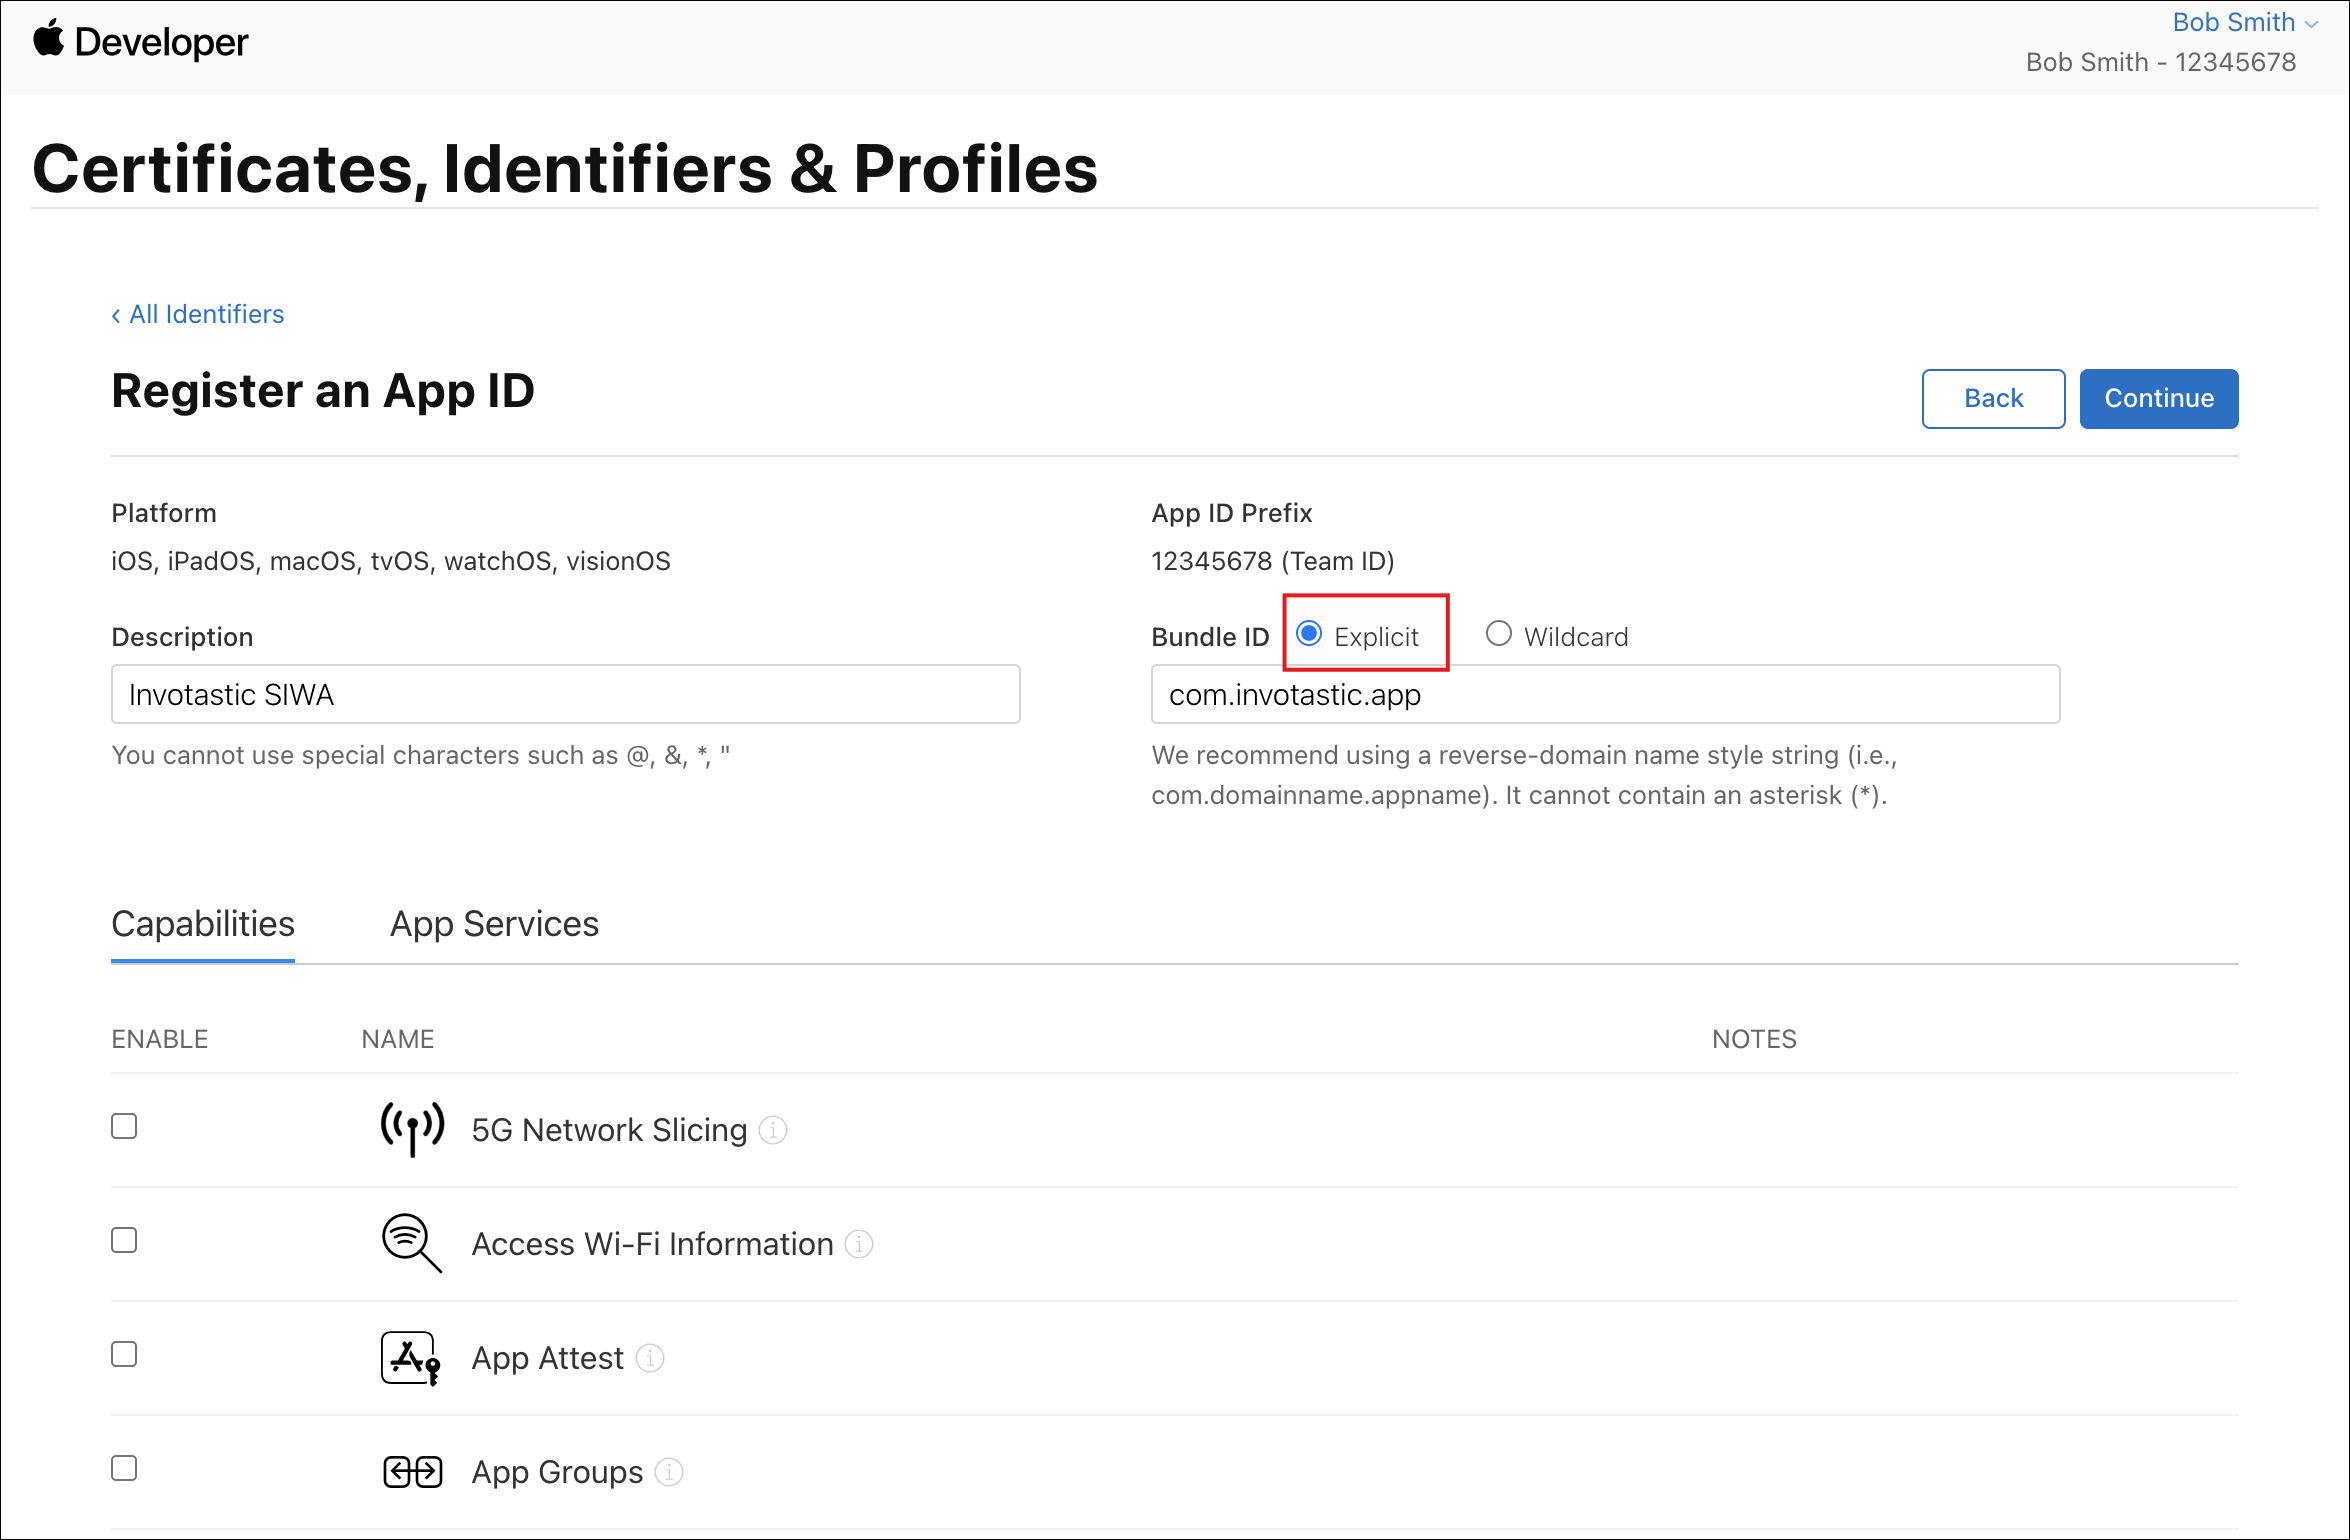
Figure 7: Enter the App ID description and explicit bundle ID.
- Select the Sign In with Apple checkbox. Click Continue. Additional configuration is optional.
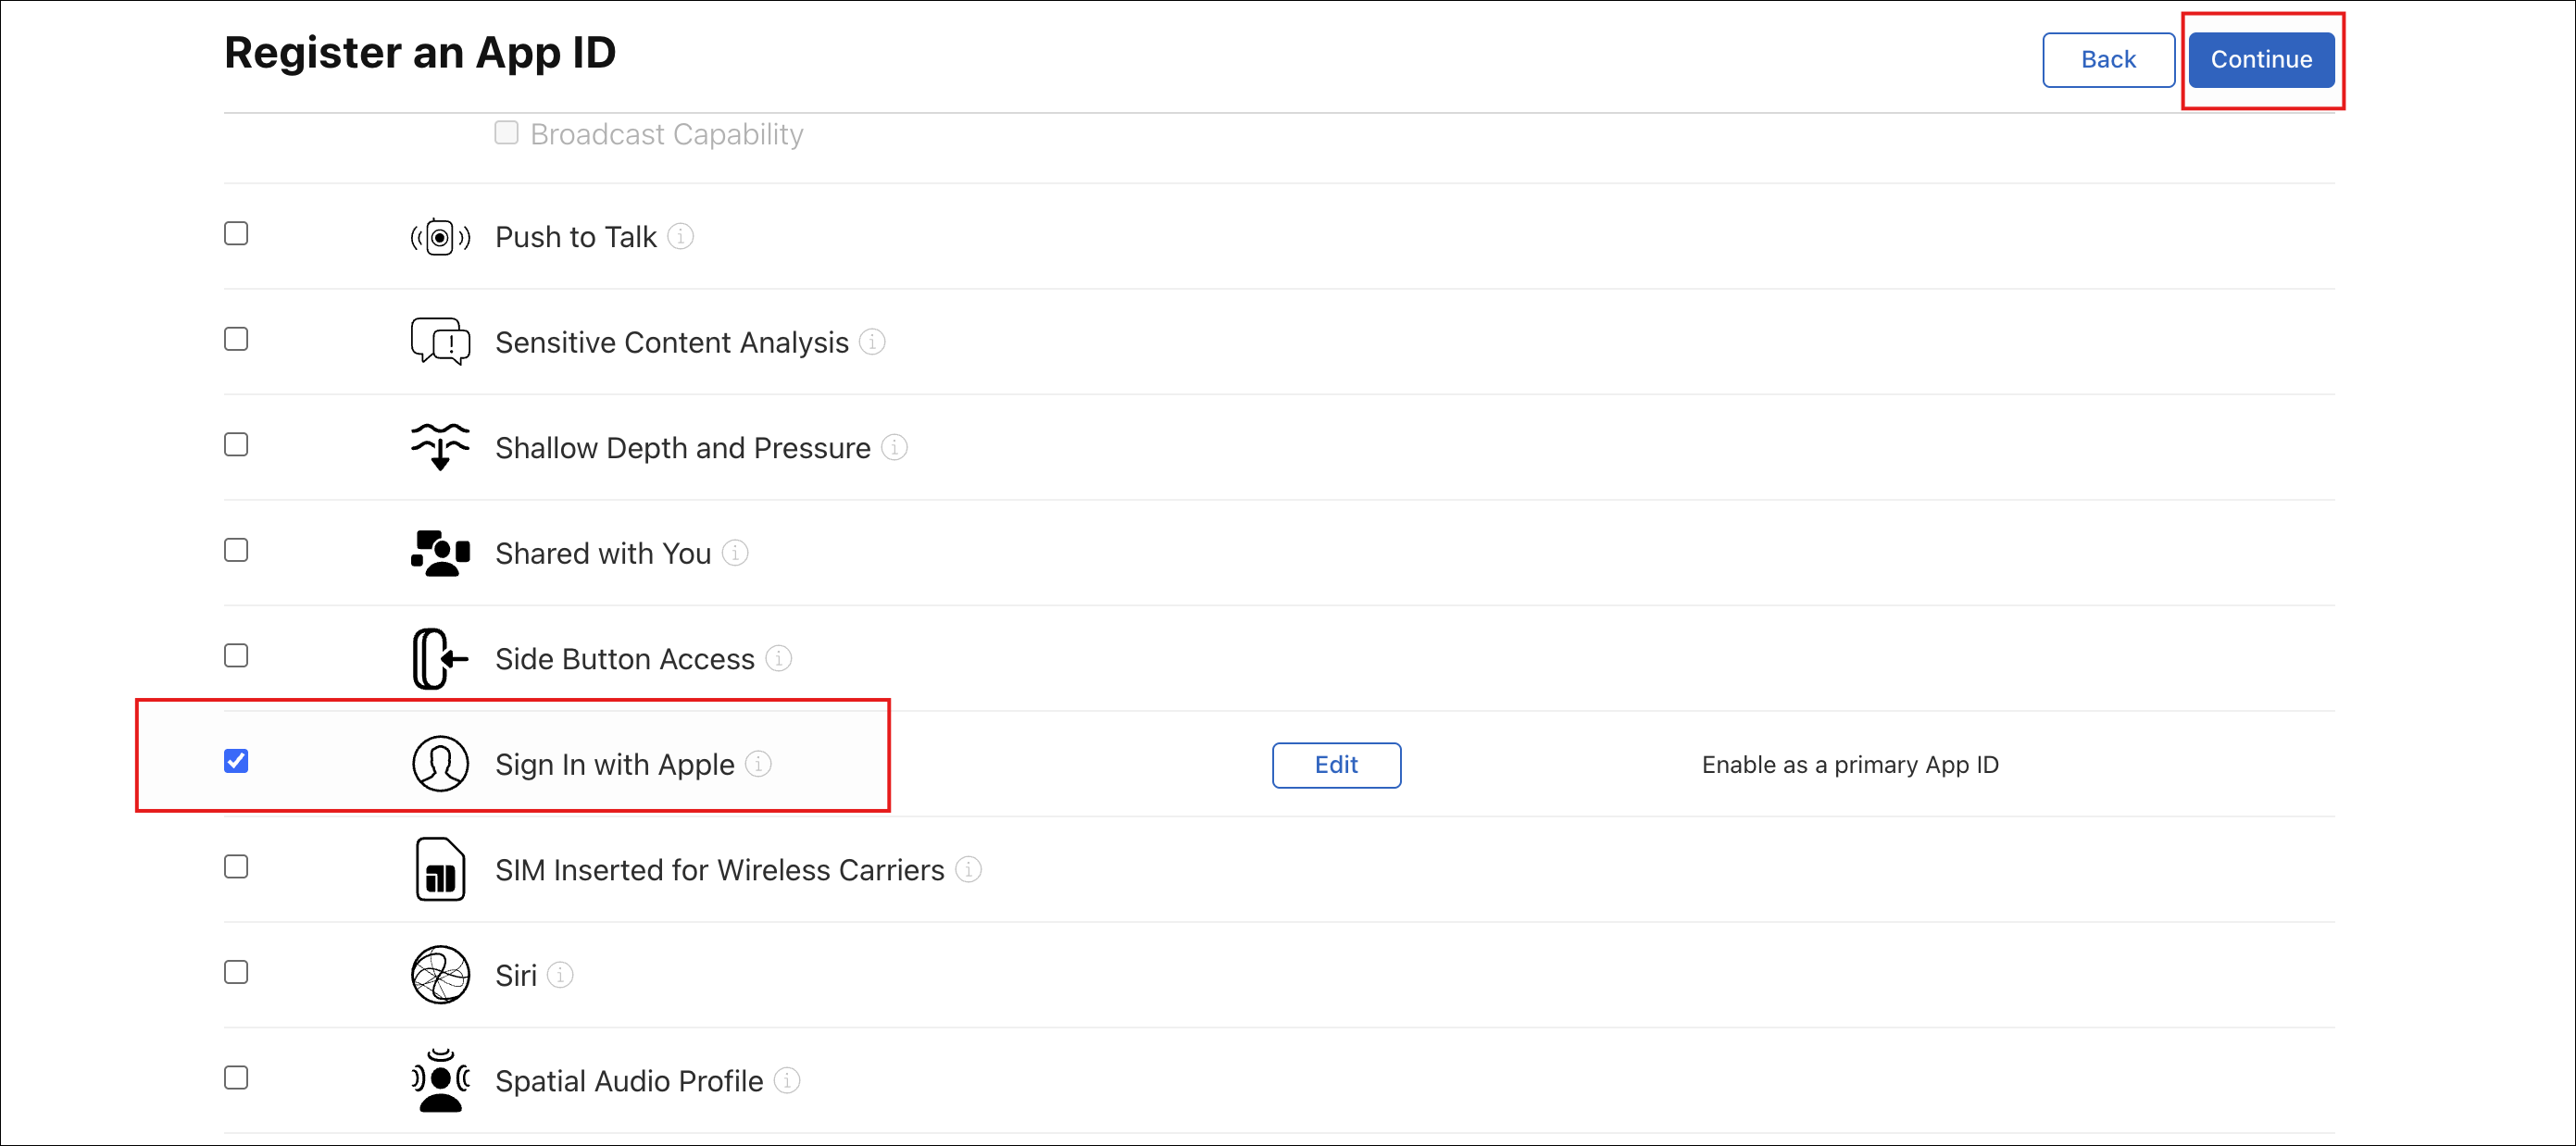
Figure 8: Enable Sign In with Apple for the App ID.
- Copy the App ID Prefix (Team ID) value.
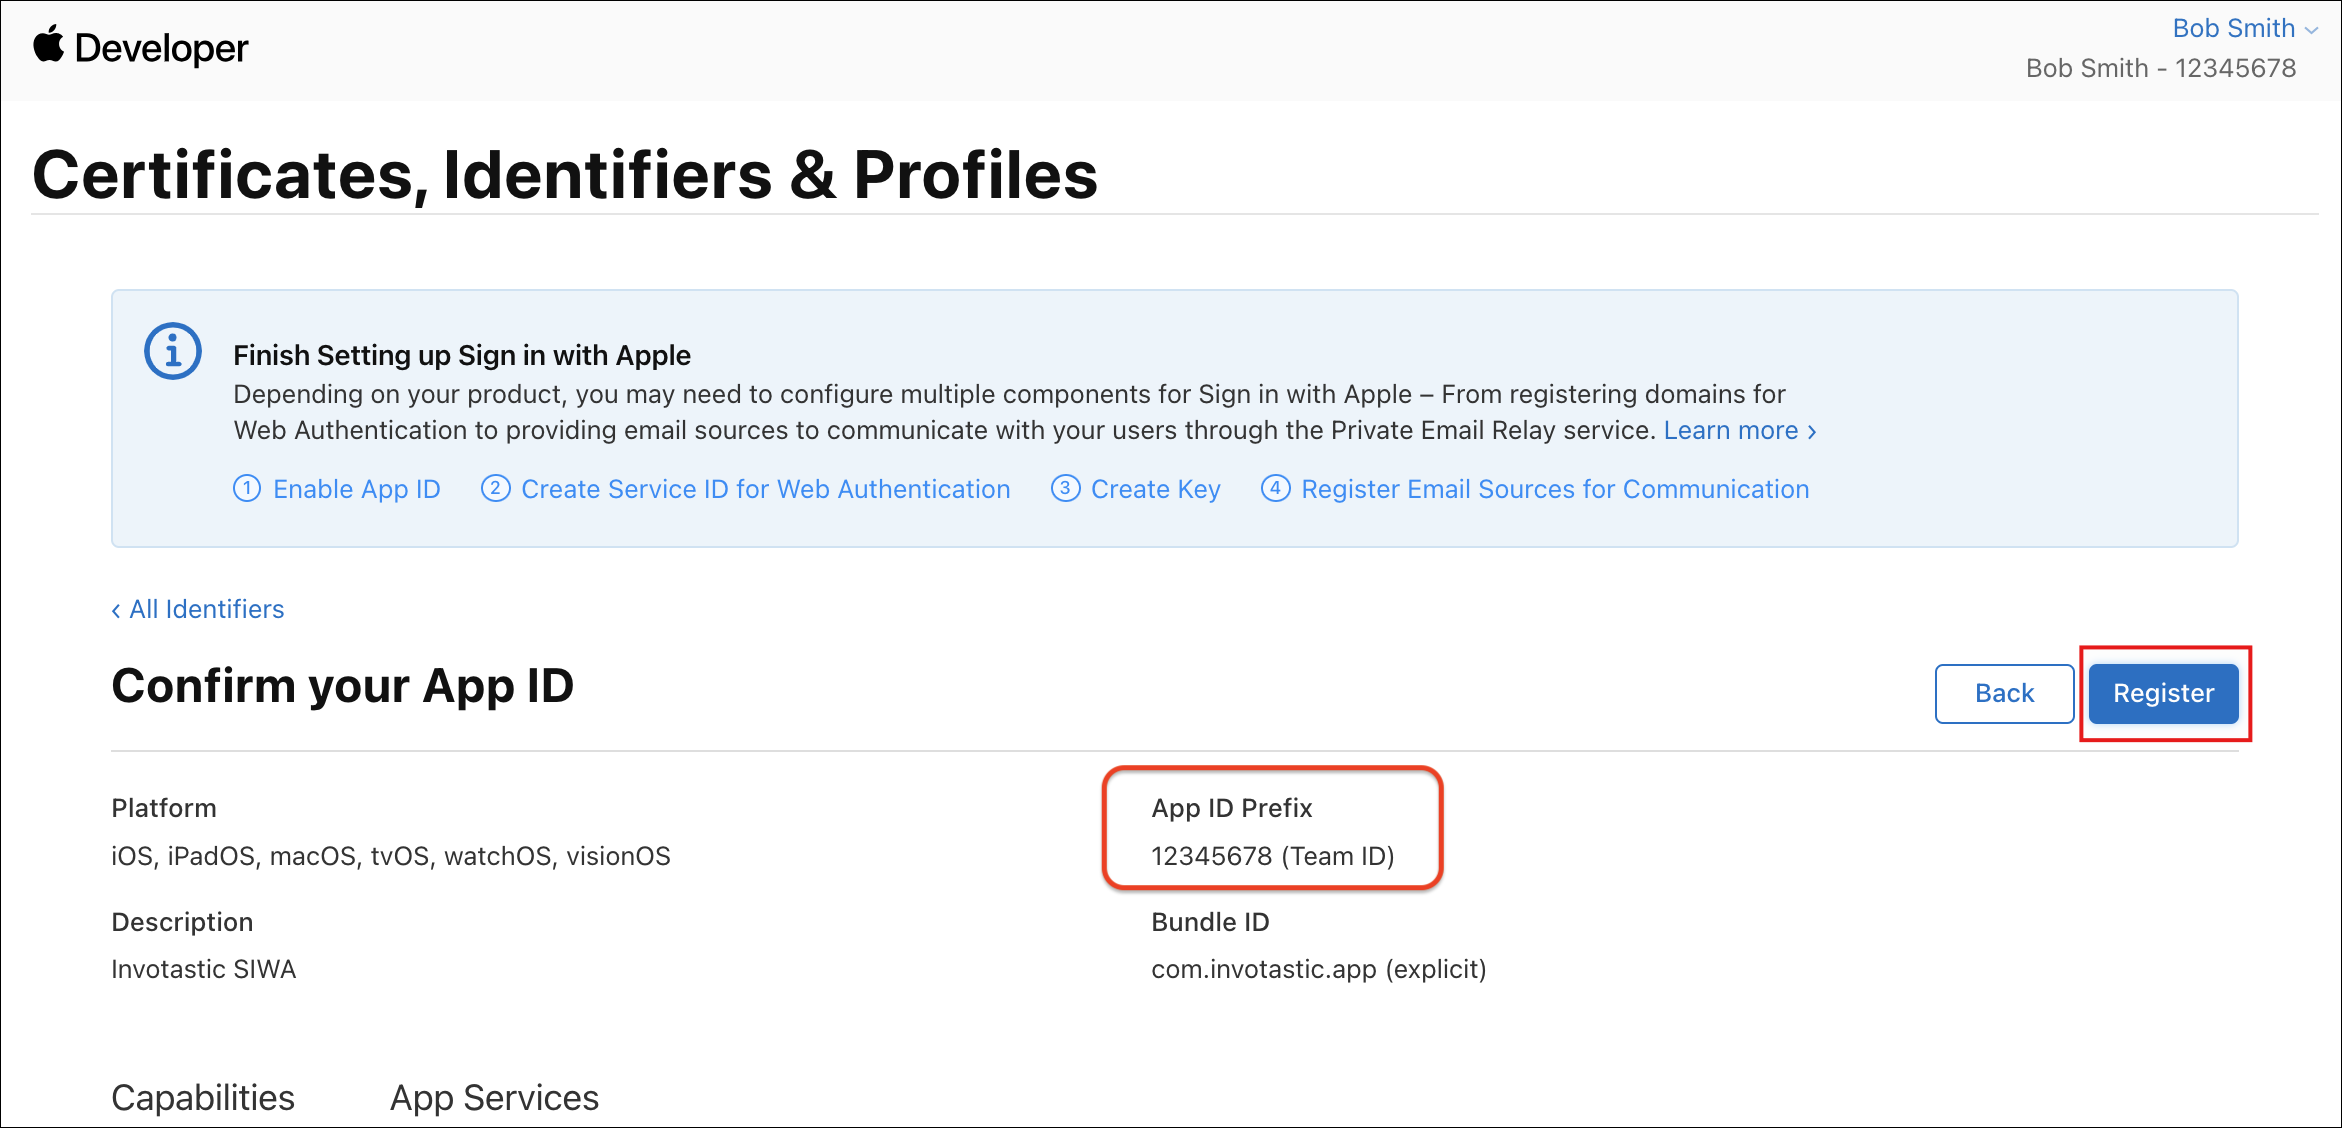
Figure 9: Copy the App ID Prefix (Team ID).
- Click Register to complete the App Identifier registration.
Step 4: Register A Service Identifier
- Click the Identifiers+ button on the Certificates, Identifiers, & Profiles page.

Figure 10: Start registering a Service Identifier.
- Select Service IDs and click Continue.
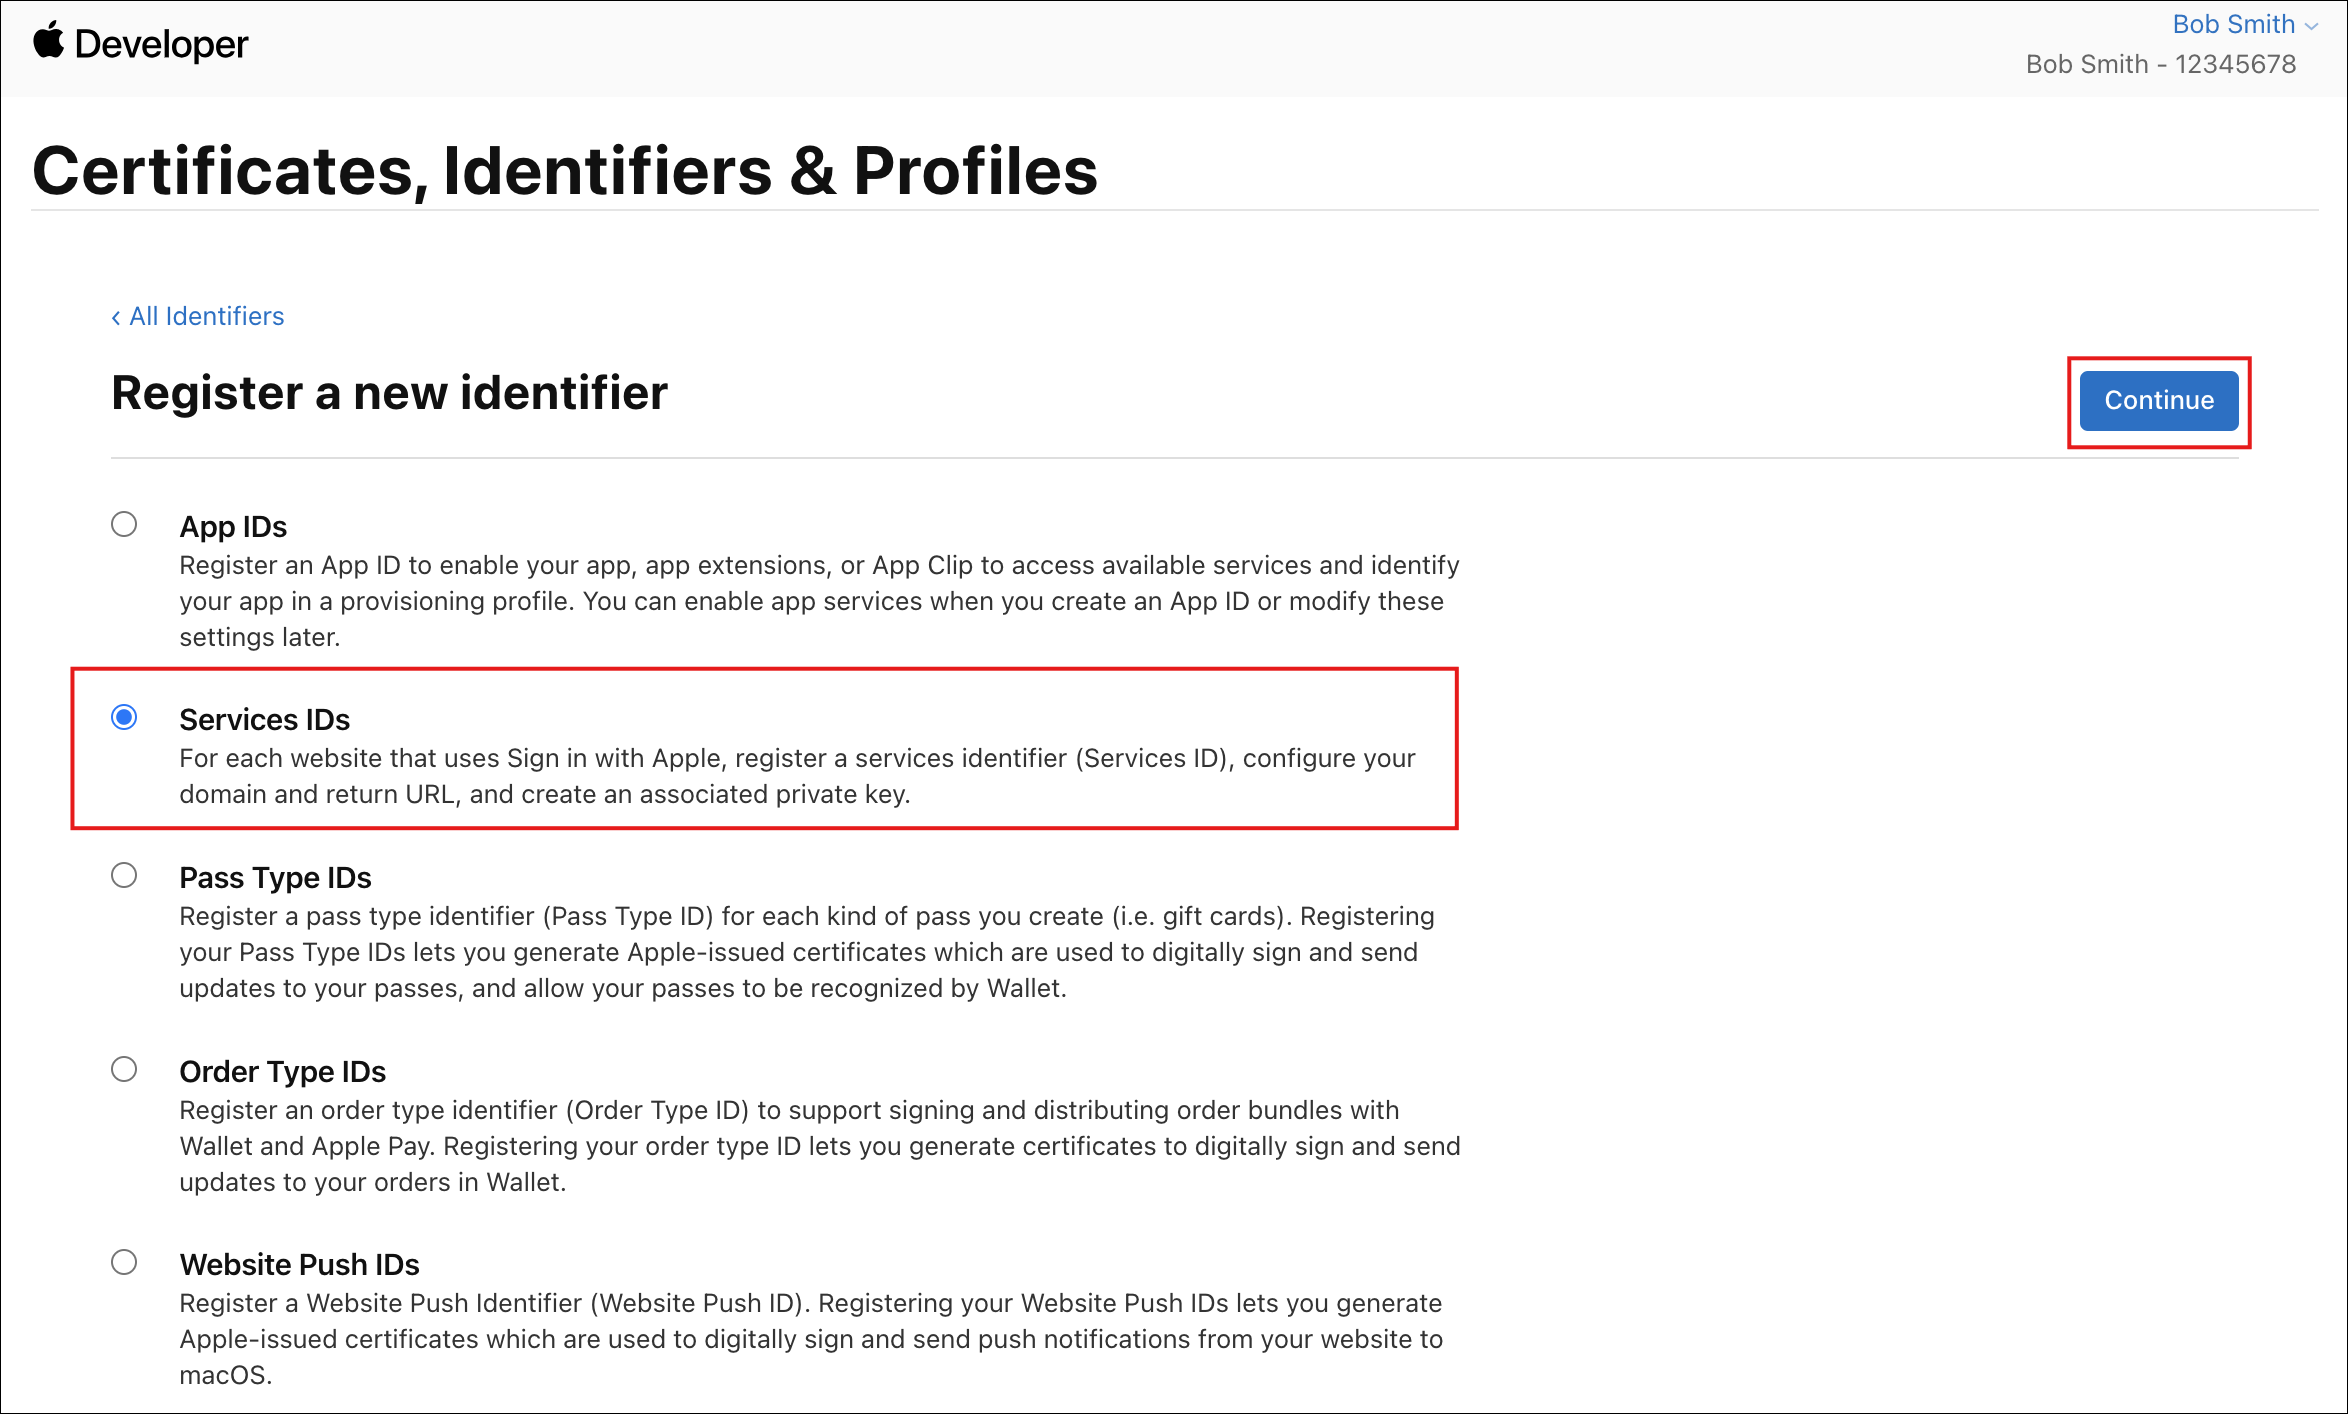
Figure 11: Select Service IDs as the identifier type.
- Fill out the form:
- Description: Any appropriate value.
- Identifier: Any appropriate value, usually the reverse domain of your application.
- Click Continue.
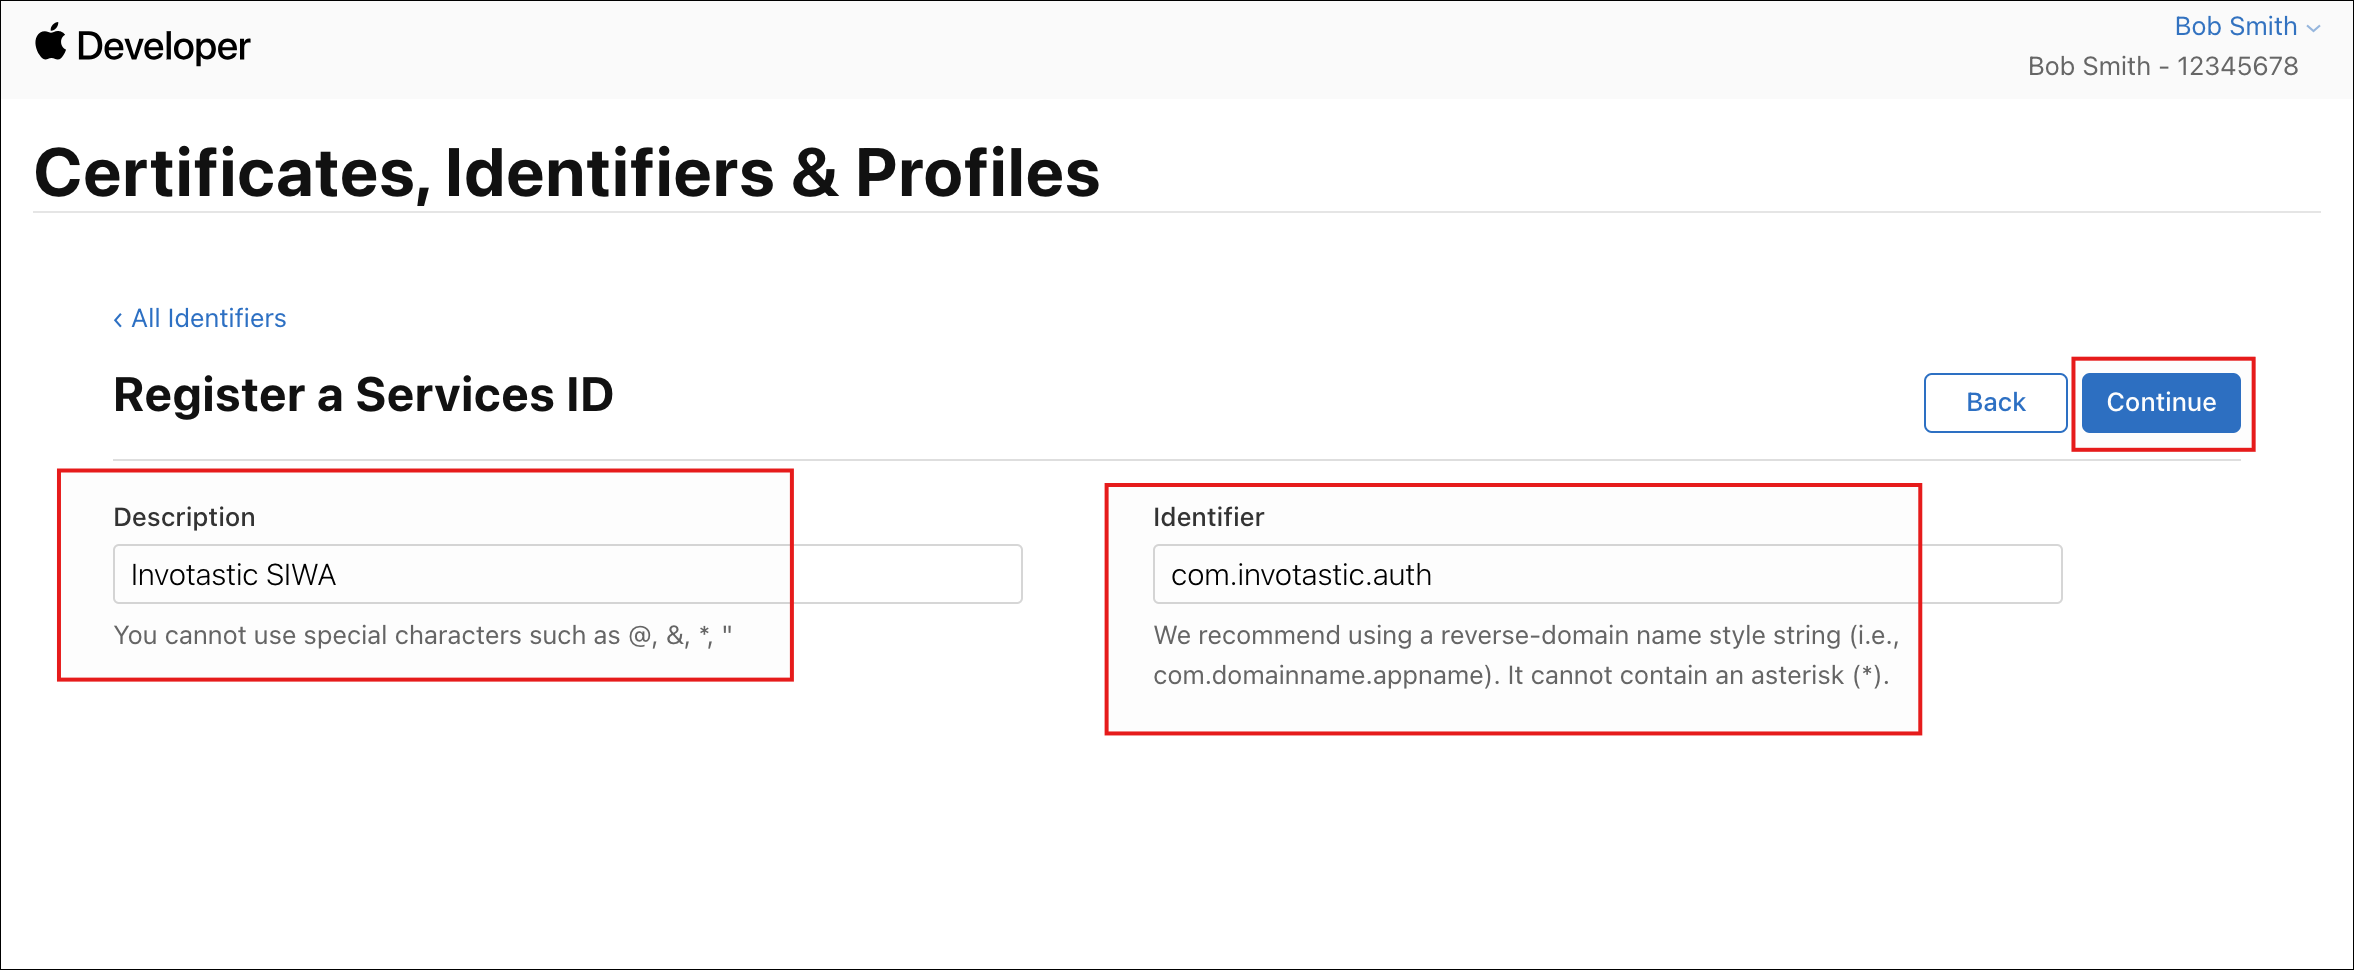
Figure 12: Enter the Service Identifier description and identifier value.
- Copy the Identifier (Service ID) value and Click Register.
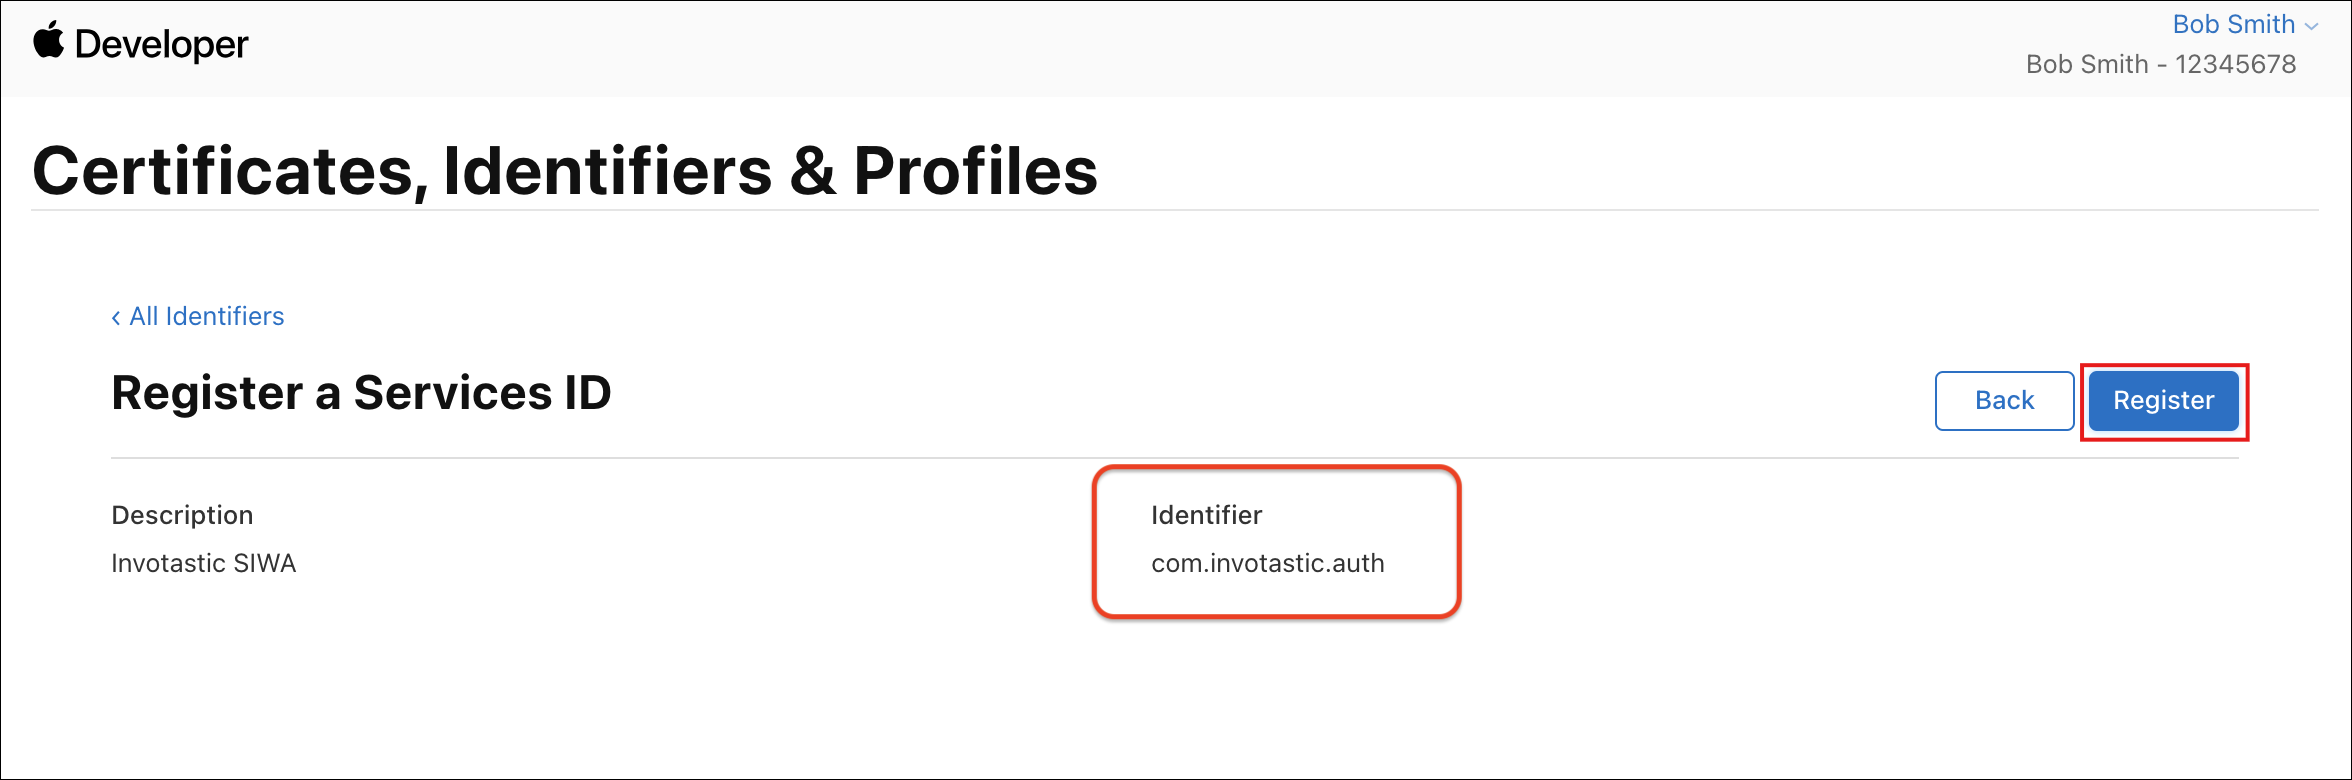
Figure 13: Copy the Service Identifier value.
4. Click the row for the Service Identifier you just created to edit its configurations.
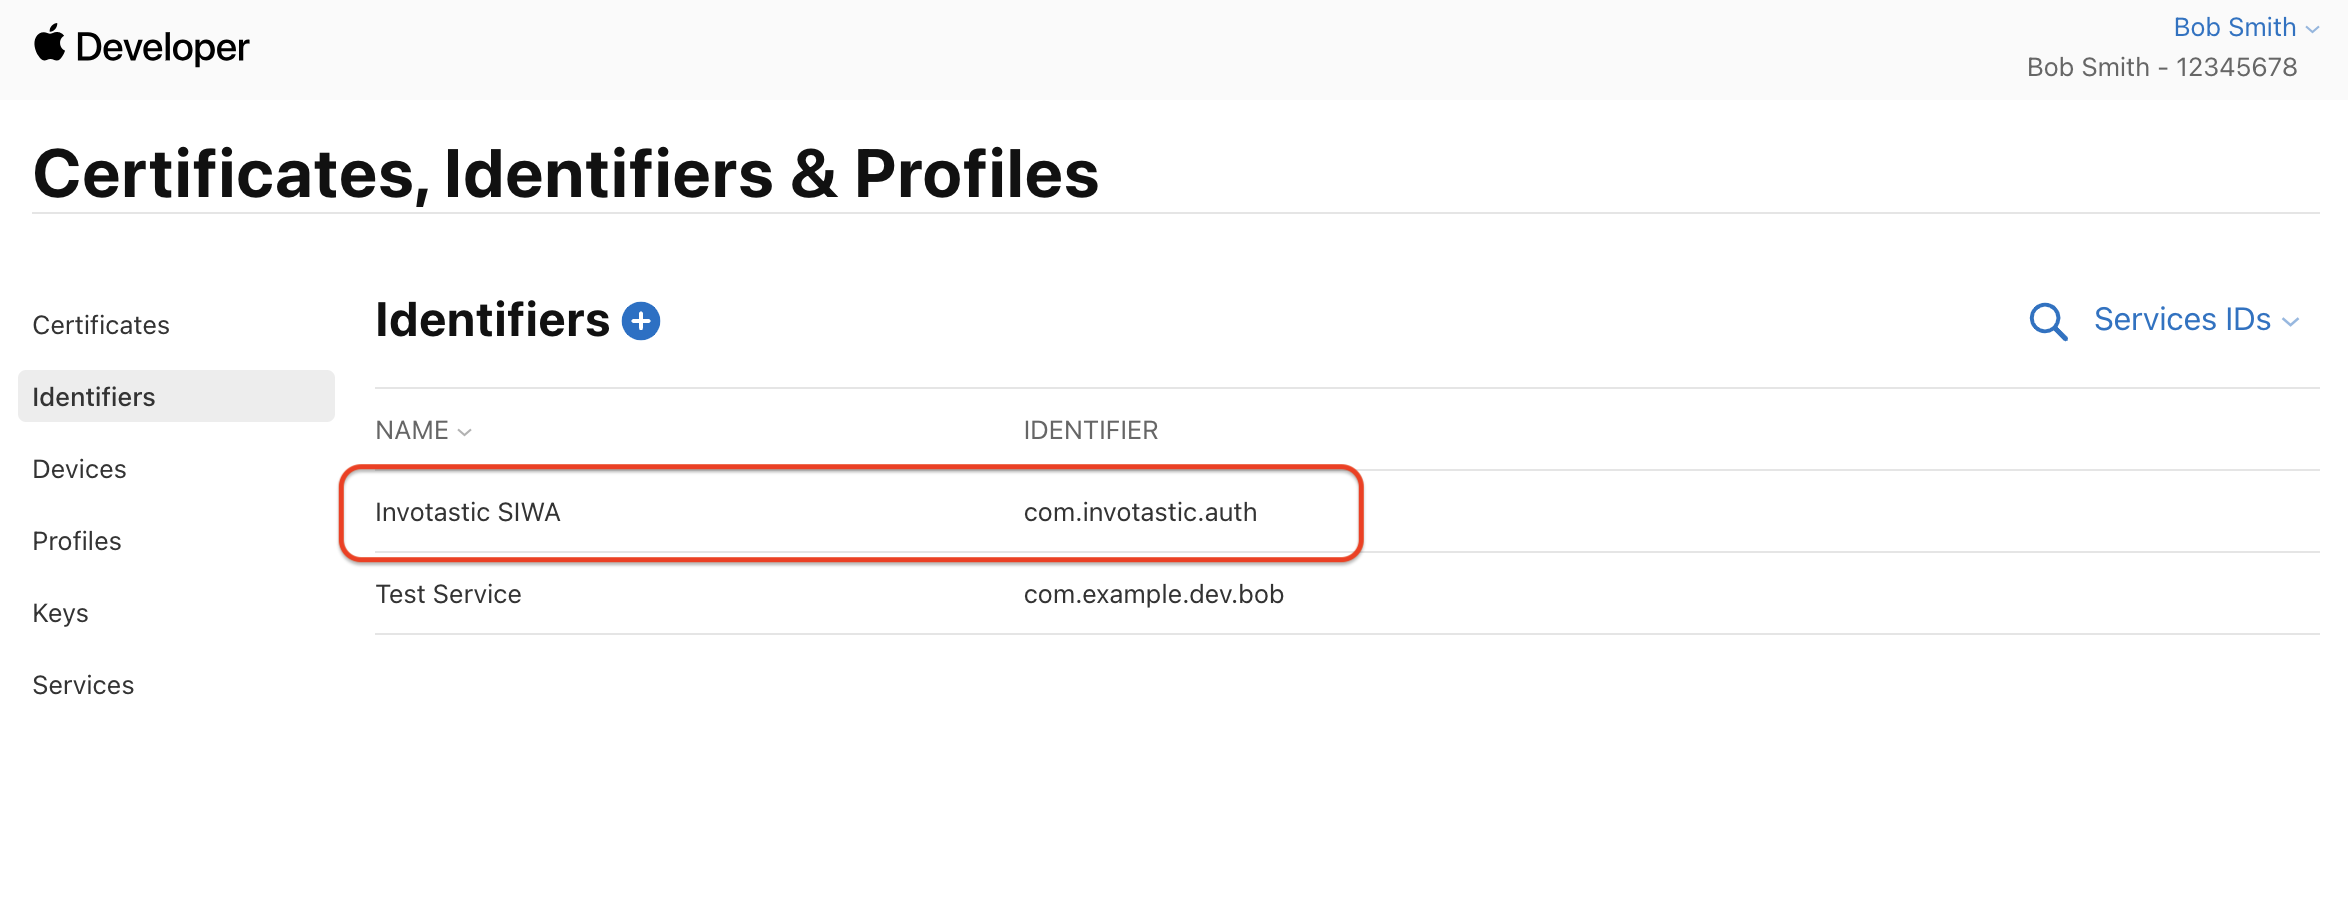
Figure 14: Select the new Service Identifier to edit its configuration.
- Enable Sign In with Apple and click Configure.
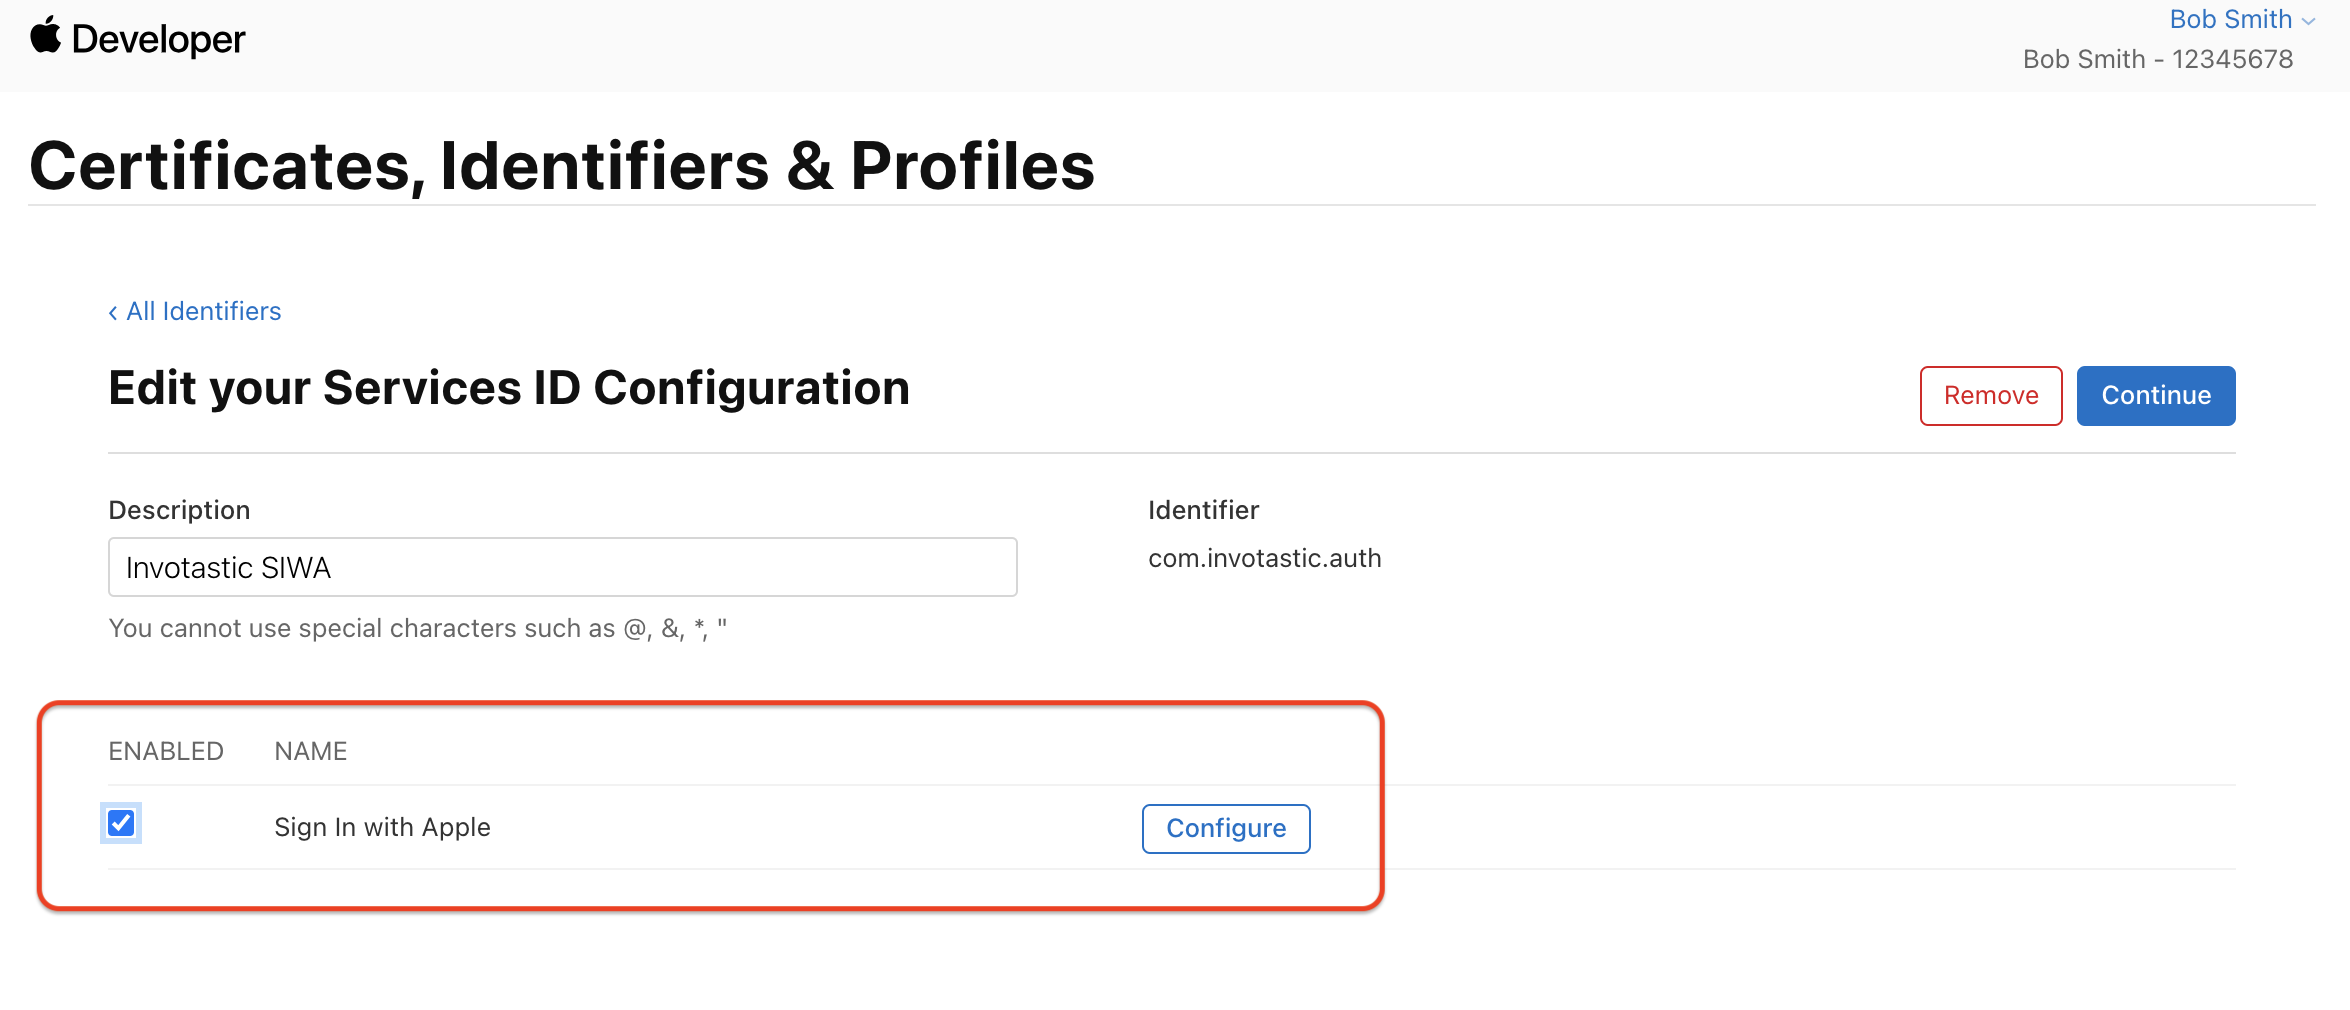
Figure 15: Enable Sign In with Apple for the Service Identifier.
- Fill out the Web Authentication Configuration form:
- Primary App ID: The App Identifier from step 3.
- Domains and Subdomains: Your Application Vanity Domain or custom domain.
- Return URLs: Paste the External IdP Callback URL from step 1.
- Click Next.
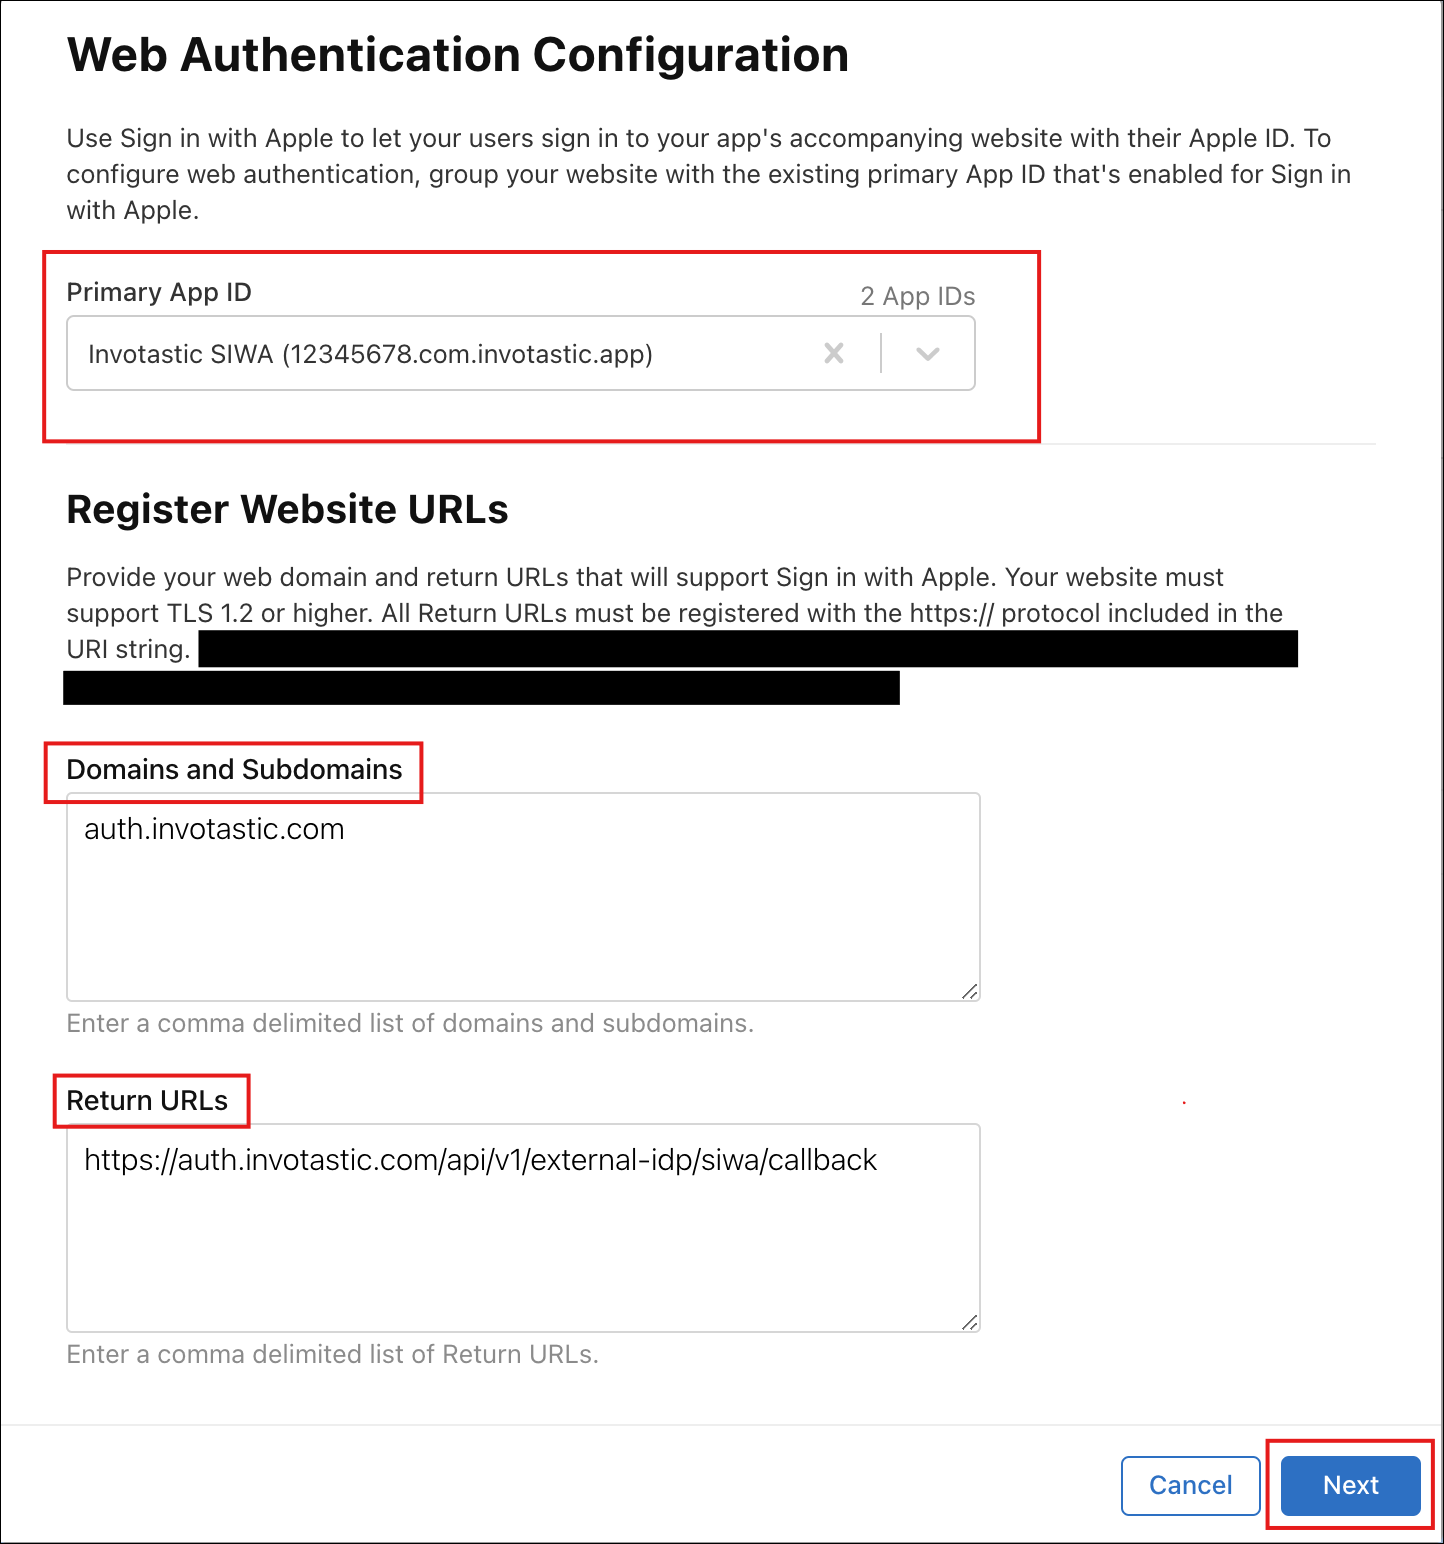
Figure 16: Configure web authentication for the Service Identifier.
- Confirm the configurations and click Done.
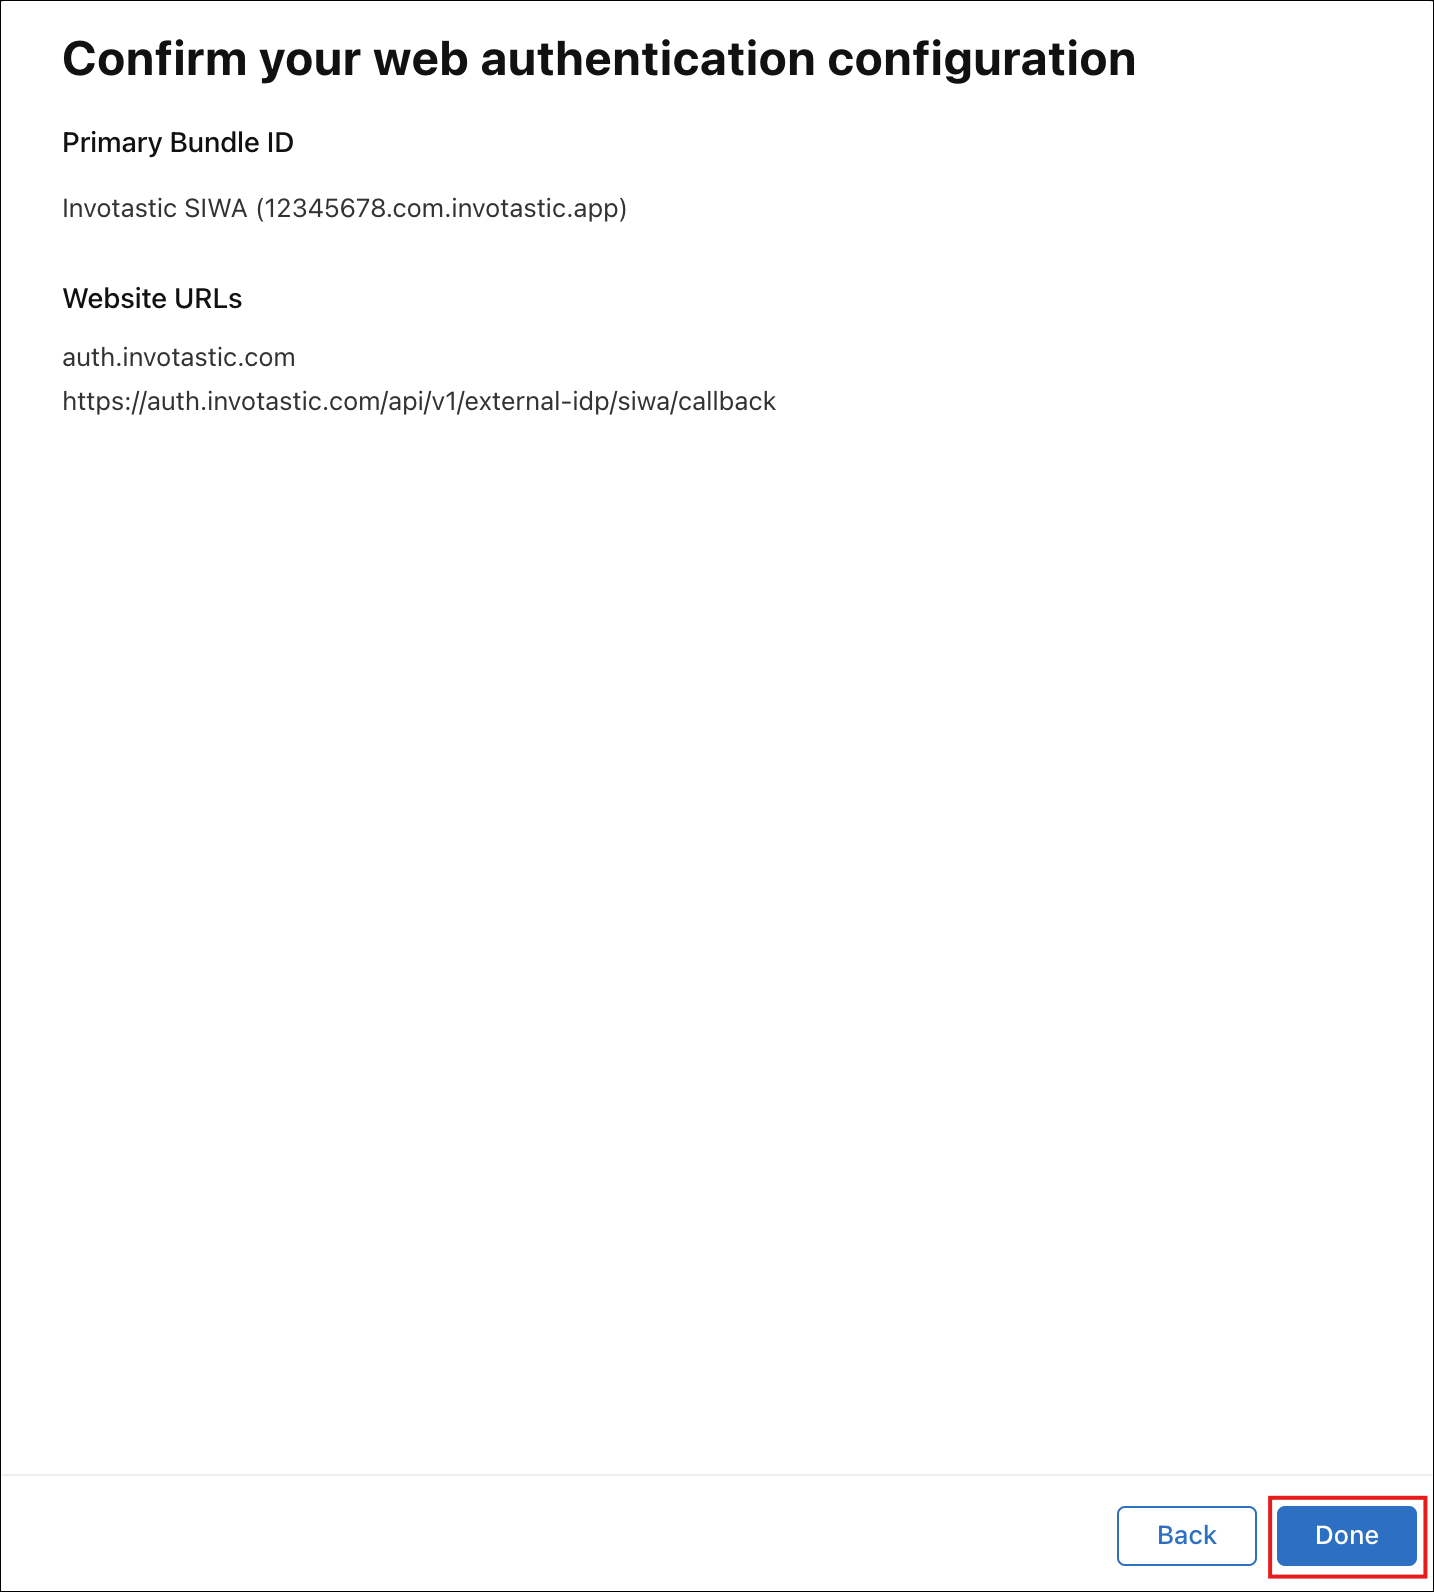
Figure 17: Confirm the web authentication configuration.
- Click Save to persist the changes.
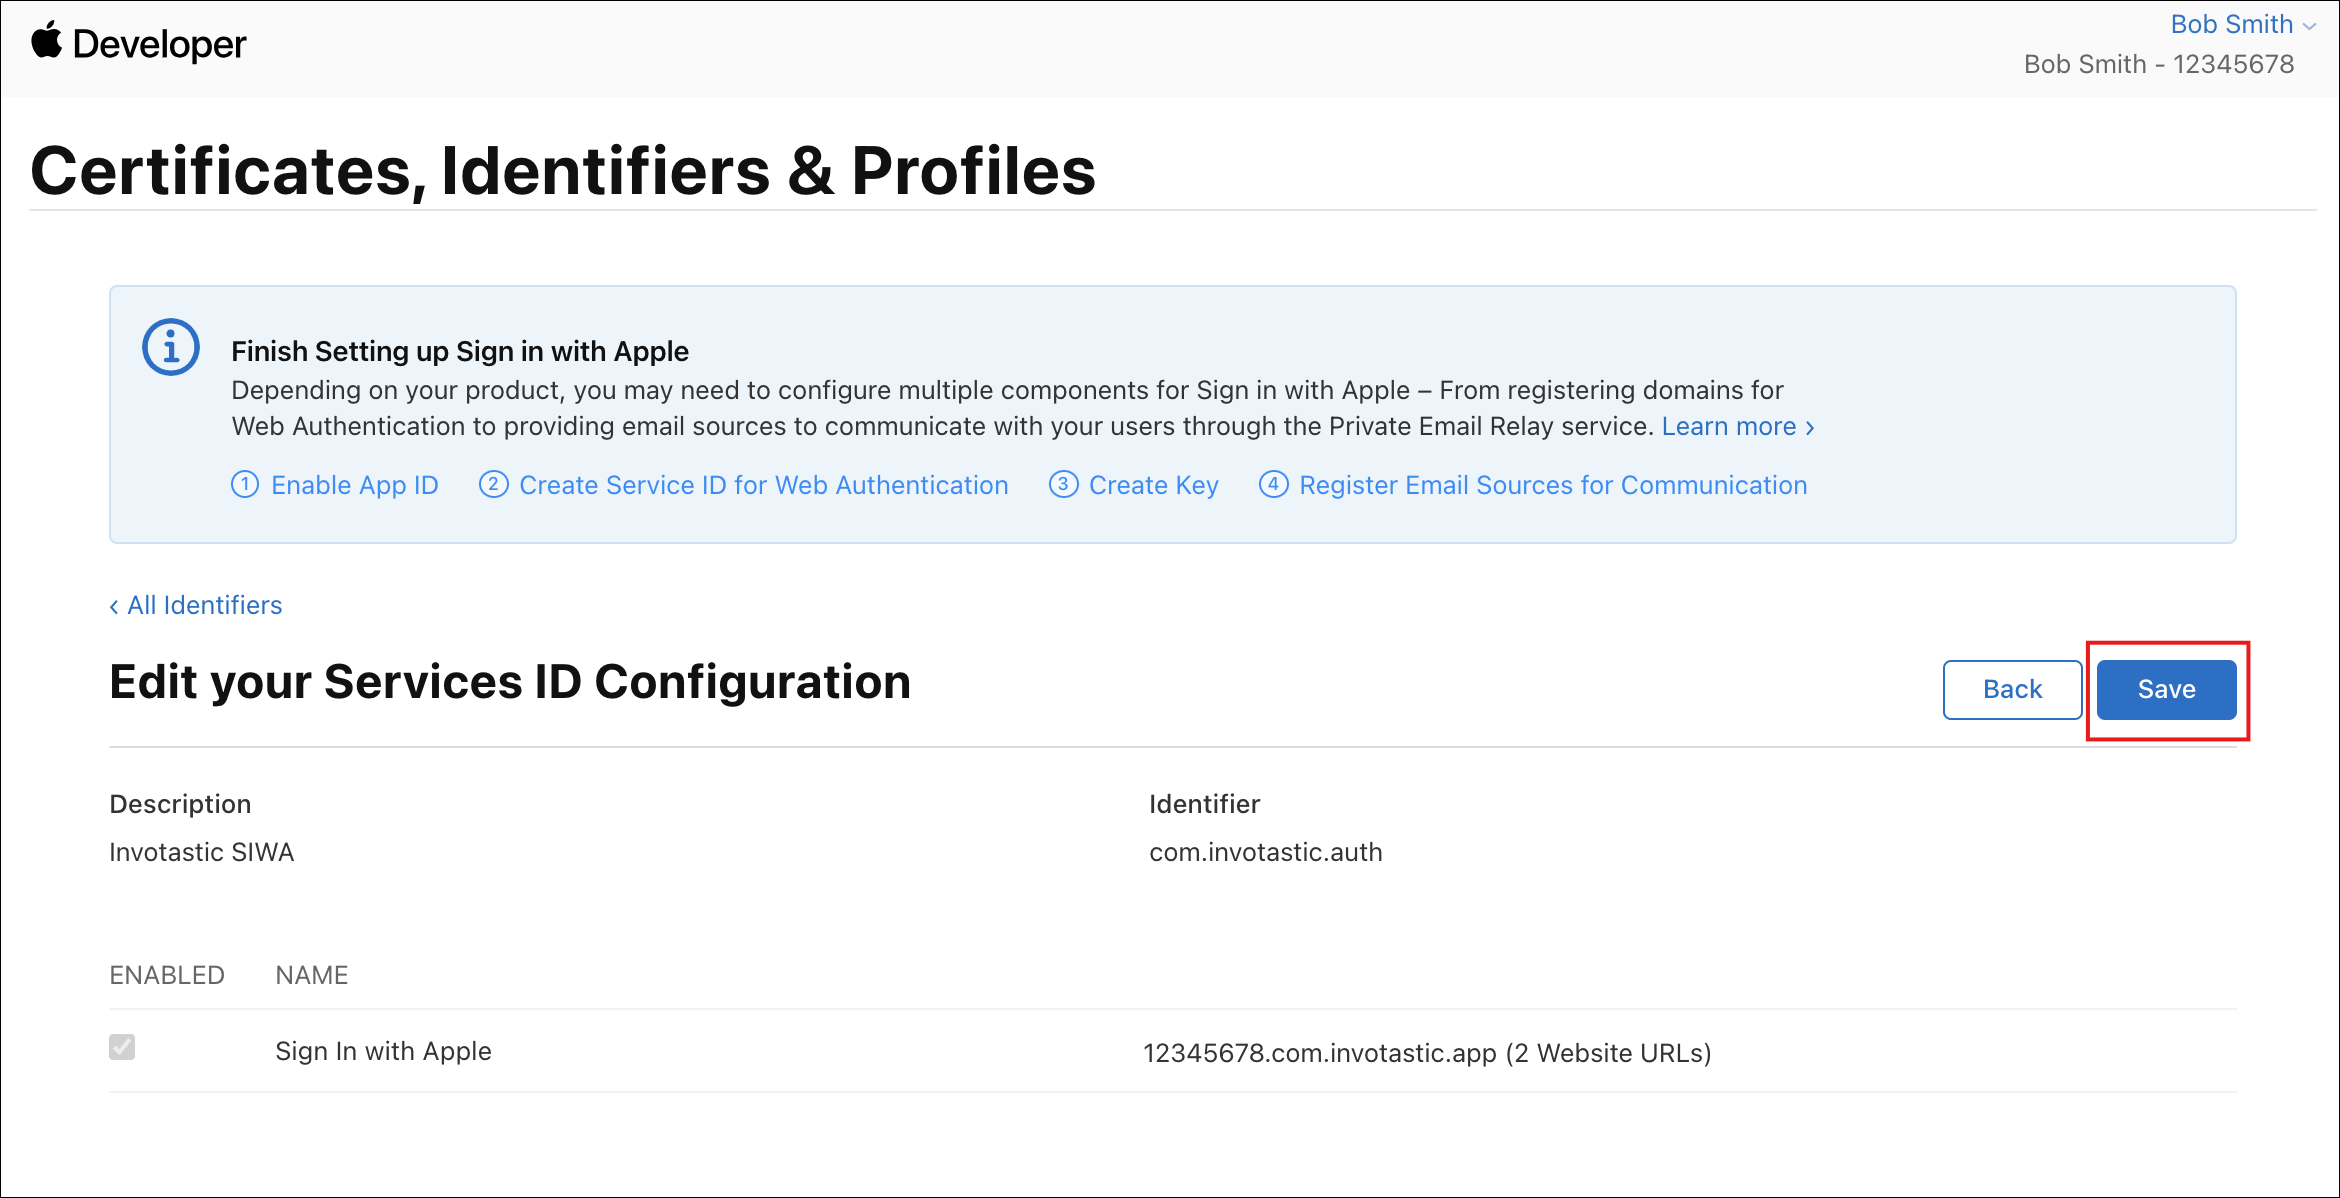
Figure 18: Save the Service Identifier configuration.
Step 5: Register A Sign In With Apple Key
- Navigate to the Keys menu. Click the + button to start the key registration process.
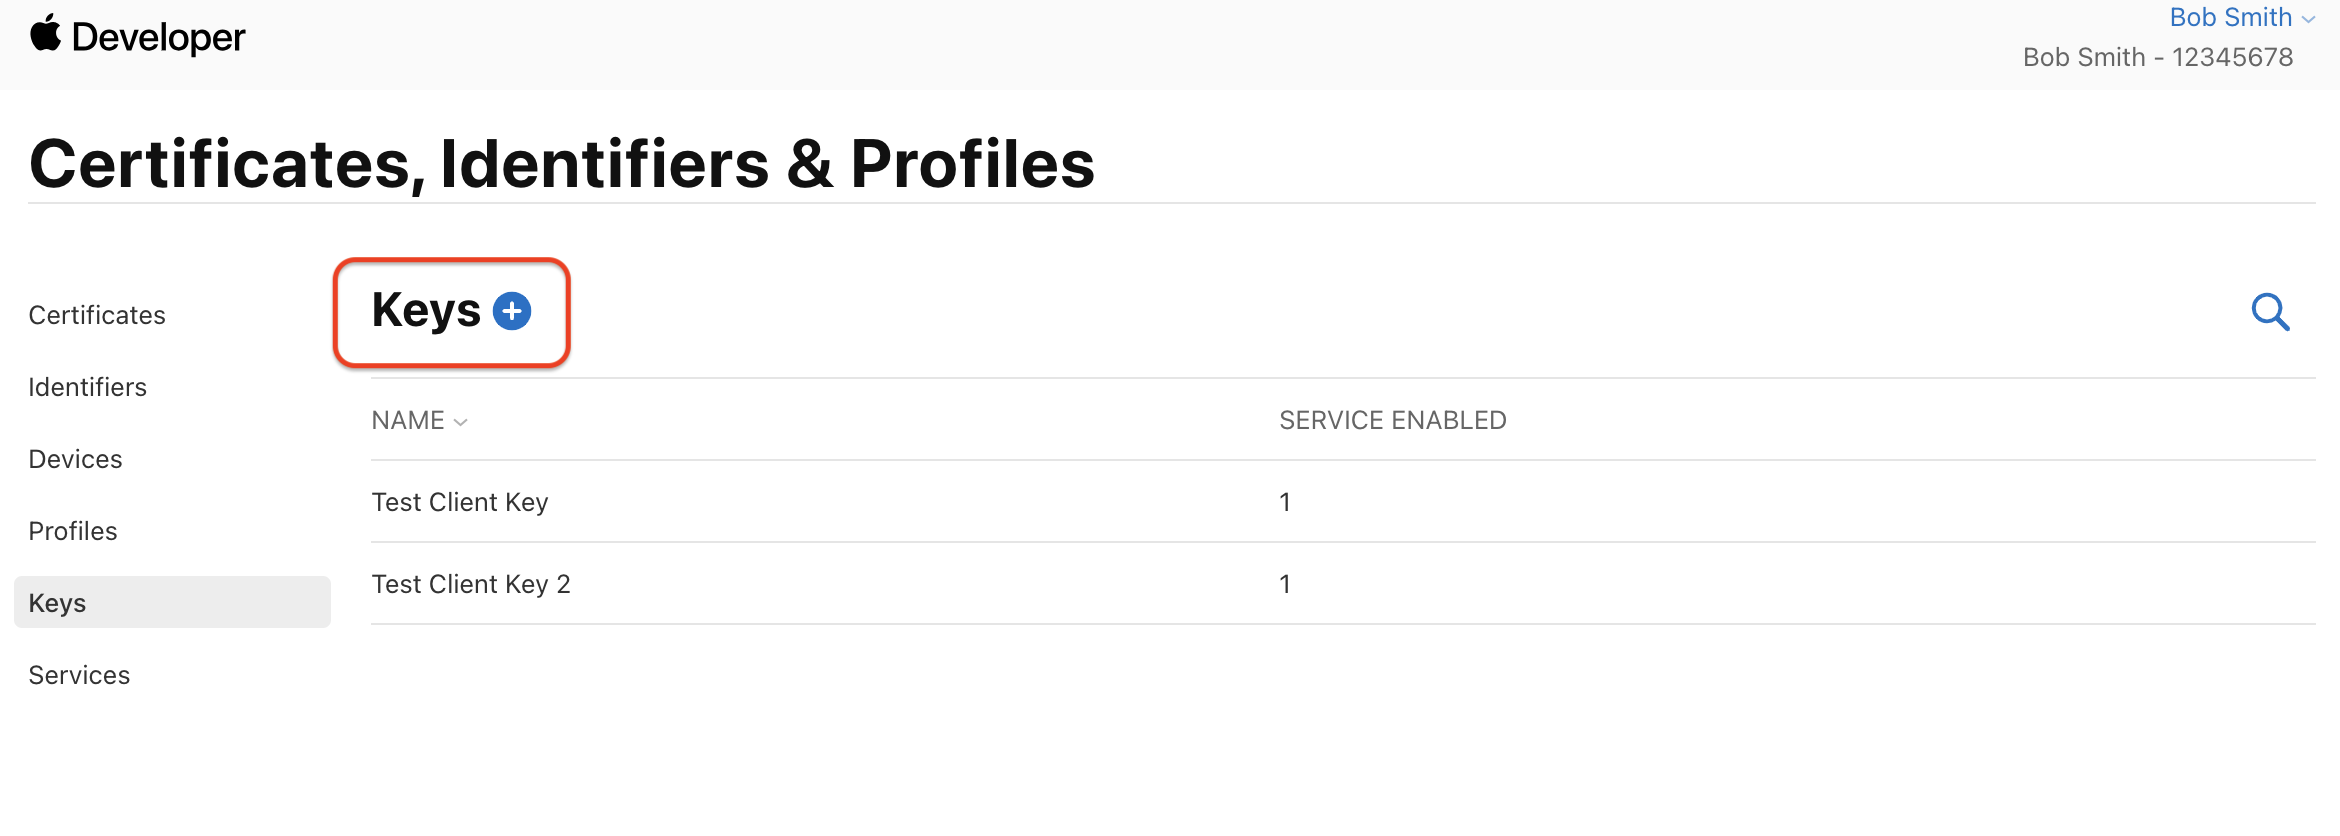
Figure 19: Start registering a new key.
- Check the Sign in with Apple option. Click Configure.
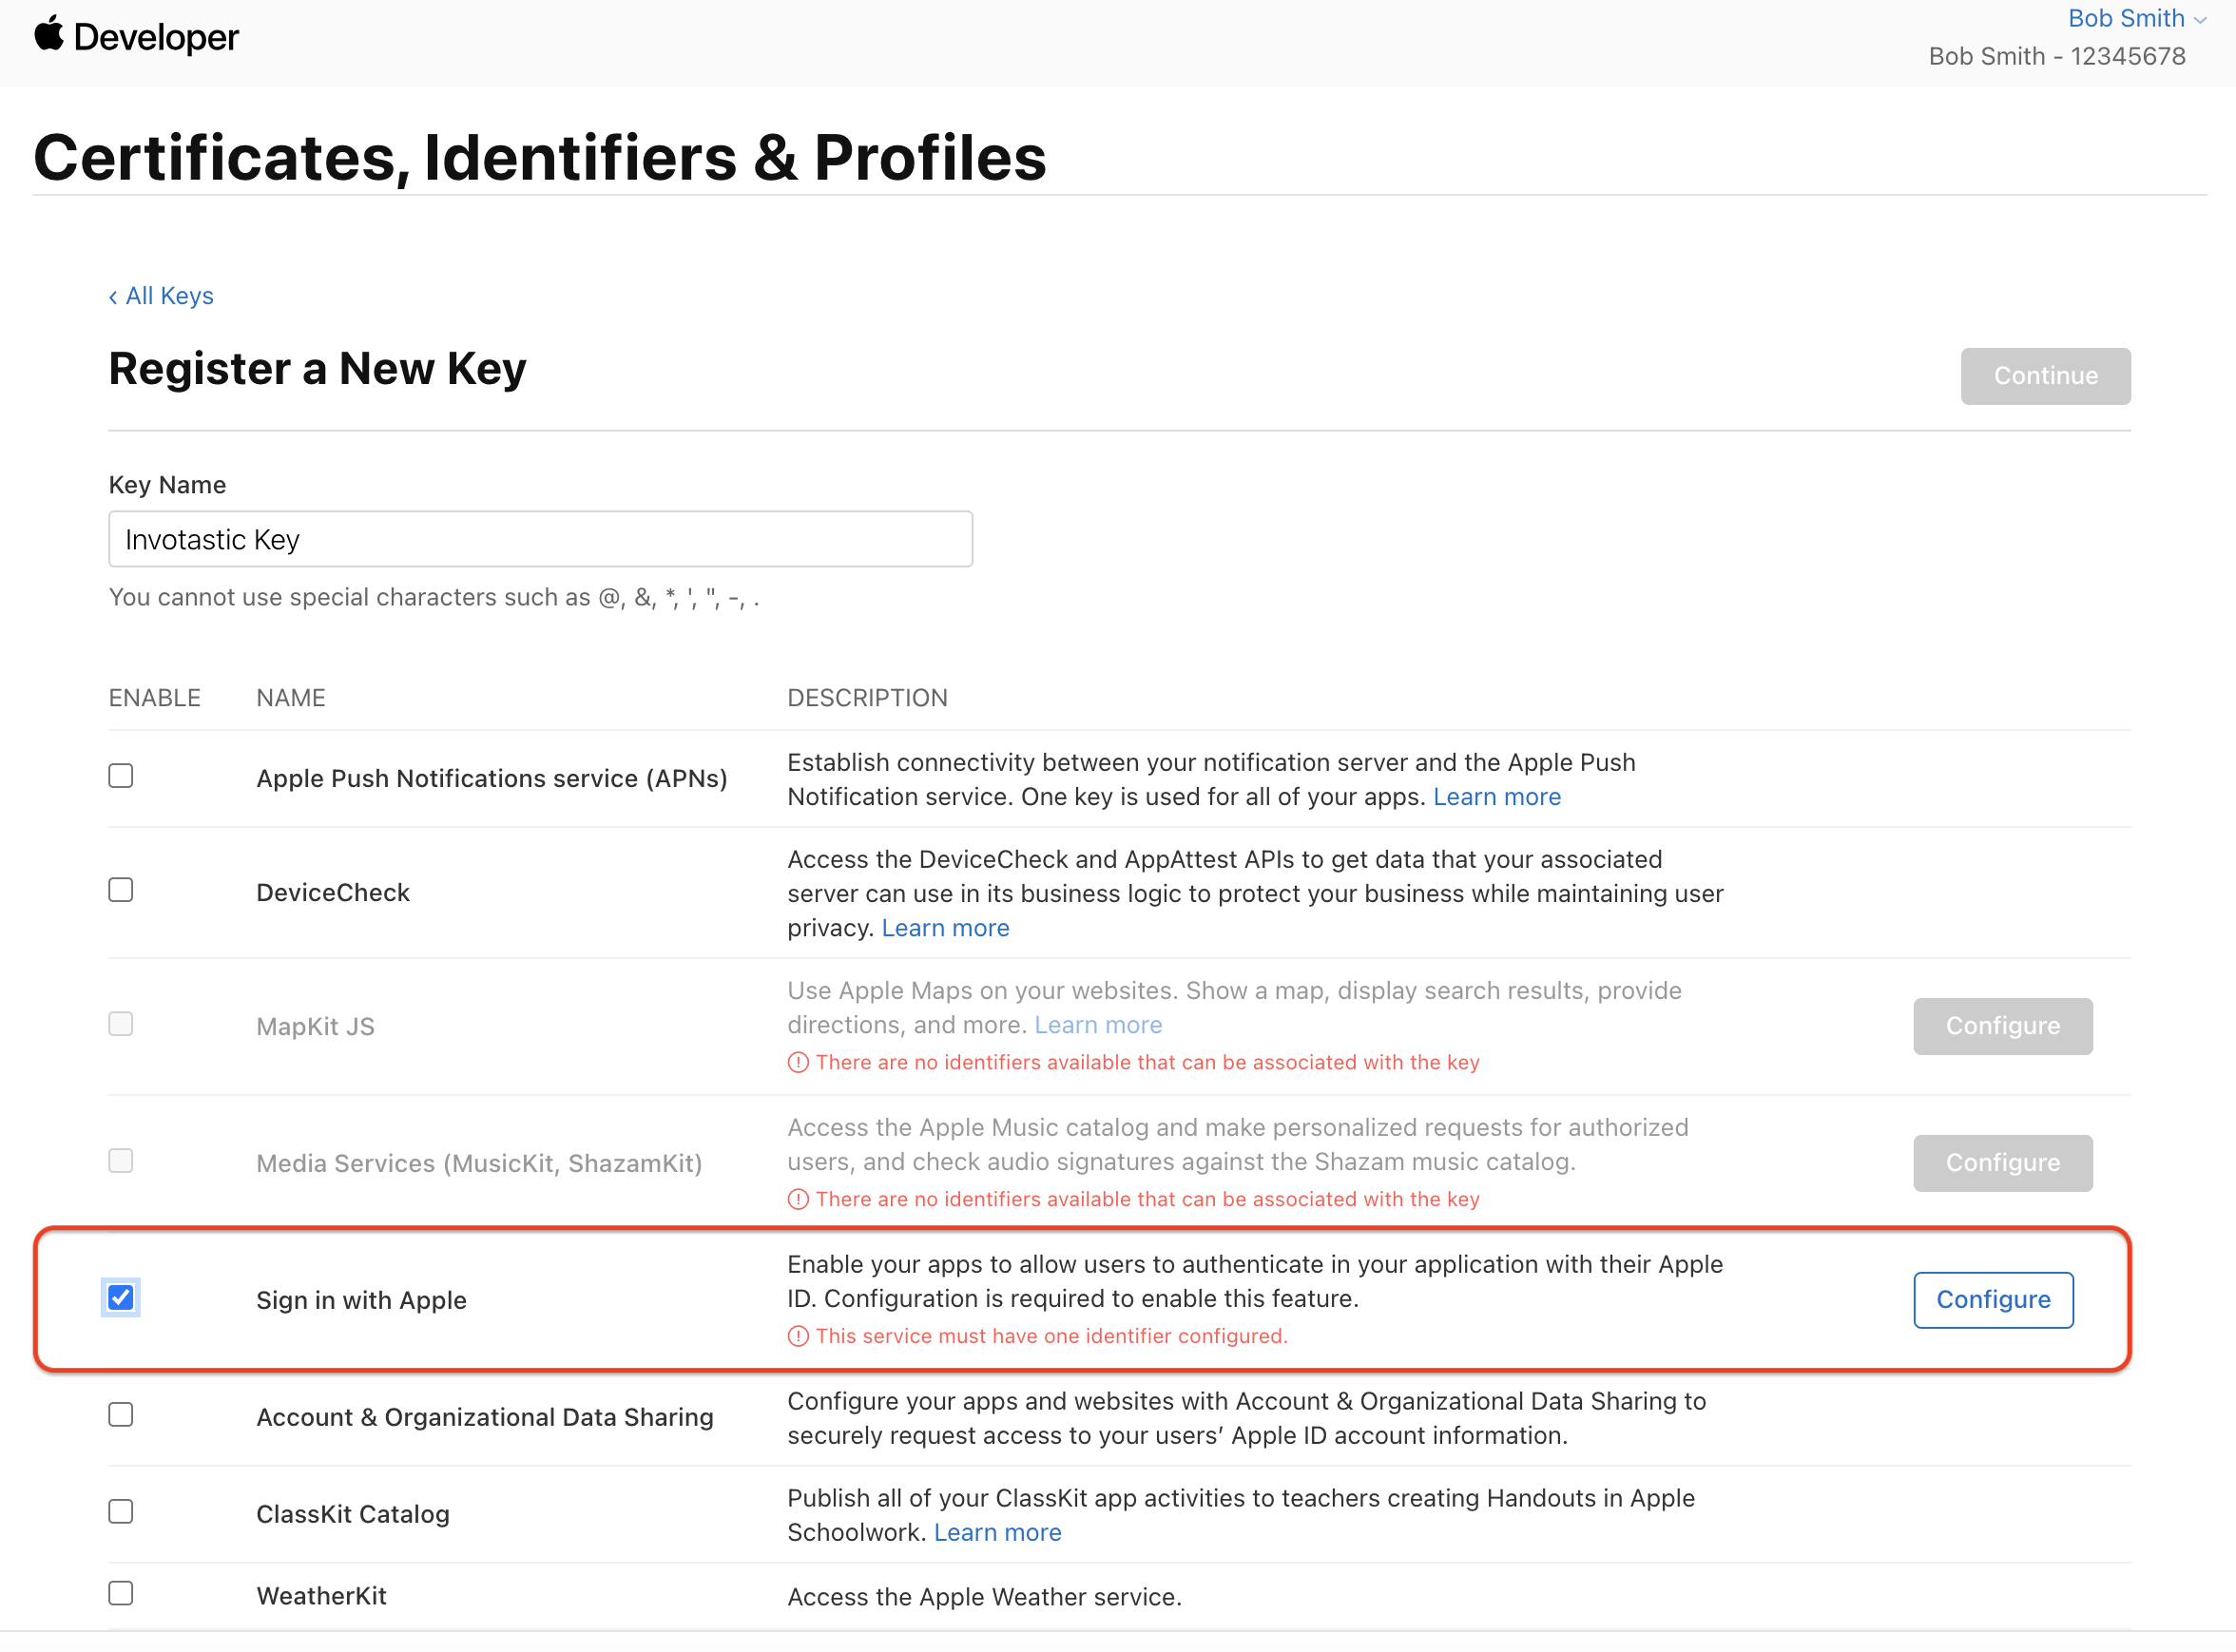
Figure 20: Enable Sign In with Apple for the new key.
- Select the App ID you created in step 3 from the Primary App ID dropdown. Click Save.
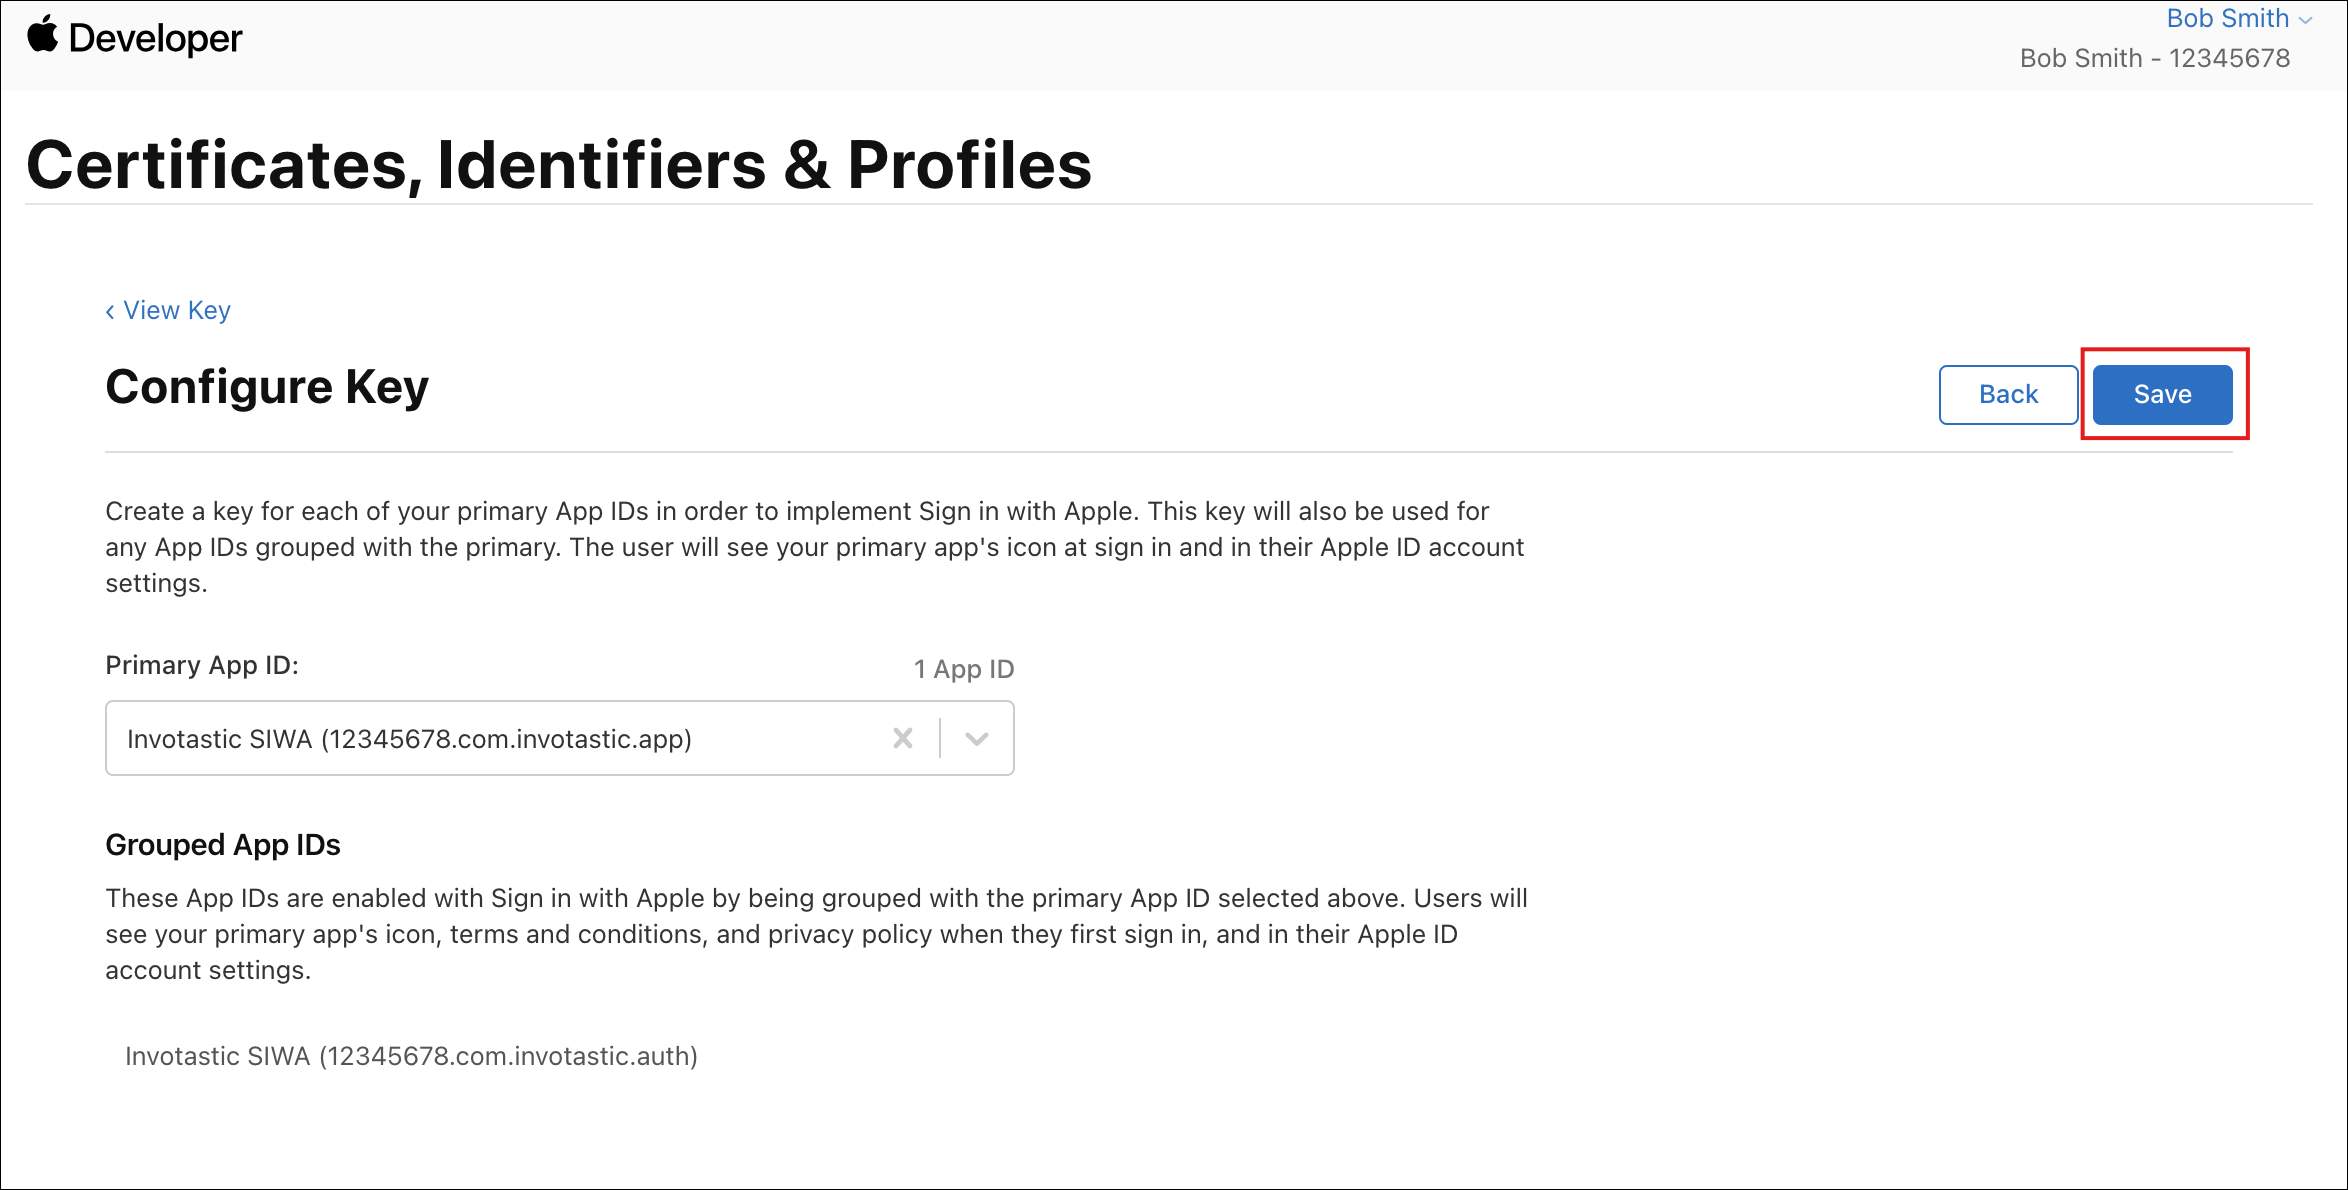
Figure 21: Select the App ID associated with the key.
- Click Register on the preview screen.
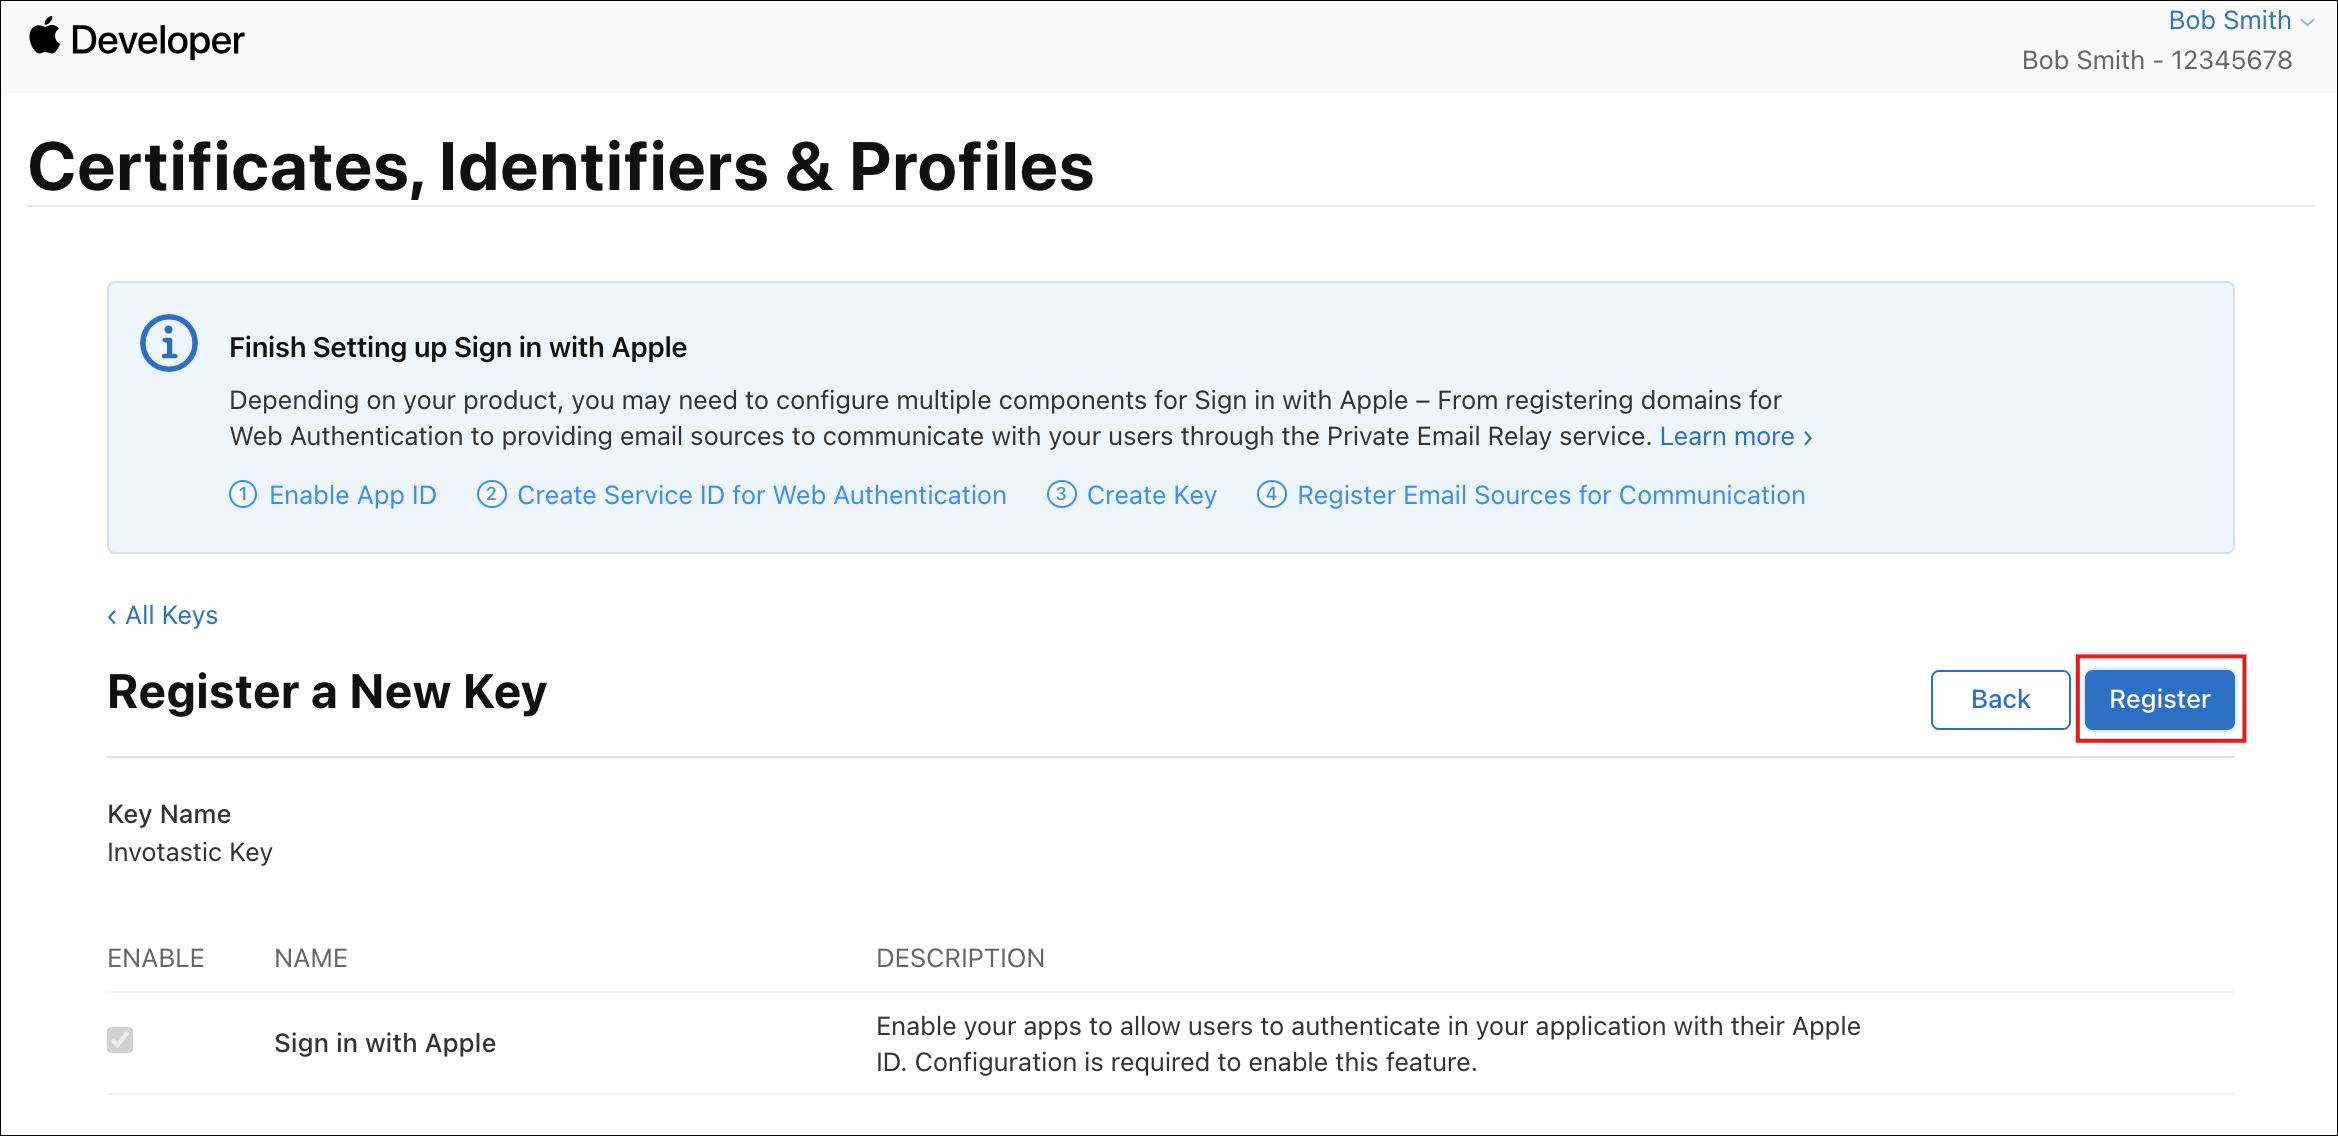
Figure 22: Register the Sign In with Apple key.
- Copy the Key ID value and download the PEM key file.
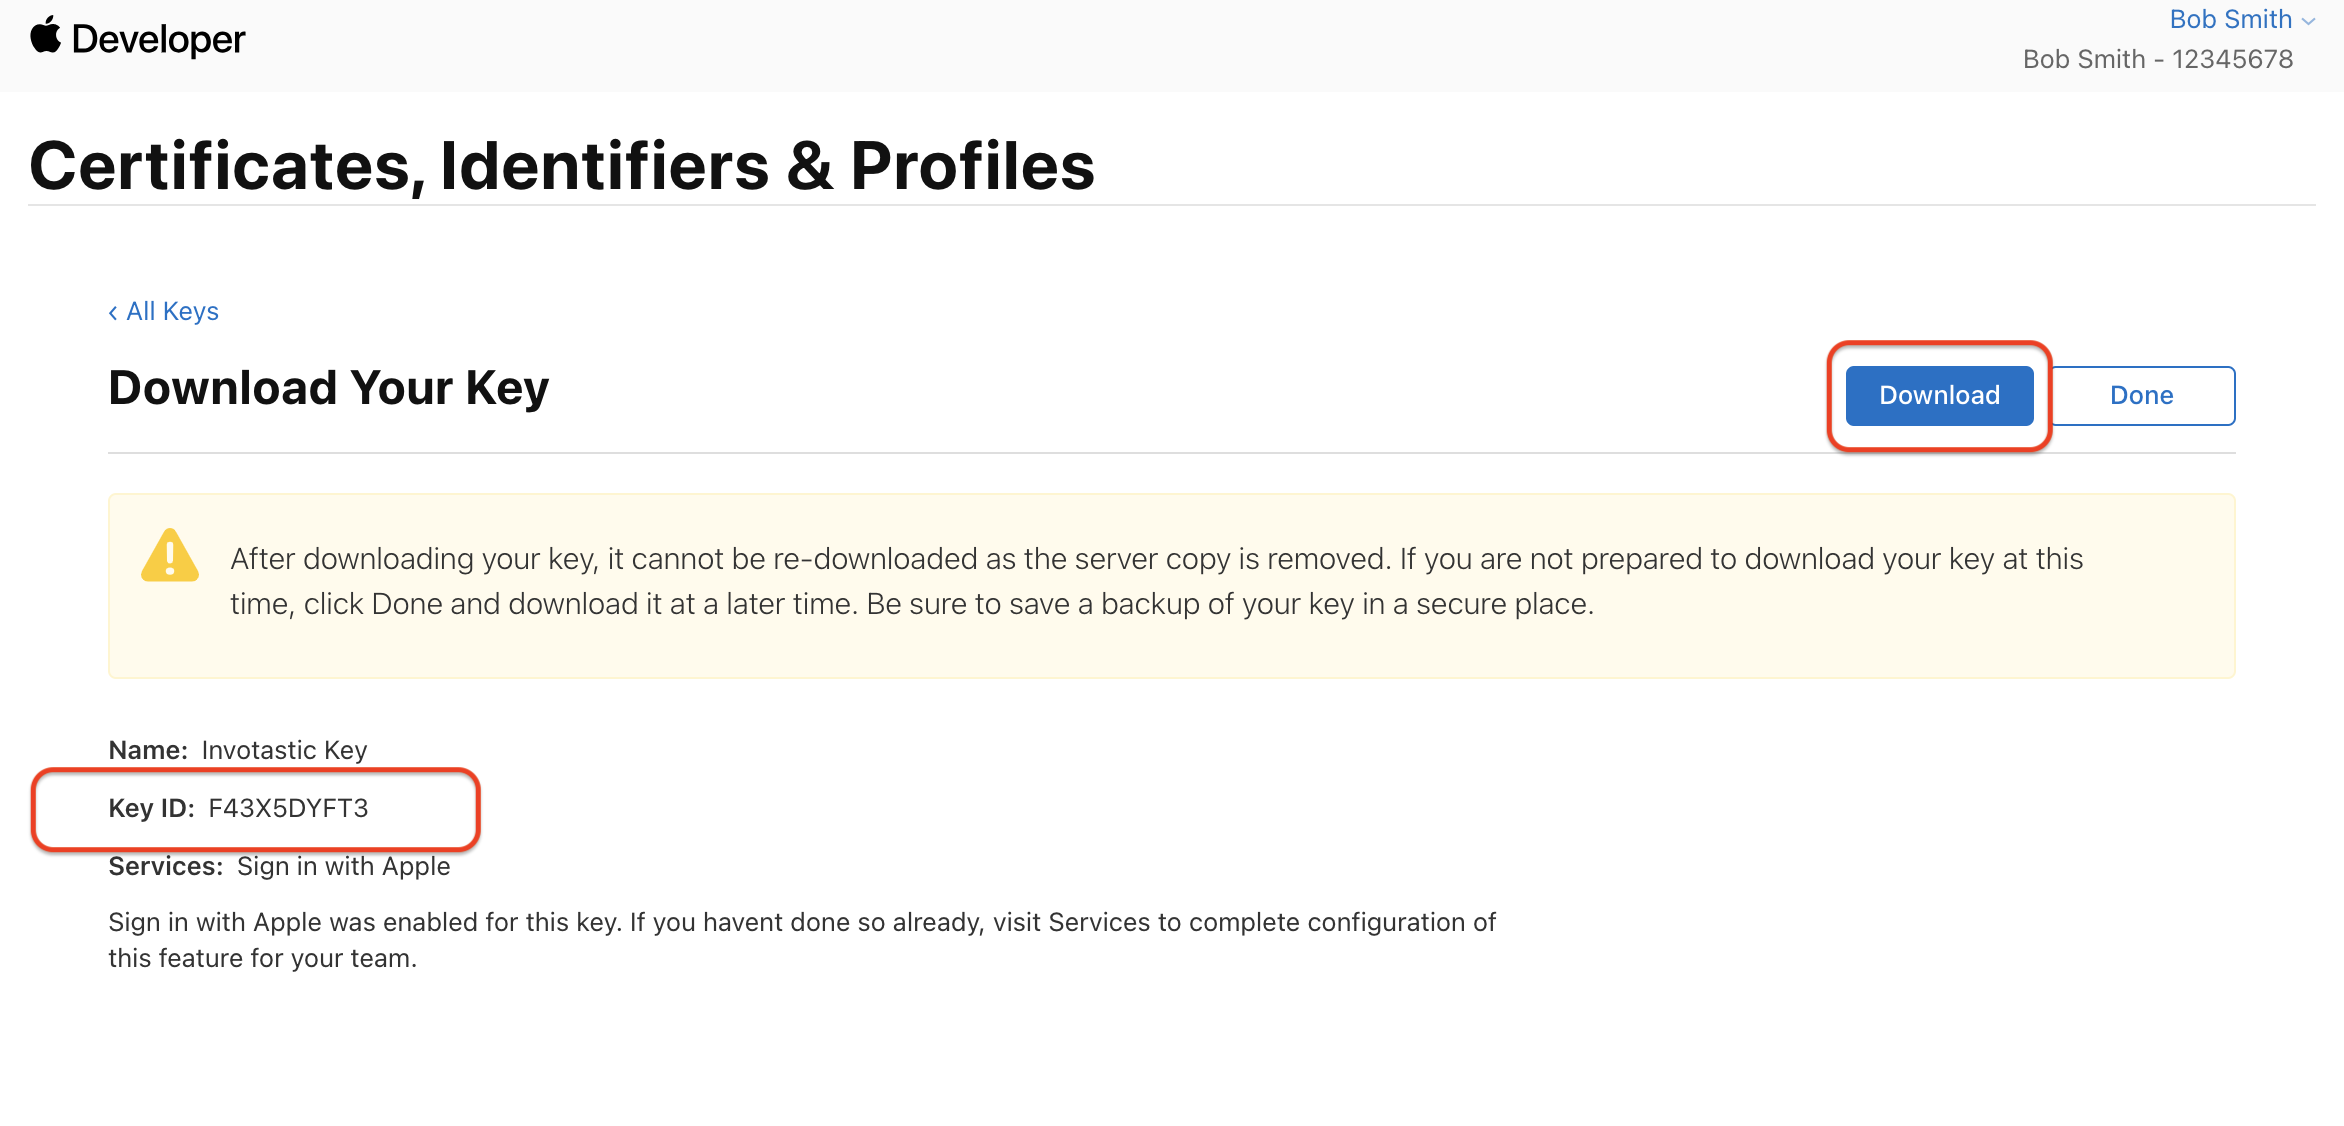
Figure 23: Copy the Key ID and download the private key file.
- Click Done. You have now configured everything necessary on Apple's side for social login integration.
Step 6: Configure the Apple IdP in Wristband
-
Return to the Wristband dashboard to the Social Identity Provider Page from step 1. Fill out the form with the following values:
- Team ID: The App ID Prefix value from step 3.
- Service ID: The Identifier value from step 4.
- Key ID: The Key ID value from step 5.
- Private Key: The Key PEM file from step 5.
- Open the file and copy the contents into the form.
-
By default, the following scopes will always be requested during authorization with Apple (additional scopes are optional):
- name
-
Click Save to finish. The Apple External IdP will be in an
ENABLEDstatus.
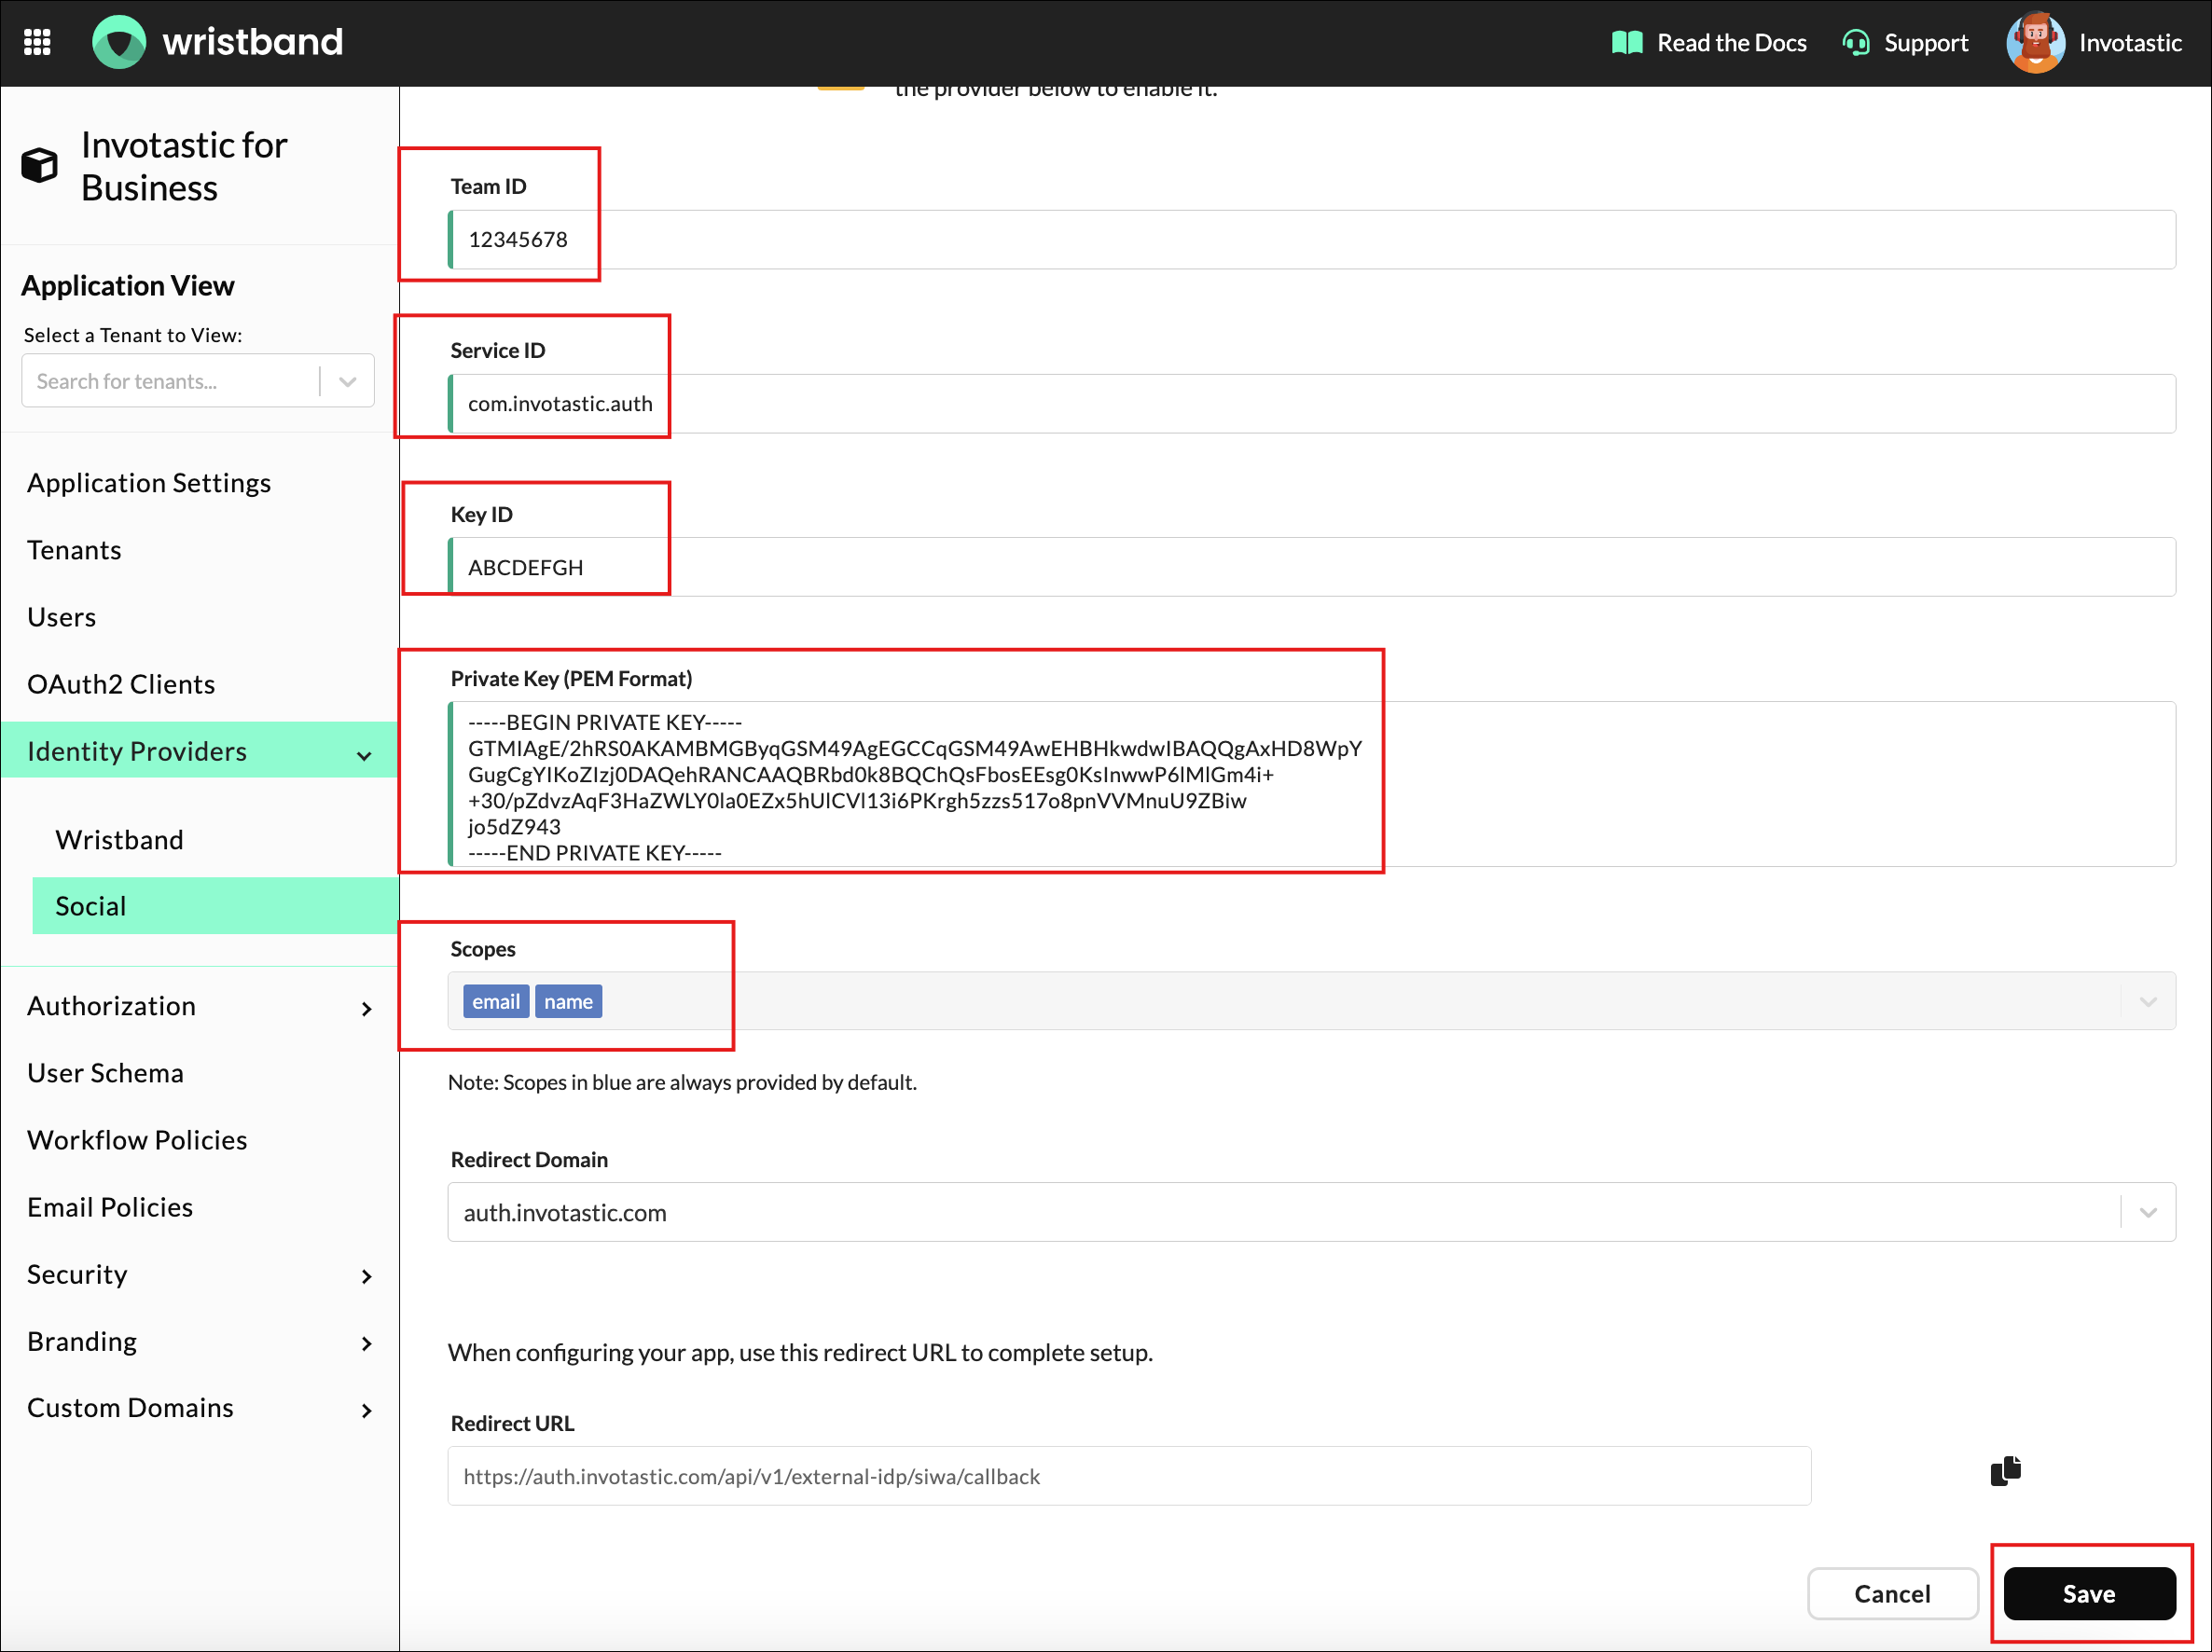
Figure 24: Complete the Configuration of the Apple identity provider in Wristband.
- At this point, the application has successfully completed an Apple social login integration. The next time users in this application reach the Tenant-level Login Page, they should see an Apple login button.
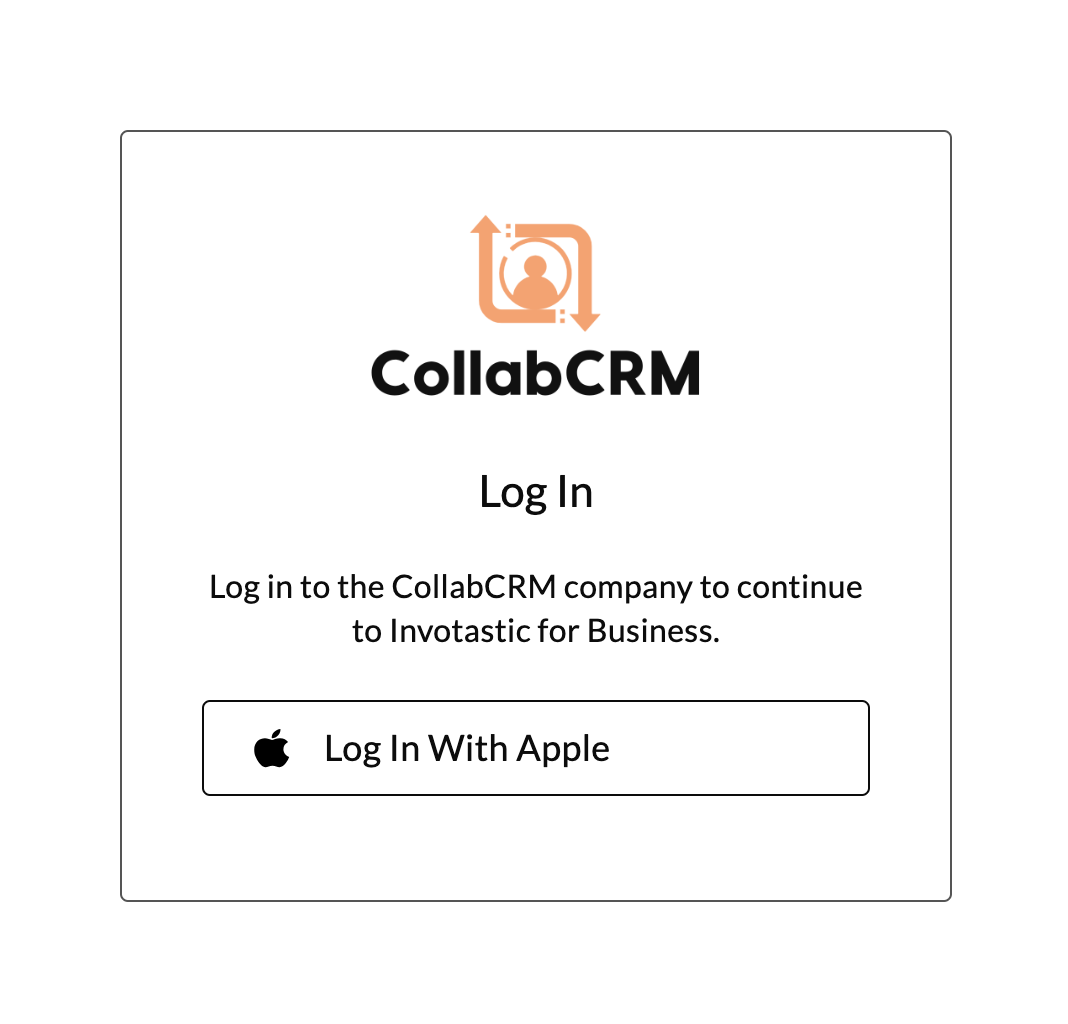
Figure 25: Apple sign-in button on the tenant-level login page.
Updated 14 days ago