Setting Up a Google Integration
This step-by-step guide outlines the process of setting up a Google social login integration in Wristband.
Step 1: Locate Your External IdP Redirect URL
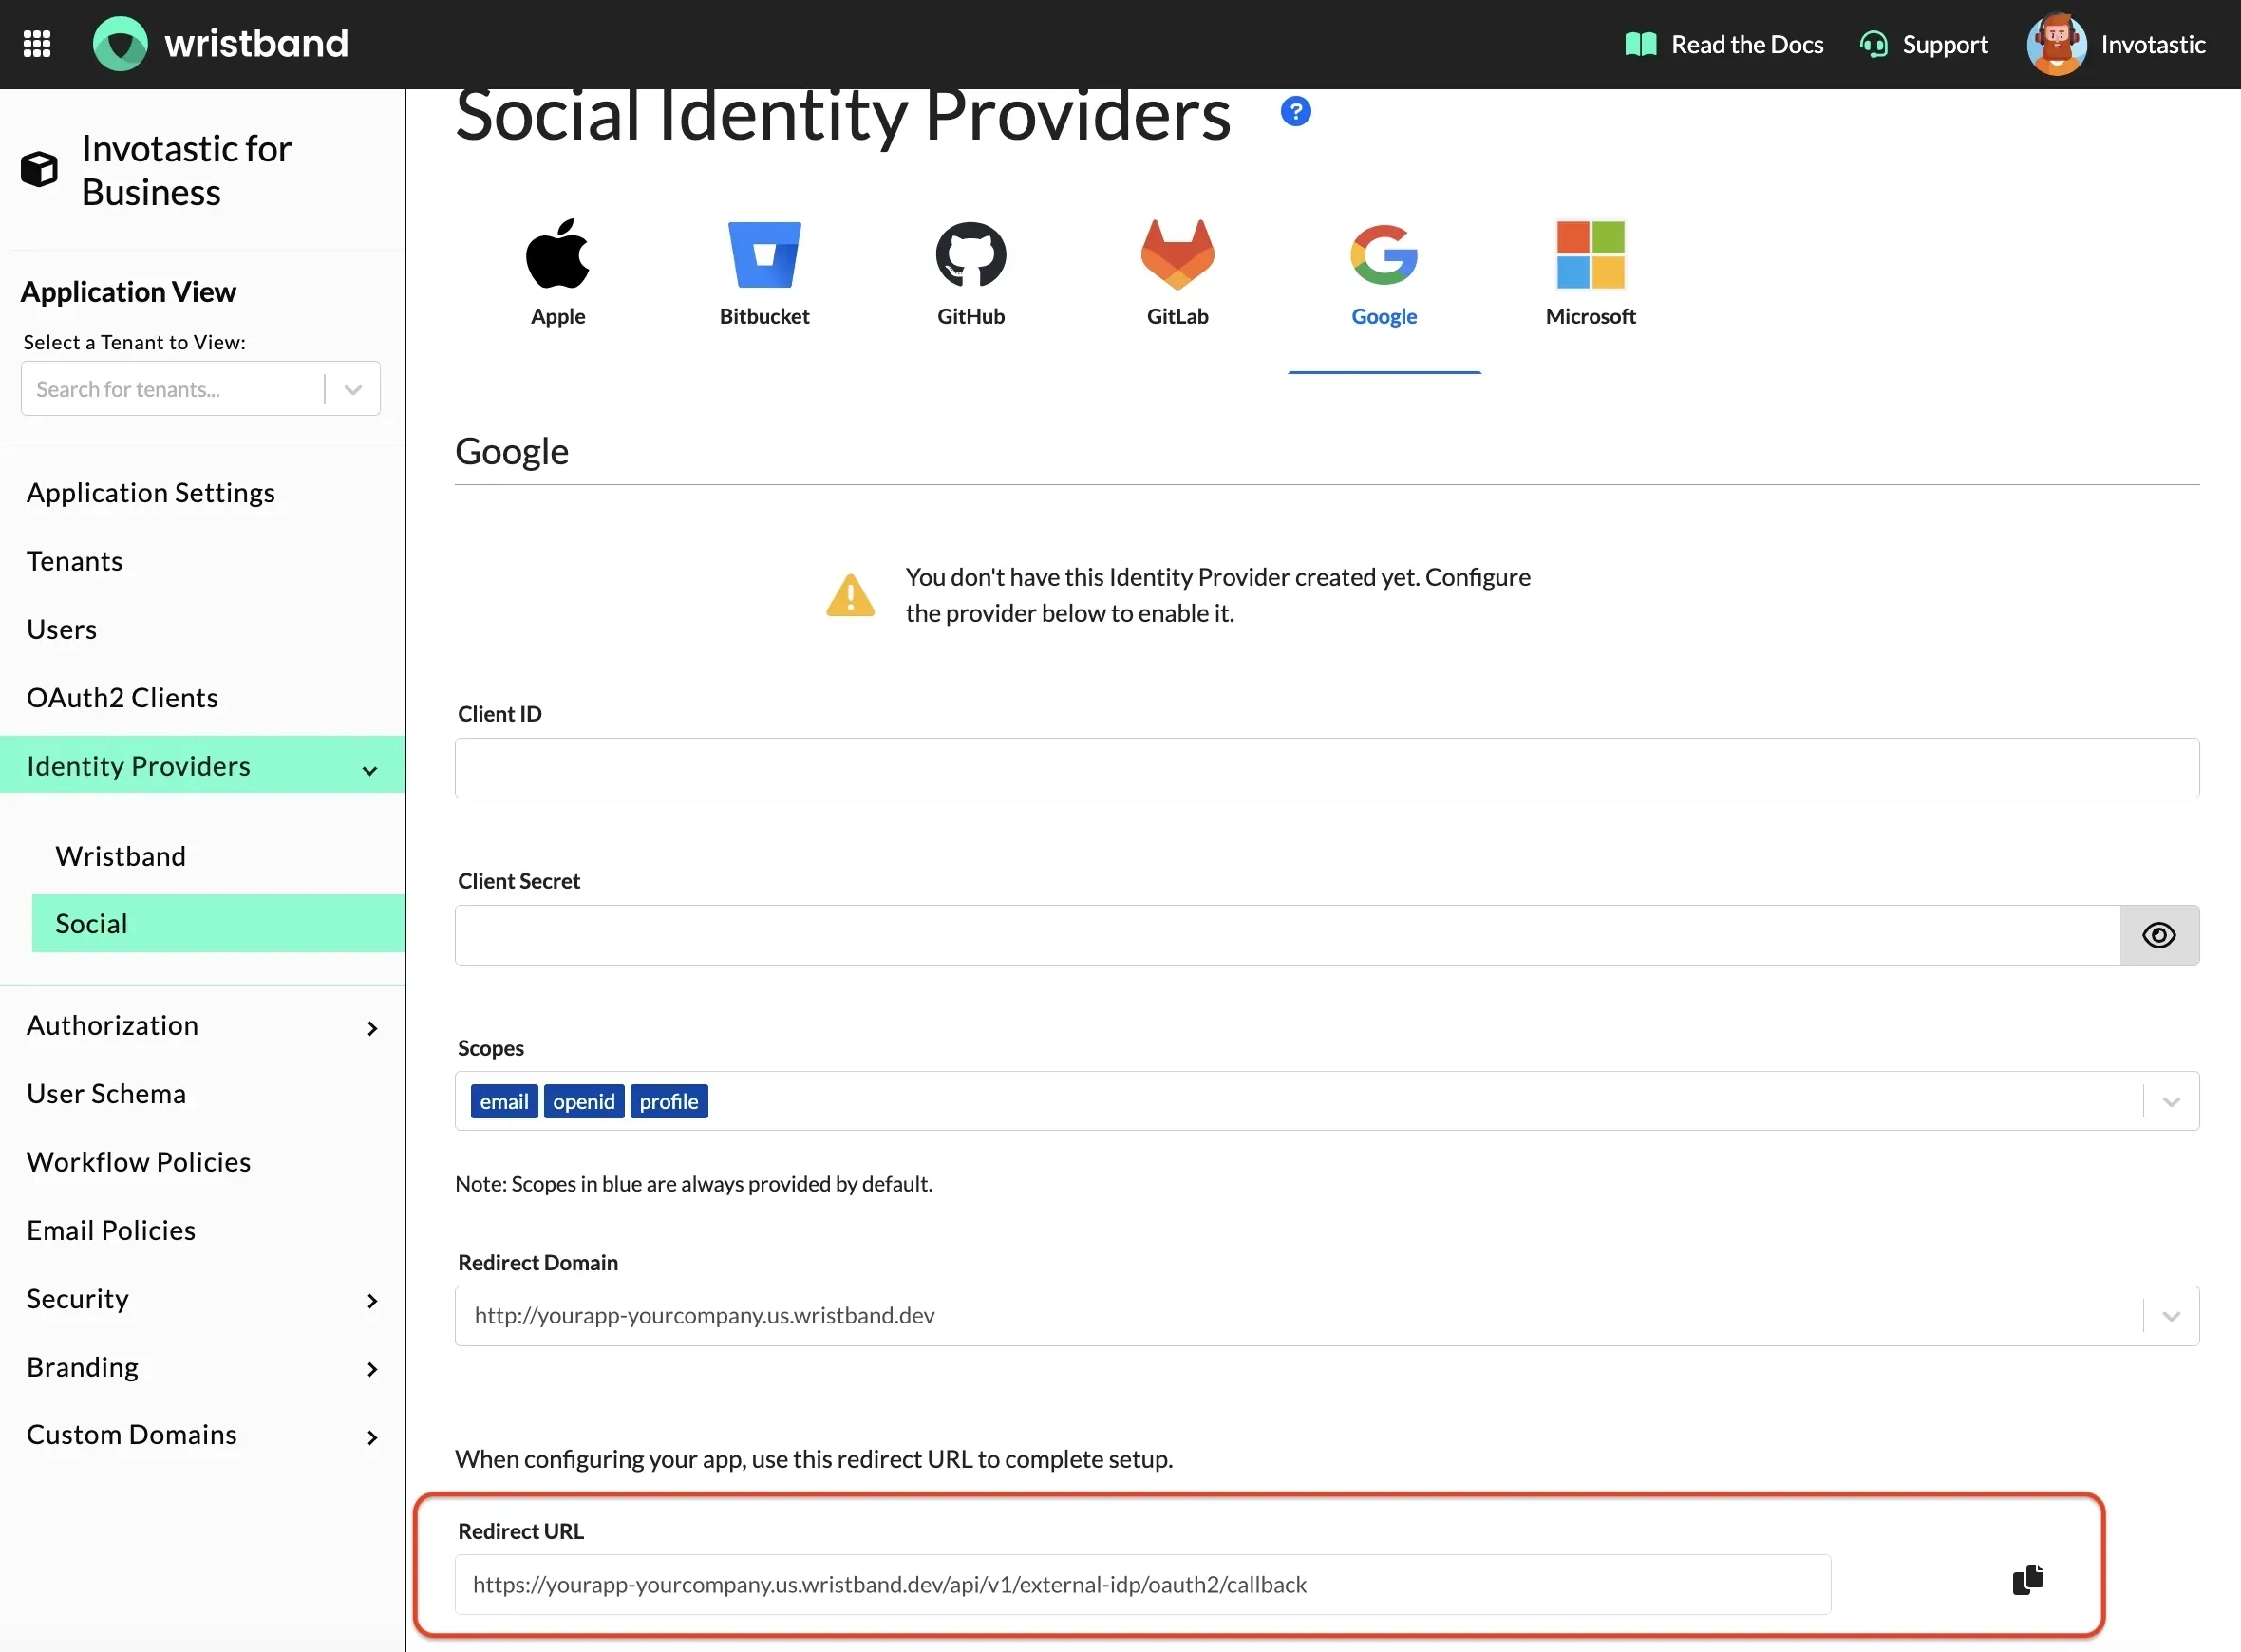
- In the Wristband dashboard, enter Application View for the application you want to integrate with Google.
- Navigate to the
Identity Providers > Socialmenu in the side navigation. - After landing on the Social Identity Providers page, select the Google provider icon at the top.
Copy the "Redirect URL" from the form - you'll need this value to configure the OAuth client in Google Cloud.
Step 2: Sign Up/Login to Your Google Account
To complete the configuration of the Google Social Login Identity Provider in the Wristband dashboard, you'll need to create an OAuth client in Google Cloud. To do so, log in to your Google account at the Google Cloud Developer Console.
Step 3: Create a New Project
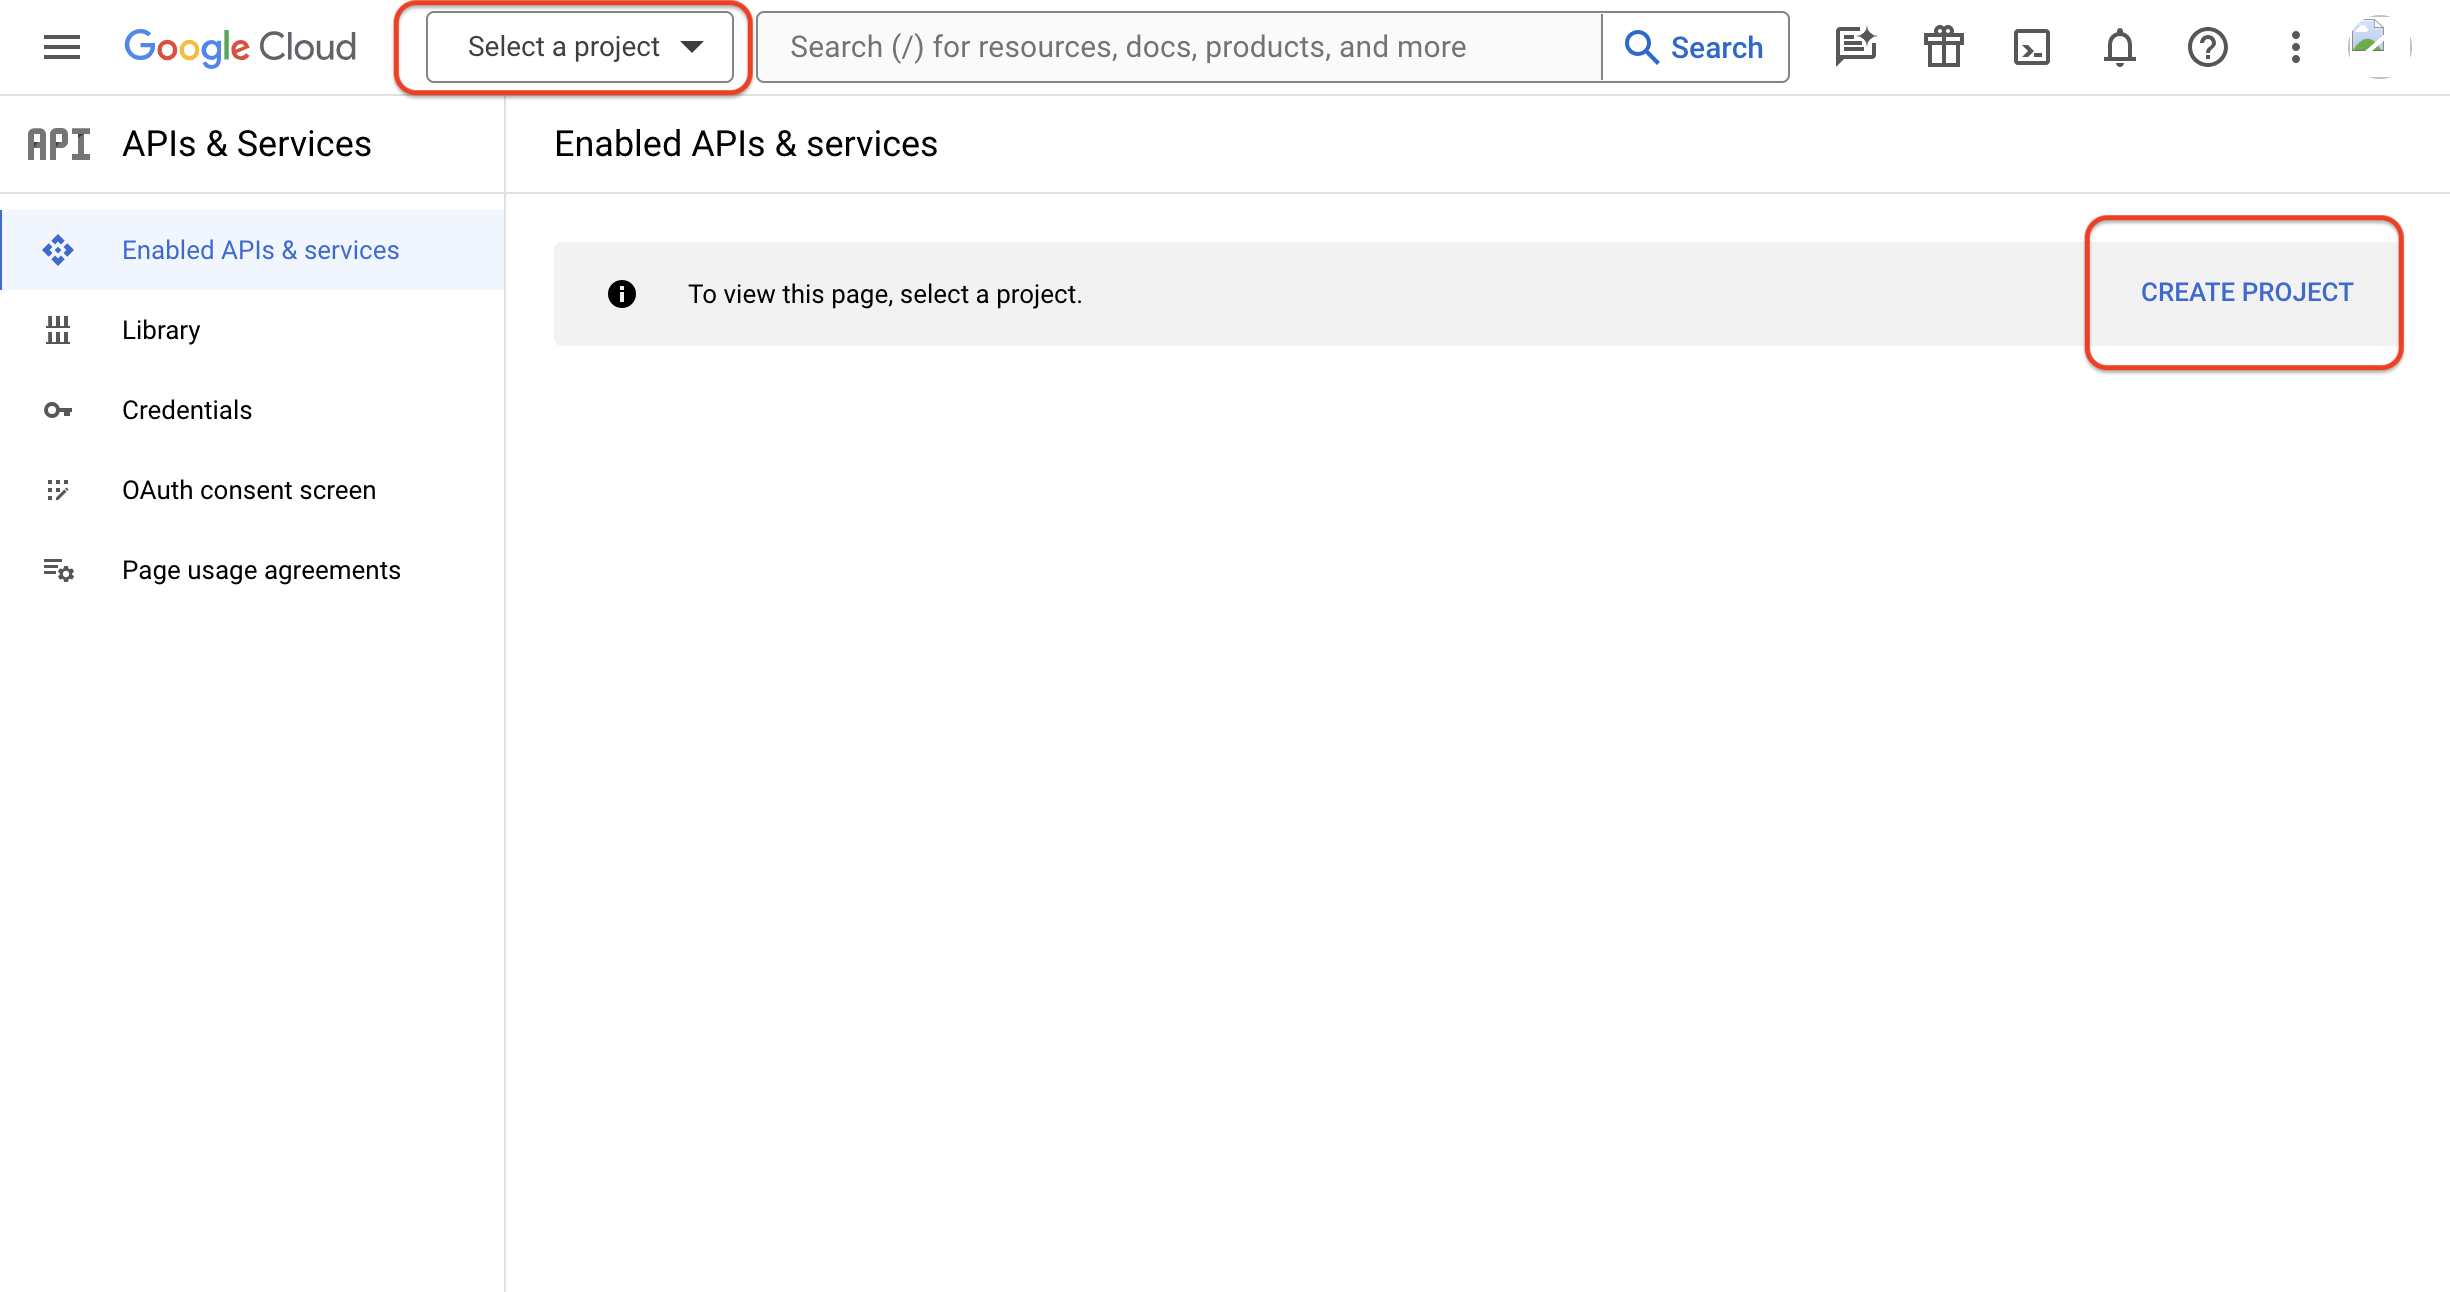
Once inside the console, you will need to create a project where the OAuth client will reside. Click the "Create Project" button to start.
Existing ProjectsThis guide assumes you have not created a project before. If you want to add an OAuth client to an existing project, you can select the project from the dropdown menu in the navbar.
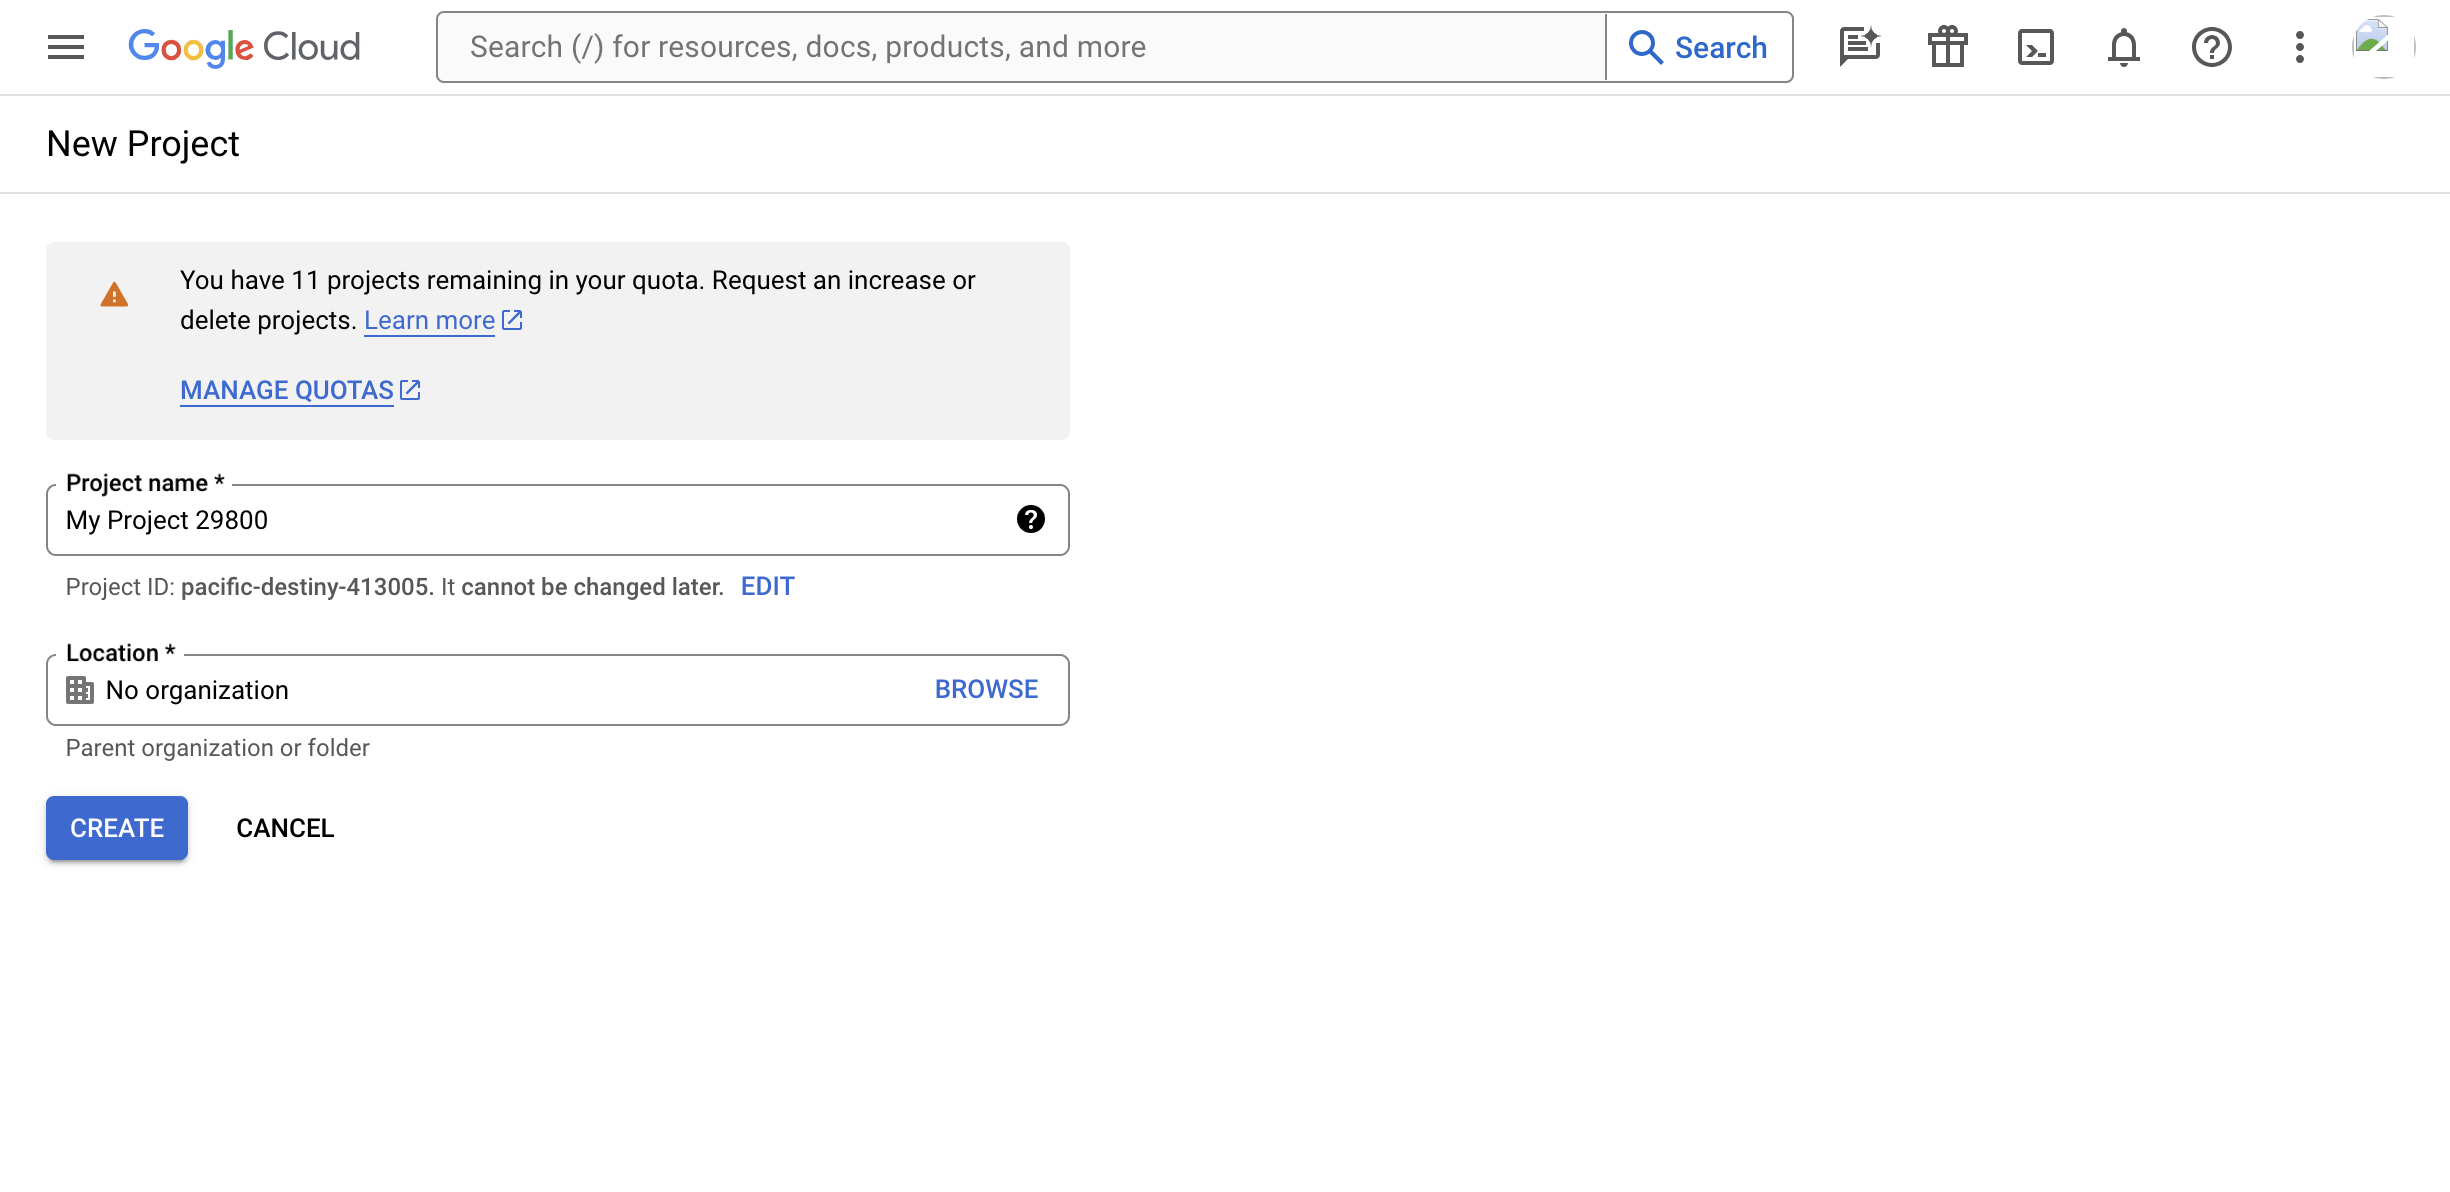
Name the project and choose the organization that makes sense for you (by default, it will get assigned No organization). Click the "Create" button to continue.
Step 4: Configure the OAuth Consent Screen
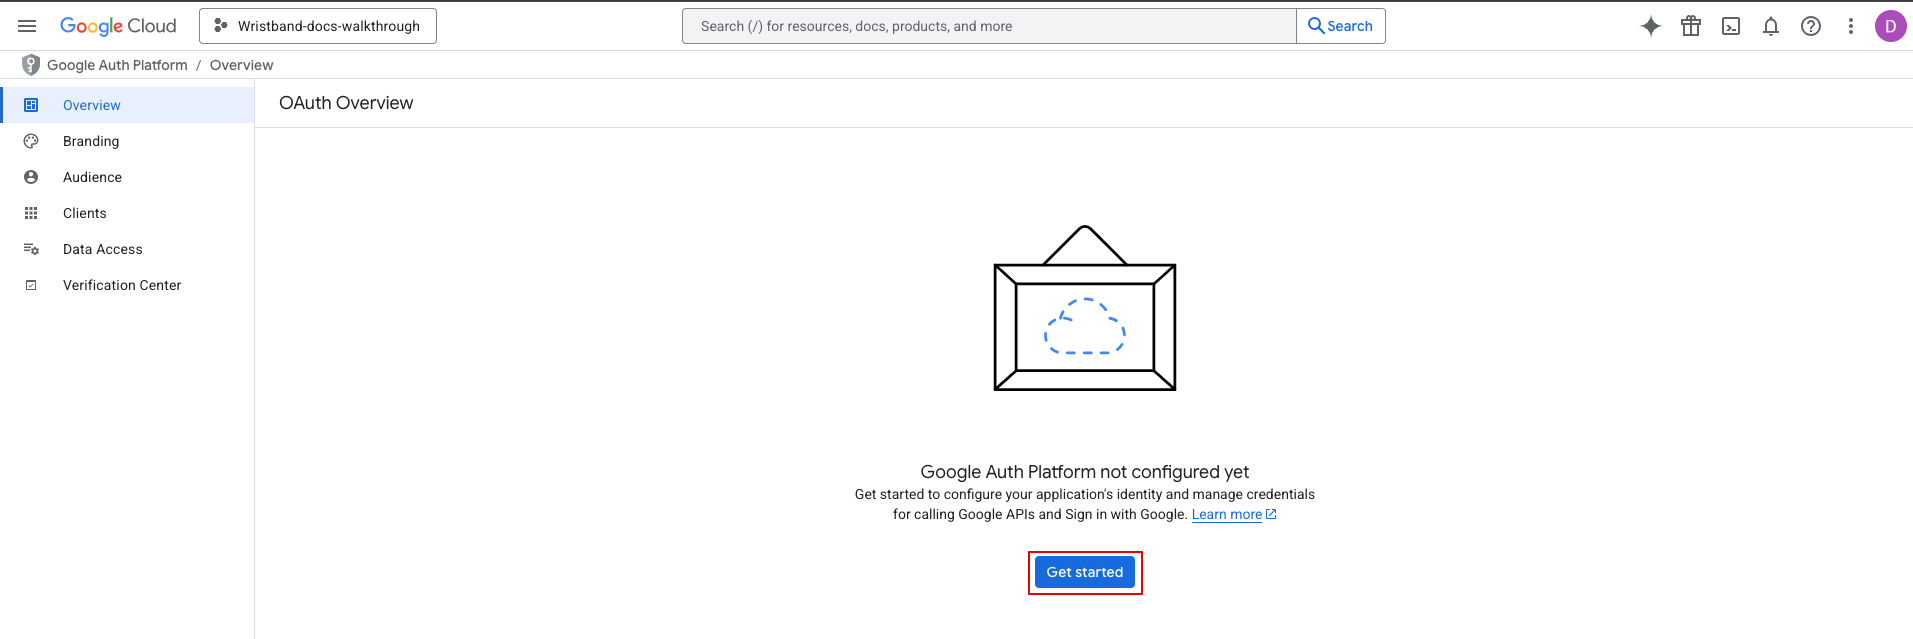
Once your project is created, you'll need to configure an OAuth consent screen. When your app redirects to Google for user authentication, Google displays a consent screen including a summary of your project and the requested scopes of access.
Step 4.0: On the "APIs & Services" page, select "OAuth consent screen" from the left side menu.

Then click the "Get Started" button.
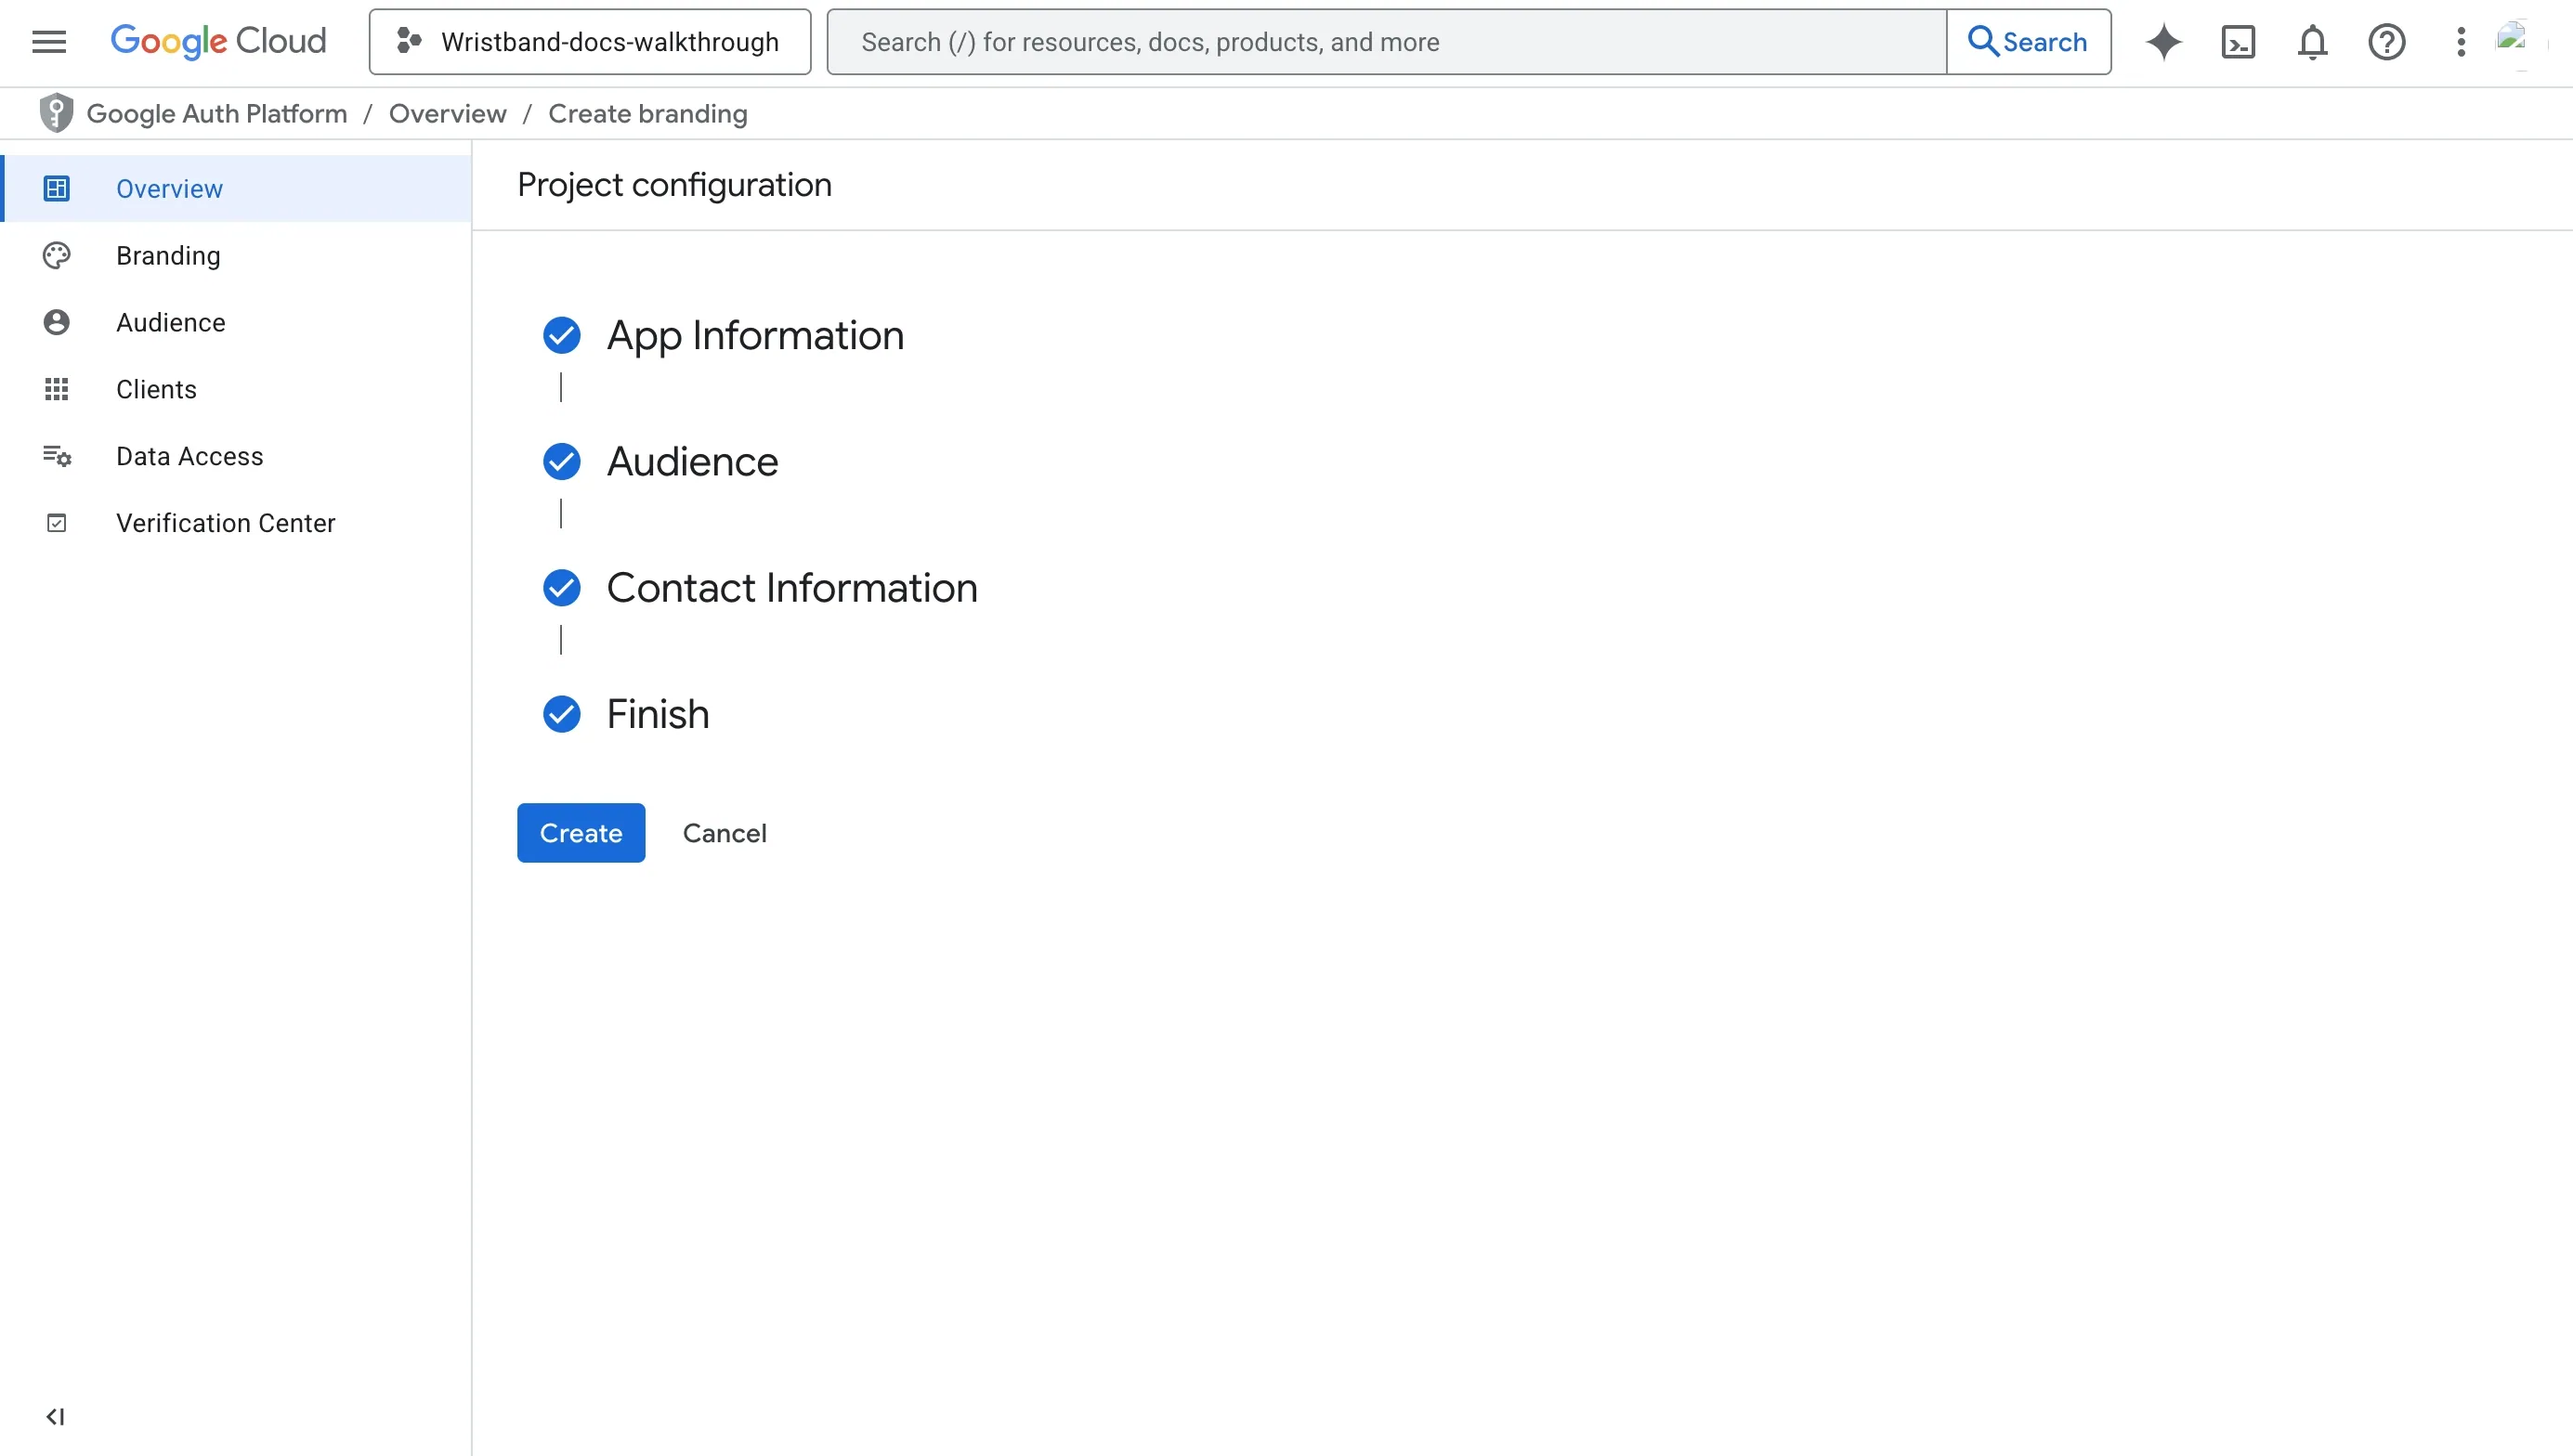
Step 4.1: Fill out the following mandatory fields:
- App name: Any appropriate value.
- User support email: Any appropriate value.
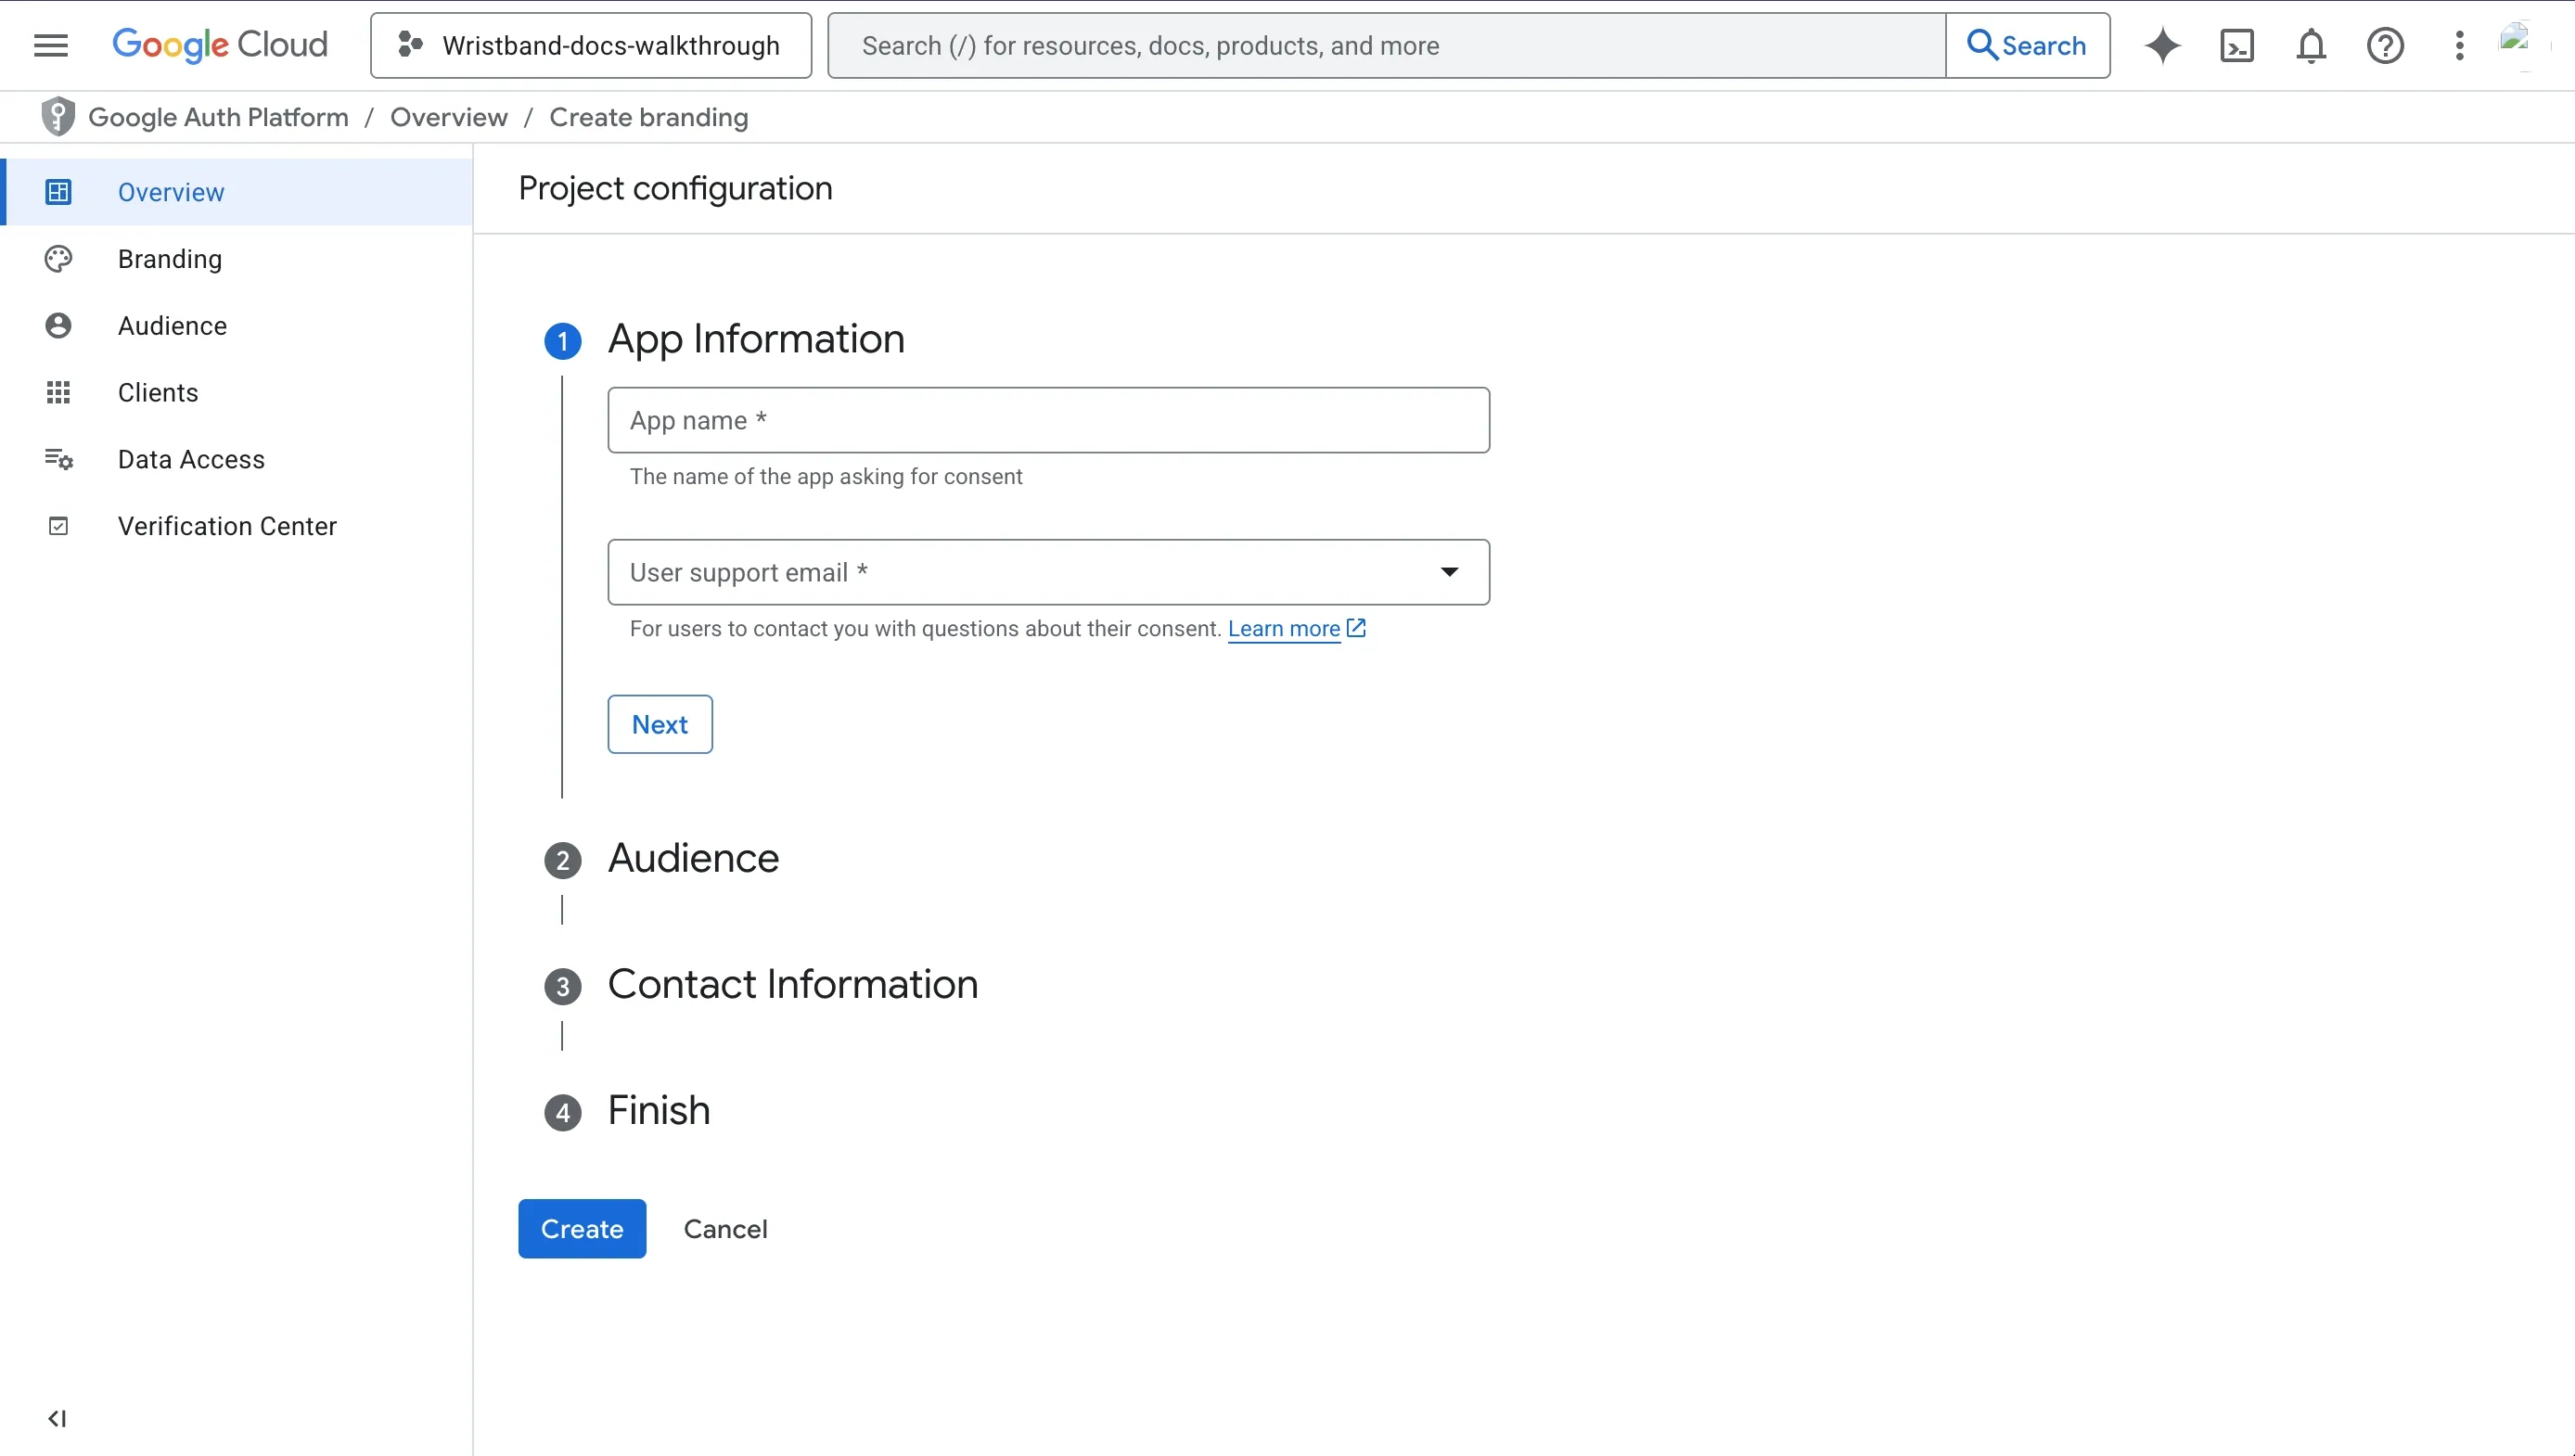
Step 4.2: For the audience, select the External option.
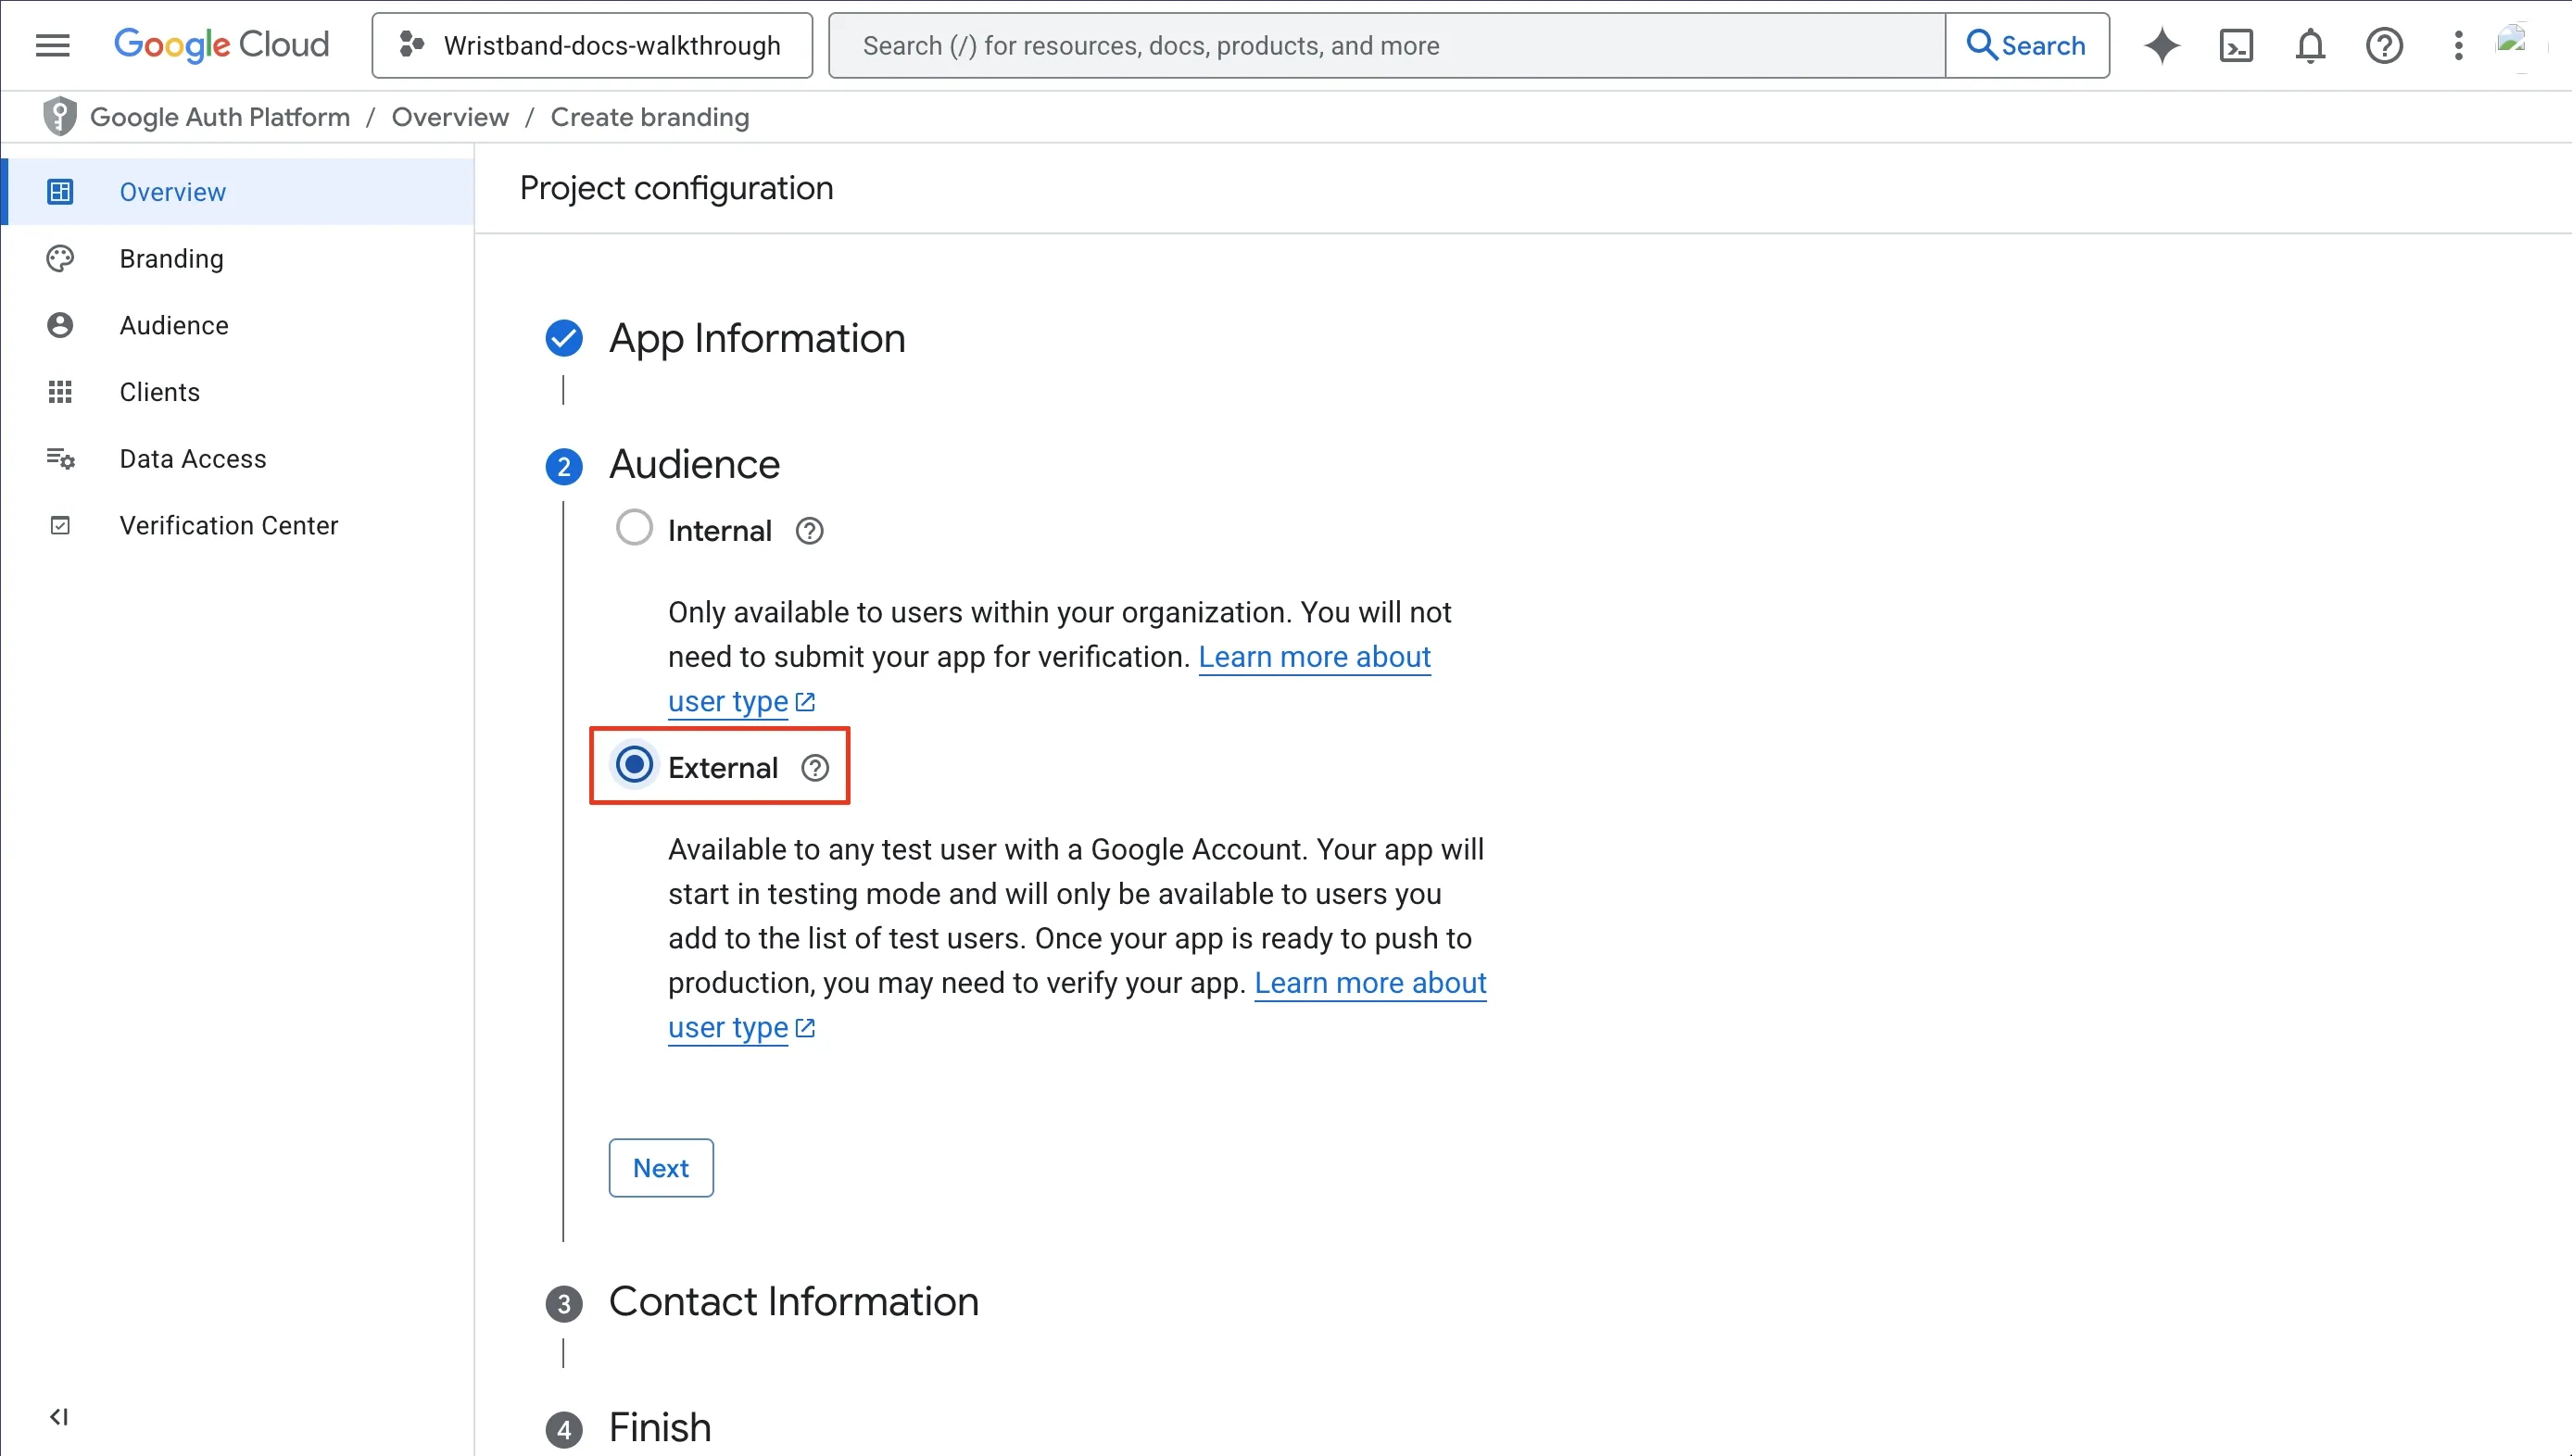
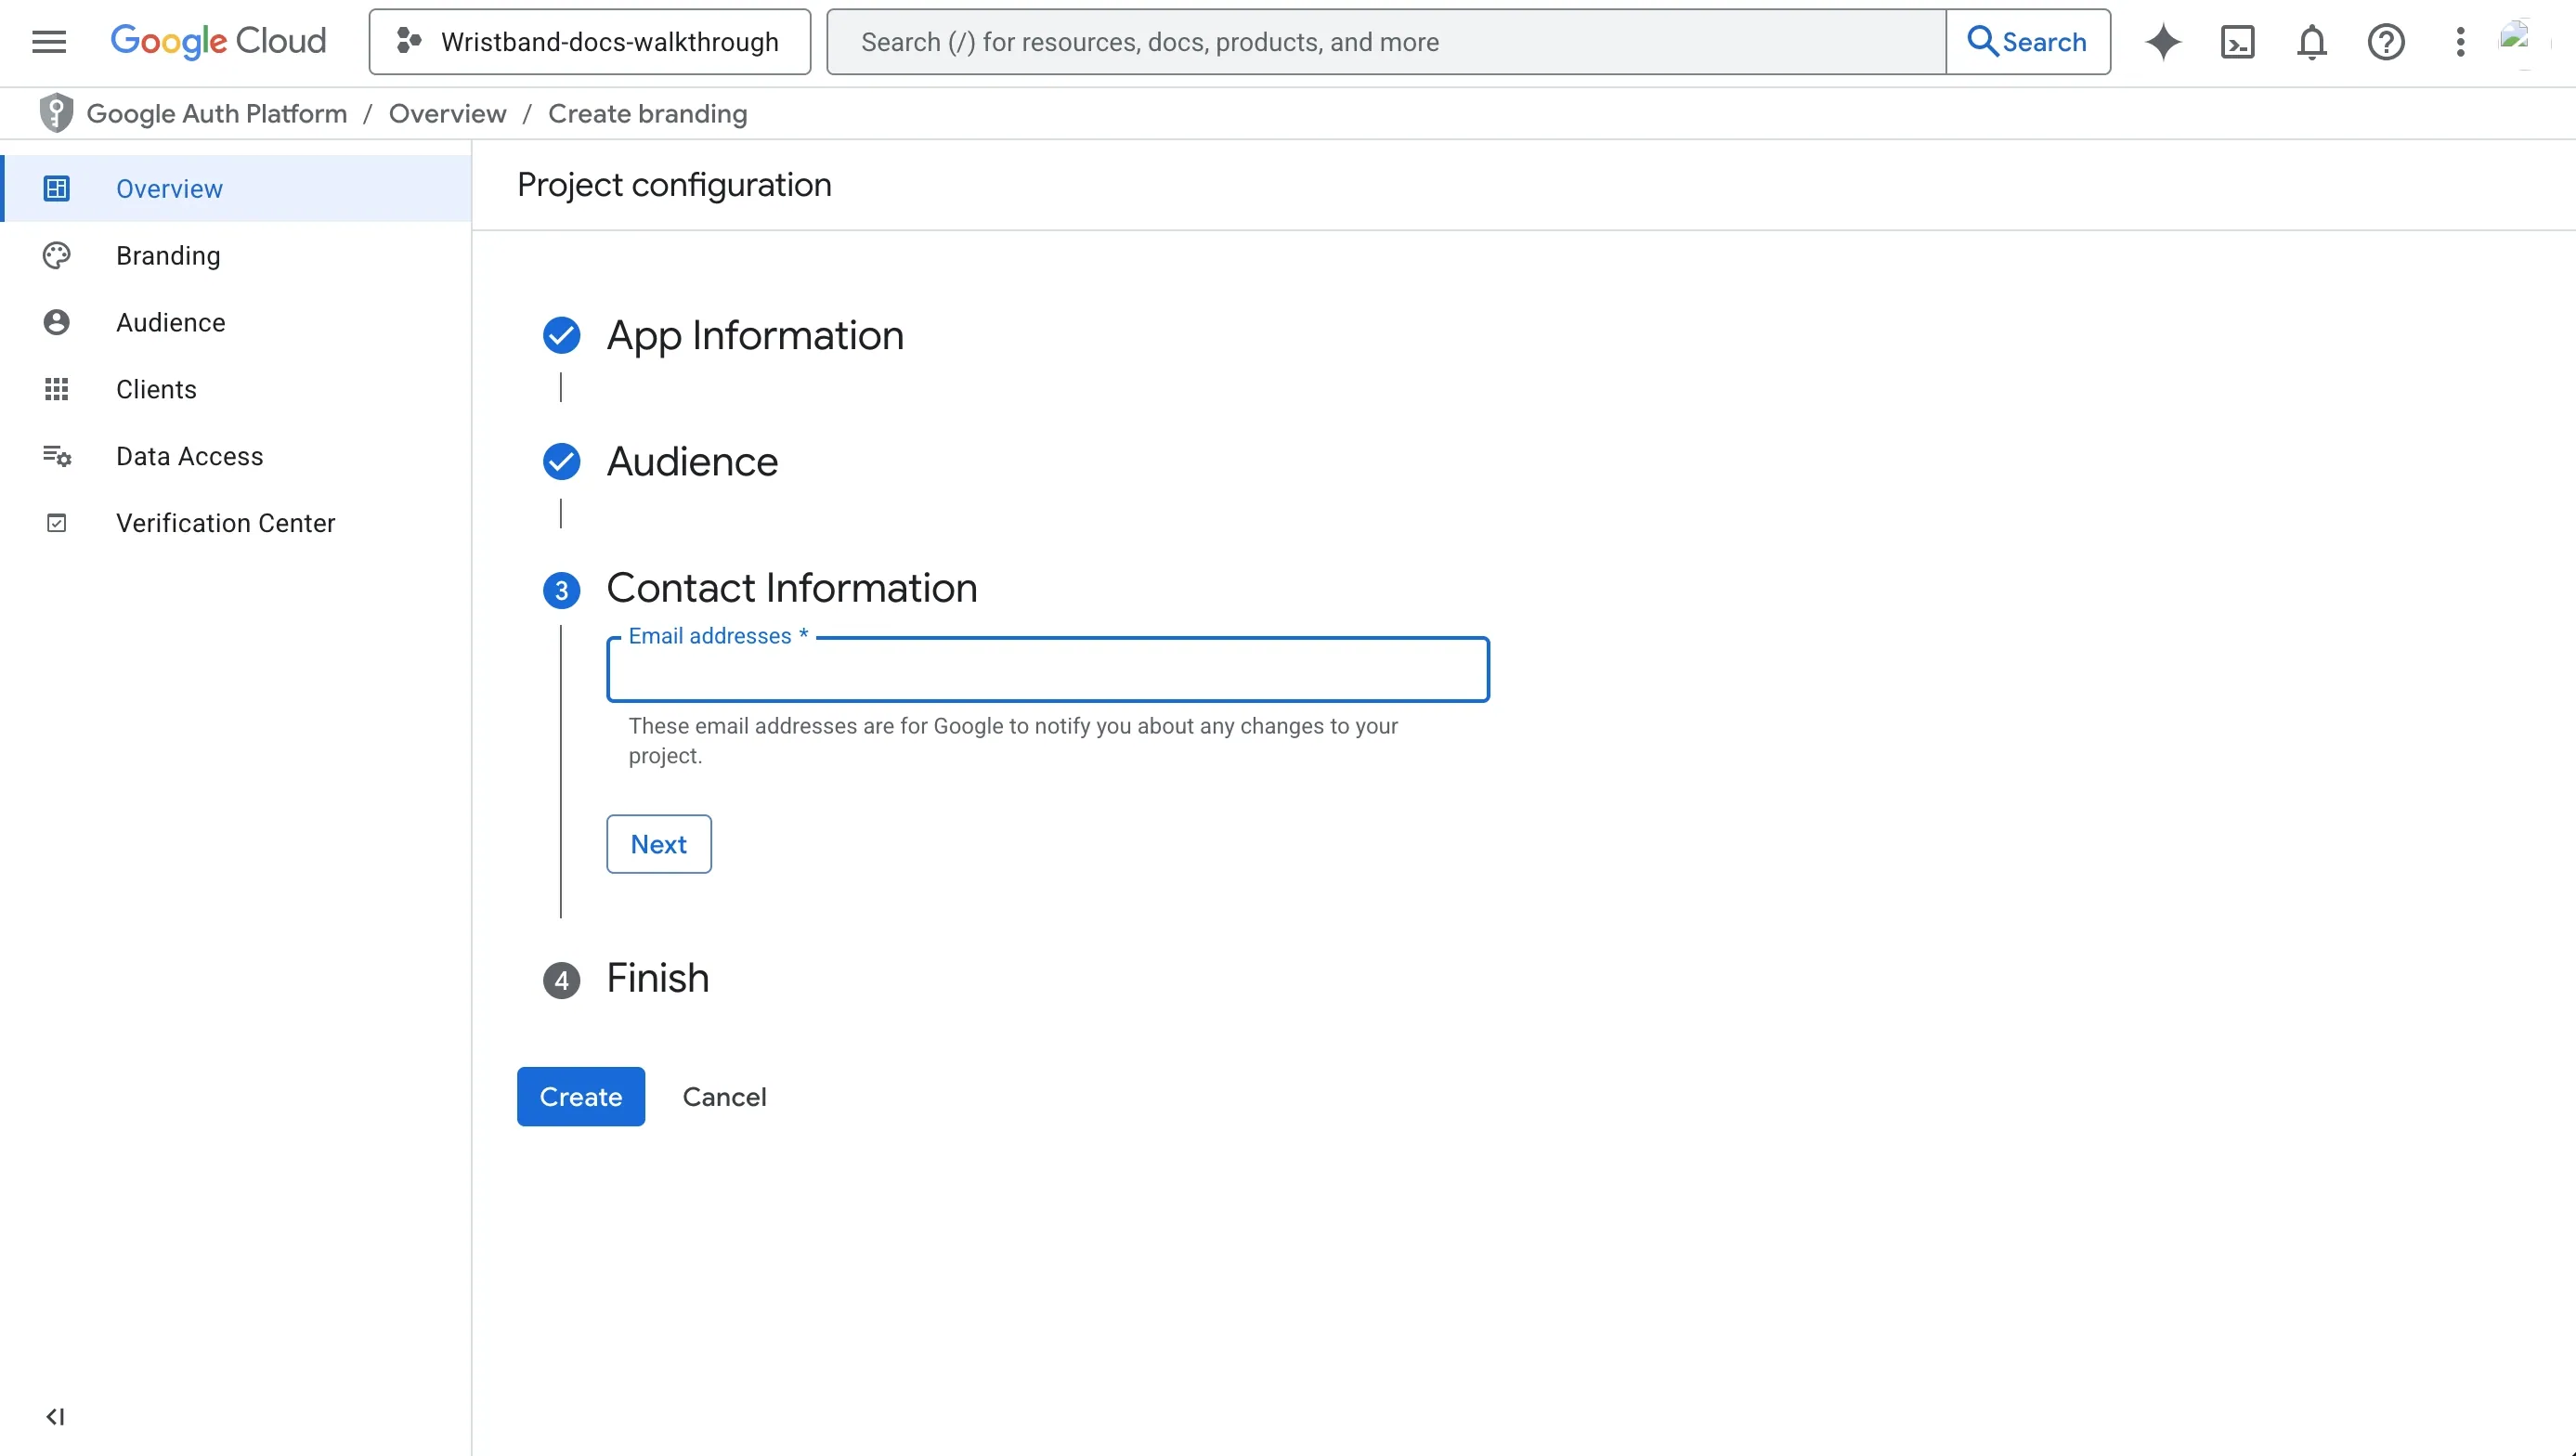
Step 4.3: Provide contact information.
Step 4.4: Agree to "Google API Services: User Data Policy".
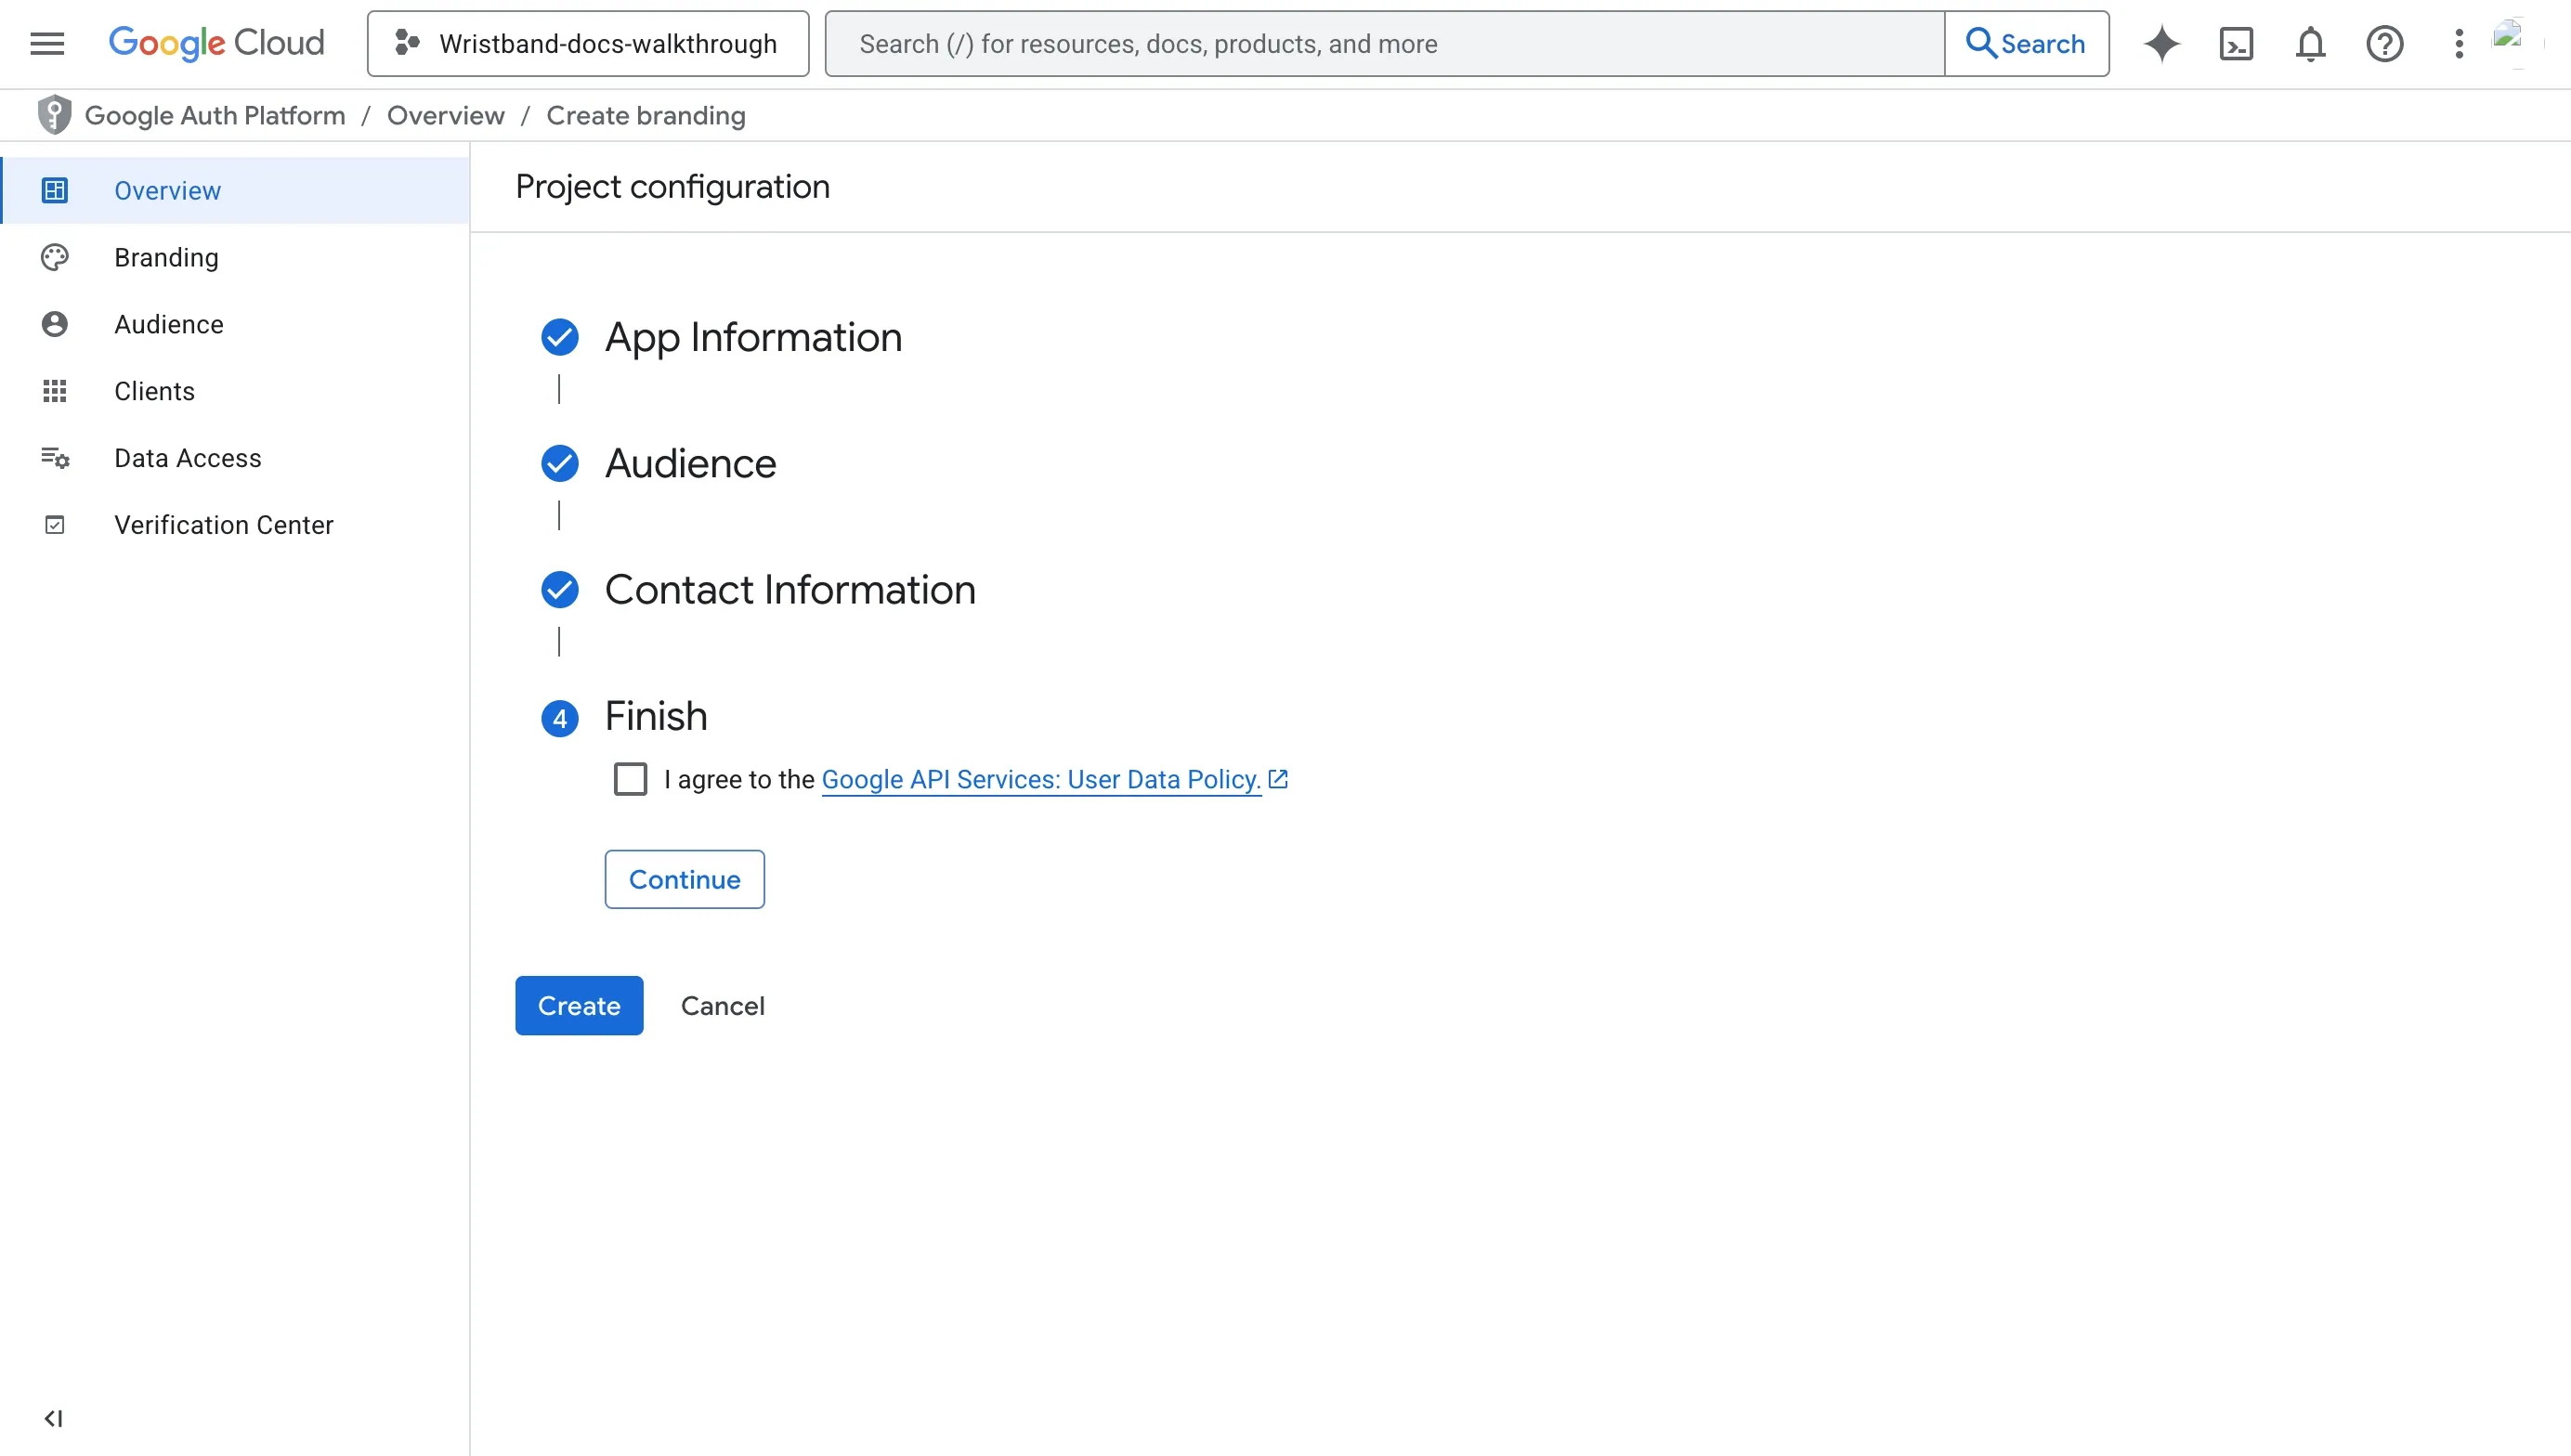
Step 4.5: Click the "Create" button.
Step 5: Configure Branding
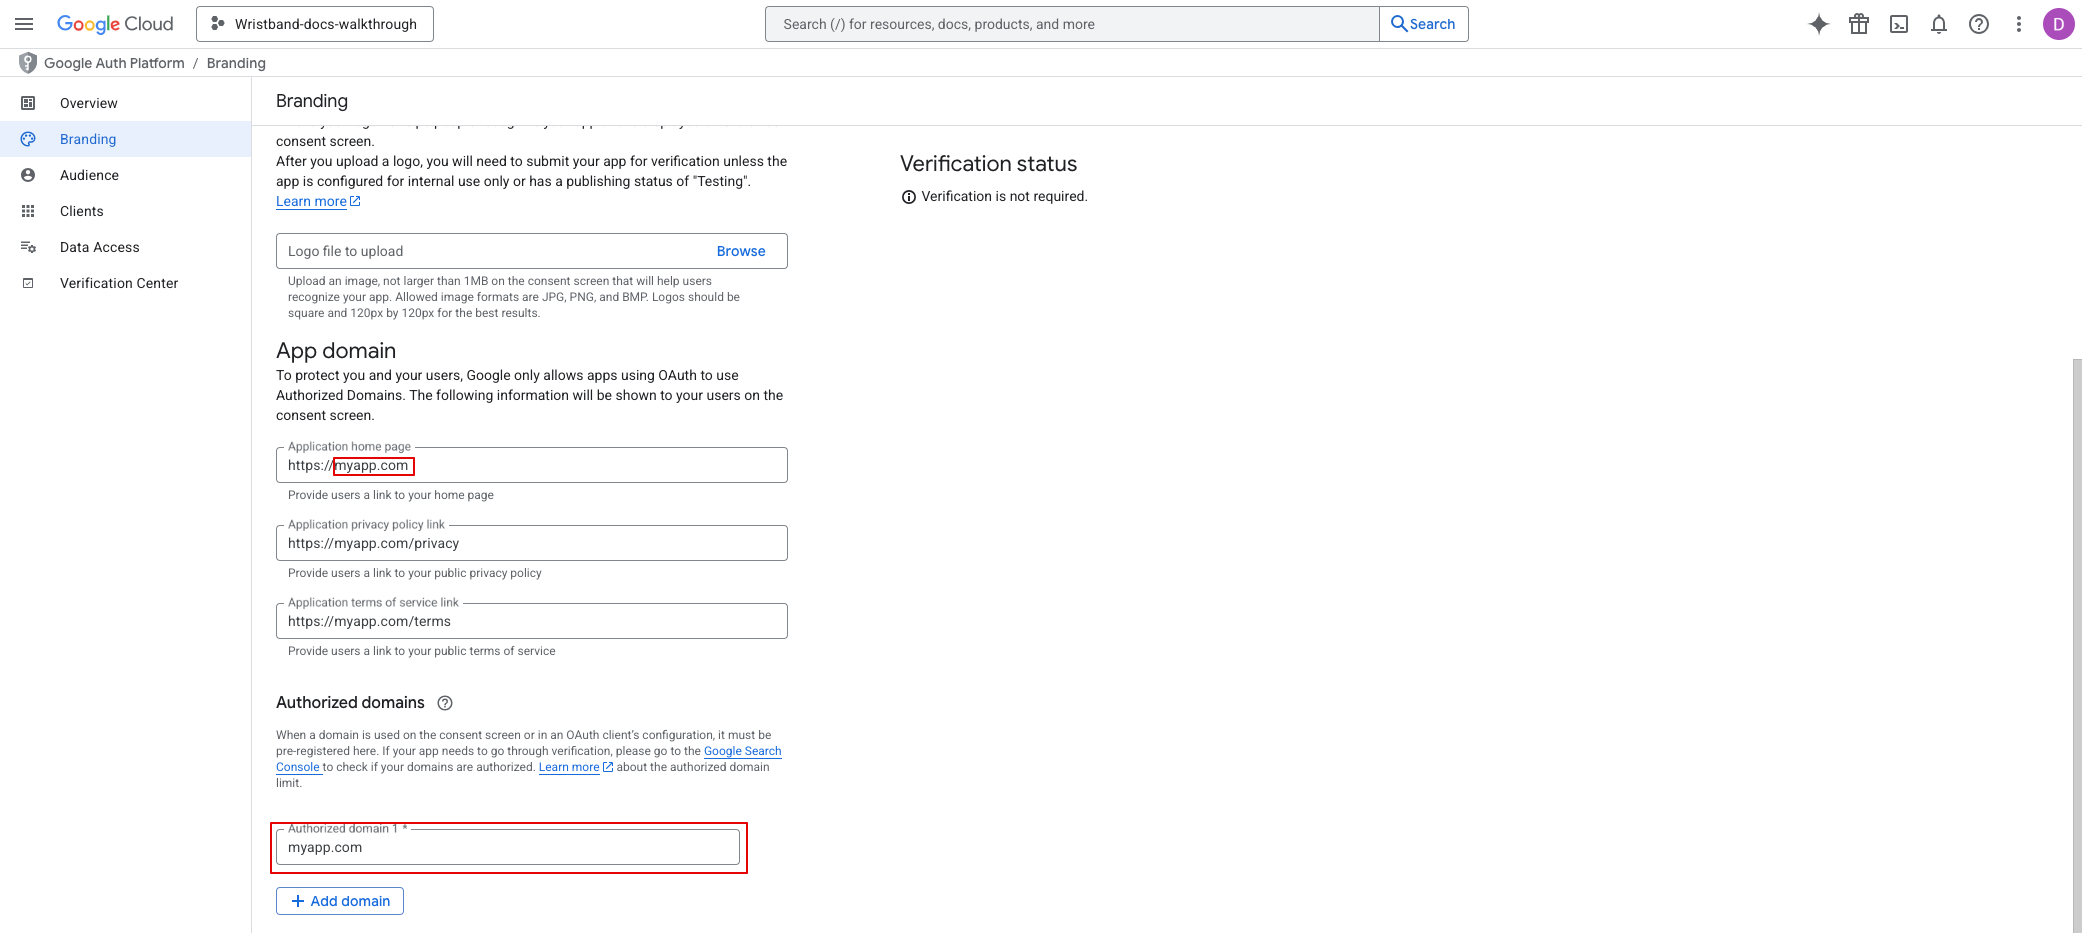
Next, click on the Branding option from the left navigation menu; there, you can add a logo, provide links to your website, privacy policy, and terms of service. For any links that you configure, you'll need to add their domains to the Authorized domains list.
NoteAny authorized redirect URIs that you register with your OAuth client in step 6 will automatically have their domains added to the "Authorized domains" list, so you don't need to manually add them.
Step 6: Create OAuth Client
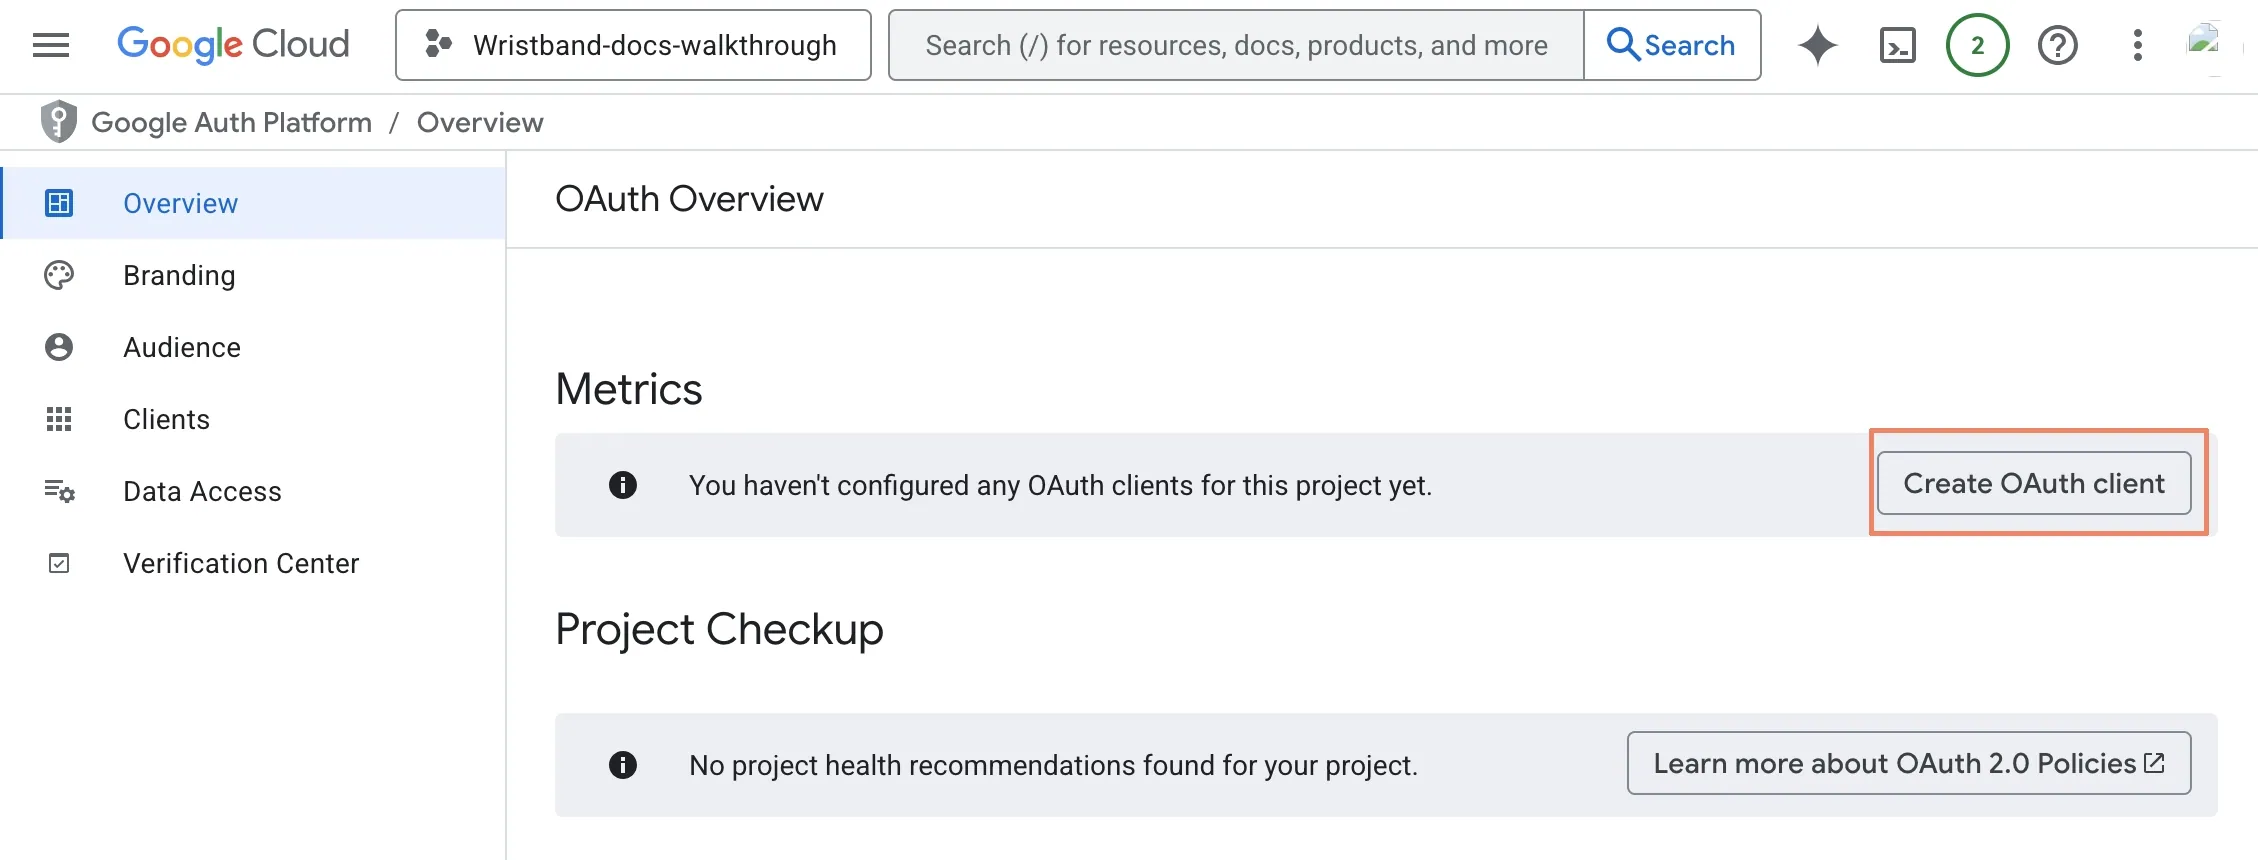
Now that the consent screen is configured, you can create the OAuth client needed for Wristband. You should be presented with the OAuth Overview page; from here, click the "Create OAuth client" button.
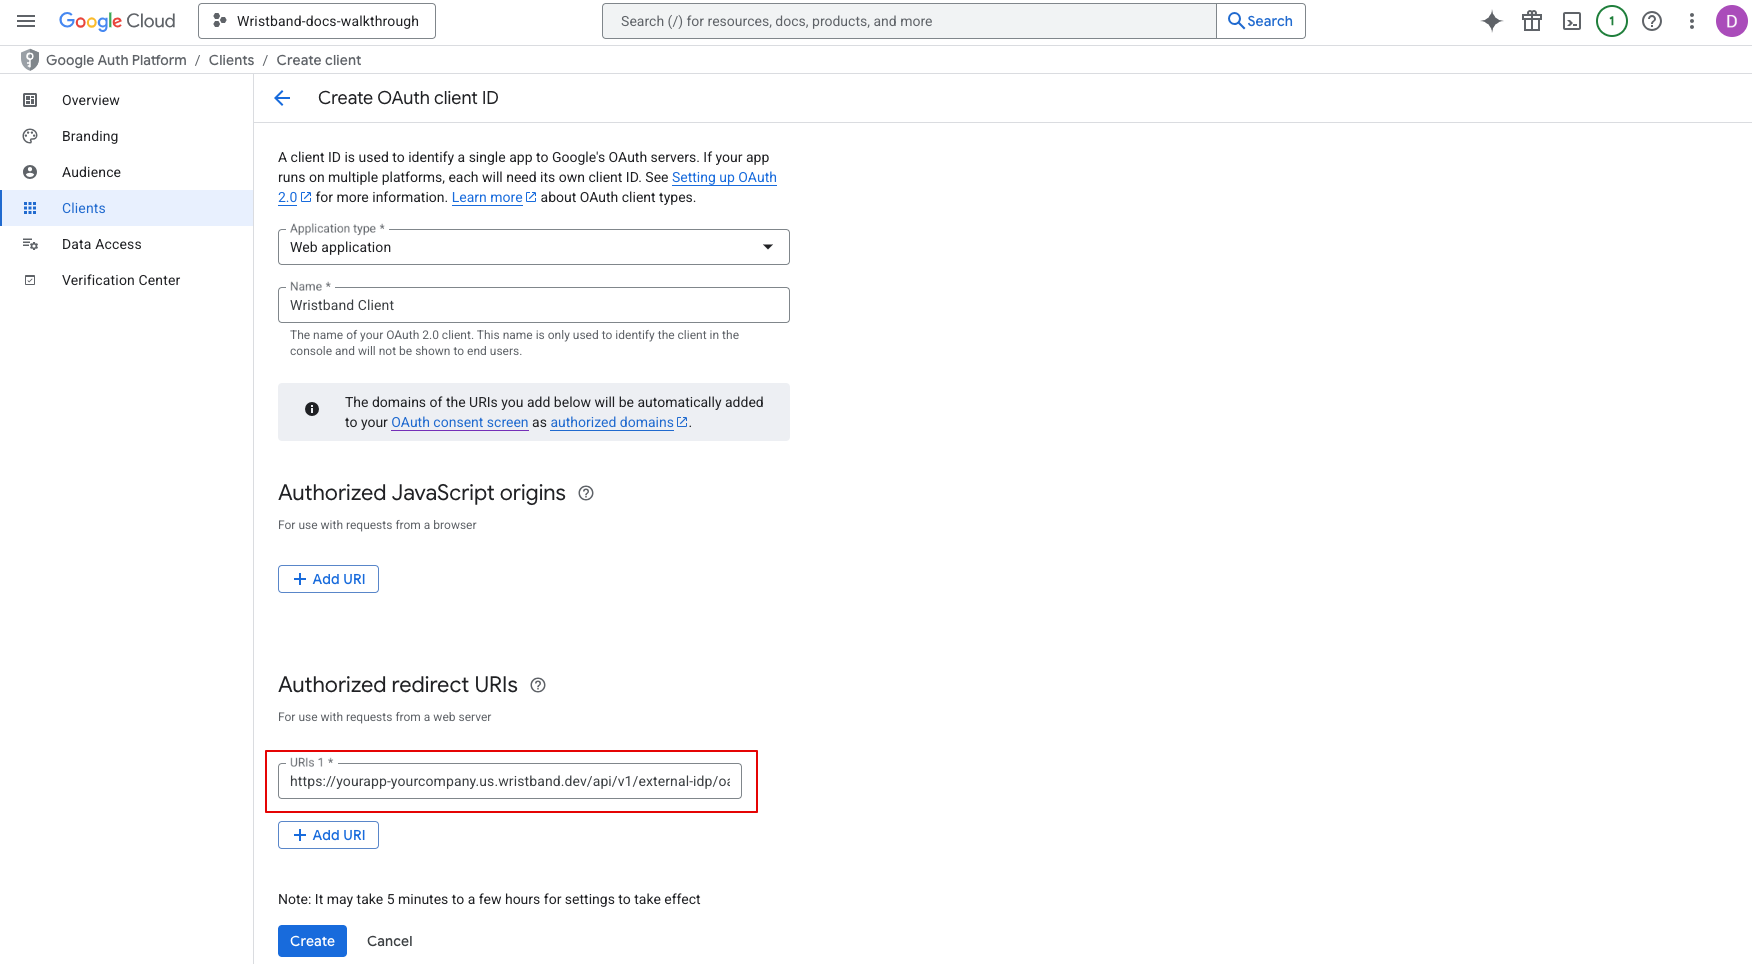
You will now be in the Clients section. Here, you will need to select the application type for your client.

Fill out the following mandatory fields:
- Application type:
Web application - Name: Any appropriate value.
- Authorized redirect URIs: Use the External IDP Redirect URL copied from step 1.
Click the "Create" button.
A modal will appear, displaying the Client ID and Client secret. Ensure that you copy these values, as they are required to complete the next step.
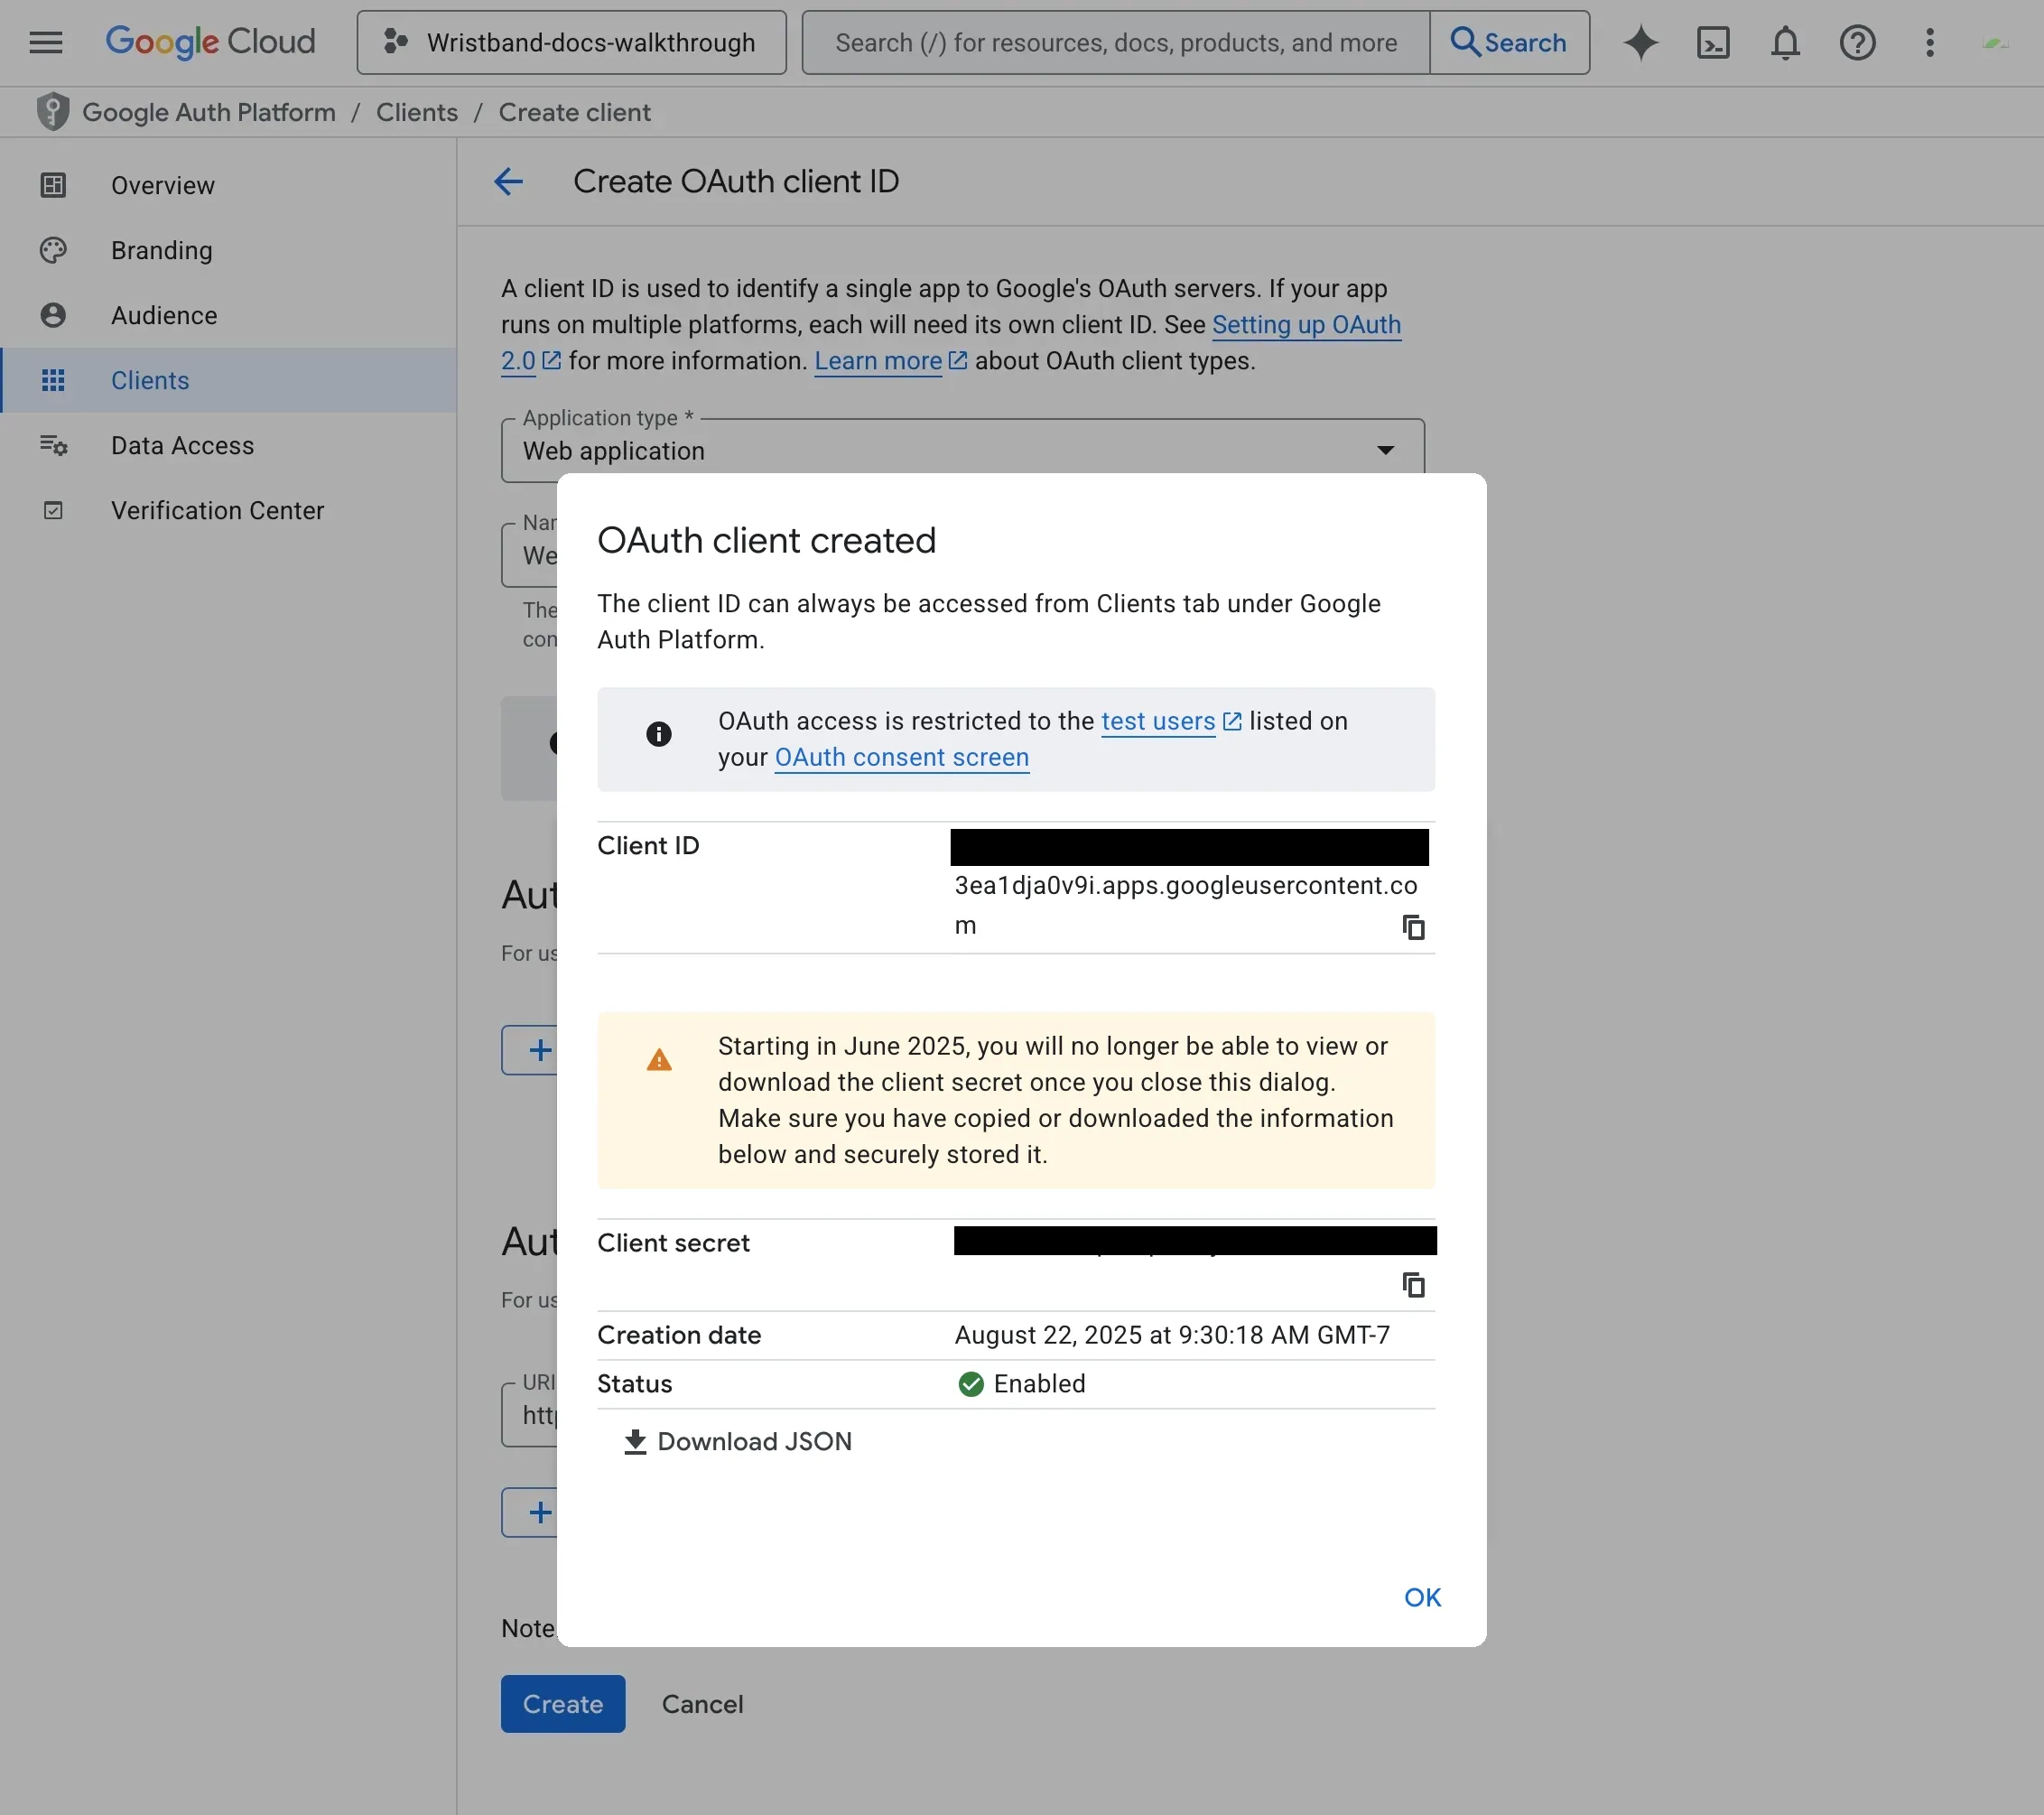
You have now configured everything necessary on Google's side for social login integration.
Step 7: Configure the Google IdP in Wristband
Return to the Wristband dashboard to the Social Identity Provider Page from step 1. Fill out the form with the following values:
- Client ID: The Client ID from step 6.
- Client Secret: The Client secret from step 6.
Optionally, you can add additional scopes that will be sent in the authorization request to Google (this is typically not required). By default, the following scopes will always be sent in the request:
- openid
- profile
Click "Save" to finish.
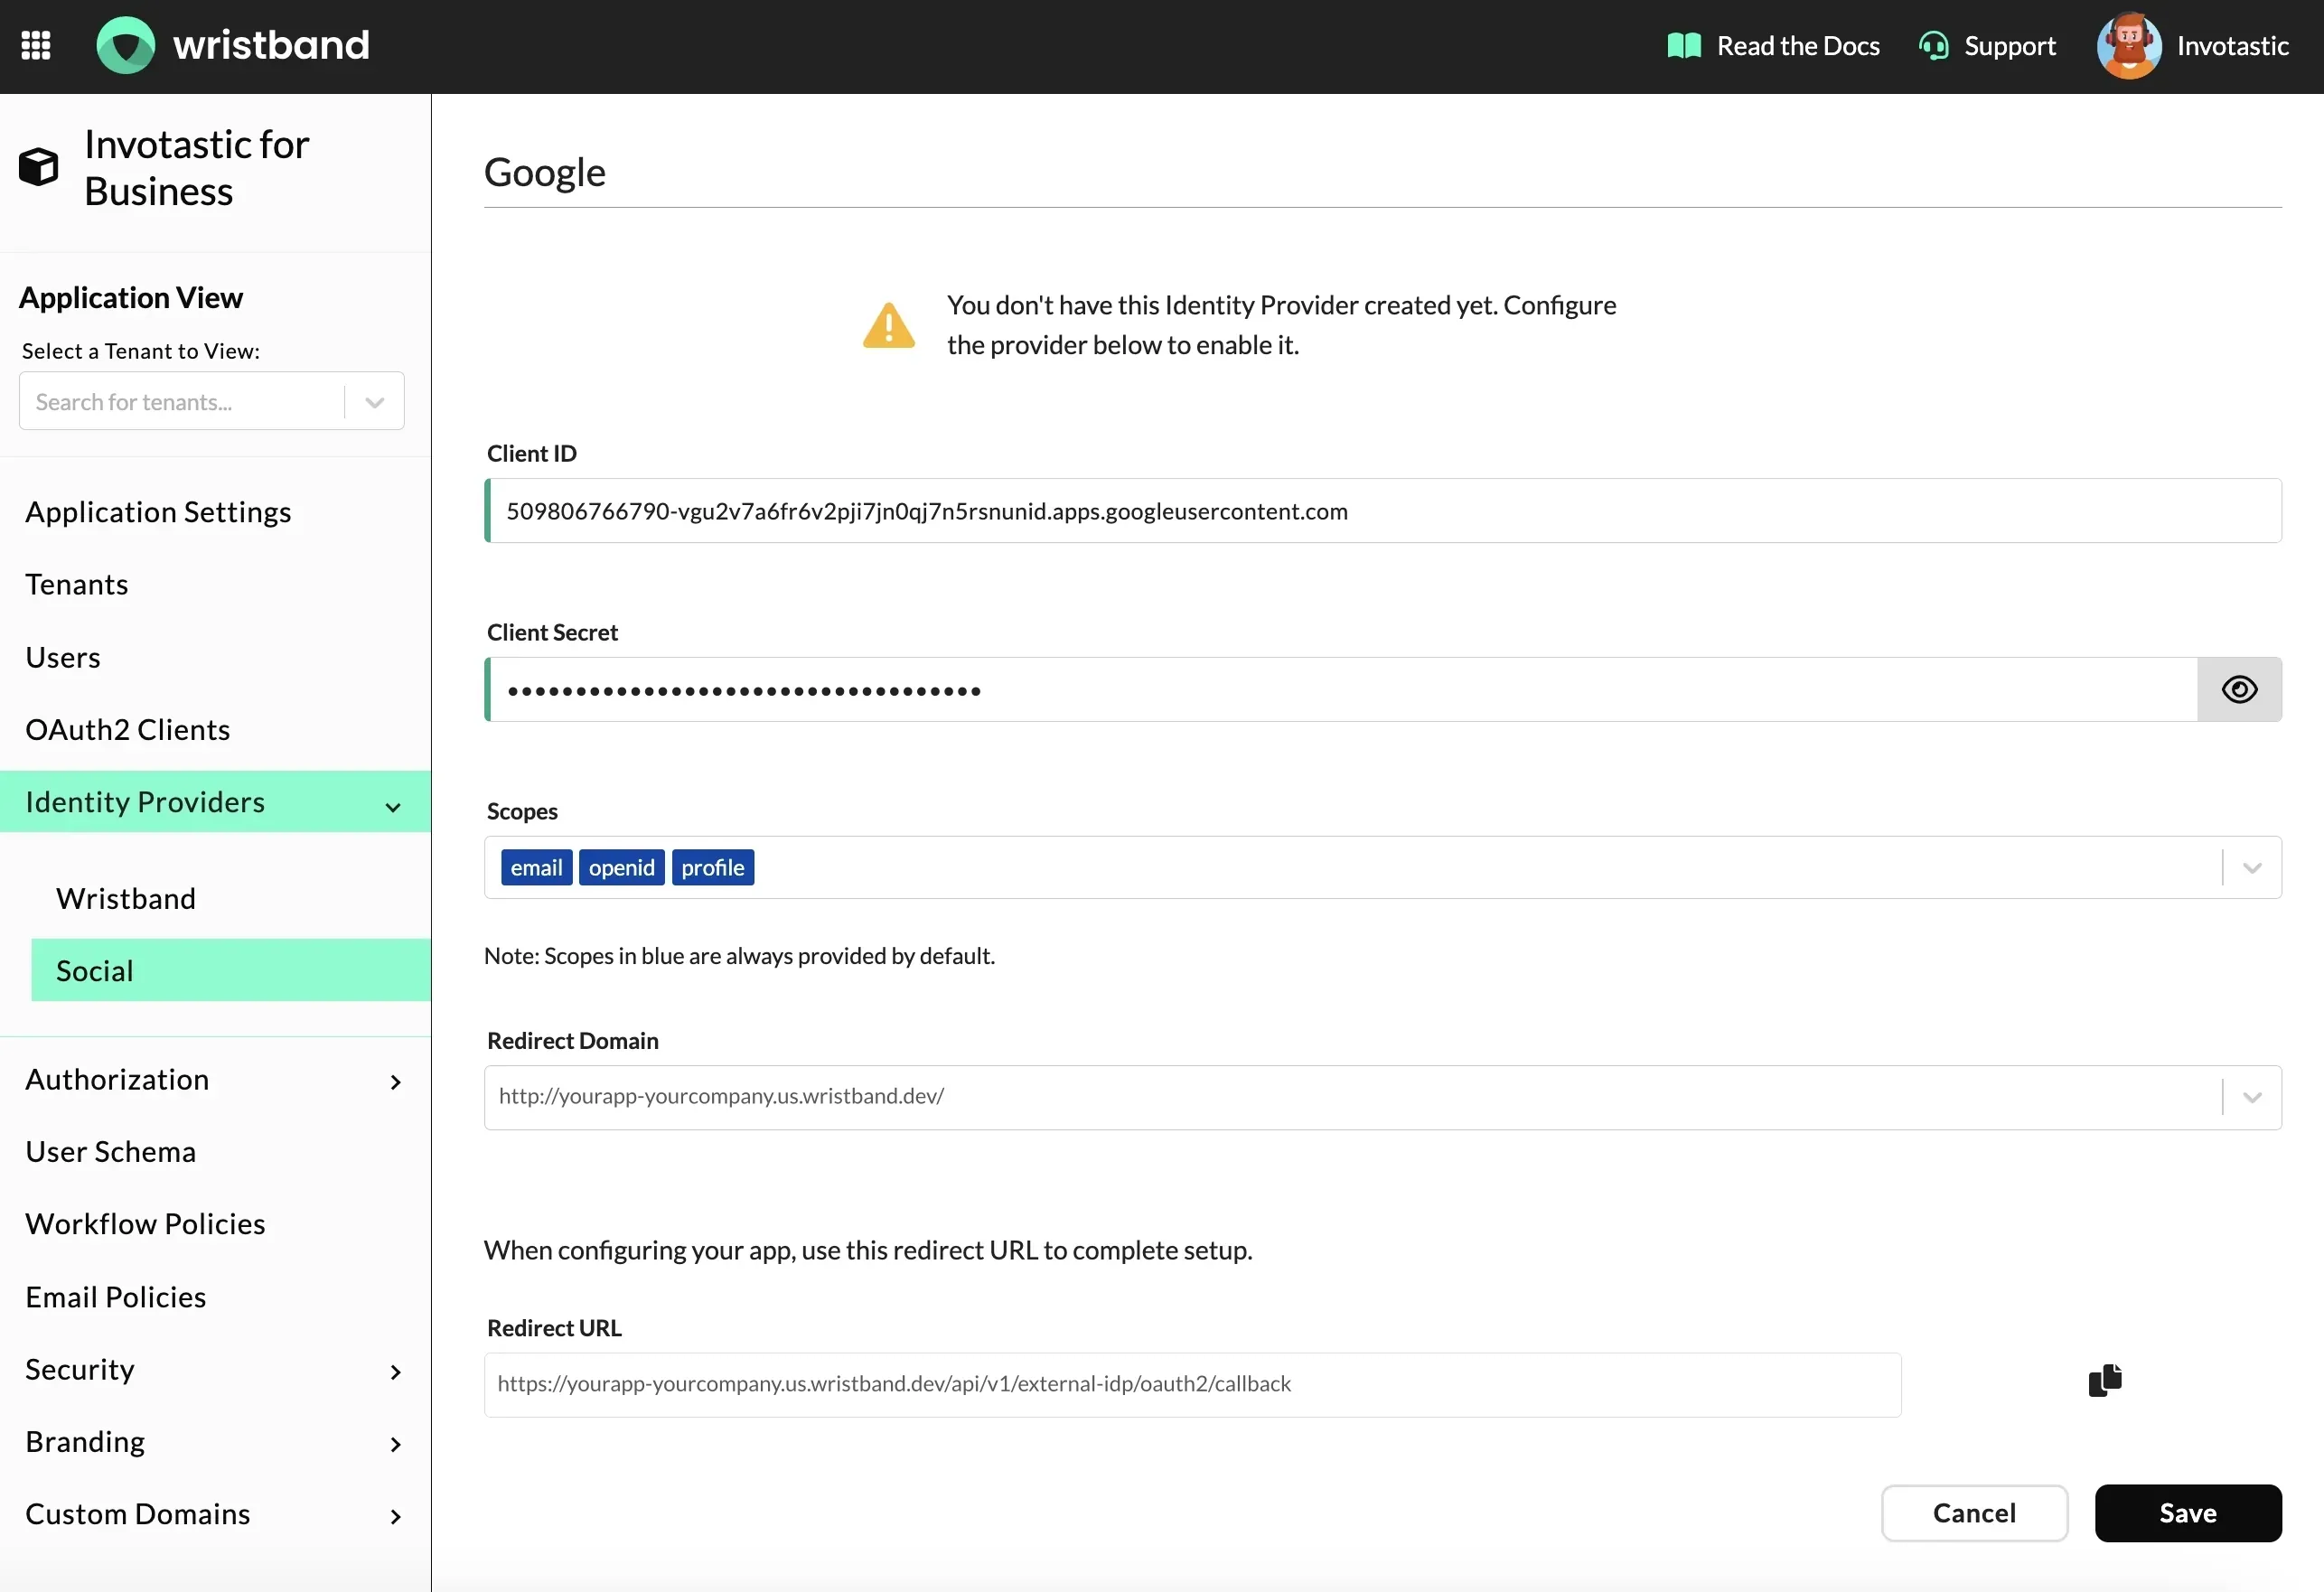
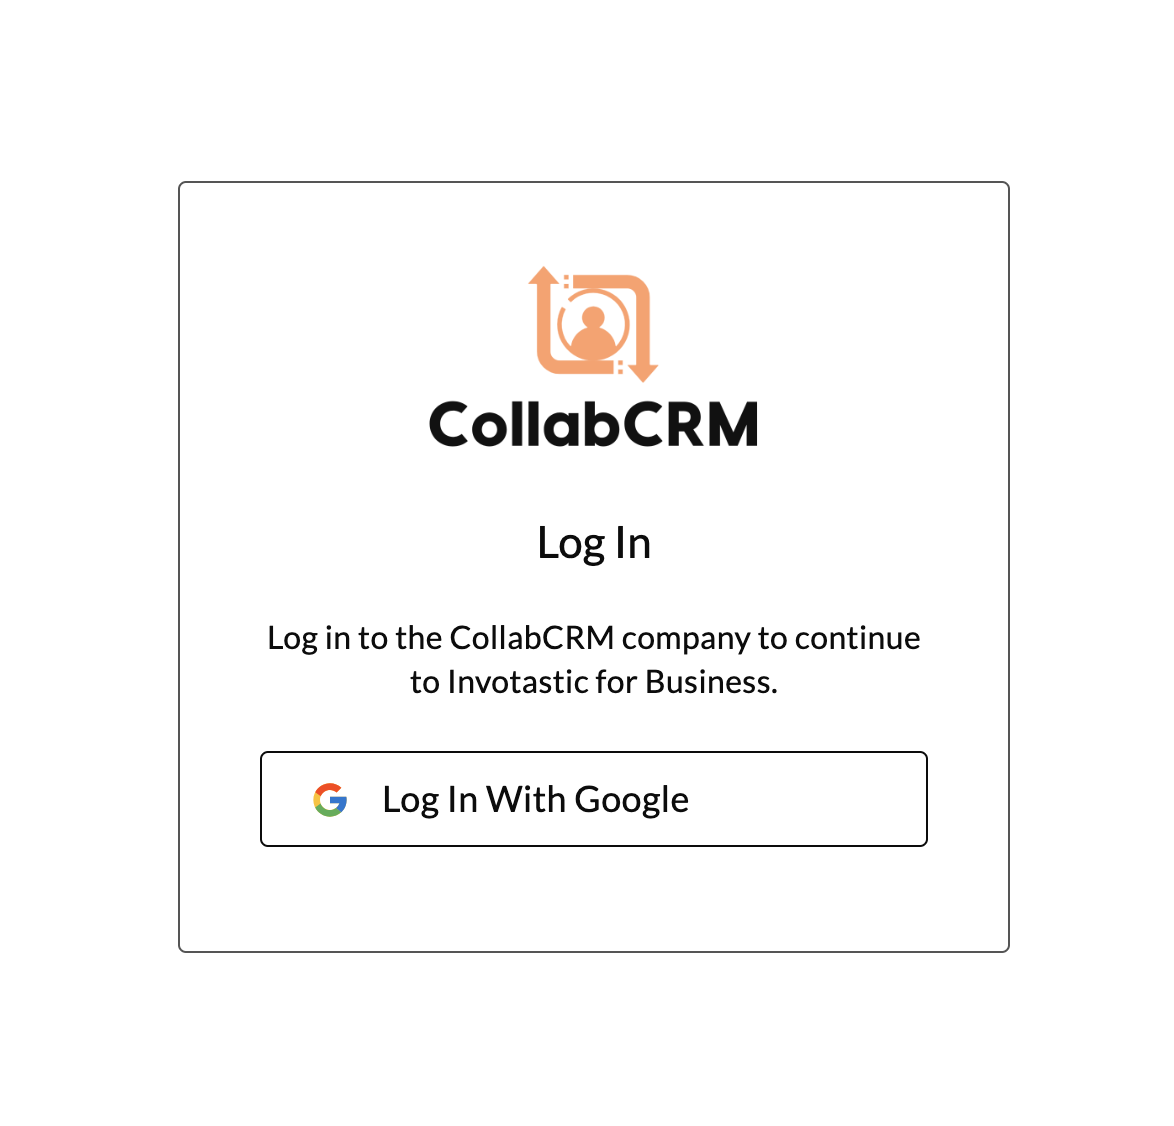
At this point, you've successfully enabled Google social login for your application. The next time users in this application reach the tenant-level Login Page, they should see a Google login button as shown in the image below.
Updated 4 months ago