Change Email: Self-Hosted UI
Implement your own Email Change Confirmation Pages using Wristband APIs to deliver a custom experience.
If you intend to self-host the Email Change Confirmation Pages, you can configure Wristband to reference the URLs where your pages are located. Wristband will then direct users to your pages wherever they need to be presented during the change email flow.
Configuration
Depending on which pages you intend to self-host, configure the relevant settings in the Wristband Dashboard.
Custom Page URLs
Under Application Settings → Custom Page URLs in the Application View of the Wristband Dashboard, set the following field to the location of your self-hosted page:
- External IdP Change Email Page URL: The location of your self-hosted External IdP Email Change Confirmation Page. Wristband redirects users here after they authenticate with an external IdP, passing along the External IdP authorization code needed to complete the change email flow. Supports the
{tenant_name}placeholder for tenant subdomains.
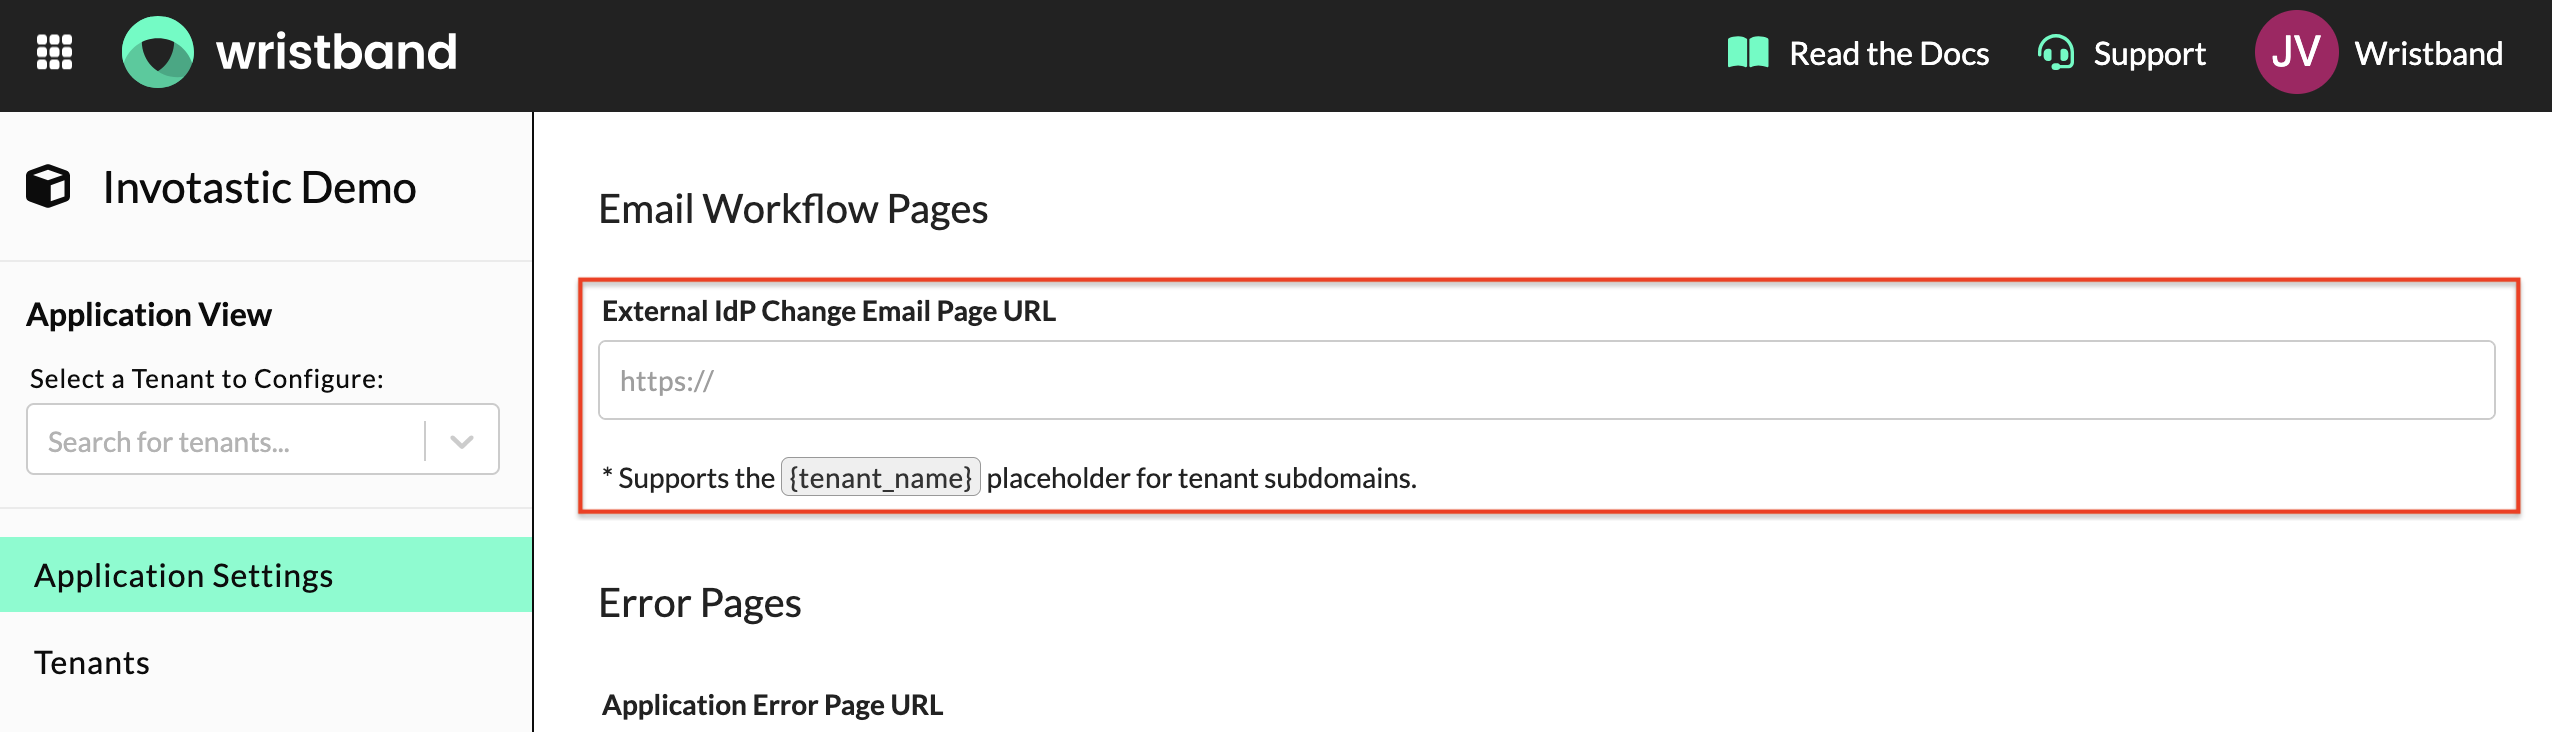
External IdP Change Email Page URL field in Application Settings → Custom Page URLs
Email Policies
Under Email Policies in the Application View of the Wristband Dashboard, set the Action Link URL for the relevant Change Email email templates to the locations of your self-hosted pages. Individual tenants can also override these application-level settings.
- Email Change Confirmation: Set to the location of your self-hosted Email Change Confirmation Page. Wristband sends this URL in the Email Change Confirmation email when a user initiates a change email request.
- Passwordless Email Change Confirmation: Current Email: Set to the location of your self-hosted Passwordless Email Change Confirmation Page. Wristband sends this URL in the Passwordless Email Change Confirmation email during the Magic Link login change email flow.
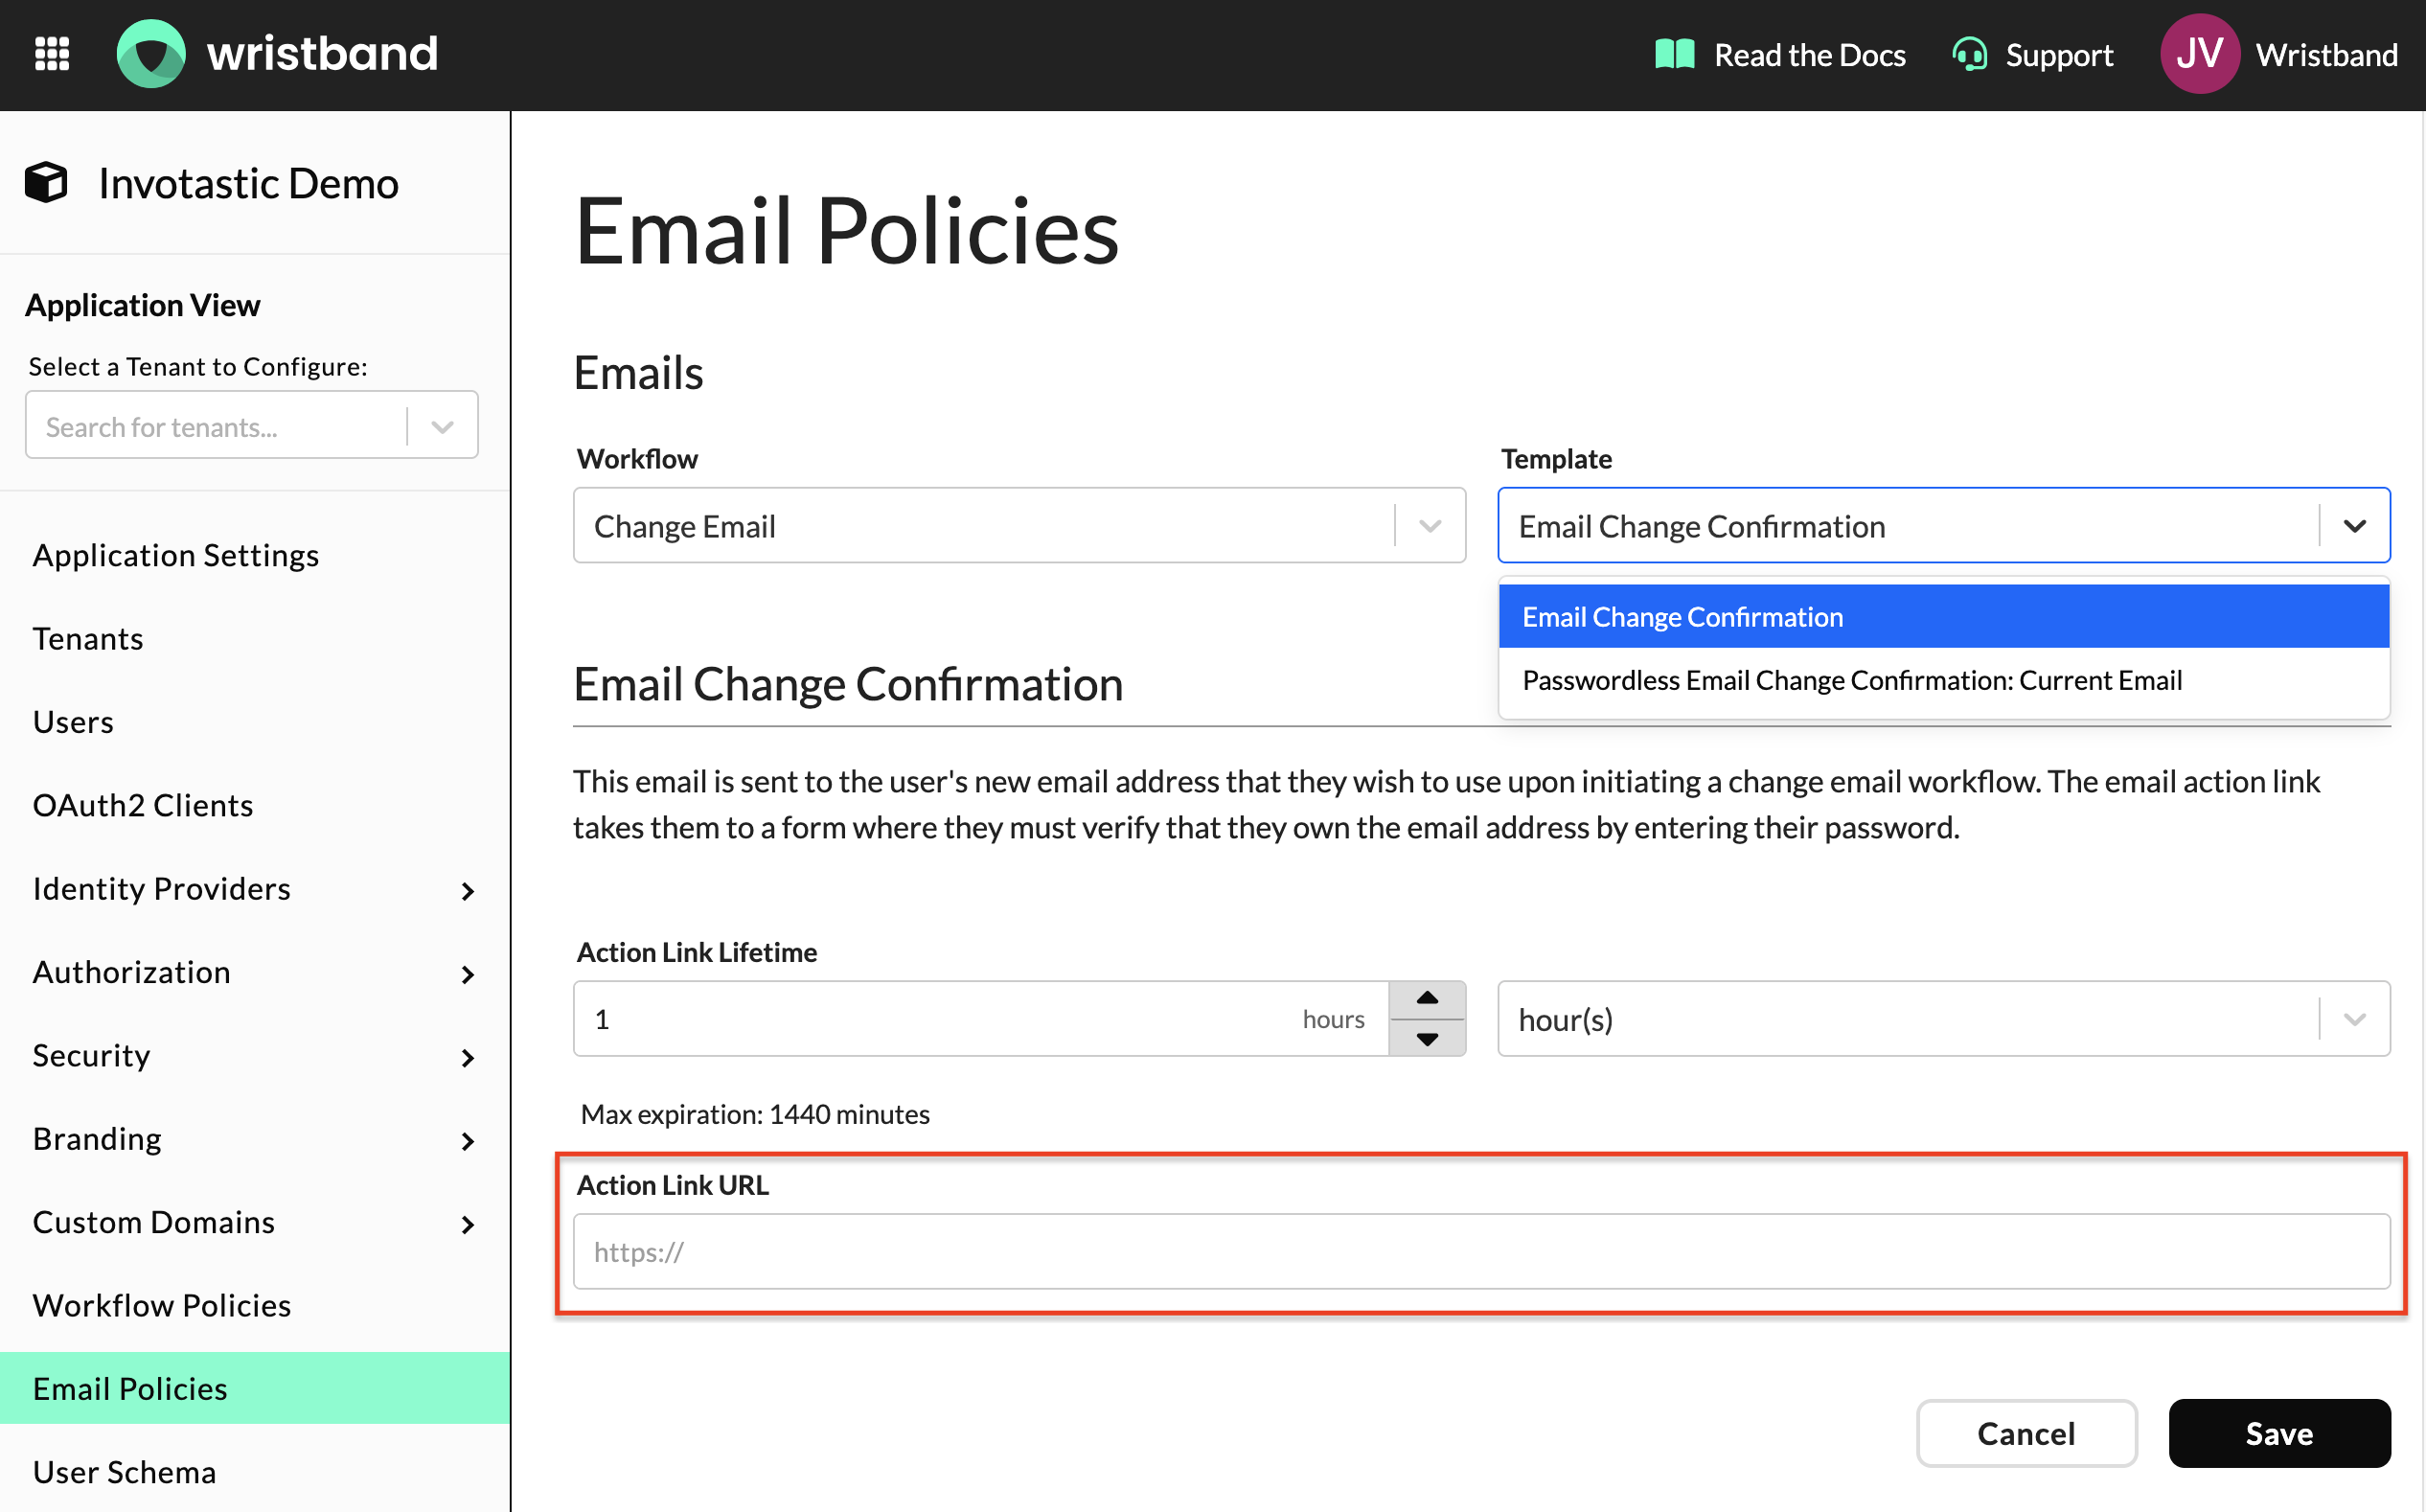
Change Email email templates Action Link URL fields in Email Policies
Wristband IdP: Password Login
At a high level:
- The user clicks on the Action Link in the Email Change Confirmation email sent to their inbox.
- The user is redirected to your application's self-hosted Email Change Confirmation Page along with the Email Authorization Code query parameter.
- The user submits their password.
- Your application calls the Wristband Confirm New Email For Password Auth Flow API, passing along the Email Authorization Code.
- A message is displayed to the user indicating that verification succeeded.
At this point, the workflow is complete, and the user can exit the page.

Wristband IdP: Magic Link Login
At a high level:
- The user clicks on the Action Link in the Email Change Confirmation email sent to their inbox.
- The user is redirected to your application's self-hosted Email Change Confirmation Page along with the Email Authorization Code query parameter.
- The user clicks the "Continue" button.
- Your application calls the Wristband Confirm New Email For Passwordless Email Auth Flow API, passing along the Email Authorization Code.
- During API execution, a Passwordless Email Change Confirmation email is sent to the user's current email address.
- The user clicks on the Action Link in the Passwordless Email Change Confirmation email sent to their inbox.
- The user is redirected to your application's self-hosted Passwordless Email Change Confirmation Page.
- Your application calls the Wristband Confirm Current Email For Passwordless Email Auth Flow API, passing along the Email Authorization Code.
- A message is displayed to the user indicating that verification succeeded.
At this point, the workflow is complete, and the user can exit the page.

External Identity Provider
At a high level:
- The user clicks on the Action Link in the Email Change Confirmation email sent to their inbox.
- The user is redirected to your application's self-hosted Email Change Confirmation Page.
- The user clicks the "Authenticate" button, which triggers a call to the Wristband Authorize External IDP User for Change Email Endpoint.
- Wristband redirects the user to the identity provider's login page.
- The user submits their credentials.
- The identity provider redirects the user to the Wristband External IDP Callback Endpoint (found in the Identity Providers section of the Wristband dashboard for your given IDP), where Wristband creates an External IDP Authorization Code required for completing authentication.
- Wristband redirects the user to your application's self-hosted External IDP Email Change Confirmation Page along with an External IDP Authorization Code that will be used for verification.
- Your application calls the Wristband Confirm New Email For External IDP Auth Flow API, passing along the External IDP Authorization Code.
- A message is displayed to the user indicating that verification succeeded.
At this point, the workflow is complete, and the user can exit the page.

Updated 3 months ago