
Test Auth Flows
This section walks you through testing your authentication endpoints to verify they are configured correctly.
Tests not working?If you get stuck, contact us — our development team will work directly with you to get unblocked.
Now that you have implemented your authentication endpoints (login, callback, and logout), let's test some basic authentication flows to verify that everything is working correctly.
Test 1: Verify Signup Flow
First, test the Application-Level Signup flow by following these steps.
-
Select your application from the Dashboard Home Page.
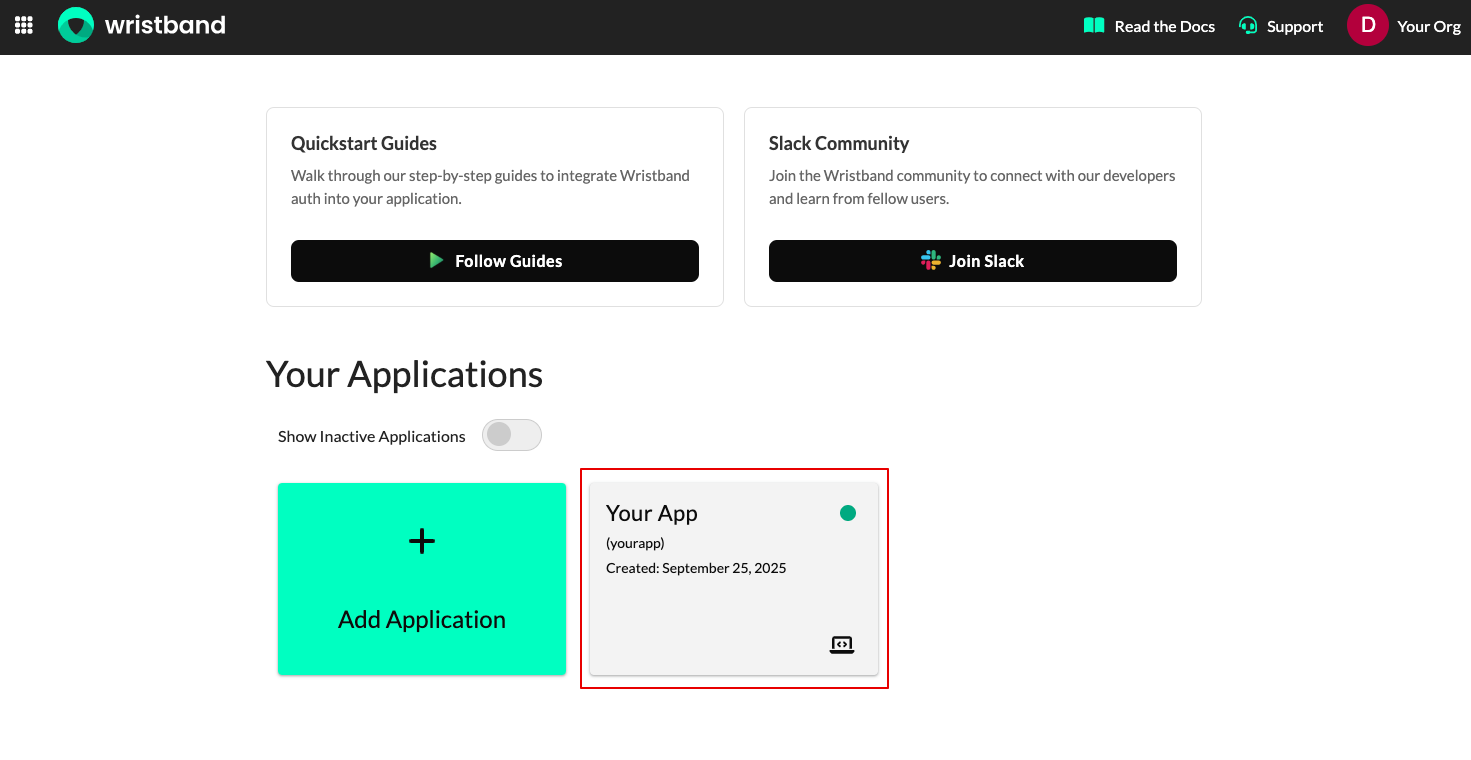
Figure 1: Select your Wristband application.
- Expand the Application URLs accordion on the settings page. Click the external link icon next to the Application-level Signup URL field.
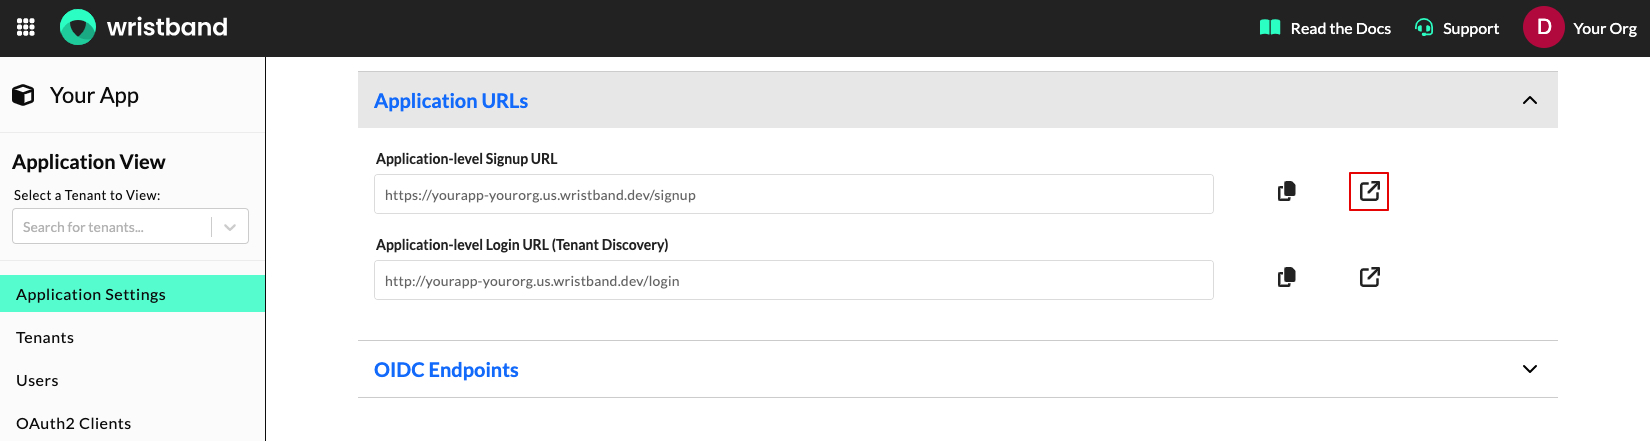
Figure 2: Open the Application-level Signup URL.
-
The link opens the Application-Level Signup page in a new browser tab. Fill out the form and submit it to create your new tenant.
- Tenant Name — the name of the tenant that application-level signup creates under your application.
- Email — a valid email address you have access to. You'll need to view an activation email sent here to complete signup.
- Password — the password you'll use to log in.
- Click Sign Up.
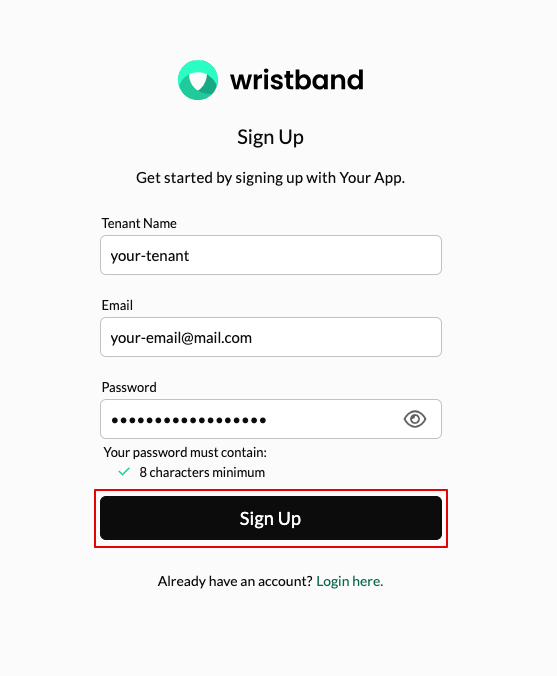
Figure 3: Complete the signup form.
- Check your inbox for a verification email containing a one-time code. Enter this code into the form to complete your signup.
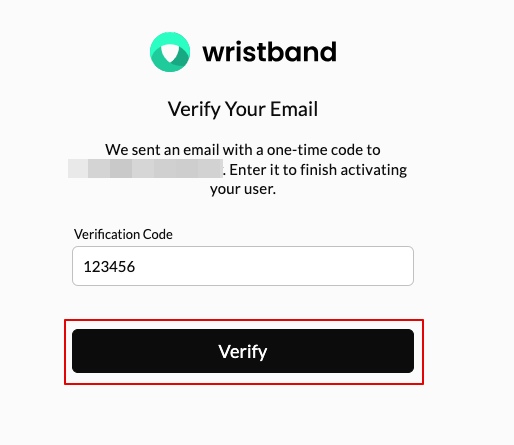
Figure 4: Verify the signup email address.
-
When the signup process succeeds, you are automatically redirected to your application's home page. This matches the default return URL you previously configured in your Callback Endpoint.
Congratulations, you successfully completed the Application-Level Signup flow! Here is a summary of the operations performed behind the scenes during this process.
Automated Background Operations
- Tenant creation: A new tenant was generated under your application using your input name.
- User creation: A new user profile was built under that tenant with your credentials.
- Account activation: The user account was verified and activated via the email code.
- Session initiation: A secure Wristband authentication session was established for the user.
Test 2: Verify Login Flow
Test the user login flow next. You must first clear any active sessions so you do not bypass the login screen.
Clearing the User's Active Auth Sessions
Clear your user's active authentication sessions by following these setup steps.
- Go to the Dashboard Home Page.
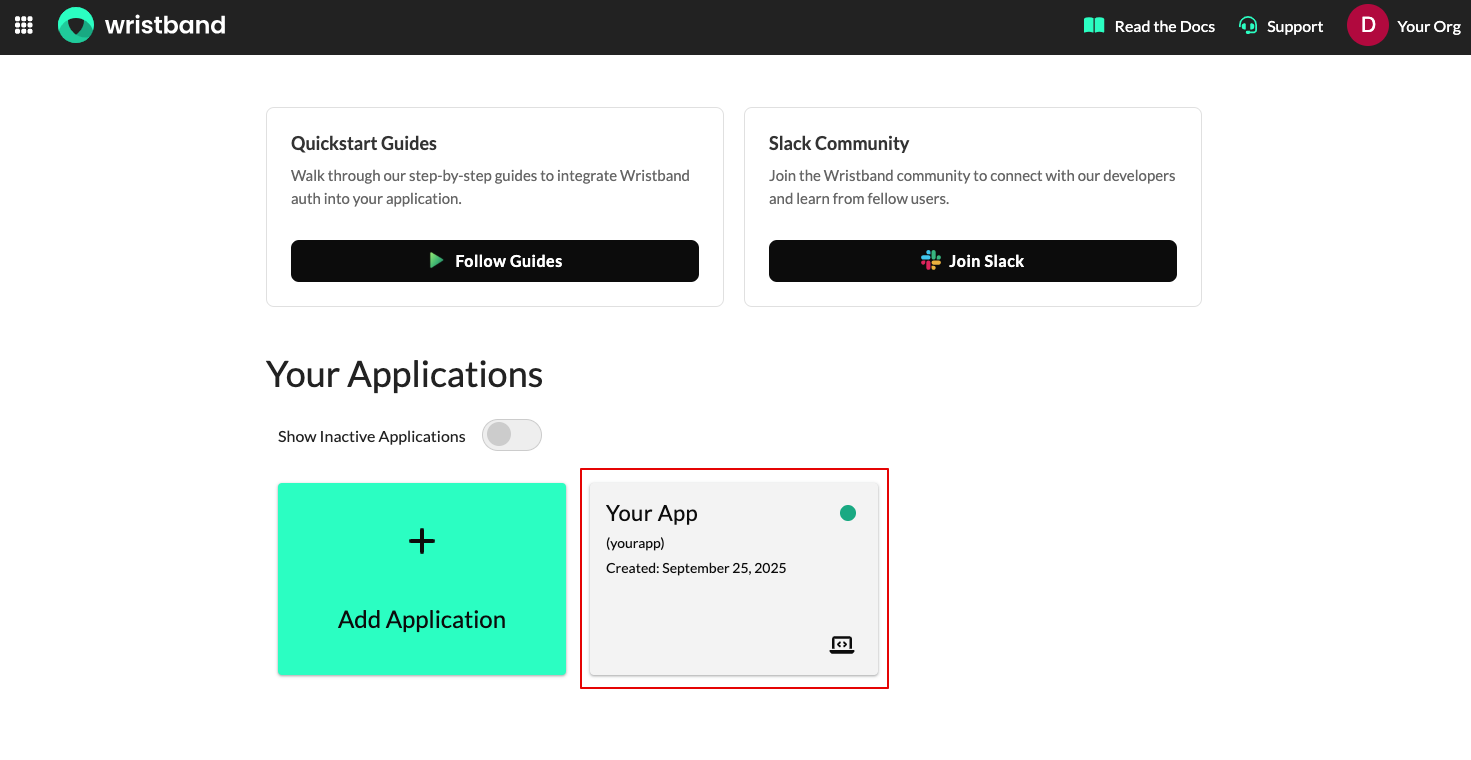
Figure 5: Select your Wristband application.
-
Locate and open the user profile you created during the signup test.
Step-by-Step Instructions
- Click Users in the navigation bar.
- Find the user in the Users table.
- Click the user's row to open their profile.
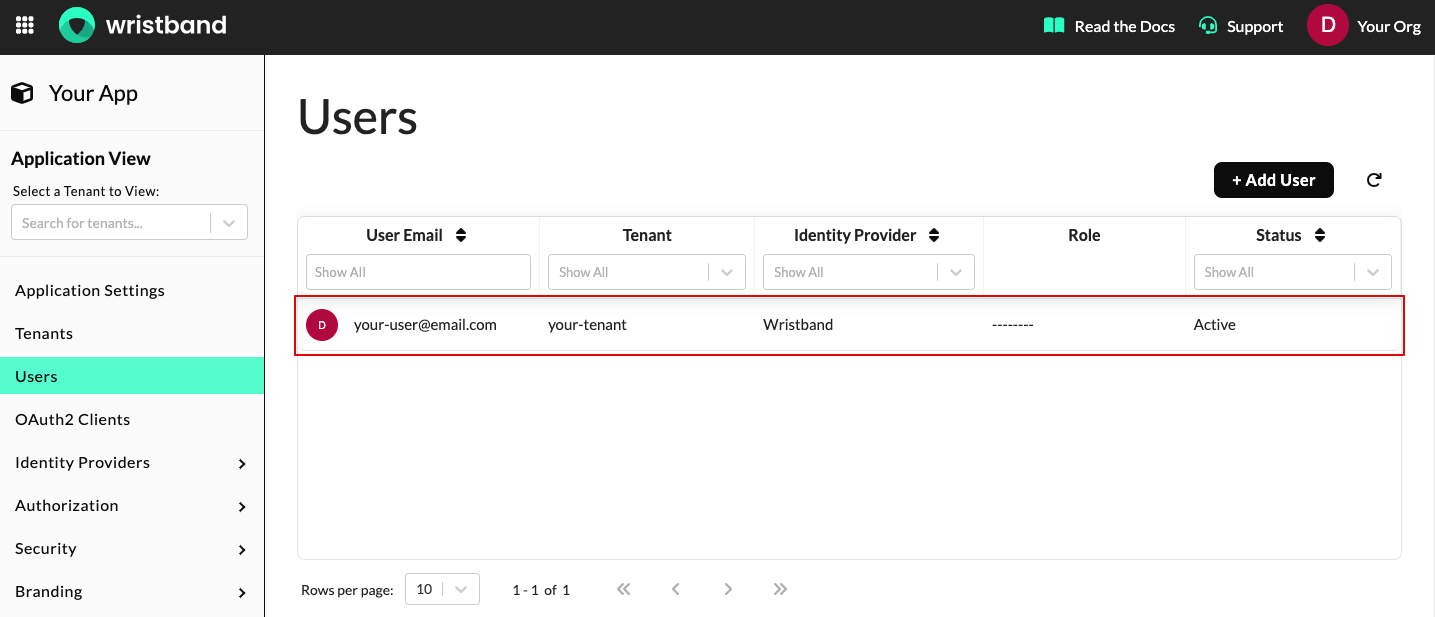
Figure 6: Select the new user.
-
Remove the active session directly from the user's profile settings.
Step-by-Step Instructions
- Scroll down to the Active Auth Sessions section.
- Click the Delete Sessions button.
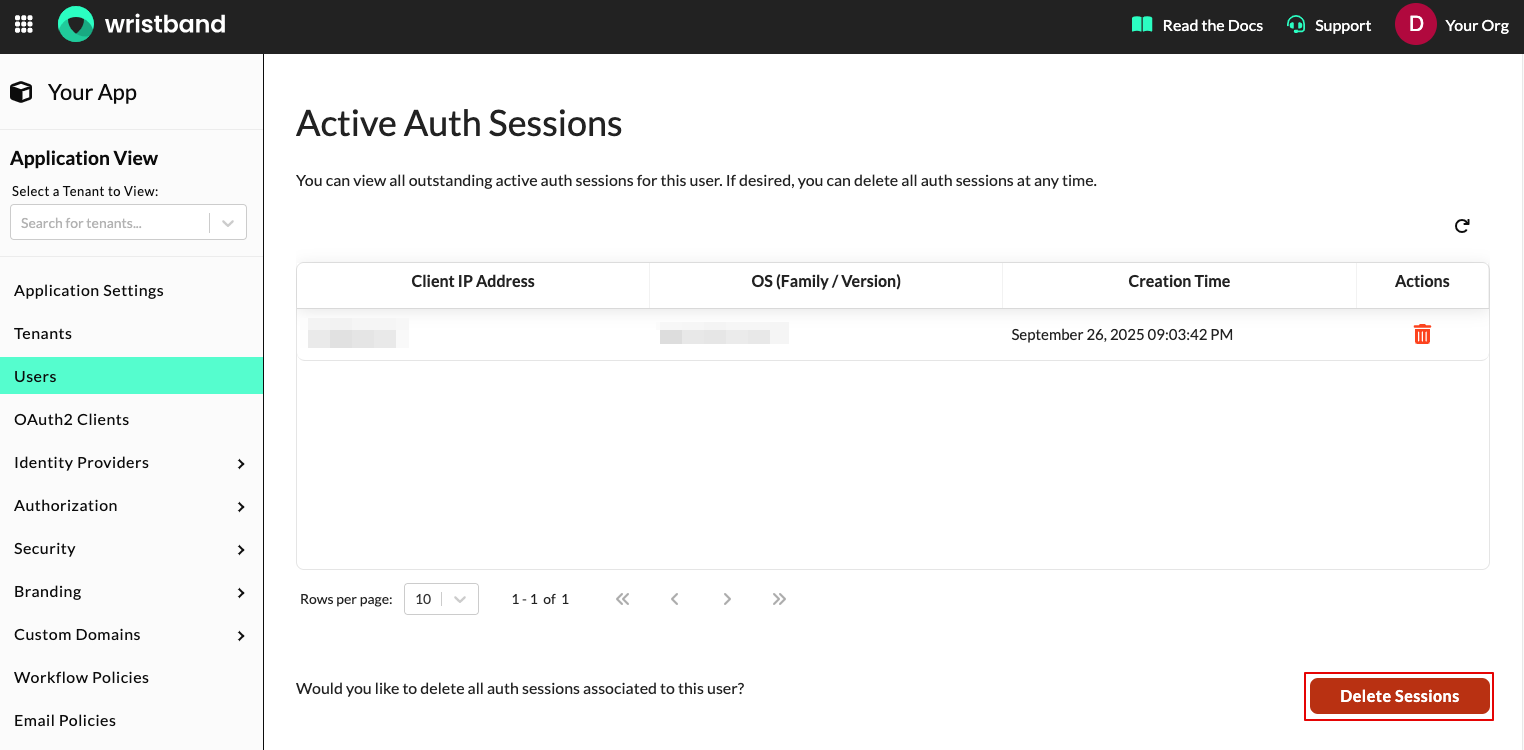
Figure 7: Clear the user's active auth sessions.
Perform User Login
-
Now that you have cleared the active sessions, start the user login flow test by accessing your app configuration.
Step-by-Step Instructions
- Open Your App
- Go to the Dashboard Home Page.
- Click your specific application name.
Figure 8: Select your Wristband application.
-
Expand the Application URLs accordion menu on the settings page. Click the external link icon next to the Application-level Login URL field.
Step-by-Step Instructions
- Scroll down to Application URLs.
- Click the section header to expand.
- Find the Application-level Login URL field.
- Click the external link icon next to it.
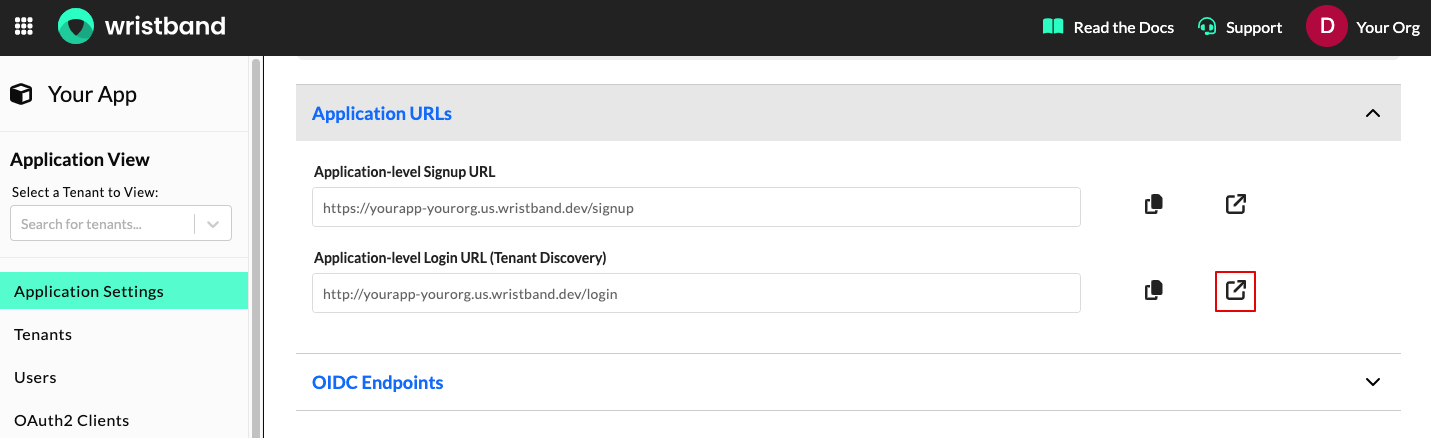
Figure 9: Open the Application-level Login URL.
-
The link opens the Application-Level Login page in a new browser tab. Select your previously created tenant to proceed to the login form.
Step-by-Step Instructions
- Look at the listed tenants you previously authenticated with.
- Find the tenant you created during the signup flow.
- Click the Select button next to that tenant.
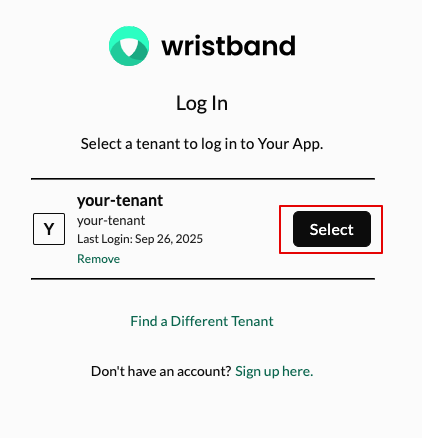
Figure 10: Select your tenant.
-
You should now see the login page for the selected tenant. Enter your credentials to log in.
Step-by-Step Instructions
- Enter the email used during signup.
- Enter your password.
- Click the Log In button.
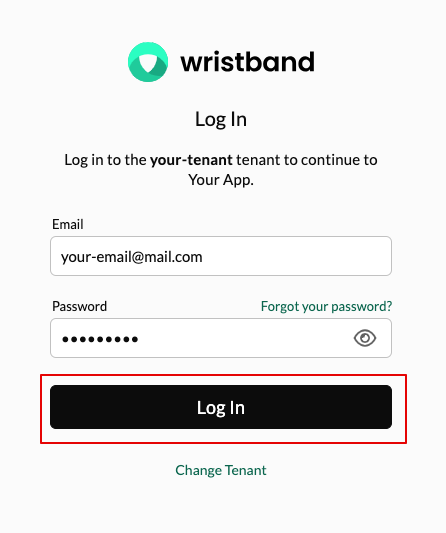
Figure 11: Log in as the new user.
- If login succeeds, you're redirected to the URL specified as the final redirect in your Callback Endpoint (set up in the Add Auth Endpoints step) — typically your application's home page.
Test 3: Verify Auth Session
-
Revisiting the login page with an active session will bypass the credential prompt and log you in automatically. Follow these steps to verify this behavior.
Step-by-Step Instructions
-
Open the Login Page
-
Enter your Application-Level Login URL into your browser.
Note: If needed, find this URL on the Application Settings page under the Application URLs section.
-
Figure 12: Open the application-level login URL.
-
Select your previously used tenant to trigger the session detection check.
Step-by-Step Instructions
- Look at the listed tenants on the page.
- Find the tenant you logged into during the previous test.
- Click the Select button next to it.
- Wait for the page to redirect you to that tenant's specific login page.
Figure 13: Select the tenant you created during signup.
-
Because your user has an active session, Wristband will skip the credential prompts entirely. You will be logged in immediately and sent back to your application's home page.
Expected Behavior
- Bypass credentials: The username and password form fields will not appear.
- Automatic redirection: The browser automatically processes the session data.
- Home page landing: You will land directly on your default callback destination.
Test 4: Verify Logout
-
To terminate your user's session, navigate directly to your local application logout route. This triggers the required cleanup logic and redirects you safely to the login screen.
Step-by-Step Instructions
- Type your Logout Endpoint URL into the browser address bar (e.g., http://localhost:8080/auth/logout).
- Press Enter to execute the logout route code.
- Confirm that you are automatically redirected to your tenant's login page.
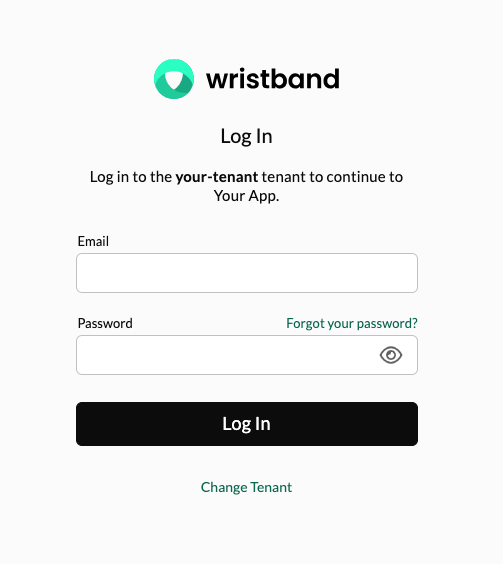
Figure 14: After logout, Wristband prompts the user to sign in again.
-
Seeing the credential prompts on the tenant login page confirms your session has been terminated. This indicates that your logout flow successfully cleared all local and server-side authentication states.
Success Criteria
- Form visible: The email and password inputs appear on the screen again.
- Session cleared: No automated redirects bypass this screen.
- State validated: The workflow successfully restored an unauthenticated state.
If you've reached this point, congratulations! Your Auth Endpoints are working correctly.
Updated about 2 months ago
What’s Next
Now that you've verified your auth flows are working, let’s secure your frontend routes and components so only authenticated users can access them.