Navigating Between Apps and Tenants
Learn to navigate application-level and tenant-level configurations by exploring the Wristband Dashboard layout.
Home Page
After logging into Wristband, you'll land on the home page, where you can create applications. To configure an application, you must first enter Application View for that application.
There are two ways to do this:
- Click the application's tile on the home page.
- Select the application from the Application Switcher menu.
Returning to the Home PageYou can return to the home page at any time by clicking the Wristband logo, or by selecting the "Home" option in the Application Switcher menu.
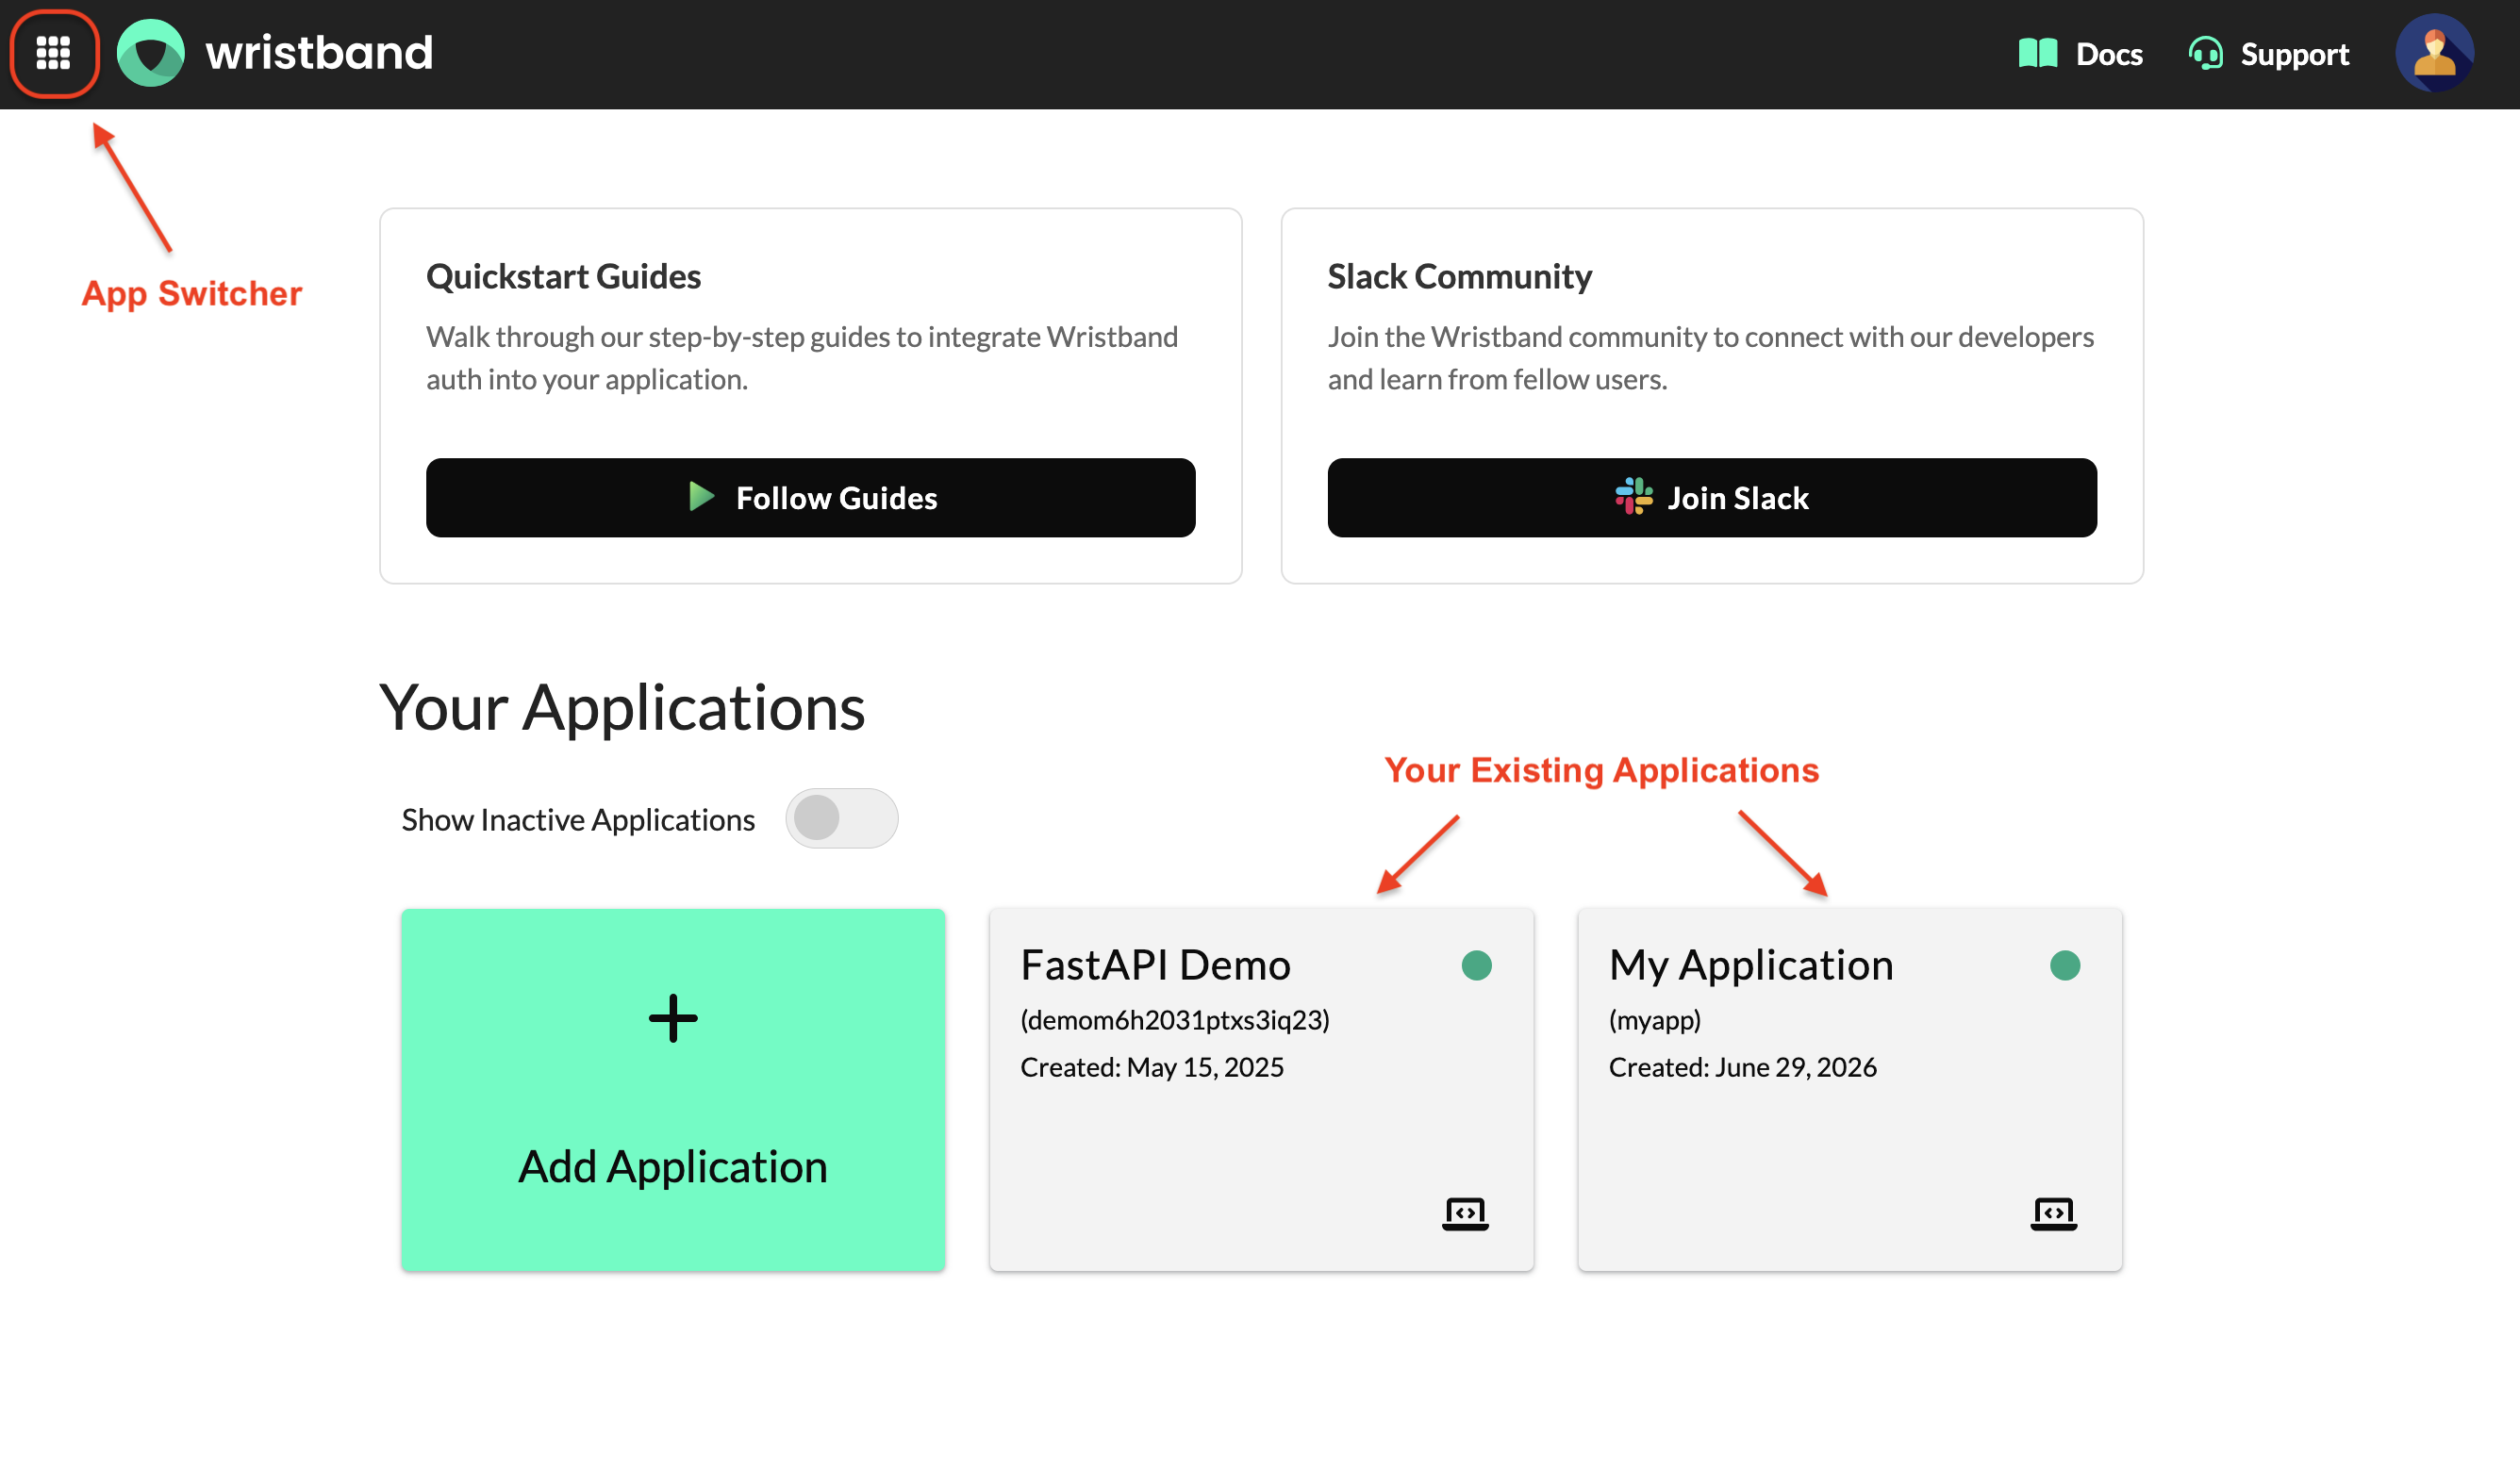
The Wristband home page, showing the Application Switcher and existing application tiles.
Application View
Wristband's Tenant Override System organizes applications and tenants hierarchically within the dashboard. In Application View, the side navigation focuses solely on application-level entities, meaning any changes made affect all tenants under that application by default.
For example, updating Page Branding for Wristband-hosted auth pages applies consistently to both the application-level login page and all tenant-level login pages, which inherit the same branding settings.
You can tell you're in Application View by the application name displayed at the top of the side navigation. To switch between applications without returning to the home page, use the Application Switcher menu.
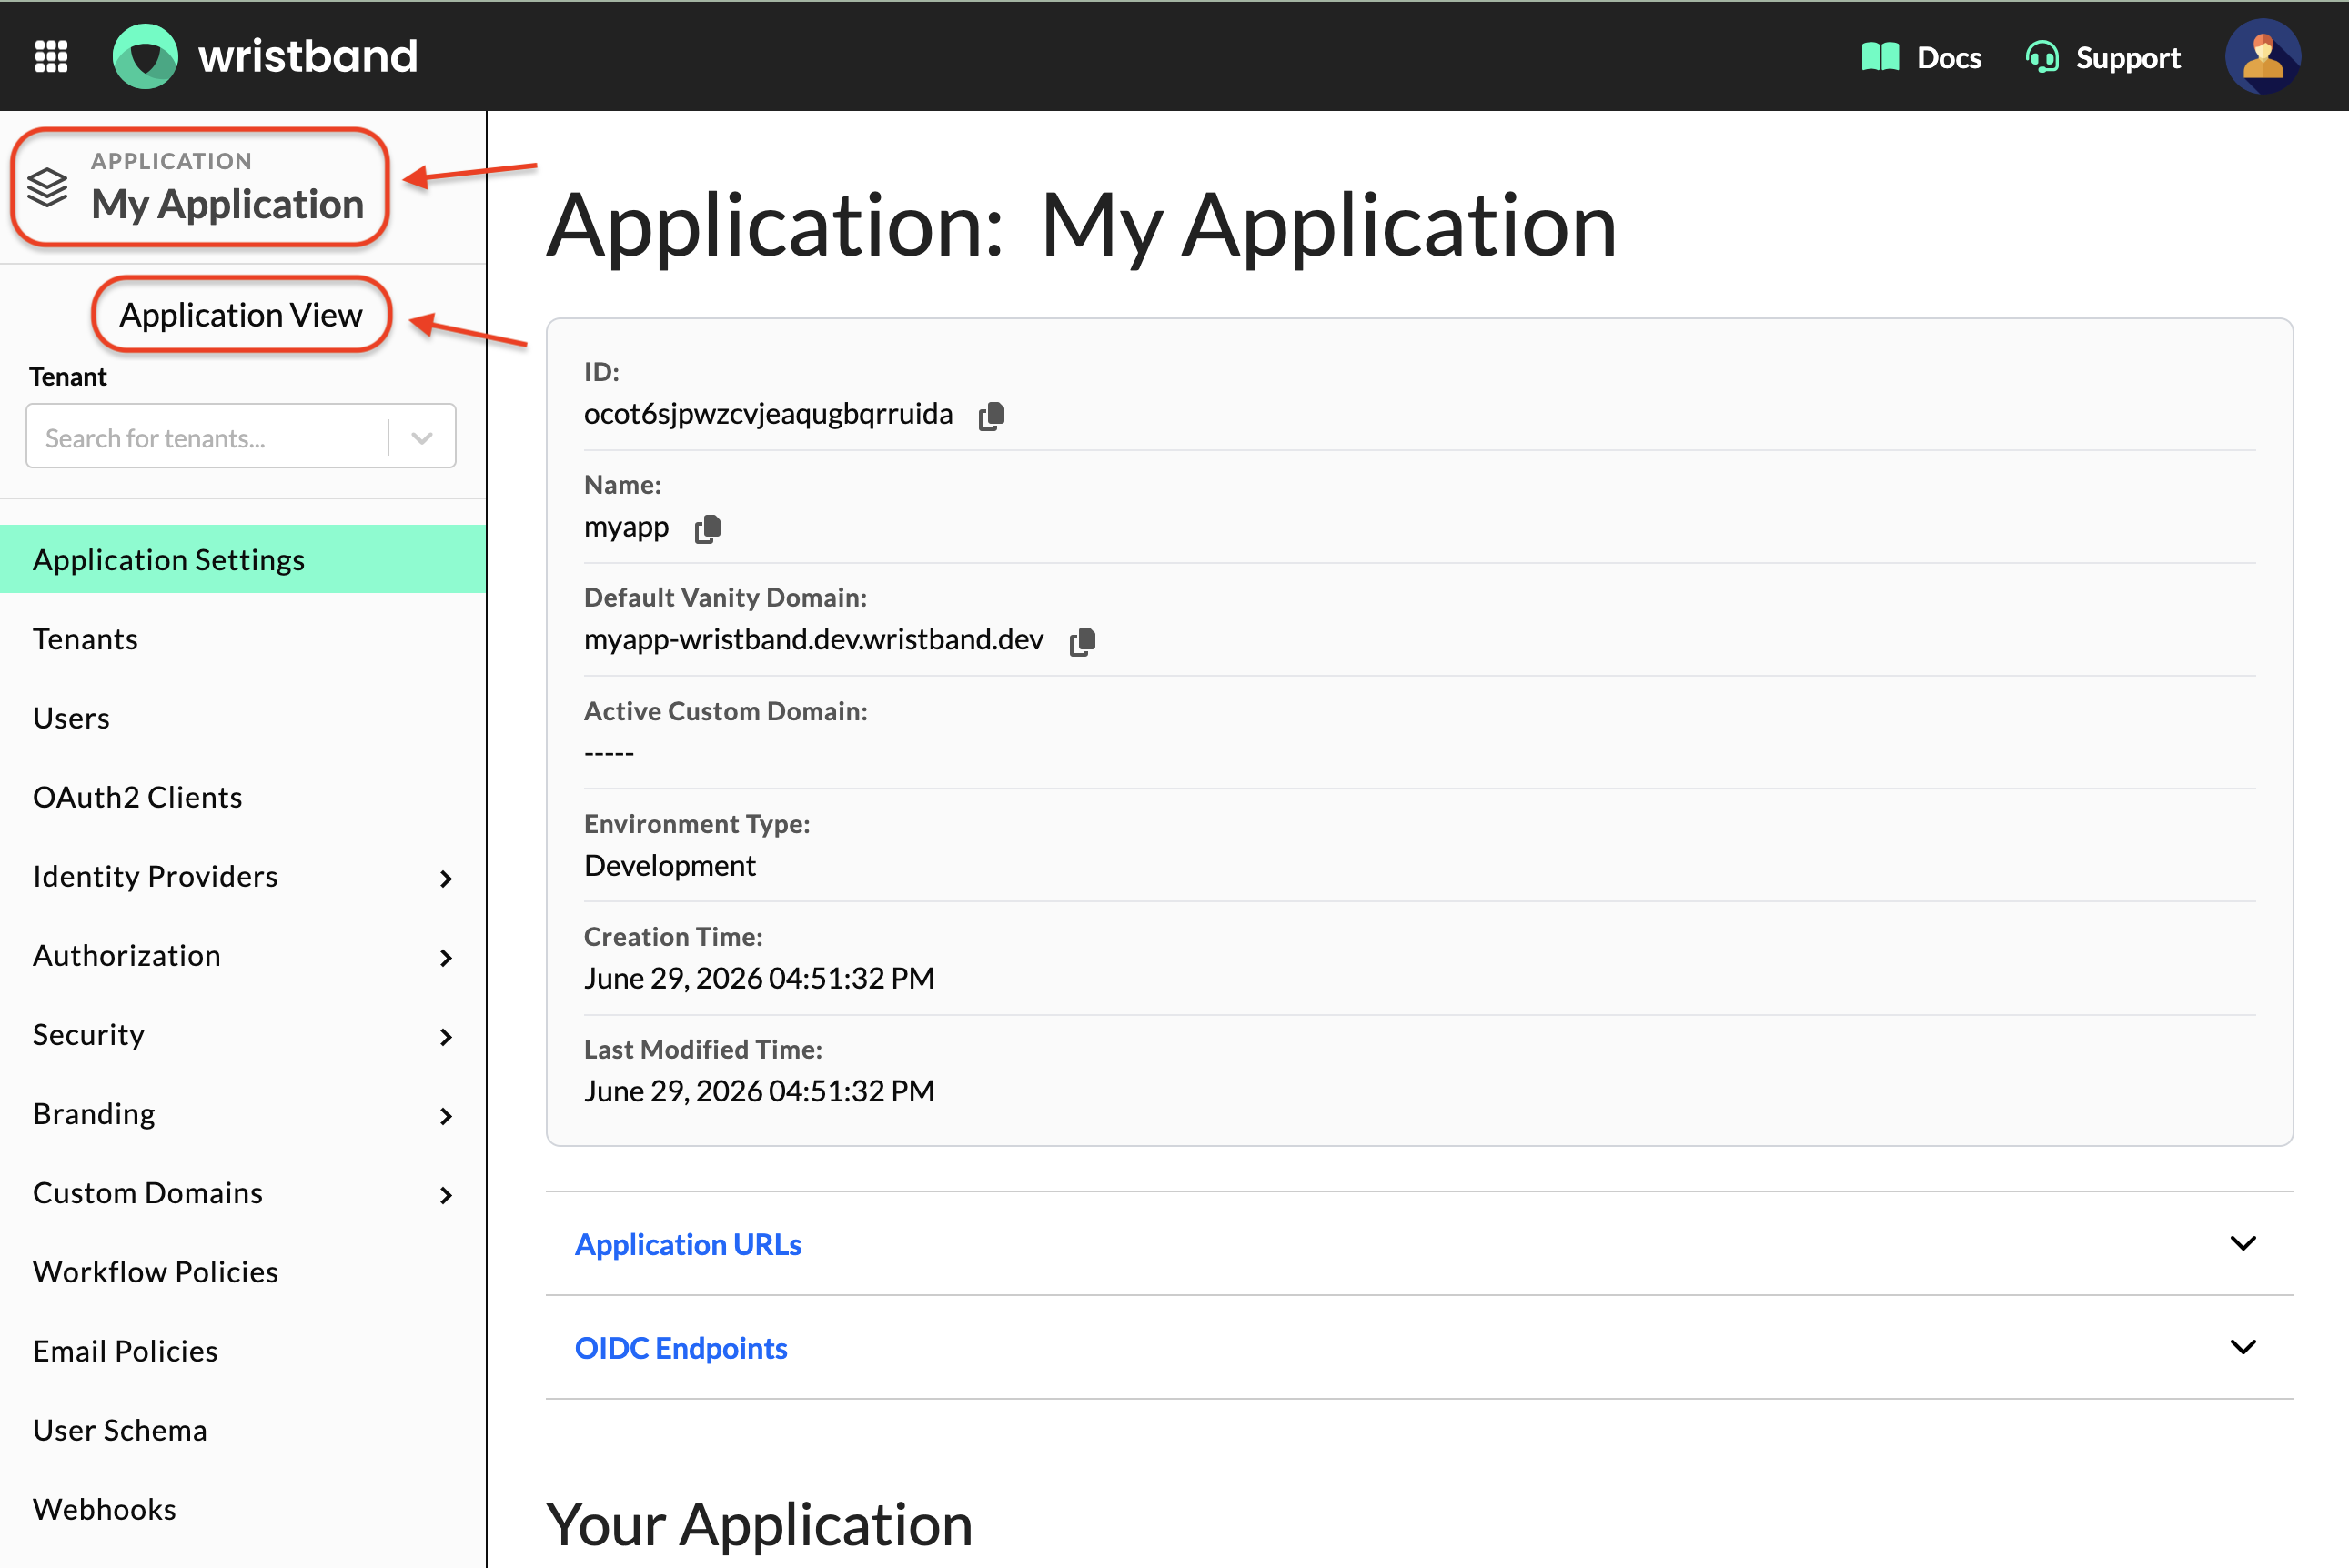
Application View for My Application, showing the app name and "Application View" label in the side navigation.
Tenant View
After creating an application in Wristband and provisioning at least one tenant, you can access Tenant View for any particular tenant. Here, you can make tenant-specific configurations without impacting other tenants in the application.
Tenant View visually mirrors Application View in terms of layout and menu options, and the side navigation applies exclusively to the selected tenant.
When in Tenant View, two visual indicators confirm which tenant you're configuring:
- A blue banner below the top navigation displays the name of the current tenant.
- The side navigation label changes to "Tenant View."
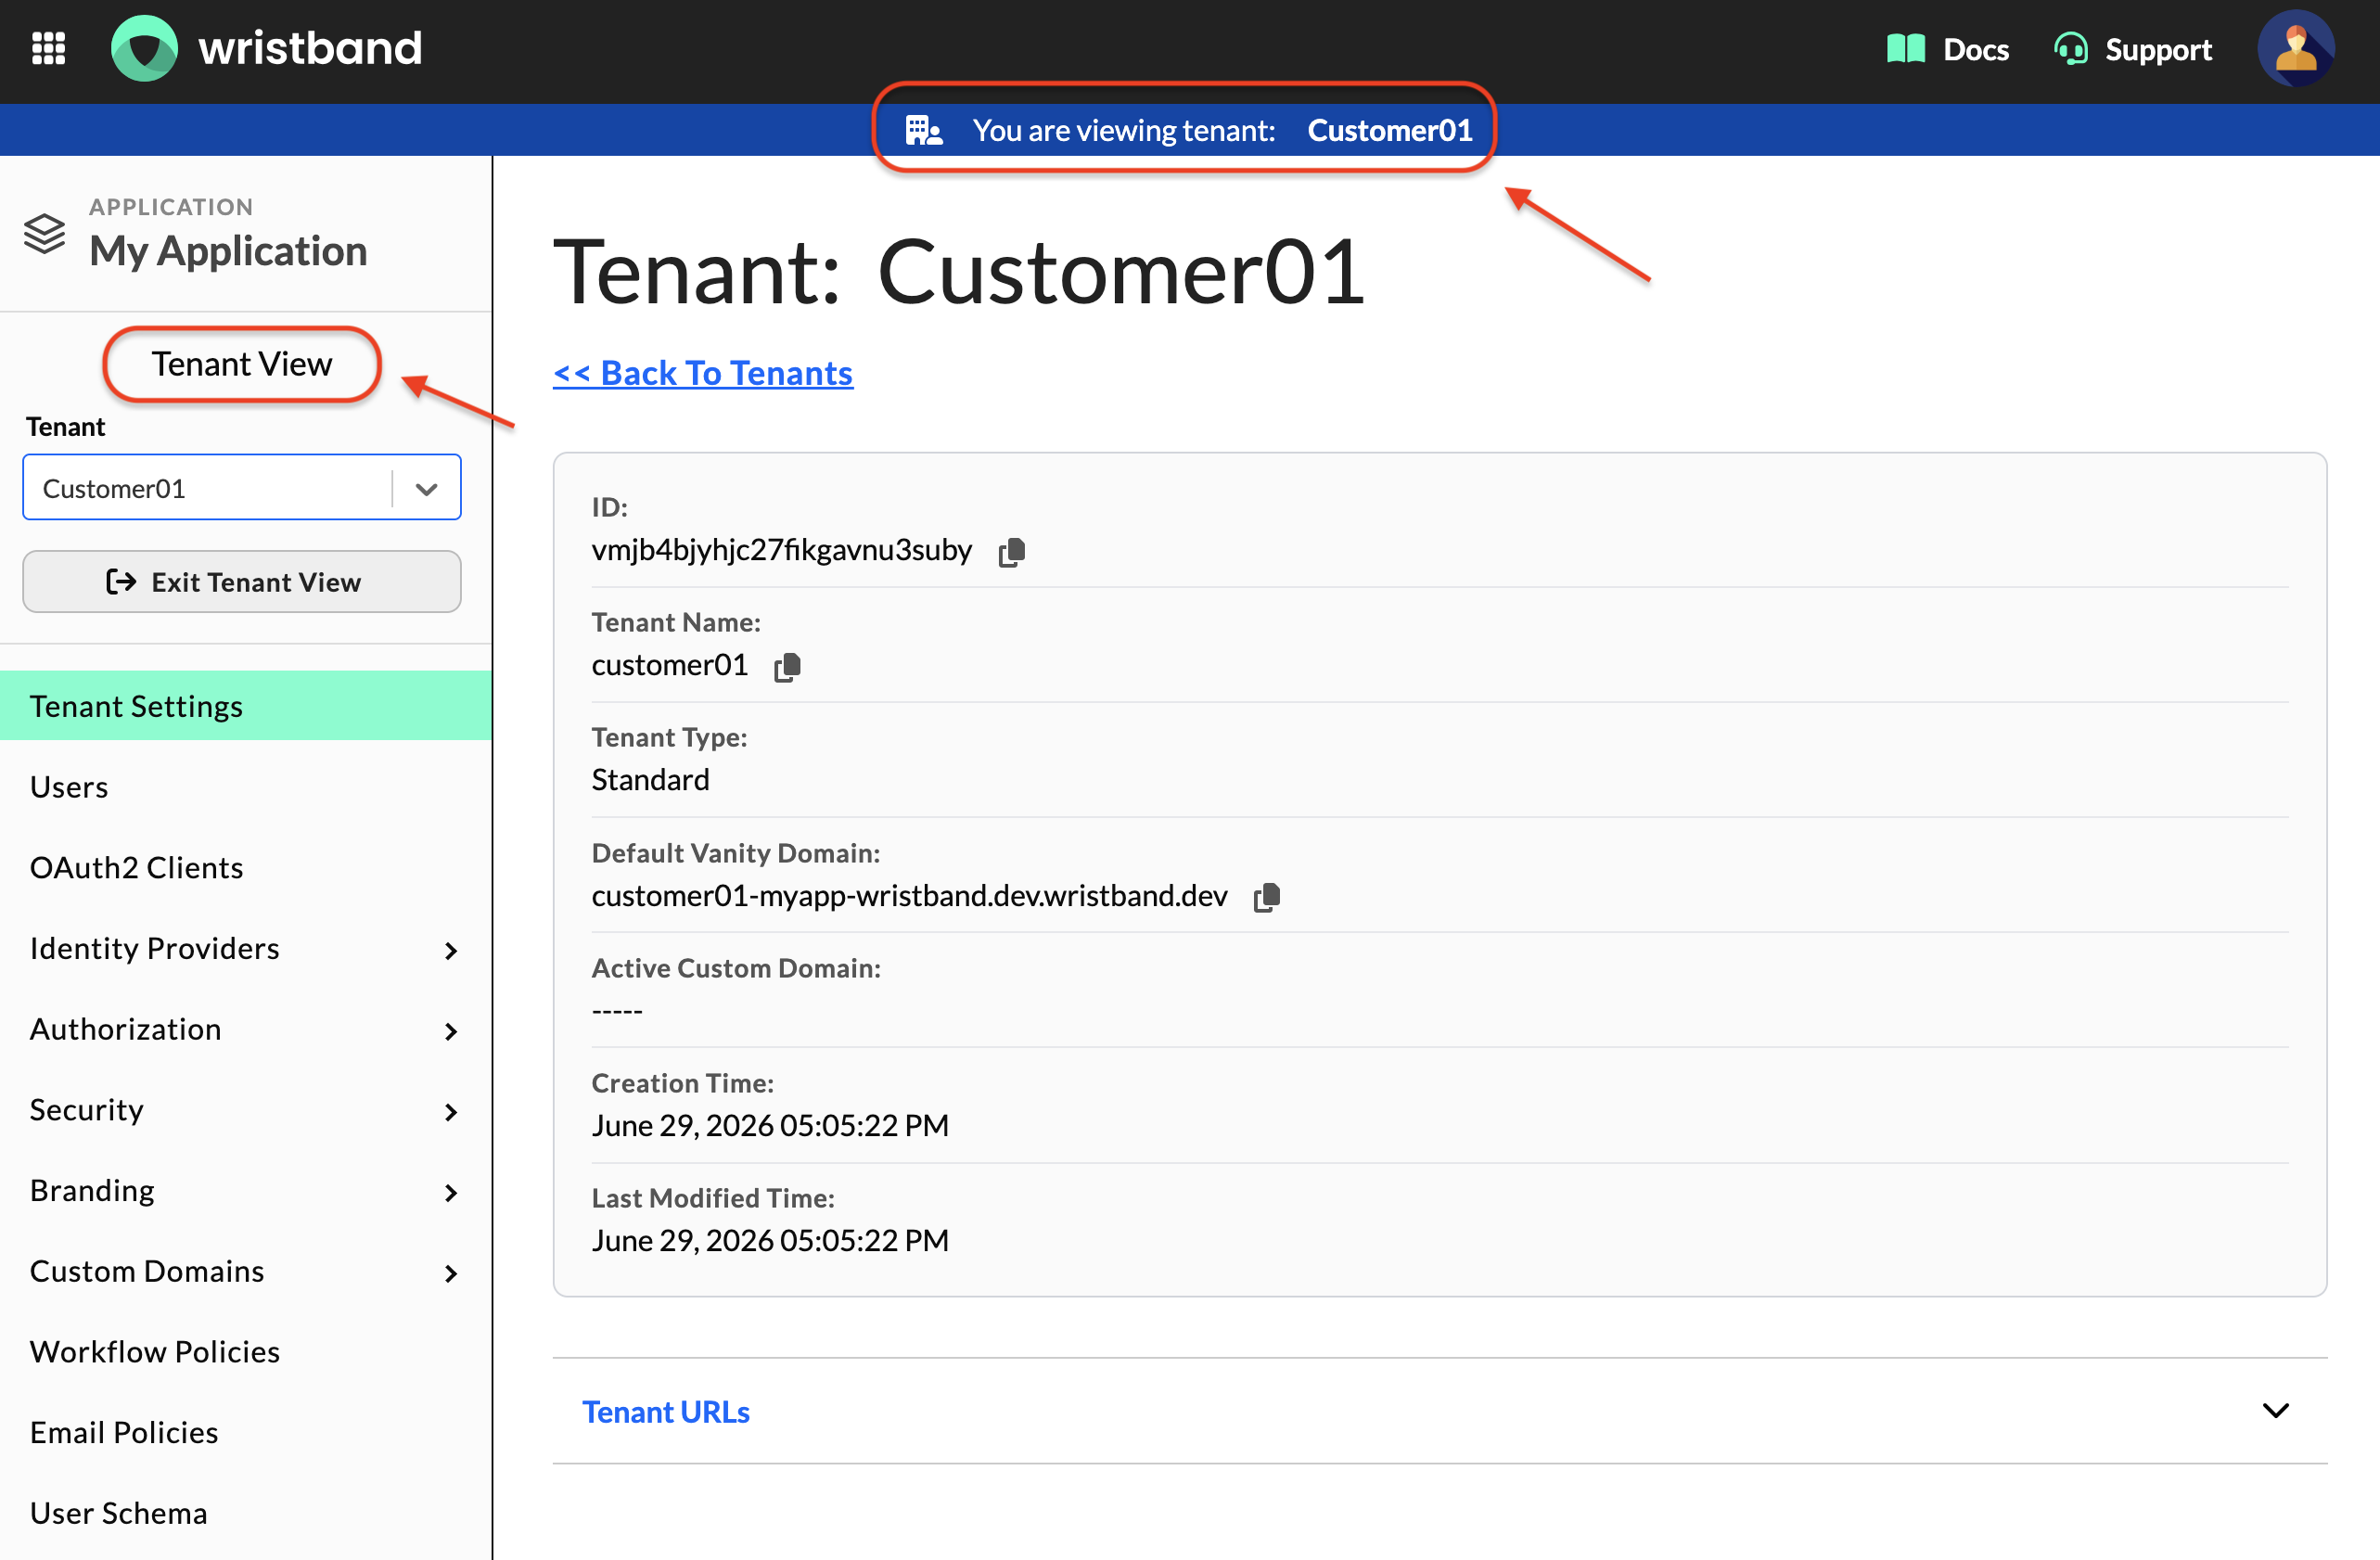
Tenant View for the Customer01 tenant, showing the Tenant View label and blue tenant banner.
Entering Tenant View
There are two ways to enter Tenant View for a specific tenant:
- The Tenants table
- The Tenant View Selector
Tenants table
In Application View, navigate to the Tenants menu in the side navigation. You'll see a table with all tenants in your application where you can search for a tenant to configure. Click the corresponding row to enter Tenant View for that tenant.

The Tenants table in Application View, showing all tenants available to configure.
Selecting a tenant from the table opens the Tenant Settings page for that tenant. At the top of the page, a link lets you return to the Tenants table in Application View.
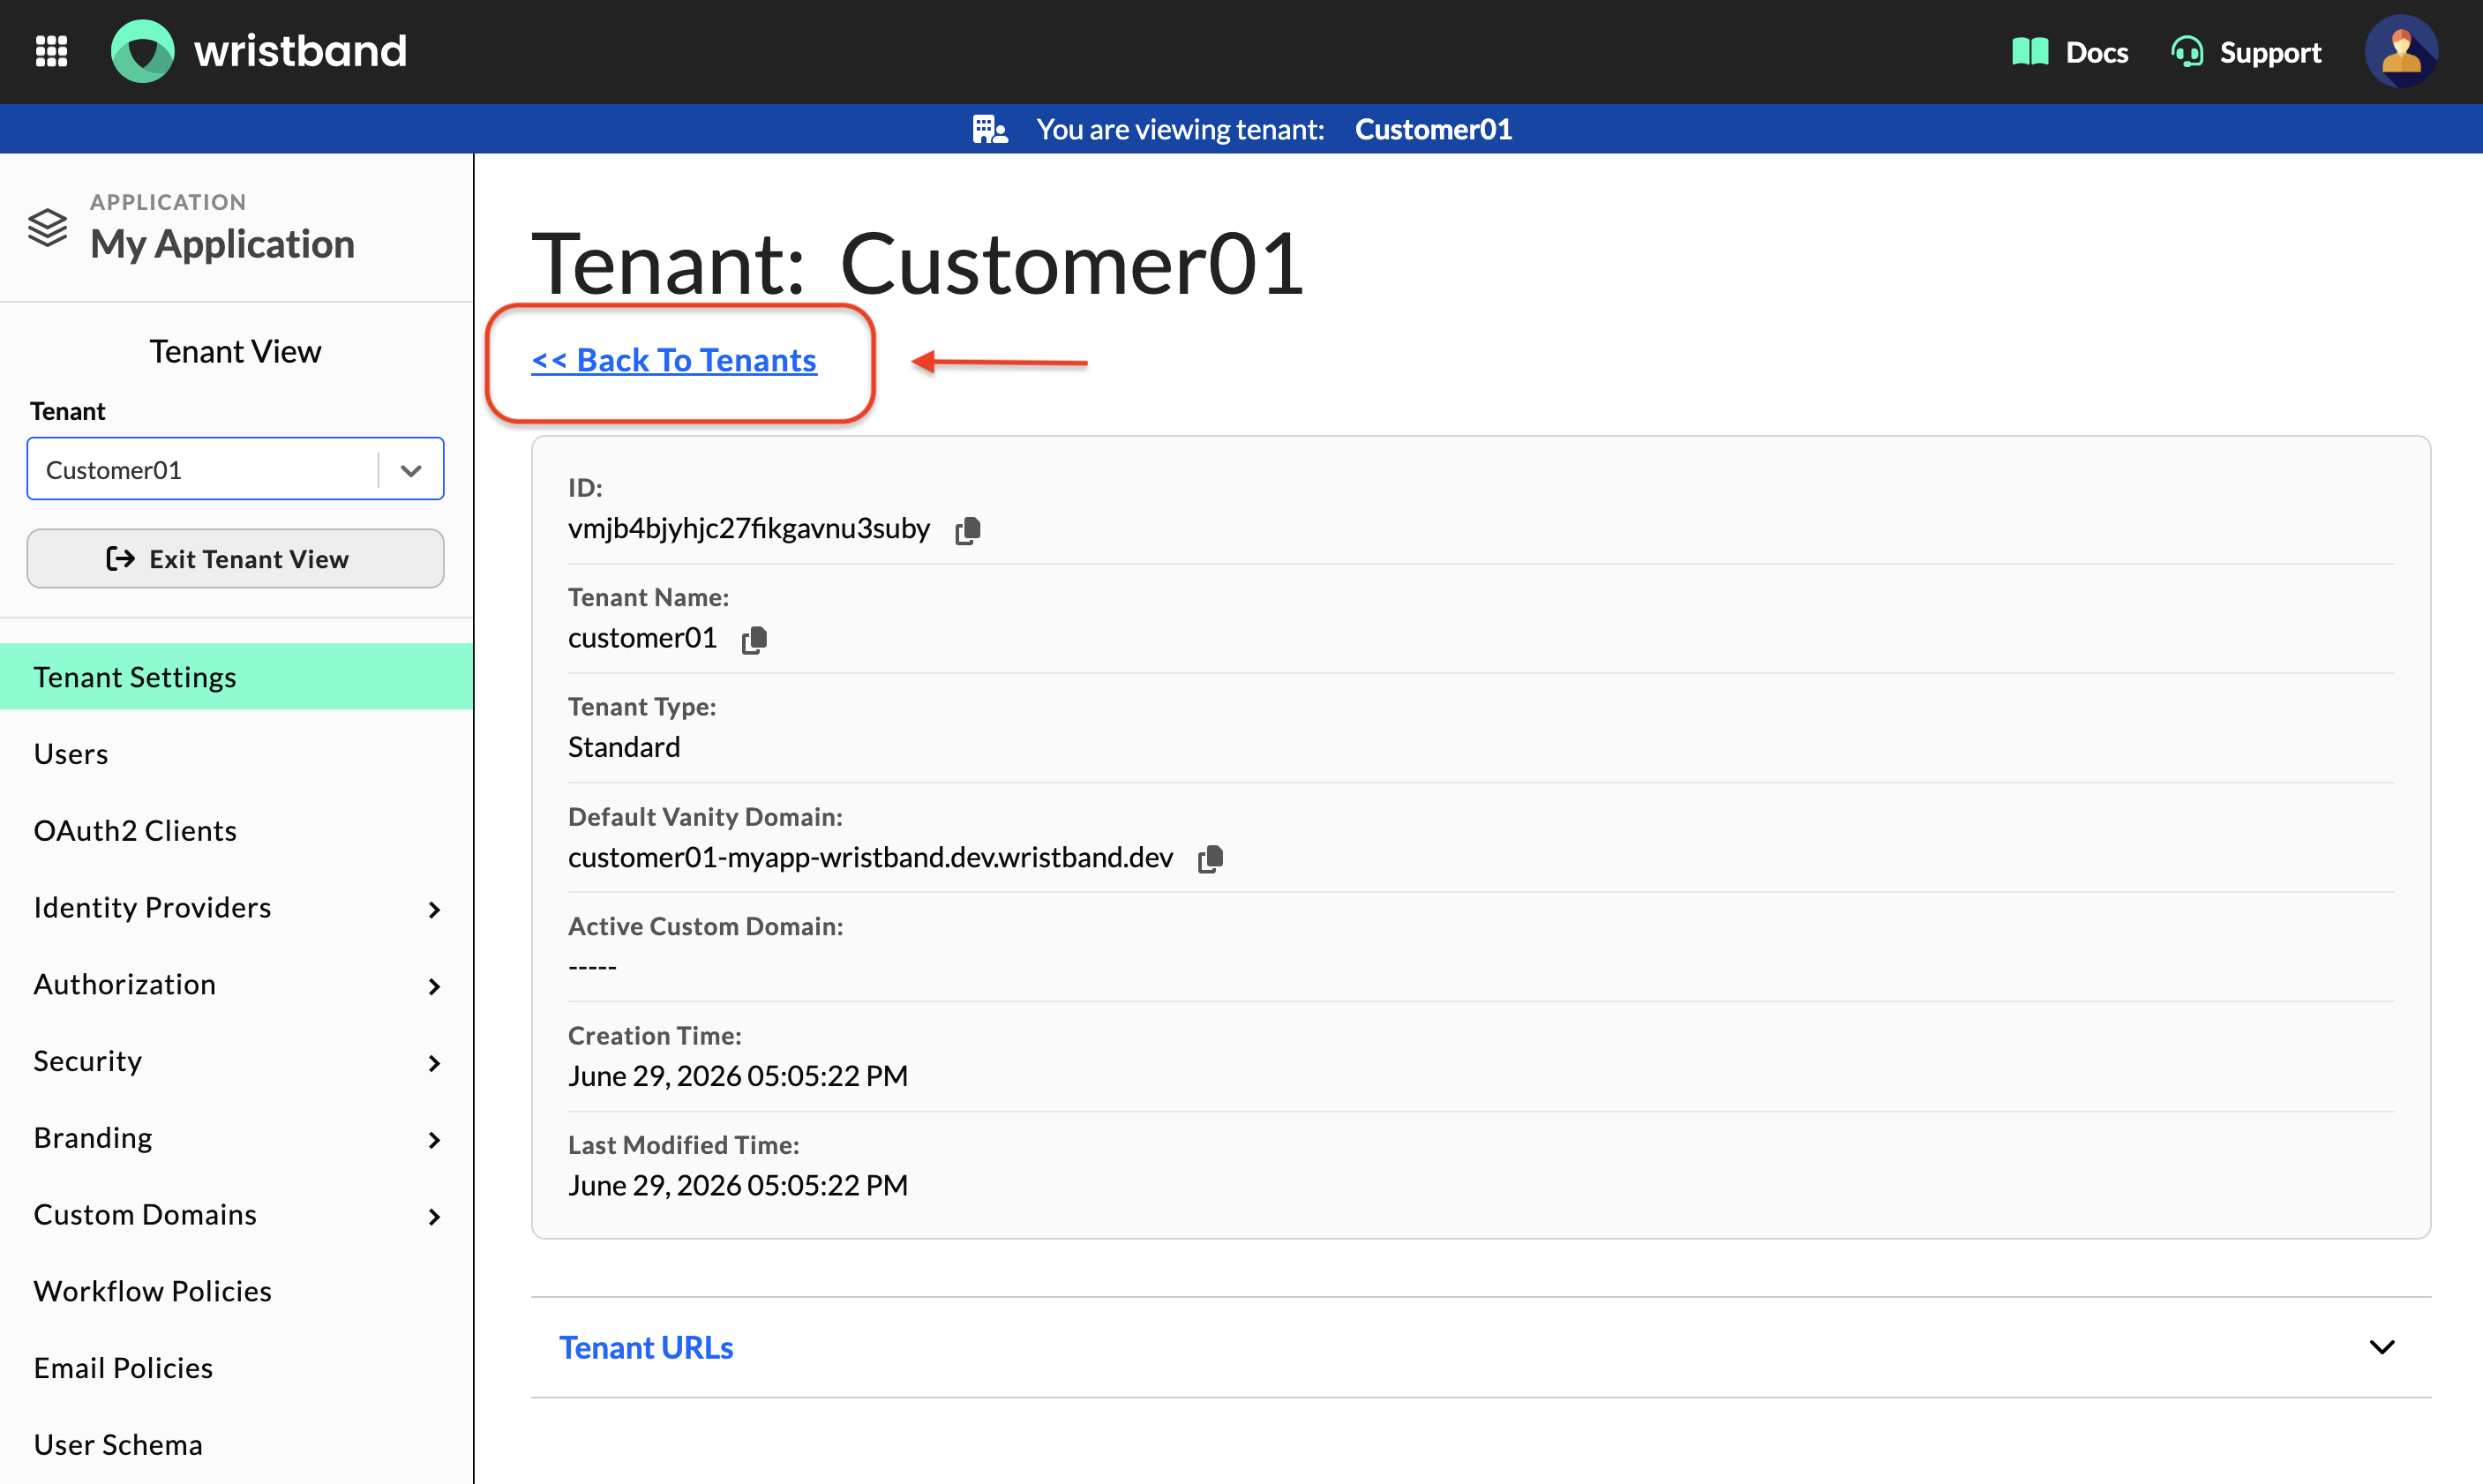
The link at the top of the Tenant Settings page for returning to the Tenants table in Application View.
Tenant View Selector
The type-ahead Tenant View Selector in the side navigation lets you choose which tenant to configure. Selecting a tenant from the dropdown opens its Tenant Settings page.
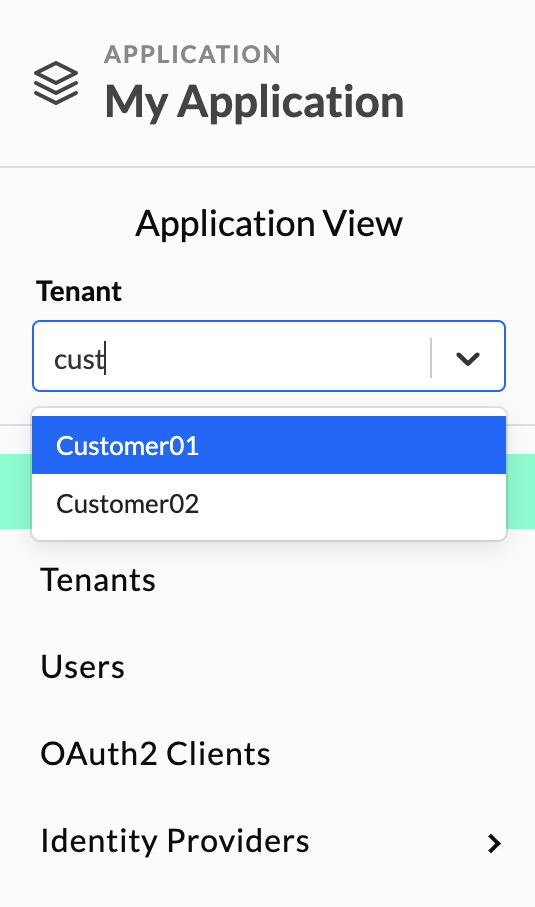
The Tenant View Selector in the side navigation.
Exiting Tenant View
To exit Tenant View, use the Tenant View Selector in the side navigation and click the Exit Tenant View button. This returns you to the Application Settings page in the Application View.
You can also switch directly to a different tenant by selecting it from the same dropdown without needing to return to Application View first.
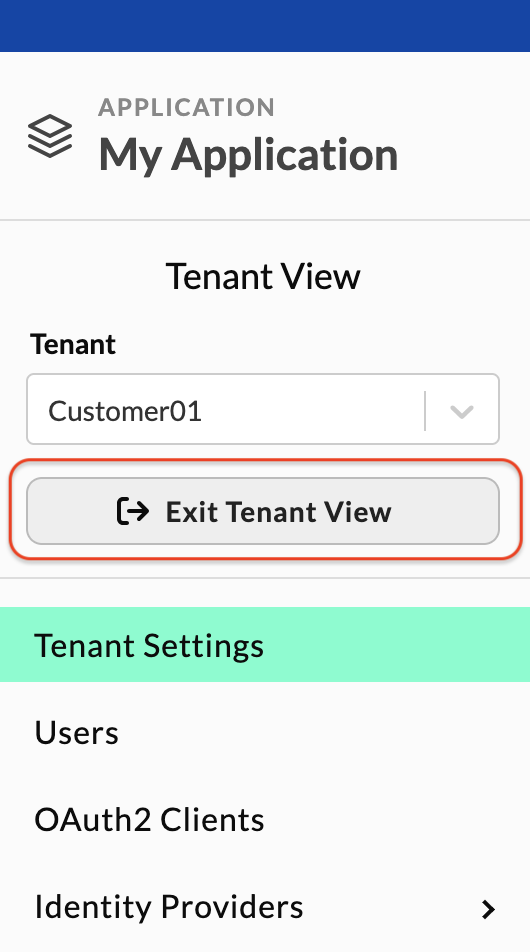
The Tenant View Selector showing the Exit Tenant View button.
Differences in Configurable Entities
Most entities can be created and configured in both Application View and Tenant View, with some exceptions. Certain entities are exclusive to the Application level, while others are specific to the Tenant level.
- OAuth2 Clients: Currently, only Machine-to-Machine (M2M) OAuth2 Clients can be created at the Tenant level. Wristband plans to support additional Tenant-level OAuth2 Client types in the future. For now, all other types can be created at the Application level.
- Enterprise Identity Providers: Enterprise single sign-on (SSO) identity providers can only be configured at the Tenant level and not at the Application level. This is due to the strict 1-to-1 mapping requirement between your customer's organizational user directory and an SSO integration with Wristband.
- Permissions and Permission Boundaries: Permissions (both custom or predefined) and permission boundaries can only be exclusively defined at the Application level, not the Tenant level. This distinction arises from the fact that these entities are determined by the developers of your application, not your customers.
- Token Settings: Wristband signing keys for verifying and signing JWTs, as well as custom token claims, are currently configured at the Application level, not the Tenant level. Support for Tenant-level signing keys and custom token claims may be introduced in the future.
Updated 13 days ago