Create an OAuth2 Client
An OAuth2 Client is used to authorize requests from your application to Wristband.
After creating your application, you'll next need to create an OAuth2 client. OAuth2 clients are required to authorize requests between your application and Wristband.
Creating Your Client
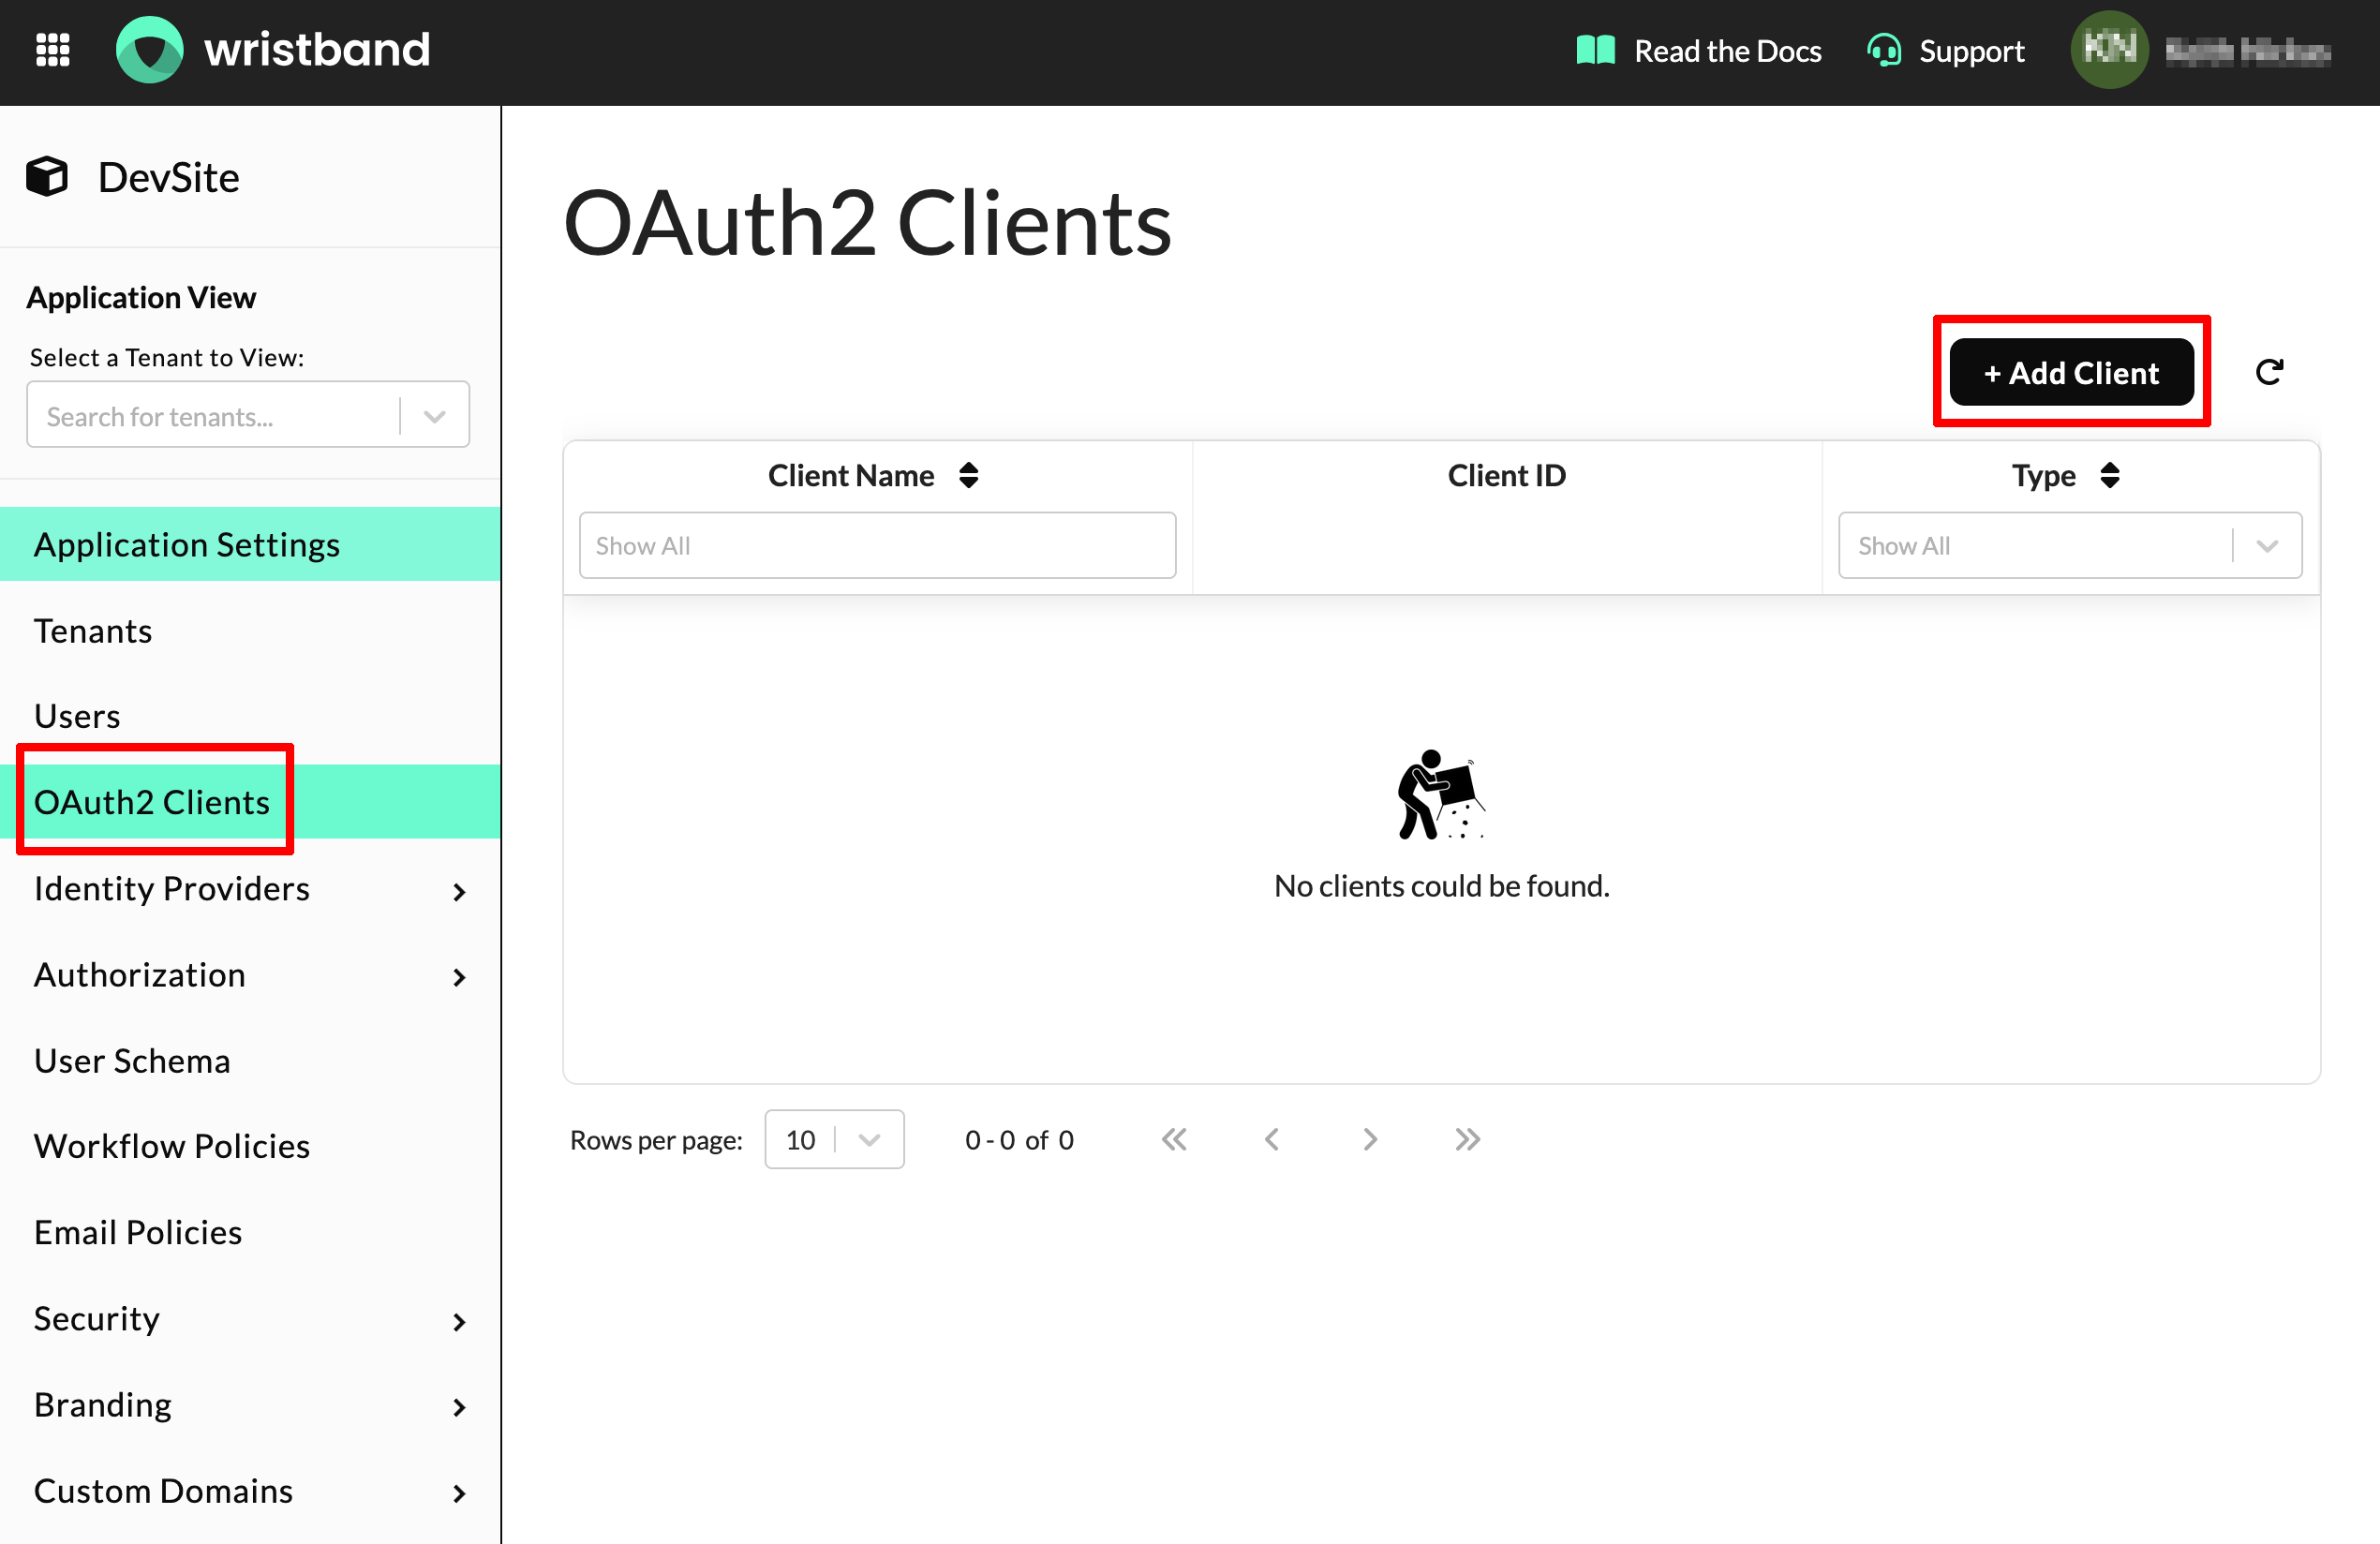
- Inside the Application View for your newly created application, select "OAuth2 Clients" from the left navigation bar.
- On the right side of the dashboard, click the "Add Client" button. This will present you with a modal to create your client.
Provision a Backend Server Client
When creating a new OAuth2 Client, you'll first need to select the type of client you want to create. The type of the client should correspond to the type of application you're building. For example, if you're building a web application that utilizes a backend server, then you should select "Backend Server" as the client type, and if you're building a desktop or mobile application then you should select "Native". For this quickstart guide, we'll be demonstrating how to configure the client for a Backend Server.
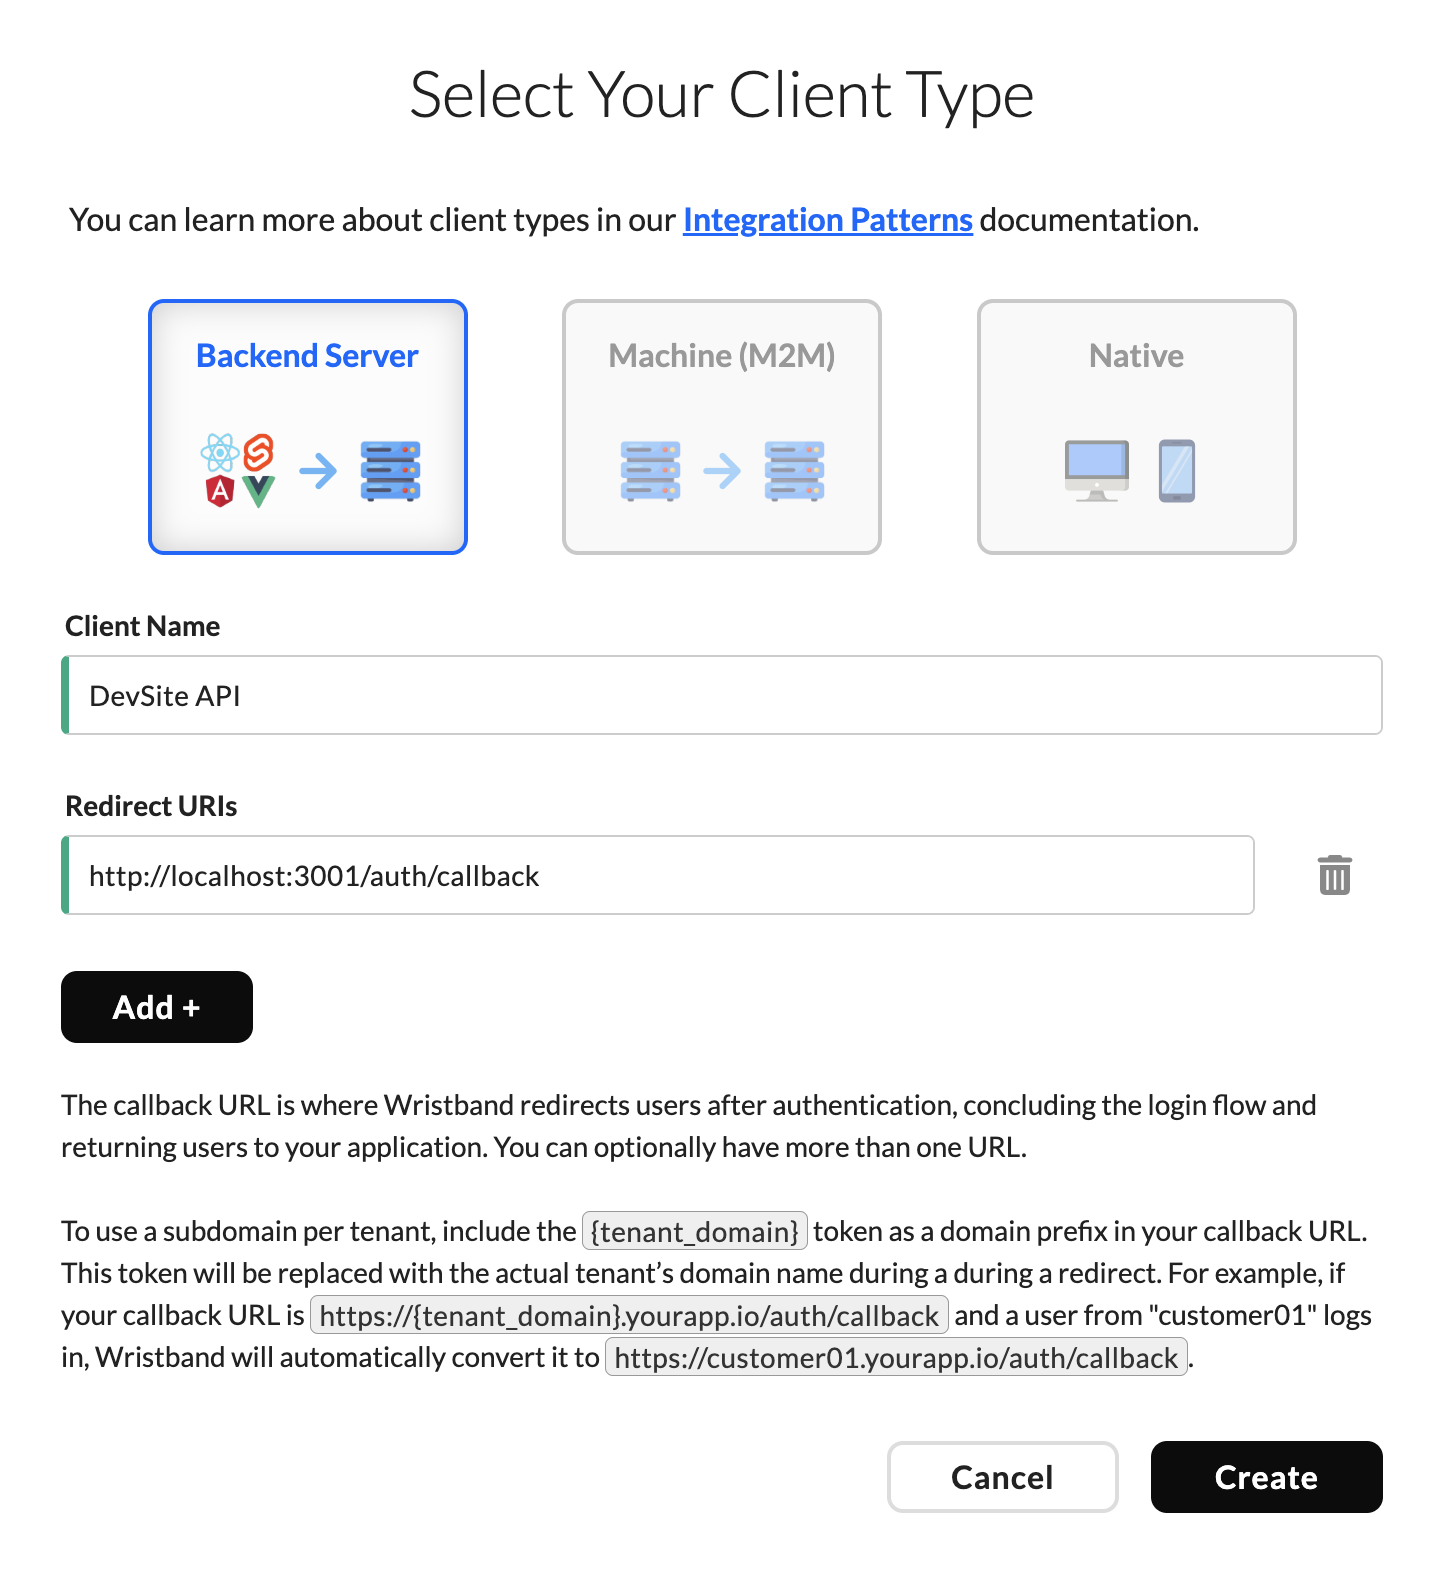
- Select "Backend Server".
- Provide a "Client Name". This is an arbitrary name that is used to identify your clients.
- Provide a "Callback URL". The callback URL is the endpoint within your application that Wristband will redirect to after authenticating the user. For example, if your application is running locally, then the callback URL might be set to a value like:
http://localhost:3001/auth/callback. - Click "Create".
- Success! Your client has been created.
Copy Client ID and Secret
Make sure to copy the values from the "Client ID" and "Client Secret" fields displayed in the success dialog. These values will be needed to configure your Wristband SDK. If you lose your client secret, you can rotate the client secret to create a new one.

Updated about 2 months ago
In the next section, you'll create a new tenant, which is a precursor to provisioning your first user.