Create a User
Users represent the individual people that log in to your application.
Before we can test the login flow for your application, we'll first need to create a user.
Creating a New User
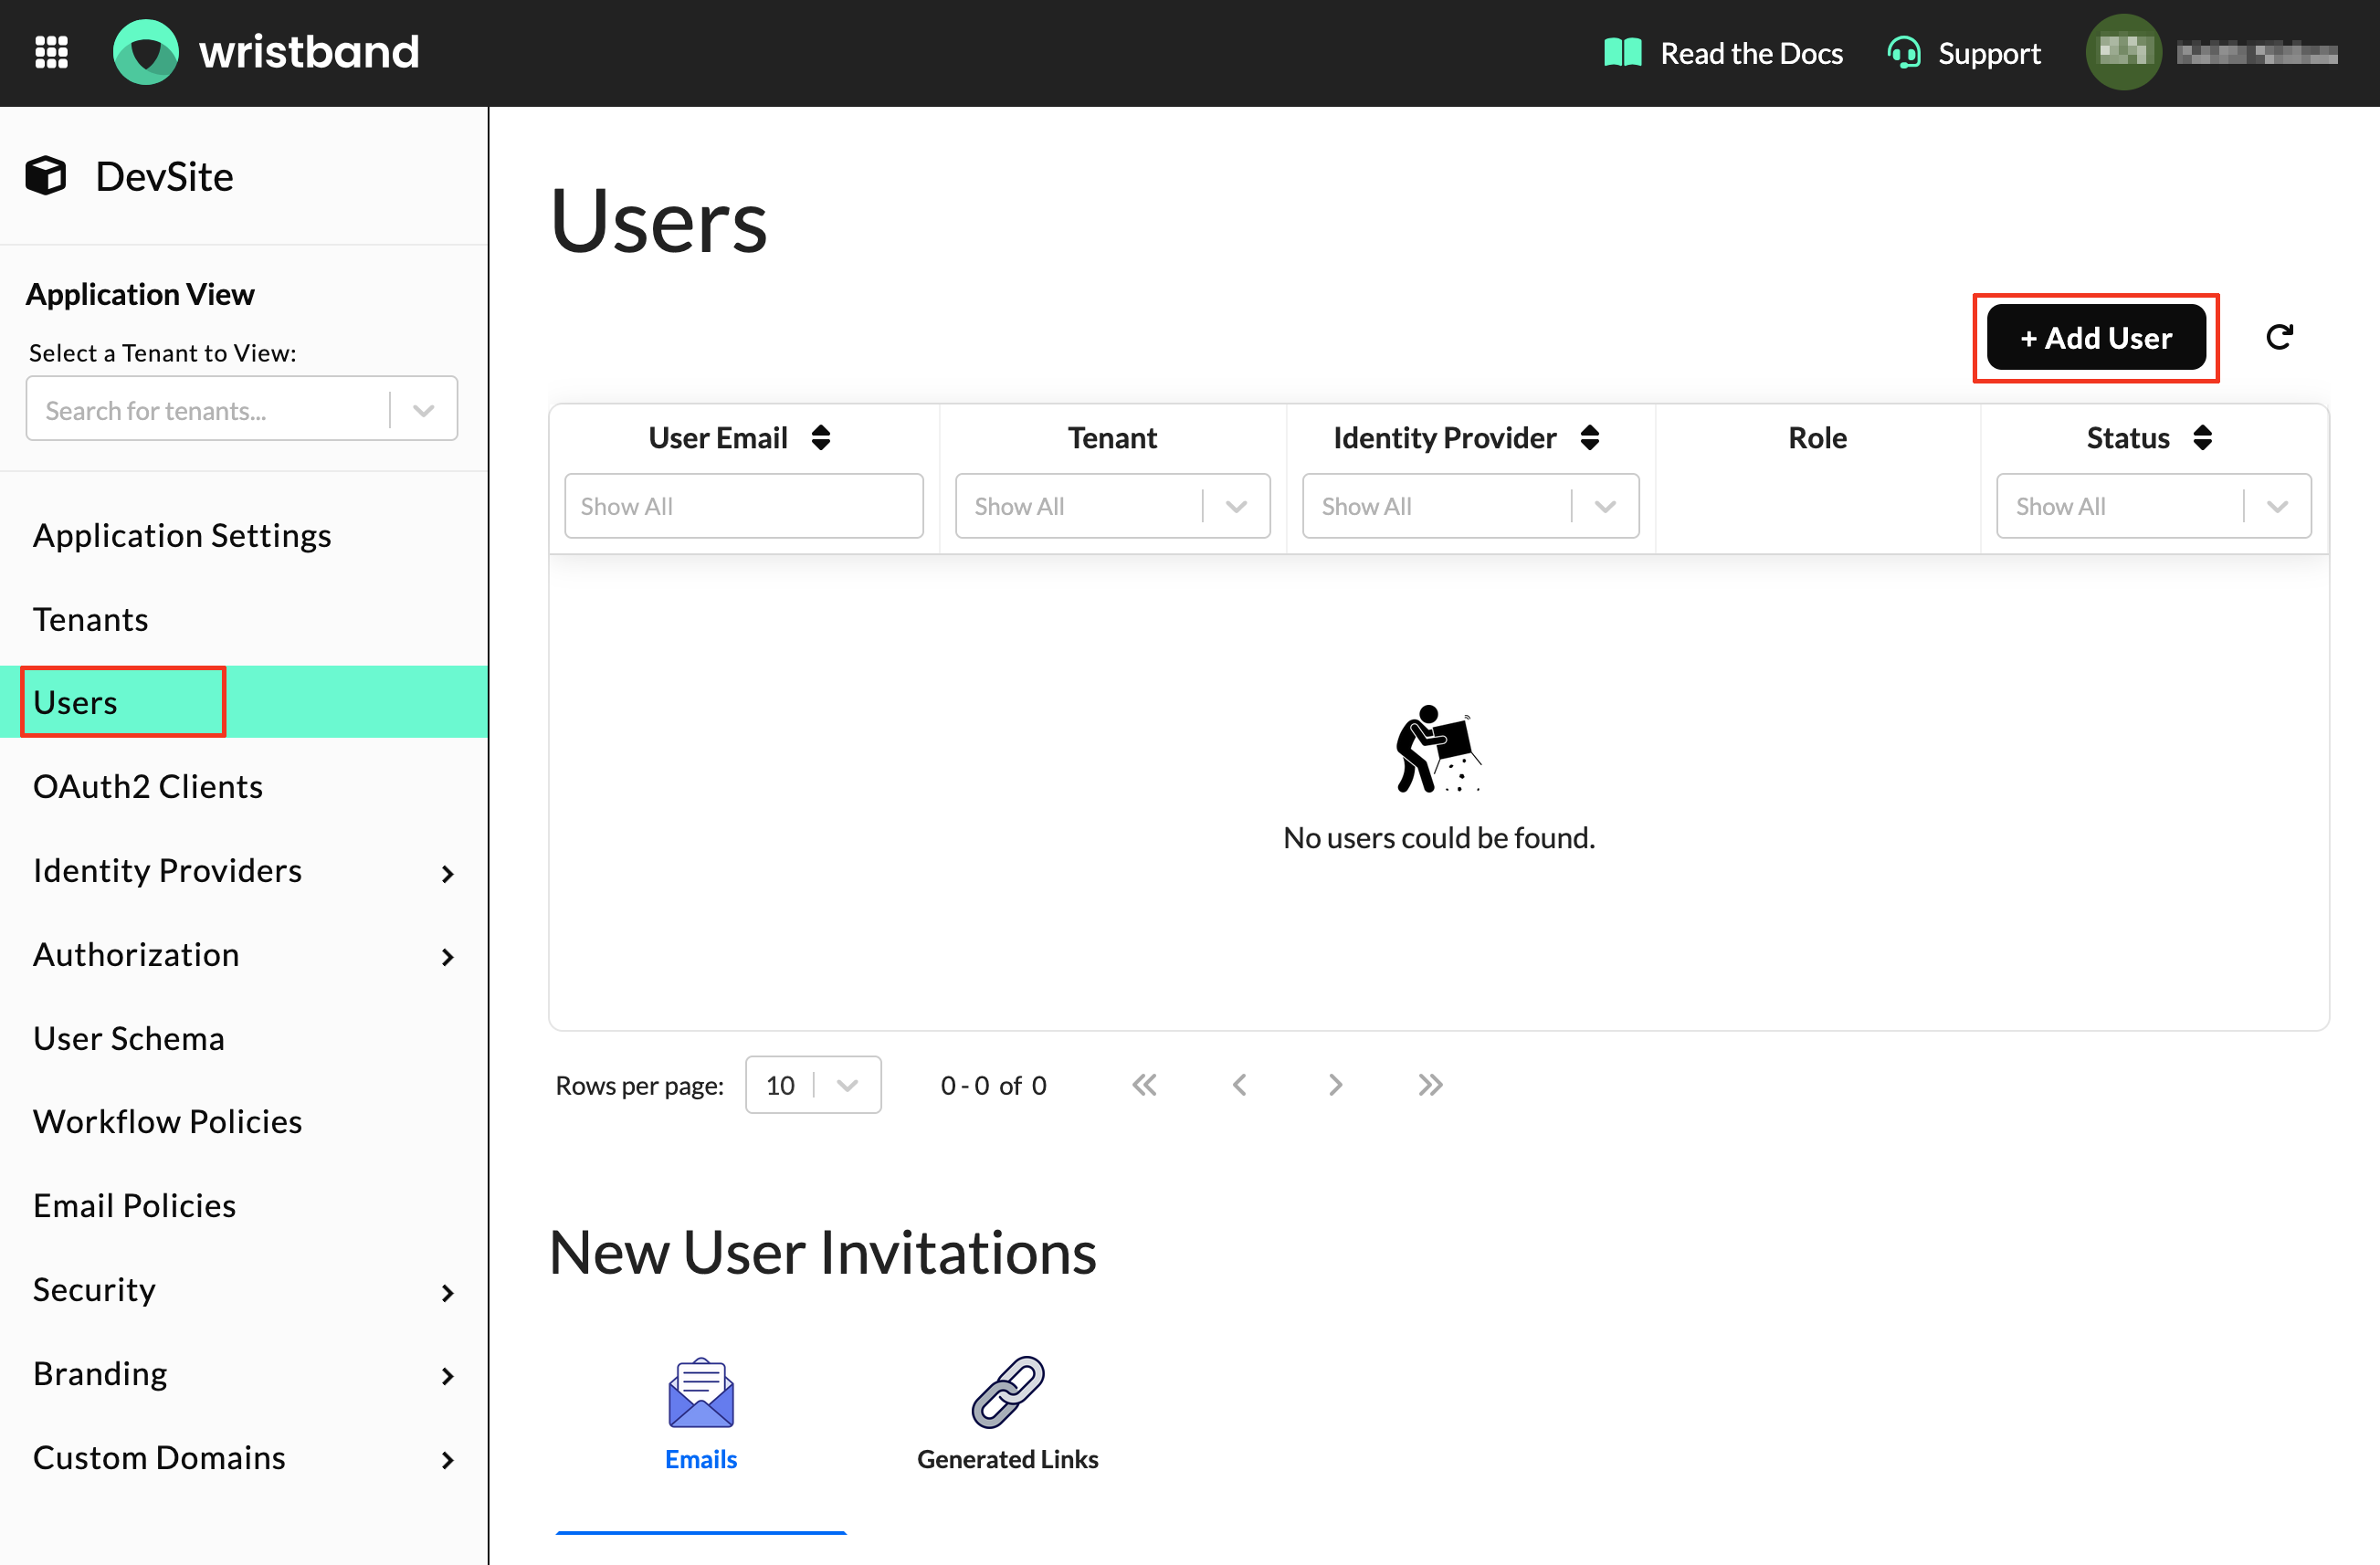
- From within the Application View, click on the "Users" link in the left navigation menu.
- Next, click on the "Add User" button.
Provision a User
After clicking the "Add User" button, a modal will pop up asking for the required user fields.
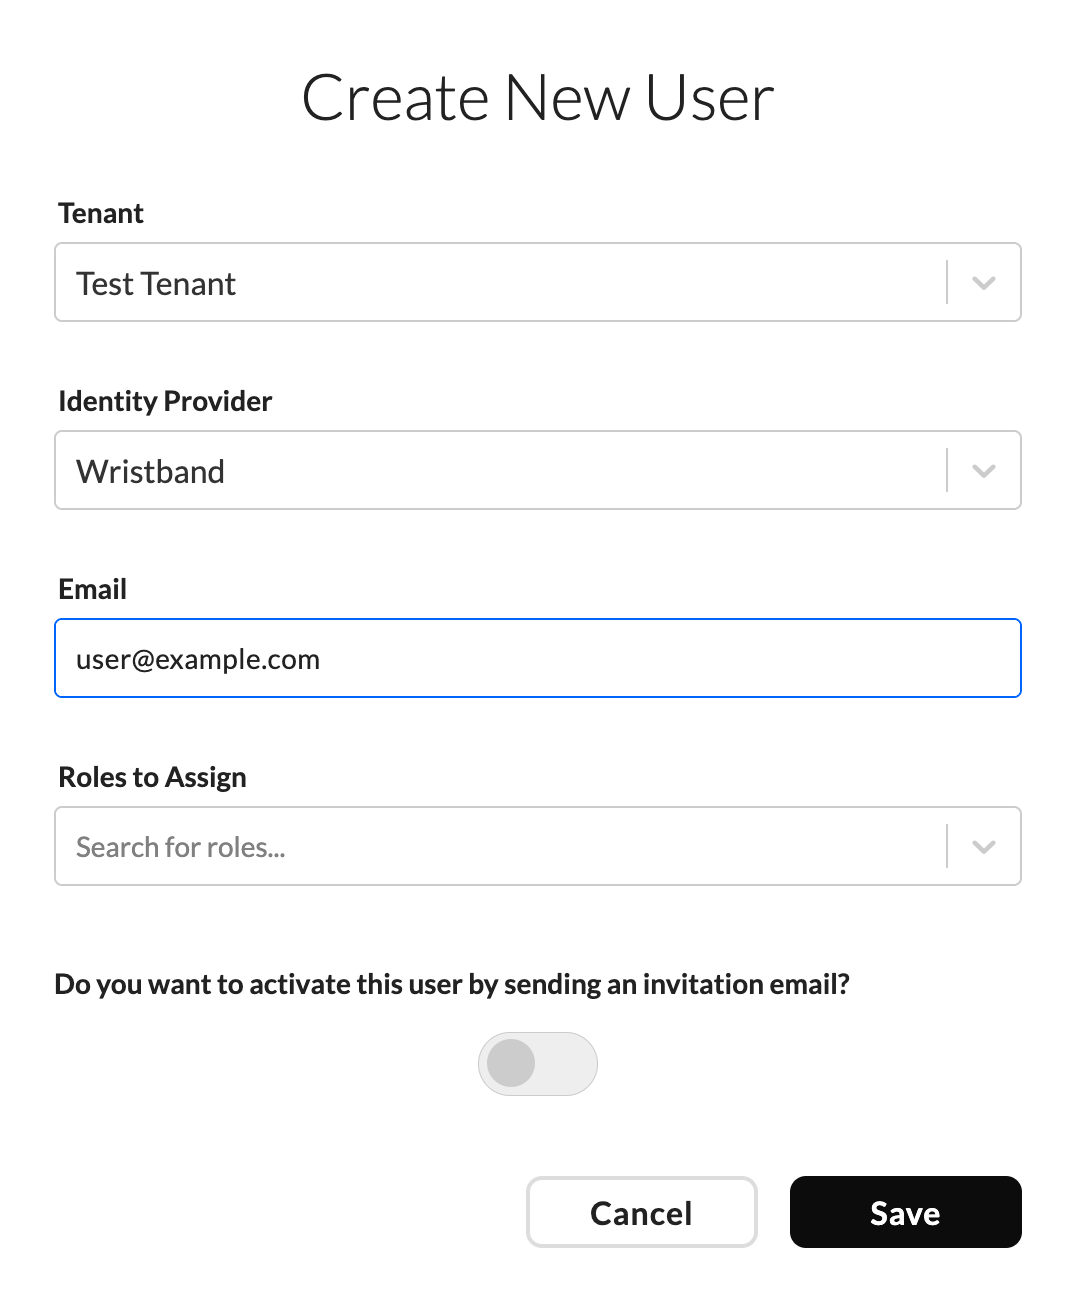
- For the "Tenant" field, select the tenant that you created in the previous step.
- For the "Identity Provider" field, select Wristband.
- Provide an "Email". The email address that you specify should be valid and under your ownership so you can view any emails sent to it.
- Since we haven't created any roles yet, leave "Roles to Assign" blank.
- Leave the "Do you want to activate this user by sending an invitation email?" toggle as off.
- Click the "Save" button.
Success! You've created a user for your tenant.
Updated 5 months ago