Okta Workforce SSO
This guide details how to set up Okta SSO integration in Wristband.
Okta SSO Support
Wristband supports the following security protocol for Okta SSO:
- OIDC
Each tenant can have unique Okta SSO identity providers. Configuration is done at the Tenant Level in the Wristband dashboard, with activation on a per-tenant basis.
Setting Up a Tenant-level Okta Integration
This guide details how to set up Okta SSO integration in Wristband.
1. Locate Your External IDP Callback URL
- In the Wristband dashboard, enter Tenant View for the tenant.
- Navigate to
Identity Providers > Enterprise. - Select the Okta provider icon and click "Create IDP."
Copy the "Redirect URL" from the form.

2. Sign Up For An Account
Create an Okta account here. Make sure to select the free Workforce Identity Cloud Developer Edition account. Fill out the form and proceed to the Okta dashboard.

3. Create a New App Integration
In the Okta dashboard, navigate to the Applications page. Click "Create App Integration."

Select OIDC - OpenID Connect as the Sign-in method, and Web Application as the Application type.

Fill out the General Settings:
- App integration name: Any appropriate value.
- Grant Type: Select
Authorization Code. - Sign-in redirect URIs: Paste the External IDP Callback URL from step 1.

In the Assignments section, select:
- Controlled access:
Allow everyone in your organization to access. - Enable immediate access: Ensure this is enabled.
Limiting Access
By default, enable access for everyone. If needed, you can limit access based on specific Okta Groups.

Click "Save" to complete the creation. Okta will take you to the Edit Application page.
4. Get the Client and Domain Information
On the Edit Application page, copy the following values:
- Client ID
- Client Secret
- Okta Domain
The Client ID and Client Secret are in the "Client Credentials" section. The Okta domain is found in the settings dropdown menu in the navbar.

5. Configure the Groups Claim (Optional)
To use Okta's Groups with Wristband's Role Mapping, configure your Okta application to include a "Groups" claim in the ID token.
Click on the "Sign-On" tab. In the OpenID Connect ID Token section, click "Edit." Ensure:
- The claim name is
groups. - The group claims filter includes all groups (
Matches regexand*).
Click "Save" to complete the configurations.

6. Create an Okta IDP in Wristband
Return to the Create External IDP Modal in the Wristband dashboard. Fill out the form with the following values:
- IDP Name: Any value desired (must be unique within the tenant).
- Display Name: Any value desired,
Oktais a safe default. - Domain Name: The Okta domain from step 4 (e.g.,
dev-60570705.okta.com). - Client ID: The Client ID from step 4.
- Client Secret: The Client Secret from step 4.
Click "Create" to finish. The Okta External IDP will be in an ENABLED status.

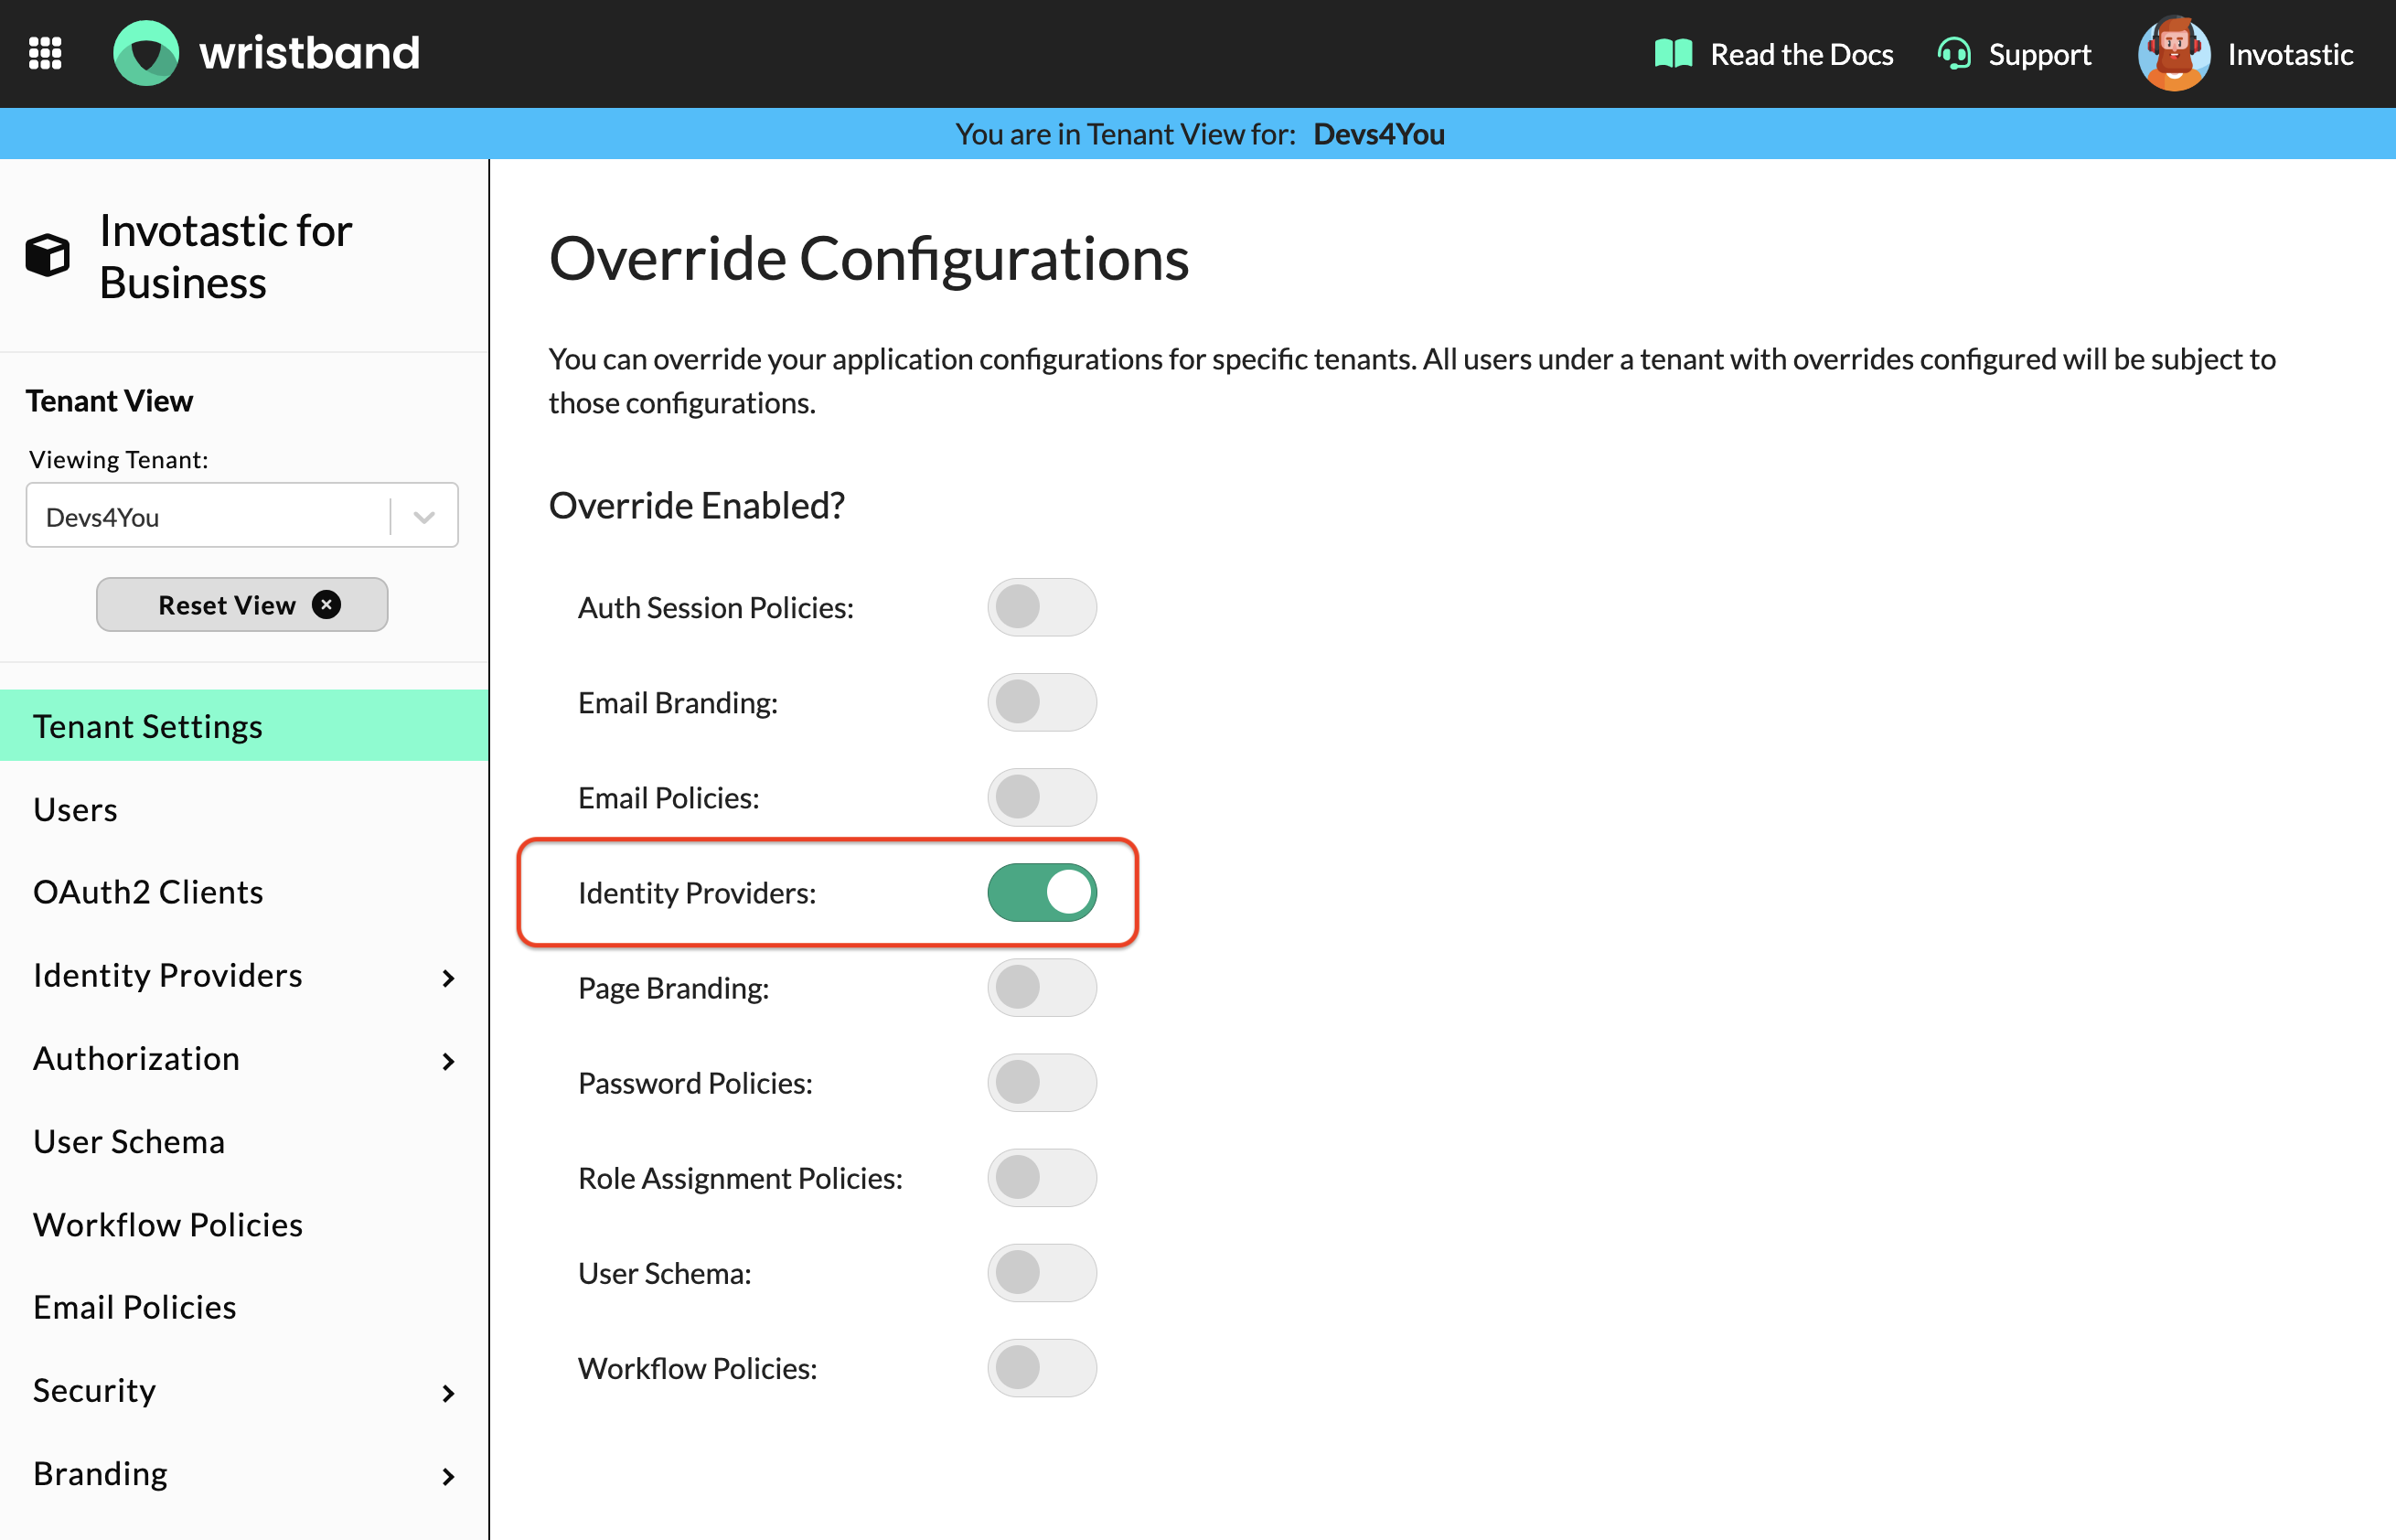
7. Enable Tenant Overrides for IDP
Enable identity provider overrides for the tenant in the Wristband dashboard:
- Navigate to Tenant Settings.
- Scroll to Override Configurations.
- Enable "Identity Providers" overrides.
Overriding Identity Providers
This will override ALL identity providers from the Application Level for the tenant.
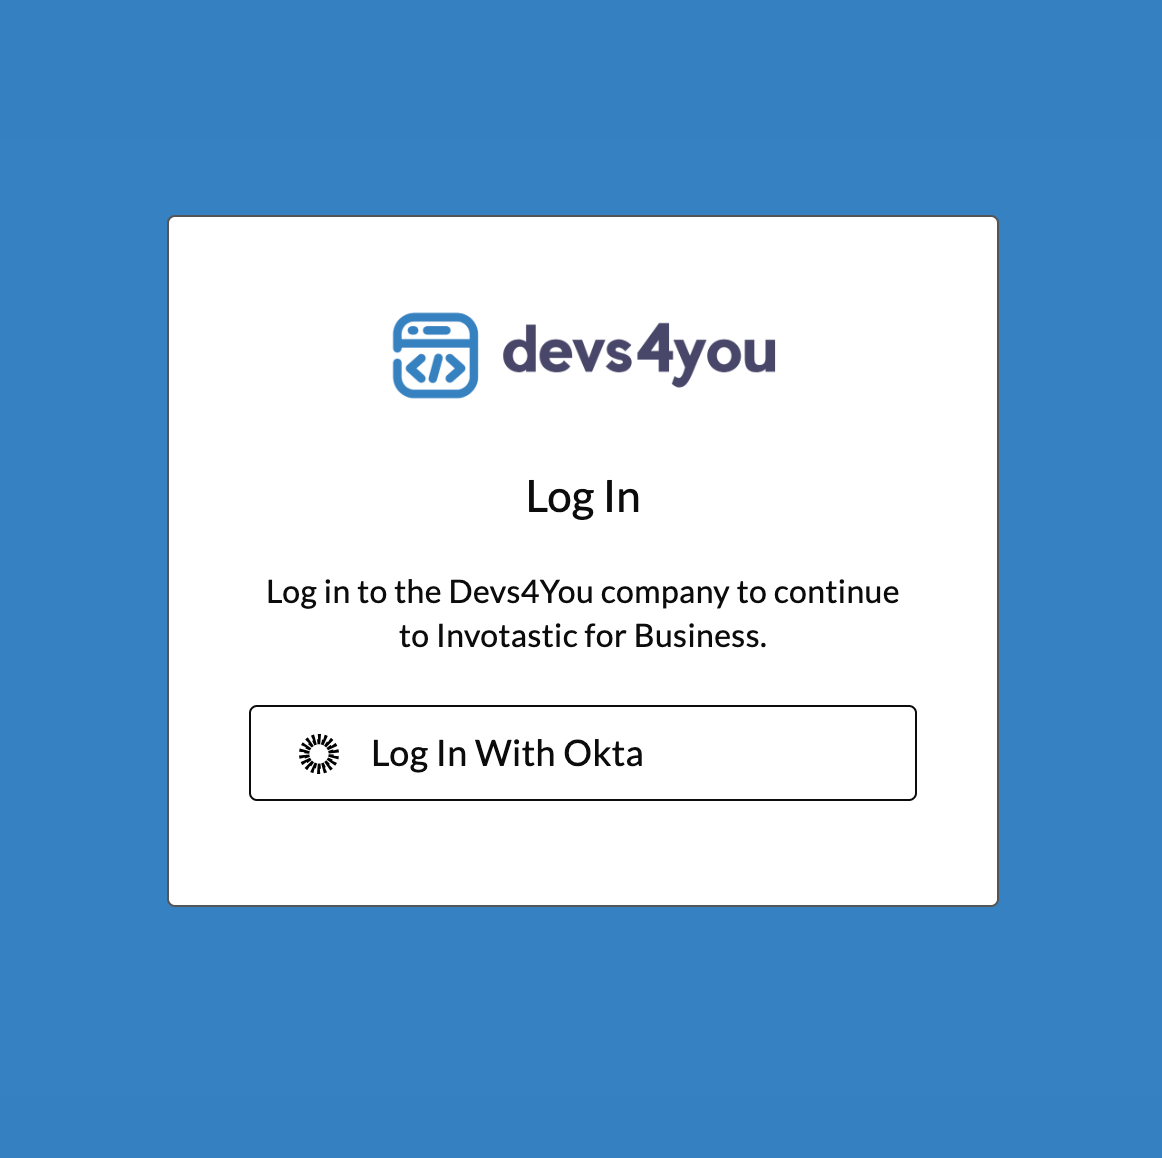
The Okta Enterprise SSO integration is now complete. Users will see an Okta login button on the Tenant-level Login Page.
Updated 27 days ago